
Create a Spring Boot project from IntelliJ


Spring Boot is widely used to develop robust Web applications in Java. You can use various IDE on the market to build your Web application.
The easiest way to create a new project is to use the spring project starter website: start.spring.io.
The typical steps are:
- Navigate to the start.spring.io
- Provide information about the Spring project and select the required dependencies
- Download the project as a zip file
- Unzip the file on your computer
- Open the folder in your favorite IDE
These steps can be done directly from IDE, especially from IntelliJ Ultimate, one of the excellent IDEs developed by Jetbrains.
We will see how to create a Spring Boot project from IntelliJ in this post. Make sure you have the IDE installed on your computer; if not, click on this link to download and install it. We will use IntelliJ 2022.1 for this post.
Install the plugin
To make the project creation from IntelliJ possible, we need to install a plugin from the marketplace called Spring Initializr and Assistant.
Create a new project
When you open the IDE, we will see the main window, locate the button labeled "New Project," and click on it:
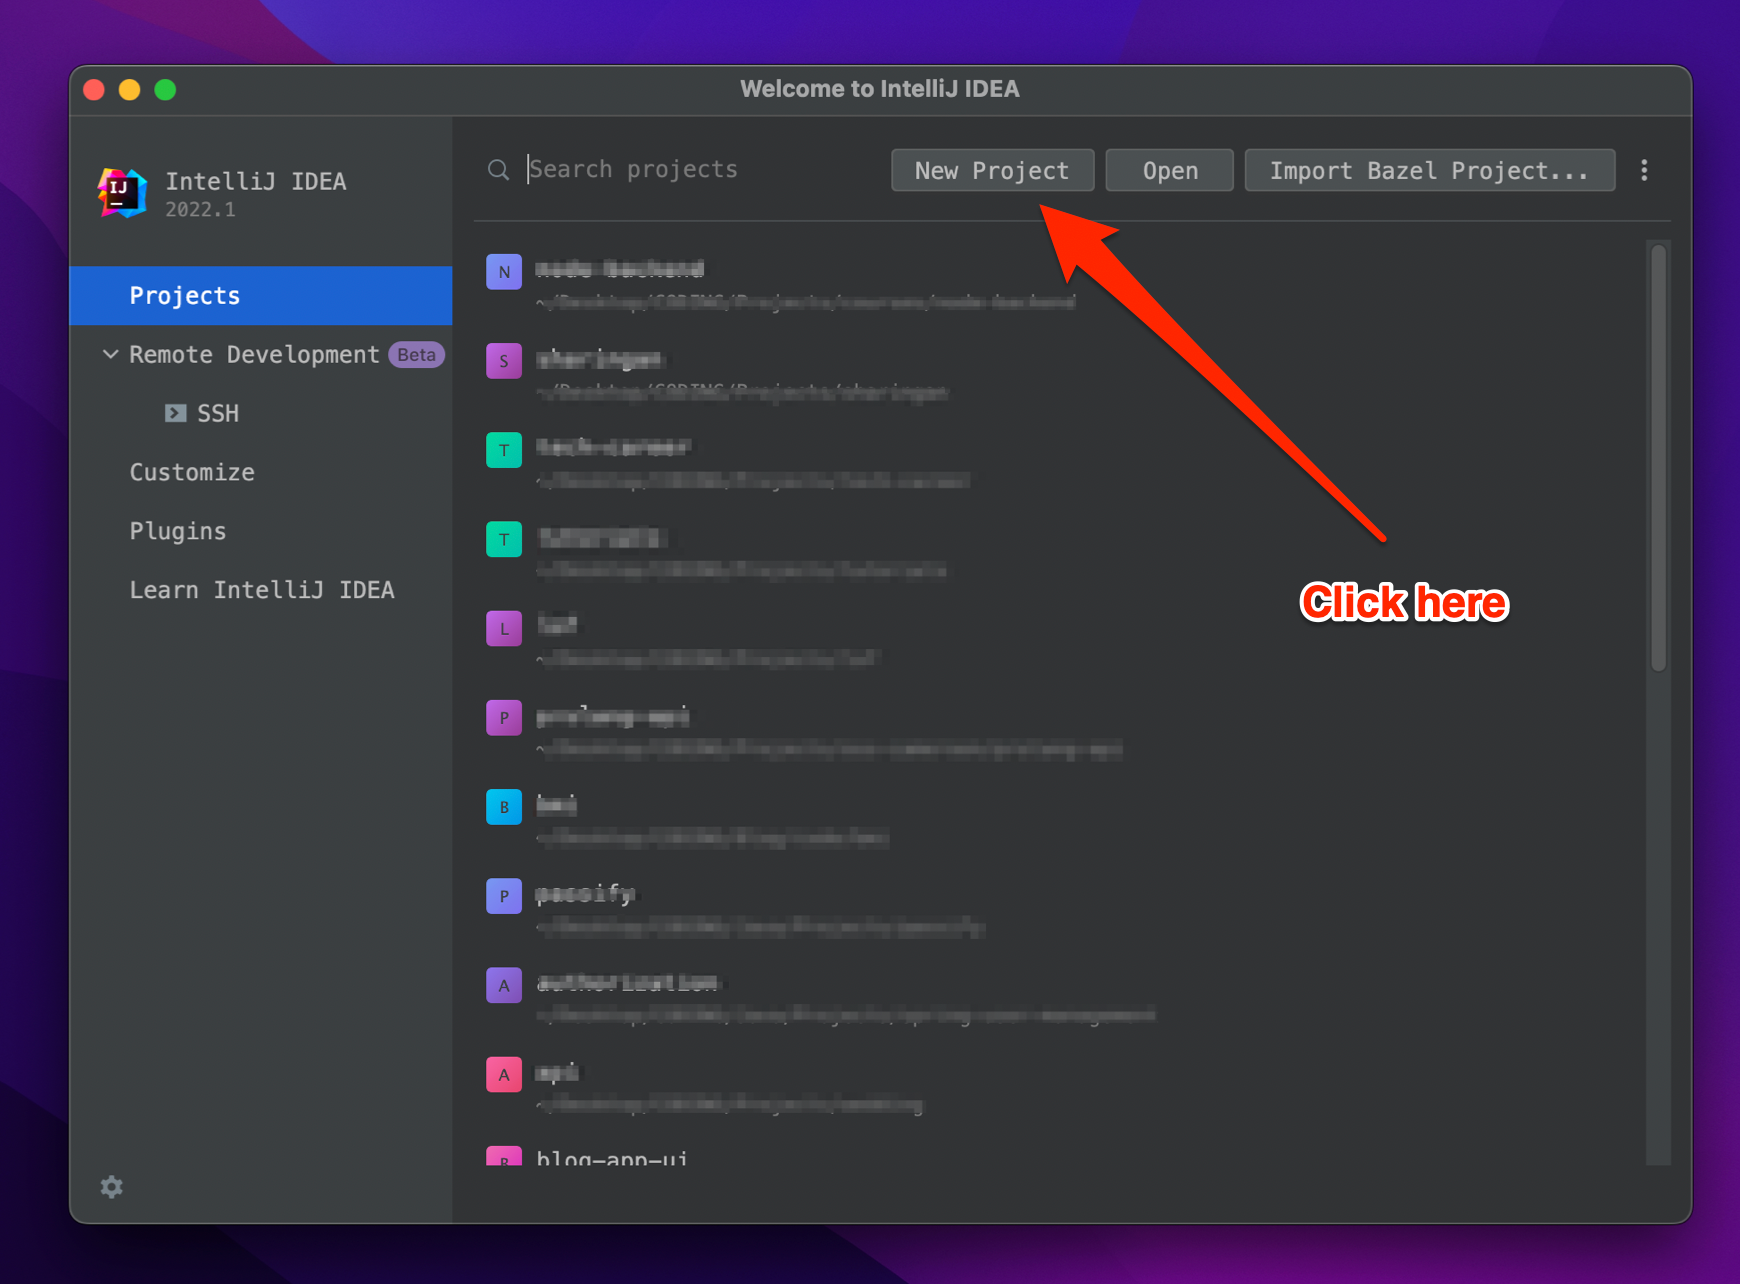
A new win dialog will open where you can select a project generator. There are generators for various programming languages and frameworks, but the one which interests us is called Spring Initializr.
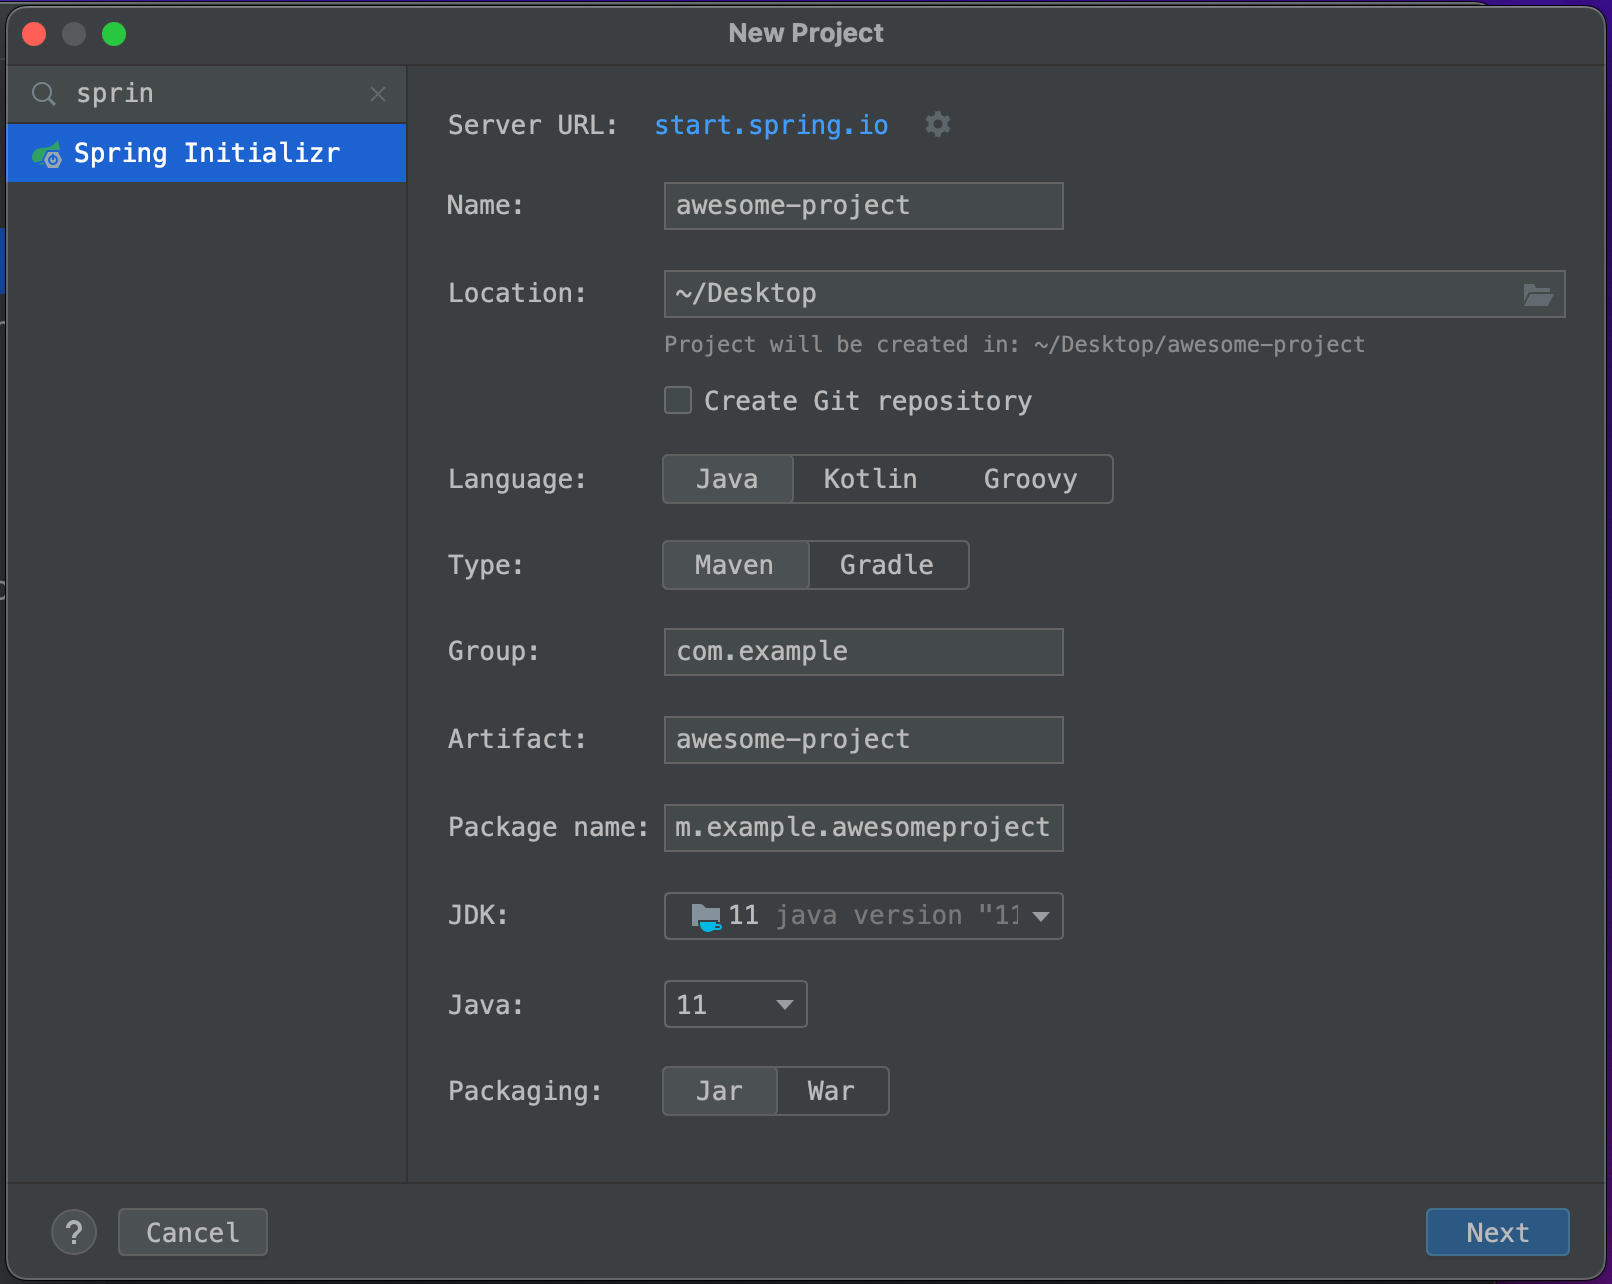
Provide project information
- Name: Give a name to the project
- Location: The location on your local disk where the project will be stored.
- Version Control: Check the box Create Git repository to activate the versioning of your code using Git.
- Language: You can choose between Java, Kotlin, and Groovy. I'm still a Javatar, so I will go for Java.
- Type: The project dependencies manager you can use to install dependencies and build and package your project. You can choose between Maven and Gradle. Want to see the comparison between the two? Check out this link.
- Group: Provide a project group. By default, it is com.example; you can leave it as-is if you want.
- Artifact: Provide an artifact name; it is the name the packaged version of the application for the project will have. By default, it is the project's name.
- Package name: The value combines the project group name and the artifact name, so, no need to update it.
- JDK: Choose the version of the JDK; Intellij will detect all the JDK installed on your computer. Check out the JDK downloads page to install it if that is not the case. You can also install it directly from IntelliJ.
Click on the dropdown to select the JDK; you will have the option "Download the JDK"; click on it.
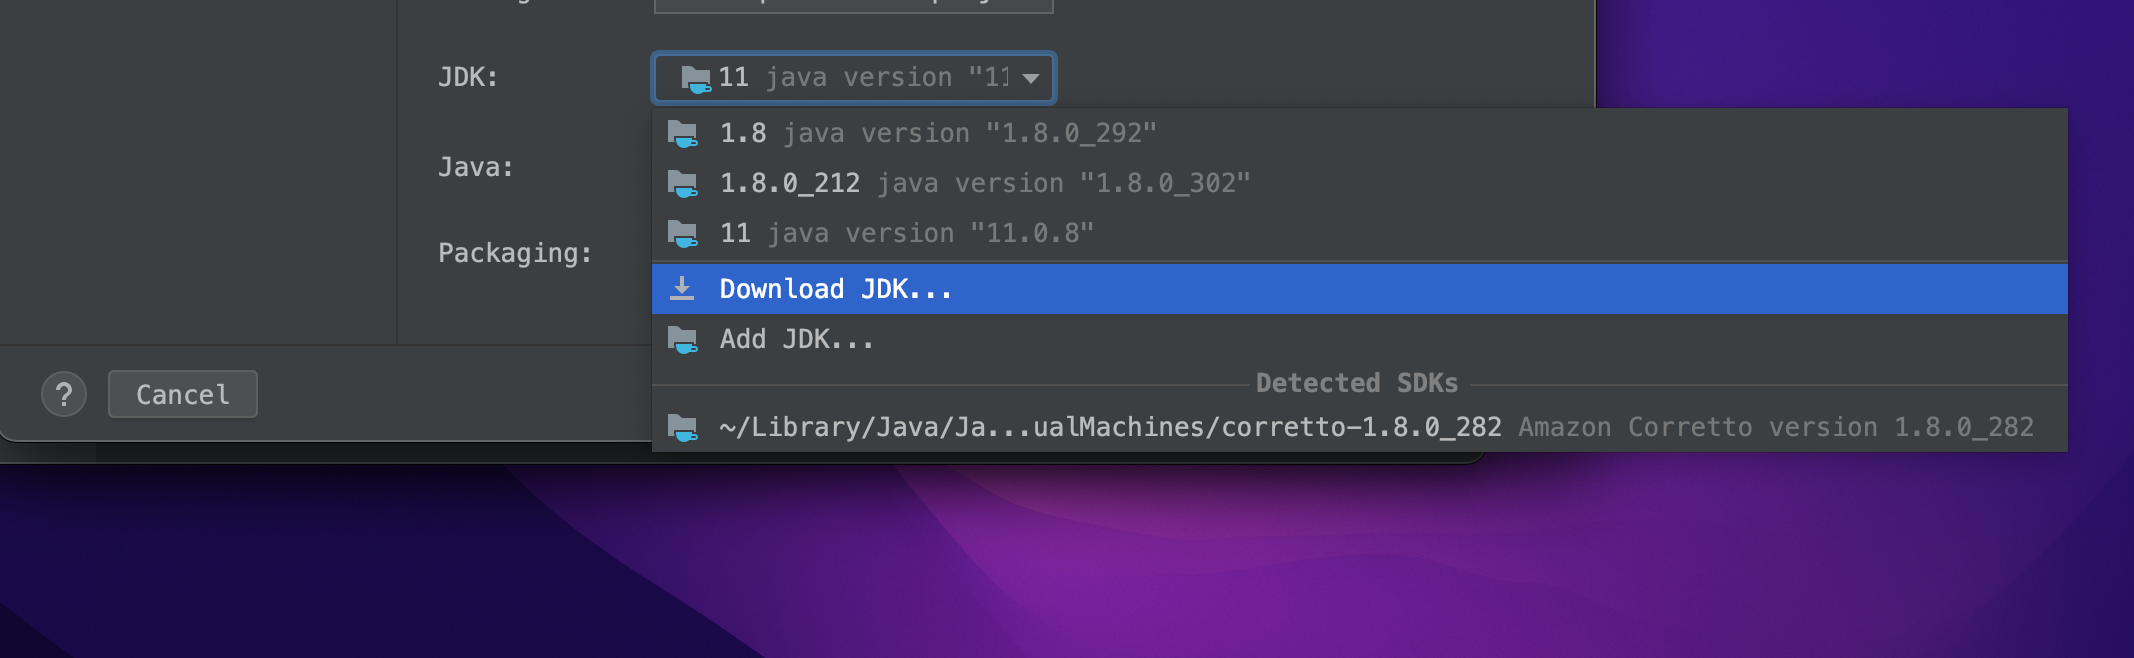
A window dialog opens, you select the version of Java you want, and IntelliJ will automagically do the rest.
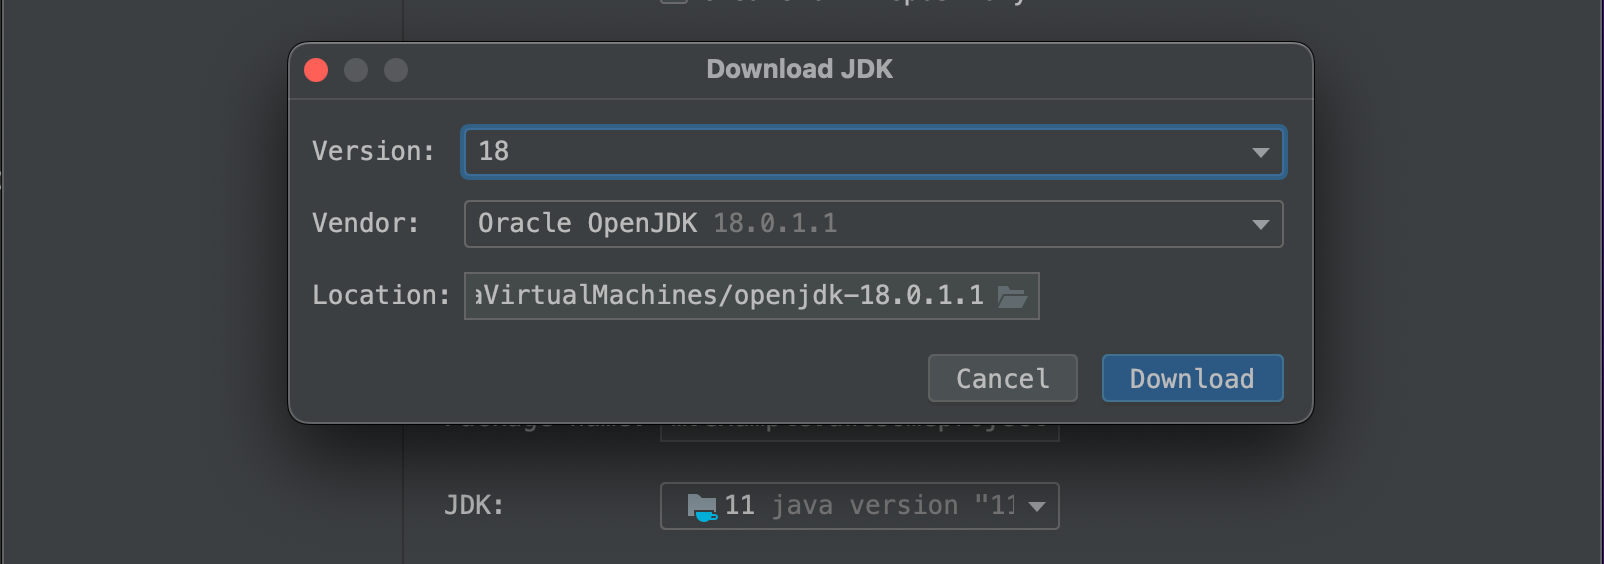
Once the download and installation are completed, the JDK will be set as the selected for this project.
- Java: Choose the Java version to use. The value is highly dependent on the JDK you have selected. You can't choose Java 17 if you selected the JDK 11 or JDK 18; you must choose the JDK 17.
- Packaging: Indicate if the project will be bundled as a JAR or WAR file. Want to know the difference between the two? Check out this link.
All the information required about the project is set; click on the "Next" button.
Select project dependencies
At this step, you can select the dependencies for the project; Let's say we want to build a web application that store and retrieve data into an MYSQL database. We will need the following dependencies:
- Spring Web: Setup the webserver and create routes and render web pages.
- Thymeleaf: View template engine to build our web page with dynamic content.
- MySQL Driver: The Java connector for the MySQL database.
- Spring Data JPA: provide an interface to perform CRUD actions against the database. Using the ORM Hibernate under the hood, this dependency allows it creates a mapping between the entities and the database table.
- Spring Boot DevTools: Enhance the development experience by providing features like LiveReload when building web pages.
- Spring Configuration Processor: Provide code completion for custom configuration keys in the application.properties file.
- Lombok (optional): Provide helpful annotation to reduce boilerplate code, especially in the POJO class.
The illustration below shows how to pick these dependencies from IntelliJ.
Click on the "Create" button. IntelliJ will create a project, download the dependencies and sync the project. Once done, we are ready to build our application.
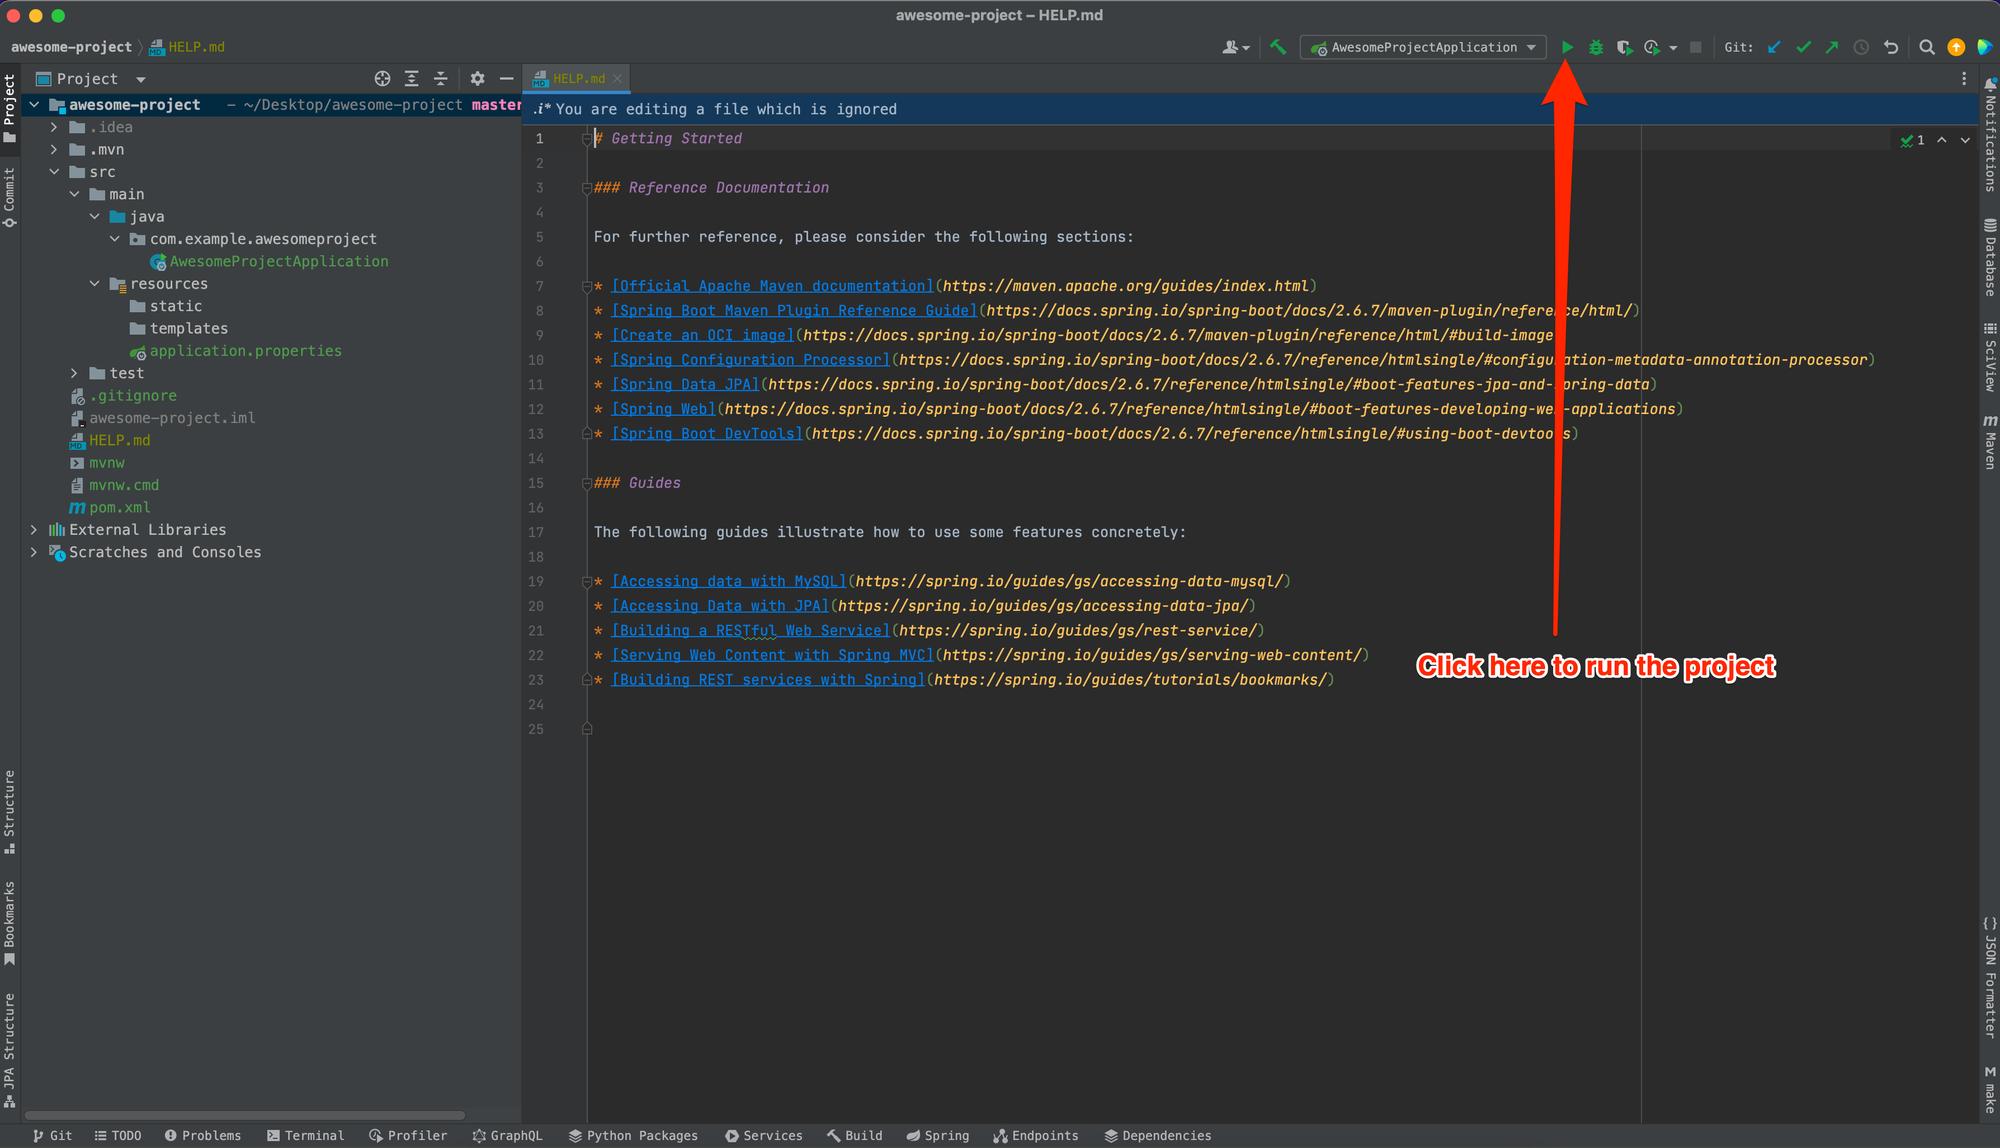
Hooray ? ? ?
Wrap up
IntelliJ makes setting up a new Spring Boot easy without leaving your IDE. You now have everything to start the new project quickly.
Follow me on Twitter or subscribe to my newsletter to avoid missing the upcoming posts and the tips and tricks I occasionally share.
Happy to see you soon ?