
Install RabbitMQ on a Ubuntu Server 22.04


Photo by Lisanto 李奕良 / Unsplash
RabbitMQ is an open-source message broker software that works as a message-oriented middleware. Based on the Advanced Message Queuing Protocol (AMQP), RabbitMQ facilitates communication between different systems or services by allowing them to exchange messages asynchronously.
It supports multiple messaging protocols and can be used in various applications and platforms, including web applications, mobile devices, and Internet of Things (IoT) devices.
What we will achieve
At the end of this tutorial, you will know how:
- Install RabbitMQ on the server
- Use the CLI command to manage the RabbitMQ server
- Enable the Web Administration UI and access it
- Create a subdomain to access the RabbitMQ server
Prerequisites
You will need a Virtual Private Server running on Ubuntu 18.04 or higher to follow this tutorial. I will be on Ubuntu 22.04 throughout the post.
You can buy a VPS on Hetzner, which provides affordable servers with good performance. The server running this blog and all my side projects are hosted here. Use my referral link to get €20 after you sign up.
After buying the server, you must do some basic configuration; I wrote the blog post below to help you with that.

Install RabbitMQ from the APT repository
The APT repository is where application packages are hosted so we can pull them and install our server. See it as NPM for Node.js packages or Docker Hub for Docker images.
RabbitMQ depends on the Erlang package, so we must install it first. Let's enable HTTPS transport, allowing APT to download RabbitMQ and Erlang packages for third-party services.
sudo apt-get install apt-transport-https
Add the signing key
Add the necessary signing keys by running the commands below:
curl -1sLf "https://keys.openpgp.org/vks/v1/by-fingerprint/0A9AF2115F4687BD29803A206B73A36E6026DFCA" | sudo gpg --dearmor | sudo tee /usr/share/keyrings/com.rabbitmq.team.gpg > /dev/null

curl -1sLf "https://keyserver.ubuntu.com/pks/lookup?op=get&search=0xf77f1eda57ebb1cc" | sudo gpg --dearmor | sudo tee /usr/share/keyrings/net.launchpad.ppa.rabbitmq.erlang.gpg > /dev/null

curl -1sLf "https://packagecloud.io/rabbitmq/rabbitmq-server/gpgkey" | sudo gpg --dearmor | sudo tee /usr/share/keyrings/io.packagecloud.rabbitmq.gpg > /dev/null
- The first command adds Team RabbitMQ's main signing key.
- The second command adds the signing key of Launchpad PPA, which provides modern Erlang releases.
- The third command adds the signing key of the PackageCloud repository providing RaabitMQ releases.
Add a Source List File for Erlang and RabbitMQ
All the source lists are placed in the folder /etc/apt/sources.list.d/; Let's create a file inside named rabbitmq.list:
sudo touch /etc/apt/sources.list.d/rabbitmq.list
Open the file and add the code below:
deb [signed-by=/usr/share/keyrings/net.launchpad.ppa.rabbitmq.erlang.gpg] http://ppa.launchpad.net/rabbitmq/rabbitmq-erlang/ubuntu jammy main

deb-src [signed-by=/usr/share/keyrings/net.launchpad.ppa.rabbitmq.erlang.gpg] http://ppa.launchpad.net/rabbitmq/rabbitmq-erlang/ubuntu jammy main

deb [signed-by=/usr/share/keyrings/io.packagecloud.rabbitmq.gpg] https://packagecloud.io/rabbitmq/rabbitmq-server/ubuntu/ jammy main

deb-src [signed-by=/usr/share/keyrings/io.packagecloud.rabbitmq.gpg] https://packagecloud.io/rabbitmq/rabbitmq-server/ubuntu/ jammy main
The keyword jammy represents this Ubutu 22.04 distribution name, so you must change it if you are on a different version. Here are other distributions with their name:
| Distribution version | Distribution name |
|---|---|
| Ubuntu 18.04 | bionic |
| Ubuntu 20.04 | focal |
| Ubuntu 22.04 | jammy |
| Debian Buster | buster |
| Debian Bullseye | bullseye |
Install packages
Since we added a new source list, let's update the local APT cache with the RabbitMQ and Erlang available versions by running the command below:
sudo apt update -y
Install the Erlang packages.
sudo apt-get install -y erlang-base \
                        erlang-asn1 erlang-crypto erlang-eldap erlang-ftp erlang-inets \
                        erlang-mnesia erlang-os-mon erlang-parsetools erlang-public-key \
                        erlang-runtime-tools erlang-snmp erlang-ssl \
                        erlang-syntax-tools erlang-tftp erlang-tools erlang-xmerl
Install ReabitMQ and its dependencies.
sudo apt-get install rabbitmq-server -y --fix-missing
Start and stop RabbitMQ
The server is started as a daemon by default when the RabbitMQ server package is installed. It will run as a non-privileged user rabbitmq.
To start the RabbitMQ server, run the command below:
sudo systemctl start rabbitmq-server
But we don't need to because the service immediately starts when the installation is done. You can check the RabbitMQ server status by running the command below:
sudo systemctl status rabbitmq-server
You will get the following output:
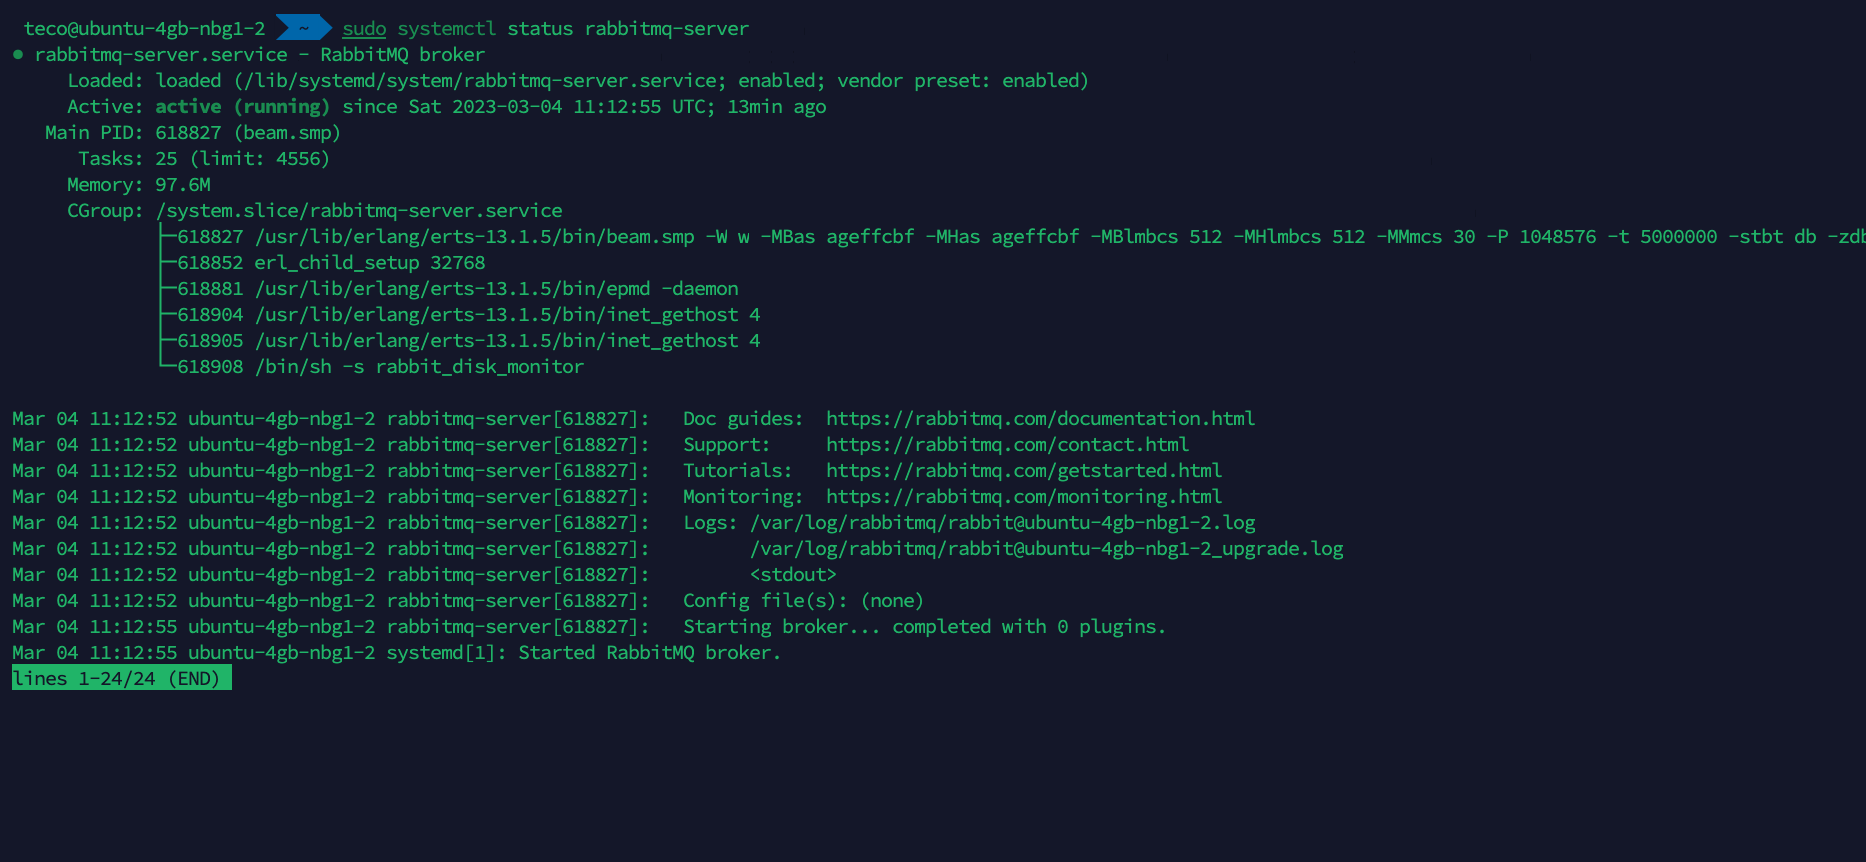
To stop the RabbitMQ server, run the command below:
sudo systemctl stop rabbitmq-server
The RabbitMQ server supports various protocols, and one of the most used is the AMQP which runs on port 5672. We must open this port on the firewall to allow connection using this protocol. Run the command below:
sudo ufw allow 5672/tcp
Enable RabbitMQ Web administration UI
The installation of the RabbitMQ server comes with some plugins disabled by default. They provide additional features that enhance your use of RabbitMQ. The management plugin allows you to manage and monitor RabbitMQ nodes and clusters, along with a browser-based UI and a command line tool named rabbitmqadmin.
To enable the management plugin, run the command below:
sudo rabbitmq-plugins enable rabbitmq_management
The management UI web application is running on port 15672 and can be accessed using a Web browser at http://<your_server_ip_address>:15672.
For it to work, you must allow incoming requests from port 15672 in your firewall rules by running the command below:
sudo ufw allow 15672/tcp
Now, open a browser tab, then navigate to: http://<your_server_ip_address>:15672 you will get the web page below:

The default username is guest, and the password is guest. But if you try to log in, you will get an error message:
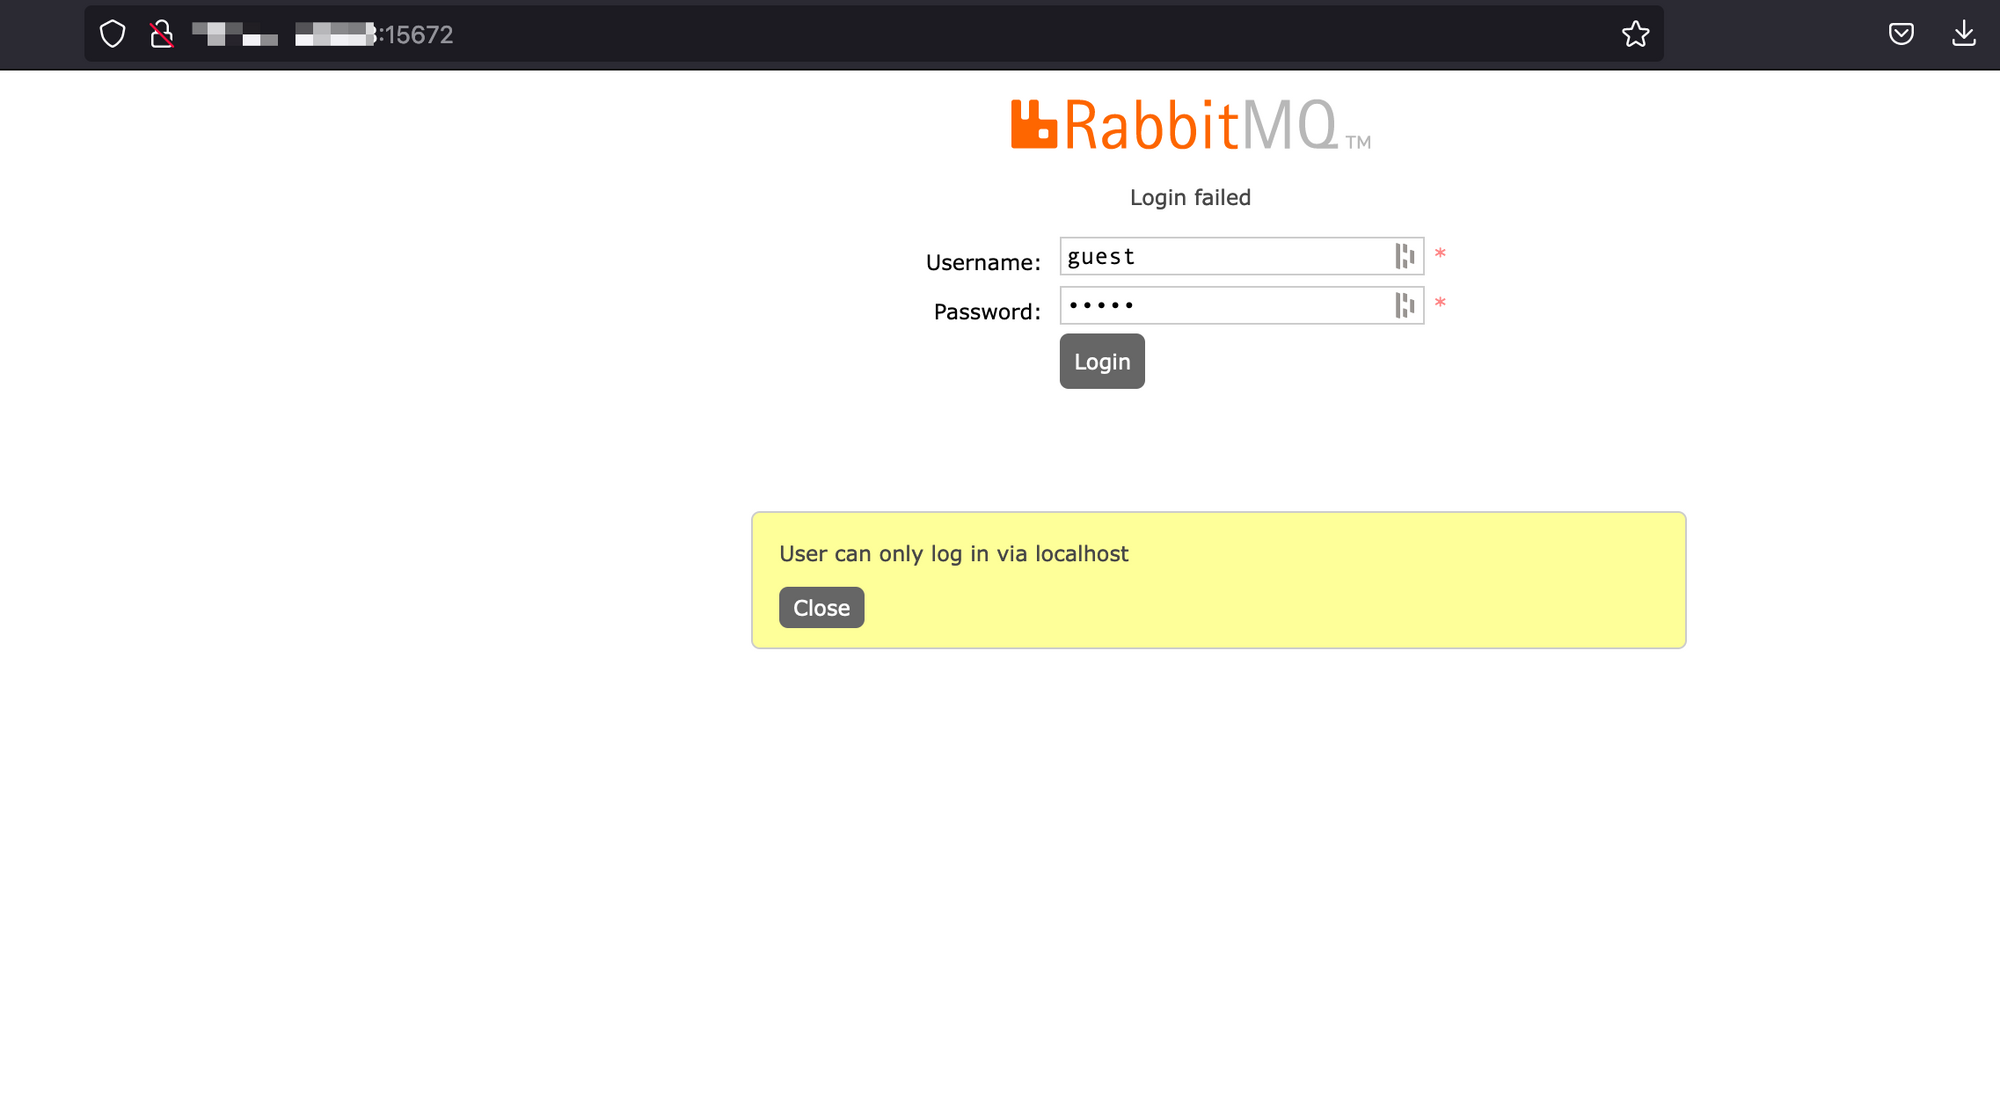
The message is self-explanatory since the server is accessible through the internet, anyway can access the administration interface with guest credentials which is very bad. We will create a new admin user.
Create a RabbitMQ admin user
To create a user, we can use the CLI to provide the username and the password. The signature of the command to create a user is the following:
rabbitmqctl add_user <username> <password>
On the server, run the command below to create an admin user:
sudo rabbitmqctl add_user "admin" "MyStrong-P4ssw0rd$"
sudo rabbitmqctl set_user_tags "admin" administrator

sudo rabbitmqctl set_permissions admin ".*" ".*" ".*"
The second command defines the user's role as "administrator," meaning he can do everything in the system. The other roles are management, policymaker, and monitoring.
Check out this link to learn more about the actions you perform with each role.
The third command defines permissions of the username "admin". The last three options are regular expressions where each represents respectively the configure, write, and read actions.
In another expression, the user "admin" can configure everything, read everything, and write everything. Check out this link to learn more about how permissions work.
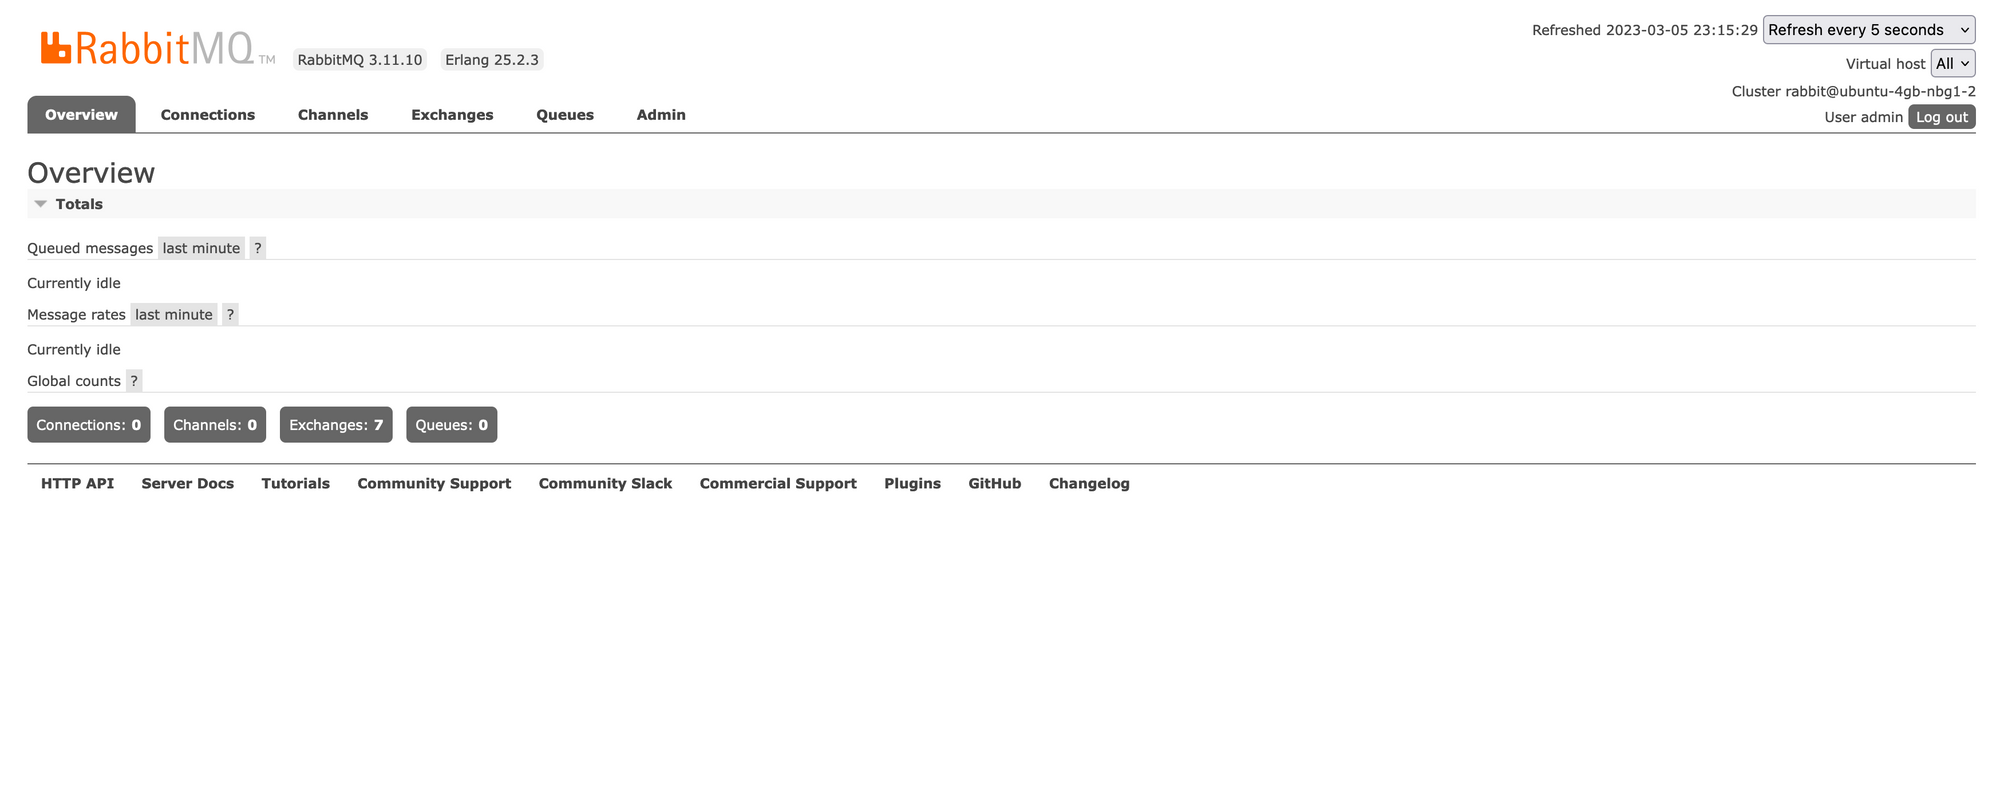
Try to log in again, and you will access the admin dashboard.
Access to RabbitMQ server using a subdomain
To connect to the RabbitMQ server, we must provide the IP address and the port. Instead of giving the IP address, we want to provide a domain or subdomain name. In my case, I want to use the subdomain rabbitmq.tericcabrel.com.
- On the web, it will give access to the Web admin UI
- In a backend application, it will make a connection to the server
We will need Nginx to configure a reverse proxy. Make sure you have it installed on the server already running RabbitMQ.
Configure the DNS zone
We must route the traffic received from the domain name to the server, which is achieved by configuring a DNS record of type A. My domain is registered at OVH; I will log into the admin panel to do my configuration. Do the same If you have another hosting provider.
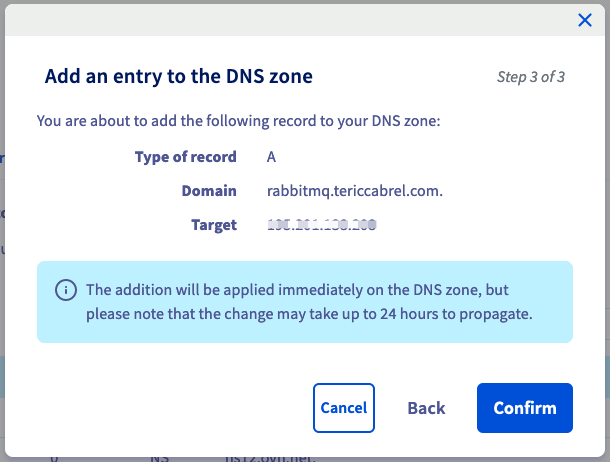
The change can take up to 24 hours to propagate; use this website to verify if the DNS record is fully propagated.
Configure the reverse proxy with Nginx
To create the Nginx configuration for the subdomain, run the command below:
sudo nano /etc/nginx/sites-available/rabbitmq.tericcabrel.com
Paste the code below in the file, save, and exit.
server {
    server_name rabbitmq.tericcabrel.com;
    index index.html index.htm;
    access_log /var/log/nginx/rabbitmq.log;
    error_log  /var/log/nginx/rabbitmq-error.log error;

    location / {
        proxy_set_header X-Forwarded-For $proxy_add_x_forwarded_for;
        proxy_set_header X-Forwarded-Proto $scheme;
        proxy_set_header X-Real-IP $remote_addr;
        proxy_set_header Host $http_host;
        proxy_pass http://127.0.0.1:15672;
        proxy_redirect off;
    }
}
Enable the reverse proxy configuration by running the code below:
sudo ln -s /etc/nginx/sites-available/rabbitmq.tericcabrel.com /etc/nginx/sites-enabled/rabbitmq.tericcabrel.com
Let's verify if there is no Nginx error, then reload it to take the changes into account:
sudo nginx -t

sudo nginx -s reload
Add SSL certificate with Letsencrypt
Install Certbot, which is the tool responsible for certificate generation:
sudo apt install snapd
sudo snap install --classic certbot
Generate and install an SSL certificate for our domain.
sudo certbot --nginx -d rabbitmq.tericcabrel.com
Reload again the Nginx configuration with the command: sudo nginx -s reload
Open your browser and navigate to https://rabbitmq.tericcabrel.com; you can still log into the admin dashboard.
Wrap up
We saw how to install RabbitMQ, enable the web administration interface, and make it accessible through a subdomain. The next step is connecting to the RabbitMQ server from a backend application we will cover in an upcoming tutorial, so stay tuned!
Follow me on Twitter or subscribe to my newsletter to avoid missing the upcoming posts and the tips and tricks I occasionally share.