
Create a Docker image of a Next.js application


Next.js is the most popular React Framework for building a web application with remarkable UX and performance. Developed by Vercel, which gives massive importance to the developer experience.
Deploying applications is challenging and time-consuming; developers should focus on building features that bring value to their customers. Vercel makes it easy to deploy your application by connecting from GitHub, GitLab, and BitBucket.
Vercel also supports the deployment of many libraries and Frameworks.
When do you need a Docker Image?
With Vercel making the deployment of front-end applications and, remarkably, Next.js easier, you might wonder why you need to create a Docker image? Here are some use cases:
- If you want to show a demo of the whole application to teammates, dockerizing the project can be faster than setting up an entire environment.
- You deploy your application on an enterprise server and don't want to host it on a third-party cloud hosting.
- A web hosting platform like Vercel requires a team plan when the project repository is inside a GitHub organization. Building a Docker image can be a solution for a non-profit organization like OSS Cameroon with limited resources.
Prerequisites
You must need these tools installed on your computer to follow this tutorial.
- Node.js 20+ - Download's link
- NPM or Yarn
- Docker - Download's link
Create a Next.js application
As an example of a Next.js application, I found this good GitHub repository tailwind-nextjs-starter-blog. It's a blog template starter built using Next.js 14 app router, Tailwind CSS, Markdown, and more.
Run the following command to clone it and set it up locally:
git clone https://github.com/timlrx/tailwind-nextjs-starter-blog.git my-blog

cd my-blog

cp .env.example .env

nano .env

yarn install

yarn dev
You should create a .env from the file .env.example and provide the value for each key; fortunately, the blog still works if you don't give any.
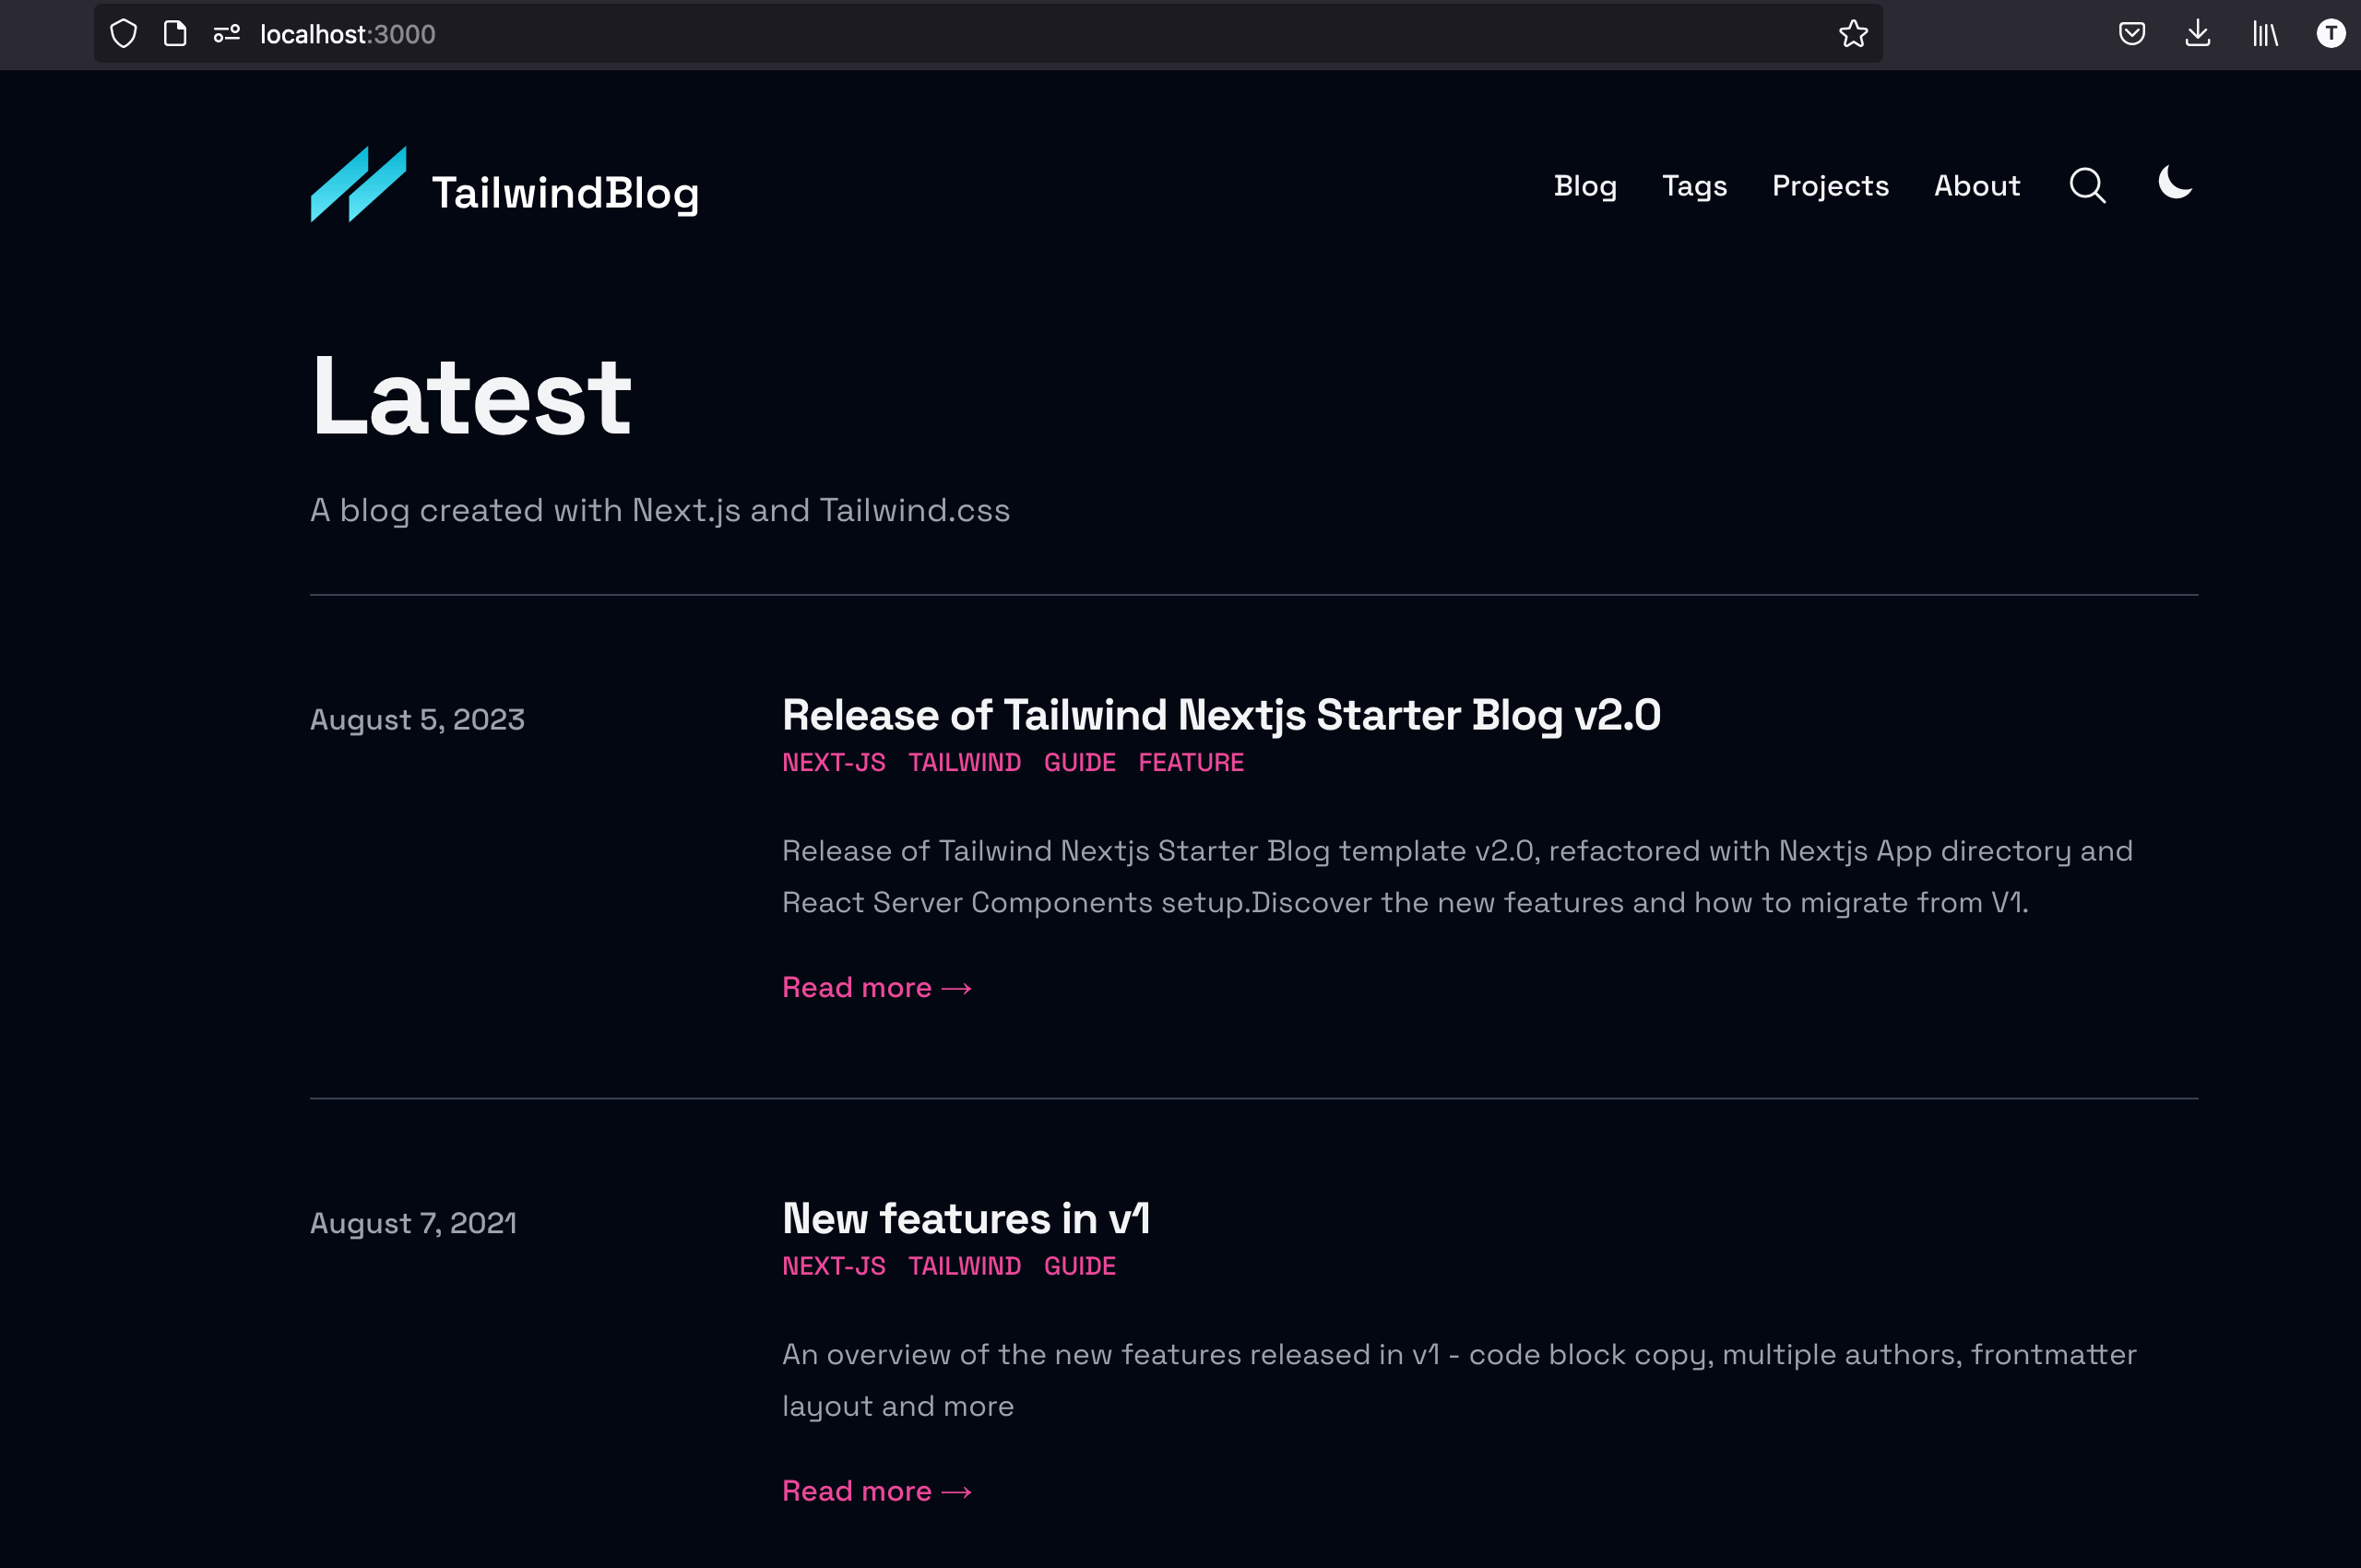
Open your favorite browser and navigate to http://localhost:3000; you get the output below:
Write the Dockerfile of the Next.js application
The goal is to build the image that we will start a Docker container that exposes a port to serve the application. We will take advantage of a multi-stage build to create a lighter image.
Create a Dockerfile in the project folder and add the code below:
# Install dependencies only when needed
FROM node:20-alpine AS deps

RUN apk add --no-cache libc6-compat

WORKDIR /app

COPY package.json yarn.lock .yarnrc.yml ./

COPY .yarn/releases/yarn-3.6.1.cjs .yarn/releases/yarn-3.6.1.cjs

RUN yarn install

# Rebuild the source code only when needed
FROM node:20-alpine AS builder

WORKDIR /app

COPY --from=deps /app/node_modules ./node_modules

COPY . .

RUN yarn build

# Production image, copy all the files and run next
FROM node:20-alpine AS runner
WORKDIR /app

ENV NODE_ENV production

RUN addgroup --system --gid 1001 bloggroup
RUN adduser --system --uid 1001 bloguser

COPY --from=builder /app/public ./public
COPY --from=builder /app/package.json ./package.json

# Automatically leverage output traces to reduce image size
# https://nextjs.org/docs/advanced-features/output-file-tracing
COPY --from=builder --chown=bloguser:bloggroup /app/.next/standalone ./
COPY --from=builder --chown=bloguser:bloggroup /app/.next/static ./.next/static

USER bloguser

EXPOSE 3000

ENV PORT 3000

CMD ["node", "server.js"]
The Docker build has three stages:
- deps: we install the node dependencies; this has the advantage of speed because this stage will run only if a Node.js dependency has been added, updated, or removed; otherwise, it will reuse the cached Node modules.
- builder: We copy the Node modules folder from the previous stage (deps), copy all the project folders and files, and build the application for the production
- runner: we define a user and a group, set the user as the owner of all the files; this prevents to running the image with the root user. We copy the build output folder, expose the port 3000, and start the Node server.
The project uses Yarn 3.6.1, so we added these lines in the "deps" build stage.
COPY package.json yarn.lock .yarnrc.yml ./

COPY .yarn/releases/yarn-3.6.1.cjs .yarn/releases/yarn-3.6.1.cjs
If you still use Yarn 1, replace these two lines with the following line:
COPY package.json yarn.lock ./
After that, the following Docker commands will stay unchanged.
Build the Dockerfile of the Next.js application
Update the file next.config.js to allow standalone output:
{
  // previous configuration here
  output: 'standalone'
}
Create a ".dockerignore" file in the root folder, to help exclude unnecessary directories and files for the image build.
Add the content below inside to exclude these folders:
node_modules
.next
.github
.husky
.yarn
Run the following command to build the Docker image:
docker build -t blog-site:v2 .
When the build is complete, you can use the command docker image ls to view the Docker image:
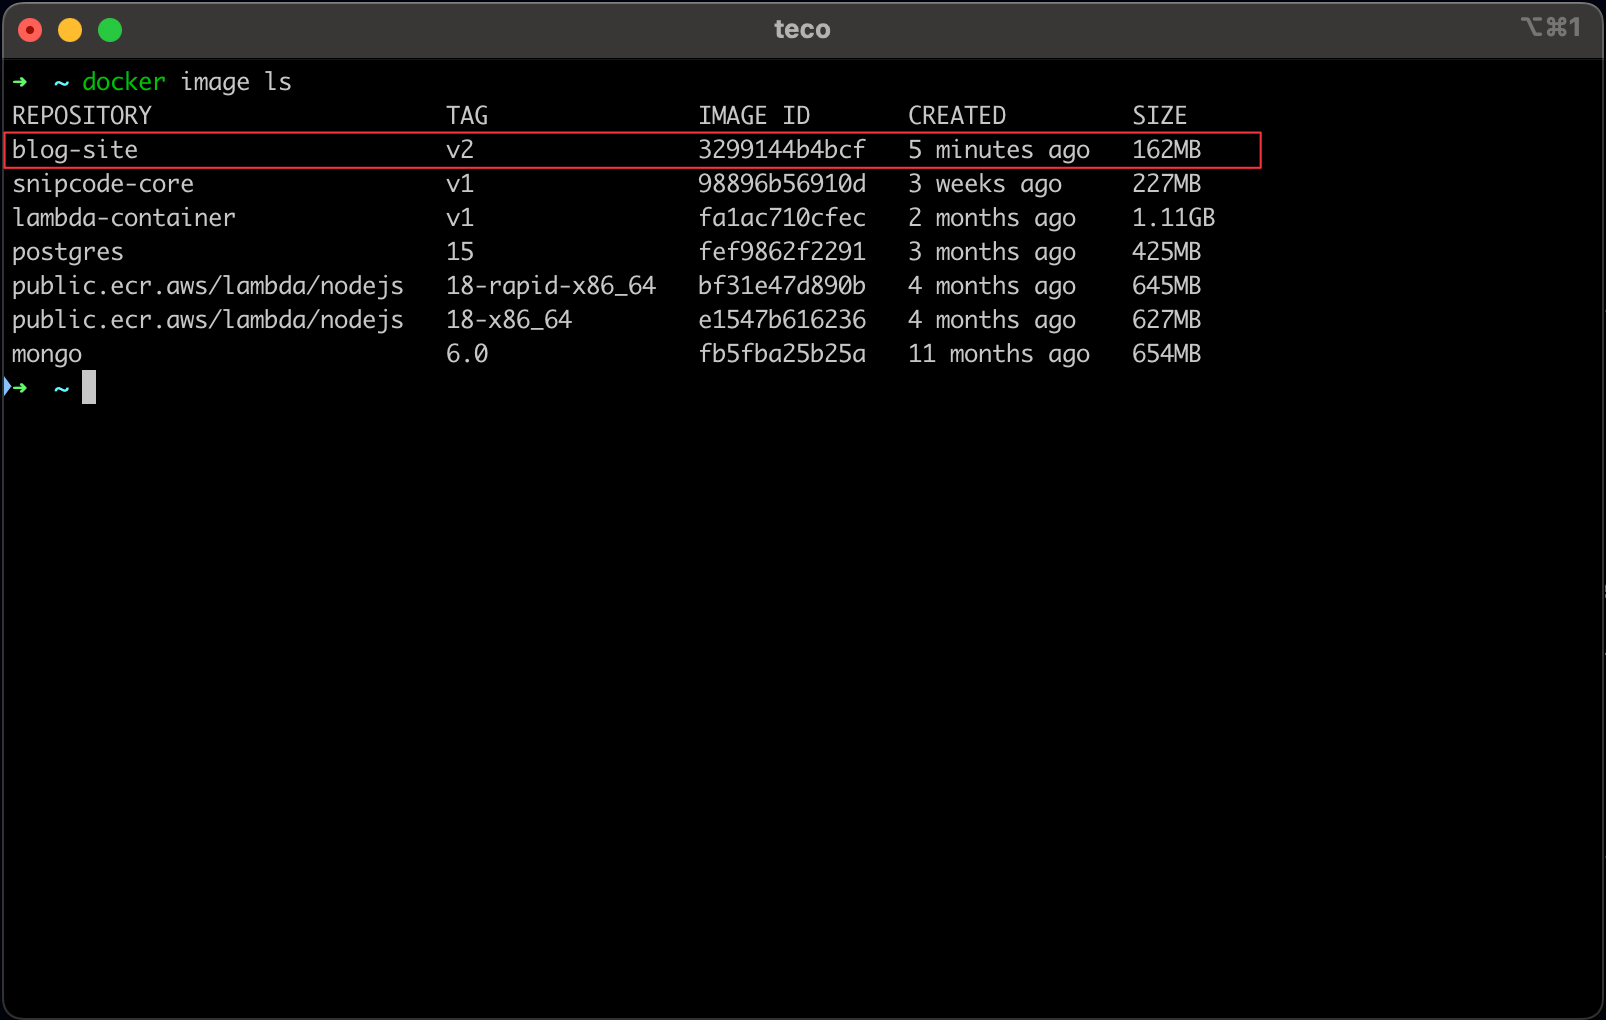
The image size would have been bigger if we didn't use the standalone output.
Run the Docker image
The image exposes the port 3000, so we should map it to a port of the physical computer, say 8080. The command to start a Docker container from the Next.js Docker image we built is:
docker run --rm -it -p 8080:3000 --name my-blog blog-site:v2
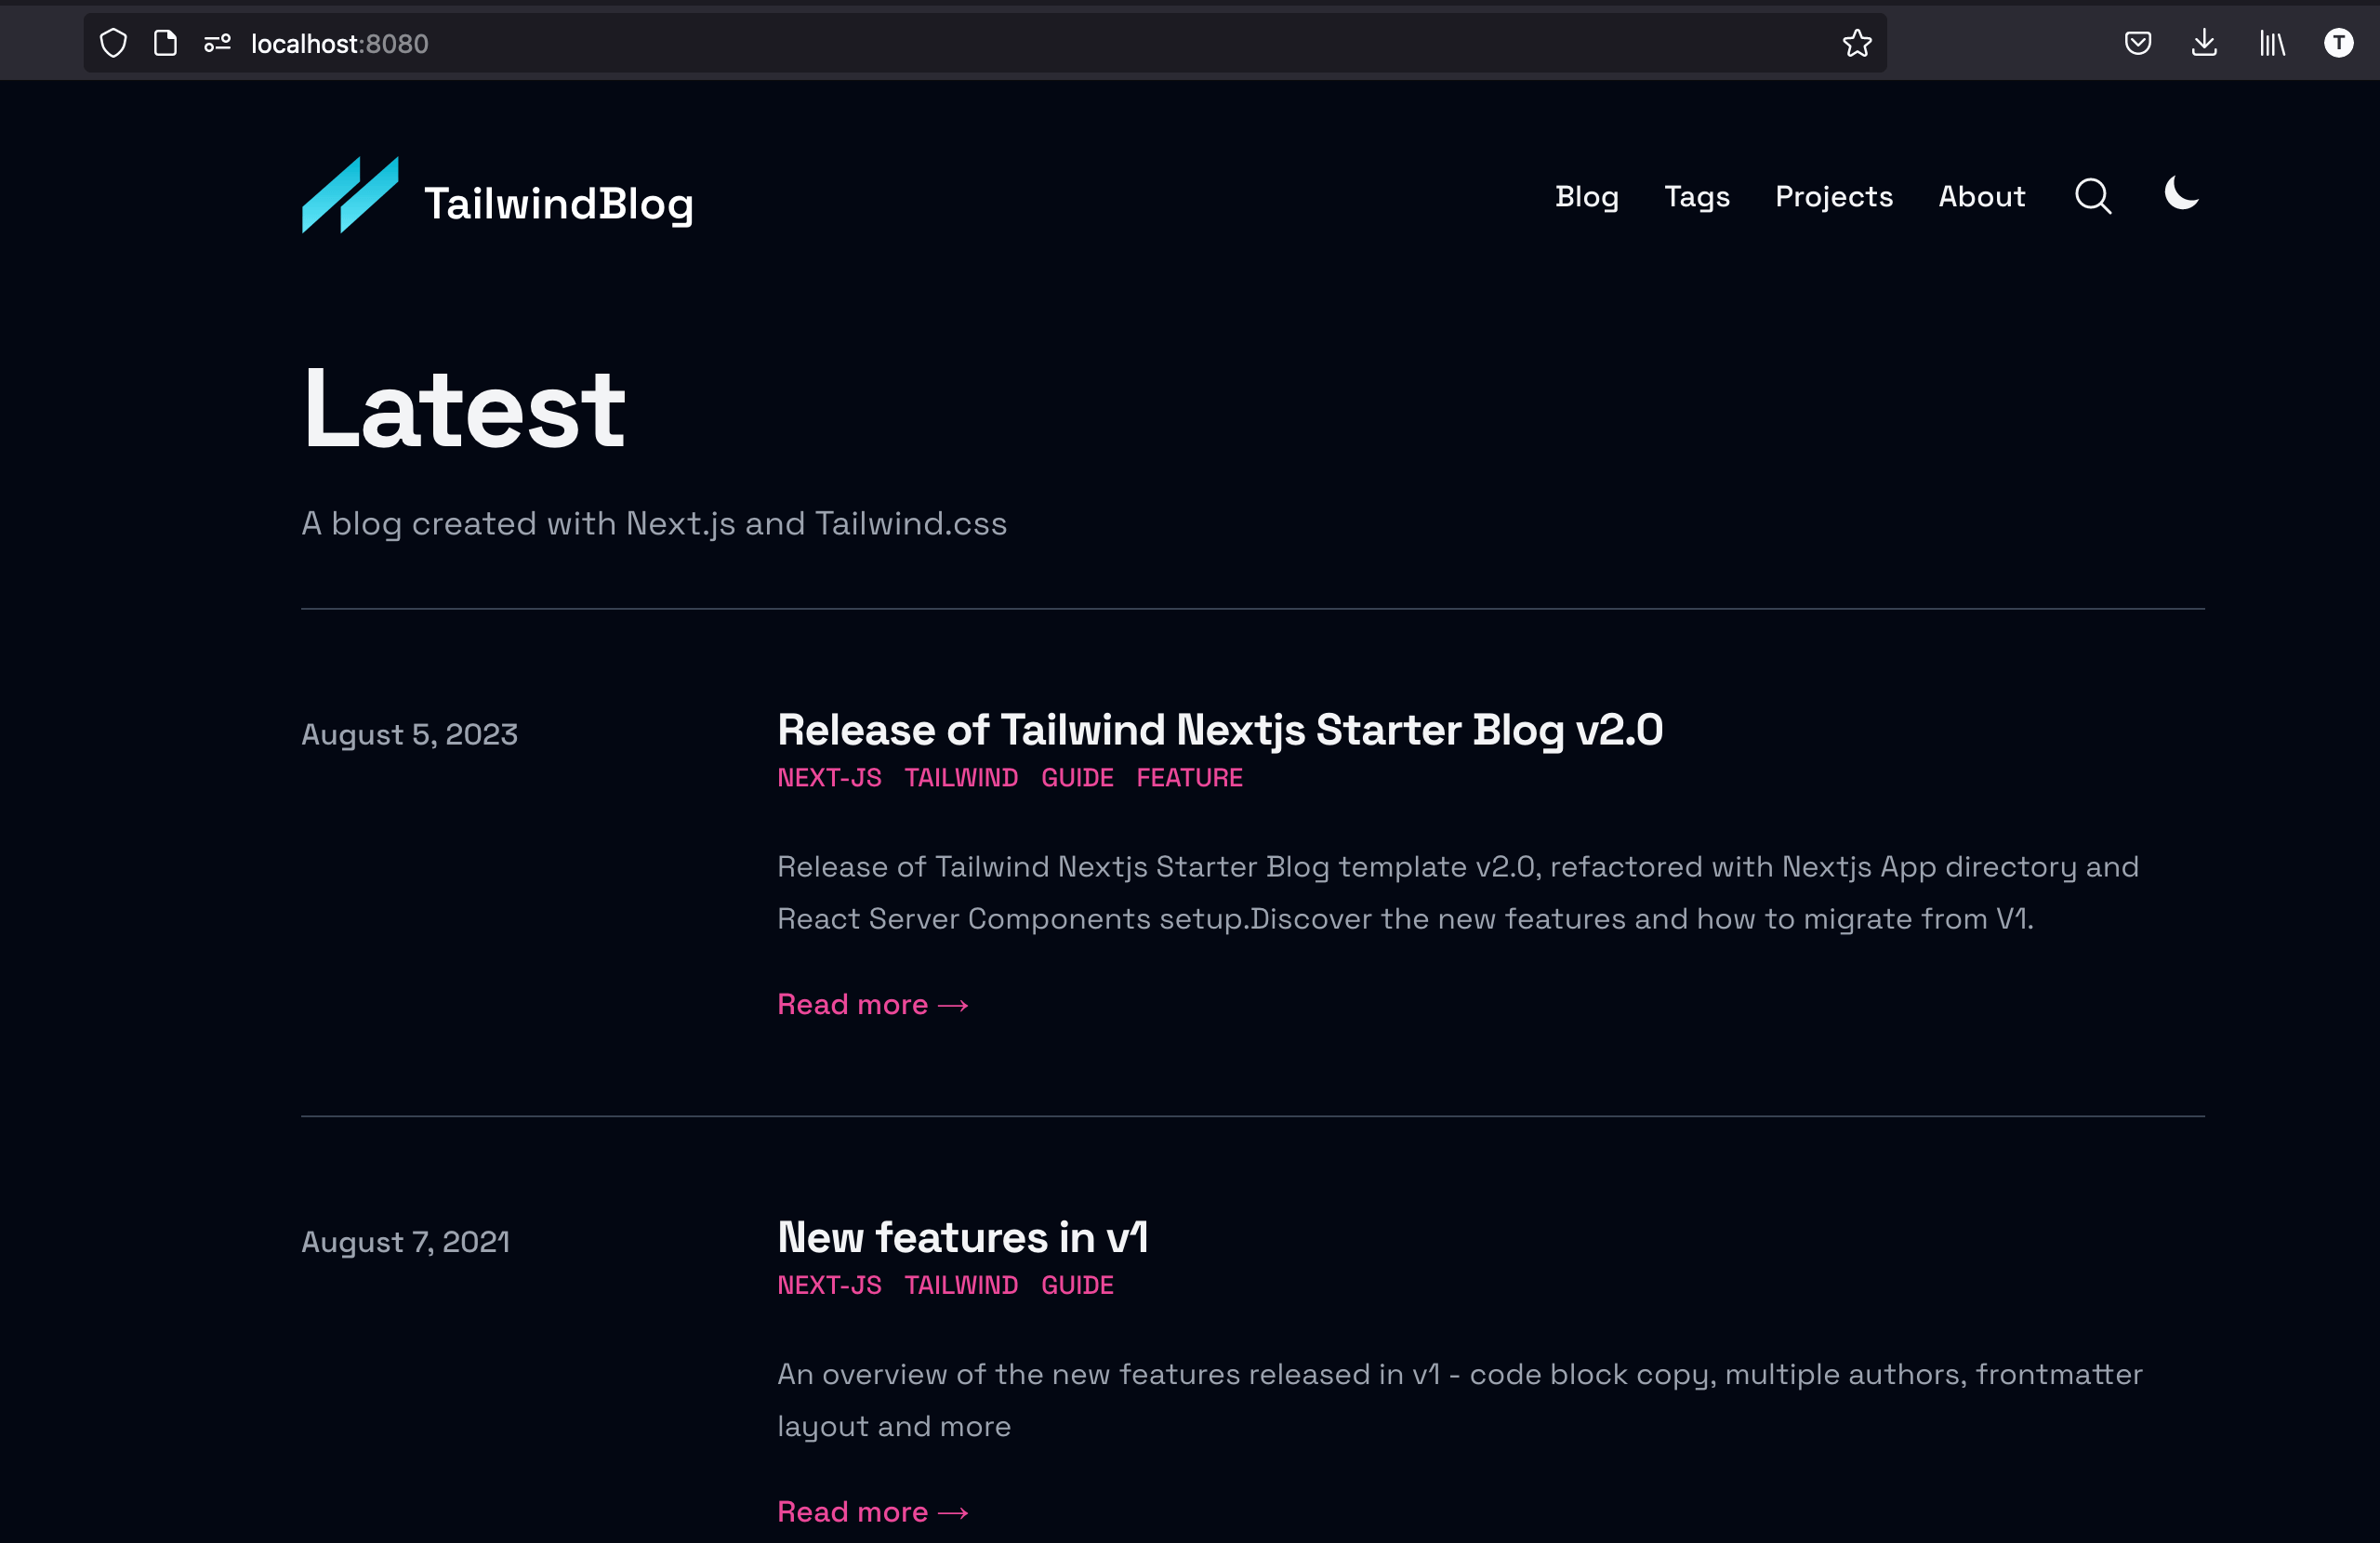
Open your favorite browser and navigate to http://localhost:8080; you get the same page as before:
Handle environment variables
We build the image with a local configuration where environment variables aren't required, but for production, you need to set these values like the Google Analytics ID and the website URL. Since the .env file is not versioned, how do we add these variables in the Docker context?
We can use Docker build arguments to provide these variables:
Let's say we want to set these two environment variables:
| Variable | Value |
|---|---|
| GOOGLE_ANALYTICS_ID | GA-1234567 |
| SITE_URL | https://myblog.dev |
Let's update the stage builder in the Dockerfile to set the environment variables read from the build arguments:
# Rebuild the source code only when needed
FROM node:20-alpine AS builder

ARG GOOGLE_ANALYTICS_ID=""
ENV NEXT_PUBLIC_GA_ID=$GOOGLE_ANALYTICS_ID
ARG SITE_URL="https://myblog.dev"
ENV NEXT_PUBLIC_SITE_URL=$SITE_URL

WORKDIR /app

COPY --from=deps /app/node_modules ./node_modules

COPY . .

RUN yarn build
We use the command ARG to define a build argument and set a default value if the argument is not provided.
We use the command ENV to create an environment variable and set the value to the build argument value.
Now, the command to build the image is the following:
docker build -t blog-site:v2 --build-arg GOOGLE_ANALYTICS_ID=ga_id --build-arg SITE_URL=https://myblog.dev .
You can provide as many arguments as you want.
Deploy on a Virtual Private Server
Interested to learn how to deploy this docker image on a Virtual Private Server? Here is the process:
- Push the image to the Docker Hub
- Connect to the server through SSH and pull the image from the Docker Hub
- Start a container from the image
- Create a DNS Record
- Configure a Reverse proxy with Nginx Apache or Caddy.
I show how to do these steps in the post below, starting in the section "Push the image to the Docker Hub."
 Eric Cabrel TIOGO
Wrap up
Despite the outstanding experience provided by Vercel, you still need to package your Next.js application on your own and deploy it on a server. Docker has the advantage of giving a reproducible build and is also agnostic to the operating system.
We can use the standalone output to reduce the bundle size; to learn more about it, check out the Next.js documentation-related page.
You can find the code source on the GitHub repository.
Follow me on Twitter or subscribe to my newsletter to avoid missing the upcoming posts and the tips and tricks I occasionally share.