
Deploy a Node.js application with PM2 and Nginx


Deploying an application is one of the most prominent parts of the software development lifecycle. When working with Node.js, deploying our application can be challenging.
Fortunately, some tools make it easier, like PM2, which keeps your Node.js application alive and allows you to scale and distribute the load between the application instances.

Once the application is live, it is not accessible to the world, and you need a Webserver + a domain name to make it possible. This tutorial will show how to deploy a Node.js application using PM2 and do a reverse proxy with Nginx.
Here is the picture to summarize what we want to achieve
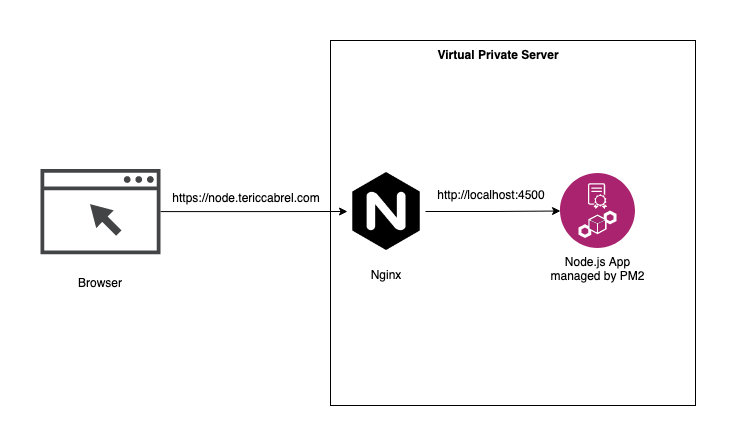
Nginx and PM2 work together to achieve this implementation.
Prerequisites
To follow this tutorial, you must have the following requirements:
You can buy a VPS on Hetzner, which provides affordable server with good performance. The server running this blog and all my side projects are hosted here. Use my referral link to get €20 after you sign up.
- A ready-to-use VPS; you can buy one on Hetzner, which provides an affordable server with good performance. The server running this blog is hosted here. Use my referral link to get €20 after you sign up.
- A domain or subdomain name
- An SSH client; I use Termius, but your terminal is enough for Unix systems such as Ubuntu or MacOS.
- Node.js 20+ and Nginx installed on the VPS

Create a simple Node.js application
To create a Node.js application to deploy on the server and make it accessible worldwide, we will use the Node.js project starter we built in this tutorial.
git clone https://github.com/tericcabrel/node-ts-starter.git -b express deploy-node-app

cd deploy-node-app

yarn install

yarn start
You will have a Node.js project with the Express framework already installed and configured. Navigate to the URL http://localhost:4500/ to make sure it works as expected.
Update the file src/index.ts with the code below:
import express from 'express';
import dotenv from 'dotenv';

dotenv.config();

const HOST = process.env.HOST || 'http://localhost';
const PORT = parseInt(process.env.PORT || '4500');
let requestCount = 0;

const app = express();

app.use(express.urlencoded({ extended: true }));
app.use(express.json());

app.get('/', (req, res) => {
  requestCount++;

  return res.json({
    message: 'Hello World!',
    numberOfCall: requestCount,
  });
});

app.listen(PORT, () => {
  console.log(`Application started on URL ${HOST}:${PORT} ?`);
});
When we hit the endpoint with this code, the number of calls will be incremented and displayed in the browser.
Let's transpile the TypeScript code to JavaScript.
yarn tsc
A "build" folder is generated with the JavaScript code. Run the application with Node.js:
node build/index.js
The code still works as expected; let's deploy it on the VPS.
Package and upload the project to the server
The "build" folder contains only the index.js, but if you zip it and run it on the server, it will not work because the dependencies don't exist, so we will add the package.json and the yarn.lock.
cp package.json yarn.lock build

tar czf backend.tar.gz build/.
The second line compresses the build folder to a file called backend.tar.gz.
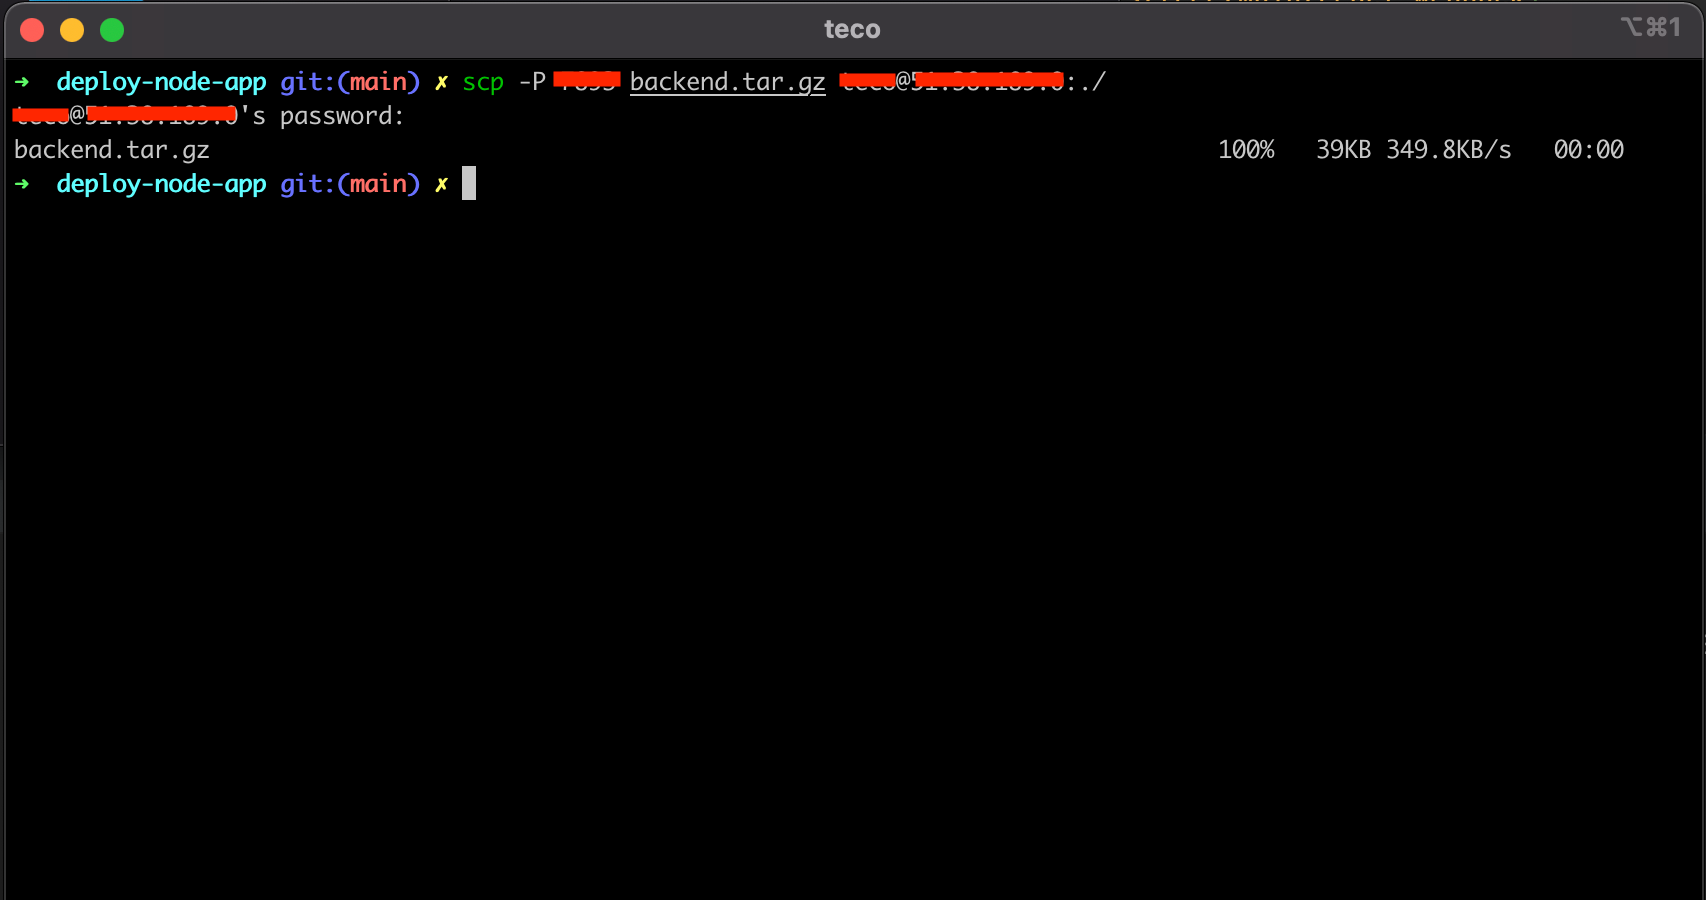
The next step is to copy the file to the VPS in the $HOME folder; we will use SCP, which stands for Secure Copy. It allows performing the distant copy.

The syntax is:
scp -P $PORT $ZIPPED_FILENAME $USER@$HOST:./
- $PORT: Replace this with the port of your VPS
- $ZIPPED_FILENAME: The compressed file on the local computer we want to copy on the server. The value is backend.tar.gz
- $USER: Replace the username created on your VPS
- $HOST: Replace this with the IP address of your VPS.
An example of the whole expression is:
scp -P 4321 backend.tar.gz user@192.186.11.12
Run the application with PM2
The file is copied to the server in the user's "home" directory. Log into the server, uncompress the application, and run with PM2.
ssh -P $PORT $USER@$HOST

tar xf backend.tar.gz

cd build

yarn install

pm2 start index.js --name backend-app
Below, are all these steps in a picture.
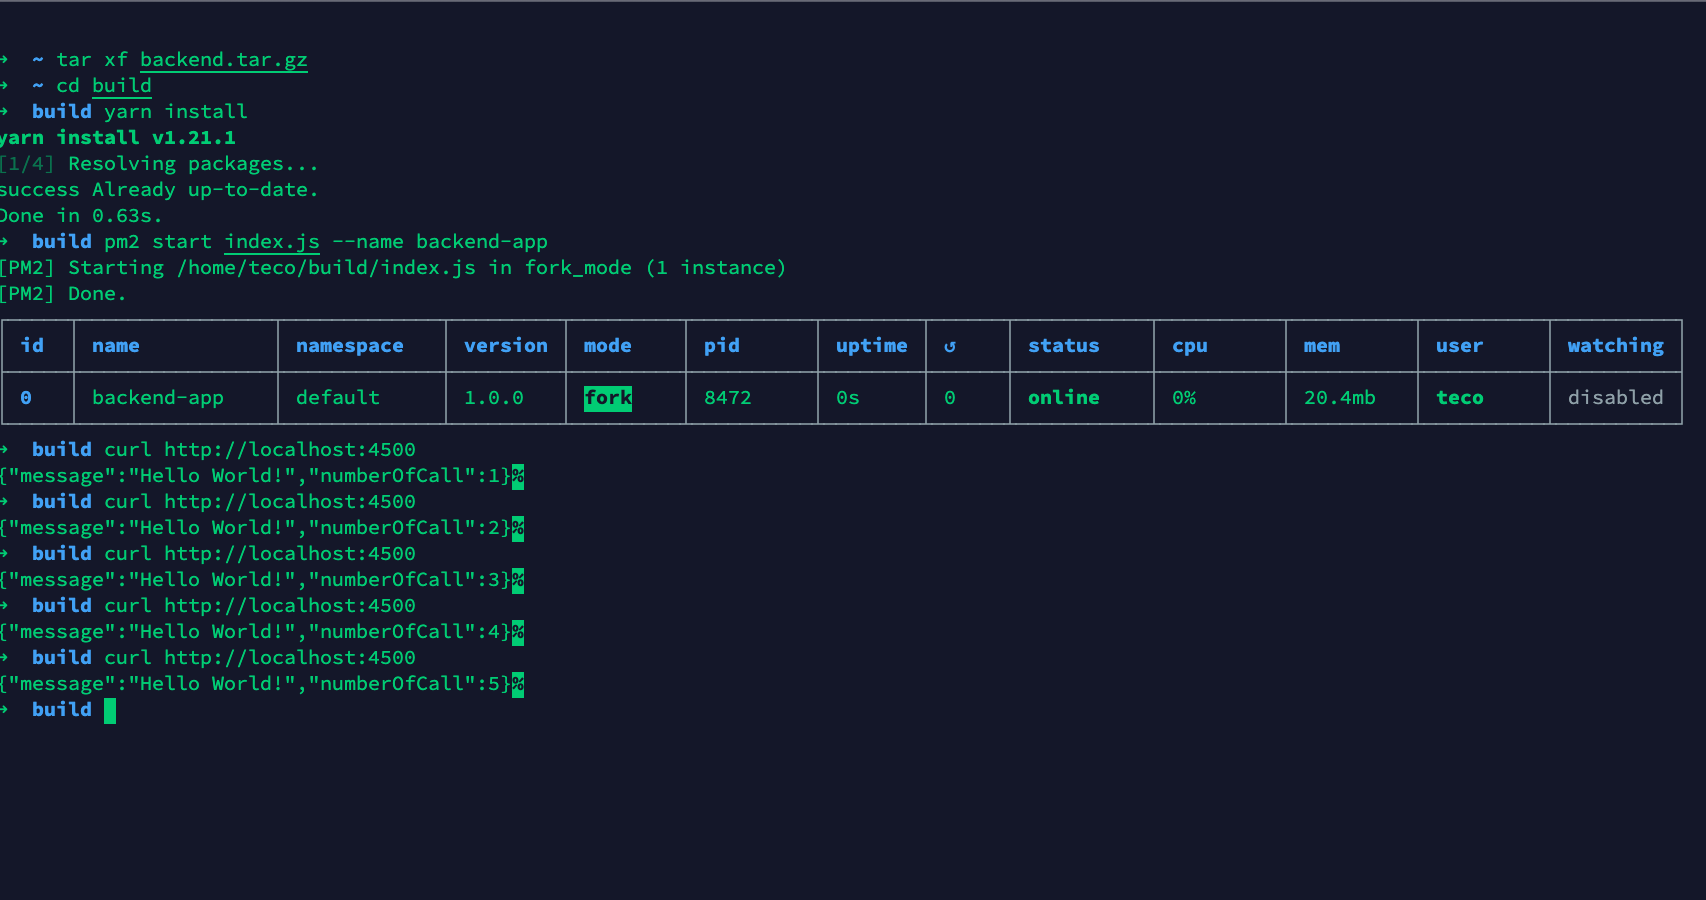
As we can see, the Node.js application is working as expected.
To install the Node.js PM2 package on the server, run the command below:
npm install -g pm2
With PM2, you can create a configuration file that will be used to launch your application. You can indicate the application's name, the entry point, the environment variables to inject, etc...
Inside the "build" folder, create a file called ecosystem.config.js and add the code below:
module.exports = {
  apps: [
    {
      name: 'backend-app',
      script: './index.js',
      watch: false,
      force: true,
      env: {
        PORT: 4500,
        NODE_ENV: 'production',
        MY_ENV_VAR: 'MyVarValue',
      },
    },
  ],
};
To launch your Node.js application, run the command below:
pm2 start
Behind the scenes, PM2 will detect the ecosystem.config.js file, parse it, and extract the required information to launch the application
Set up a Reverse proxy with Nginx
The application is running on the server, but we can access it from the outside. We will create a subdomain and then use Nginx to make a reverse proxy for the application.
My domain's name is tericcabrel.com; I will create a subdomain that points to my VPS IP address. Log into the client space of your hosting platform to proceed.
On my side, I use OVH.

The change can take up to 24 hours to propagate. You can use this website to check if the DNS is ready.
We must create an Nginx configuration file for the website with the command below:
sudo nano /etc/nginx/sites-available/node.tericcabrel.com
Paste the code below inside the file, save, and exit:
server {
    server_name  node.tericcabrel.com;
    index index.html index.htm;
    access_log /var/log/nginx/nodeapp.log;
    error_log  /var/log/nginx/nodeapp-error.log error;

    location / {
        proxy_set_header X-Forwarded-For $proxy_add_x_forwarded_for;
        proxy_set_header X-Forwarded-Proto $scheme;
        proxy_set_header X-Real-IP $remote_addr;
        proxy_set_header Host $http_host;
        proxy_pass http://127.0.0.1:4500;
        proxy_redirect off;
    }
}
Don't forget to replace node.tericcabrel.com by your domain or subdomain.
Enable the website with the command below:
sudo ln -s /etc/nginx/sites-available/node.tericcabrel.com /etc/nginx/sites-enabled/node.tericcabrel.com
We created a symbolic link of our config file inside the folder /etc/nginx/sites-enabled. This is because Nginx only activates the website configurations present in this folder.
Let's verify if there is no Nginx error, then reload it to take the changes into account:
sudo nginx -t

sudo nginx -s reload
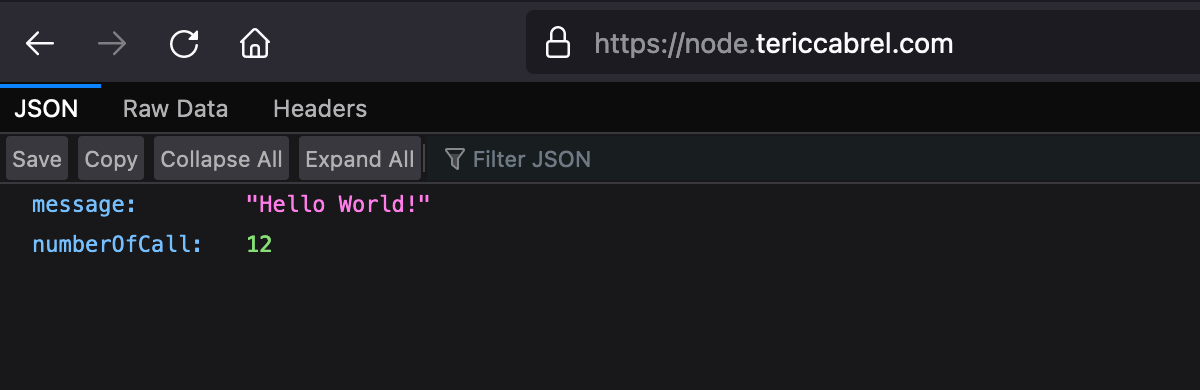
Navigate to http://node.tericcabrel.com to see the result:
The Node.js application is accessible from the subdomain 🎉.
Add SSL certificate with Letsencrypt
Install Certbot, which is the tool responsible for certificate generation:
sudo apt install snapd
sudo snap install --classic certbot
Generate and install an SSL certificate for our domain
sudo certbot --nginx -d node.tericcabrel.com
You will be asked if you want to redirect HTTP to HTTPS. You can press 1 to deny or 2 to accept. In this case, press 2, hit Enter, and wait for the installation to complete.
Reload the Nginx configuration using the command below.
sudo nginx -s reload
Navigate to https://node.tericcabrel.com.
Challenge
Now, you know how to deploy a Node.js application with PM2 and Nginx, but before you go, I have a challenge for you:
Let's make the number of calls on node.tericcabrel.com reach 500,000? 😁
You can find the code source for this tutorial on the GitHub repository.
Follow me on Twitter or subscribe to my newsletter to avoid missing the upcoming posts and the tips and tricks I occasionally share.