
Set up a Node.js project with TypeScript, ESLint, and Prettier


TypeScript is a free and open-source programming language developed by Microsoft to improve and secure JavaScript code production.
It is a superset of JavaScript, meaning any correct JavaScript can be used with TypeScript. Its code is transpiled in JavaScript and can be interpreted by any Web browser or JavaScript engine. The first version was released in 2012.
Why do you need TypeScript?
TypeScript brings more comfort in syntax writing. It's a good choice to use it because :
- An optional static type of variables and functions
- Object-oriented programming support
- Module import
- It supports the ECMAScript 6 specification.
- The ability to compile down to a version of JavaScript that runs on all browsers.
- IDE provides IntelliSense, which improves the developer experience.
- The code is easier to test.
Prerequisites
To follow this tutorial, you must install these tools:
- Node.js 20.6 or higher - Download's link
- A Node.js package manager such as NPM or Yarn.
Node.js comes with NPM, which can be used to install Node.js modules, so feel free to use it. I will use Yarn.
Initialize node project
Create a new folder that will hold the contain our source code:
mkdir node-typescript-starter

cd node-typescript-starter
We are inside the folder; let's initialize a Node.js project by running the command below:
yarn init
The CLI will ask questions about your project; answer as you want. Here is the project initialization example:
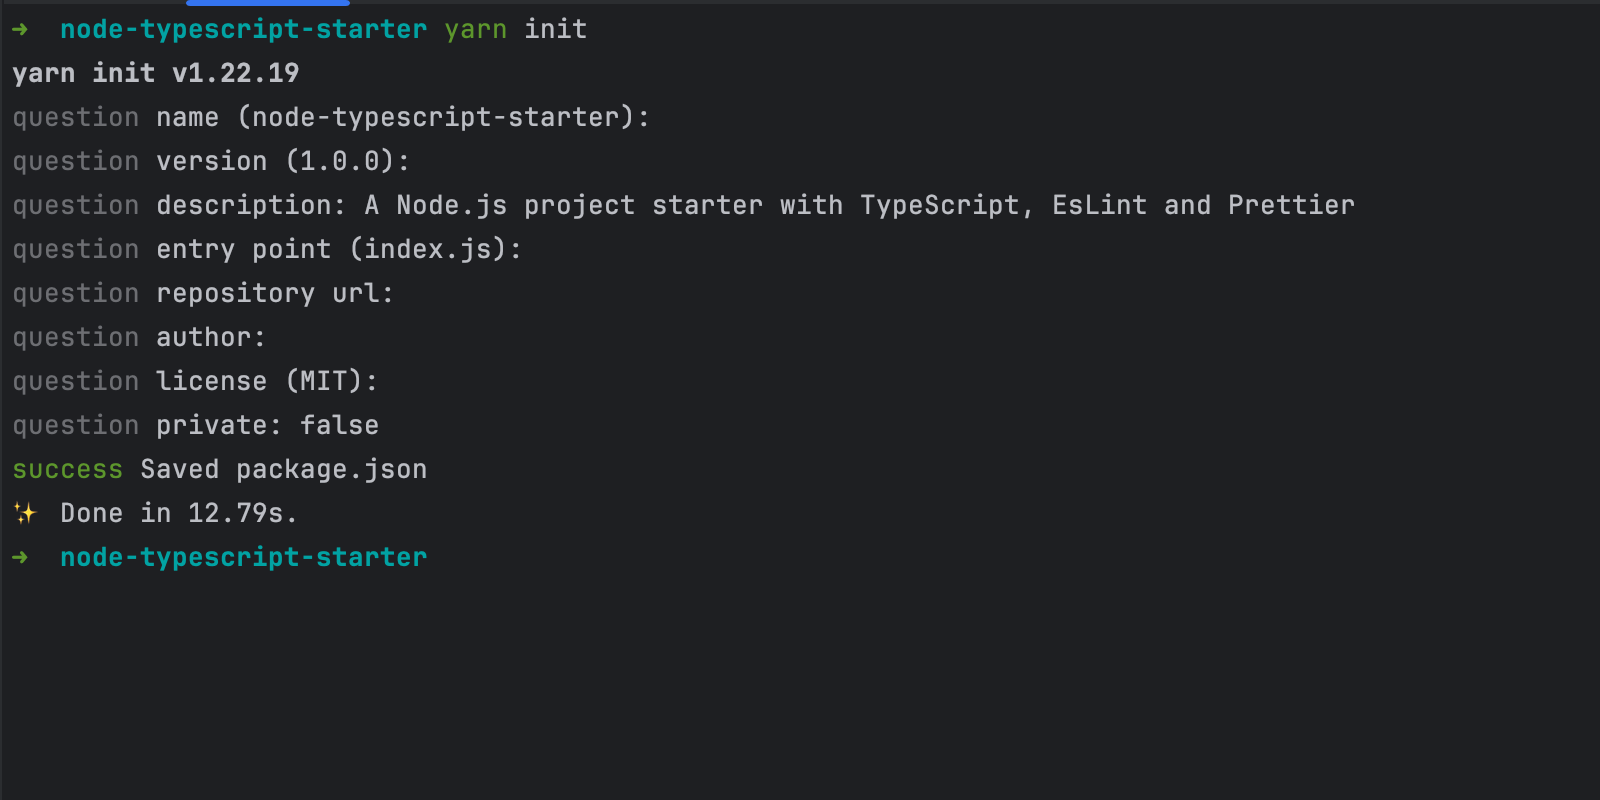
A file named "package.json" will be created, the configuration file for a Node.js project.
Install TypeScript
Run the commands below to install TypeScript:
yarn add typescript
yarn add -D @types/node
The first line installs TypeScript in the project, and the second line installs the types definition of the Node.js native modules such as http, fs, path, cluster, etc...
Let's set up TypeScript's configuration, which consists of a file with rules TypeScript uses to perform type checks and transpile the code to JavaScript.
For example:
- Which version of JavaScript we are targeting?
- Which directories should be excluded or included in type checking?
- Do you want to enable/disable some type-check rules?
- Etc...
Run the command below to initialize the TypeScript configuration:
yarn tsc --init
# or
npx tsconfig.json
These two commands have the same goal but produce different results.
- The first command generates a "tsconfig.json" file with comments on each property, which helps understand its purpose. I recommend this command to someone who is just starting with TypeScript.
- The second command generates a "tsconfig.json" file with many predefined properties already configured, contrary to the first, which has few properties. I recommend this for someone already familiar with TypeScript.
You can customize the "tsconfig.json" as you want. I will provide the one I use on all my projects in the project repository at the end.
Write code with TypeScript
Create an "src" folder, then create a file named "index.ts". Feel free to use your favorite editor or IDE.
mkdir src
cd src
touch index.ts
Open the file "index.ts" and paste the code below:
const addition = (a: number, b: number): number => {
    return a + b;
};

const number1: number = 5;
const number2: number = 10;
const result: number = addition(number1, number2);

console.log('The result is %d', result);
Run the Node.js project
We wrote our super function, which calculates the sum of two numbers, and we want to run it to see the output. Let's look at a possible way of running the project.
1. Transpile the file and run it with the Node.js
The Node.js runtime runs only JavaScript code; since ours is in TypeScript, we must convert it to JavaScript and then run it. The command below achieves that:
yarn tsc

node dist/index.js
The output will be similar to the picture below:

2. Run the Typescript file directly
We can run our code but must run two commands to see the result. Why can we just execute our .ts file directly? Also, we only need JavaScript files to deploy them in production.
Fortunately, it's possible to run TypeScript files using a TypesScript runtime such as TS Node, Tsx, Jiti, Sucrase, etc... Here is a features comparison between major TypeScript runtimes.
We will use TS Node, so let's run the command below to install it.
yarn add -D ts-node
Run the command below to execute the TypeScript code:
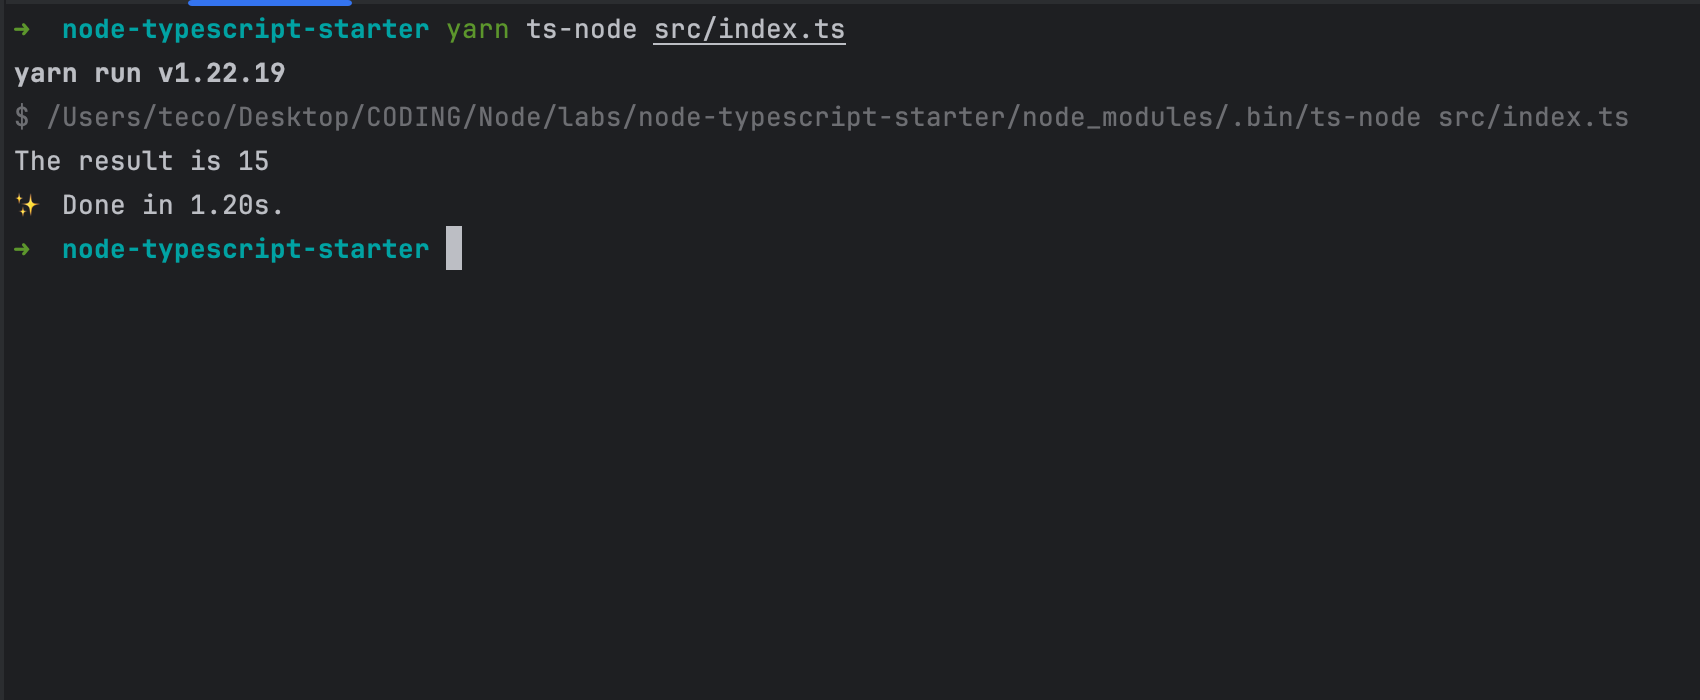
yarn ts-node src/index.ts
The output will be similar to the picture below:
3. Run the file on changes
To improve the developer experience while coding, running the code when a file changes is great as it will increase the feedback loop. We can use a file watcher to detect file changes in the project and run the command to run the project.
A Node.js package called Nodemon is suited for this task, so let's install it.
yarn add -D nodemon
Before you start editing your files, run this command:
nodemon --watch "*.ts" --exec "ts-node" ./src/index.ts
This command means: Watch every change on all files having the .ts extension, then use ts-node to run the project and use the file ./src/index.ts as the entry point.
nodemon --watch "*.ts" --watch "*.json" --exec "ts-node" ./src/index.ts
Load environment variables
In a real-world application, we load sensitive information such as database connection URL, API key, and server SSH key from the environment variables.
Supporting it out of the box will be great for the starter project. Let's say we want to read the application name from the environment variable "APP_NAME" and display it.
In the project root folder, create a file named ".env"
touch .env
Open it and add the content below:
APP_NAME=node-ts-starter
Update the file "src/index.ts" to read and display the environment variables
const addition = (a: number, b: number) => {
  return a + b;
};

const number1 = 5;
const number2 = 10;
const result = addition(number1, number2);

console.log(`The application name is "${process.env.APP_NAME}"`);

console.log('The result is %d', result);
Starting version 20.6.0, Node.js supports environment variables, so we don't need to install a Node.js package. If you are still under version 20.6.0, I recommend using dotenv.
The Nodemon command is the following:
nodemon --watch "*.ts" --exec "node -r ts-node/register --env-file=.env" ./src/index.ts
We replaced "ts-node" with "node -r ts-node/register --env-file=.env" which tells Node.js to preload "ts-node/register" which is helpful to execute a TypeScript file in Node.js; then, load environment variables in the ".env" file.
Run the command on your computer, you get the following output:
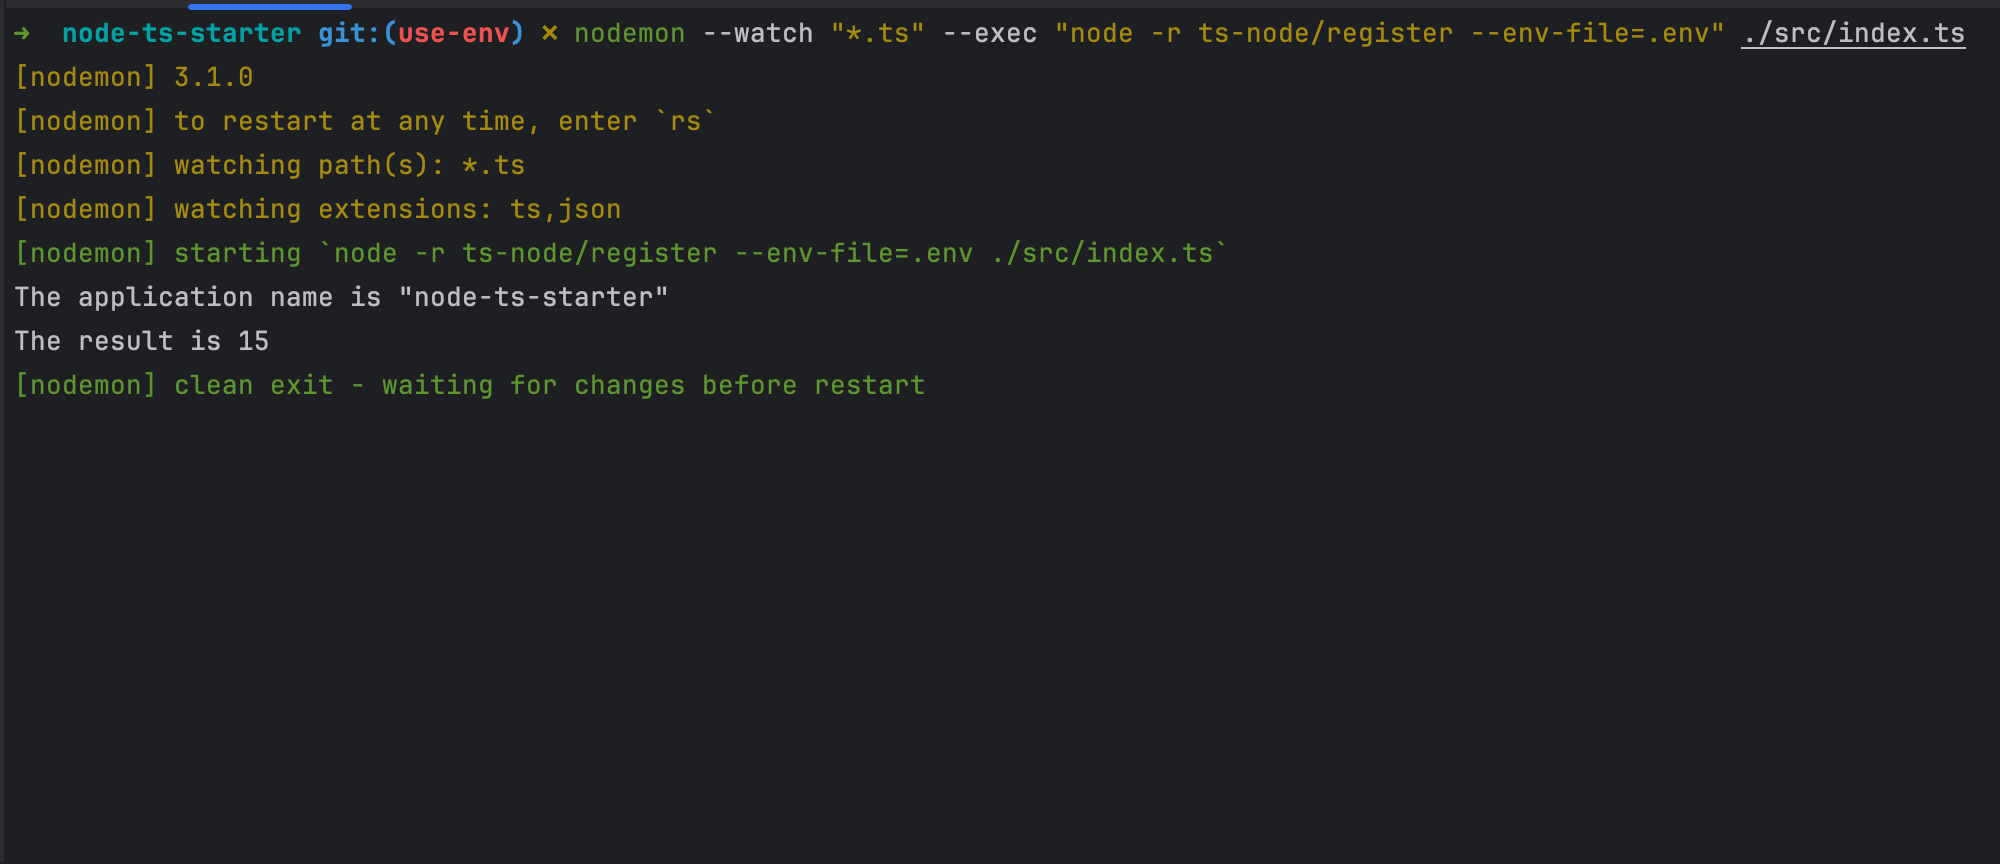
You can see the application's name is read and displayed. To learn more about environment variables in Node.js, check out my post below.

Configure ESLint and Prettier
ESLint helps write better code by checking if the code is well-written and well-formatted and respects some rules defined as the best practices for maintainable and consistent code.
Let's install the required dependencies:
yarn add -D eslint prettier eslint-config-prettier eslint-plugin-prettier @typescript-eslint/eslint-plugin @typescript-eslint/parser
Create a file .eslintrc.js in the root folder of the project and add the code below:
module.exports = {
  parser: '@typescript-eslint/parser',
  extends: [
    'plugin:prettier/recommended',
    'prettier',
    'eslint:recommended'
  ],
  plugins: ['@typescript-eslint'],
  parserOptions: {
    ecmaVersion: 2022,
    sourceType: 'module',
    project: 'tsconfig.json',
  },
  env: {
    es6: true,
    node: true,
  },
  rules: {
    'no-var': 'error',
    semi: 'error',
    indent: ['error', 2, { SwitchCase: 1 }],
    'no-multi-spaces': 'error',
    'space-in-parens': 'error',
    'no-multiple-empty-lines': 'error',
    'prefer-const': 'error',
  },
};
The interesting part of the code above is the rules property. It is here we define our rule.
For example:
semi: 'error' means a semicolon is required at the end of an instruction.
prefer-const means the use of let is forbidden, and the use const instead.
Here is the list of available ESLint rules; feel free to customize them.
If a rule is not respected, the line will be underlined with a red or orange line depending on the error level set for this specific rule, which is "error" or "warning" respectively.
Configure Prettier
Create a file .prettierrc.js at the root folder and add the code below:
module.exports =  {
  semi: true,
  trailingComma: 'all',
  singleQuote: true,
  printWidth: 150,
  tabWidth: 2,
};
In this file, we define rules that Prettier will use to format our code for us.
semi: true means prettier would add a semicolon at the end of a line if we forgot to do that.
tabWidth: 2 means prettier will indent lines with two spaces.
Exclude files and folders from the ESLint check
In a project, some folders and files hold source code that is irrelevant to us, such as generated folders, Node.js modules, libraries configuration files, etc. We don't want to apply type checks on them.
To exclude files, let's create a file named ".eslintignore" in the project root directory and add the code below:
dist
.eslintrc.js
.prettierrc.js
We exclude the "dist" folder containing the TypeScript code transpiled into JavaScript and the configuration files for ESLint and Prettier.
By default, ESLint excludes the "node_modules" folder, so adding it to the .eslintignore is unnecessary.
Lint and format our code
Let's add commands in the "scripts" property in our "package.json" to check ESLint and Prettier errors and fix them:
...
"scripts": {
  "lint": "eslint src/**/*.ts --fix"
}
...
Let's edit the code of the src/index.ts to intentionally break some ESLint rules:
const addition = (a: number, b: number): number => {
  return a + b;
}

let number1: number = 5;
var number2: number = 10;
const result: number = addition(number1, number2);

console.log(`The application name is "${process.env.APP_NAME}"`);

console.log("The result is %d", result );
The table below lists the ESLint errors on the above code.
| Line | Error | EsLint rules broken |
|---|---|---|
| Line 3 | No semicolon at the end | semi |
| Line 5 | Using let instead of const | prefer-const |
| Line 6 | Using var instead of const | no-var |
| Line 9 | There is a space before the closing parenthesis | space-in-parens |
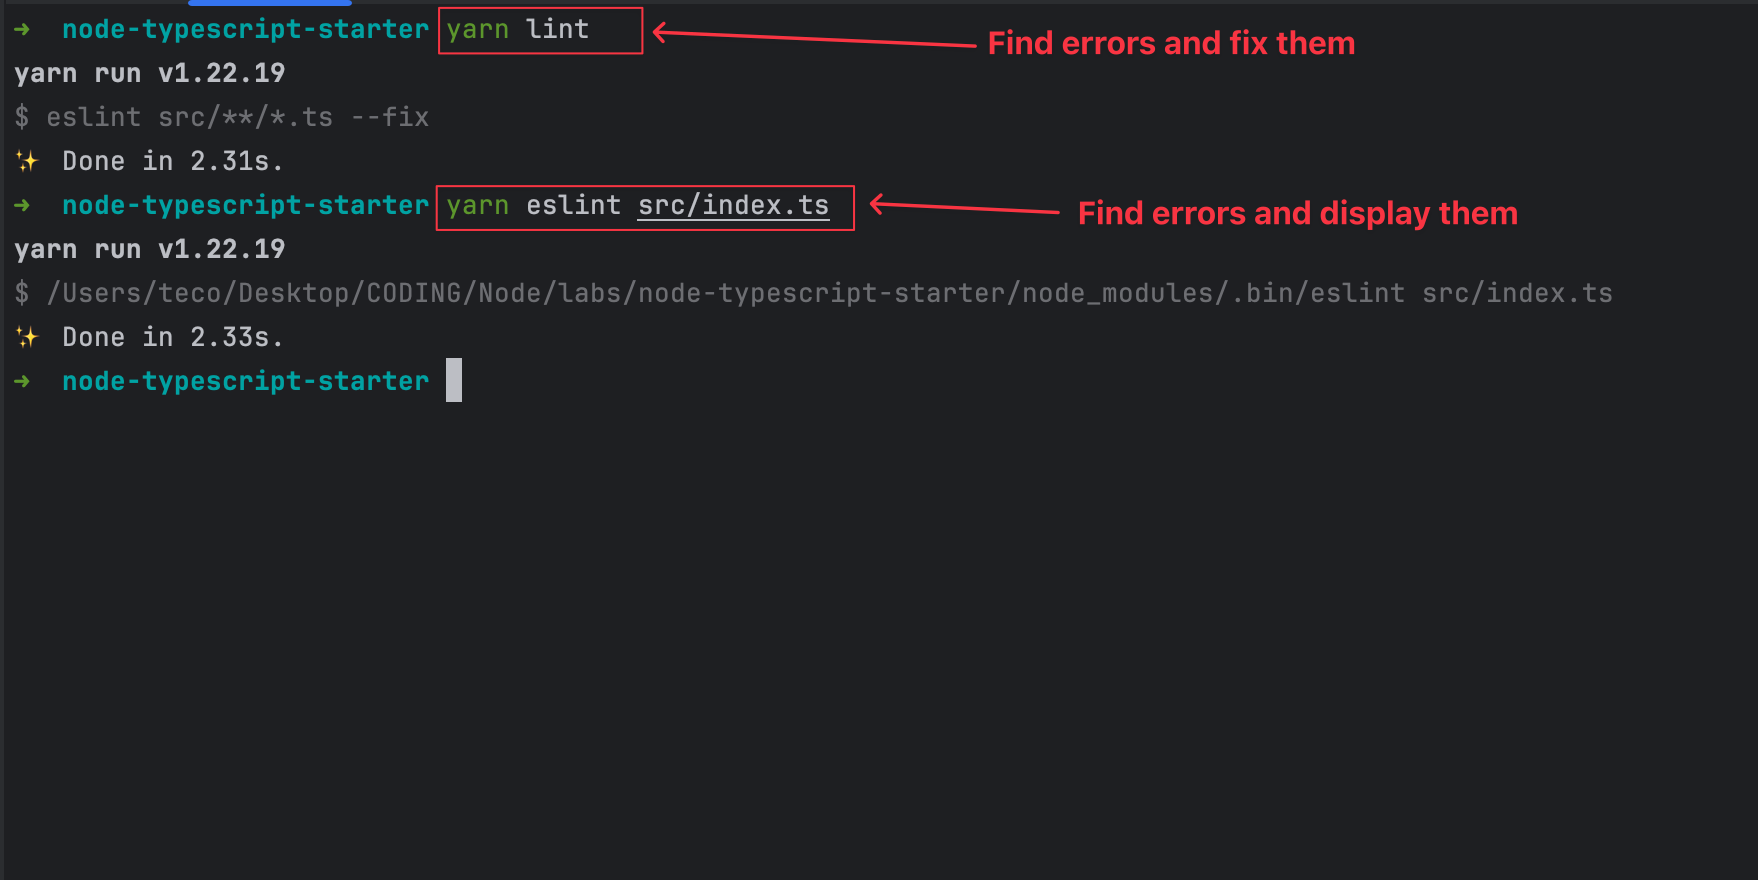
Run the command yarn eslint src/index.ts, you will get the following output:
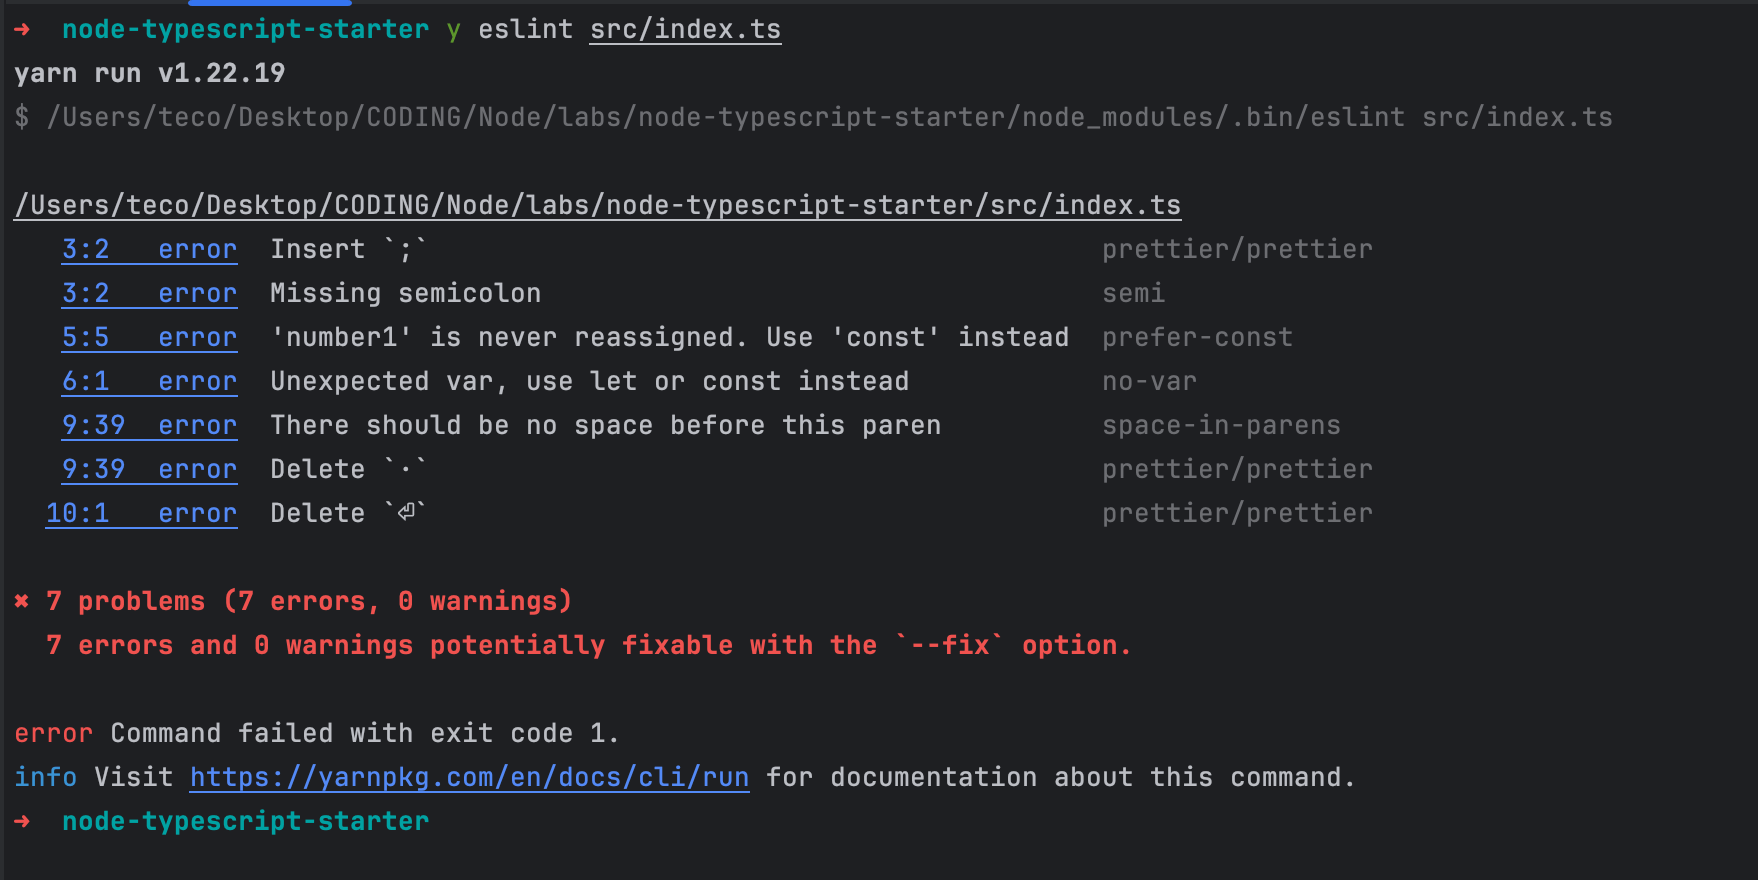
There are four ESLint errors and three Prettier errors; run the command below to fix them:
yarn lint
All earlier errors are automatically fixed, and the concerned files are updated.
Bonus: Type Inference
TypeScript has a great feature that consists of guessing the variable type based on the value assigned to the last one or guessing the return type of a function based on the value returned.
Let's see some examples:
const isValid: boolean = true; // The type is explicit

let age = 44; // TypeScript will give the type of value '44' to the variable 'age' which is a Number

const word = "5"; // TypeScript will do the same so 'word' is a type String

number = word; // TypeScript will show and error because a String can't be assigned to a number.
We can refactor our code to remove unnecessary types. The advantage of doing that is that our code will be more readable and avoid boilerplate code.
const addition = (a: number, b: number) => { // Typescript will guess the function returns a number
    return a + b;
};

const number1 = 5;
const number2 = 10;
const result = addition(number1, number2); // Result will be a number

console.log('The result is %d', result);
We have a good project starter for building awesome Node.js applications using TypeScript.
You can find the code source on the GitHub repository.
Follow me on Twitter or subscribe to my newsletter to avoid missing the upcoming posts and the tips and tricks I occasionally share.