
Enable authentication and authorization on MongoDB


Photo by Barefoot Communications on Unsplash
MongoDB is a Document Object-Oriented database belonging to the NoSQL databases category. It allows manipulating structured objects in a BSON (binary JSON) format without a predetermined schema.
You need MongoDB when you build a system that needs to support a massive amount of readers in the database; you need to scale your database horizontally with the growth; you want to store data where model restriction doesn't exist.
In 2019, MongoDB had a market share of 24.6% in the database.
We are in 2022, and it is the most used NoSQL database. Companies like Barclays, Uber, Lyft, Accenture, CircleCI, and Segment use it to handle their most demanding apps in areas like IoT, Gaming, Logistics, Banking, e-Commerce, and Content Management.
Installation
MongoDB has two editions: Community Edition and Server edition.
The community edition provides enough features for small and middle applications.
Among these features, we can list the following:
- Flexible document model.
- Indexing to make our queries faster.
- Real-time aggregation provides powerful ways to access and analyze your data.
- Replication is beneficial for those who are working in a distributed system.
- Horizontal scalability with native sharding.
The Enterprise Edition has all the features of the community edition plus:
- Auditing allows administrators and users to track system activity for deployments with multiple users and applications. In other words, you can have the history of CRUD operations, schema changes, Authentication, and Authorization.
- In-Memory Storage Engine.
- LDAP Proxy Authentication and LDAP Authorization.
- Kerberos Authentication.
When I'm writing this article, we are on version 6.0, and we will use the community edition that is free and enough for our use case.
Follow the installation tutorial on the MongoDB website according to your operating system. Once completed, we can continue with the steps below.
For mac users with Intel processors, here is the command to run:
# Install XCode Command Line Tools
xcode-select --install

# download the official Homebrew formulae for MongoDB and Database tools
brew tap mongodb/brew

# Verify that your system meets all the installation prerequisites
brew tap | grep mongodb

# Install MongoDB
brew install mongodb-community@6.0

# Start MongoDB as a MacOS service
brew services start mongodb/brew/mongodb-community

# Start Mongo Shell to make sure everything works
mongos --version
The configuration file is located at: /usr/local/etc/mongod.conf
Create user and database
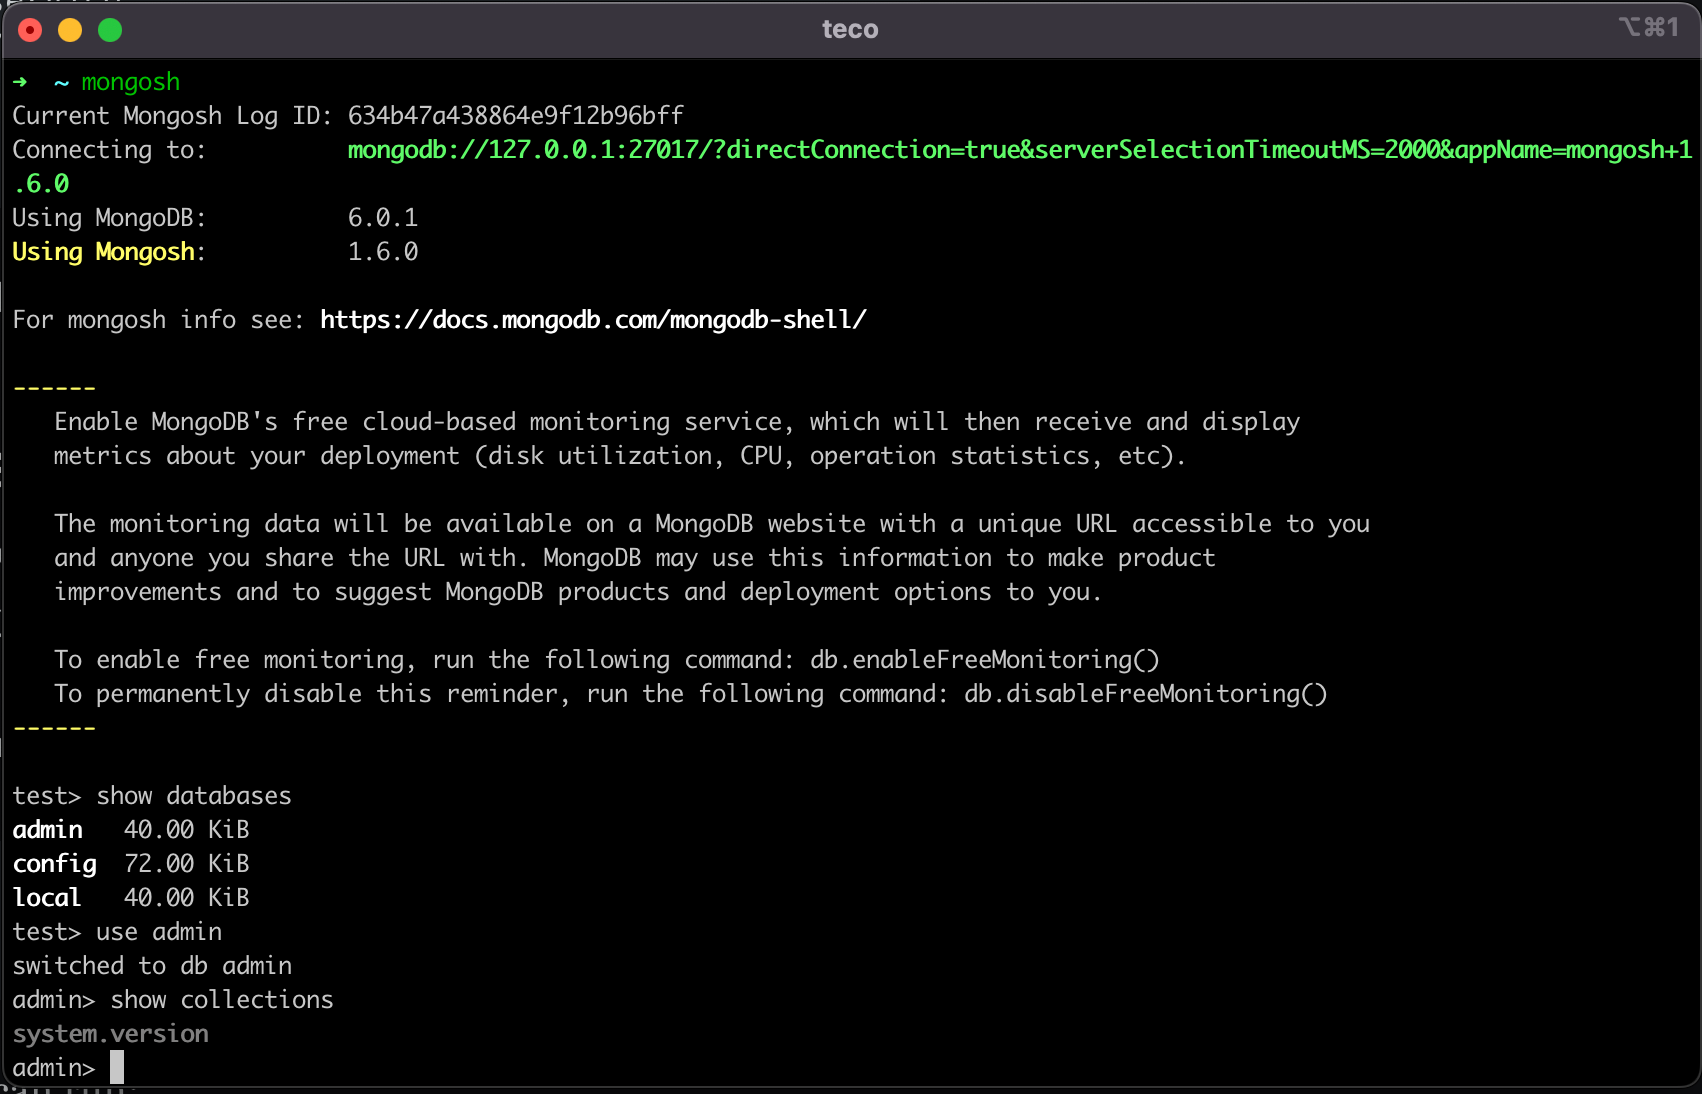
We use the MongoDB shell to connect to the database. The authentication is disabled, and you can connect with the root user.
Run the command below to connect to MongoDB using Mongo shell:
mongosh
Here are some commands you can run:
- View all databases:
show databases - Select a database:
use <database_name> - View collections of a database:
show collections
Working with no authentication can be okay for development or testing environments. Still, when you are in production with customers' data stored inside, it's mandatory to restrict access to the database by:
- Identifying all the users who connect to the database; it's called Authentication.
- Restrict actions an authenticated user can do in the database; it's called Authorization.
Built-in roles
MongoDB comes with built-in roles that will help define restrictions across the database. The picture below shows available roles:
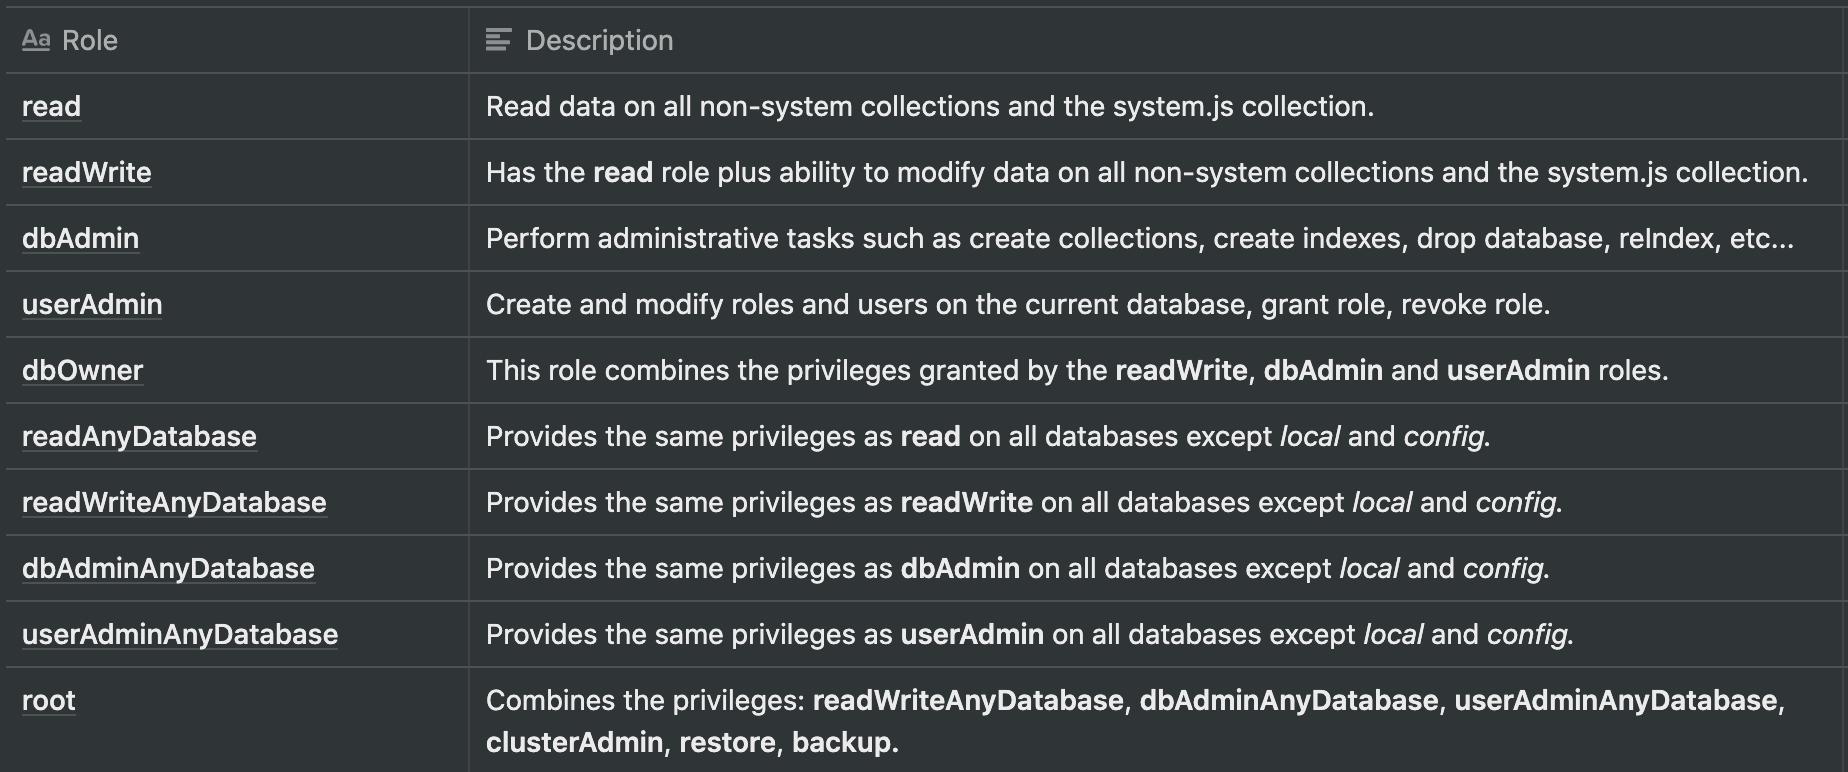
You can restrict using these roles, for example:
- A read role for a Data Scientist who needs to read data to generate statistics.
- A readAnyDatabase for a Data scientist who needs to aggregate data from many databases to generate statistics.
- readWrite and dbAdmin for the backend of a web application with one database. The dbAdmin is useful when you use an ORM that creates the collection in the database from your classes/entities model.
Use case
Let's imagine we have a worker who will do the backup of our database periodically.
According to the roles table above, we will need to create a user with a role root for the worker to backup and restore our DB, but it is too much because we are also giving all the accesses to this user.
To avoid that, you can only give the role backup and restore to this user.
Keep this in mind for when you will need to provide a specific role to a user.
You can also create your custom role by combining many built-in roles.
Enable the authentication
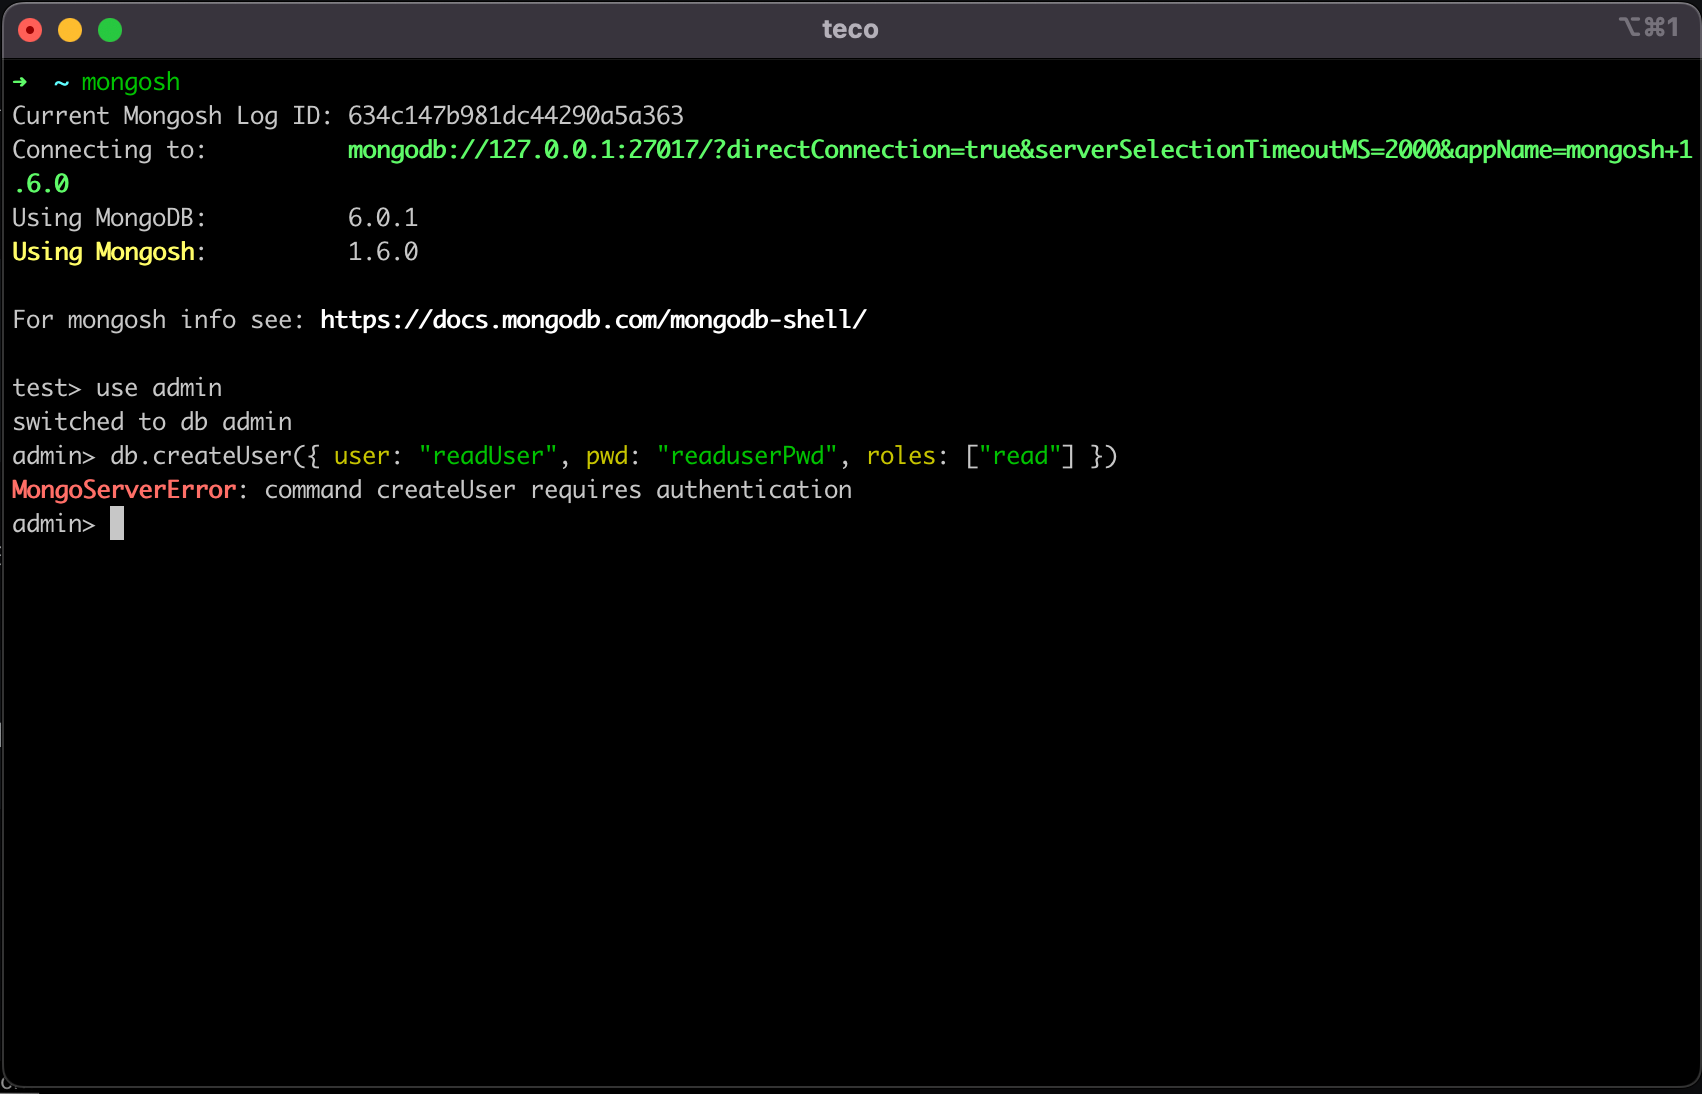
Before that, we need to create a user with a password; otherwise, you cannot connect to the DB after the Authentication is enabled.
Inside the Mongo shell, run the command below:
use admin
db.createUser({ user: "rootUser", pwd: "rootUserPwd", roles: ["root"]})
We select the database admin and we create a user named rootUser with the password rootUserPwd and finally, grant him the role root.
Exit the Mongo shell by typing exit.
To enable authentication, open the config file /usr/local/etc/mongod.conf, locate the property authorization and set the value to enabled:
security:
  authorization: enabled
Save the file, then exit and restart the MongoDB server.
brew services restart mongodb-community
As the picture shows, we get an error if we create a user with a role.
Authenticate a user
Here is the command to connect with a user on a MongoDB instance:
mongosh --host localhost --port 27017 --username "rootUser" --password "rootUserPwd" --authenticationDatabase "admin"
You can also use a connection string to authenticate:
mongosh "mongodb://rootUser:rootUserPwd@localhost:27017/admin"
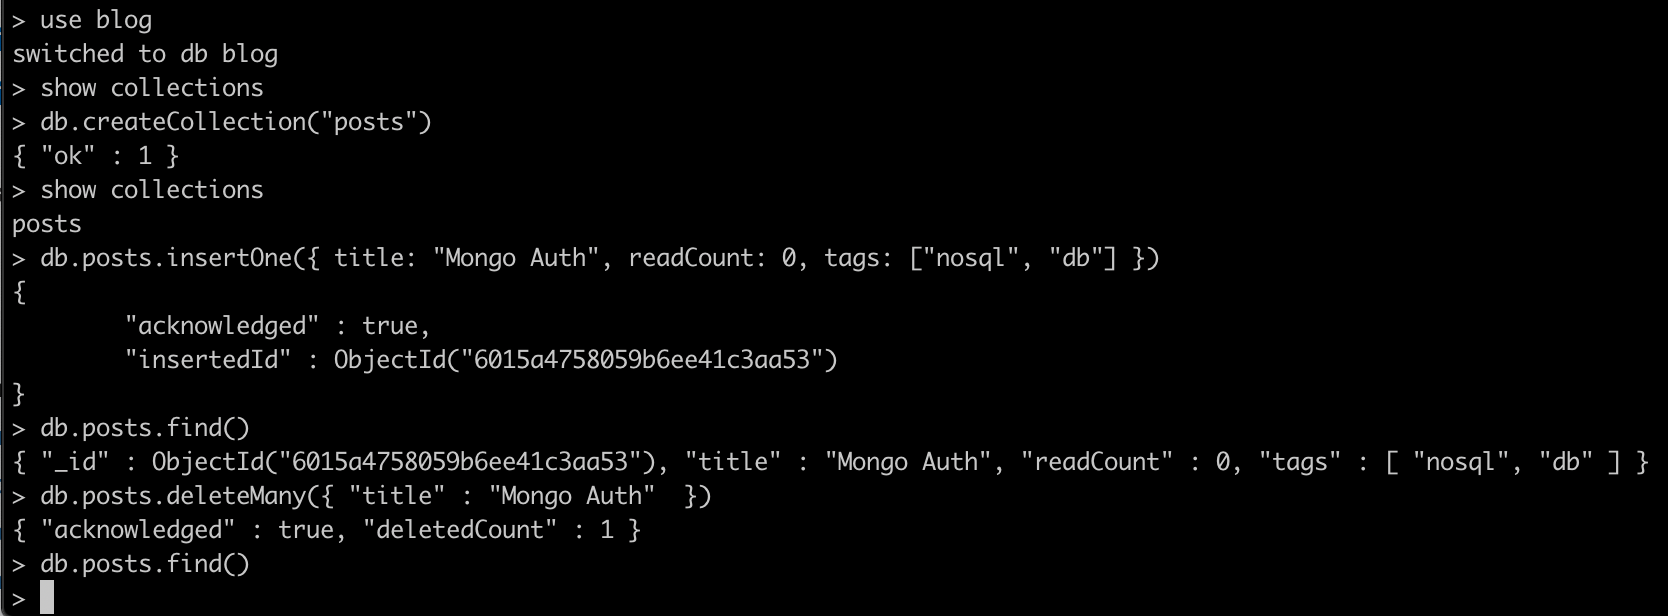
Now we will create a user and give him the role readWrite and dbAdmin on a new database called blog.
We will connect with this user and create a collection called posts and make sure we can write and read data.
use blog

db.createUser({ user: "blogUser", pwd: "blogUserPwd", roles: [{ role: "dbAdmin", db: "blog" }, { role: "readWrite", db: "blog" } ]})

exit
The user is now created. Let's continue with the following steps:
mongosh "mongodb://blogUser:blogUserPwd@localhost:27017/blog"

use blog

db.createCollection("posts")

show collections

db.posts.insertOne({ title: "Mongo Auth", readCount: 0, tags: ["nosql", "db"] })

db.posts.find()

db.posts.deleteMany({ "title" : "Mongo Auth" })

db.posts.find()
We get the following output:
Wrap up
MongoDB is available on major operating systems. It comes with many built-in roles you can use to restrict the actions a user can do on the database. The authentication is disabled by default, and you can enable it by editing the configuration file.
I recommend enabling authentication, even in the development and test environment.
Follow me on Twitter or subscribe to my newsletter to avoid missing the upcoming posts and the tips and tricks I occasionally share.