
Use Hetzner’s rescue mode to unlock your server


Hetzner is a cloud provider that provides performant servers at affordable prices. The easy access to a virtual private server at a cheap price encourages computer scientists to use a server.
Having a server means you are responsible for upgrading the operating system, installing/updating software, managing security, and ensuring availability if you deploy a backend application.
Since server management is in the user's hands, it is common to see people make mistakes during server configuration and get locked out of it. This is not a good situation.
Reasons people are locked out of the server
There are many situations where you cannot use your server efficiently due to a bad manipulation, the operating systems upgrade, or after a software installation. Here are the most common:
- I lost the sudo privilege of the admin user.
- I forgot the user's root password for my virtual private server.
- I forgot the admin password for my virtual private server, but login with the root user is disabled.
- The user partition (home) of the server disk is locked.
- Many other reasons I cannot imagine...
This post shows how to use Hetzner's rescue mode to access your server and fix these issues.
Prerequisites
To follow this tutorial, make sure you meet the following requirements.
- You have a Hetzner Cloud account and can access the console.
- You have a Virtual Private Server hosted on Hetzner; use my referral link to get €20 after you sign up.
Once you get the server, you must configure it; I wrote a post on a minimal configuration you need to do to host a Web application.

The VPS I will use runs on Ubuntu 22.04; the instructions will also work for a Debian distribution.
Remove the sudo privilege for a user
After the operating systems upgrade, the server admin user can lose the sudo privilege if the file configuration is not handled well.
To simulate this, I will intentionally remove the sudo privilege, and we will see how to add it back using the Hetzner rescue mode.
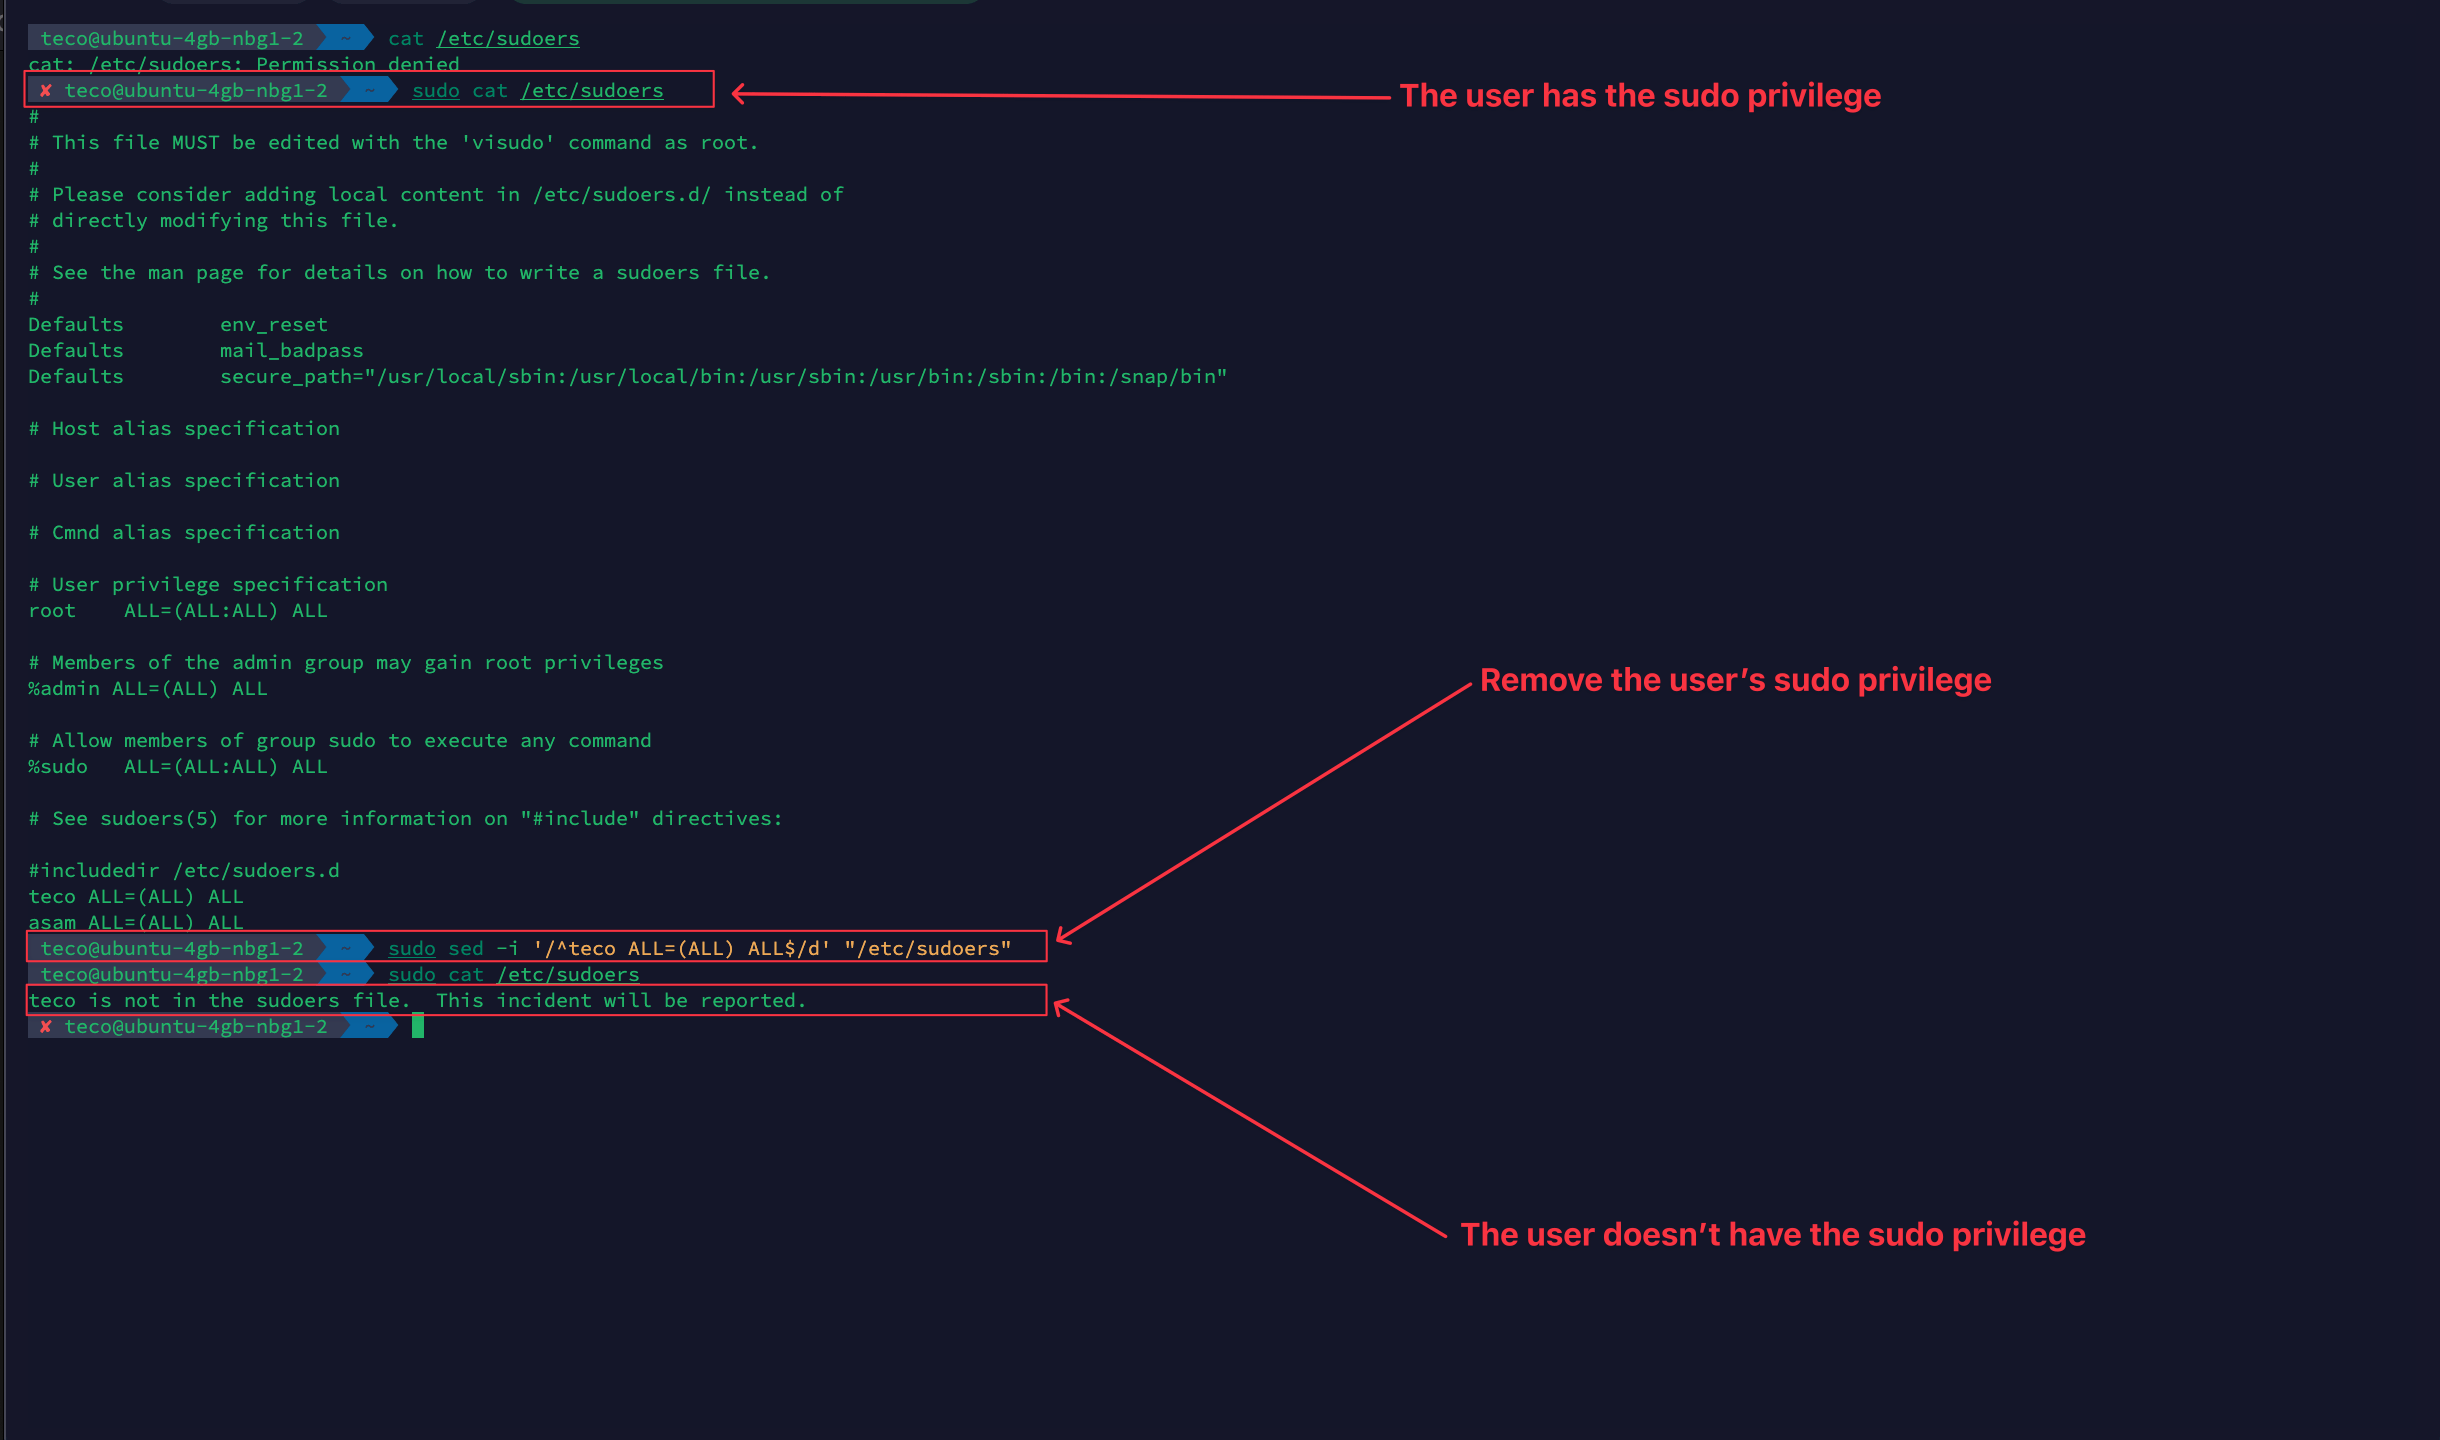
The file "/etc/sudoers" contains the users allowed to run a sudo command; removing a line associated with a user will prevent him from running sudo commands.
If you can log in with the root user, you can simply edit the file to add the line back, but it is recommended that you disable the login with the root user because we can do everything with this user.
The admin user lost the sudo privilege, and you cannot log in with the root user. Let's use the server rescue mode of the Hetzner cloud console to fix this issue.
Put a server on Hetzner in rescue mode
Log in to the Hetzner Cloud console at https://console.hetzner.cloud and Select a project. Select the server you want to put on rescue mode inside the selected project.
In the tabs menu, locate the menu item "Rescue" and click on it.

On the page displayed, click on the button "Enable rescue"

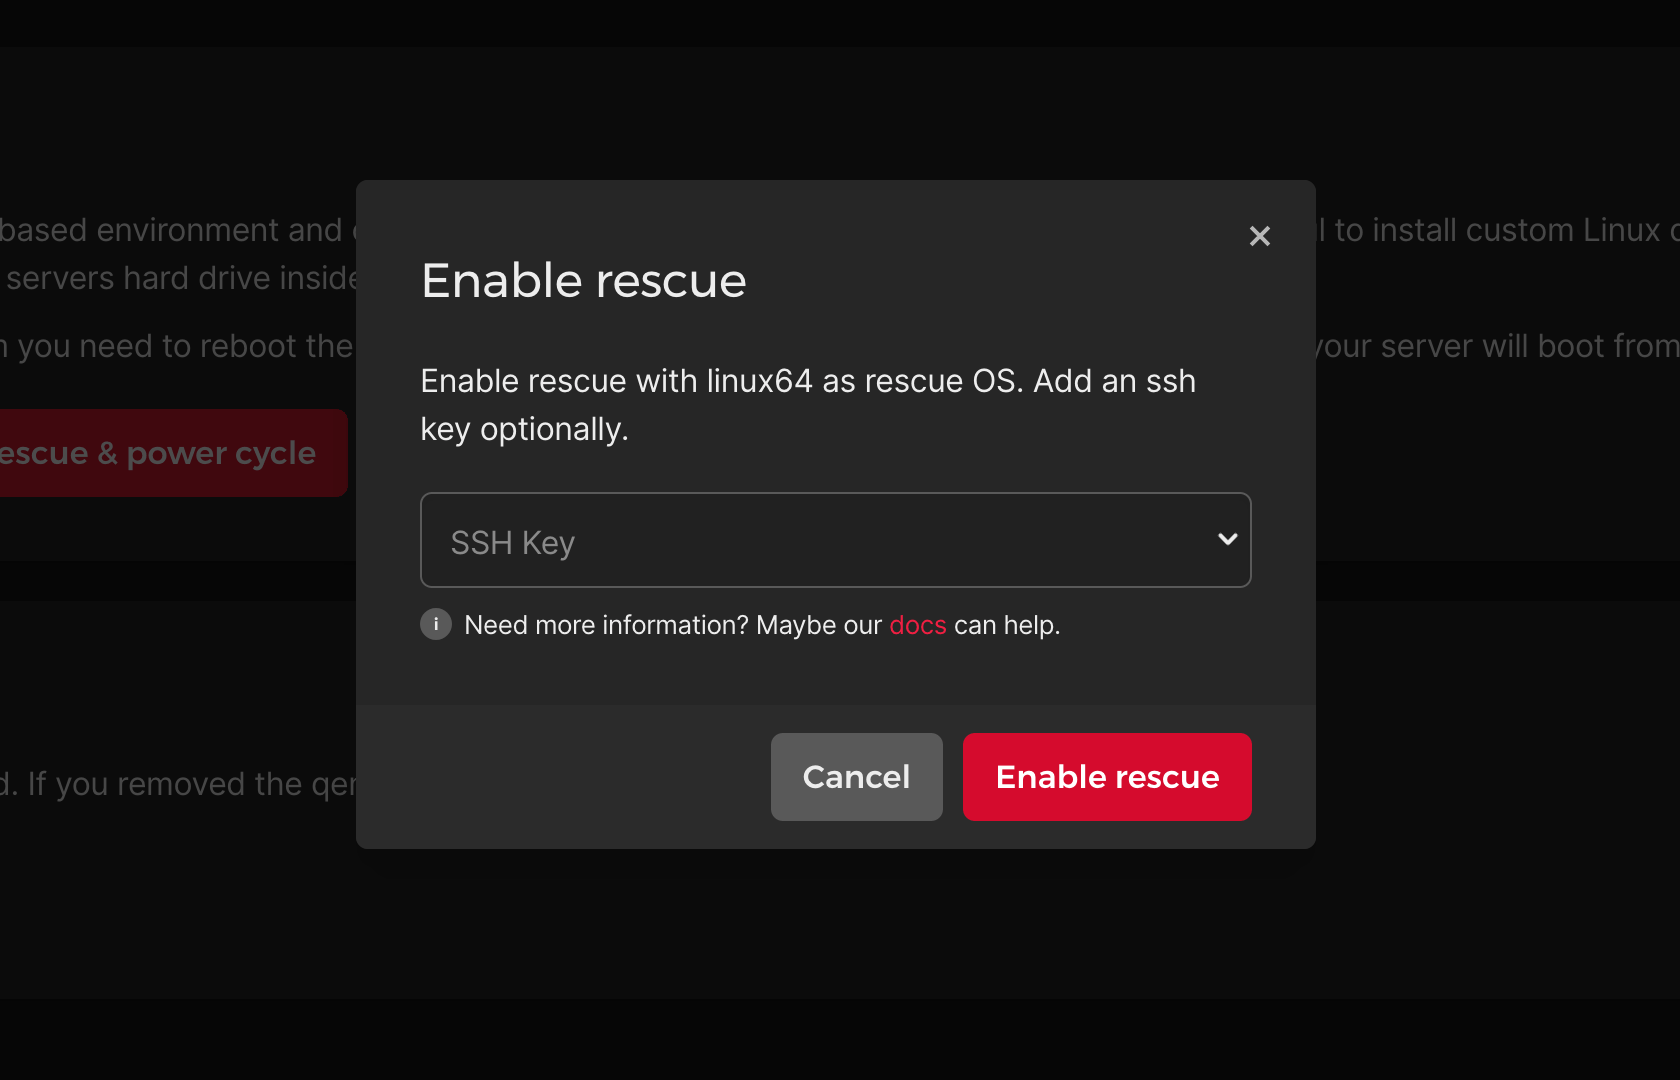
The following modal asks you to select an SSH key, but it is optional. Click on "Enable rescue" to continue.
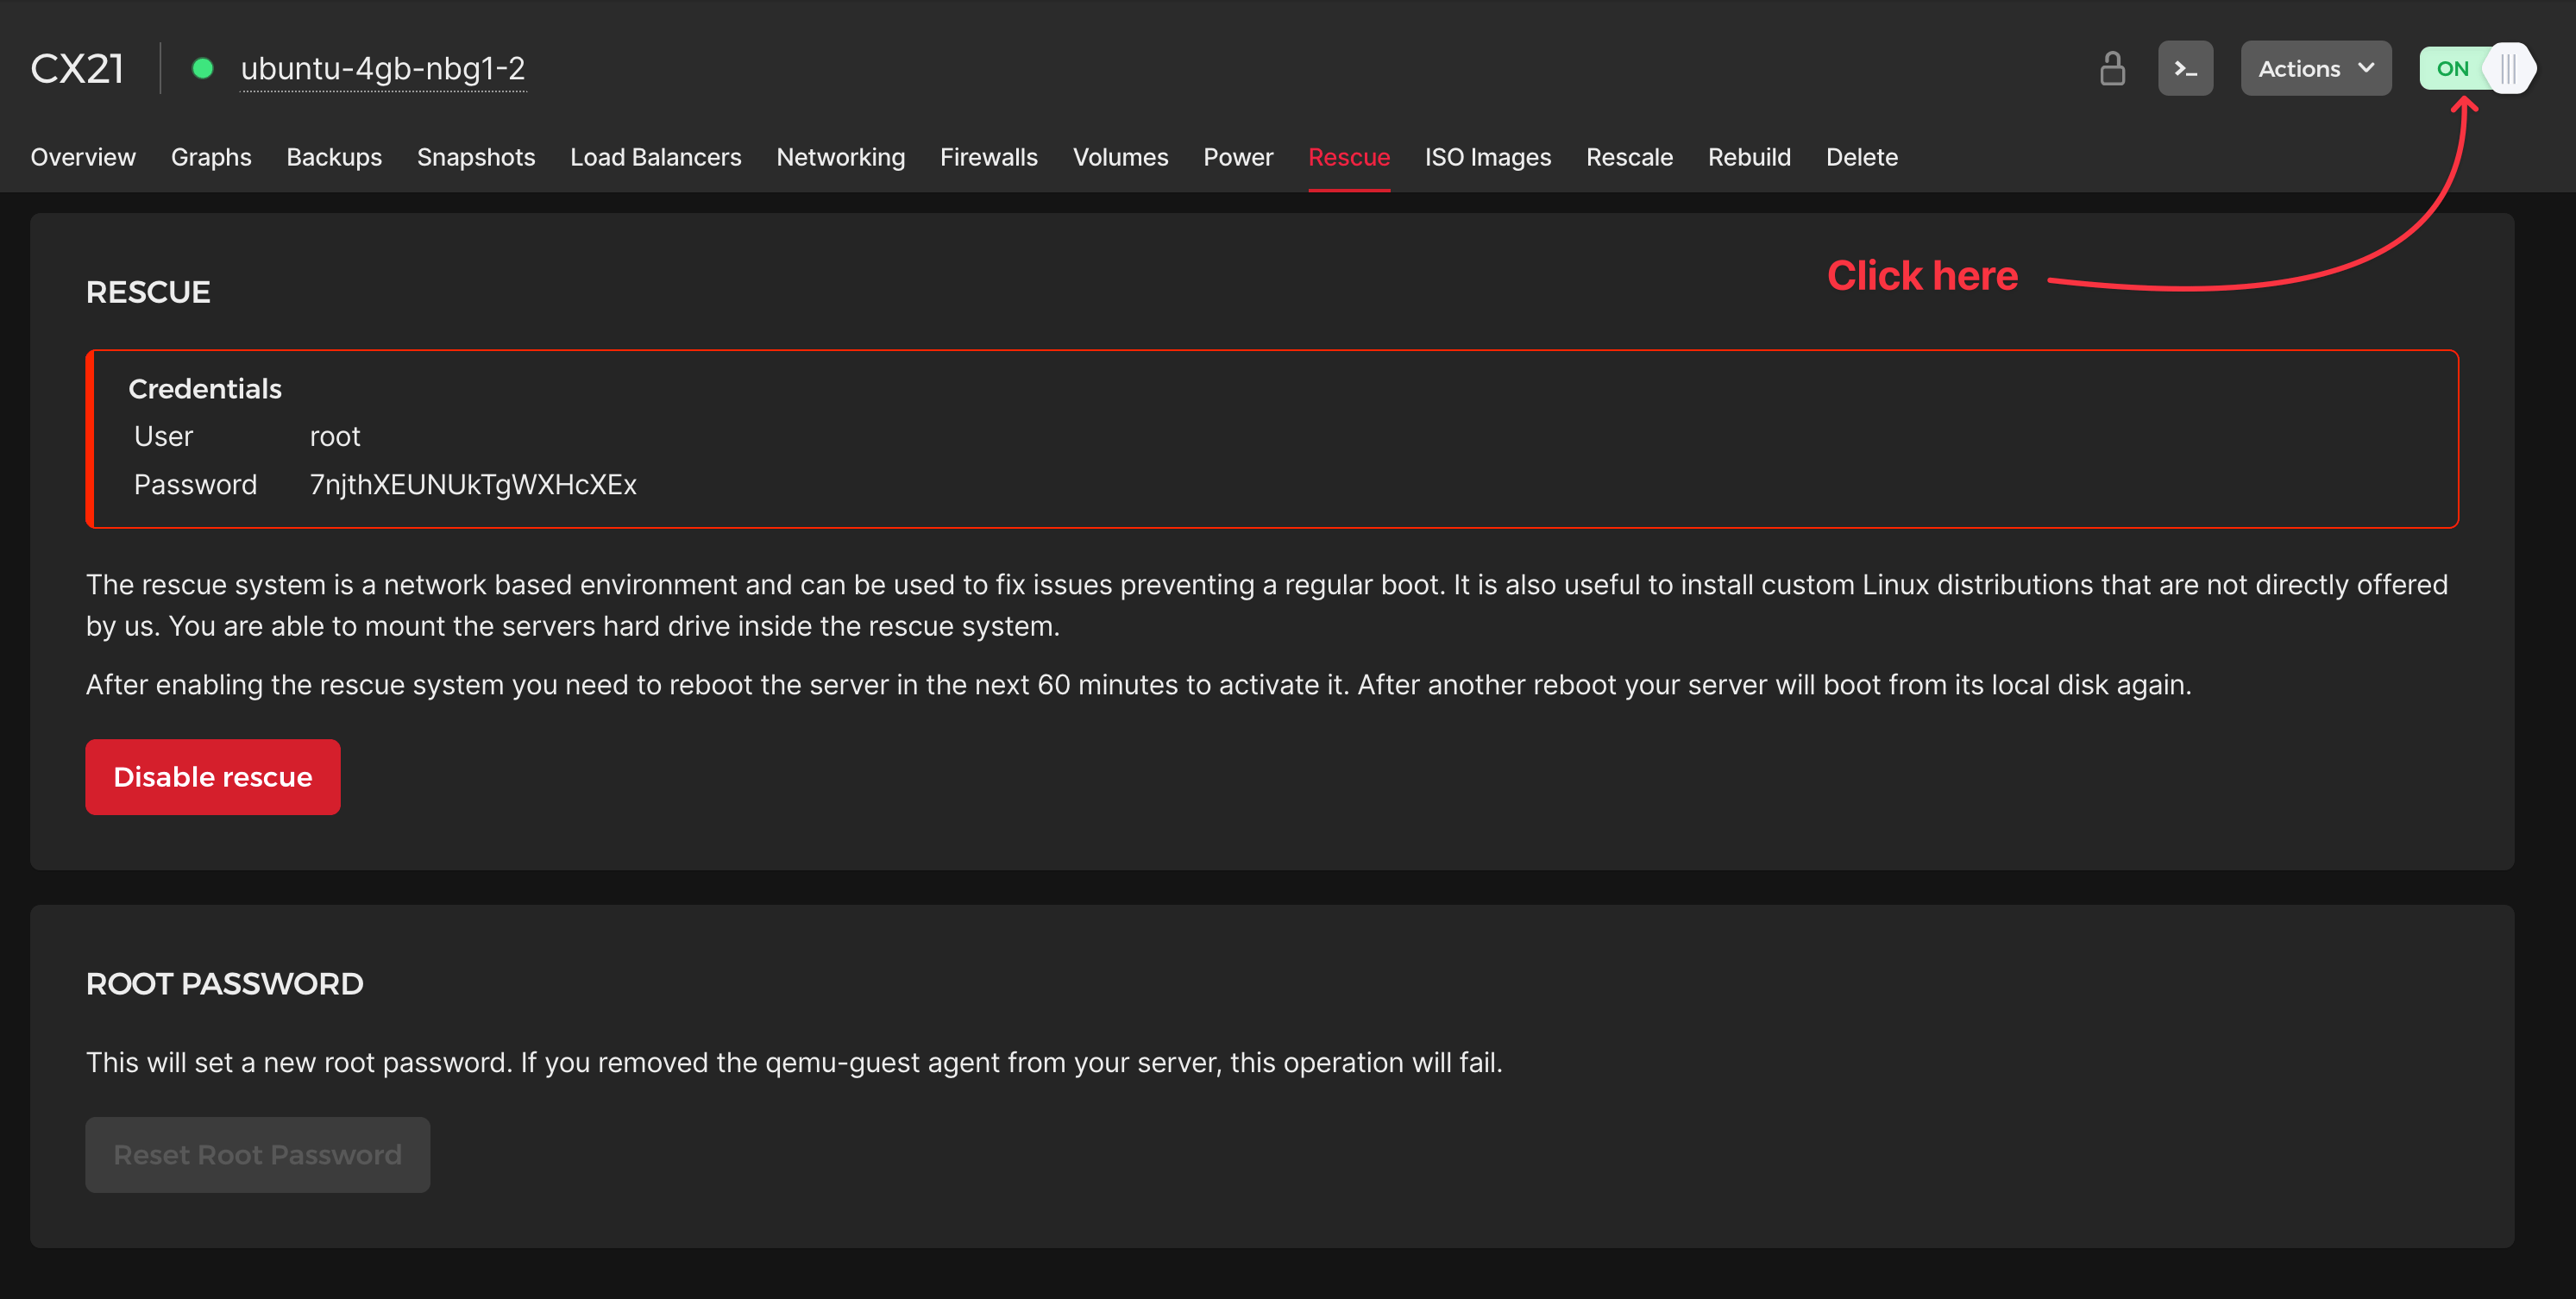
The rescue mode is enabled on the server; you can see the username and the password to connect, copy them, and keep them somewhere.
The server is not in rescue mode yet; you must restart it to make it effective. Click on the toggle button to power off the server.
Wait for the server to be stopped and click on the button again to power on. Wait for the server to be up; you can now connect in rescue mode.
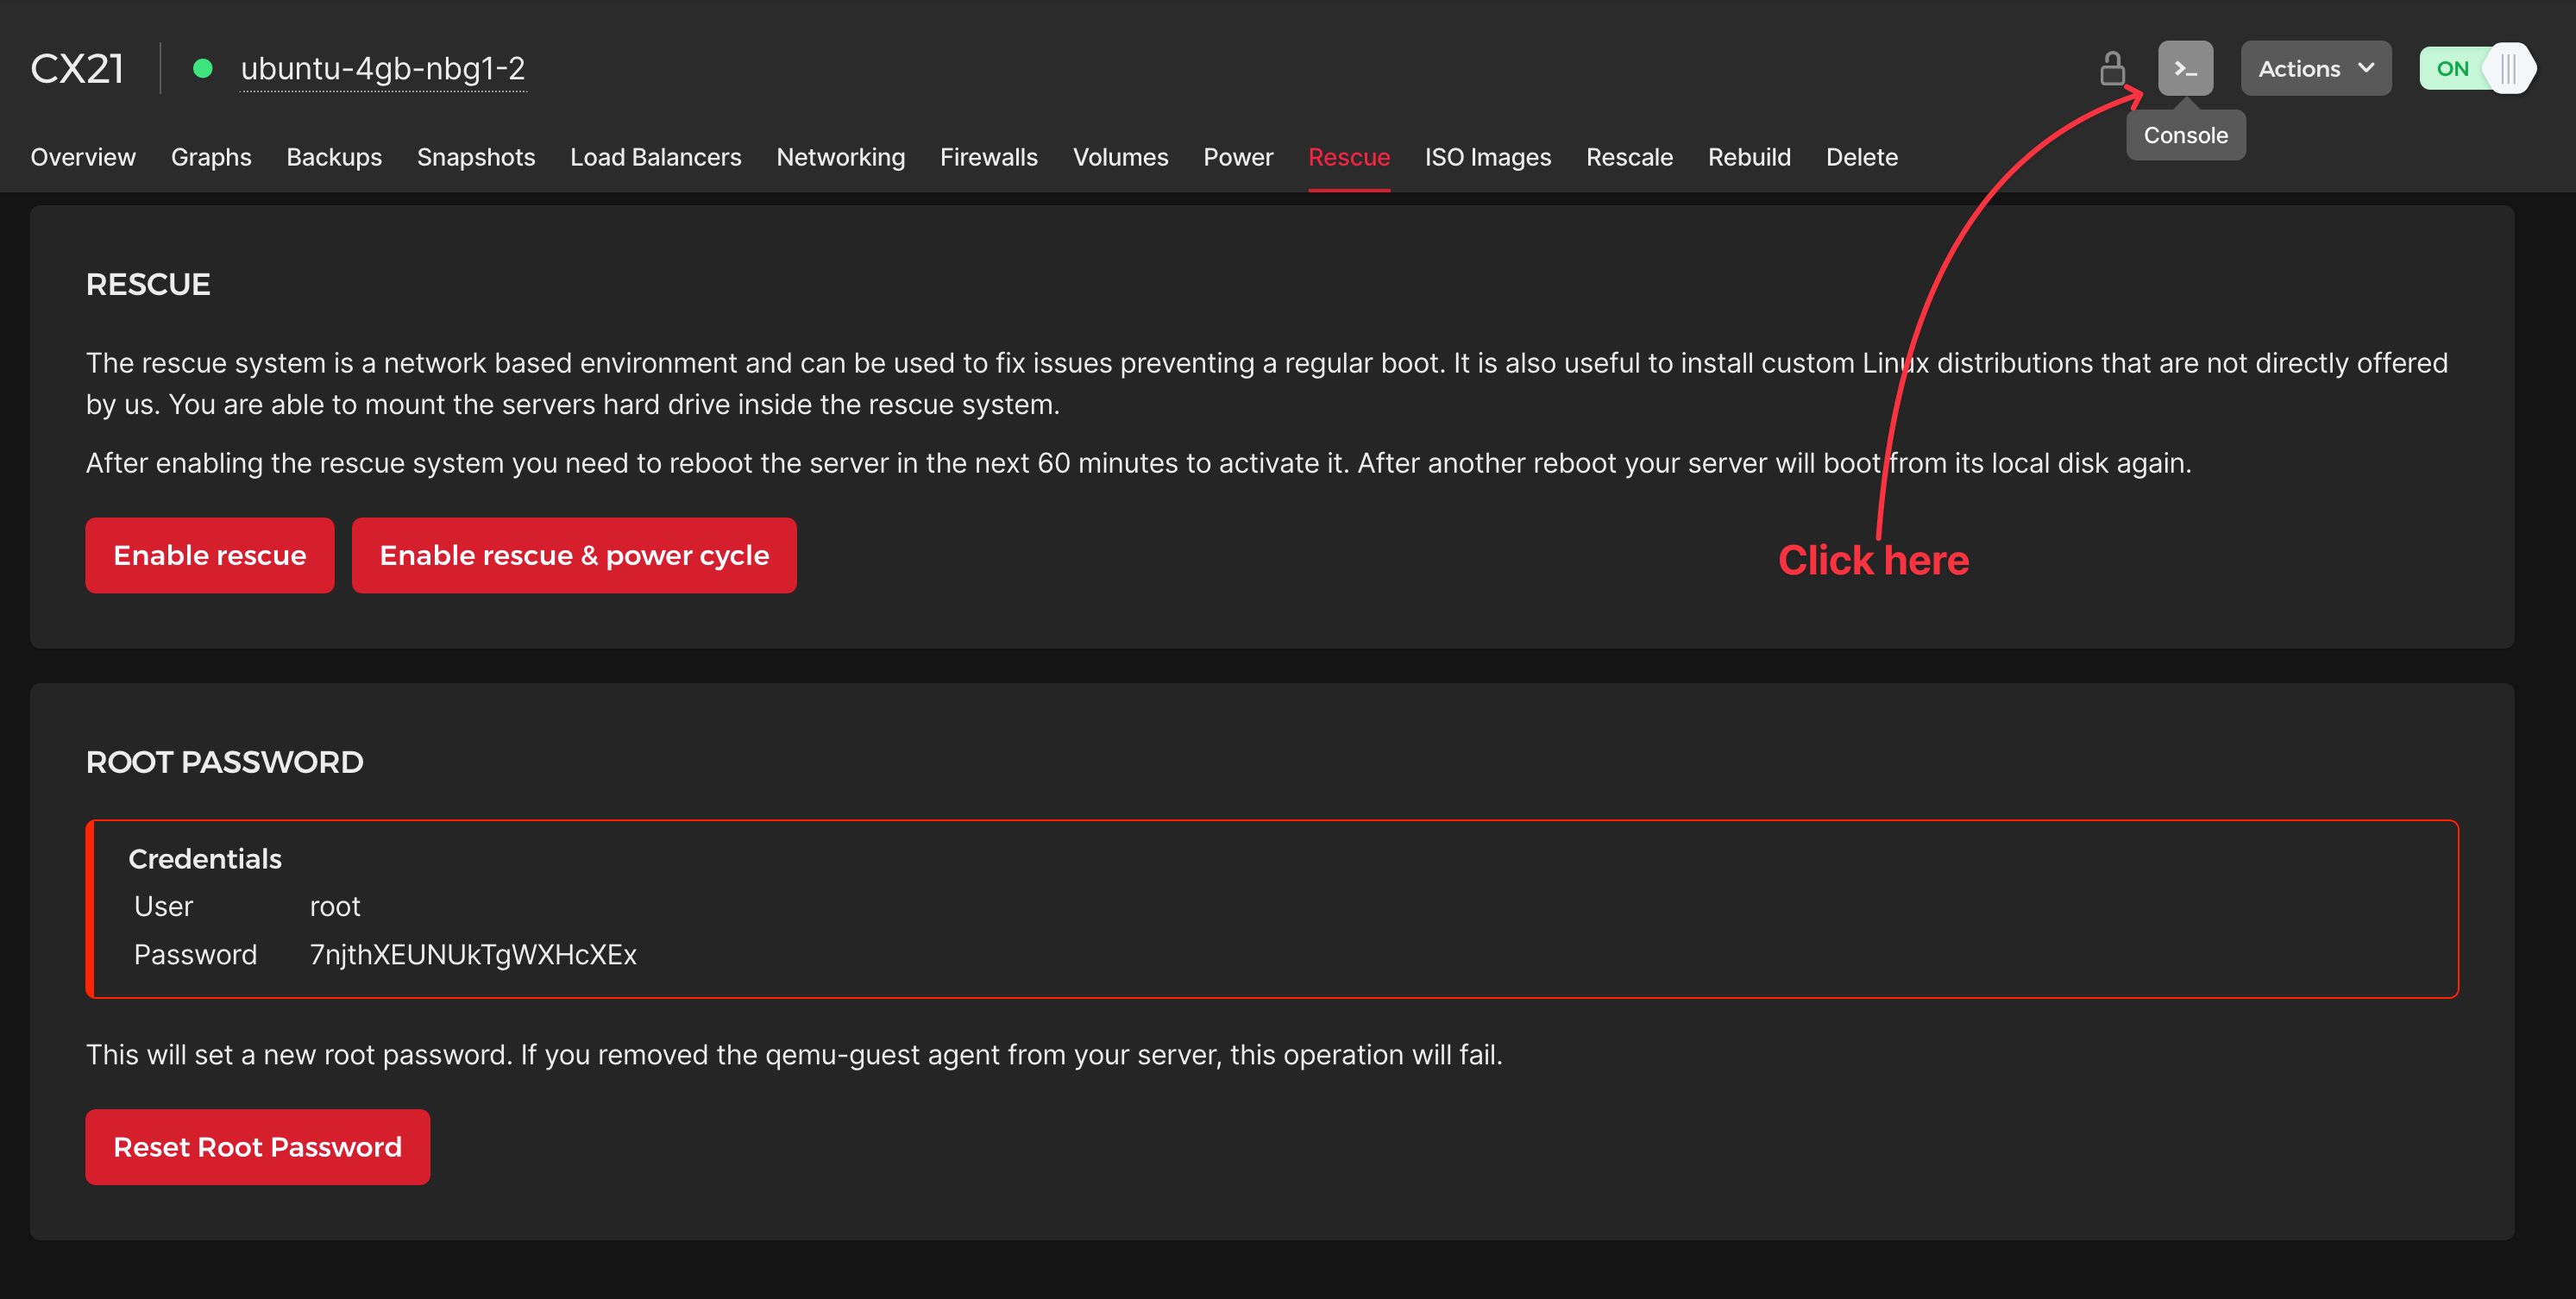
A new web browse window opens with a Terminal; enter the password you copied earlier to log in to the server in rescue mode.
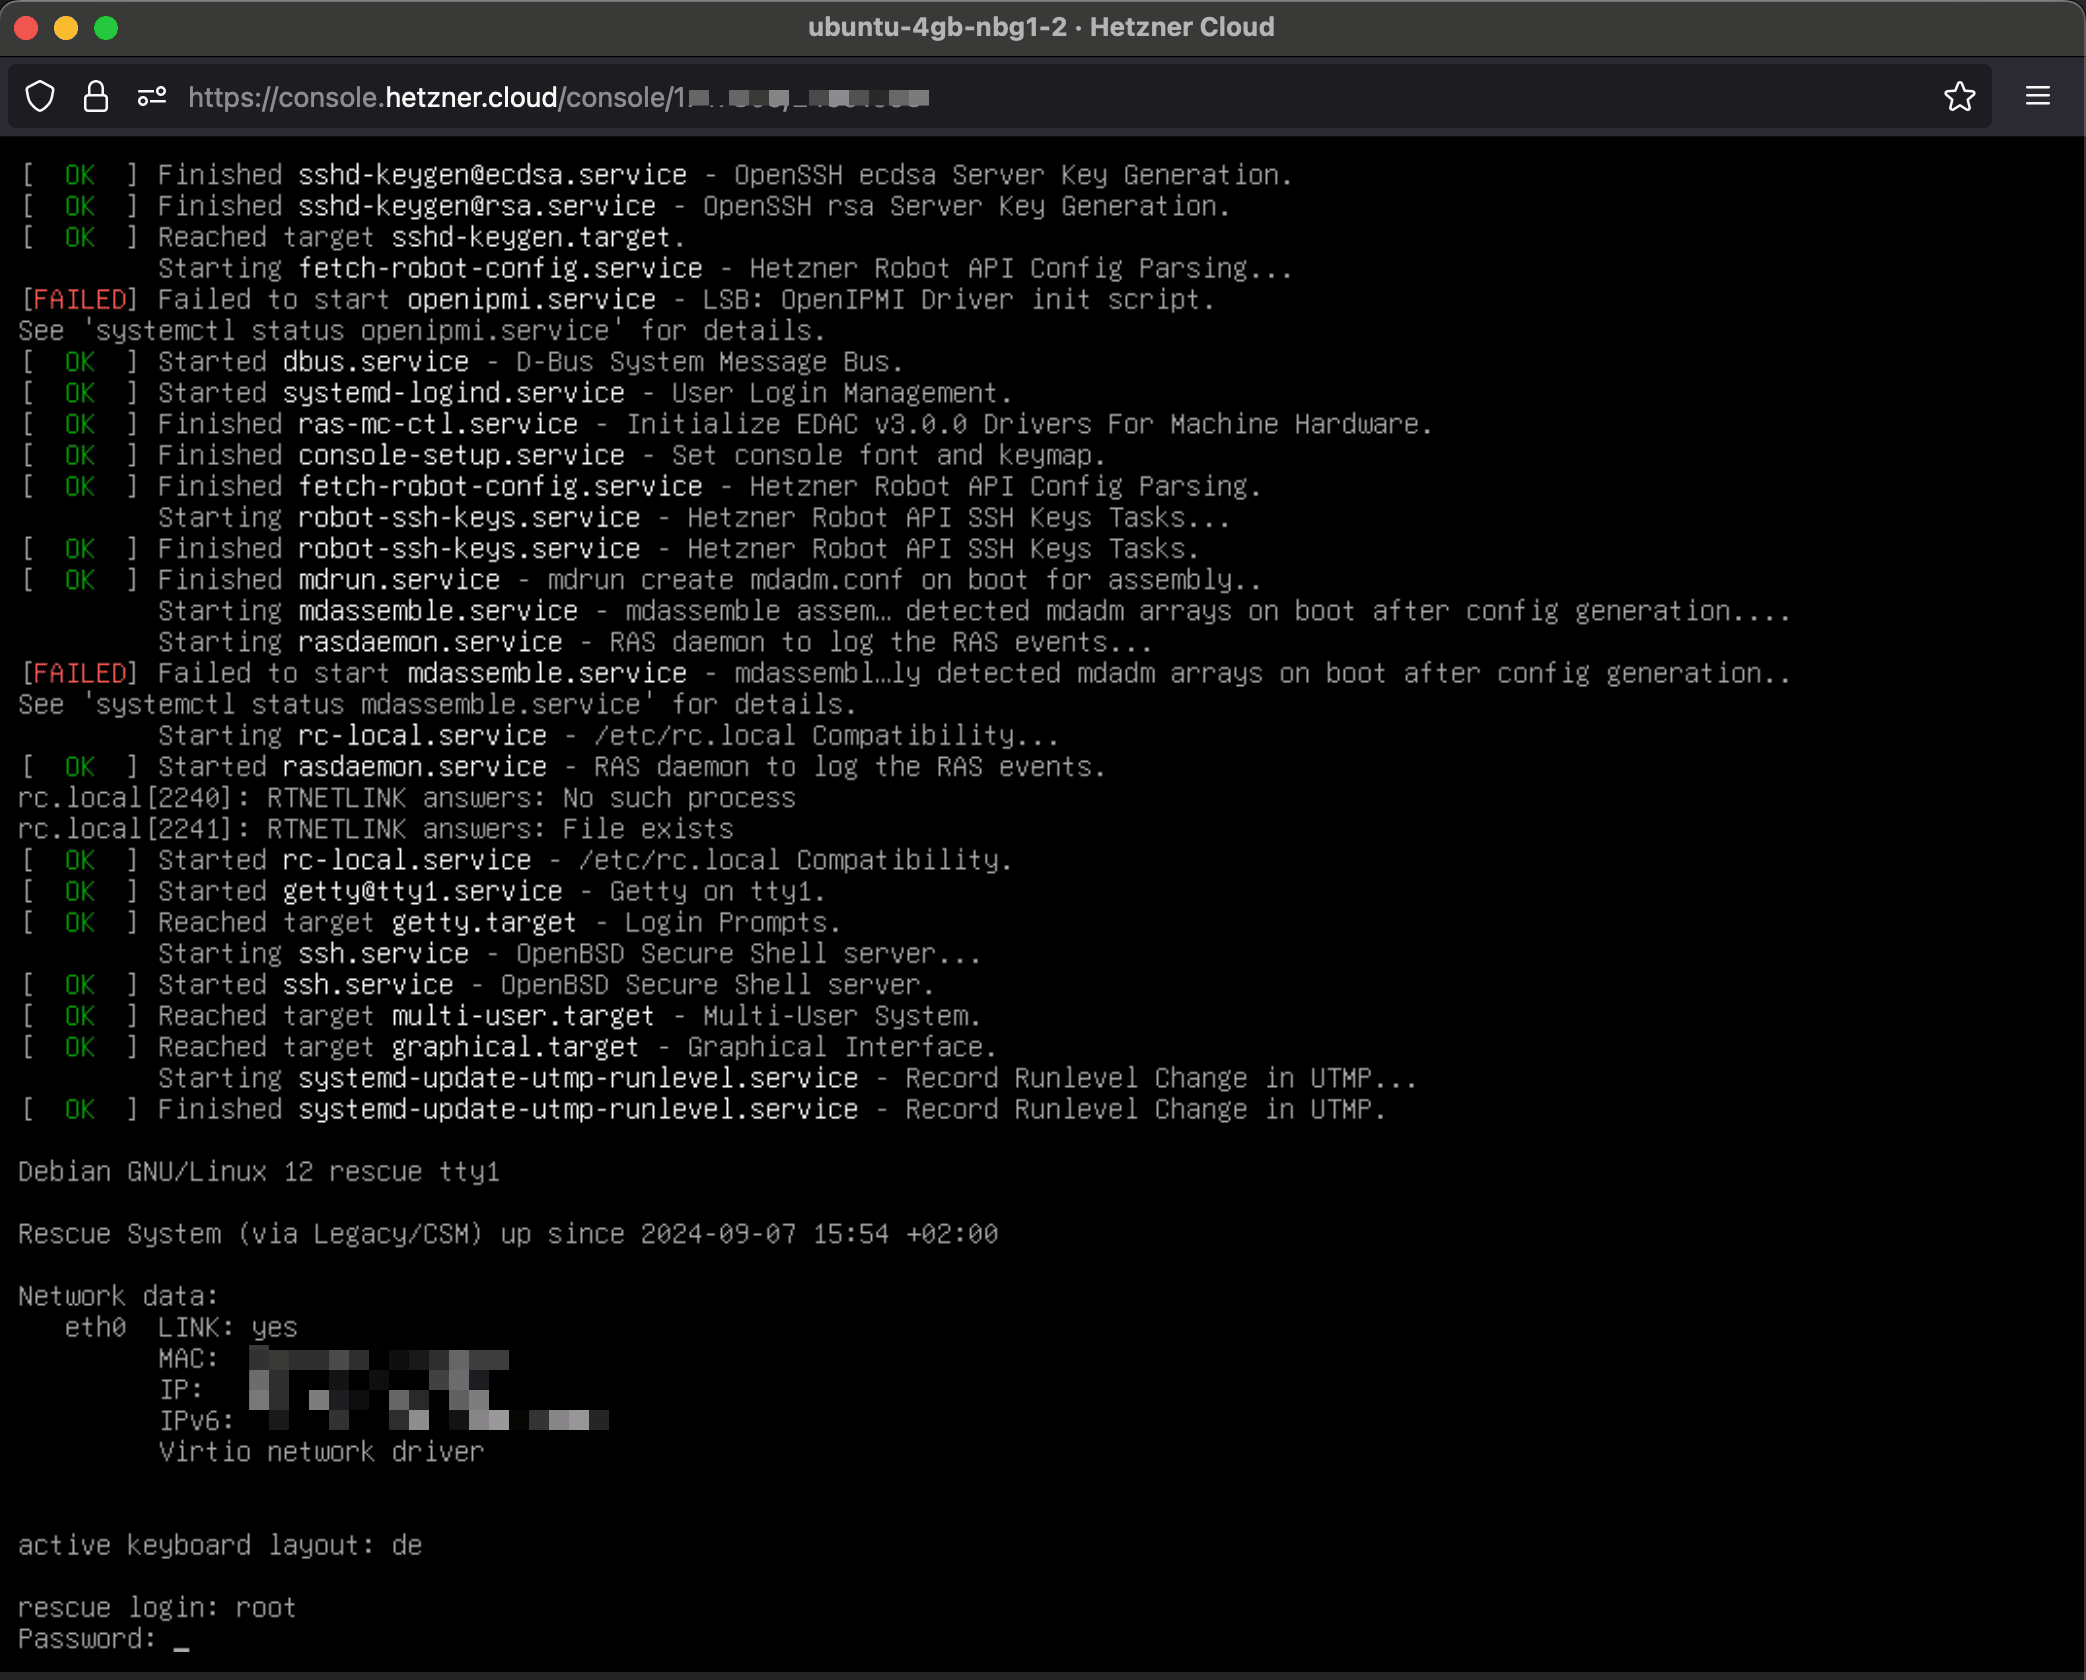
You must type the password because copying/pasting doesn't work here. After a successful login, you will see the following output.
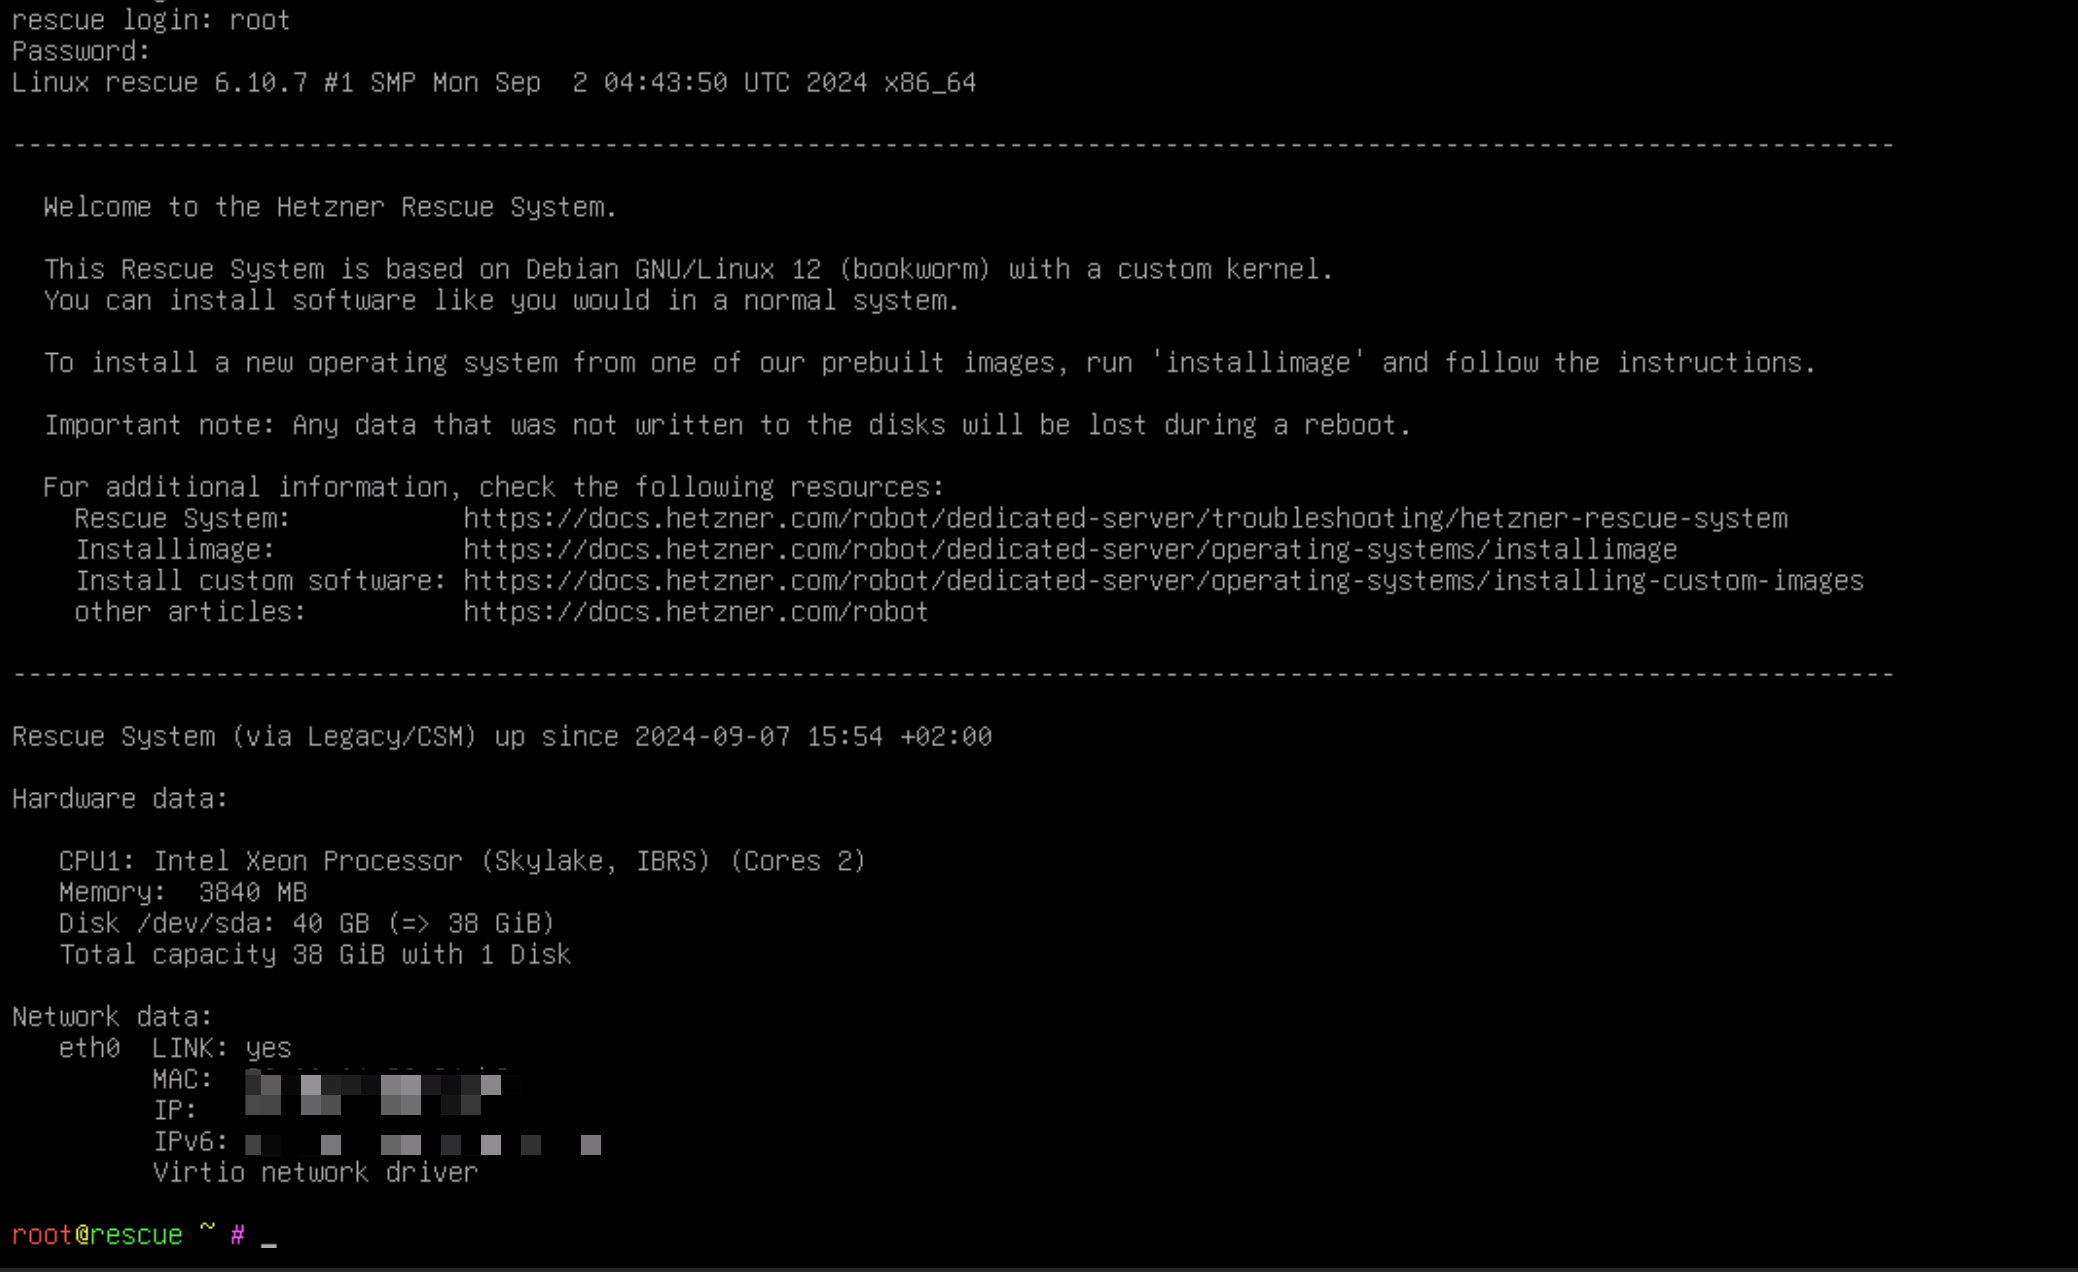
We are connected to the server rescue mode.
Mount the server disk partition
The server disk containing our data is not mounted by default; to access the data inside, we must mount it first. Run the following command to list available partitions.
lsblk
Locate the partition containing your data; the partition size is what I look to find it.
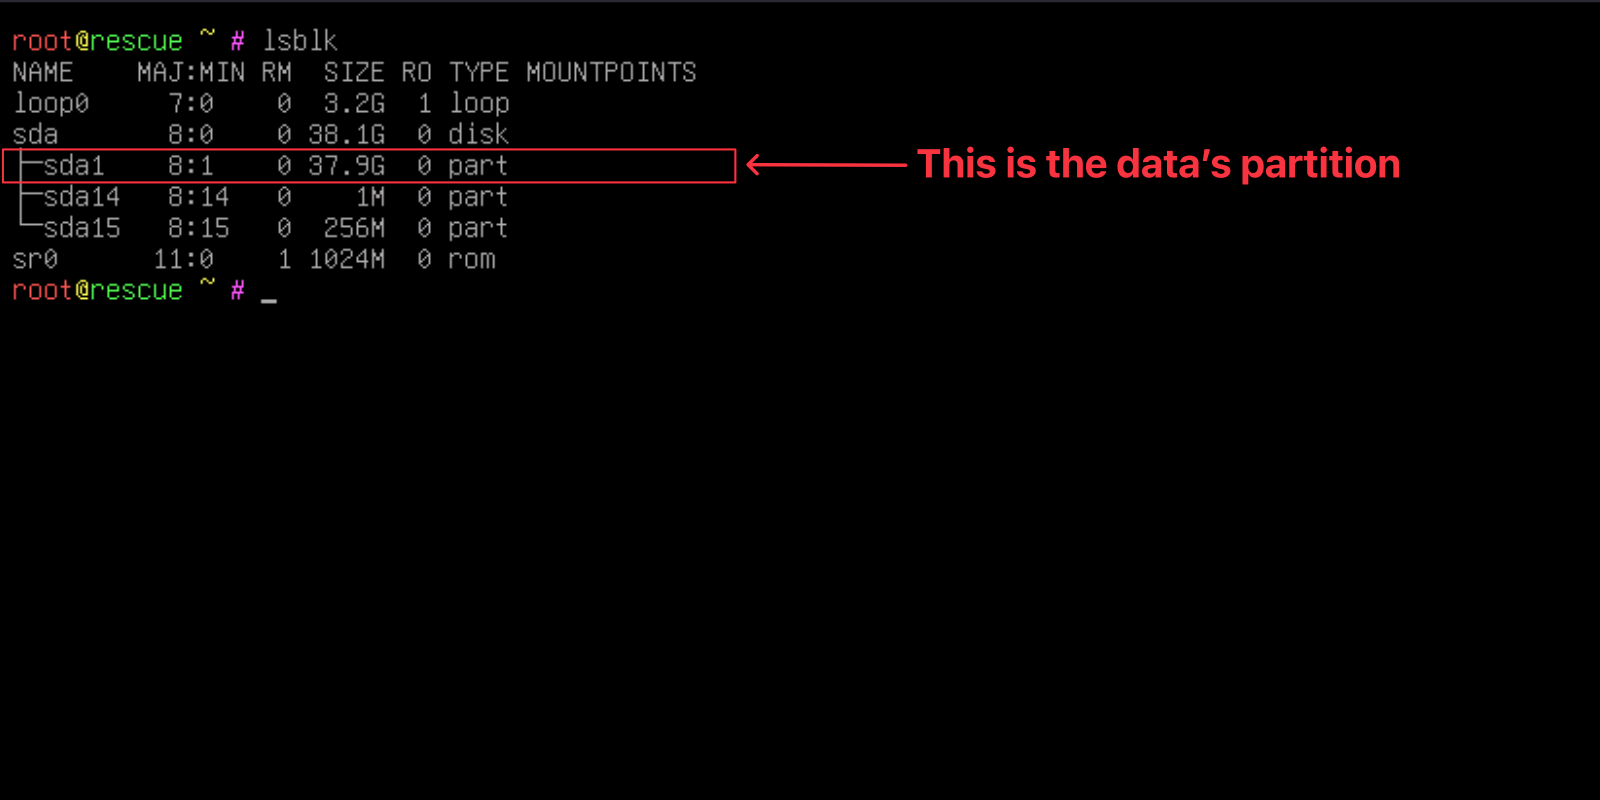
The disk partition is /dev/sda1.
Let's mount the disk partition into a folder called "/mnt"; you can name it however you want.
mount /dev/sda1 /mnt
Now, you can see the content of your server if you access the folder "/mnt".
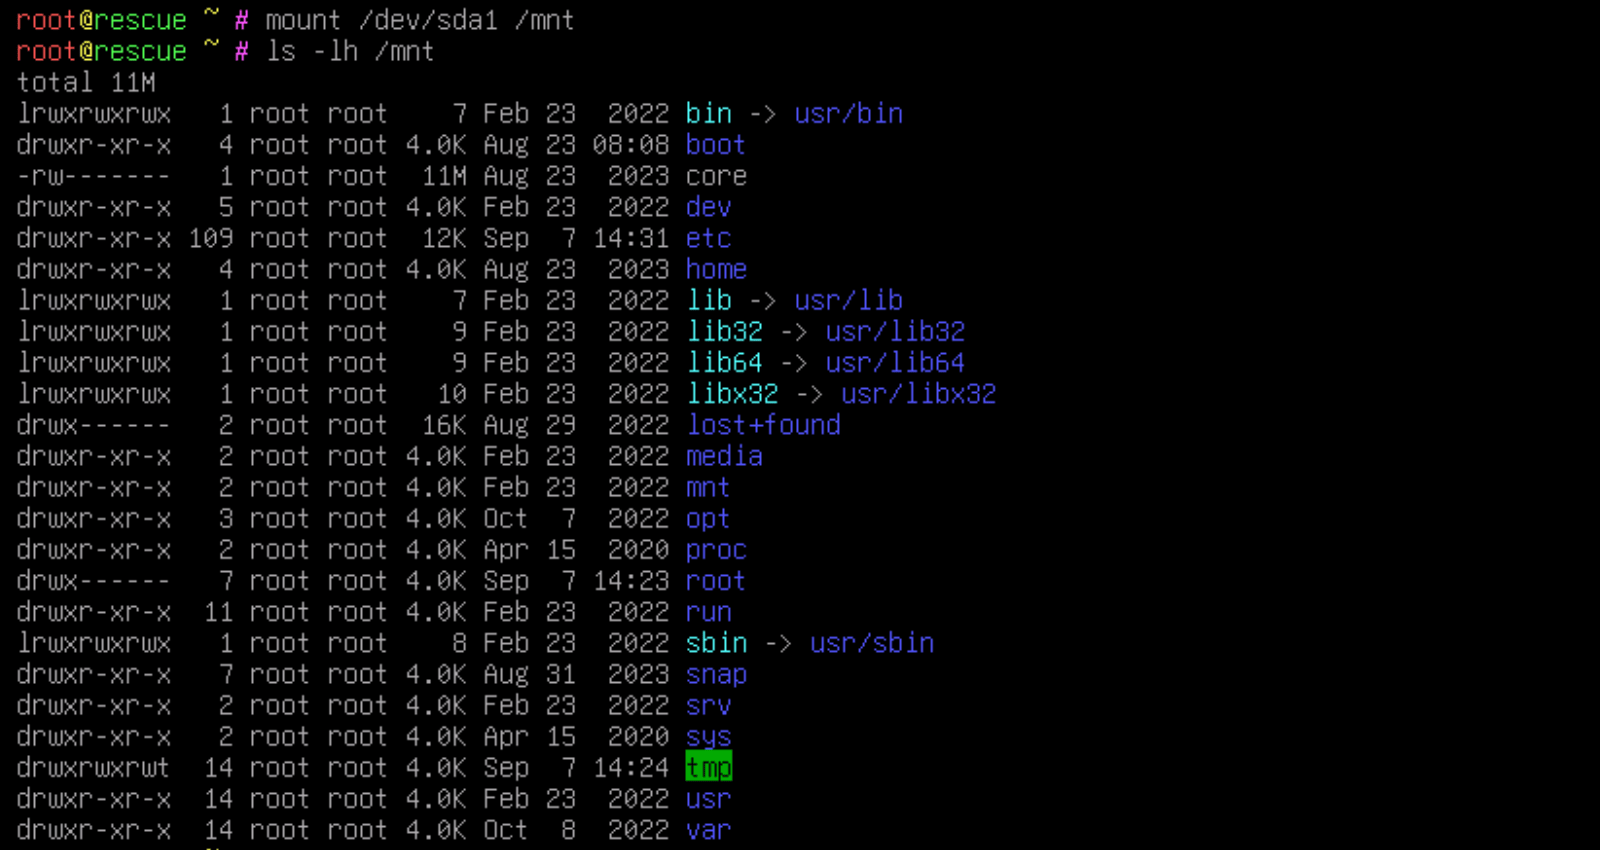
The disk partition mount is successful.
Restore the sudo privilege for a user
Now that the disk partition is mounted, to restore the sudo privilege for the admin user, we must edit the file "/etc/sudoers" to add the line <admin_user> ALL=(ALL) ALL where you replace <admin_user> by your admin user.
Run the following commands to do that:
cd /mnt/etc
echo "teco ALL=(ALL) ALL" >> sudoers
Verify the file "/mnt/etc/sudoers" contains the line
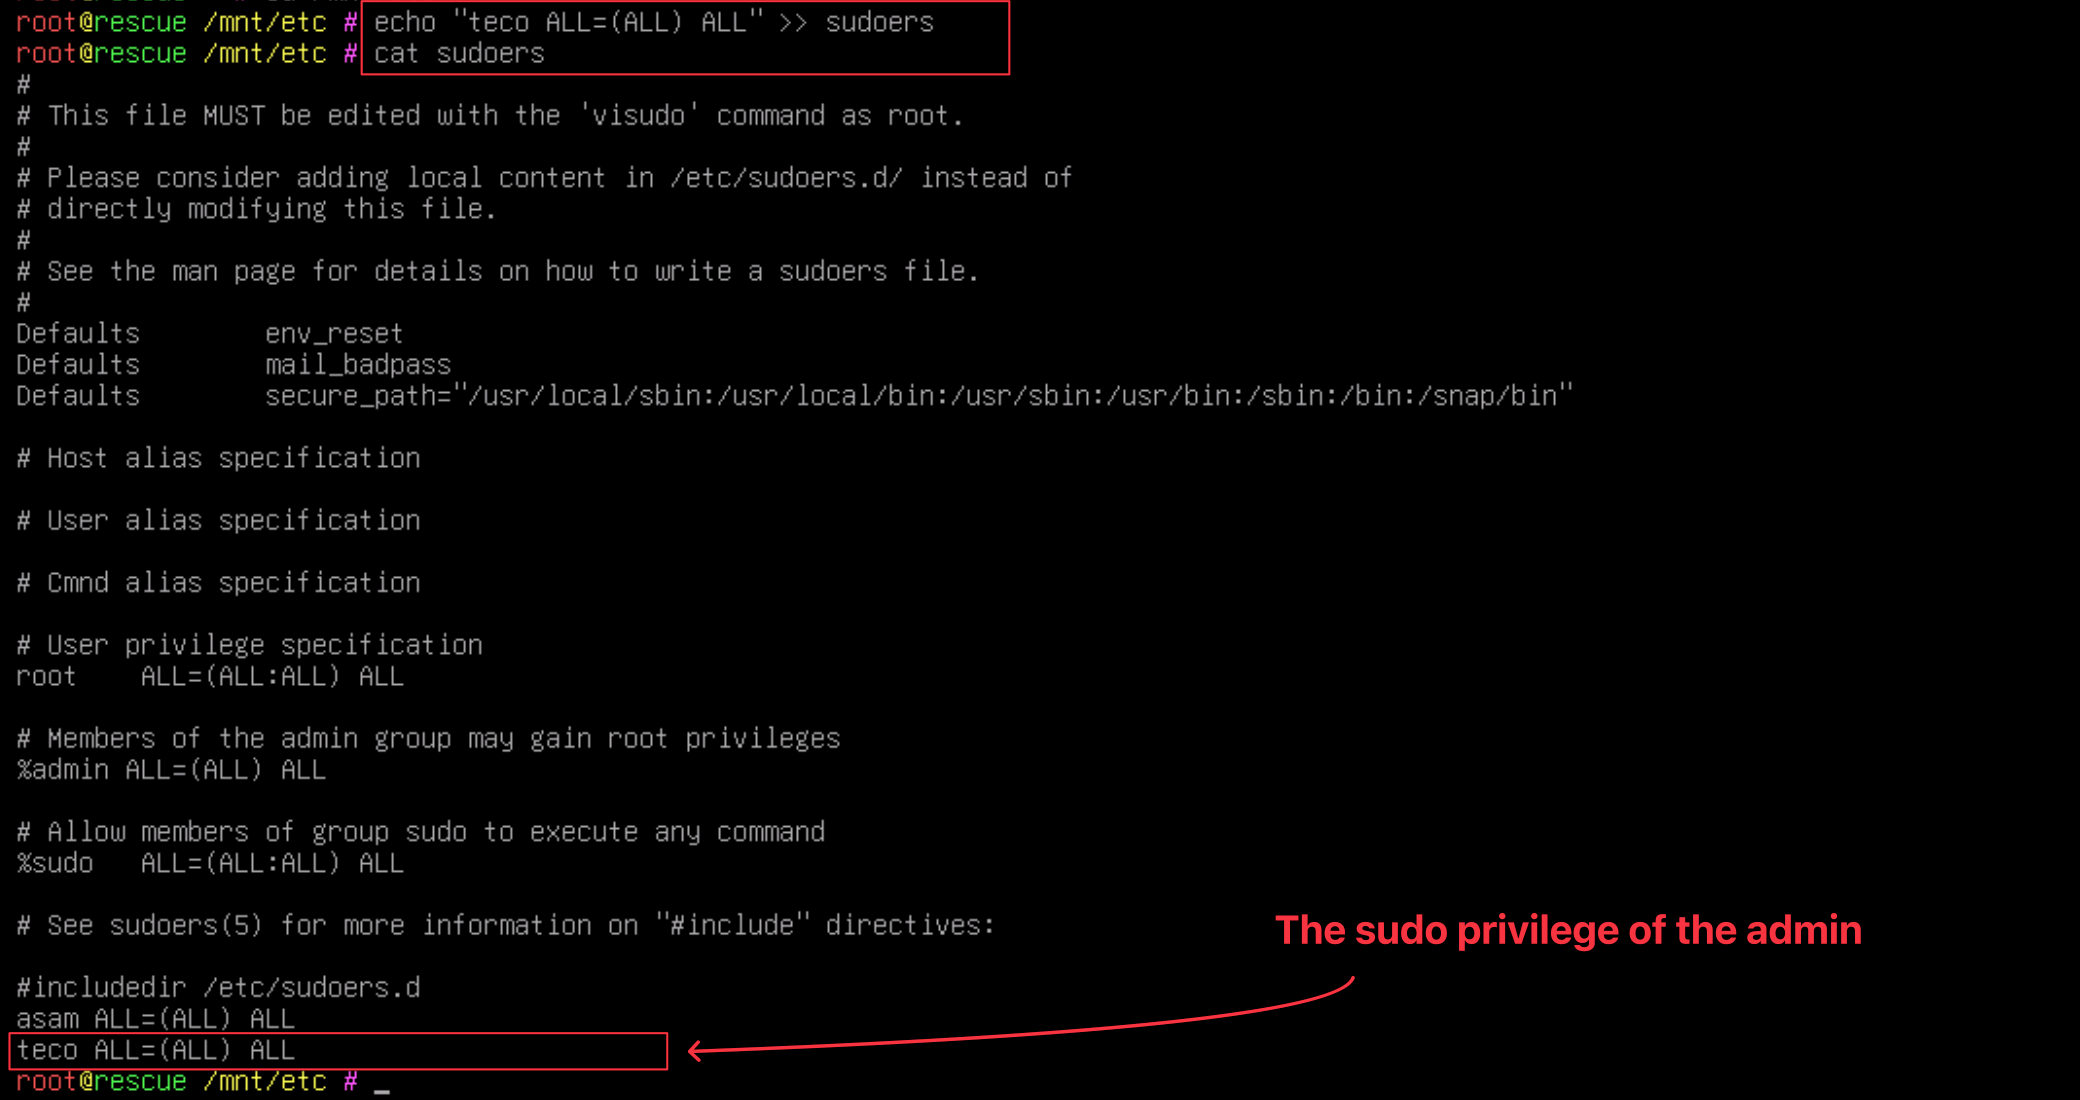
It is all good. Let's get the server out of rescue mode.
Disable the rescue mode on the server
Unmount the disk partition by running the command
cd /
umount /dev/sda1
You can now reboot the server by running the command reboot.
Close the browser window and open a terminal to log into your server with the admin user. Once done, run a sudo command to ensure it works.
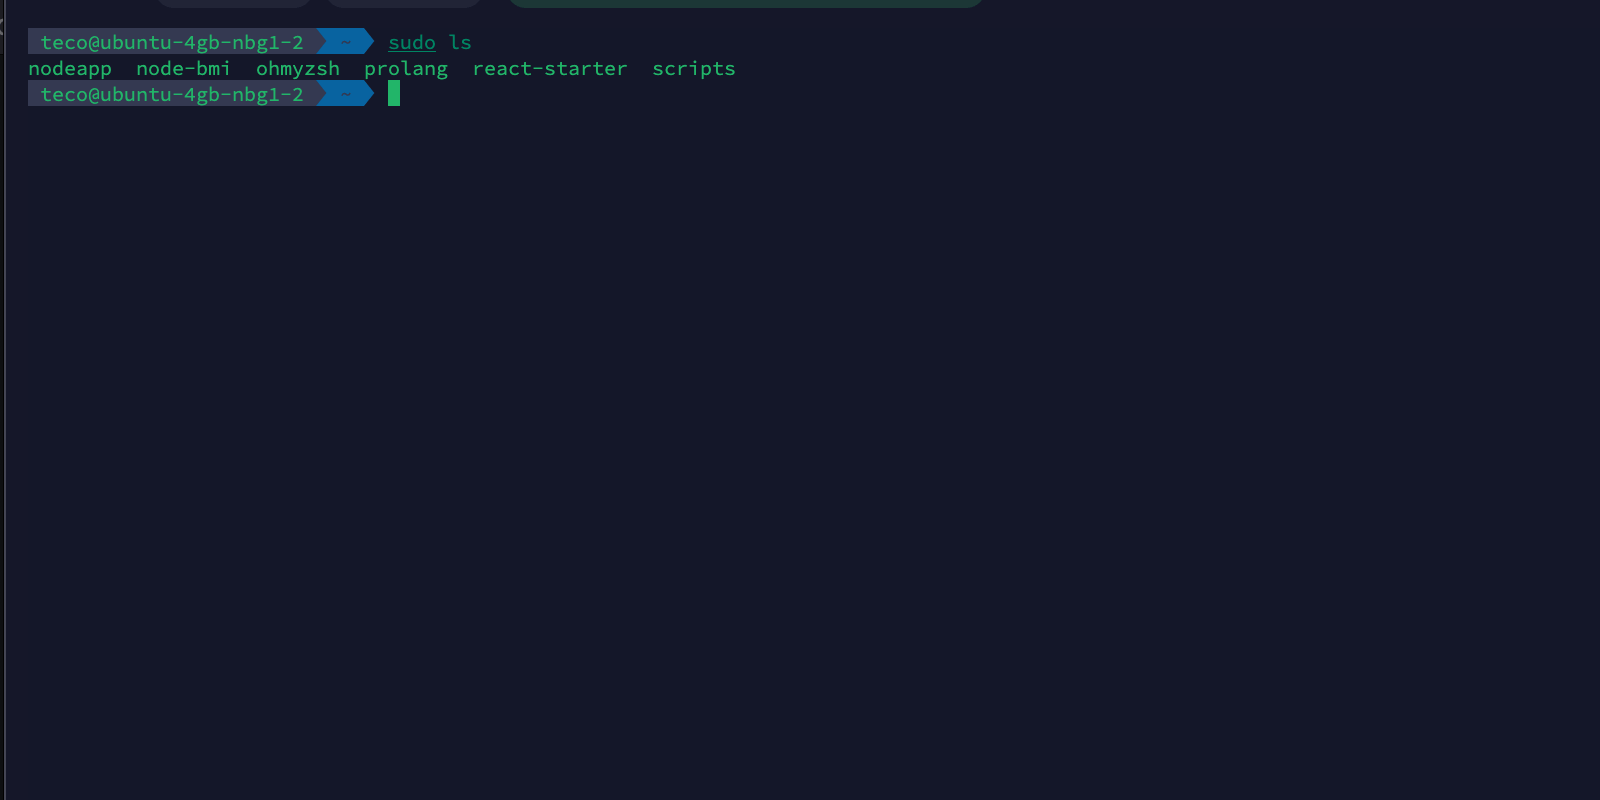
The admin user can now run commands with the sudo privilege.
Use rescue mode to enable the root user login
In the case where you forgot the admin user password and cannot log in with the root user because it is allowed, start with the two steps we saw earlier:
- Enable the rescue mode on your server.
- Mount the VPS partition disk in a folder.
At this step, the partition disk of the server is mounted in the folder "/mnt".
The file "/etc/ssh/sshd_config" contains your server's SSH configuration. You must edit it to allow the root user to log in.
Run the command below to open the file.
nano /mnt/etc/ssh/sshd_config
Locate the line "PermitRootLogin no" and replace "yes" with "no"
PermitRootLogin yes
Save an exit and disable the rescue mode by unmounting the server partition and rebooting. You can now log in as the root user.
Wrap up
Enabling rescue mode is the best way to regain control of your server. We saw how to work with a server hosted on Hetzner, but the same should be done with other cloud providers such as OVH, Digital Ocean, AWS, Linode, Vultr, etc.
Be prudent about what you do when the server is in rescue mode to avoid causing more damage, such as locking a partition or wiping your partition disk.
Follow me on Twitter or subscribe to my newsletter to avoid missing the upcoming posts and the tips and tricks I occasionally share.