
Install an SSL certificate for Web application running behind Nginx


In today's digital age, online security is of utmost importance. Protecting your online data is essential with the rise of cyber-attacks and data breaches.
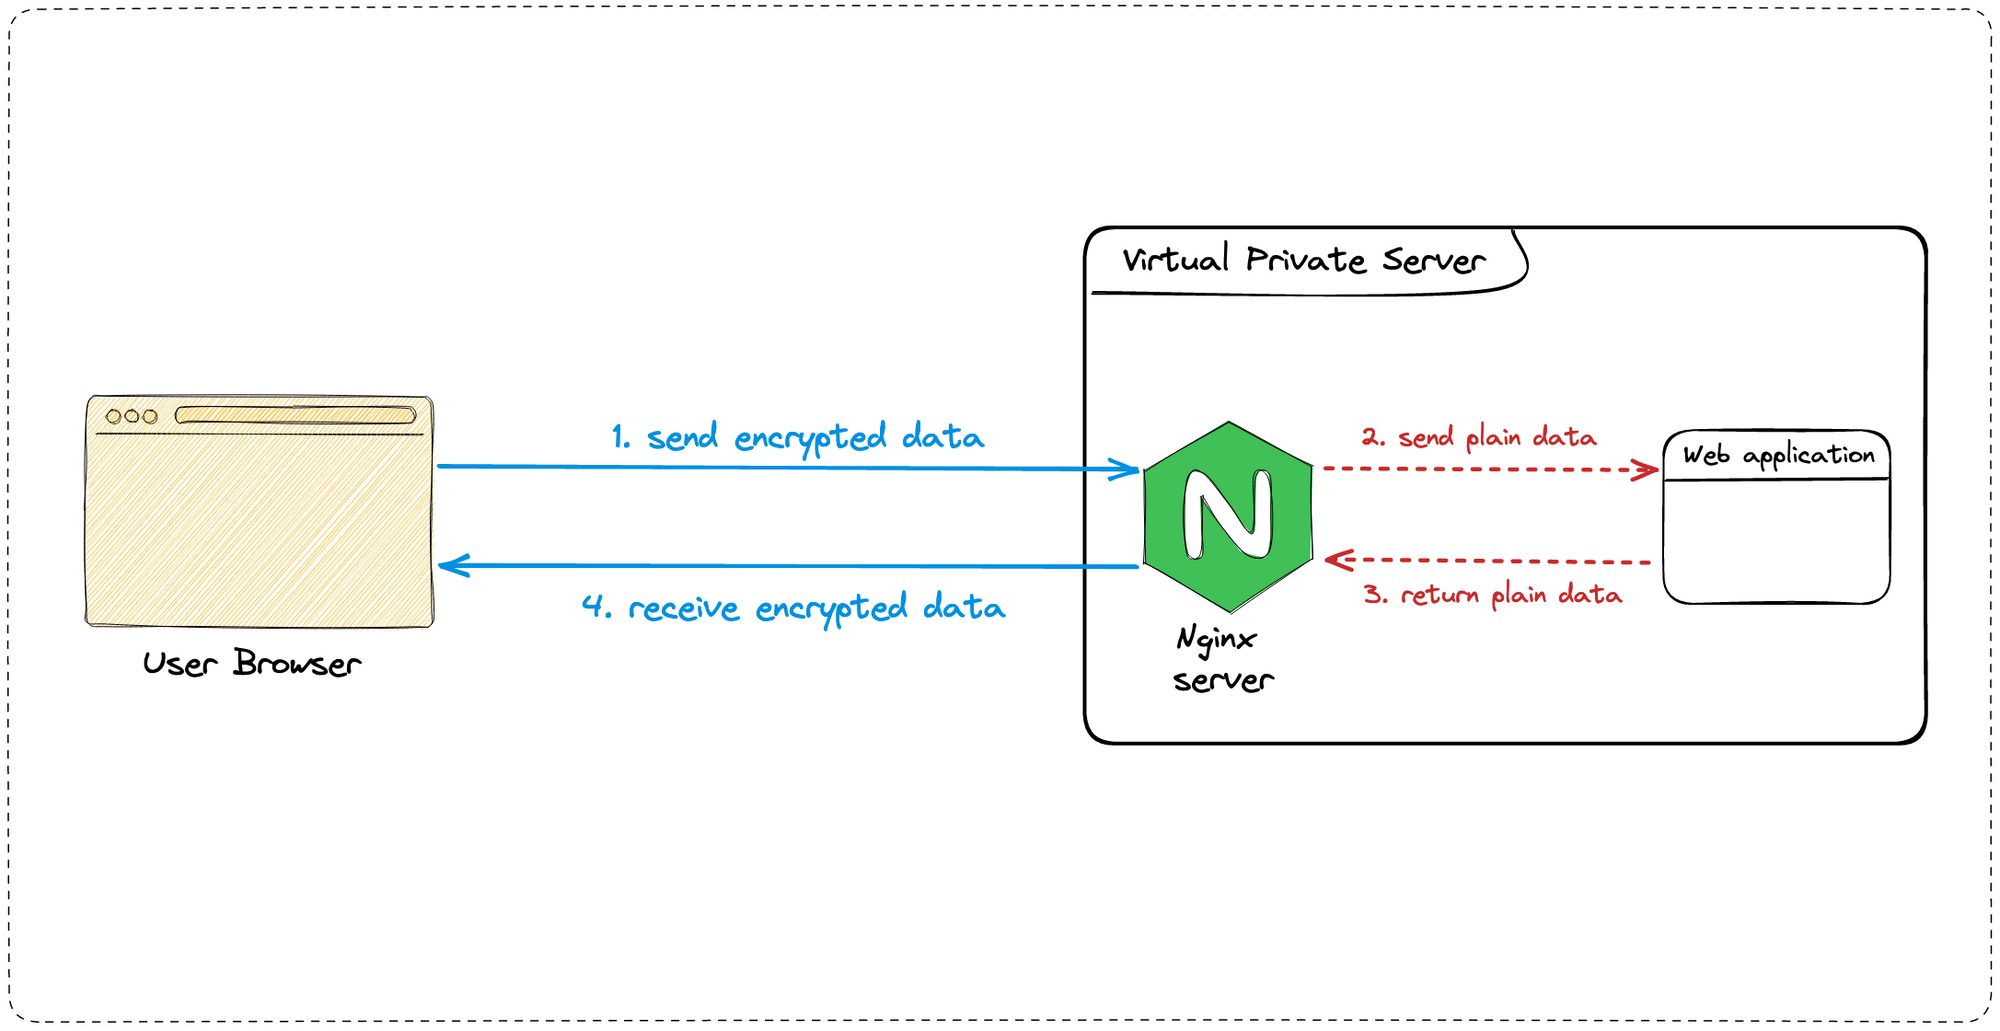
One of the most effective ways to do this is through HTTPS, the secure version of HTTP. HTTPS uses SSL/TLS certificates to encrypt the data transferred between a web server and a web browser, making it more difficult for hackers to intercept and steal sensitive information.
SSL stands for Secure Sockets Layer, a protocol for establishing secure communication between a client and server. When users visit a website using SSL, their browser and the web server establish an encrypted connection. Any data transferred between the user's browser and the server is encrypted and cannot be intercepted by a third party.
Prerequisites for installing SSL certificate on Nginx
To follow this tutorial, you will need the following elements.
A Virtual Private Server
You can buy a VPS on Hetzner, which provides affordable servers with good performance. The server running this blog and all my side projects are hosted here. Use my referral link to get €20 after you sign up.
A running web application behind a reverse proxy
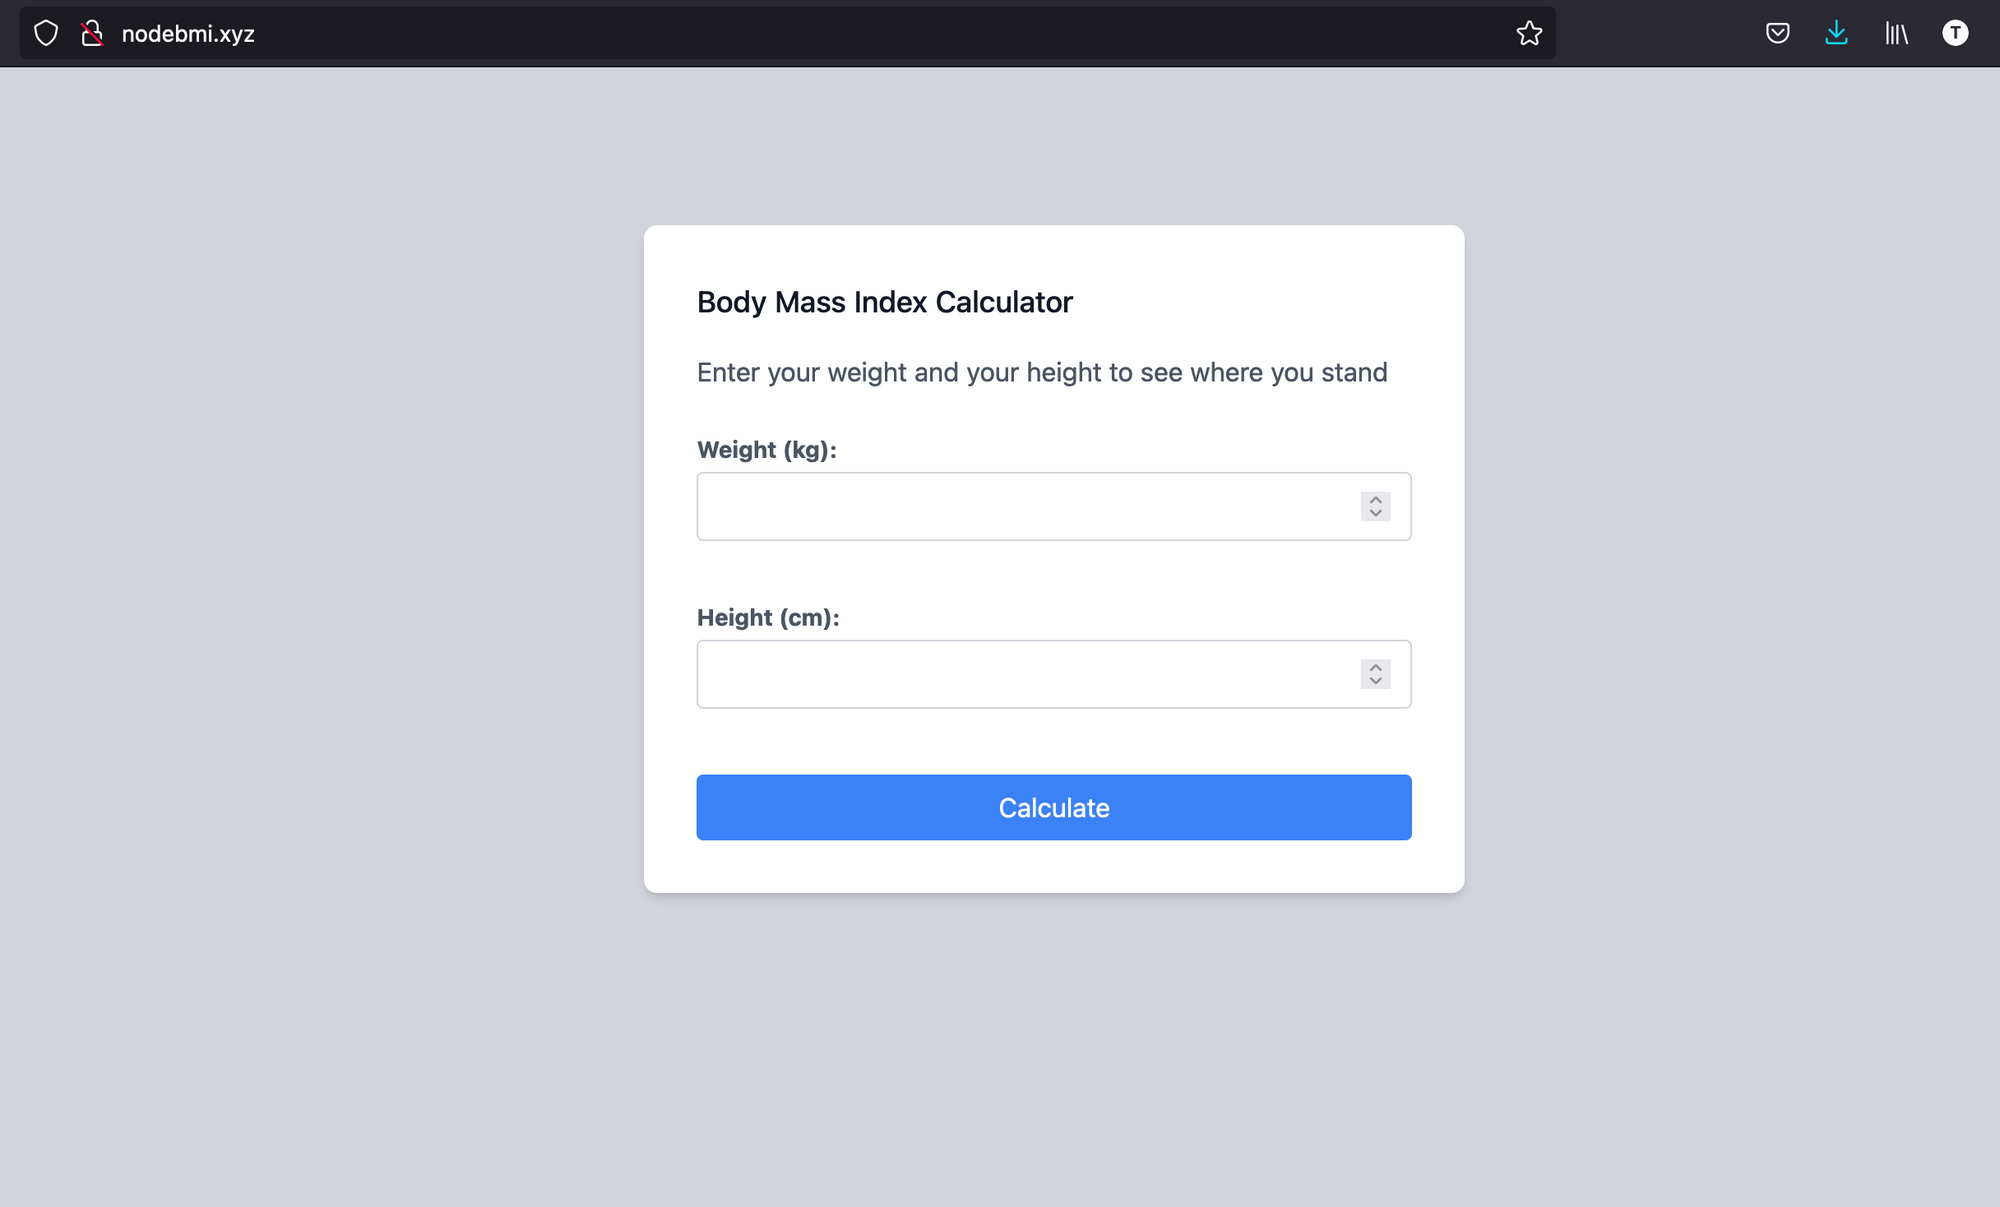
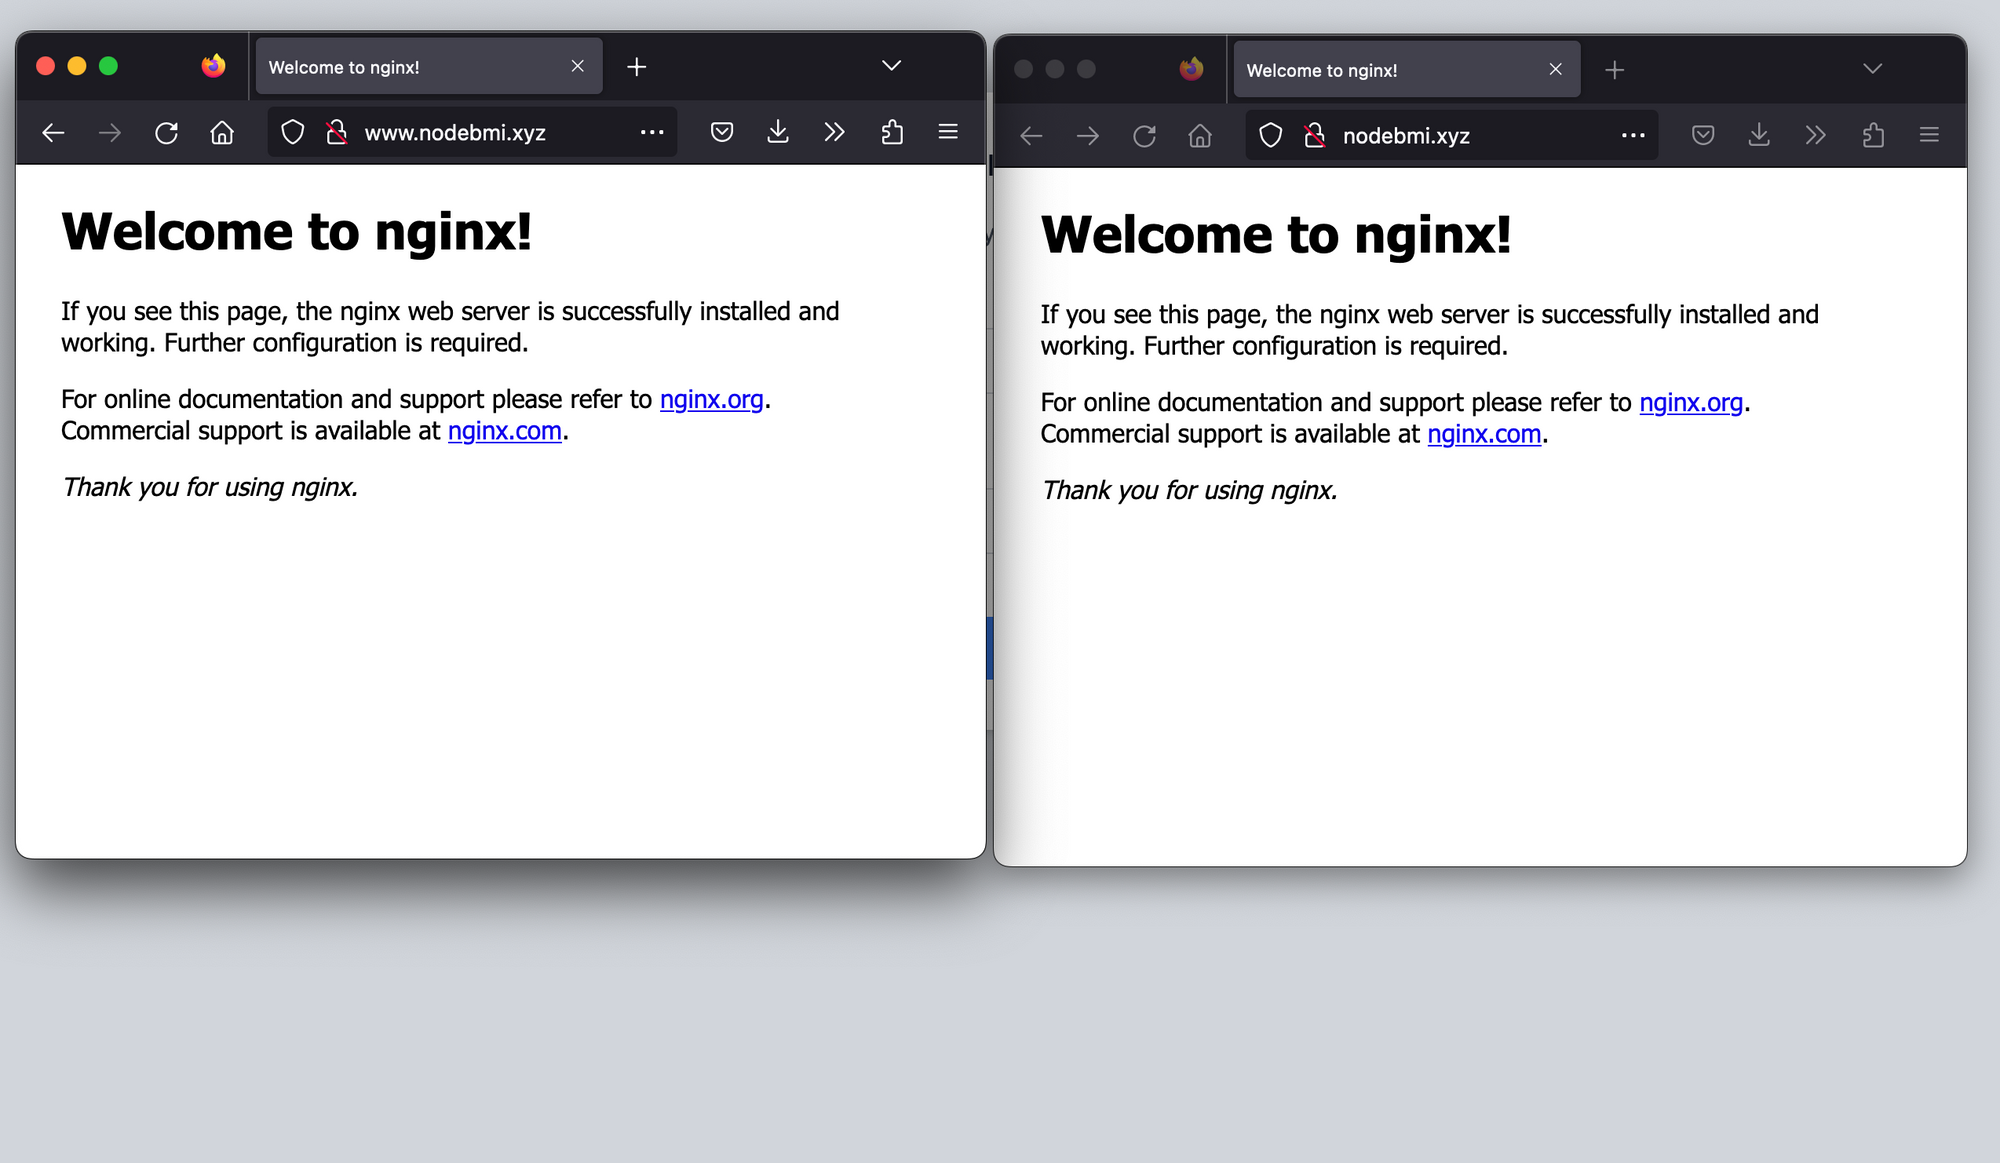
I built and deployed a Node.js application using PM2 on the VPS I bought; Nginx acts as a reverse proxy to make the application accessible through the internet using the domain nodebmi.xyz. It is not secure, and our goal will be to fix that.
Check out my article on deploying a Web application behind a reverse proxy.

Buy an SSL certificate
You must buy a certificate from Certificate Authority. I use Comodossl for every website I need to secure.
I bought a certificate for a single domain, but there are also certificate SSL for domains, including the subdomains.
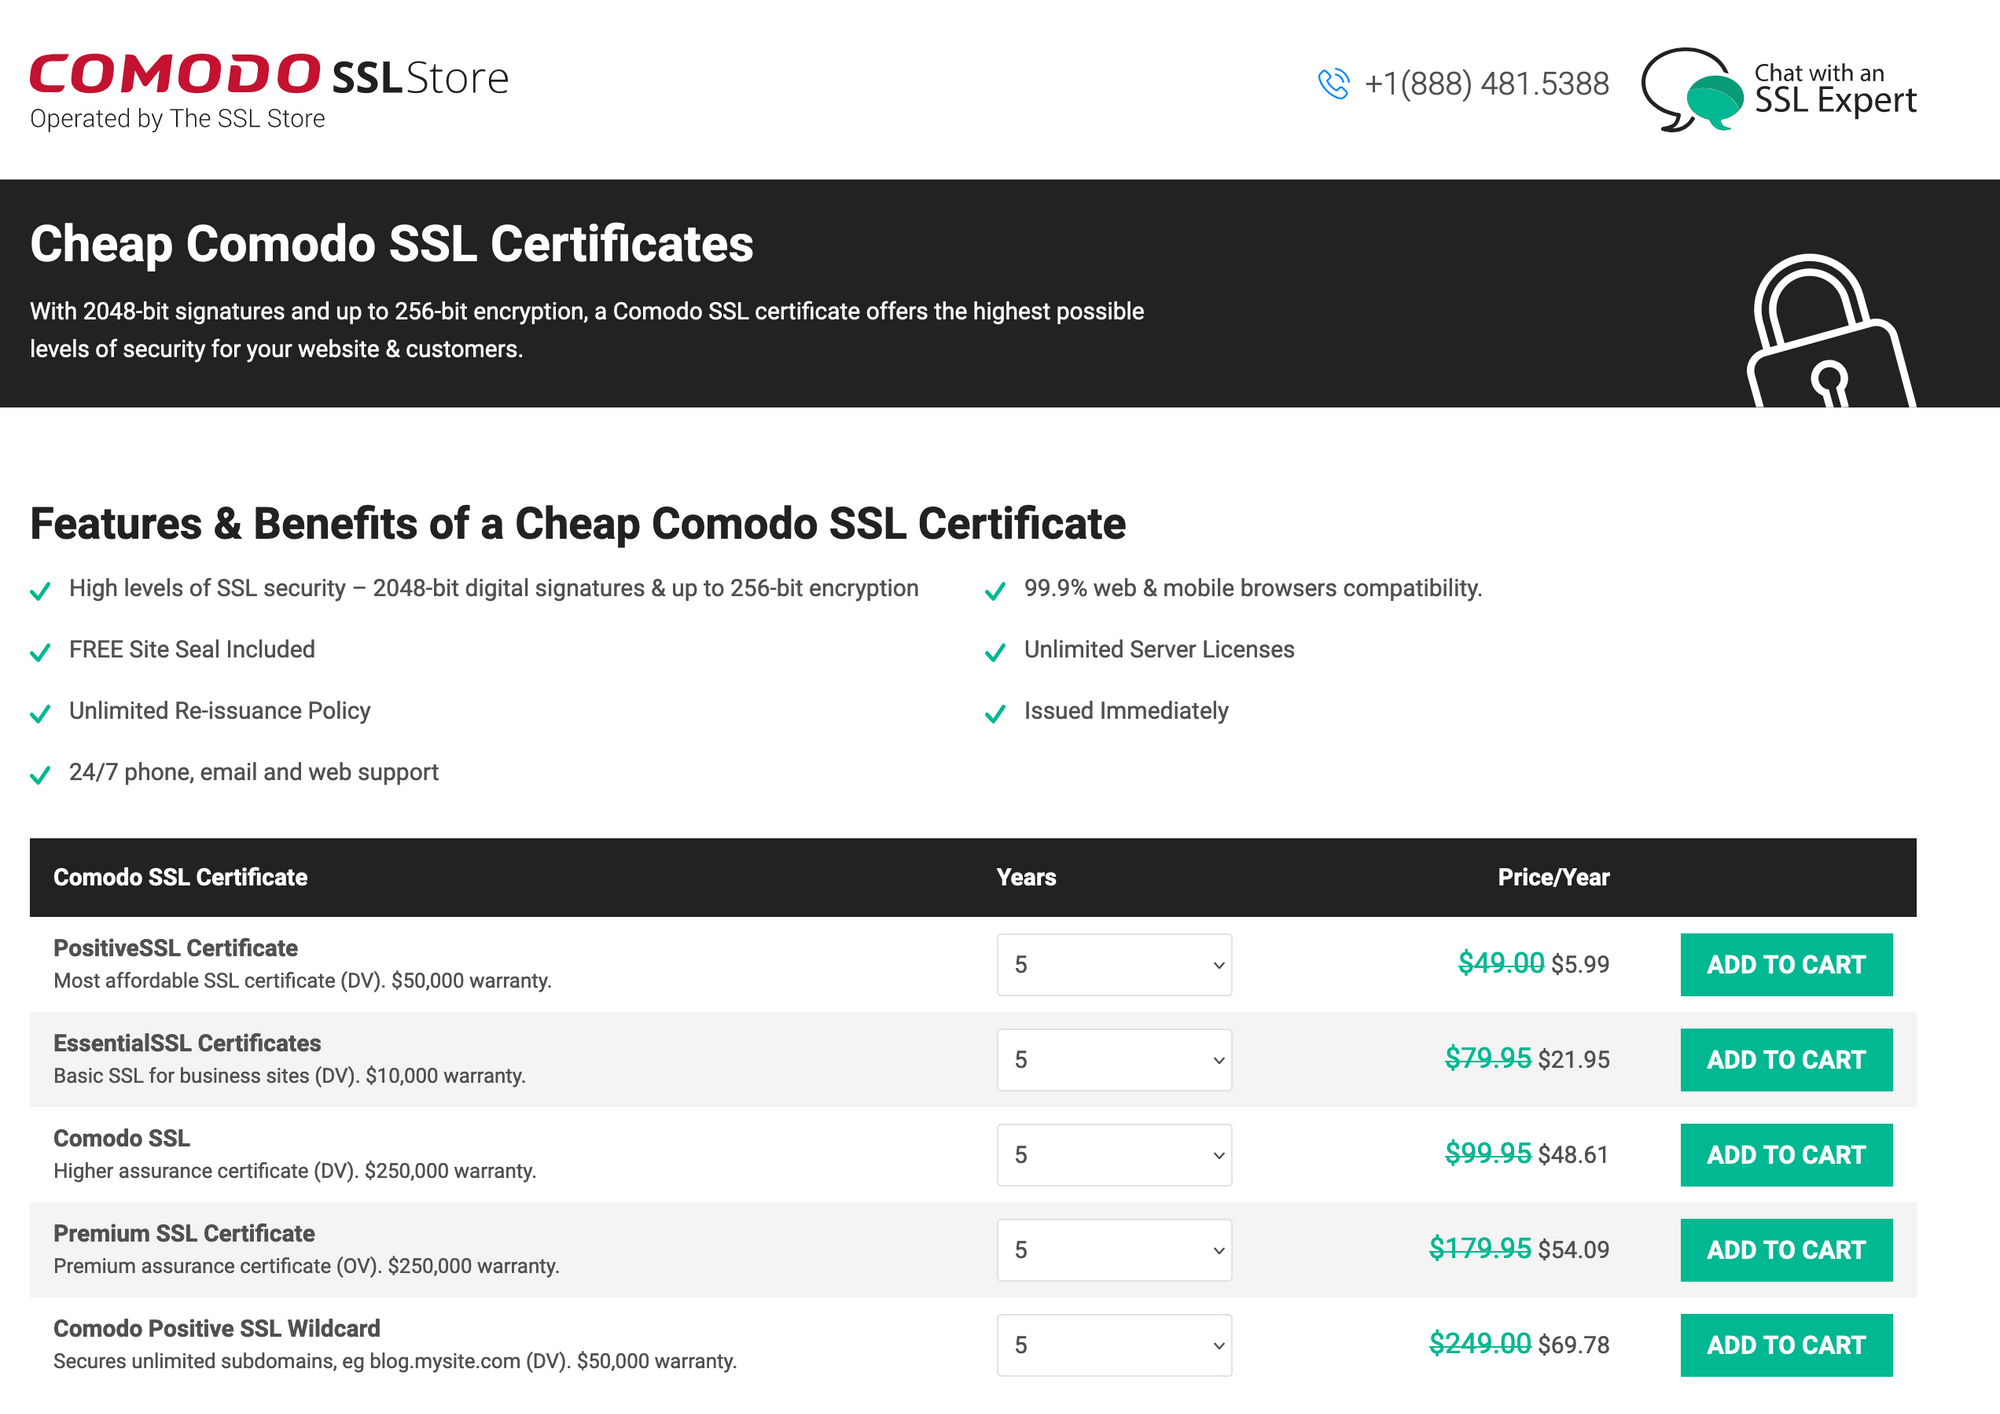
I bought the positive SSL certificate, but the certificate is not generated yet because the generation requires a CSR. We will generate it in the next step.
Generate a Certificate Signing Request (CSR)
A CSR is a message sent from an applicant to a certificate authority to apply for a digital identity certificate. It includes the server's public key and information about the domain the certificate will be issued for.
To generate the CSR for the Nginx server, we will use OpenSSL, a software containing a set of data encryption functions.
This is the syntax for generating the CSR:
openssl req -new -newkey rsa:2048 -nodes -keyout <private_key_filename> -out <csr_filename>
<private_key_filename> represents the name, including the path of the server private's key that will be generated. The key will be used to generate, encrypt and decrypt the data sent/received from the server.
<csr_filename> represents the CSR filename, including the path where to save it.
The command for generating the CSR for the website in the .ssh folder of the user home directory looks like this:
cd ~/.ssh

openssl req -new -newkey rsa:2048 -nodes -keyout nodebmi.key -out nodebmi.csr
You will be asked the following questions:
| Question | Description | Default value |
|---|---|---|
| Country Name | Two uppercase letters only (United Kingdom, use GB, not UK). The country where the company is legally located. | AU |
| State or Province Name | The state where the company is legally located. Do not abbreviate. (e.g., California) | Some-State |
| Locality Name | The city where the company is legally located | Empty |
| Organization Name | The company's name | Internet Widgits Pty Ltd |
| Organizational Unit Name | The department's name within the organization. Example: "IT", "Sales", or simply leave blank. | Empty |
| Common Name | The fully-qualified domain name (FQDN) (e.g., www.example.com or *.example.com for wildcard certs). | Empty |
| Email Address | The domain administrator's email address | Empty |
| A challenge password | The password to secure the private key | Empty |
| An optional company name | Another name used for the company | Empty |
Here is an example of the CSR generation on the server.
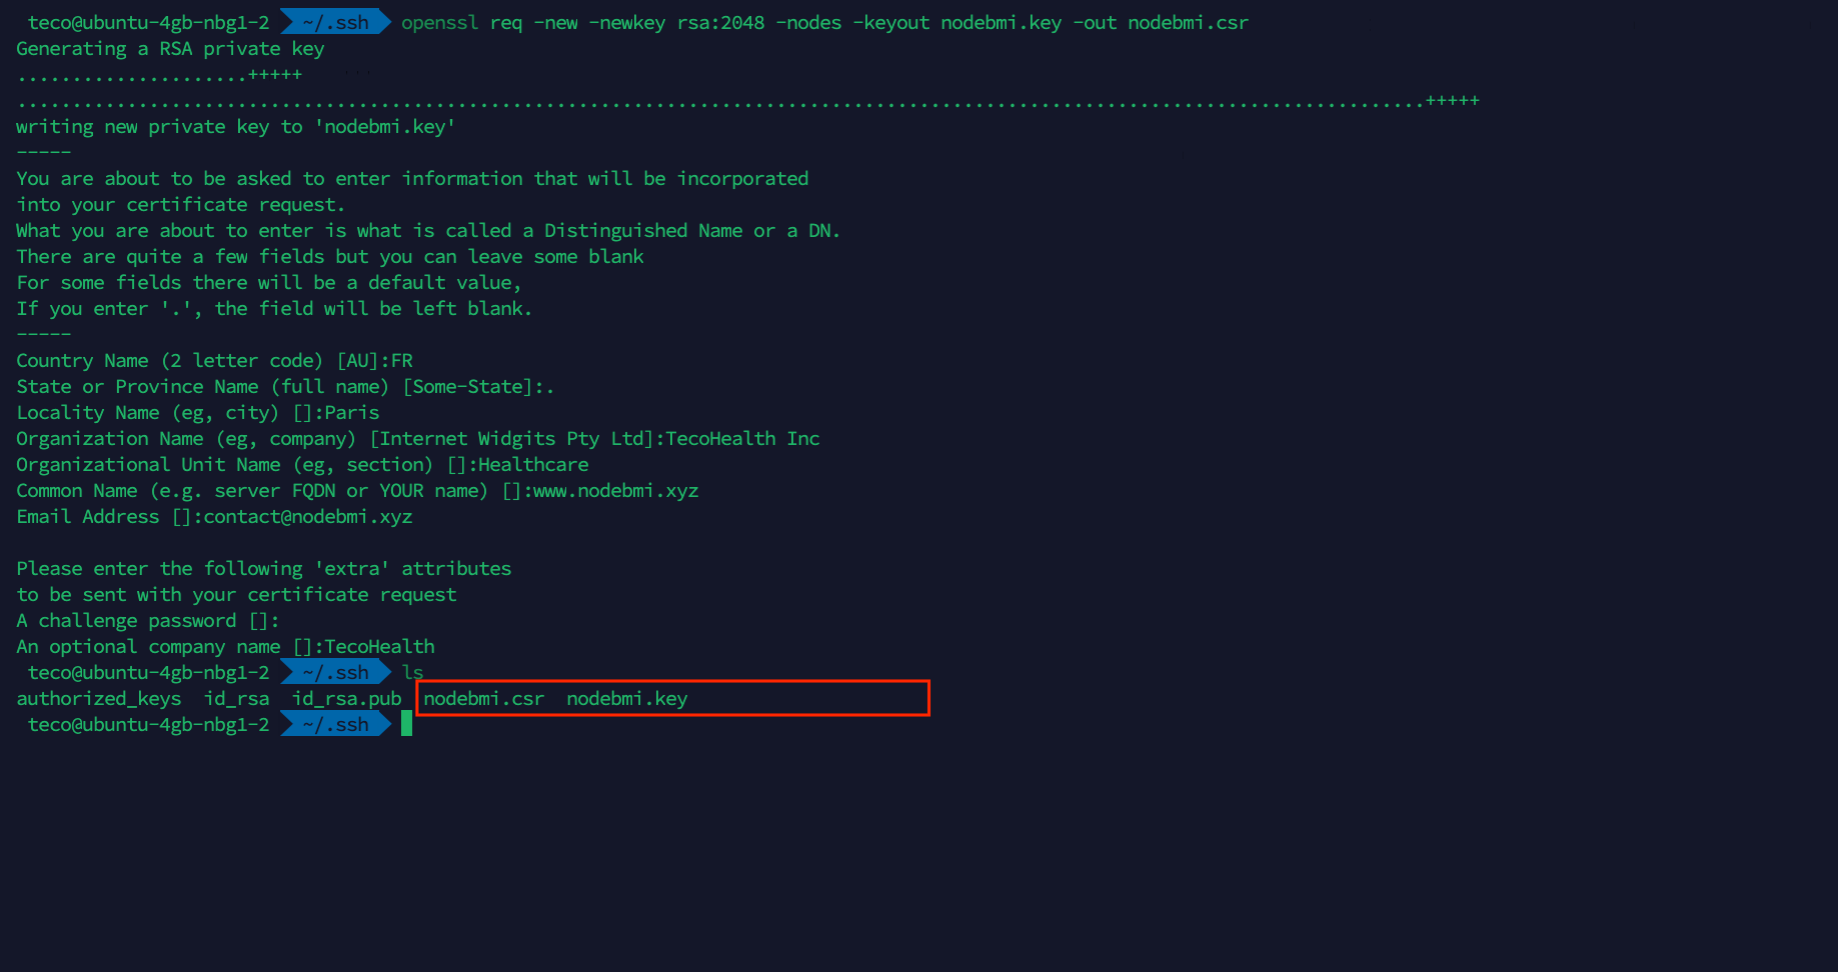
nodebmi.xyzAt this step, the private key and the CSR are located at $HOME/.ssh/.
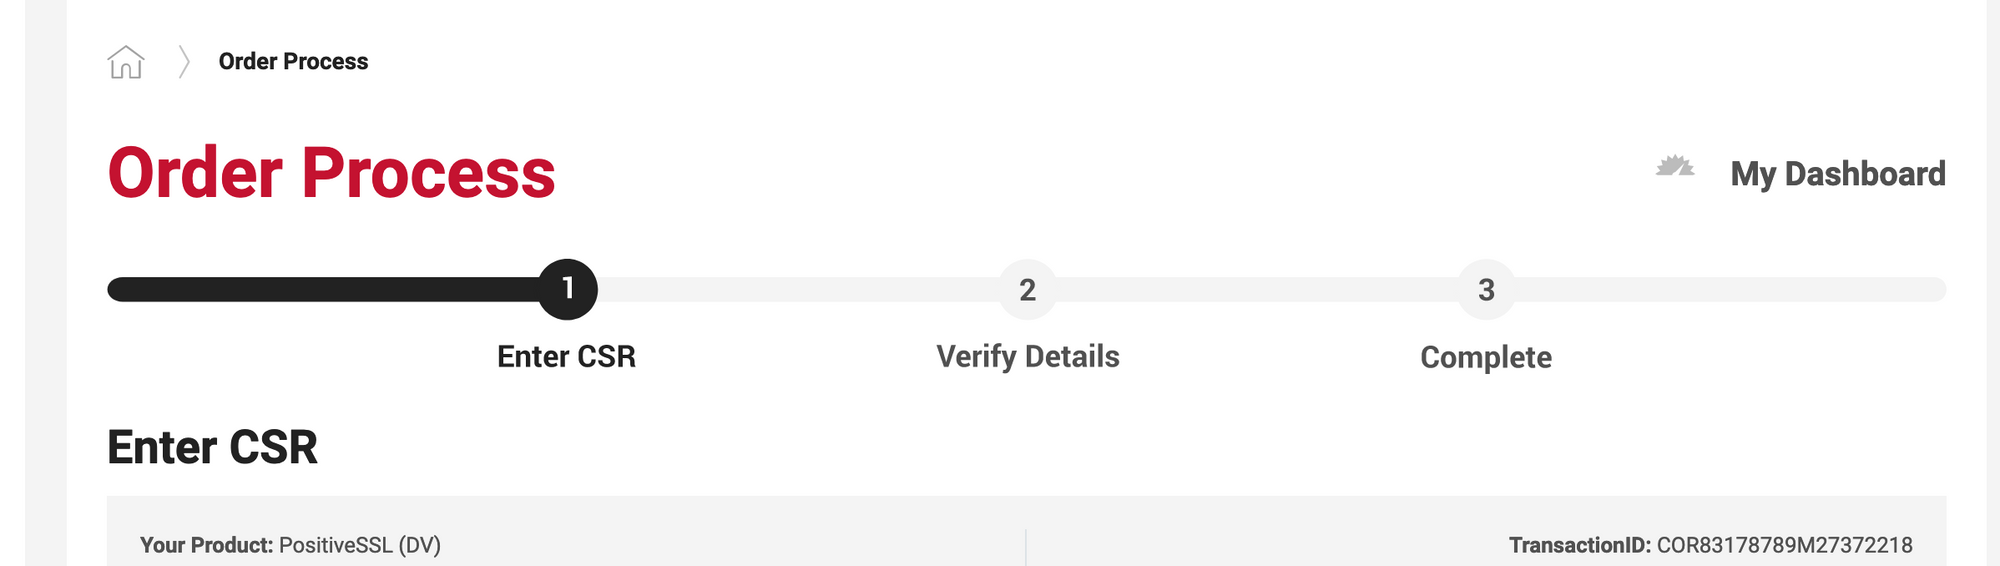
Finalize the certificate creation
We can enter the CSR to finish the certificate creation. Copy the content of the file nodebmi.csr, go to the certificate order page and paste it:
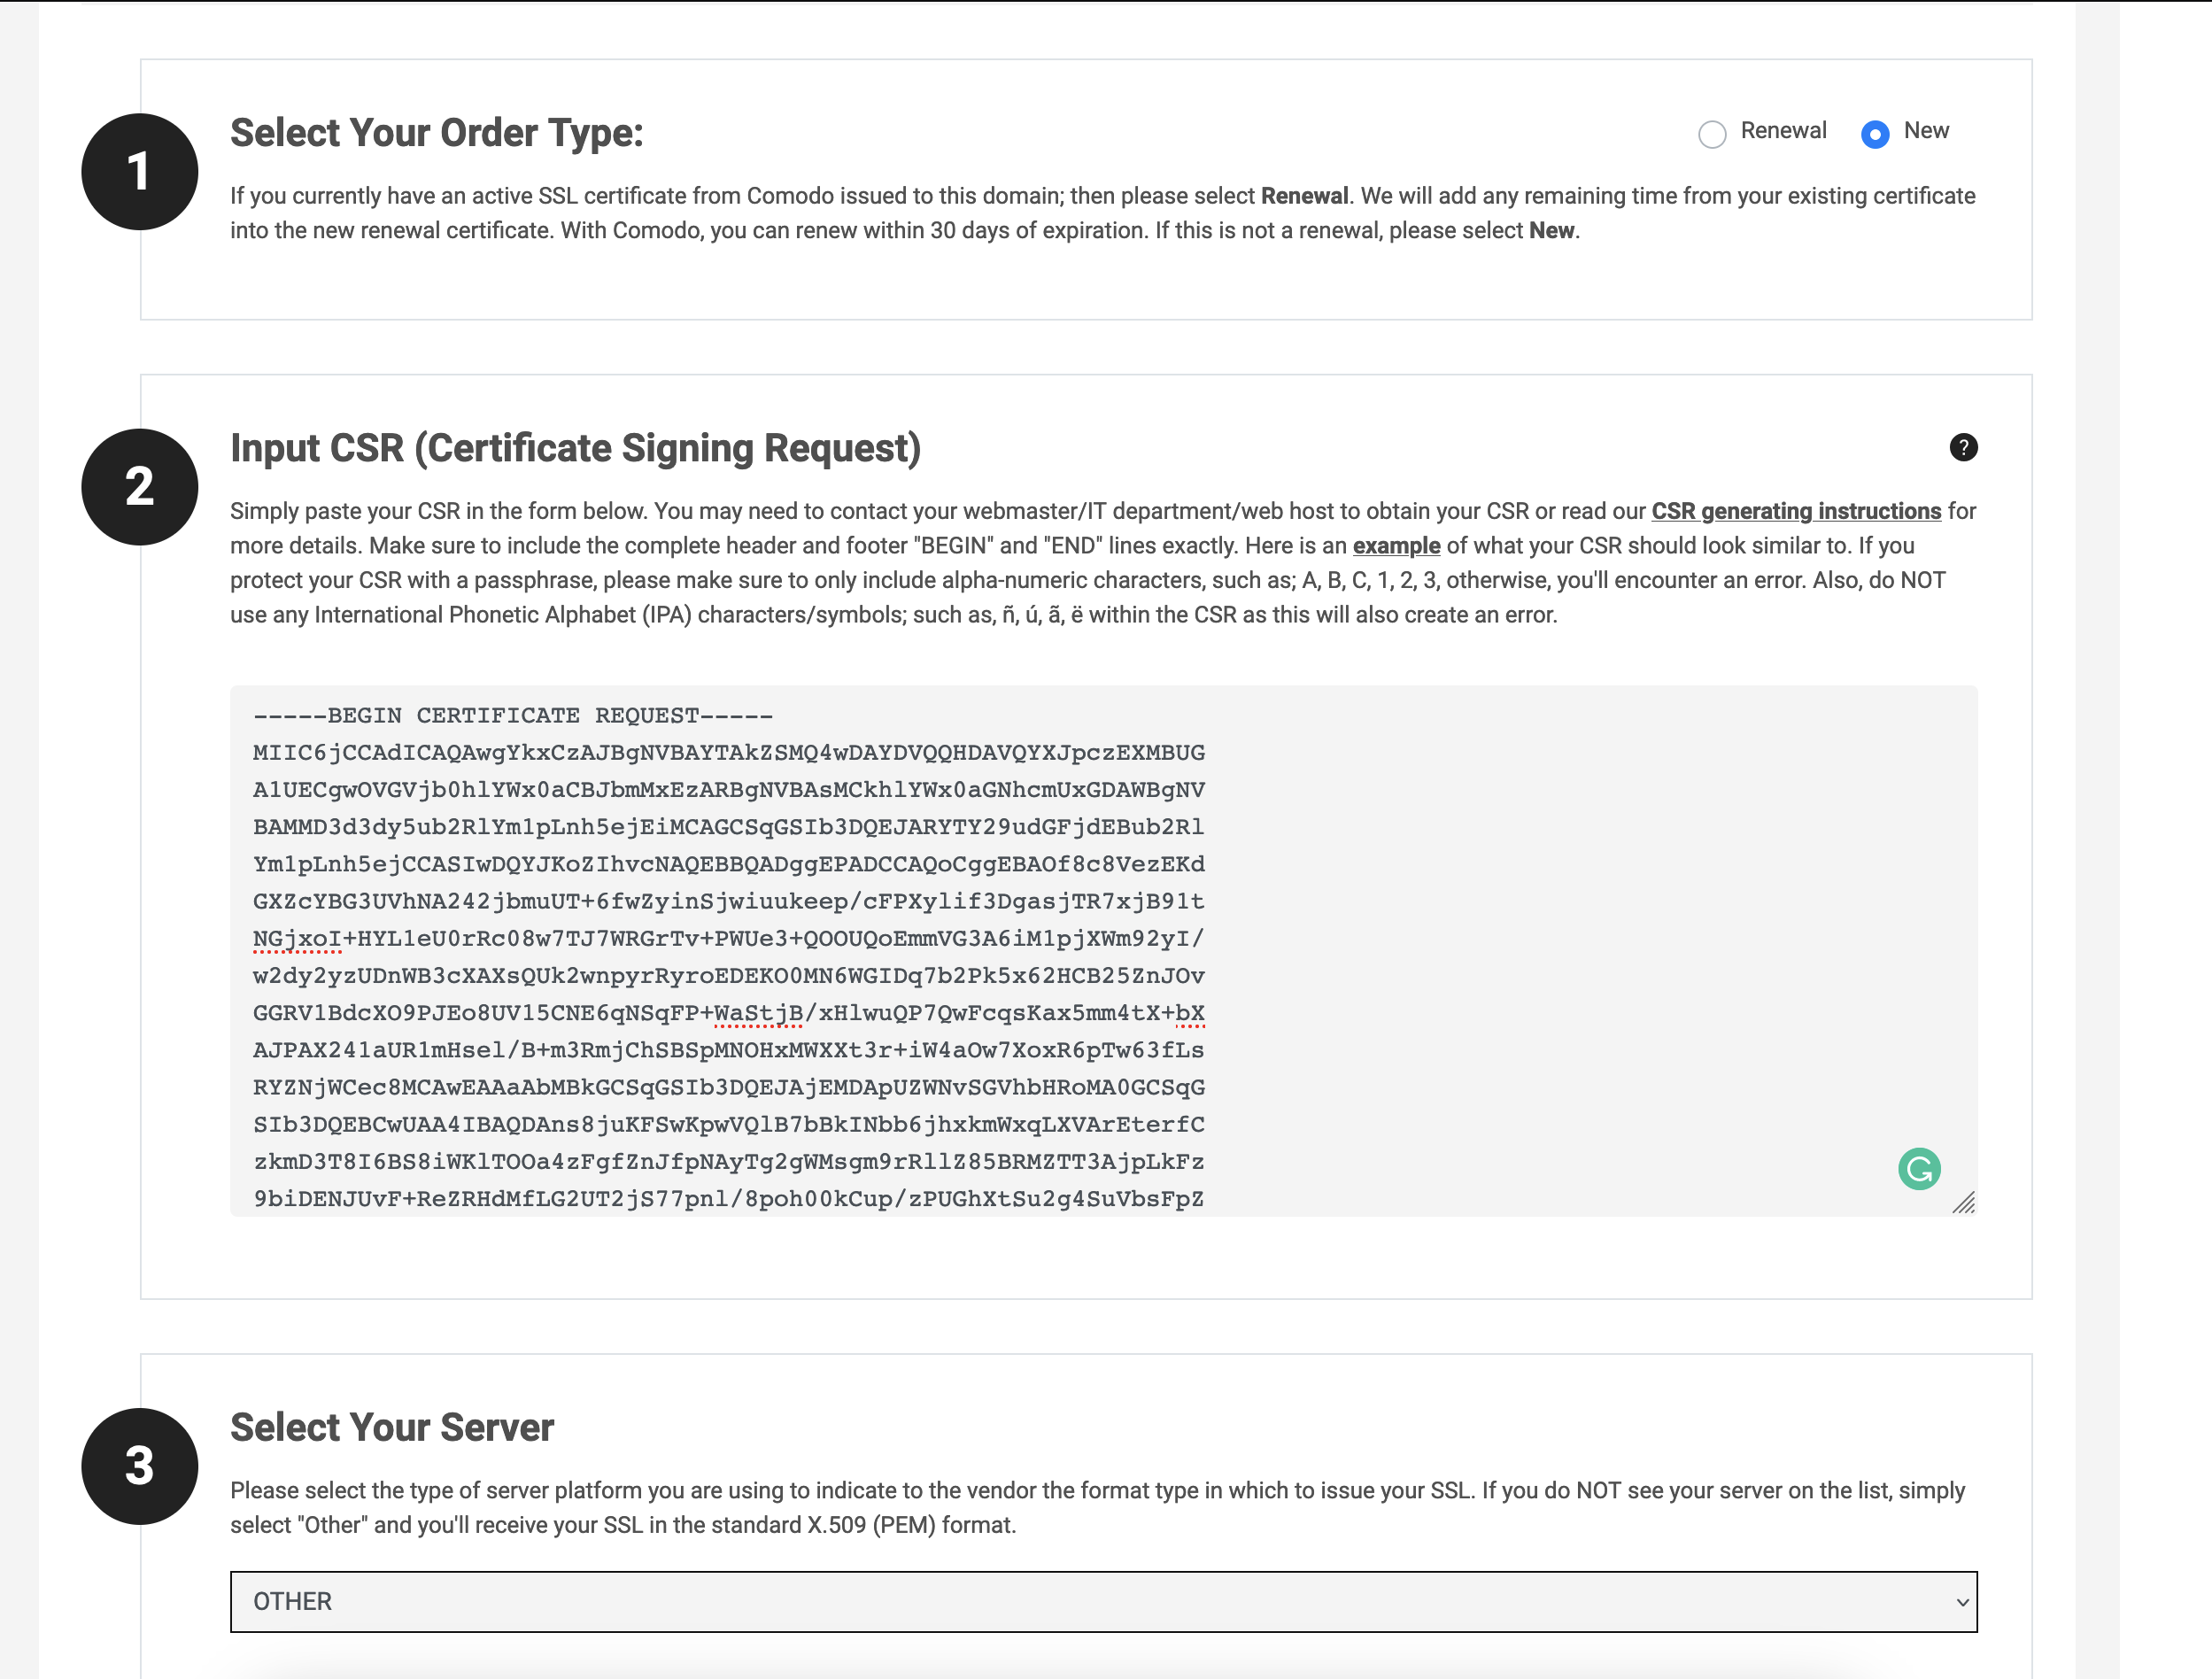
For the Web server, you should select Nginx if it exists otherwise, choose OTHER as I did.
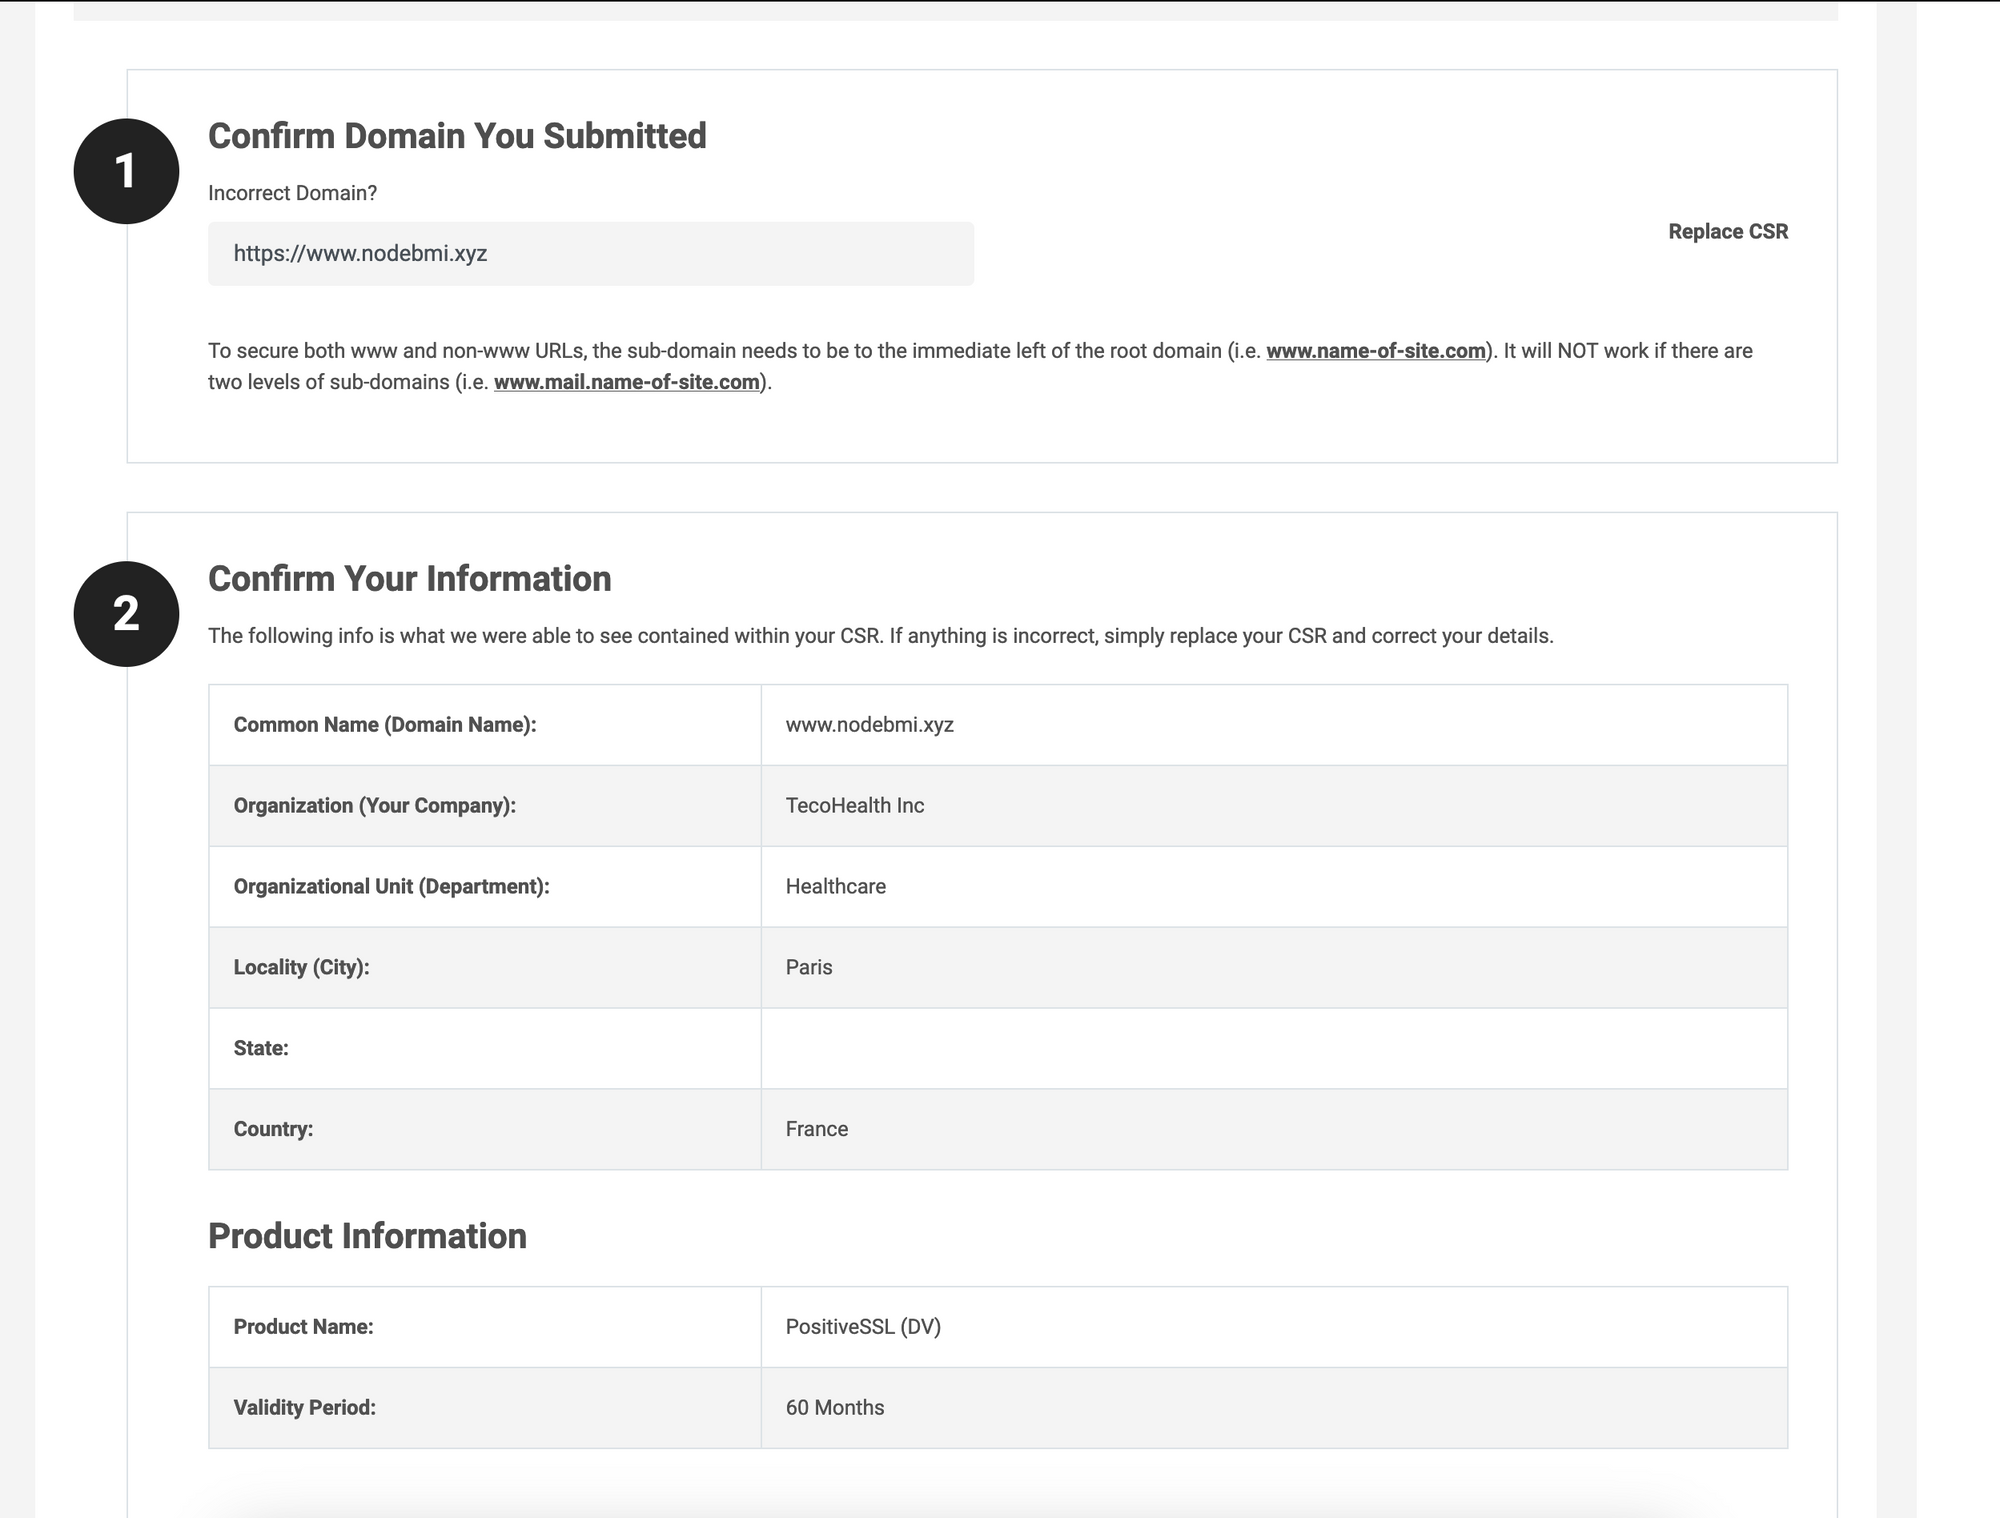
Click on the button "Continue", and the next page will show a summary of the information retrieved from the CSR text in five steps.
The following section is about domain ownership validation. The Certificate Authority wants to verify your identity and domain ownership before issuing the SSL certificate. It can be done in four different ways.

Email is the easiest way to validate the domain ownership; you provide an email address xxxxx@<your_domain> and you will receive a mail with validation instructions.
This post will show how to perform the HTTP File-Based validation. Select this validation and continue.
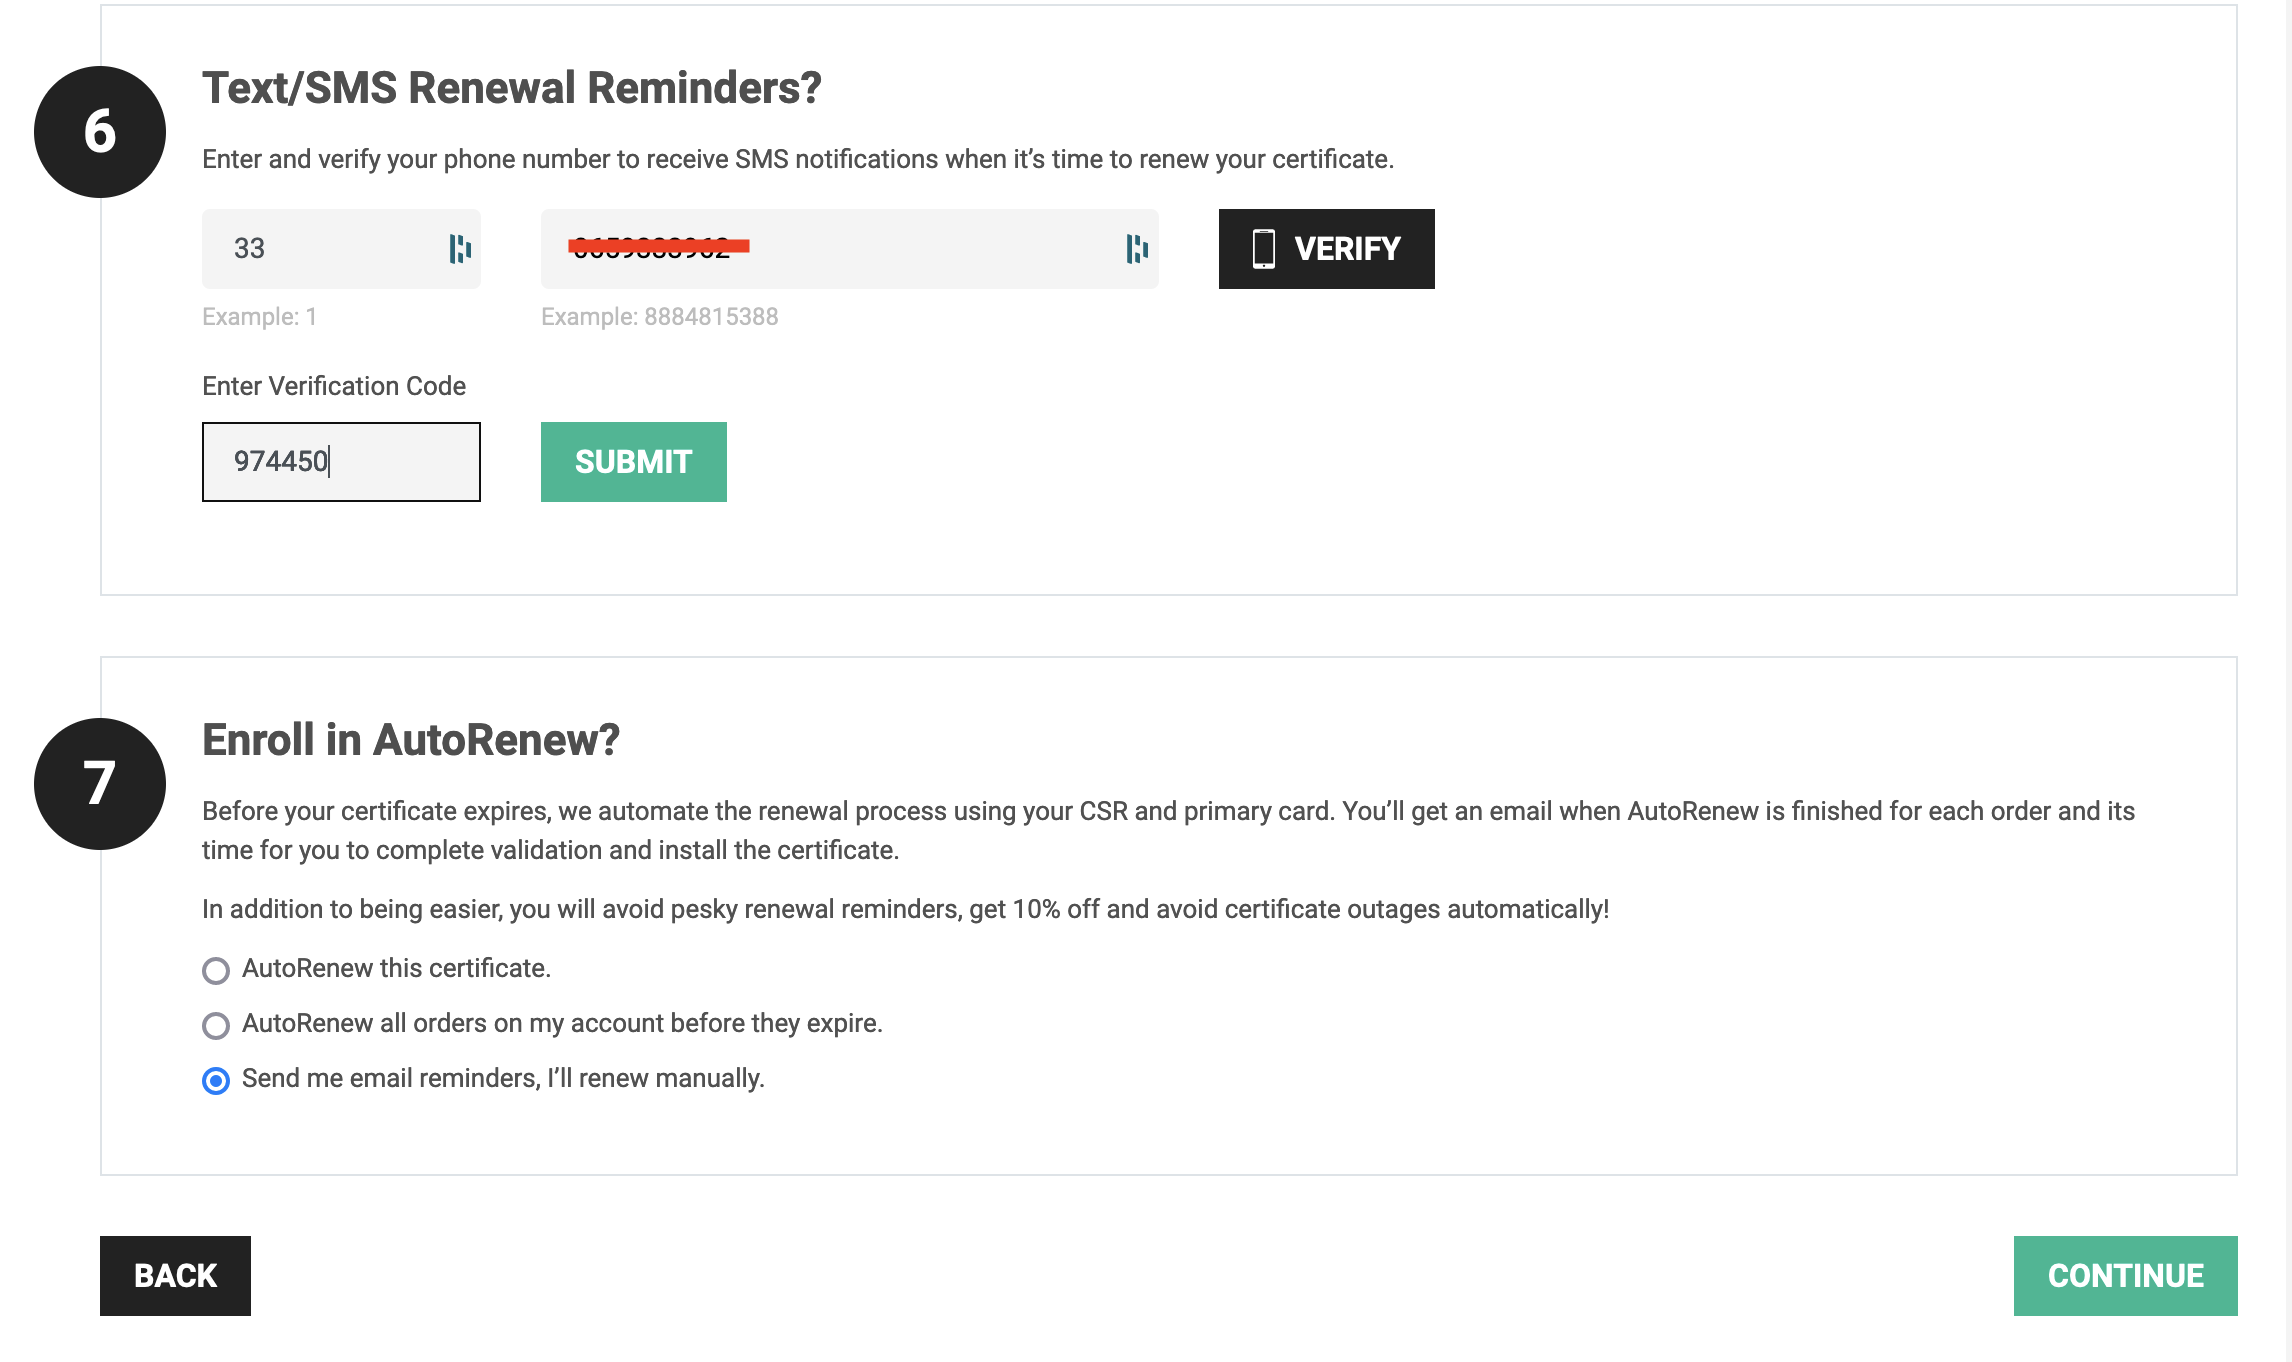
Step 4 is related to filling out the administrator and technical contact information, while step 5 is related to the terms agreement.
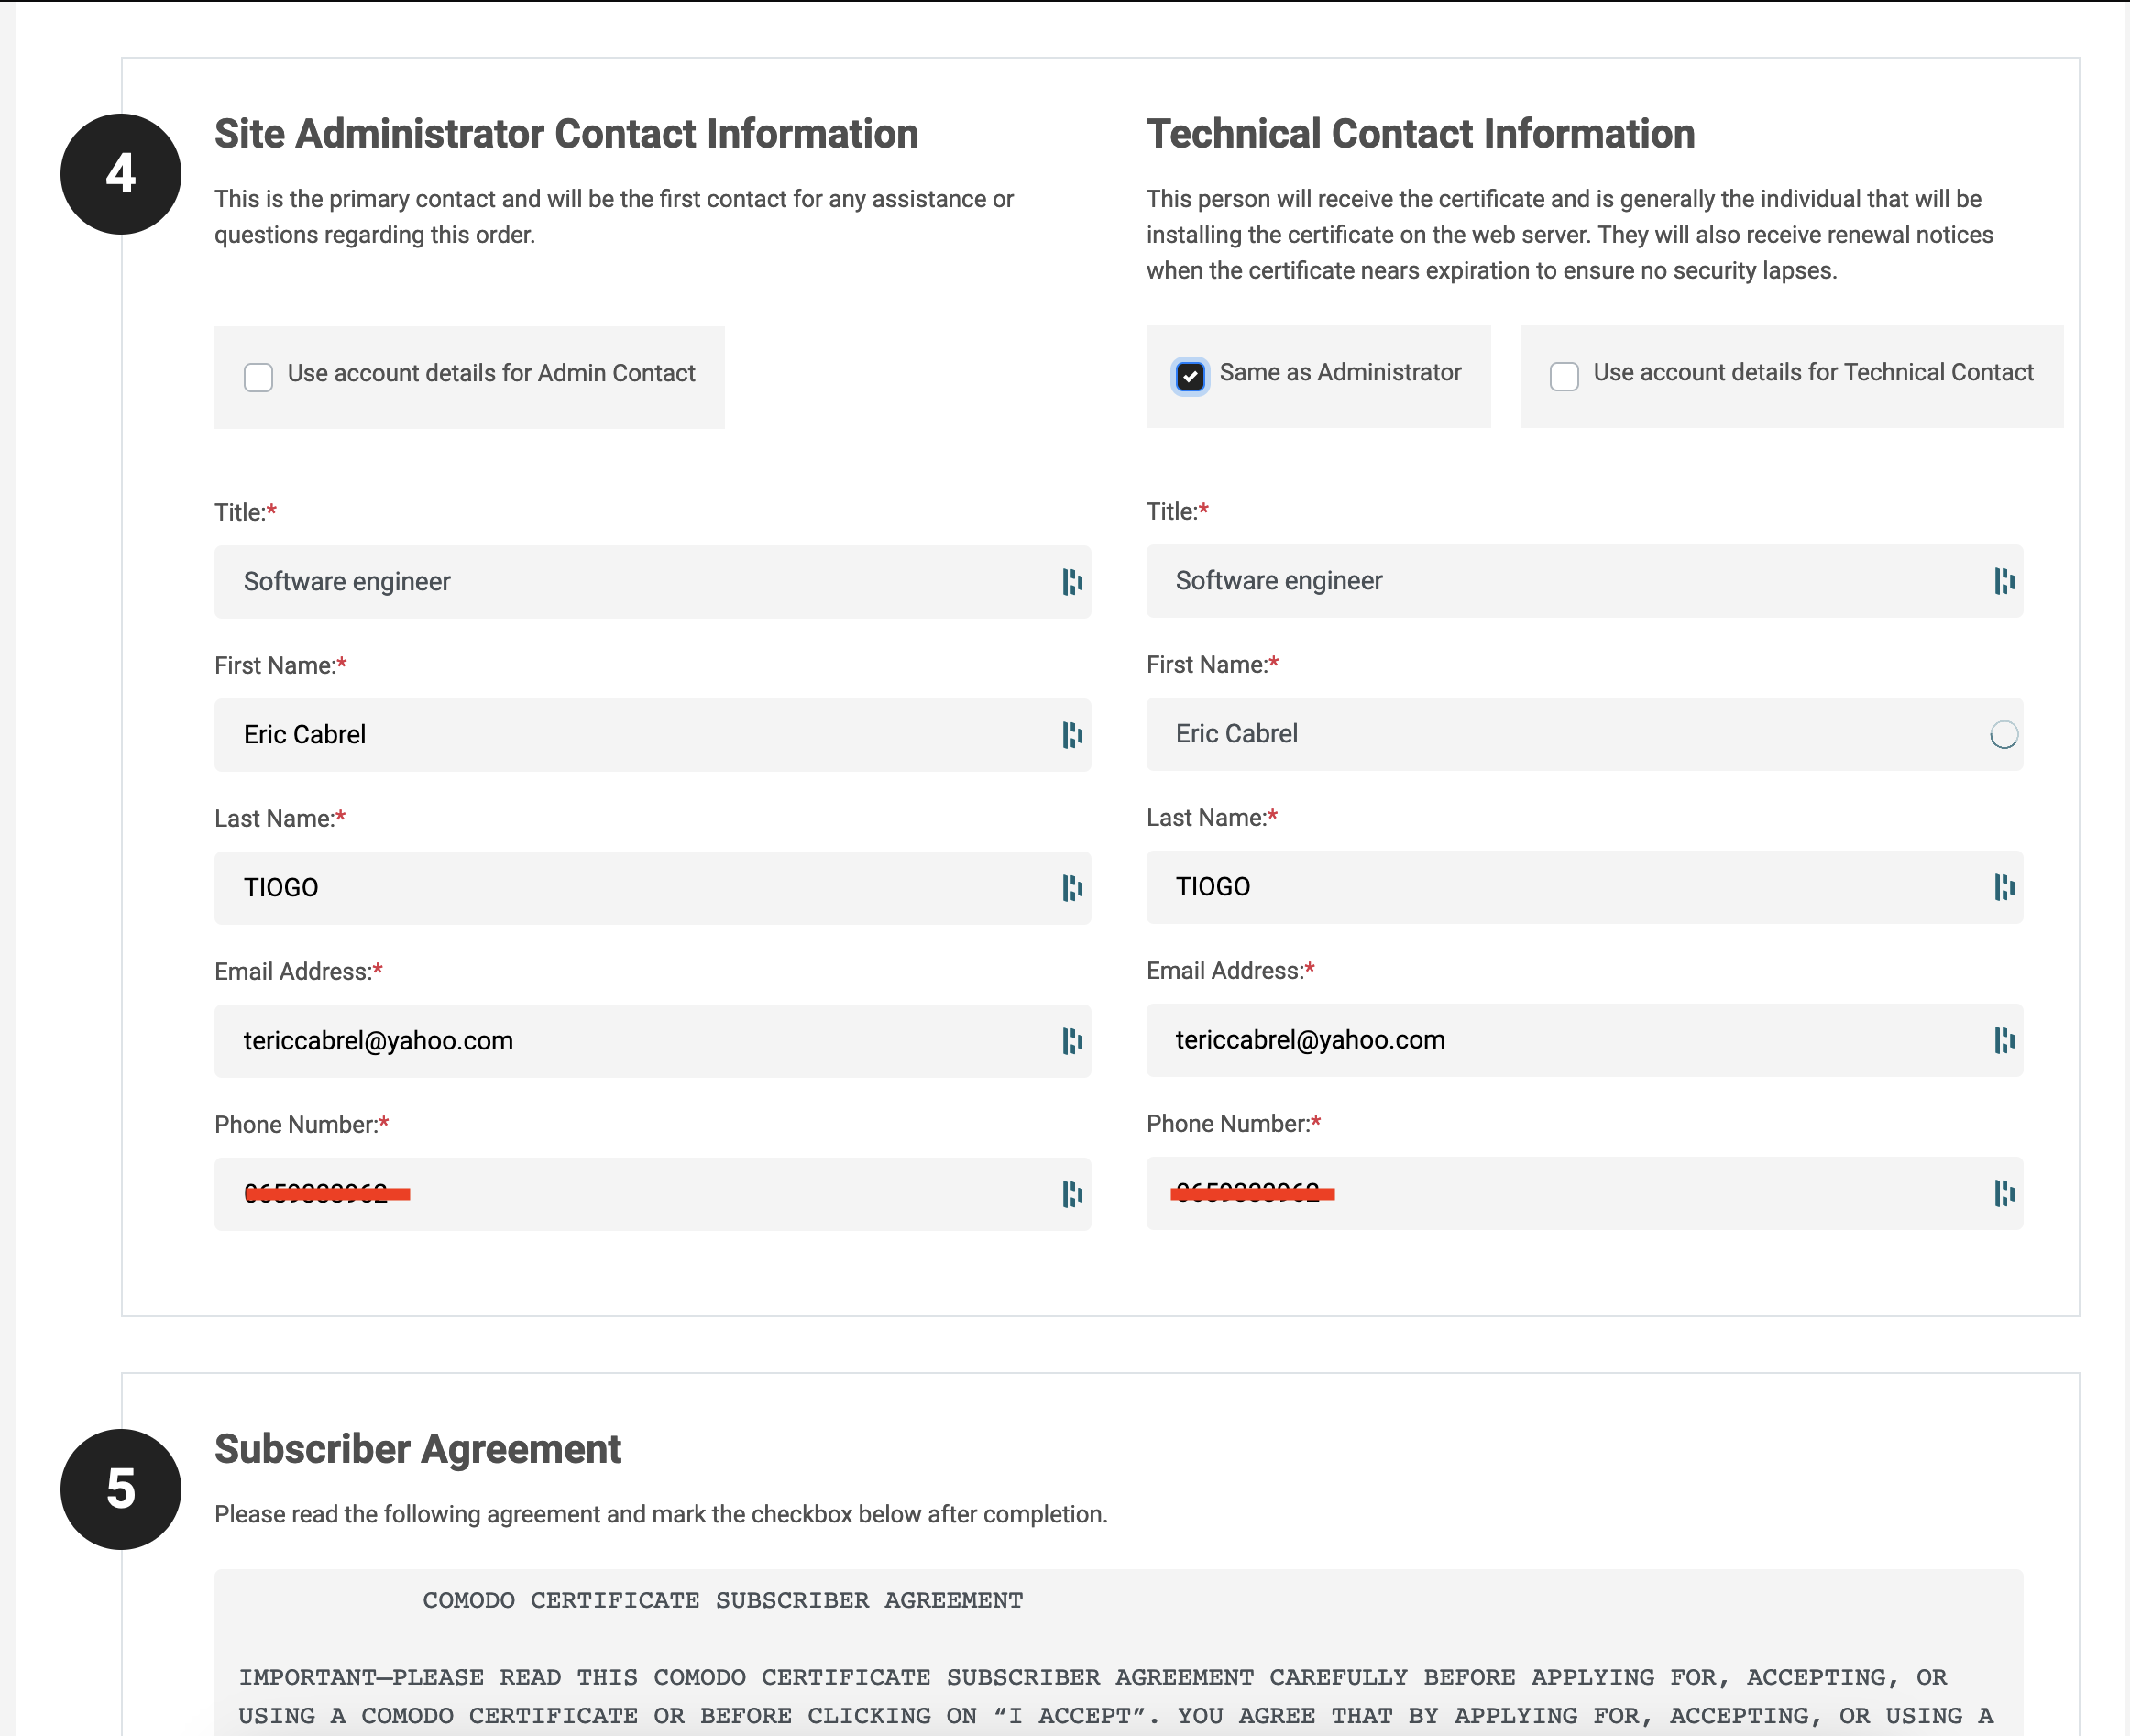
The last two are related to phone number verification and auto-renew enrollment, asking if you want automatically renew the certificate when it expires.
I chose to renew manually for a real business, I always chose auto-renew, and I recommend it to you.
Click on the button "Continue"; you will get the order confirmation page and can start the domain validation.
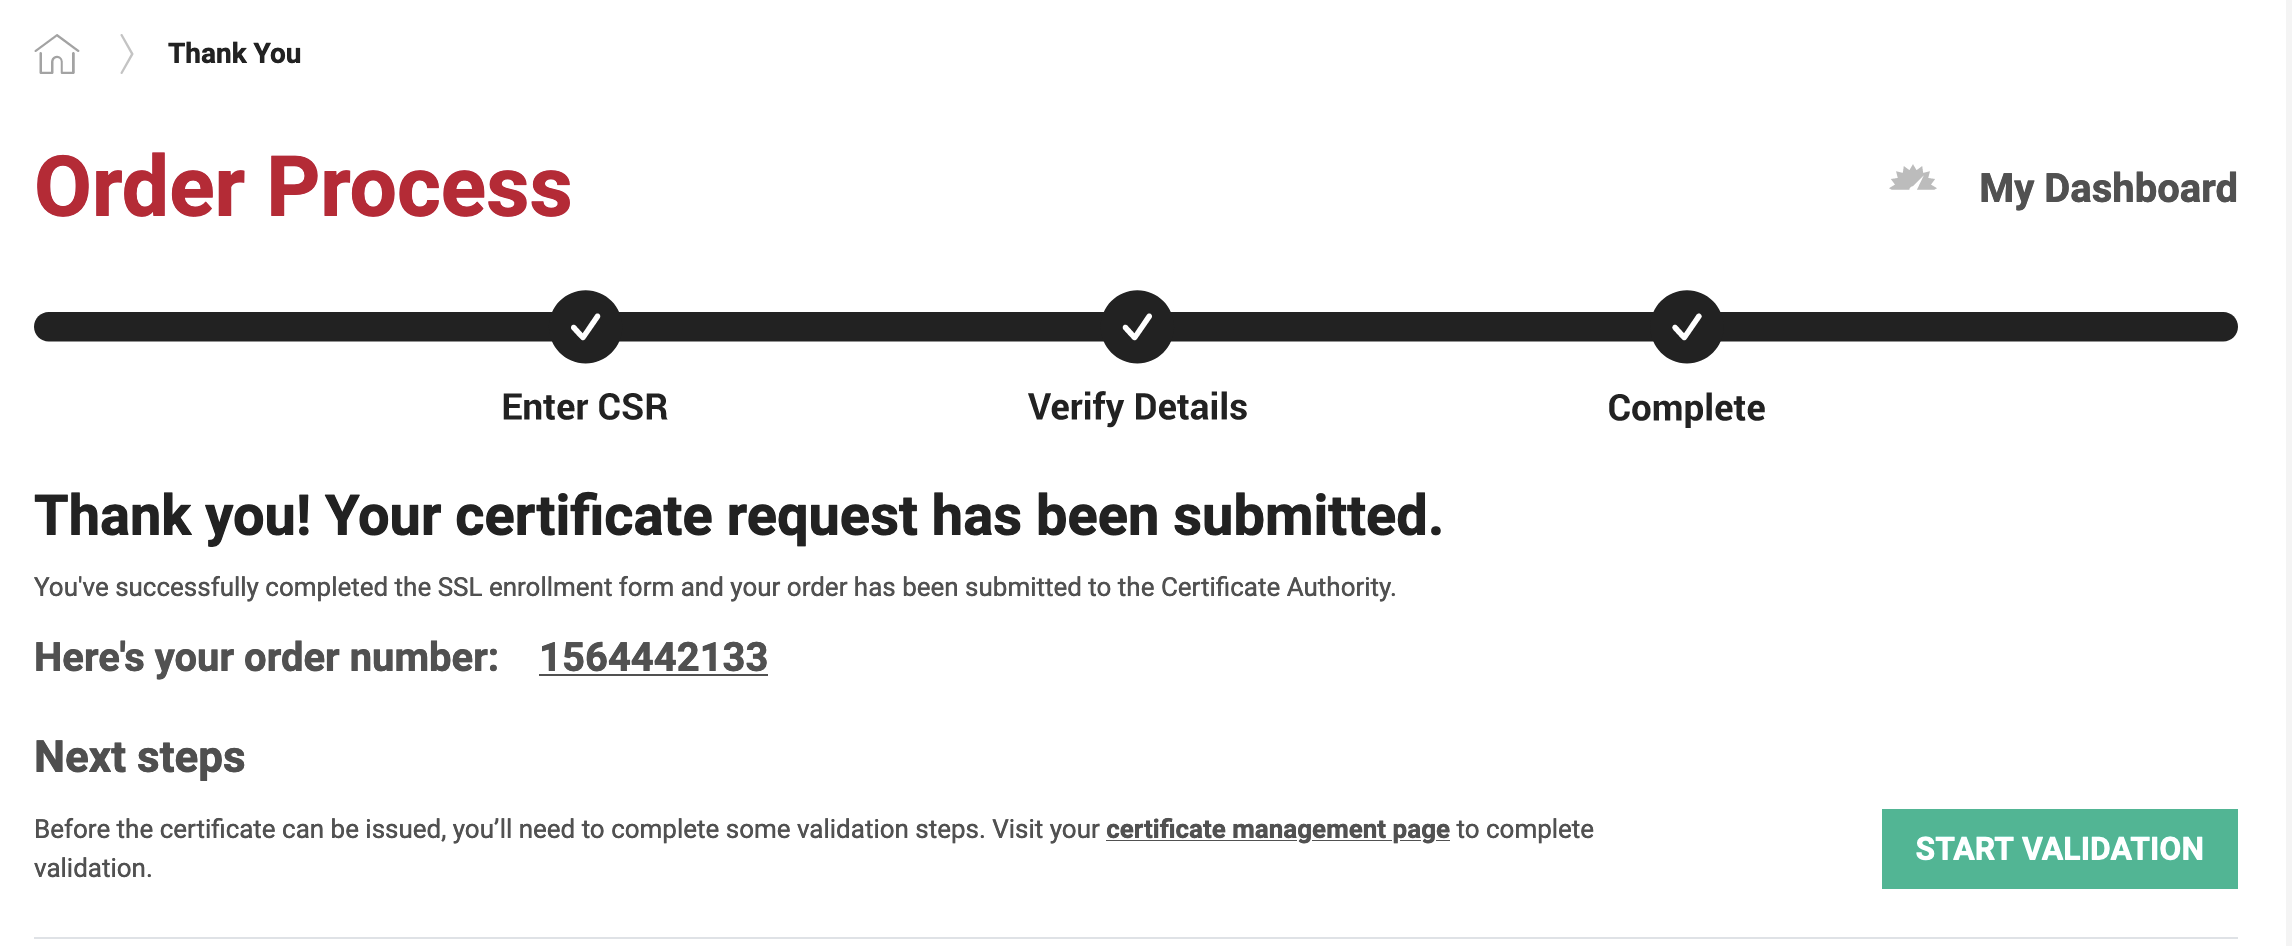
Click on the button "Start validation" to perform the HTTP file-based validation, and you will be redirected to the page below giving the instruction.
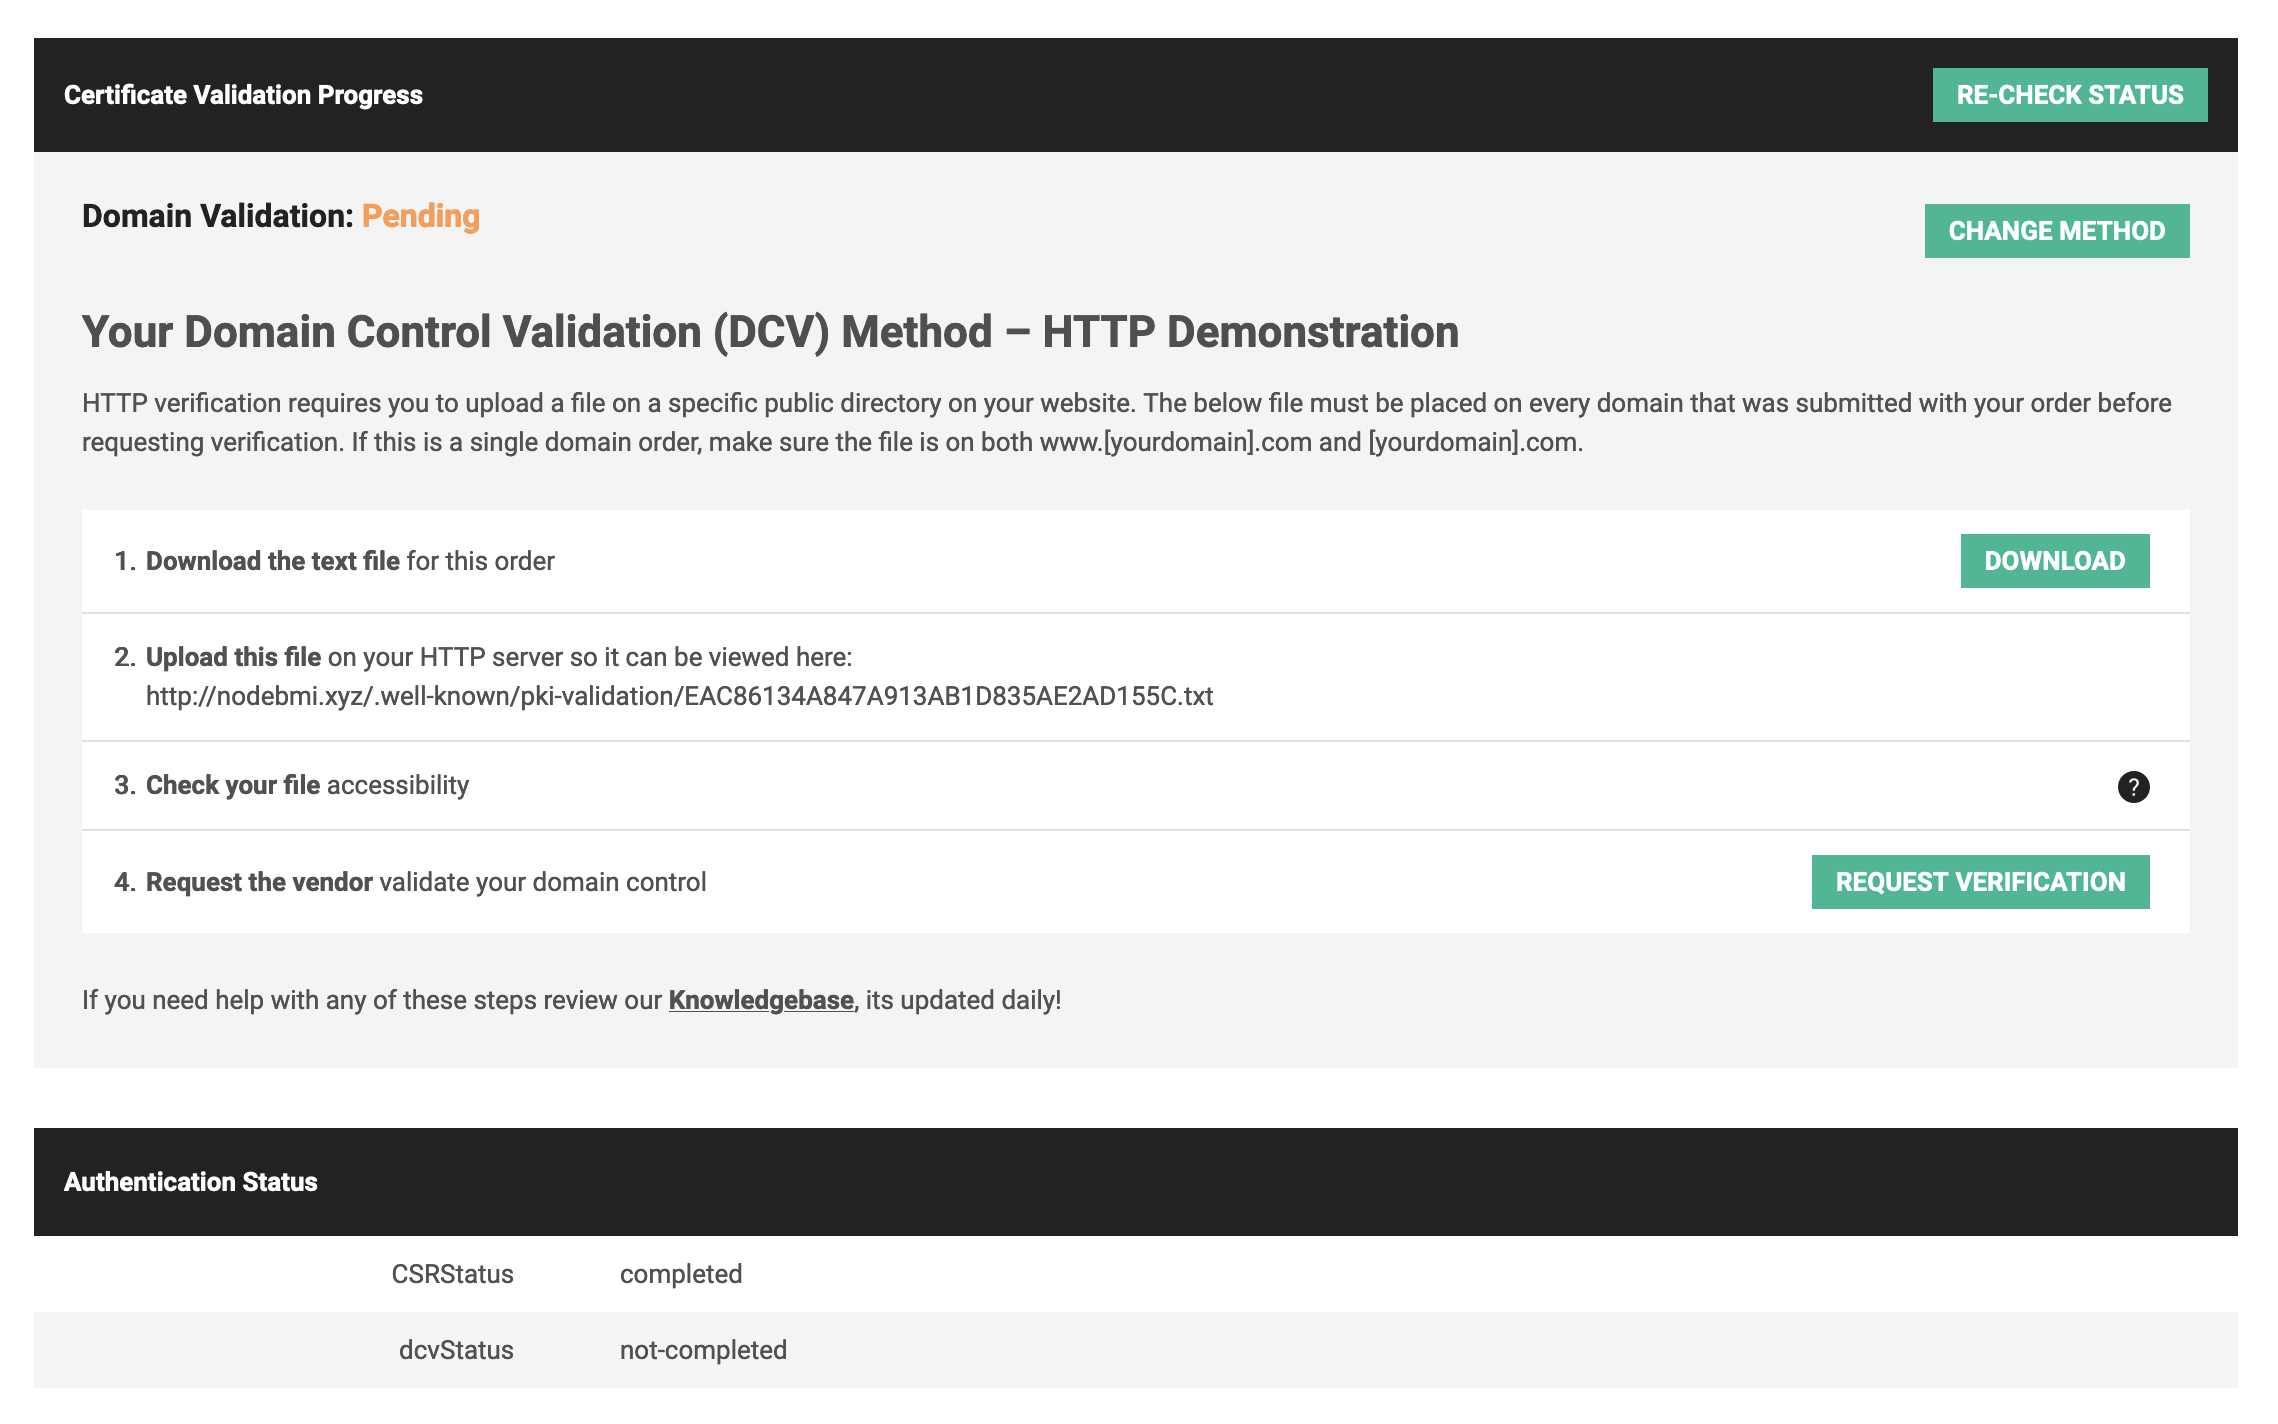
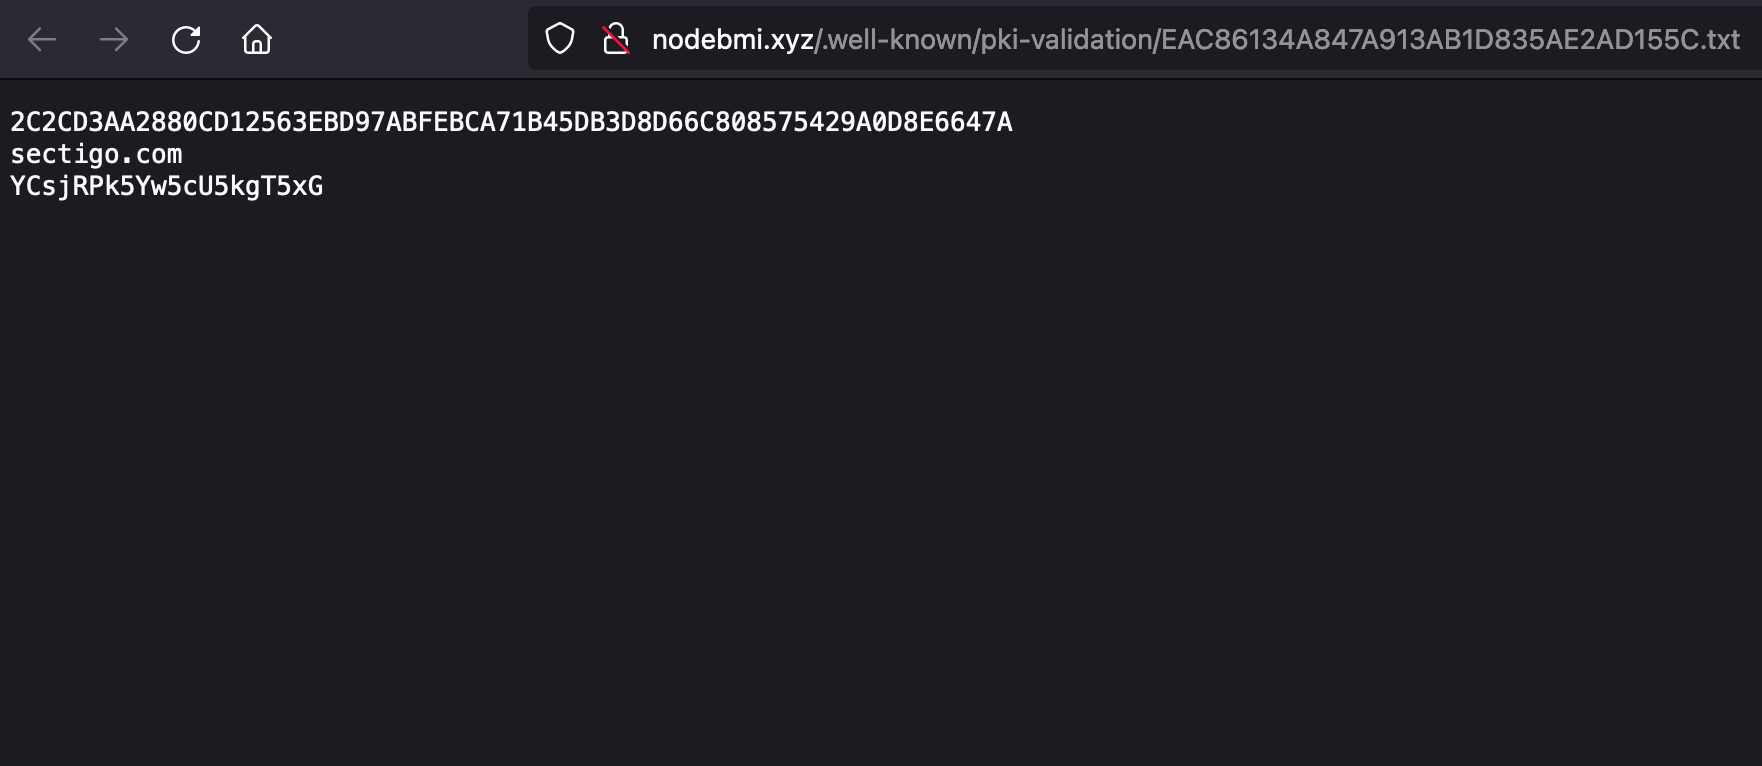
To verify that we own the domain nodebmi.xyz, we need to download the file provided and make it accessible through the domain behind which our application is running.
The file should be served as a static file; usually, the file must be uploaded to the public folder of our application.
At the bottom of the picture above, you can see the status of the domain control validation is set the not-completed. The validation is good when this value changes to completed.
Perform the Domain Control Validation
Download the file and place it in the Desktop folder so the path will be ~/Desktop/EAC86134A847A913AB1D835AE2AD155C.txt.
We must copy this file to the server in the application's public folder behind the domain's name. The application is a Node.js application with Express.
Since the public folder serve static files and the URL path to access the validation file is http://nodebmi.xyz/.well-known/pki-validation/EAC86134A847A913AB1D835AE2AD155C.txt, the file must be placed in the folder /public/.well-known/pki-validation.
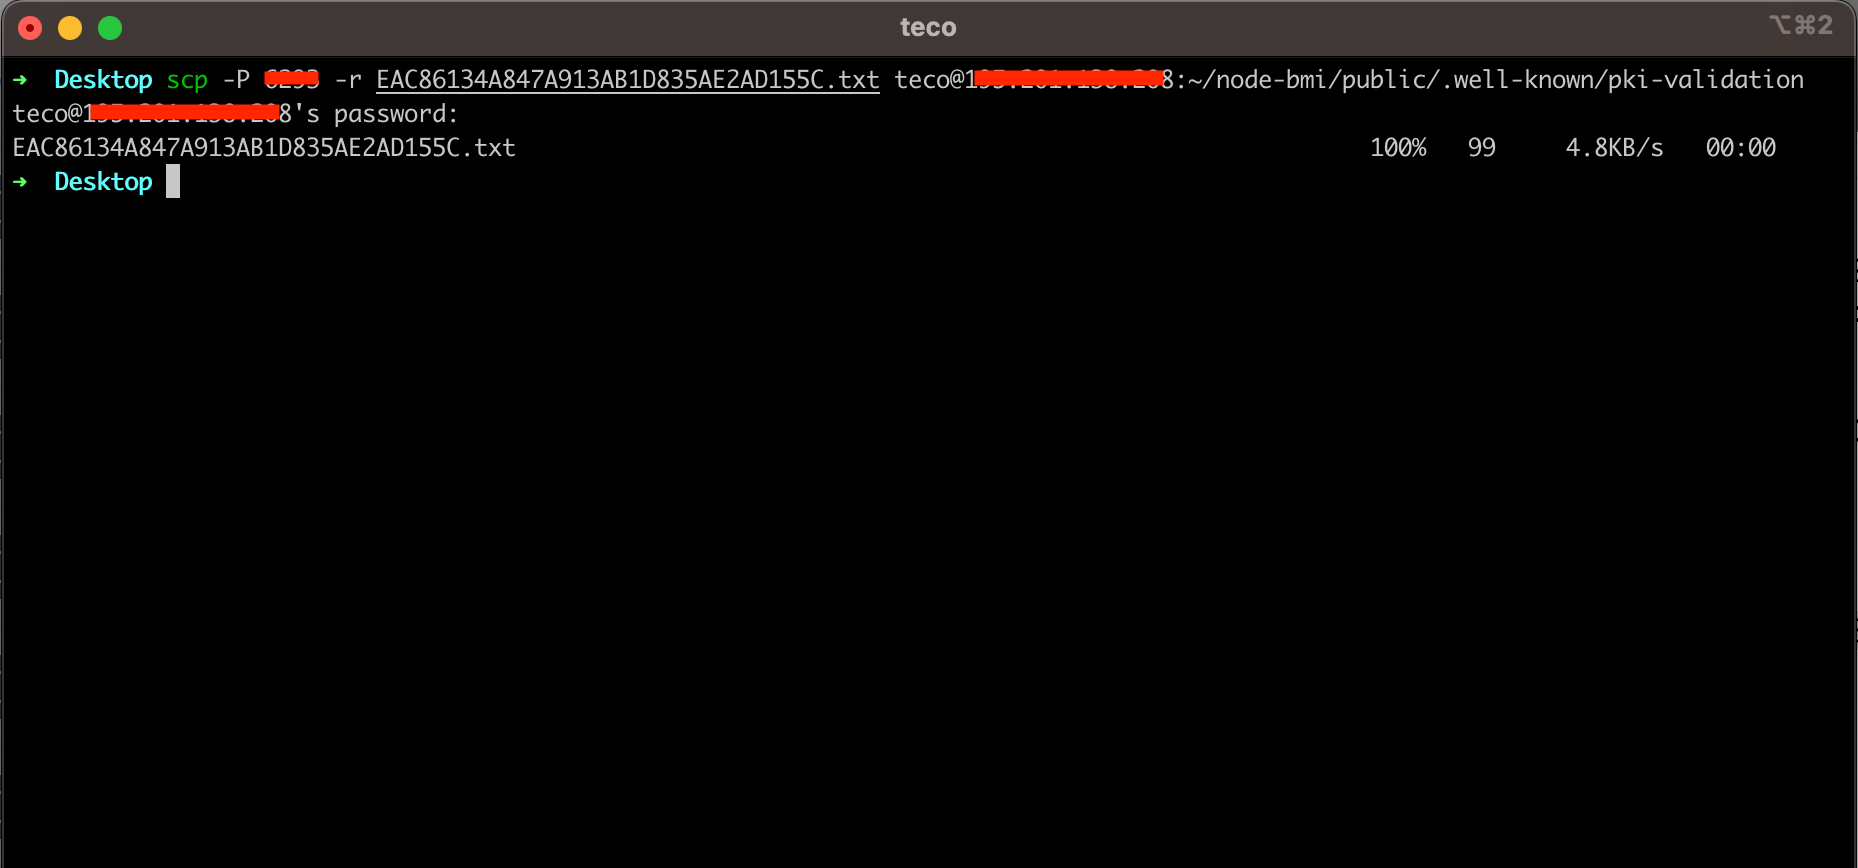
To copy the file from our local computer to the server, will perform a copy over SSH using SCP; if you want to learn more about it, check out the post I wrote about.

Before running the command, log into the server and create the folder .well-known/pki-validation in the application public folder.
cd node-bmi/public
mkdir -p .well-known/pki-validation
We can run the command below to copy the file into the server application's public folder.
scp -P <server_port> -r EAC86134A847A913AB1D835AE2AD155C.txt <server_user>@<server_ip>:/path/to/my/app/public/.well-known/pki-validation
This is the command copy in my case:
We can verify that the file is accessible through the application URL by navigating to nodebmi.xyz/.well-known/pki-validation/EAC86134A847A913AB1D835AE2AD155C.txt in the browser.
Go to the ComodoSSL DCV validation page and click on the button "Request verification". Wait for a few minutes, and you should receive a click on the button "Re-check status".
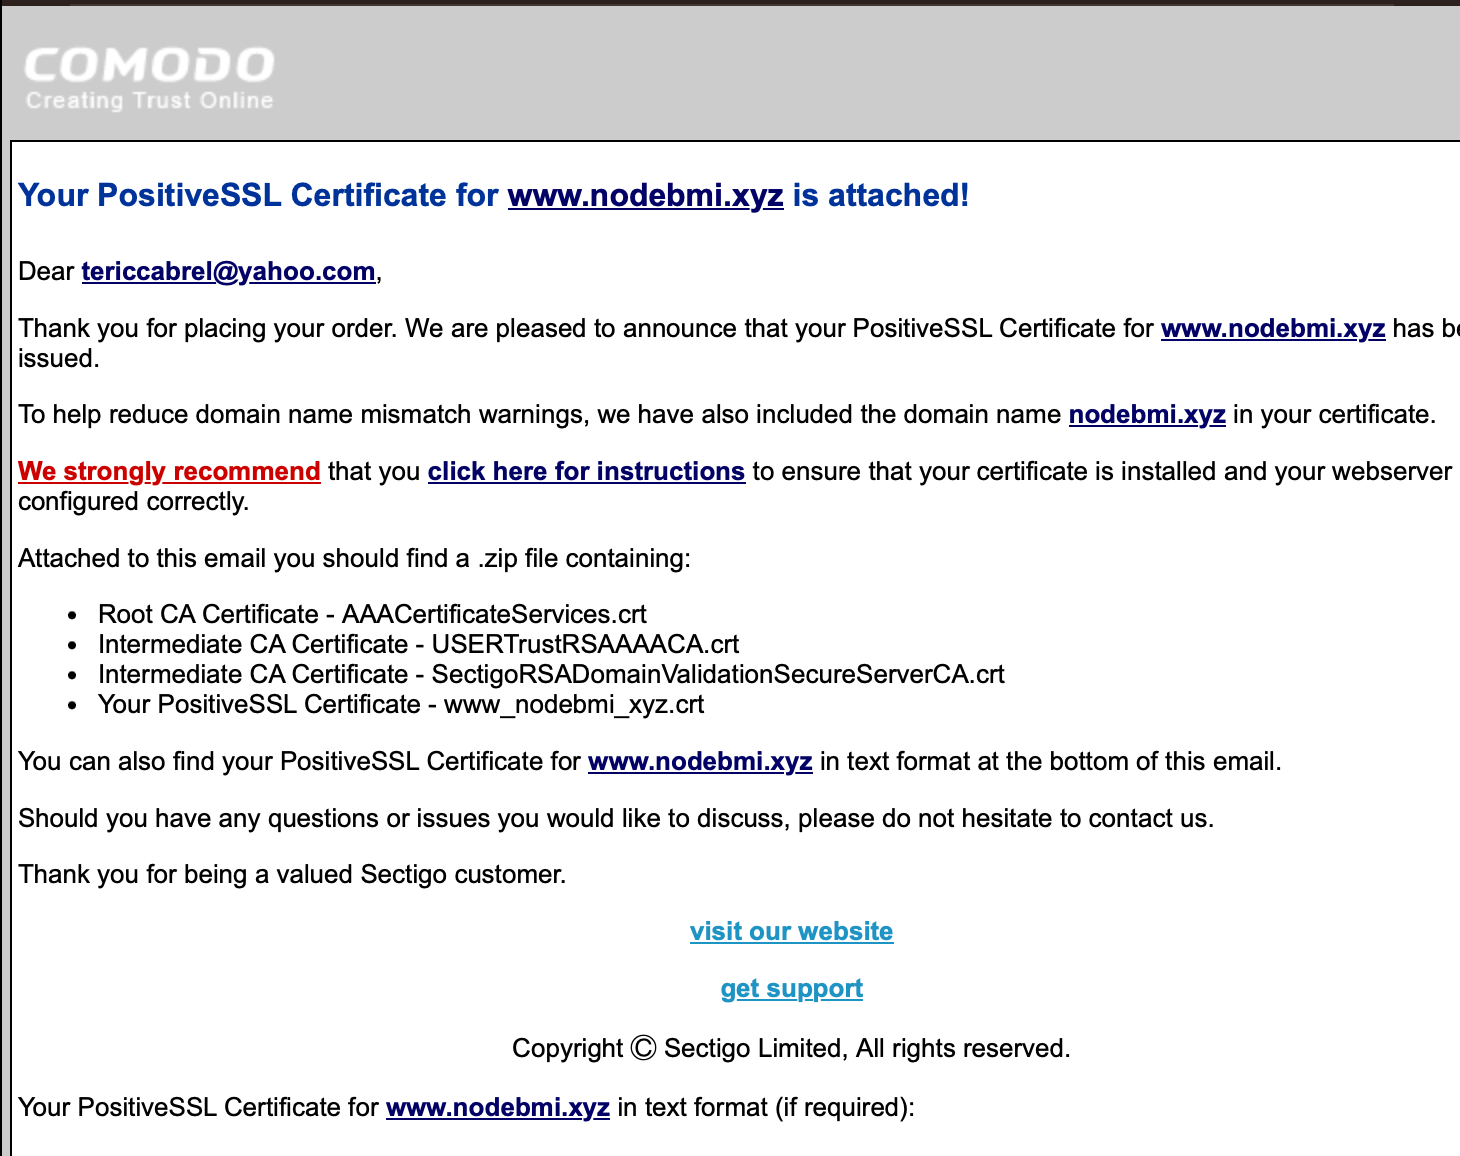
You will receive an email containing the attached certificate; download it.
Concatenate the SSL certificate
As detailed in the email, the certificate is a zip file containing four files that have to be merged into a single one.
Unzip the certificate, then open the unzipped folder, and run the command below to merge the four files:
cat www_nodebmi_xyz.crt AAACertificateServices.crt SectigoRSADomainValidationSecureServerCA.crt USERTrustRSAAAACA.crt >> bundle.crt
The bundled certificate to install on the server is the file bundle.crt
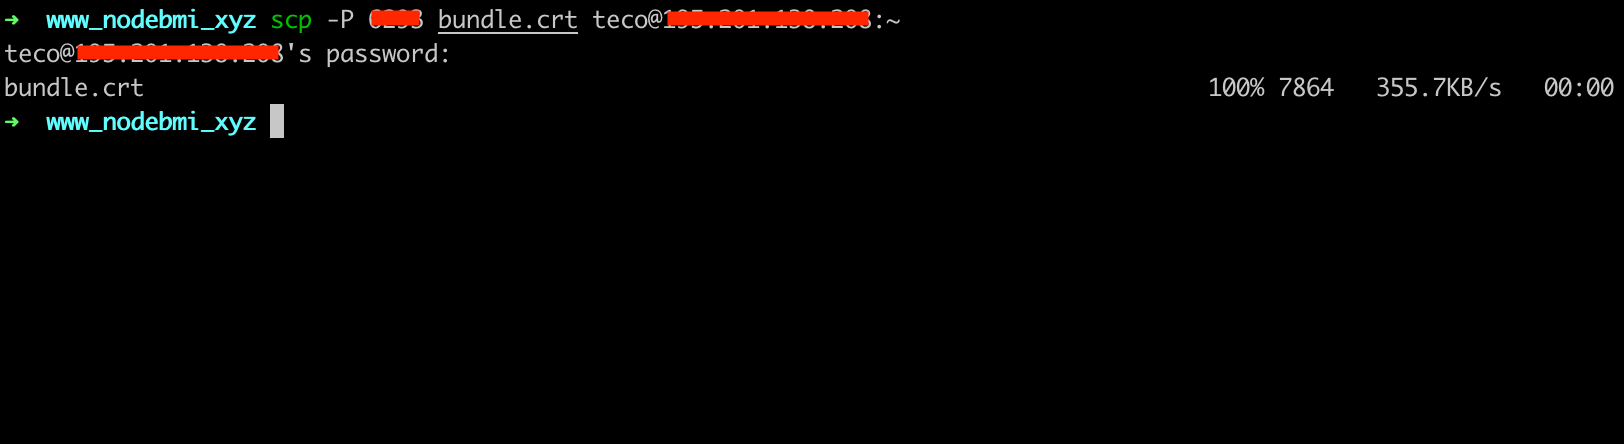
Upload the bundled SSL certificate to the server
We will use the SCP command as before to copy the certificate on the server in the user home directory.
scp -P <server_port> bundle.crt <server_user>@<server_ip>:~
This is the command copy in my case:
Install the SSL certificate
The bundled certificate is on the server in the user's home directory ~/bundle.crt. We must move it into the SSL certificate directory /etc/ssl . You must be an administrator to perform this action.
sudo mv bundle.crt /etc/ssl
We must also copy the private key generated during the CSR creation.
sudo mv ~/.ssh/nodebmi.key /etc/ssl
Edit the Nginx configuration file located at /etc/nginx/sites-available/nodebmi.xyz to install the SSL certificate.
server {
    listen 443 ssl;
    listen [::]:443;

    ssl_certificate /etc/ssl/bundle.crt;
    ssl_certificate_key /etc/ssl/nodebmi.key;

    server_name nodebmi.xyz www.nodebmi.xyz;
    index index.html index.htm;
    access_log /var/log/nginx/nodebmi.log;
    error_log  /var/log/nginx/nodebmi-error.log error;

    location / {
        proxy_set_header X-Forwarded-For $proxy_add_x_forwarded_for;
        proxy_set_header X-Forwarded-Proto $scheme;
        proxy_set_header X-Real-IP $remote_addr;
        proxy_set_header Host $http_host;
        proxy_pass http://127.0.0.1:4600;
        proxy_redirect off;
    }
}
The first six lines are responsible for installing and enabling the SSL certificate for the domain.
Check the configuration is good and reload the Nginx server.
sudo nginx -t
sudo nginx -s reload
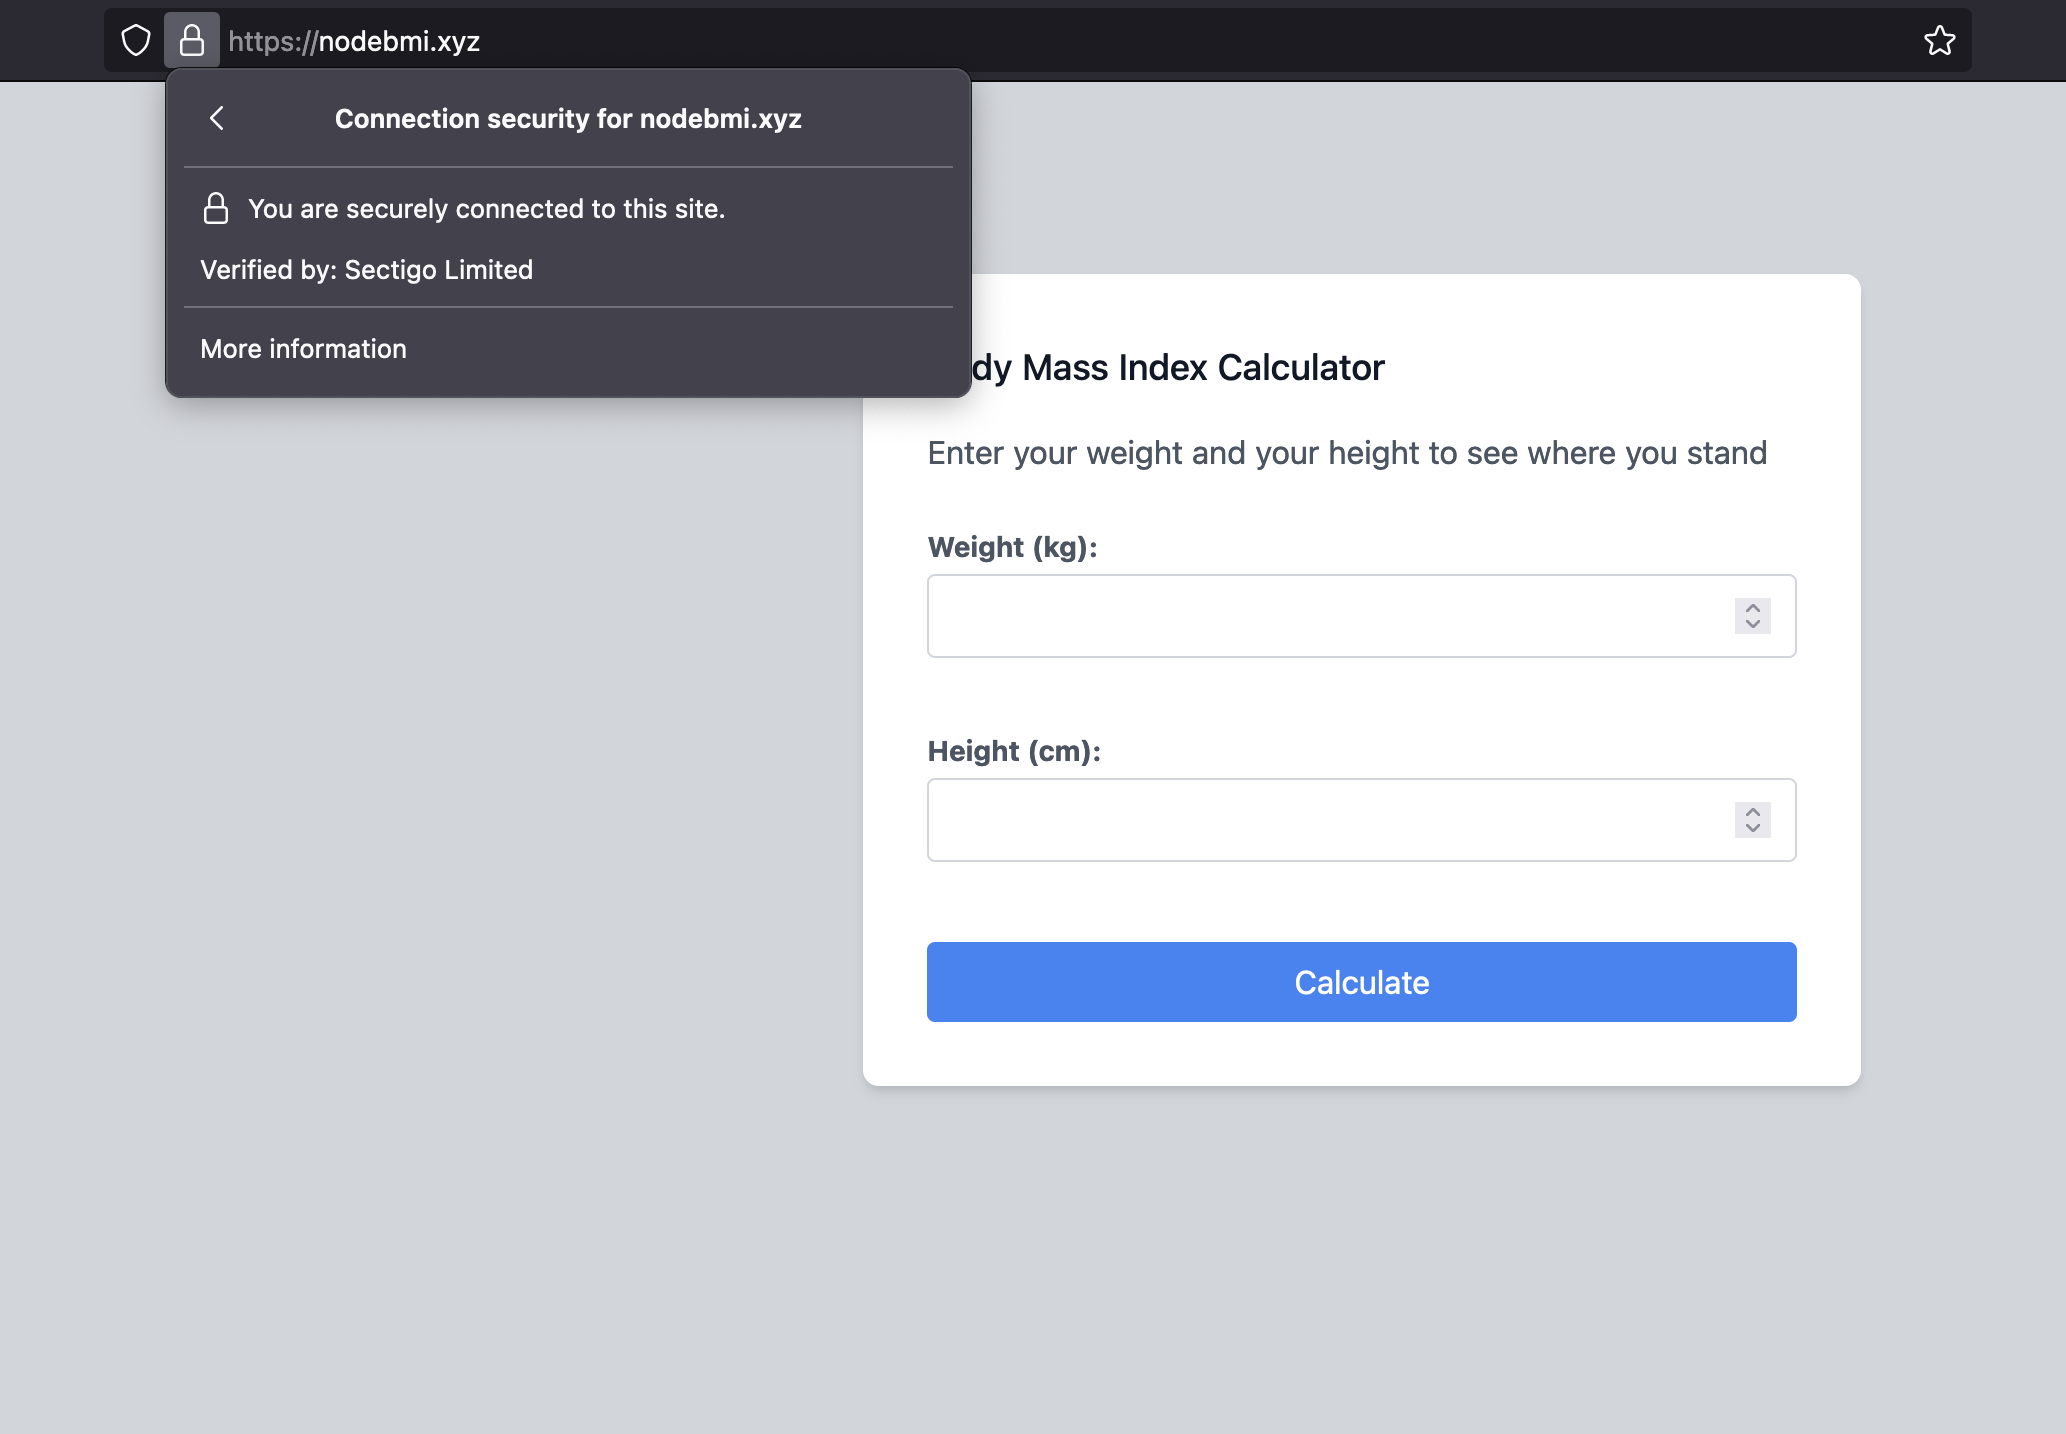
Navigate to the web https://nodebmi.xyz; you can see the website is secured.
Configure redirection from HTTP to HTTPS
Previously, we explicitly typed https://nodemi.xyz, what happens if you type http://nodebmi.xyz or nodebmi.xyz or www.nodebmi.xyz?
To fix this issue, we must update the Nginx configuration to redirect the non-secured URL (HTTPS) to the secured (HTTPS). The final Nginx SSL configuration looks like this:
server {
    if ($host = nodebmi.xyz) {
        return 301 https://$host$request_uri;
    }

    if ($host = www.nodebmi.xyz) {
        return 301 https://$host$request_uri;
    }

    listen 80;
    listen [::]:80;

    server_name nodebmi.xyz www.nodebmi.xyz;
    return 404;
}

server {
    listen 443 ssl;
    listen [::]:443;

    ssl_certificate /etc/ssl/bundle.crt;
    ssl_certificate_key /etc/ssl/nodebmi.key;

    server_name nodebmi.xyz www.nodebmi.xyz;
    index index.html index.htm;
    access_log /var/log/nginx/nodebmi.log;
    error_log  /var/log/nginx/nodebmi-error.log error;

    location / {
        proxy_set_header X-Forwarded-For $proxy_add_x_forwarded_for;
        proxy_set_header X-Forwarded-Proto $scheme;
        proxy_set_header X-Real-IP $remote_addr;
        proxy_set_header Host $http_host;
        proxy_pass http://127.0.0.1:4600;
        proxy_redirect off;
    }
}
Check the configuration is good and reload the Nginx server.
sudo nginx -t
sudo nginx -s reload
Navigate to the non-secured website again; it now shows the web application on HTTPS as we want.
Wrap up
Generating an SSL certificate is a tedious process, and below is the takeaway:
- Order an SSL certificate from a Certificate Authority.
- Generate the Certificate Signing Request on the application server.
- Submit the CSR to the CA and perform the Domain Control validation.
- Download, concatenate the certificates to a single one, and upload to the server.
- Install the SSL certificate on Nginx and configure the HTTP redirection
Every year you must renew the certificate by performing the last three steps. The Certificate Authority will notify you 1-2 months before the expiration.
Follow me on Twitter or subscribe to my newsletter to avoid missing the upcoming posts and the tips and tricks I occasionally share.