
Set up a Node.js project with TypeScript and Biome


Biome is a fast code formatter and a performant code linter developers use to save time spent on linting and formatting their code.
Here are some advantages to using Biome:
- It is faster at linting and formatting code than other tools.
- It is easy to set up and use it with zero configuration.
- The conciseness of the linting and formatting errors.
- The ability to fix automatically many errors found in your code.
- The integration with majors code editor and IDE.
This post will show you how to set up Node.js with TypeScript and use Biome as our code linter and formatter.
Prerequisites
To follow this tutorial, make sure you have the following tools installed on your computer.
- Node.js 18 or higher - Follow the installation guide
- A Node Package Manager such as NPM or Yarn. We will use Yarn.
Biome can work with Node.js 14 or higher, but we set the starting to 18 because building Node.js applications with a recent and maintained version is suitable.
If you still use a Node.js version < 18, you can follow this tutorial, but I recommend upgrading your Node.js.
Set up the Node.js project
Let's create a folder to hold the code and initialize a Node.js project. Open the terminal and run the following command:
mkdir node-ts-starter

cd node-ts-starter

yarn init
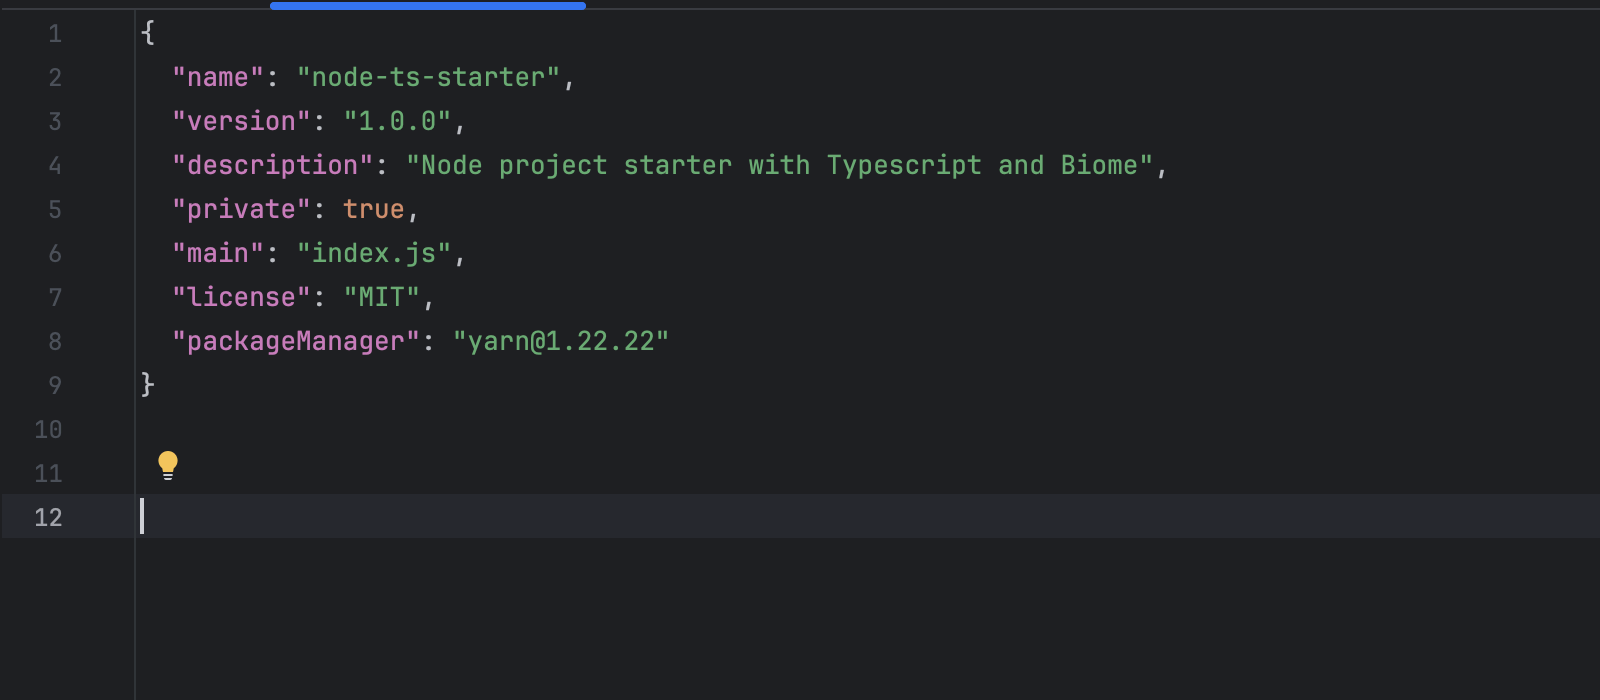
The last command initializes a new Node.js project; you will be asked to answer some questions about your project. After the execution, a "package.json" file is created.
Add TypeScript to the project.
Run the commands below to install the latest version of TypeScript:
yarn add typescript
yarn add -D @types/node
The second line provides definitions of the types of Node.js native modules such as http, fs, path, cluster, etc.
Let's configure TypeScript by generating a file named "tsconfig.json" containing settings to perform type checks and transpile the code to JavaScript.
Run the command below to generate the TypeScript configuration file:
yarn tsc --init
You can customize the "tsconfig.json" as you want. In the end, I will provide the one I use on all my projects in the project repository.
Run the Node.js project
Create an "src" folder, then create a file named "index.ts". Feel free to use your favorite editor or IDE.
mkdir src
touch src/index.ts
Open the file "index.ts" and paste the code below:
const addition = (a: number, b: number): number => {
  return a + b;
};

const number1: number = 5;
const number2: number = 10;
const result: number = addition(number1, number2);

console.log('The result is %d', result);
To run this code, we must install TypeScript runtimes such as TS Node, Tsx, Jiti, or Sucrase. Here is a comparison of features between major TypeScript runtimes.
We will combine TS Node and Nodemon to re-run the project on file change; run the commands below to these two packages.
yarn add -D ts-node nodemon
Run the command below to execute the file:
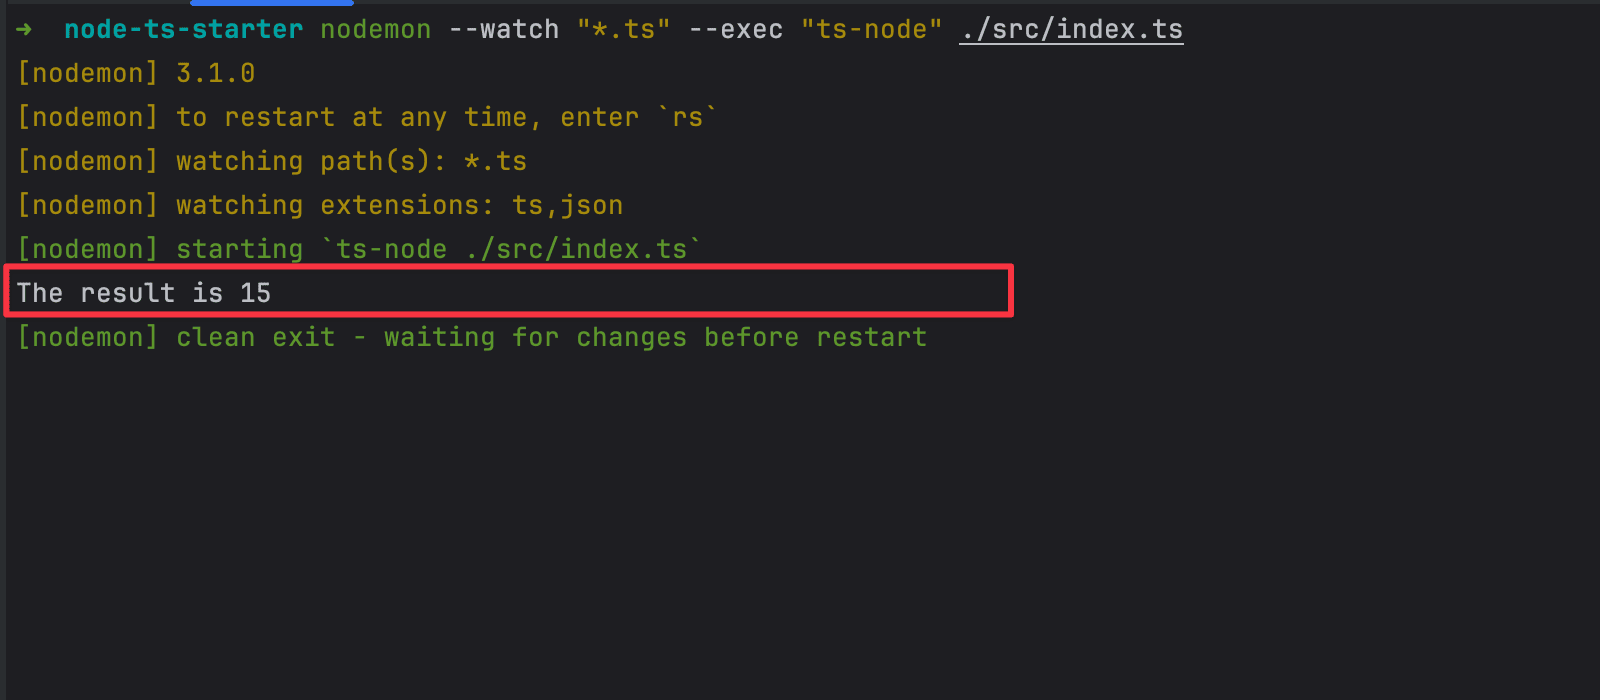
nodemon --watch "*.ts" --exec "ts-node" ./src/index.ts
This watches every change on all files having the .ts extension, then uses ts-node to run the project using the file ./src/index.ts as the entry point.
We get the following output:
Install Biome in Node.js
Run the command below to install the latest version of the package
yarn add --dev --exact @biomejs/biome
Biome maintainers recommend using a fixed version to avoid unexpected behavior.
Let's initialize the Biome configuration file by running the command below:
yarn biome init
The above command generates a file "biome.json" with a default configuration:
{
	"$schema": "https://biomejs.dev/schemas/1.9.2/schema.json",
	"vcs": {
		"enabled": false,
		"clientKind": "git",
		"useIgnoreFile": false
	},
	"files": {
		"ignoreUnknown": false,
		"ignore": []
	},
	"formatter": {
		"enabled": true,
		"indentStyle": "tab"
	},
	"organizeImports": {
		"enabled": true
	},
	"linter": {
		"enabled": true,
		"rules": {
			"recommended": true
		}
	},
	"javascript": {
		"formatter": {
			"quoteStyle": "double"
		}
	}
}
The property "files" allows the definition of the folders and files to apply the lining and formatting.
The property "formatter" represents the default configuration for the code formatting.
The property "organizeImports" is enabled and thus will automatically sort and group modules and file imports.
The property "linter" is enabled and uses a set of predefined rules recommended to lint your code. Check out the recommended rules.
The property "javascript" allows configuring special rules for the linter and formatter for the JavaScipt files. You can do the same for all the supported languages; when none is defined, the global configuration applies.
Configure Linter with Biome
The biome linter is enabled by default with predefined rules, but you can customize it by adding new rules or disabling some predefined rules.
Biome has 279 rules grouped into eight following categories:
- Accessibility: check the errors related to accessibility.
- Complexity: check complex code that can be simplified.
- Correctness: detect code that is guaranteed to be incorrect or useless.
- Performance: detect code that could be written to run faster or could be more efficient.
- Security: detect code that could represent potential security flaws.
- Style: enforce a consistent and idiomatic way of writing your code.
- Suspicious: detect code that is likely to be incorrect or useless.
- Nursery: a set of rules that is still under development and unstable. They are promoted to one of the seven groups once they become stable.
187 rules are enabled by default, and you must manually enable or disable new rules to adjust the linter for your project.
Configure Formatter with Biome
Although the formatting rules aren't defined in the Biome configuration file, it is enabled by default and will format your code following the default rules defined, which is the following code:
{
  "formatter": {
    "enabled": true,
    "formatWithErrors": false,
    "ignore": [],
    "attributePosition": "auto",
    "indentStyle": "tab",
    "indentWidth": 2,
    "lineEnding": "lf",
    "lineWidth": 80
  },
  "javascript": {
    "formatter": {
      "arrowParentheses":"always",
      "bracketSameLine": false,
      "bracketSpacing": true,
      "jsxQuoteStyle": "double",
      "quoteProperties": "asNeeded",
      "semicolons": "always",
      "trailingComma": "all"
    }
  },
  "json": {
    "formatter": {
      "trailingCommas": "none"
    }
  }
}
The "formatter" property applies to any files marked in the project, regardless of the supported programming languages.
The properties "javascript" and "json" define formatter options for these related languages.
You can now edit them to suit your code formatting preferences.
Let's say we want to define the following rules:
- For all files, the line width is 100.
- For JavaScript files, use a single quote instead of the double one.
- For JSON files, use a space indentation instead of a tab.
Below is the Biome formatter configuration to define the above rules:
{
  "formatter": {
		"enabled": true,
		"formatWithErrors": false,
		"ignore": [],
		"indentStyle": "tab",
		"lineEnding": "lf",
		"lineWidth": 100
	},
	"javascript": {
		"formatter": {
			"quoteStyle": "single"
		}
	},
	"json": {
		"formatter": {
			"indentStyle": "space"
		}
	}
}
When a formatter rule is not defined, Biome will use the default value if it exists. For example, the JavaScript formatter has the rule "semicolons" with the default value of "all". It helps keep a light configuration file.
Lint files locally with Biome
The complete complete configuration is the following:
{
	"$schema": "https://biomejs.dev/schemas/1.9.2/schema.json",
	"vcs": {
		"clientKind": "git",
		"enabled": true,
		"useIgnoreFile": true
	},
	"organizeImports": {
		"enabled": true
	},
	"linter": {
		"enabled": true,
		"rules": {
			"recommended": true
		}
	},
	"formatter": {
		"enabled": true,
		"formatWithErrors": false,
		"ignore": [],
		"indentStyle": "tab",
		"lineEnding": "lf",
		"lineWidth": 100
	},
	"javascript": {
		"formatter": {
			"quoteStyle": "single"
		}
	},
	"json": {
		"formatter": {
			"indentStyle": "space"
		}
	}
}
Let's create a new file, "src/lint.ts" with the following code:
const names = ['Eric', 'Fabrice', 'Pavel', 'Sanix', 'Ange']

names.forEach((name) => {
  console.log('Hello ' + name + '!');
});
Run the following command to lint files in the "src" folders:
yarm biome lint ./src
We get the following output.
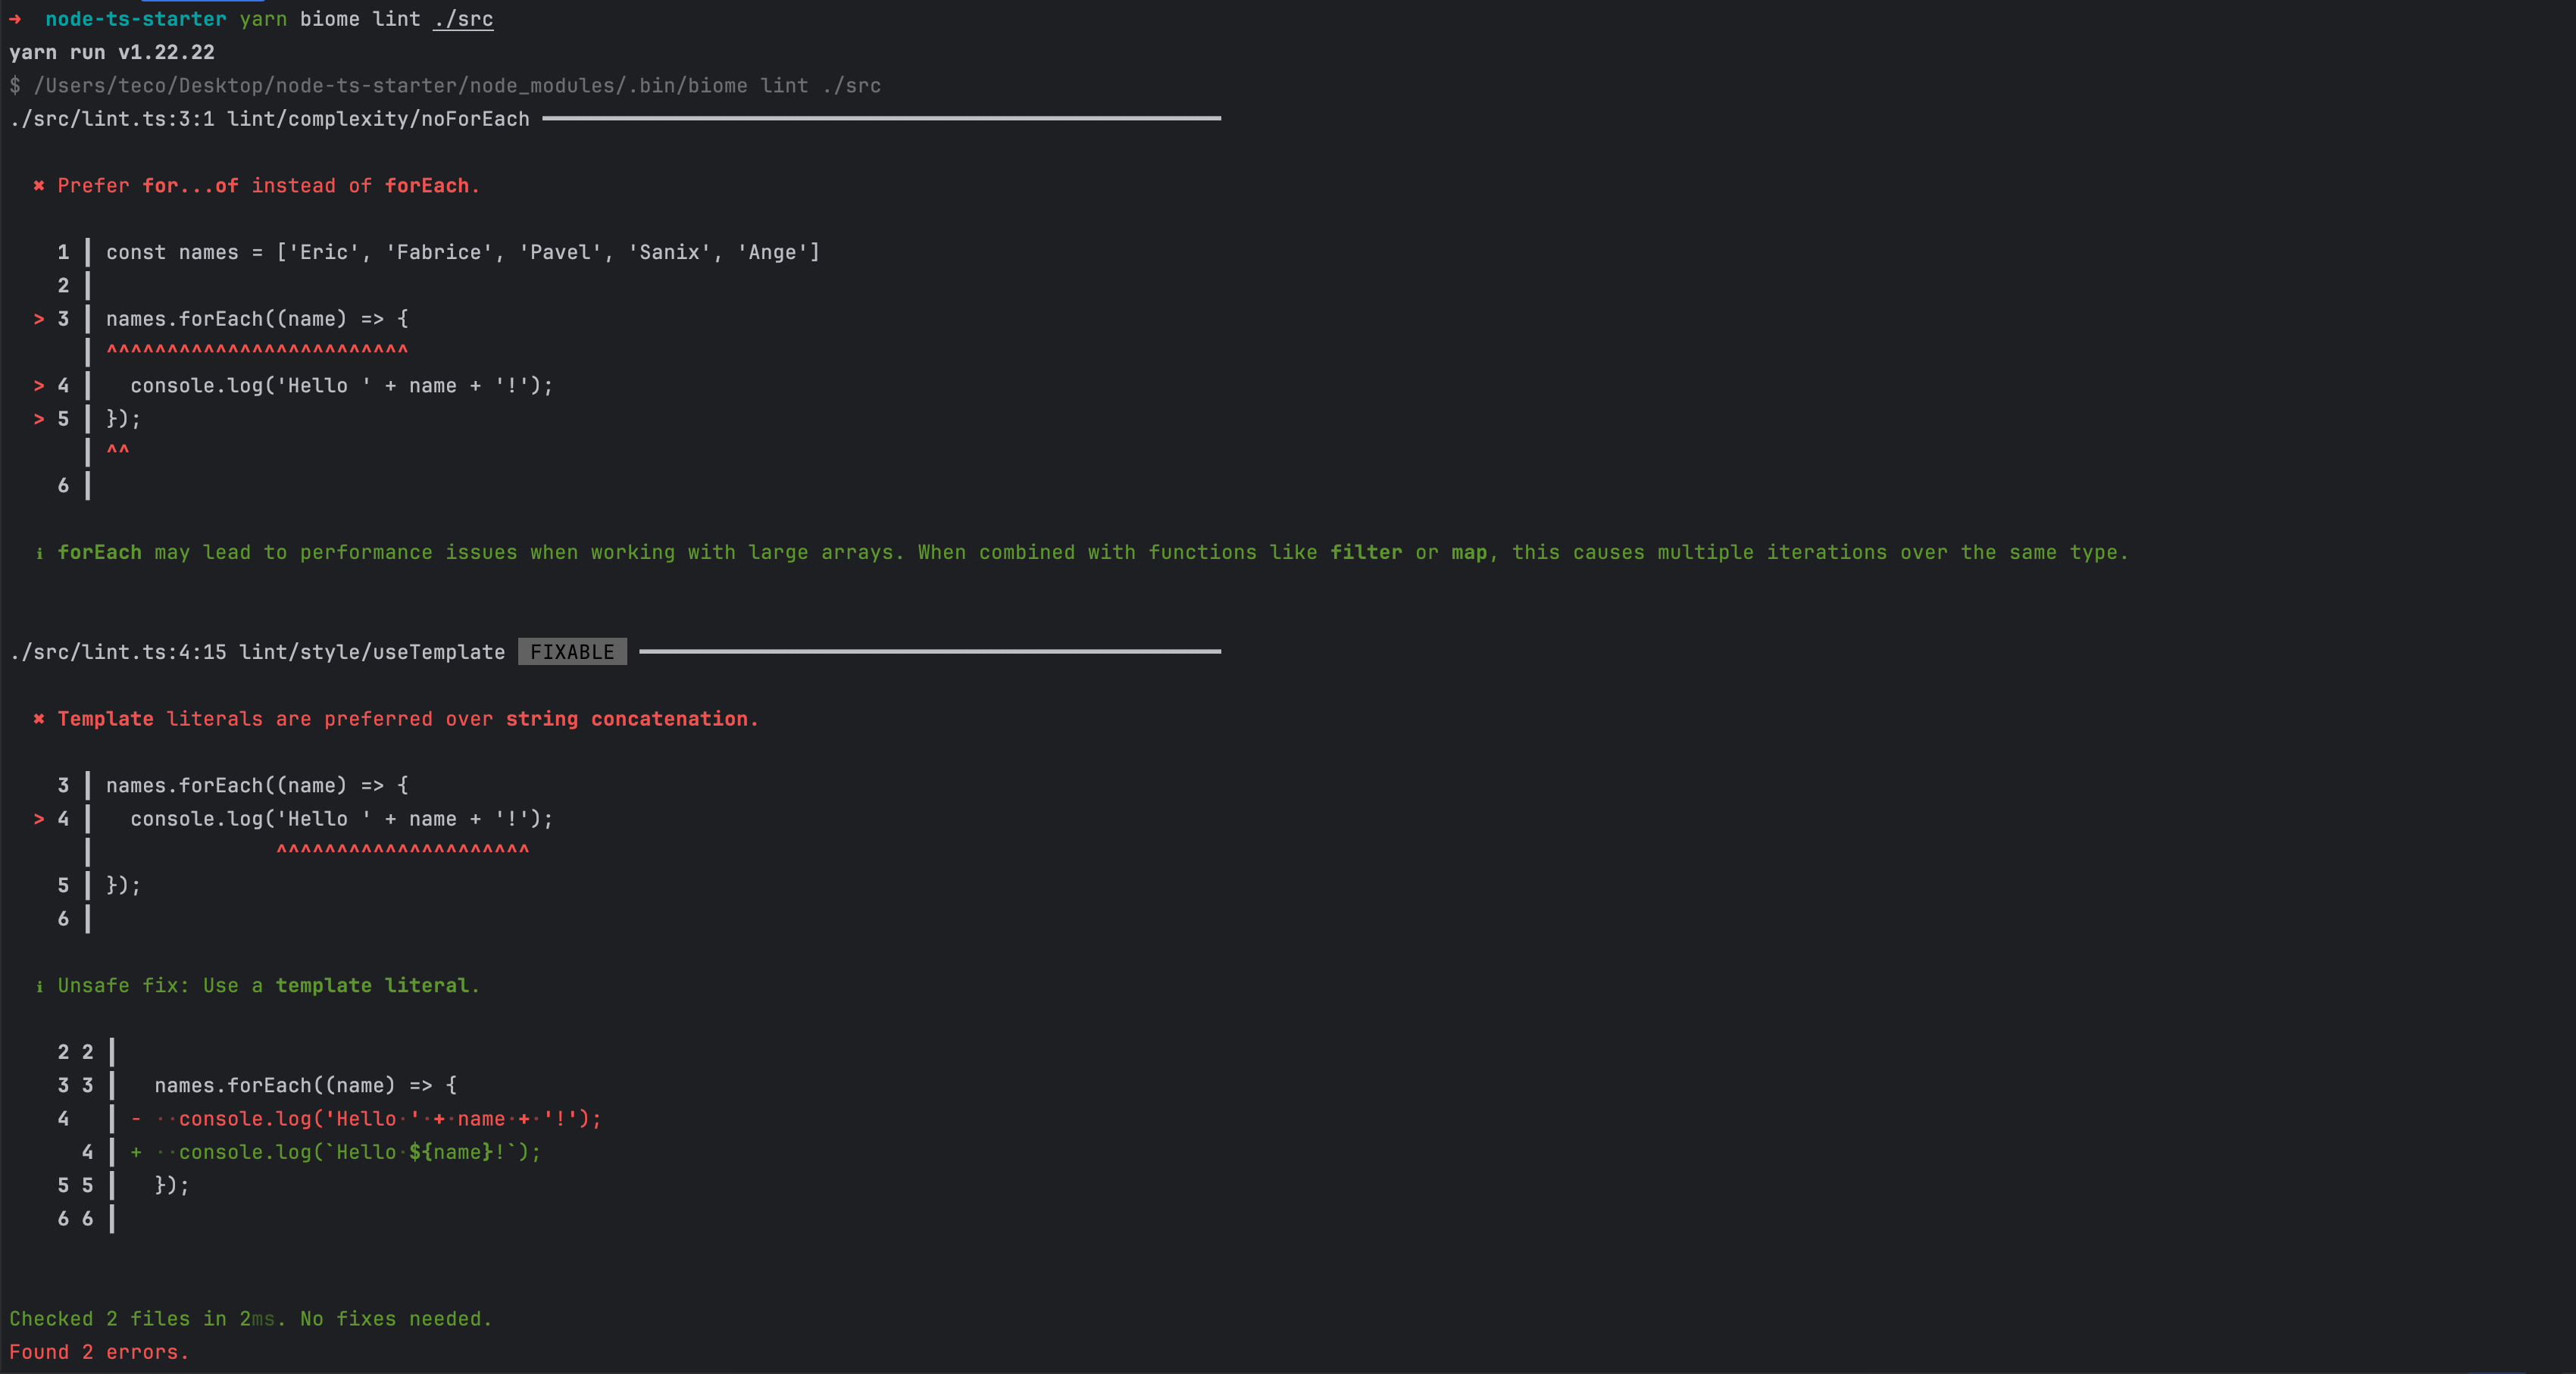
Biome detected two errors in the file "src/lint.ts":
- It recommends using
for...ofinsteadfor...each - It recommends using template literal instead of string concatenation; Biome can automatically fix it.
To lint files in the "src" folders and fix safe errors, run the following command:
yarn biome lint --write ./src
We get the following output:
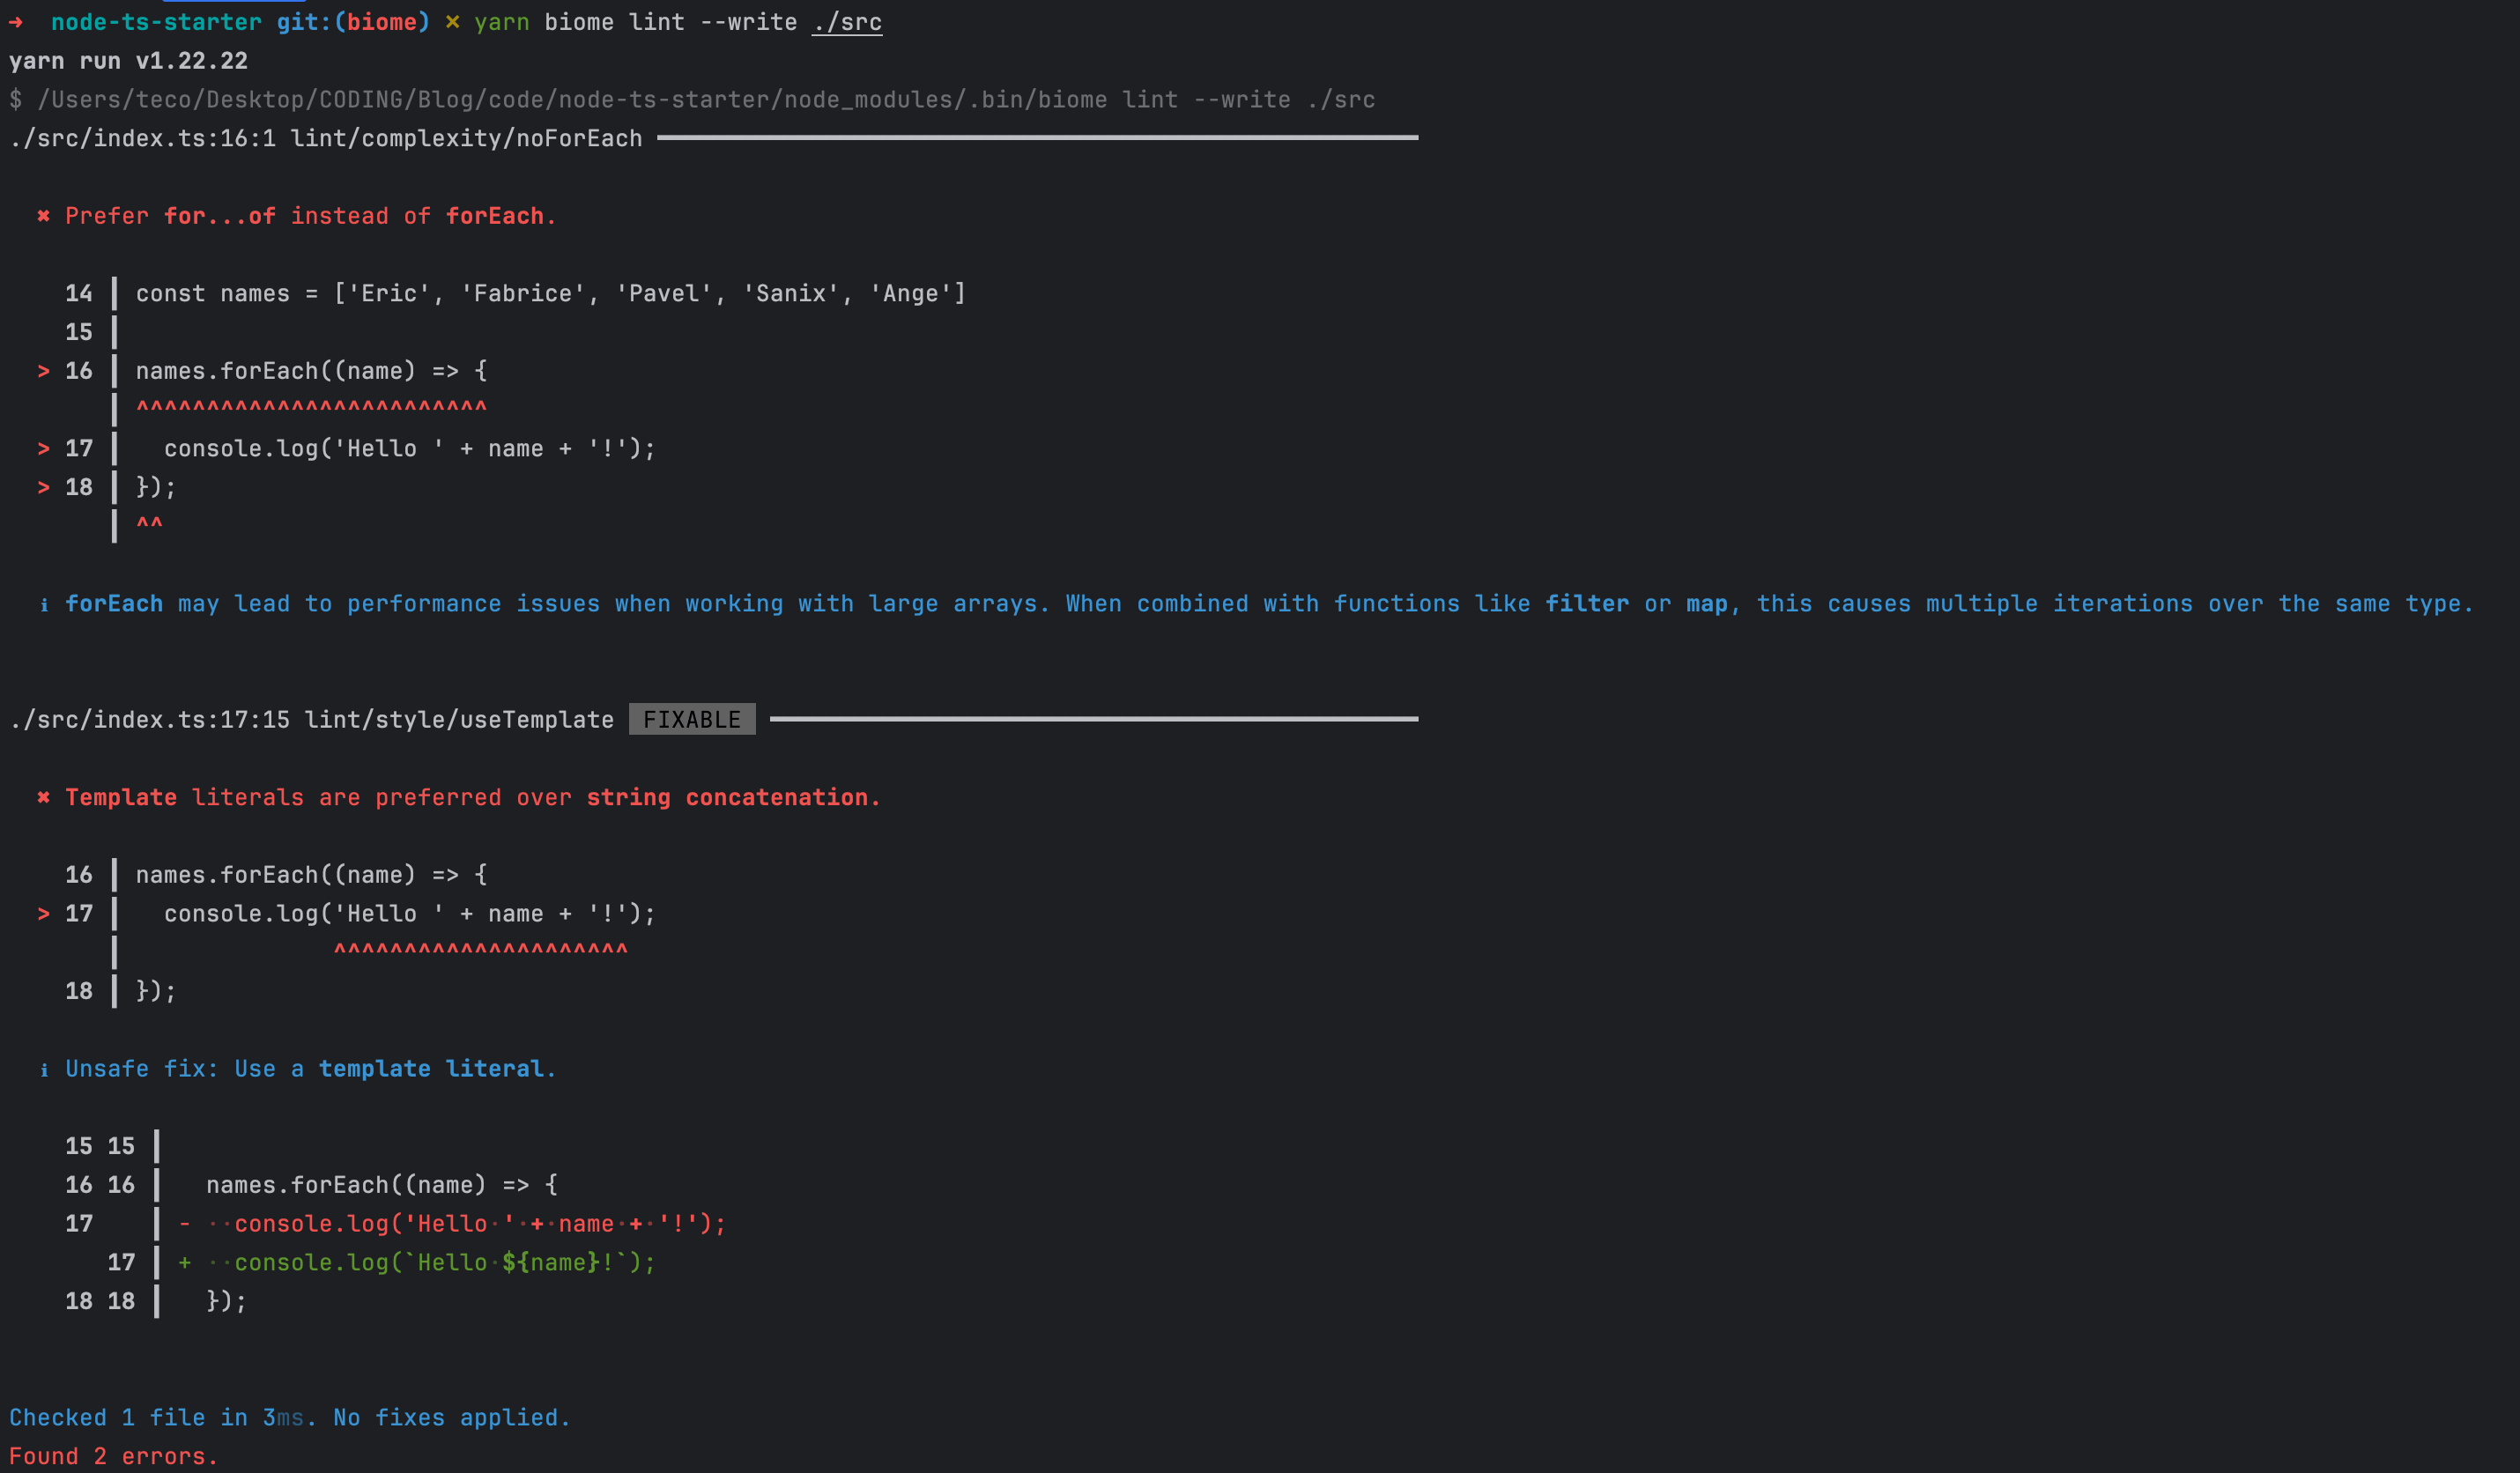
Biome still found two errors, although the second one is fixable; it is because the fix is marked unsafe and requires user verification.
If the fix suggested by Biome looks good to you, run the following command to apply the unsafe fix:
yarn biome lint --write --unsafe ./src
We get the following output:
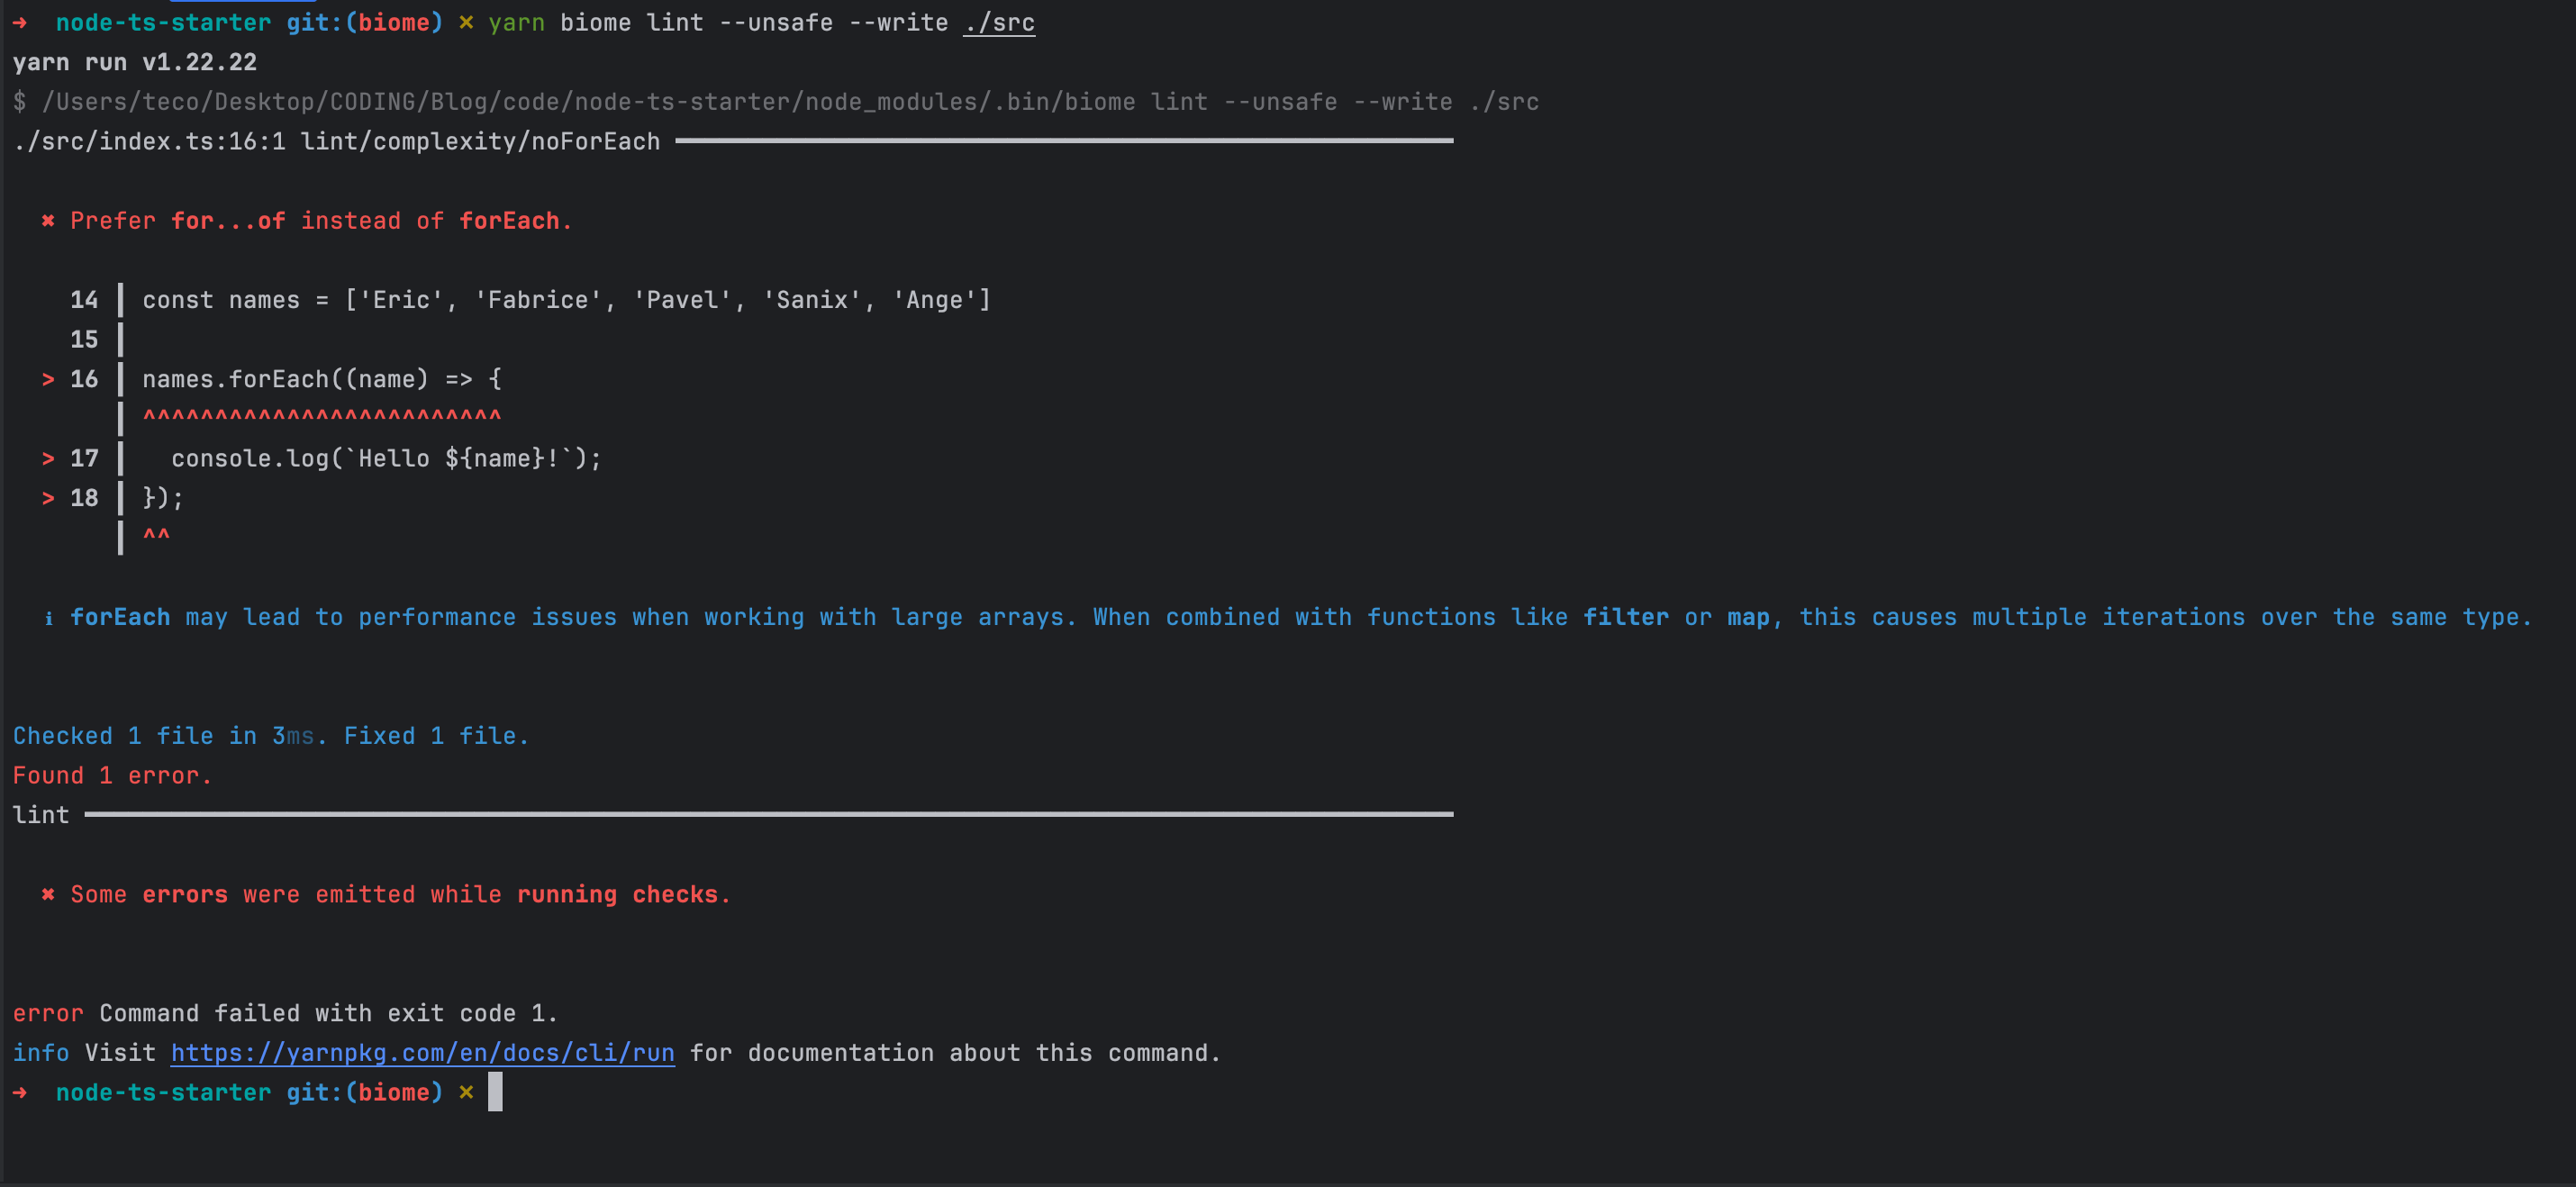
Only one error remains, and we must fix it manually.
const names = ['Eric', 'Fabrice', 'Pavel', 'Sanix', 'Ange'];

for (const name of names) {
	console.log(`Hello ${name}!`);
}
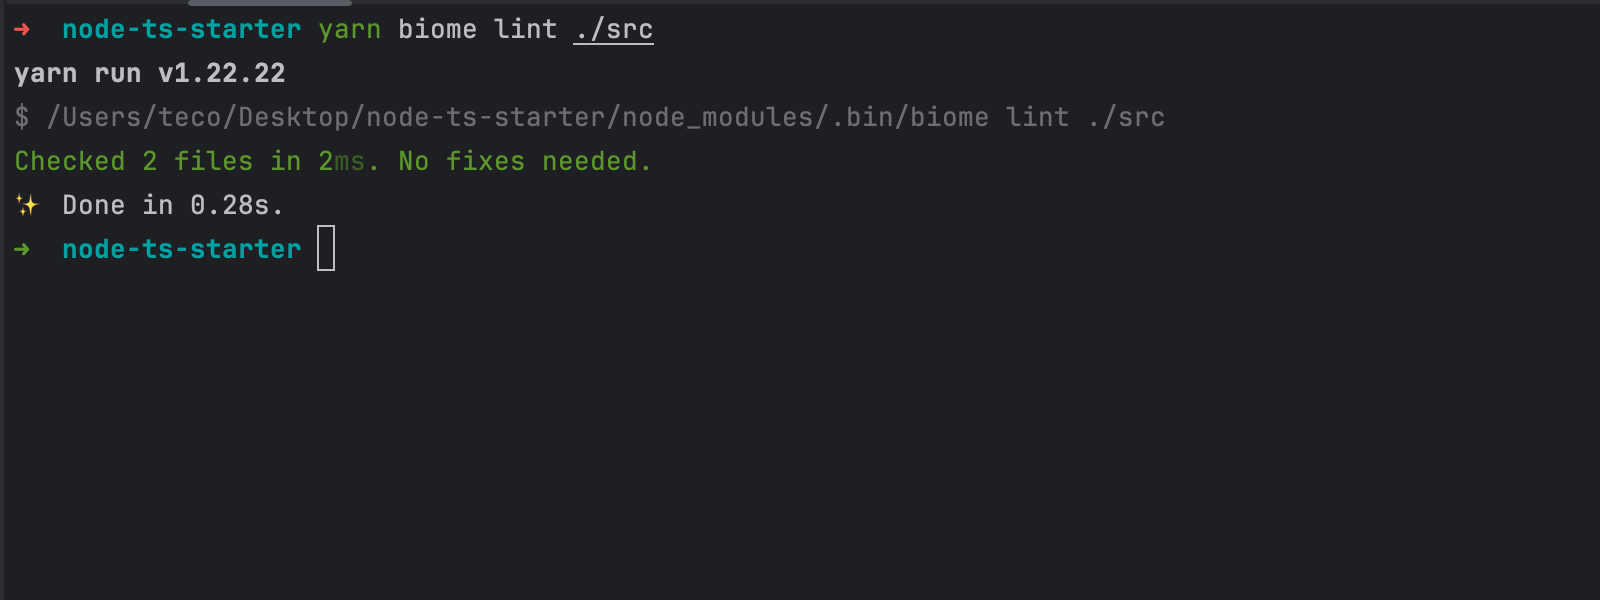
Re-run un the command to lint the files, and you will get the following output:
Format files locally with Biome
To format files in the "src" folders, run the following command:
yarn biome format ./src
We get the following output.
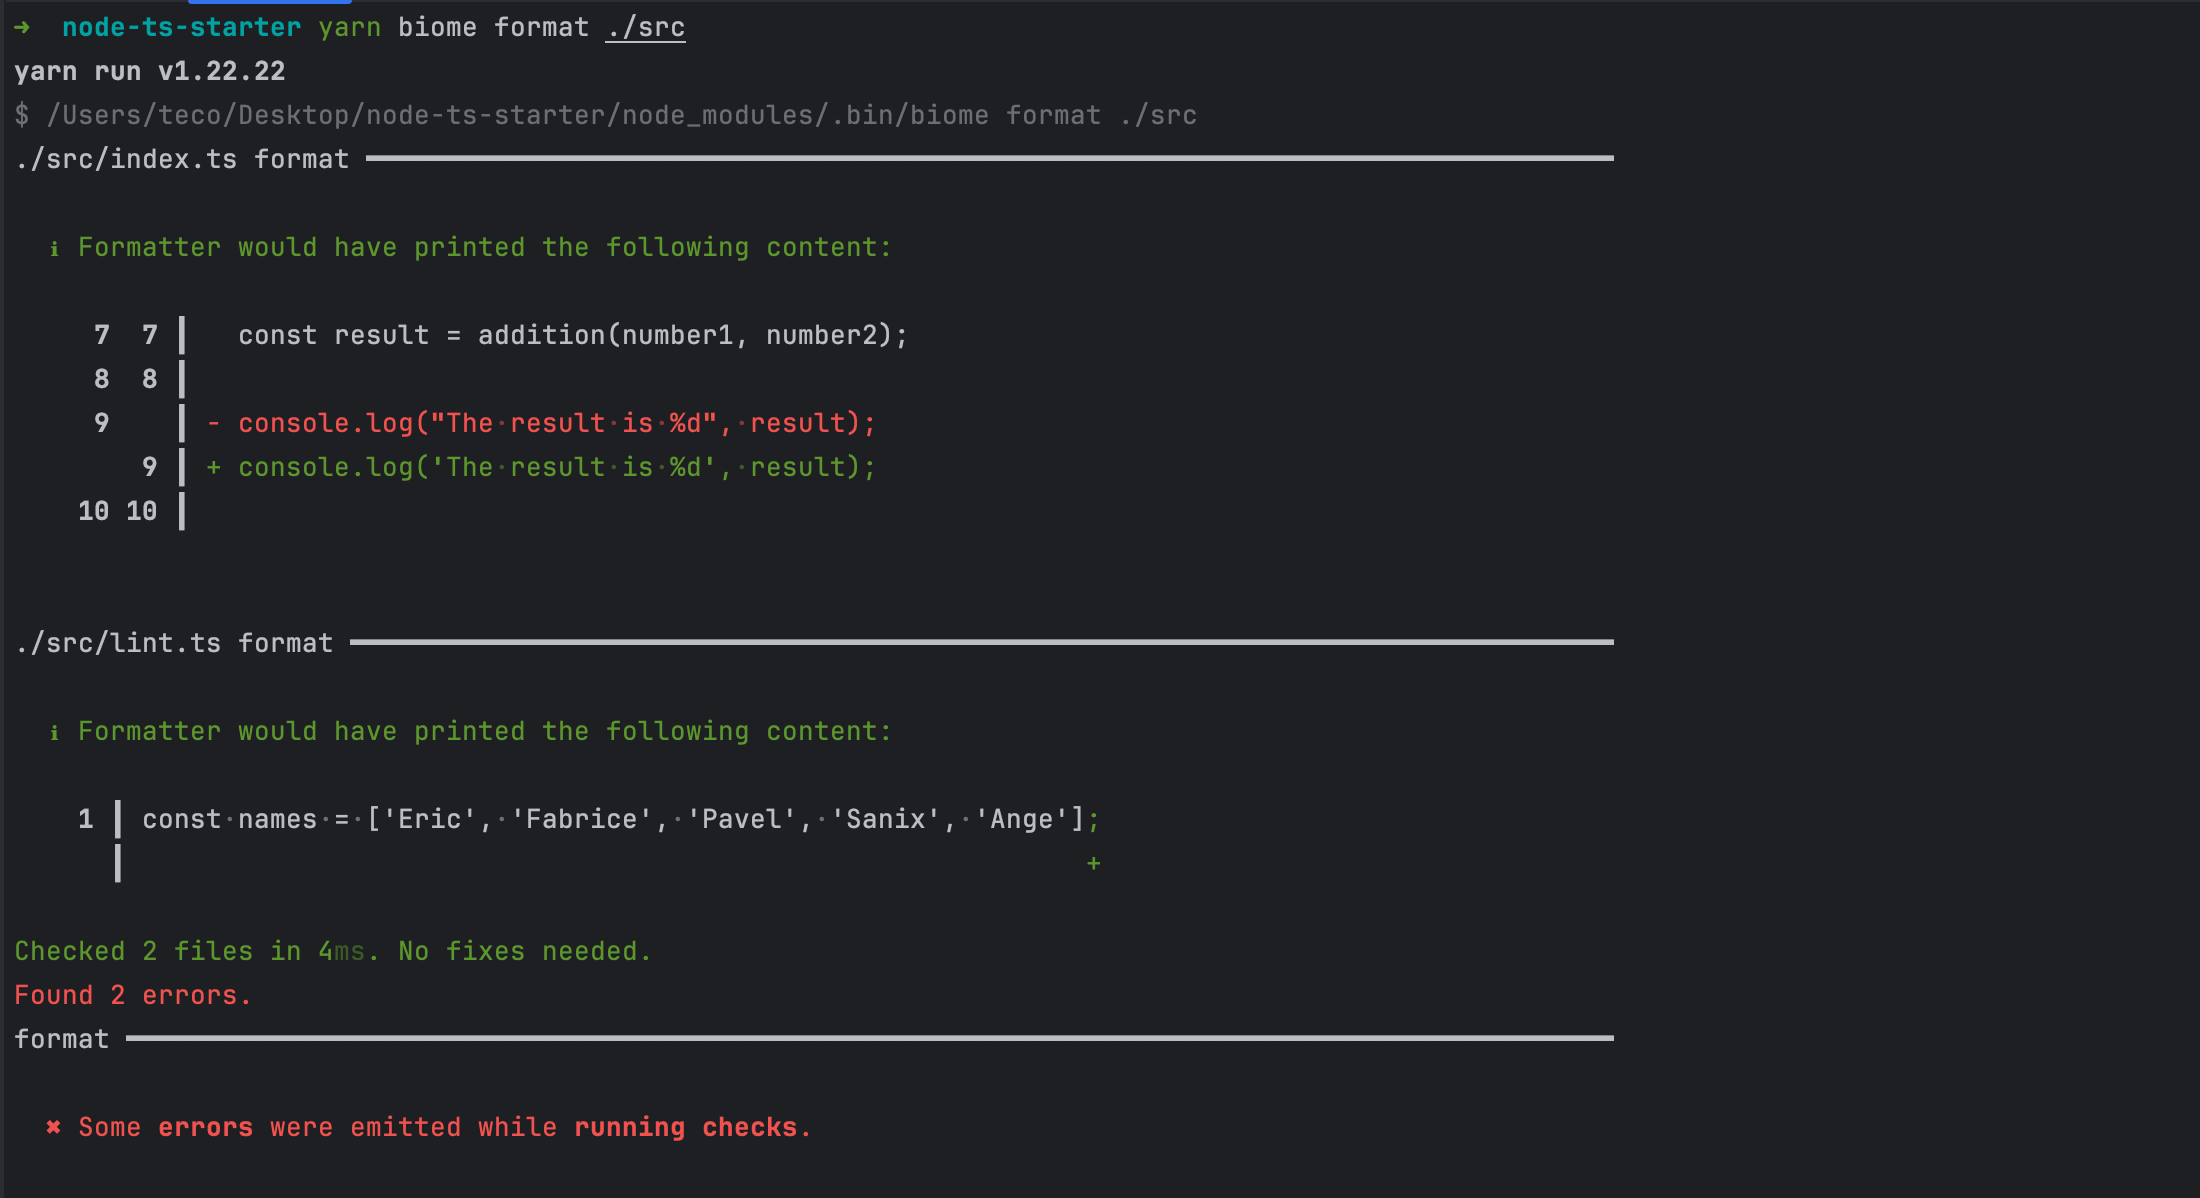
Biome detected two errors in the file "src/index.ts" and "src/lint.ts":
To format files in the "src" folders and fix errors, run the following command:
yarn biome format --write ./src
We get the following output.

Lint and Format files locally with Biome
Biome provides a single command to perform the project's linting and formatting; additionally, it organizes file imports.
Run the command below:
yarn biome check .
The "." means to use the current folder (project root) as the entry directory.
If you want to apply fixes after the lint and format, run the command below:
yarn biome check --write .
Lint and format on Git commit with Biome
Before committing staged files in the Git history, you can lint them using Biome to prevent committing files from not matching the linting and formatting rules.
To do that, we will use Husky, which is a popular hook manager; let's install and initialize it:
yarn add -D husky

yarn husky init

yarn install
The yarn husky init command will:
- Add a "prepare" script in the package.json that will be executed every time you run
yarn install. - Create a folder ".husky" with a file related to the pre-commit hook.
Husky doesn't hide unstaged changes and cannot provide the list of staged files. We must use a tool that does that for us, like lint-staged; let's install it"
yarn add -D lint-staged
We want to run lint-staged on the pre-commit hook, so replace the content of the file ".husky/pre-commit" with the content below:
lint-staged
Update the "package.json" to add the following lint-staged configuration:
"lint-staged": {
    "*": [
      "biome check --write --no-errors-on-unmatched --files-ignore-unknown=true"
    ]
}
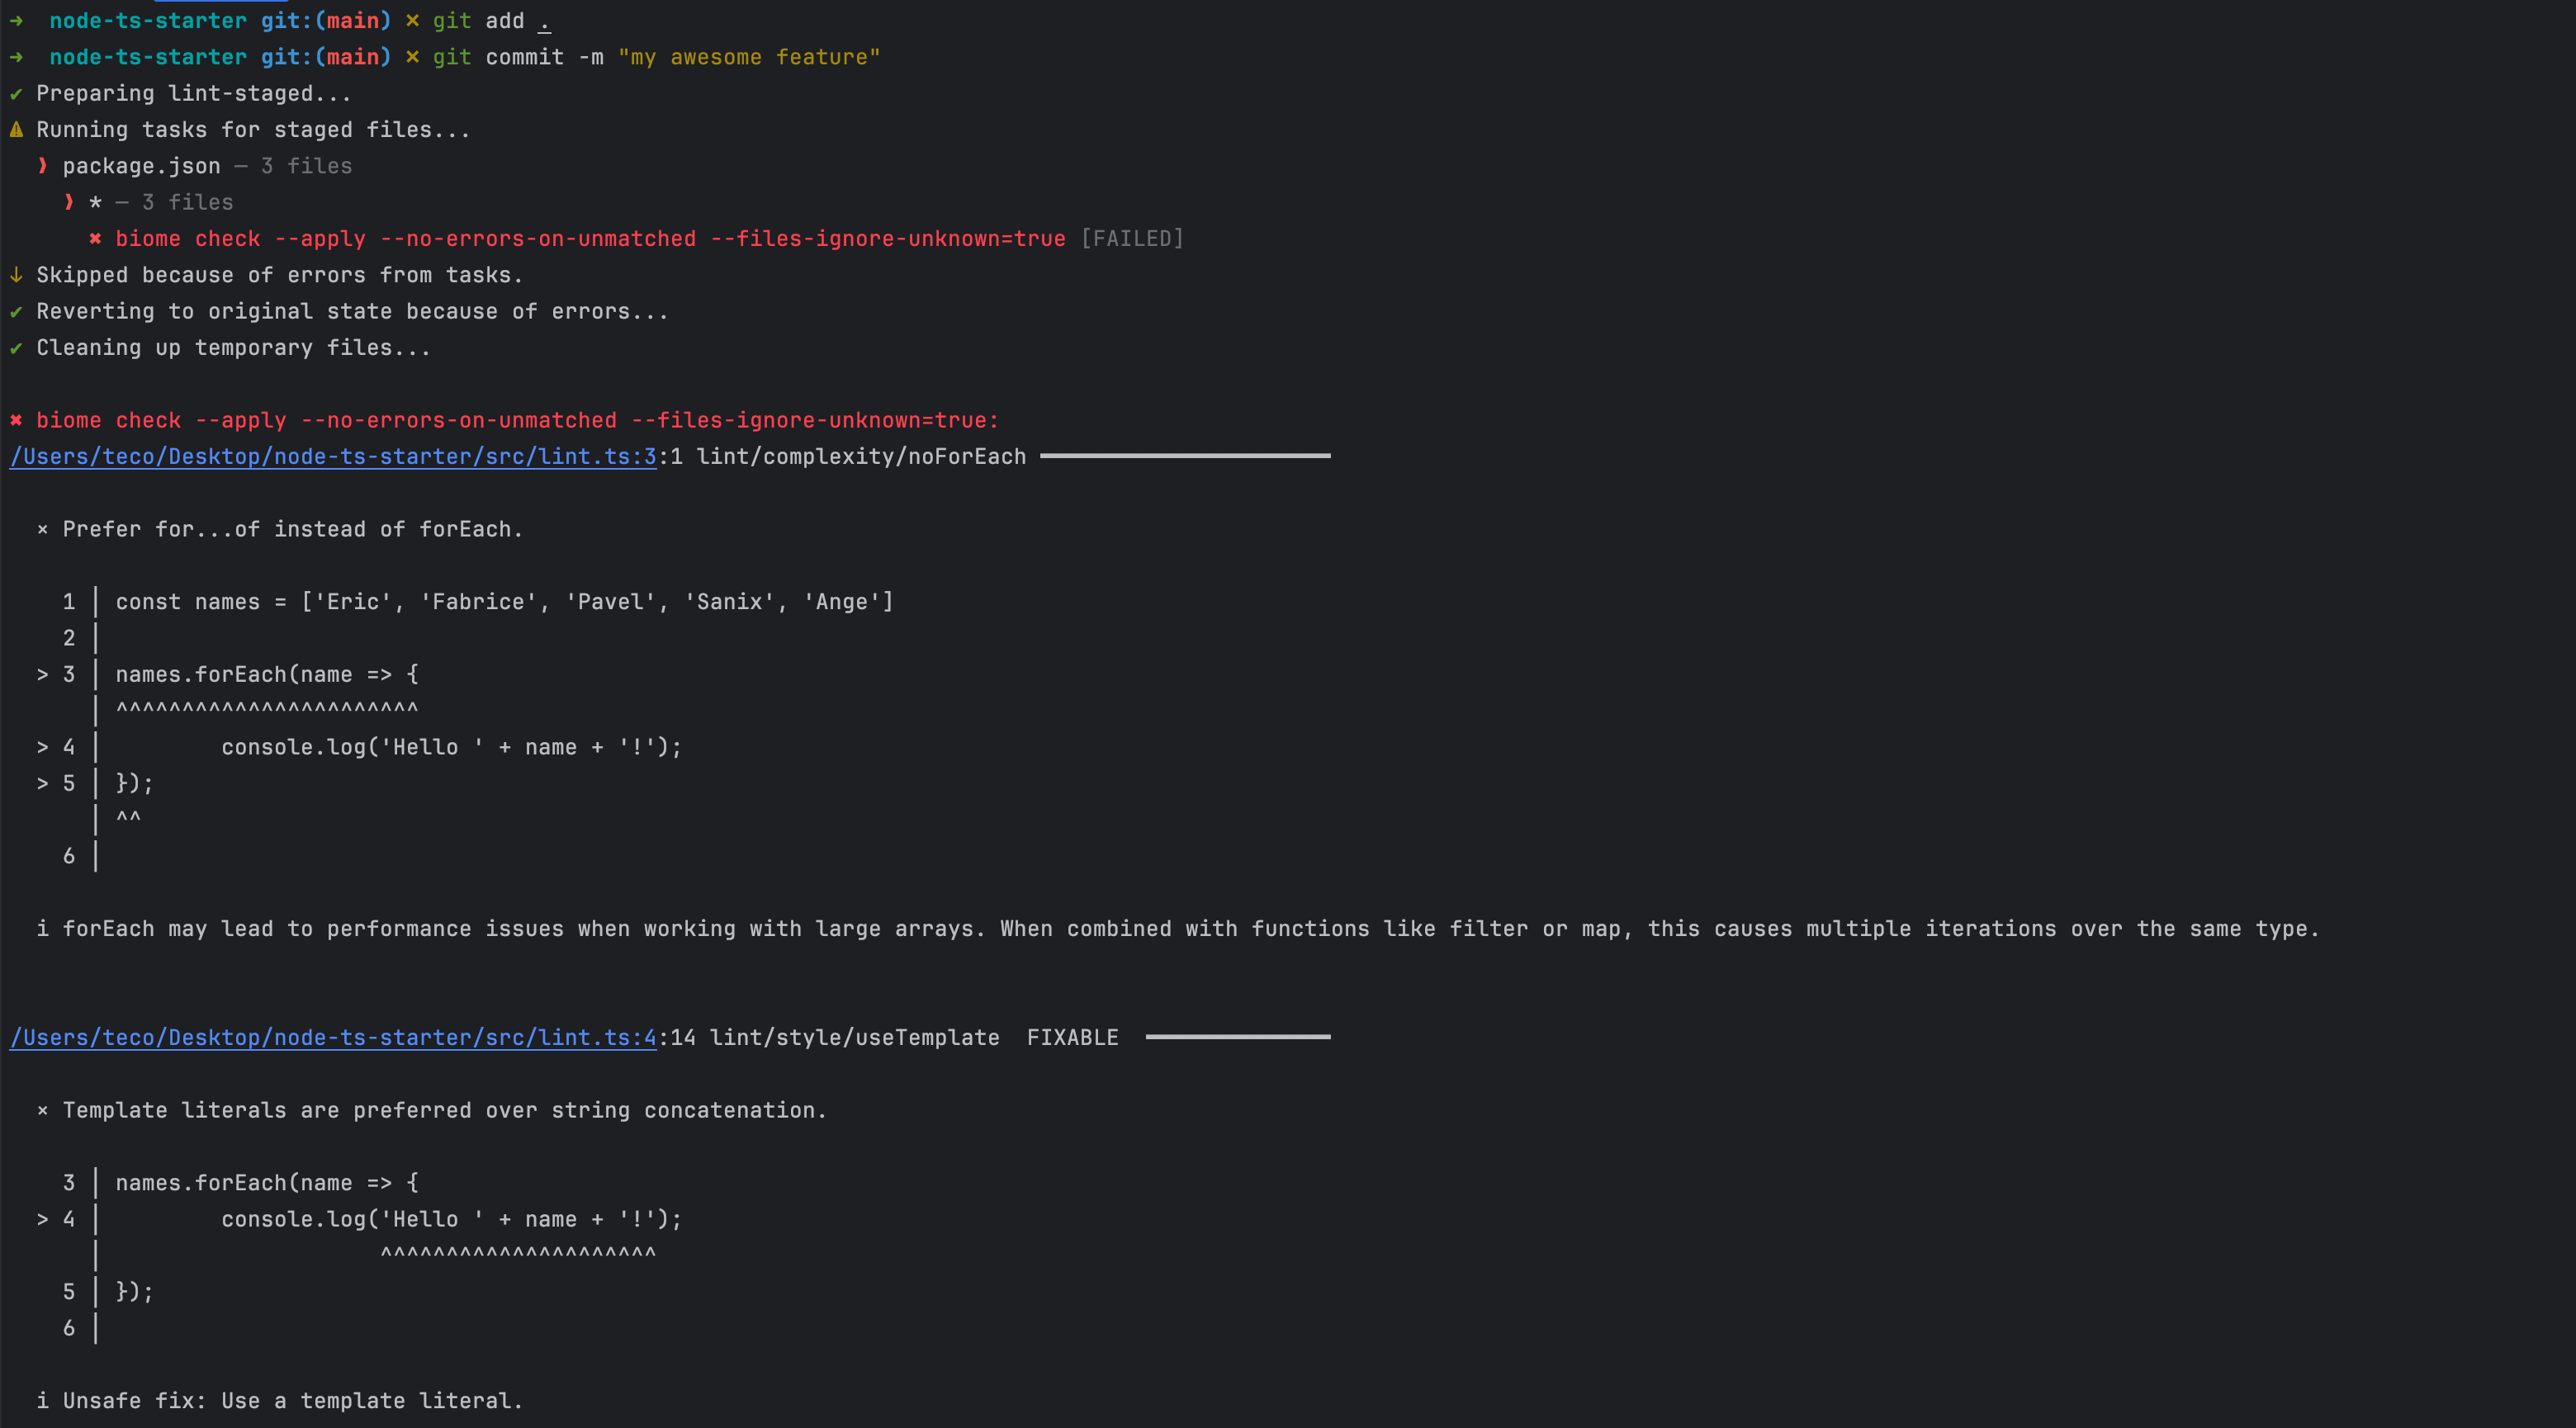
Edit some files and make a Git commit to see the result:
Use Biome in a CI pipeline with GitHub Actions
Biome has a GitHub Action in the marketplace, allowing you to perform the lint and formatting in your CI pipeline.
In your project root directory, create a directory ".github/workflows", then create a file "build.yml"
mkdir -p .github/workflows

touch .github/workflows/build.yml
Open the "build.yml" file and the content below:
name: Build Project

on:
  push:
    branches: [ main ]
  pull_request:
    branches: [ main ]

jobs:
  build:
    runs-on: ubuntu-latest
    steps:
      - name: Checkout
        uses: actions/checkout@v4

      - name: Setup Biome
        uses: biomejs/setup-biome@v2
        with:
          version: latest

      - name: Run Biome
        run: biome ci .
Make a commit, push, and create a Pull request; you will see the GitHub Actions running.
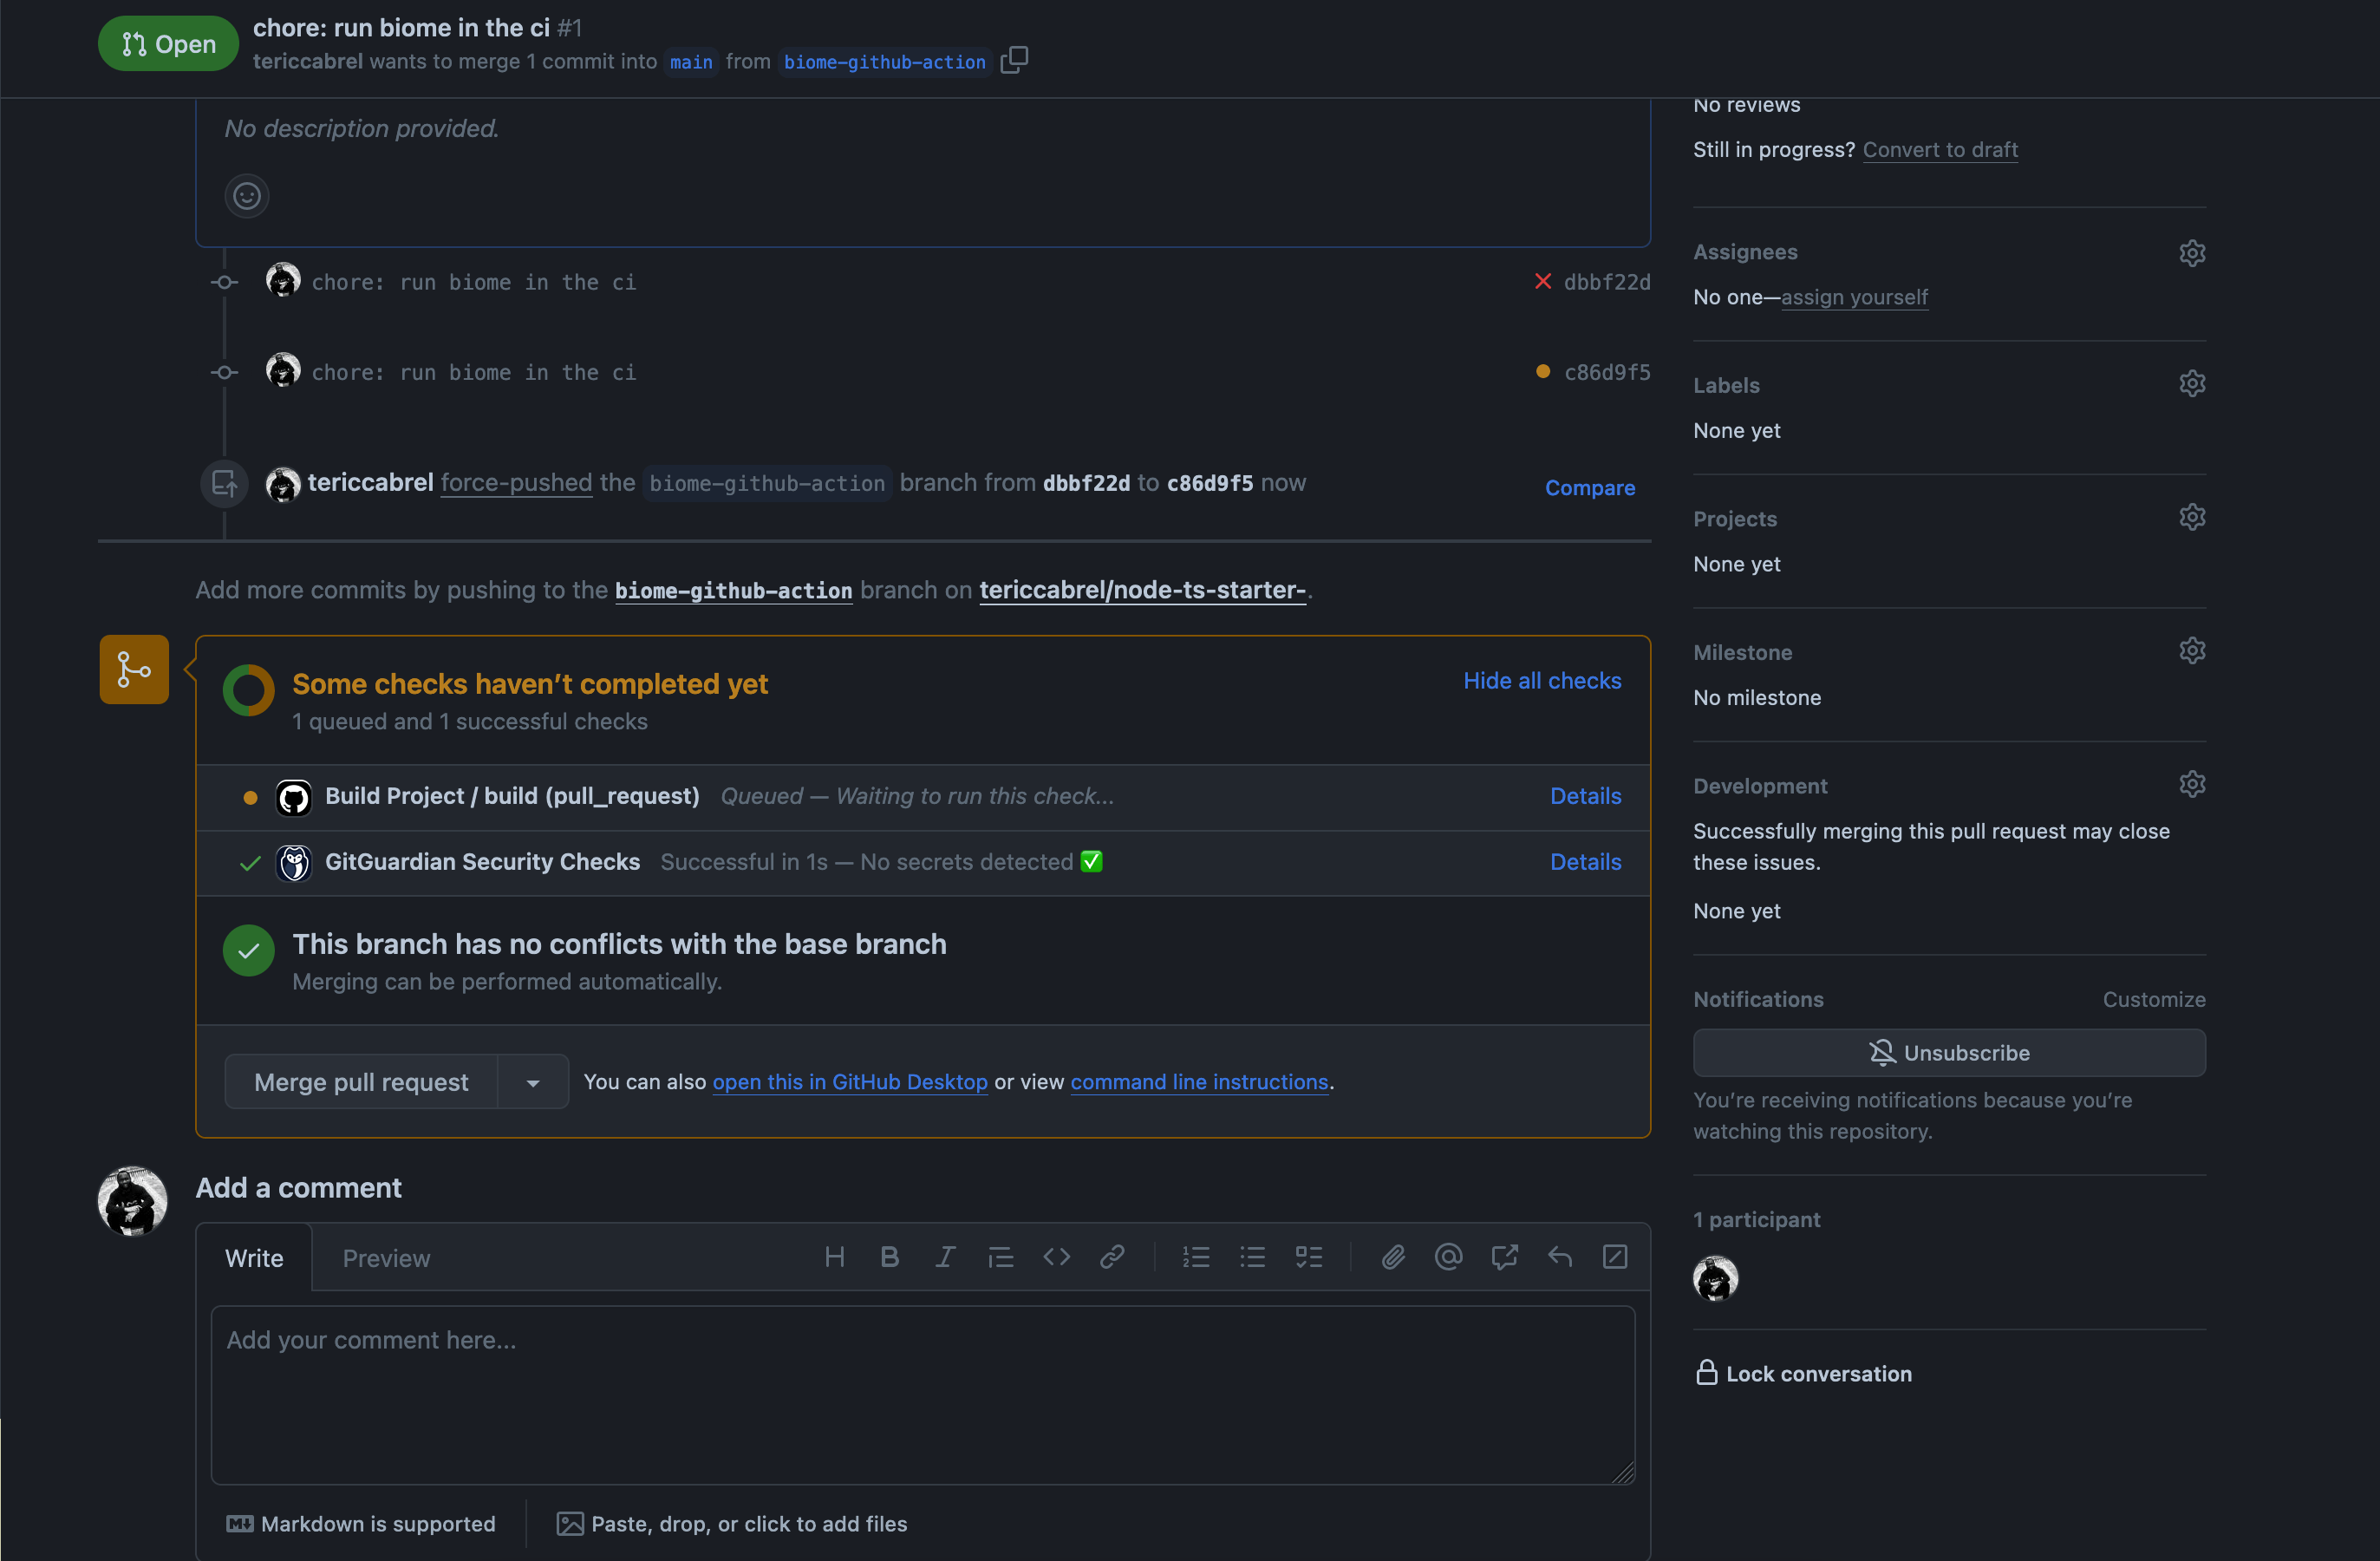
Once the GitHub Actions workflow finishes the execution, click on details to see the job related to Biome.
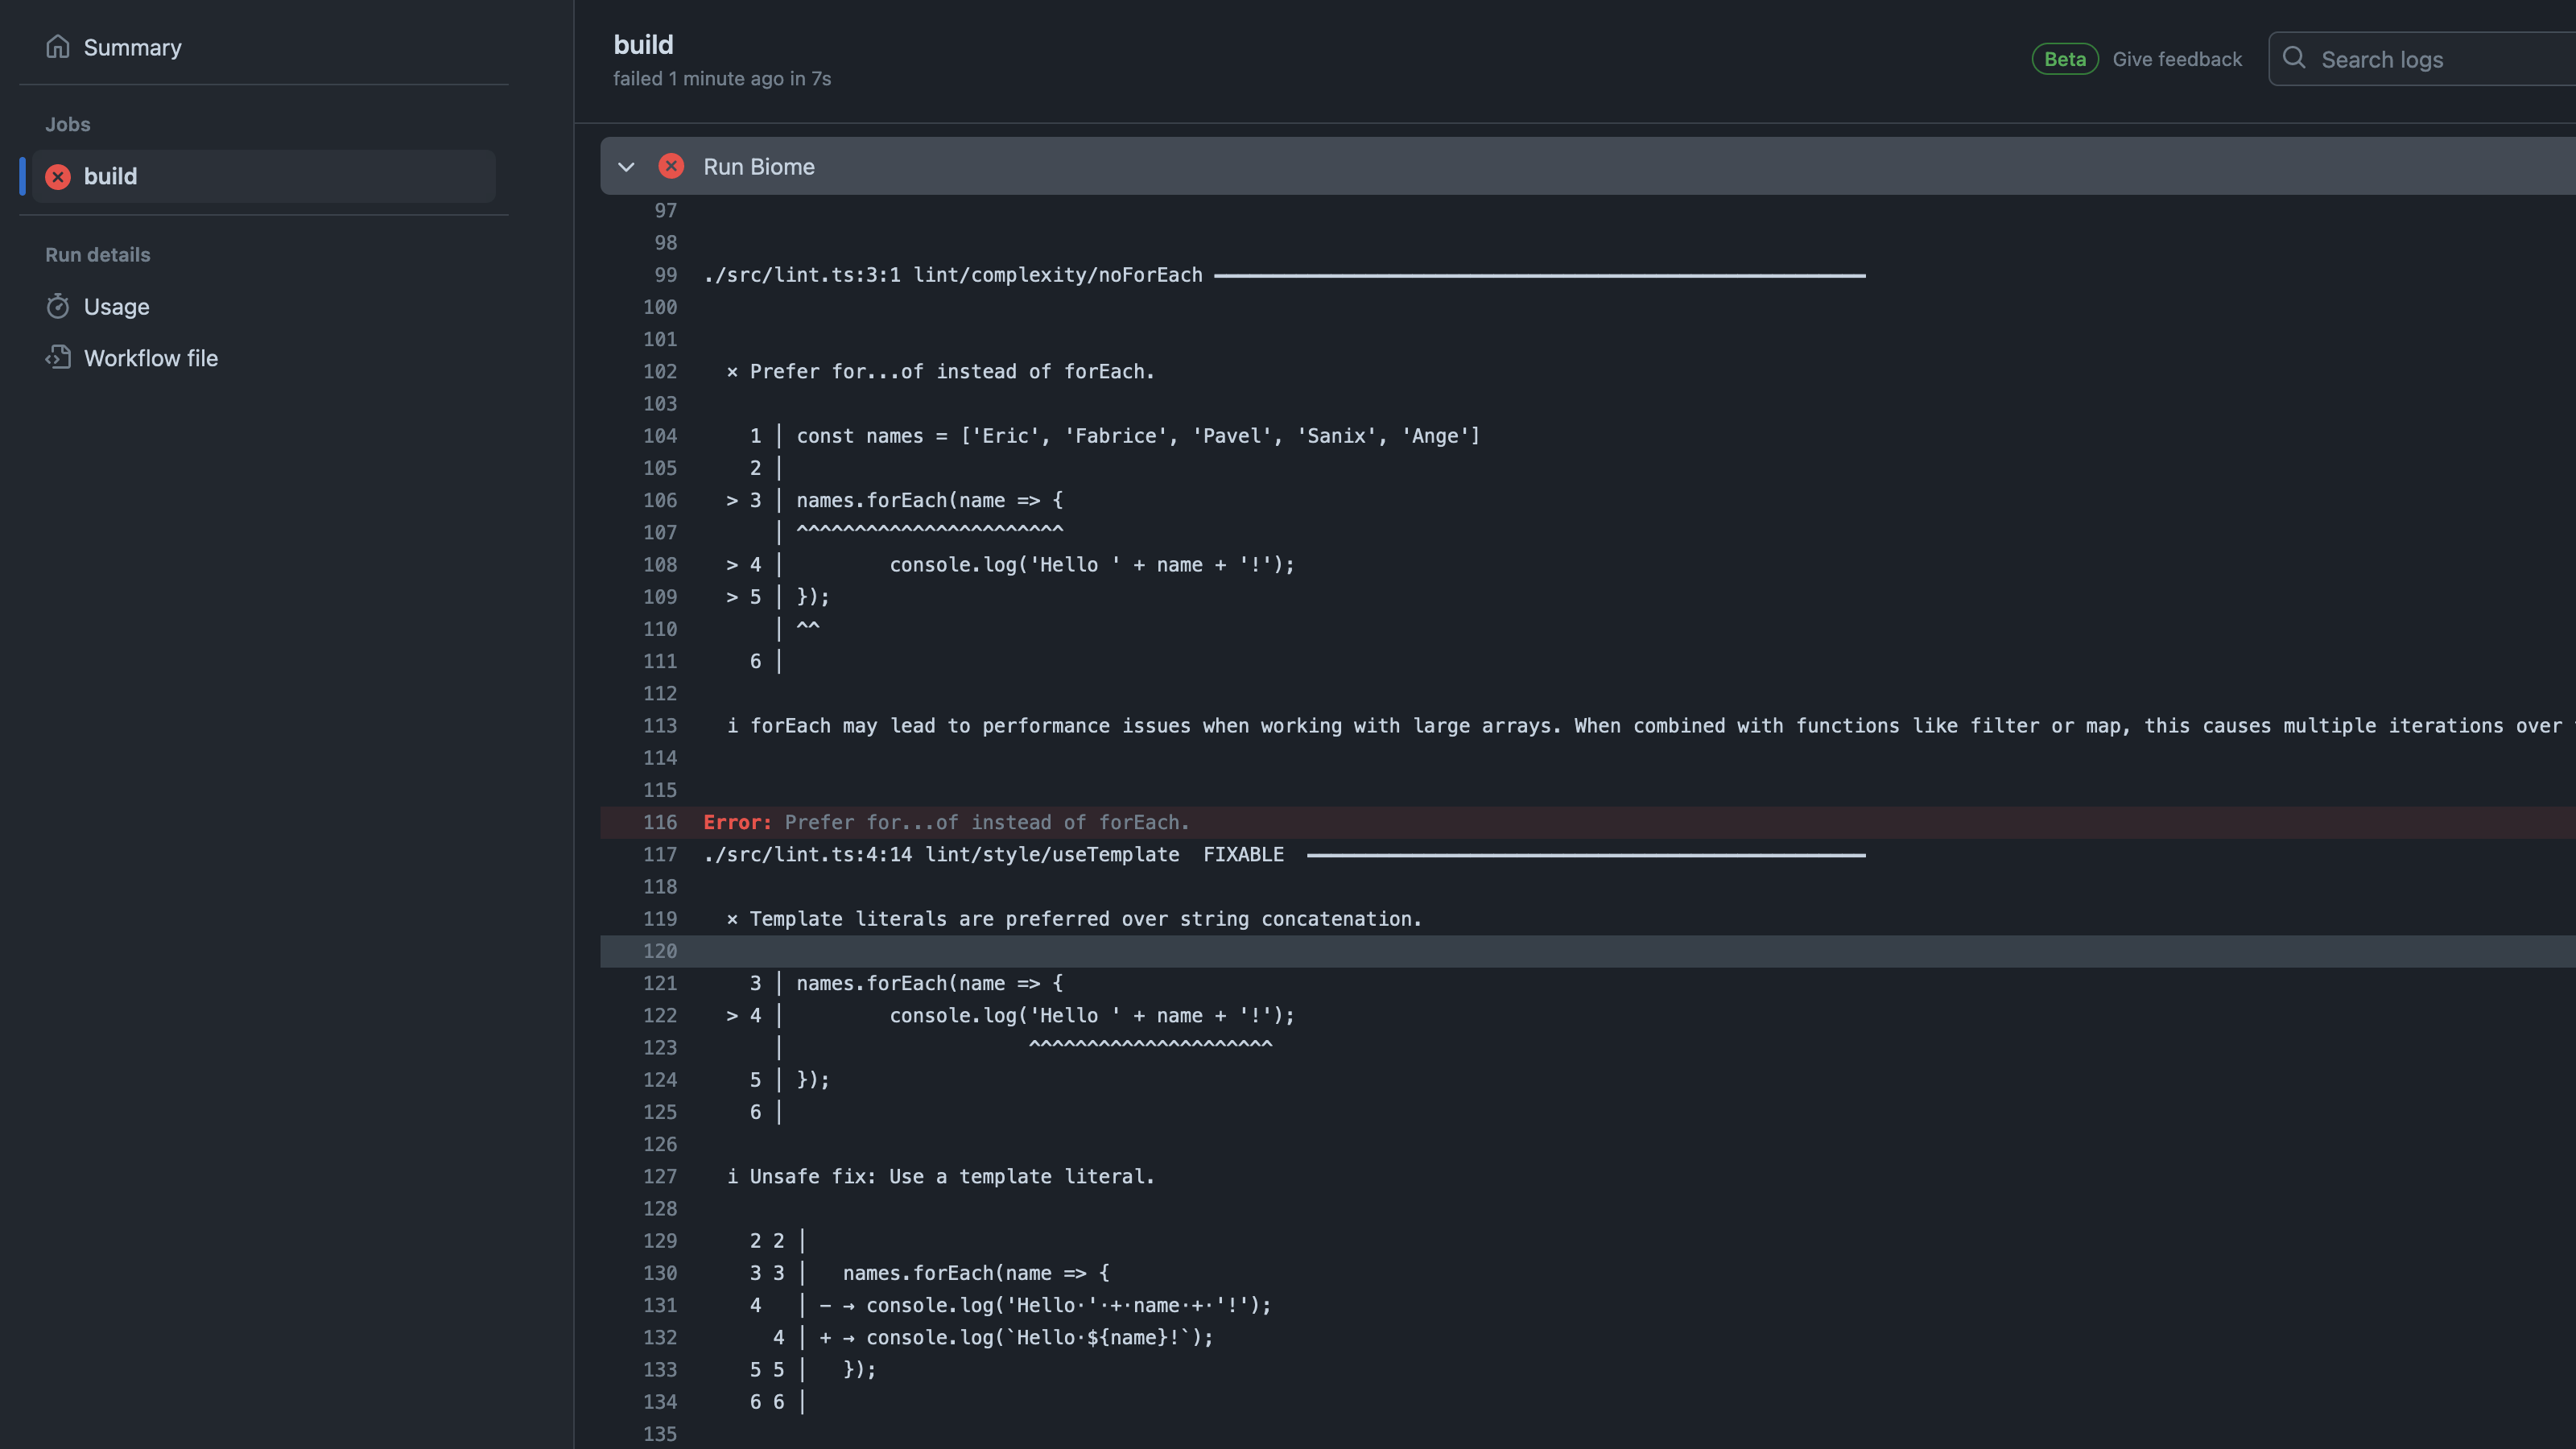
The build failed because Biome found some linting and formatting errors in my project.
If you wonder why the pre-commit kook we set up didn't catch these errors, I added the flag –-no-verify to skip it.
git commit -m "my awesome feature" --no-verify
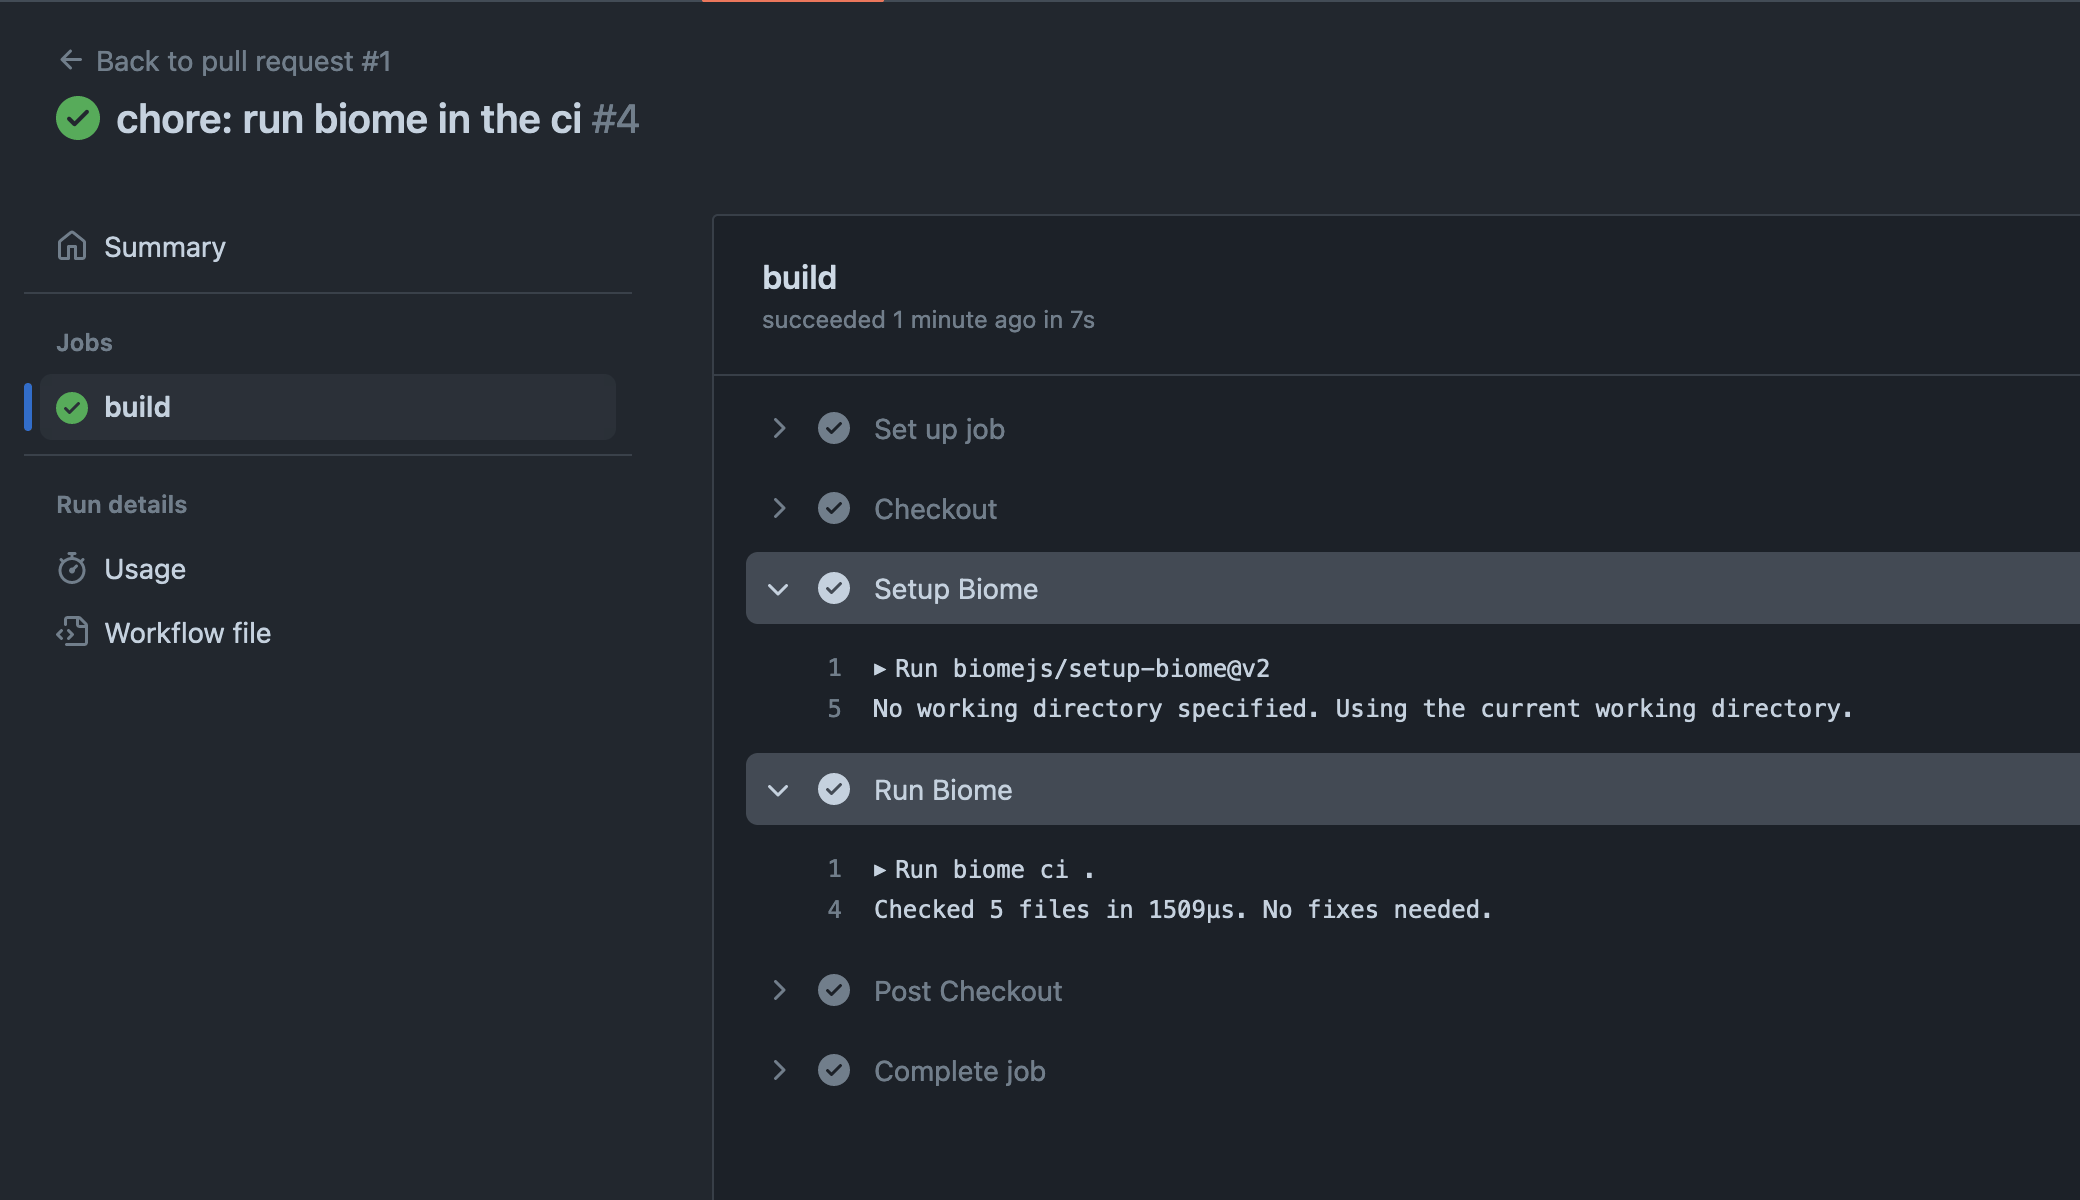
Let's fix it, commit to it, and push again. After the CI pipeline execution, we get a green light 🎉
Wrap Up
Biome makes it easy to format your code. It is also simple to configure and customize, adding/removing new rules depending on your needs.
This tutorial taught us how to install Biome, configure it to lint, and format a Node.js project.
We also configured a Git hook to run Biome before every commit. Finally, we saw how to run Biome in a Continuous Integration pipeline.
Biome also offers plugins for VS Code and JetBrains IDE to enhance the experience of working with Biome locally.
Starting version 1.7, you can now migrate from Eslint and Prettier to Biome. Read my complete tutorial, which will guide you through the process step by step.

Check out the Biome official documentation to go further into using it.
You can find the code source on the GitHub repository.
Follow me on Twitter or subscribe to my newsletter to avoid missing the upcoming posts and the tips and tricks I occasionally share.