
Push a Docker image into the Docker Hub


Photo by Kurt Cotoaga / Unsplash
Docker revolutionized the way we package, share and deploy our applications. You can run the project on your computer without worrying about the dependencies or the Operating system.
For professional teams, it is easy to version projects release and create a significant CI/CD pipeline. This is achieved by storing the Docker images on a remote server accessible from everywhere in the world called. This remote server is called a container registry. The Docker Hub is one created by the company behind Docker.
ECR is another container registry from AWS; I wrote a post about pushing and pulling an image from there.

In this post, we will see how to build a Docker image of the project and push it to a private repository.
What will we do
- Clone a Spring Boot project locally
- Create the Dockerfile and build the image
- Generate a Docker personal access token
- Push the image to the Docker Hub
Prerequisites
To follow this post, you need the following requirements to be met:
- Have a Docker account - Sign up's link
- Have Docker installed - Download's link
You can ensure Docker is installed by checking the version using the CLI:
docker --version

Docker version 20.10.14, build a224086
Set up the project
I prepared a Spring Boot project to use for this post. It is a web application to calculate the Body Mass Index. You can find de source code on my GitHub repository.
 tericcabrel
Let's clone the project locally and make it work. You can skip this part if the Java Development Kit is not installed on your computer.
git clone https://github.com/tericcabrel/bmi.git

cd bmi

mvn install

mvn spring-boot:run
Navigate to http://localhost:8000 on your browser.
Create the Docker image
In the root project directory, create a file named Dockerfile (extension is not required) and add the code below:
FROM maven:3.8.3-jdk-11-slim AS build

RUN mkdir /project

COPY . /project

WORKDIR /project

RUN mvn clean package

FROM adoptopenjdk/openjdk11:jre-11.0.15_10-alpine

RUN mkdir /app

RUN addgroup -g 1001 -S tecogroup

RUN adduser -S teco -u 1001

COPY --from=build /project/target/bmi-1.0.jar /app/bmi.jar

WORKDIR /app

RUN chown -R teco:tecogroup /app

CMD java $JAVA_OPTS -jar bmi.jar
We can build the image by using the Docker CLI command:
docker build -t bmi:v1
You can view the Docker image built by retrieving the list of Docker images stored on your computer using the command below:
docker image ls
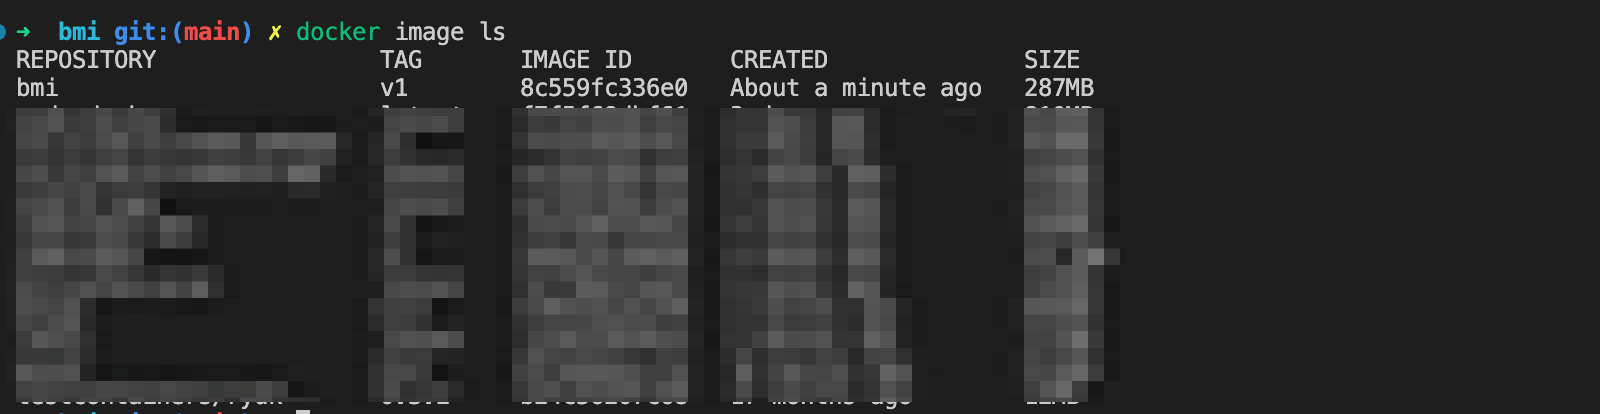
The Docker image is ready to be pushed into the Docker Hub.
Authenticate to the Docker Hub
We must have an account to store the Docker images of our project inside. You can create one private repository and an unlimited public repository in the free plan.
We use the Docker CLI to push the image to the Docker Hub, and the CLI needs to find where the image belongs. You can use the username and password you used to create the account on the Docker Hub, but it is not recommended because it allows too much privilege to the person pushing the image.
An access token is suitable since you can generate a token with only the required privilege and define the token's expiration date. This method satisfies the least privilege principle.
Generate a personal access token
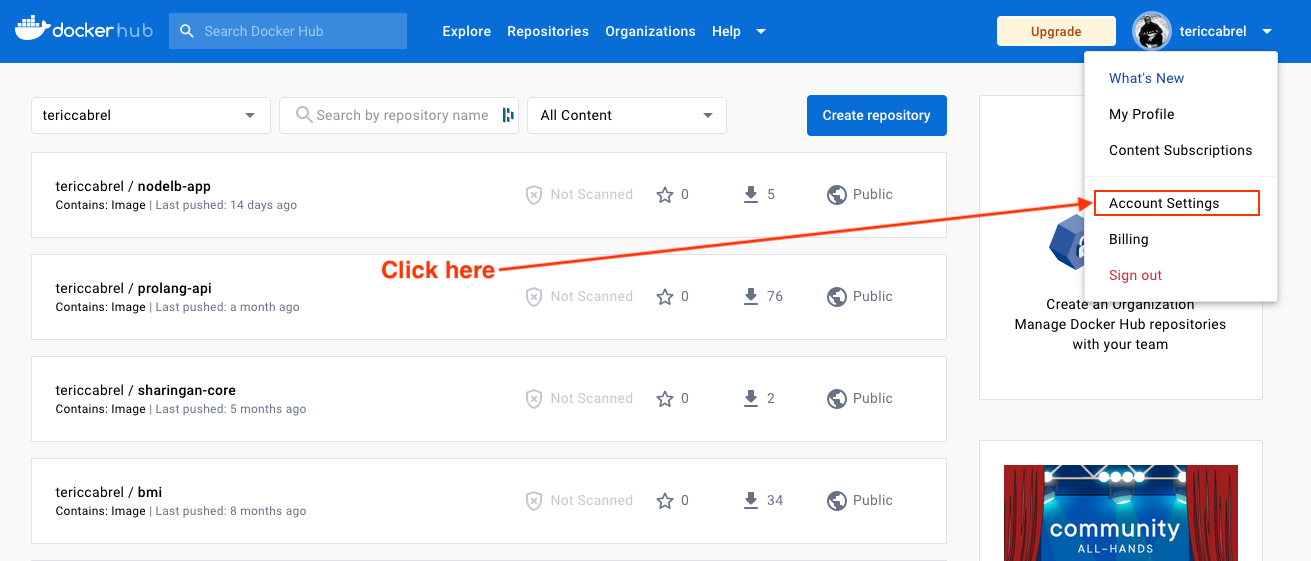
Sign into your Docker Hub account, then click on the profile menu at the right and then click on the sub-menu "Account settings":
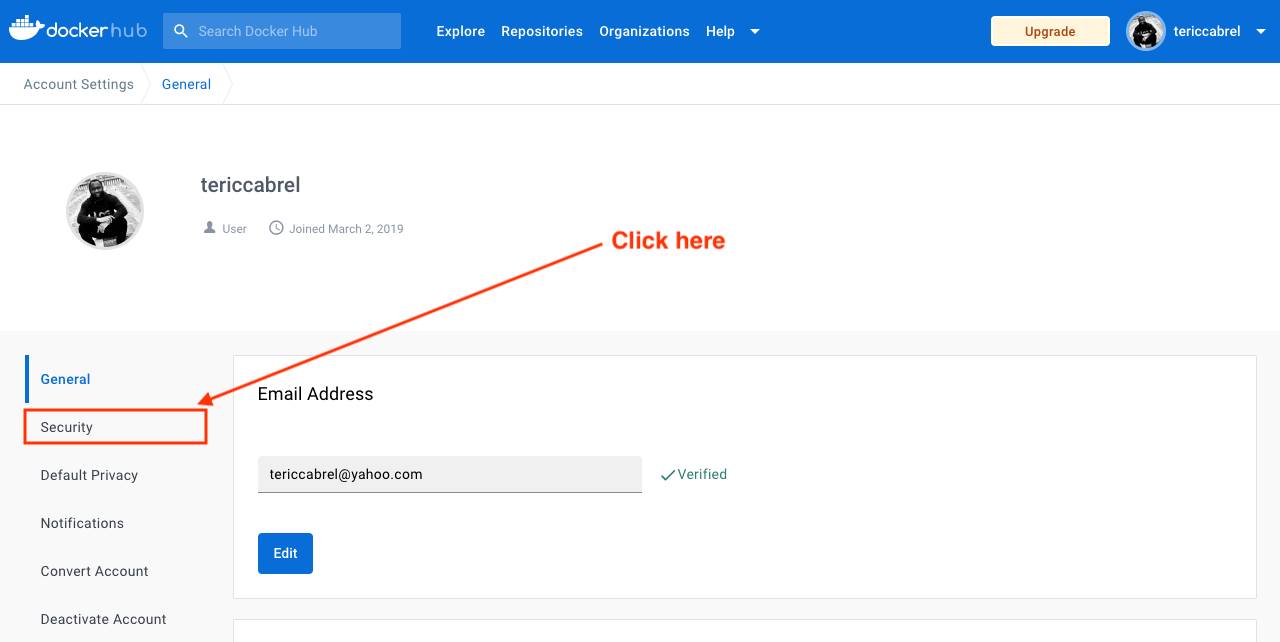
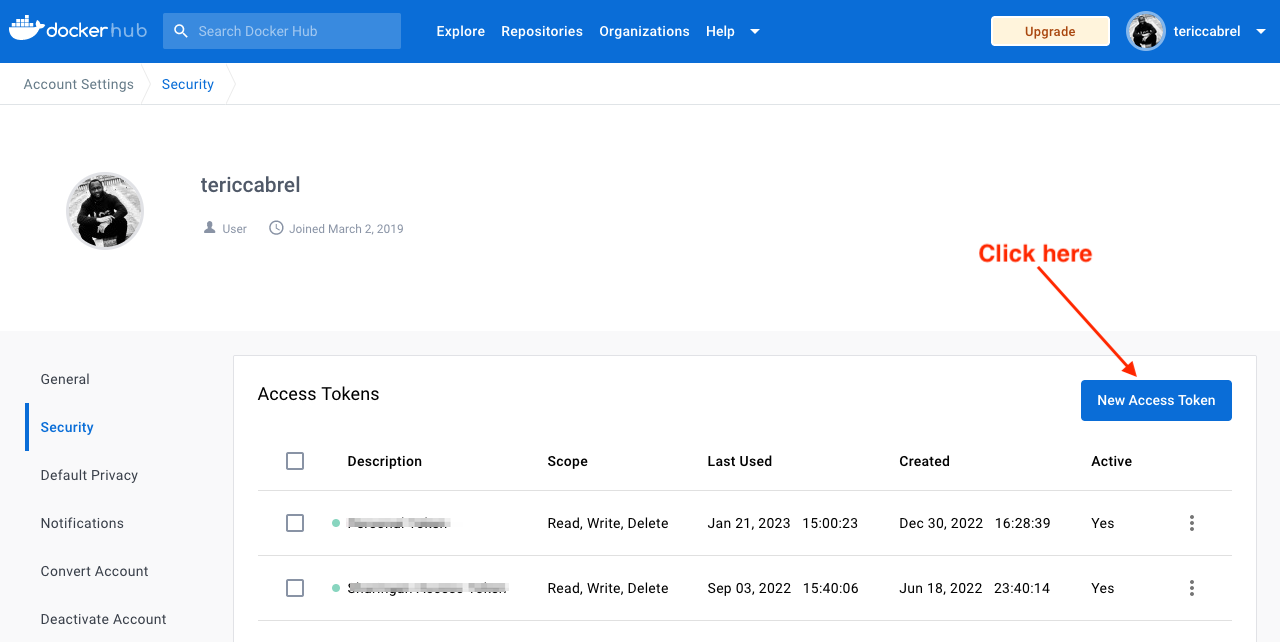
On the page displayed, click on the sub-menu named "Security":
On the page displayed, you will see the section for Access Tokens, I already have two active access tokens, but from your side, it will be empty. Click on the button "New Access Token":
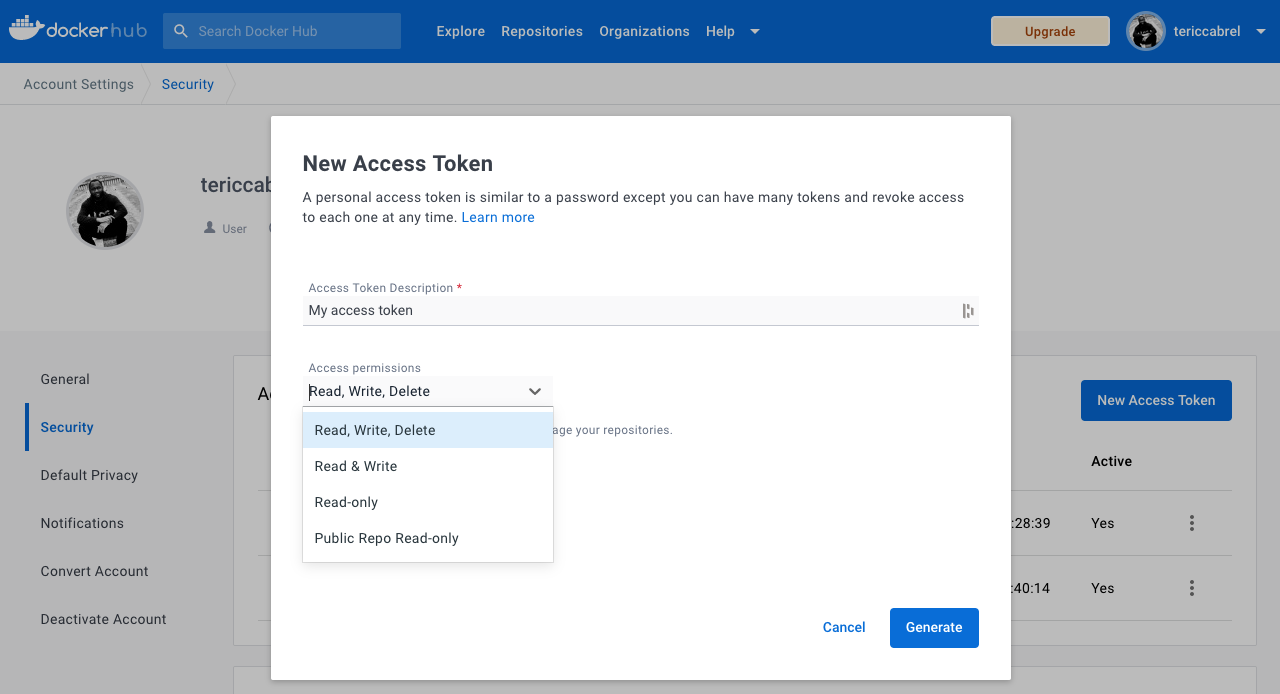
A modal window will open and will generate the access token in three steps:
- Enter the access token description
- Select the privilege for the access token
- Click on the button "Generate"
The next page will show the generated access token; copy it and close the modal window.

Authenticate with the access token
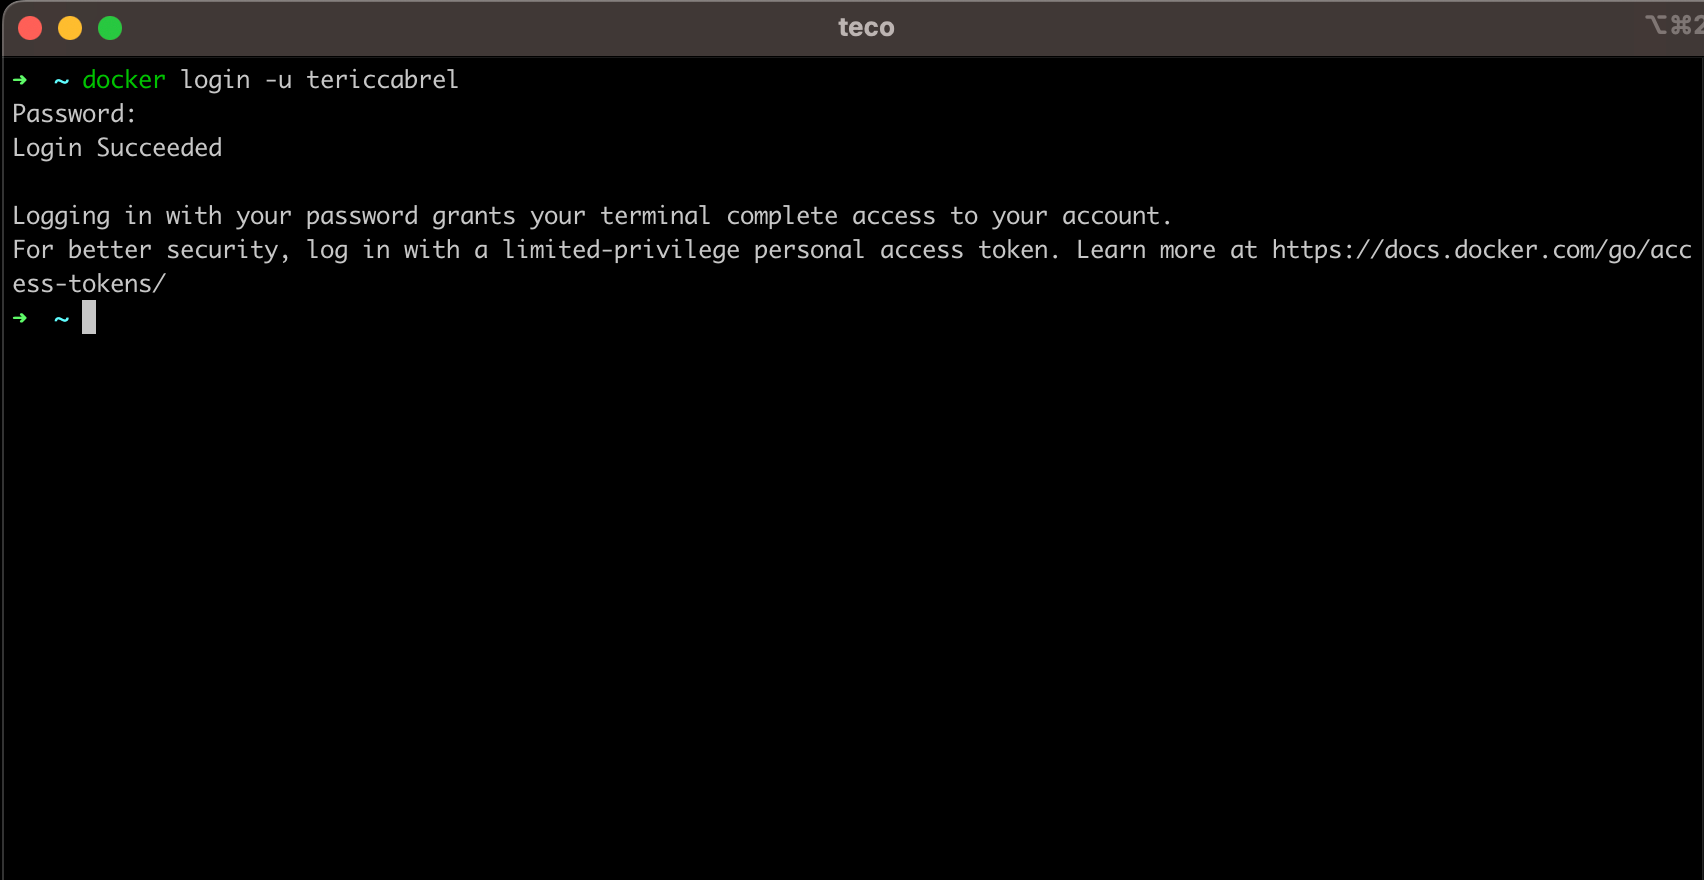
Open your terminal and run the command below; replace <your_username> with your Docker Hub username:
docker login -u <your_username>
You will be asked for your access token; provide the one we created earlier and press Enter.
Push the image on a private repository
To push on a private repository, you must create it first in the Docker Hub web application. Go to the menu "repositories" and then click on the button "create repository"
Give the repository name and a description, check the radio button labeled "private" to make the repository private, and finally, click on the button "Create":
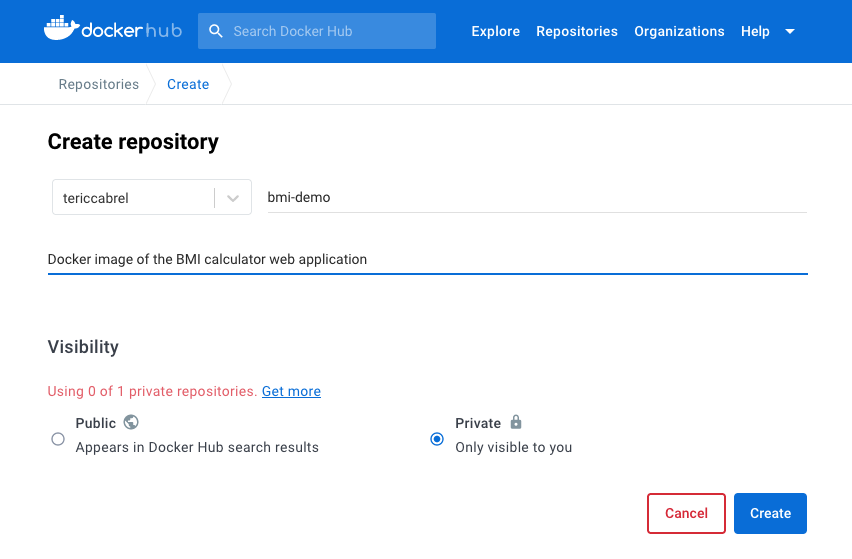
The repository's name has the following signature: <username>/<repository_name>, so in my case it is tericcabrel/bmi-demo.
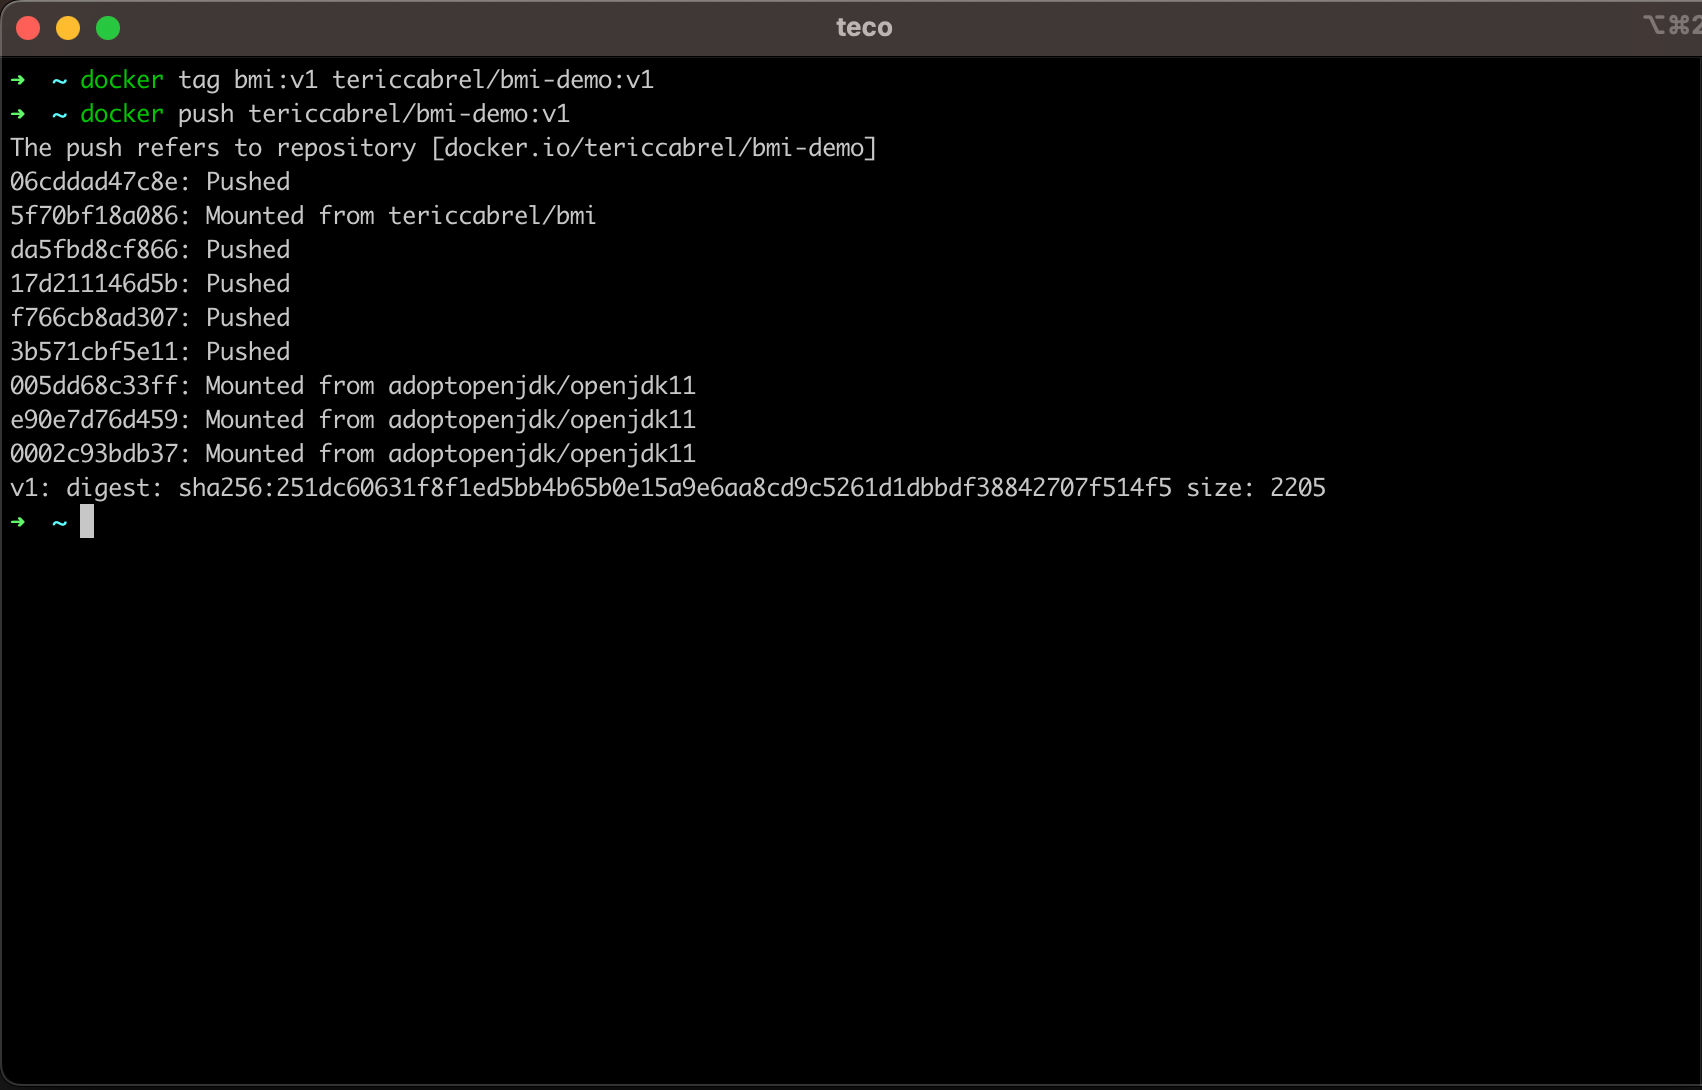
Run the commands below to push the image into the Docker Hub repository:
docker tag bmi:v1 tericcabrel/bmi-demo:v1

docker push tericcabrel/bmi-demo:v1
The first command sets a tag on the image to differentiate it from the existing one in the repository. The tag name must be unique to prevent overriding another image. We used v1 and will tag the following image to v2, the next to v3, etc...
The second command pushes the image to the Docker Hub.
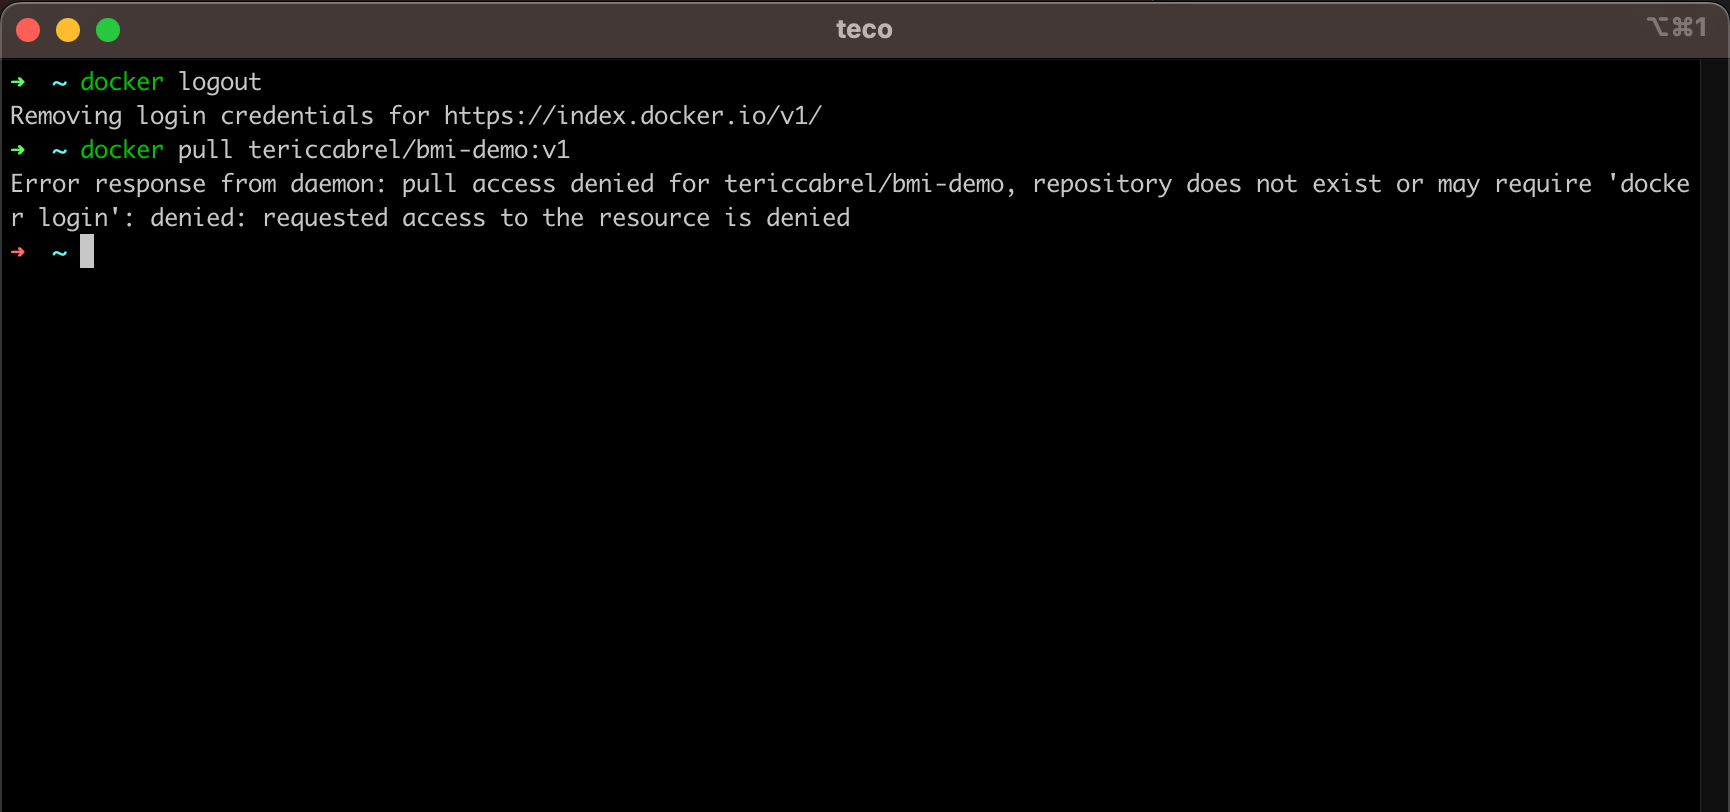
To ensure the repository is effectively private, we can log out from the CLI and try to pull the image.
Push the image on a public repository
Pushing the Docker image on a public repository is the same as the private one except that the repository visibility is public. No need to create the repository first because Docker will create it when pushing the image.
Wrap up
Docker Hub helps you store Docker images of your application. You can create private repositories within your pricing plan's limit and create unlimited public repositories.
Generate an access token with only the required privilege. Don't give the write permission if the token is intended to only pull the Docker image.
Follow me on Twitter or subscribe to my newsletter to avoid missing the upcoming posts and the tips and tricks I occasionally share.