Implement Role-based Access Control in a Node.js API

In modern web development, protecting data and ensuring that only the right people have access to sensitive actions is crucial.
Role-based access Control (RBAC) is a common approach for securing APIs. It enables developers to define what users can and cannot do based on their assigned roles.
This tutorial is the continuity of this tutorial where we implemented a JWT authentication to protect a Node.js API.
What we will do
The Node.js API we built has public routes that do not require authentication to access it, while the restricted routes require a valid JWT containing the ID of a user in the database.
Once the user is authenticated, it can access all the API resources, which is not always what we want. Indeed, we want to allow some resources only if the authenticated user has a specific role.
For our Node.js API, here are the following roles we have in our system:
- User: can access his information
- Administrator: can do everything the User role does and access the users' list.
- Super Administrator: can do everything the Admin role does and create an admin user; shortly, he can do everything.
The table below lists the protected routes and the role required to access them.
| API route | Role required | Description |
|---|---|---|
| [GET] /users/me | User, Admin, Super Admin | Retrieve the authenticated user. |
| [GET] /users | Admin, Super Admin | Retrieve the list of all users. |
| [POST] /auth/admins | Super Admin | Create an administrator. |
Prerequisites
To follow this tutorial, make sure you have the following tools installed on your computer.
- Node.js 20+ - I wrote an installation guide.
- NPM or Yarn (I will use Yarn)
- MongoDB installed: Download the version for your operating system.
- A GUI REST client; I will use Postman.
If you have Docker, you can start a Docker container of MongoDB from the Docker image. Run the command below to start the Docker container from the MongoDB image:
docker run -d --rm -e MONGO_INITDB_ROOT_USERNAME=user -e MONGO_INITDB_ROOT_PASSWORD=secret -p 27018:27017 --name mongodb mongo:8.0
The MongoDB URL is mongodb://user:secret@localhost:27018/admin.
Set up the project
We will start from the final project of the tutorial about implementing a JWT authentication in a Node.js API.
We will do a sparse checkout to only clone the project folder we want in the Git repository.
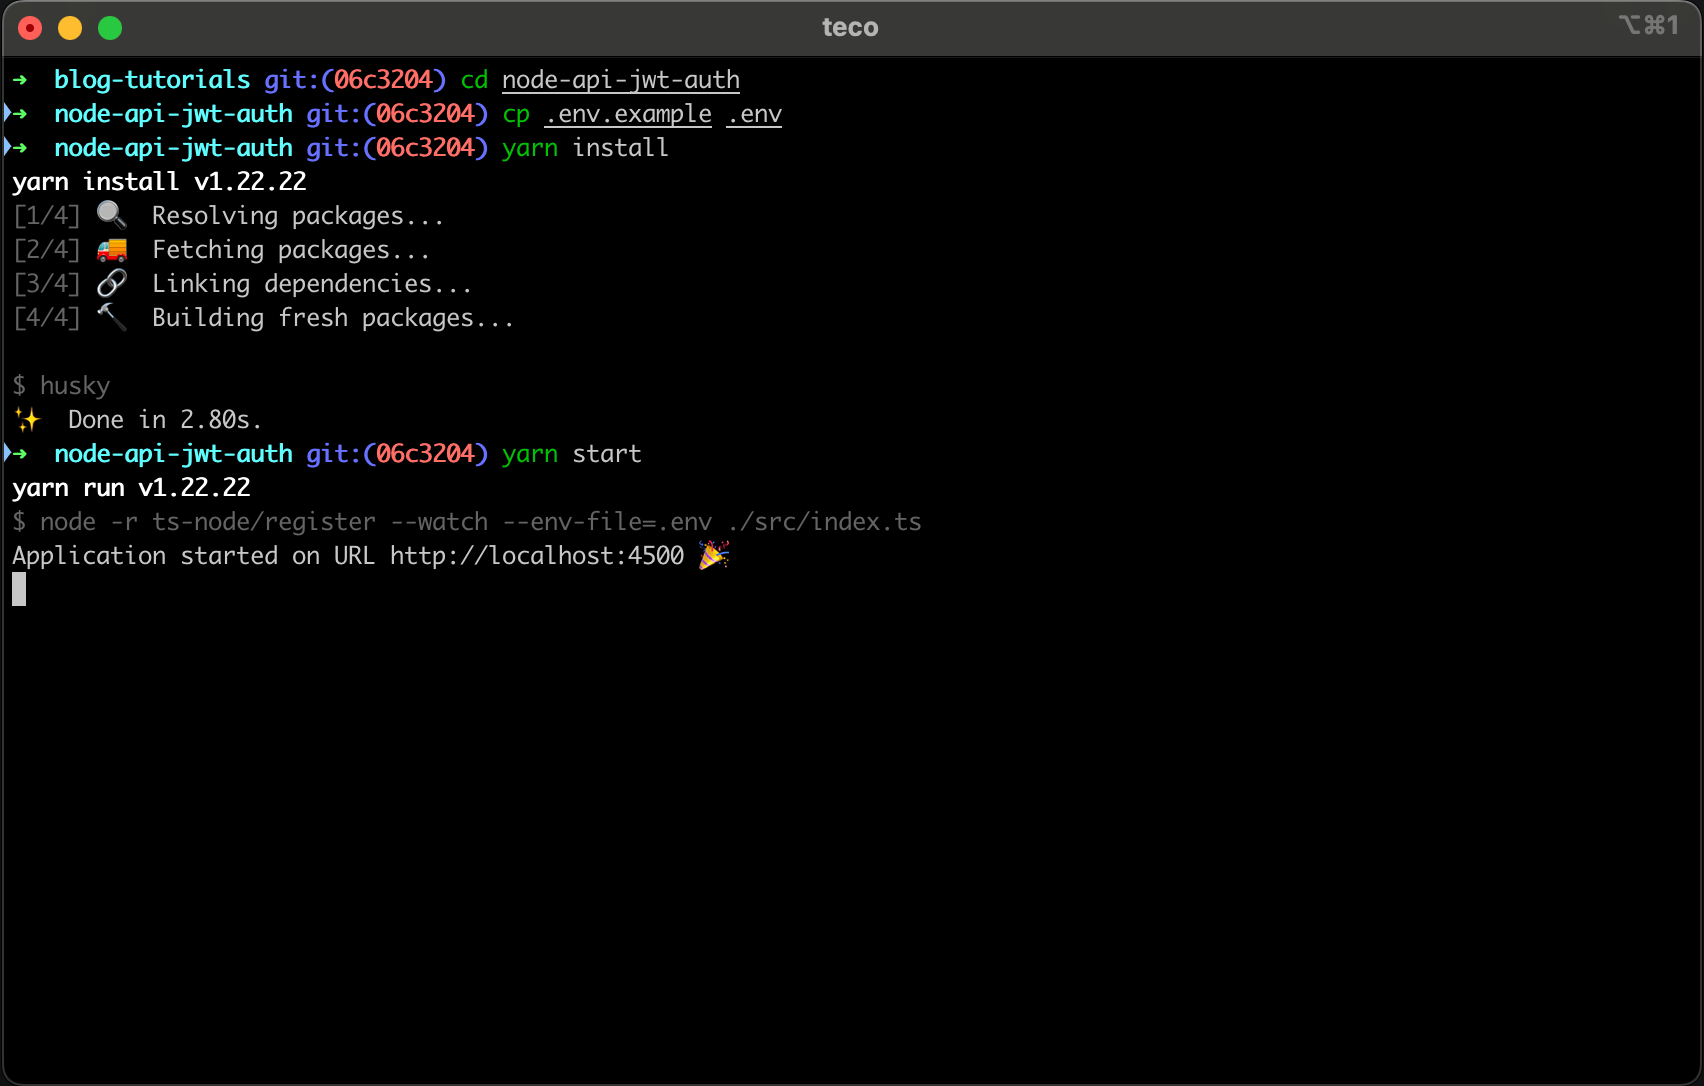
Run the commands below to configure the project locally and launch it:
git clone --no-checkout https://github.com/tericcabrel/blog-tutorials.git

cd blog-tutorials

git sparse-checkout init --cone

git sparse-checkout set node-api-jwt-auth

git checkout @

cd node-api-jwt-auth

cp .env.example .env

yarn install

yarn start
Before running the last command, ensure the MongoDB Docker container is running. The application will start on port 4500.
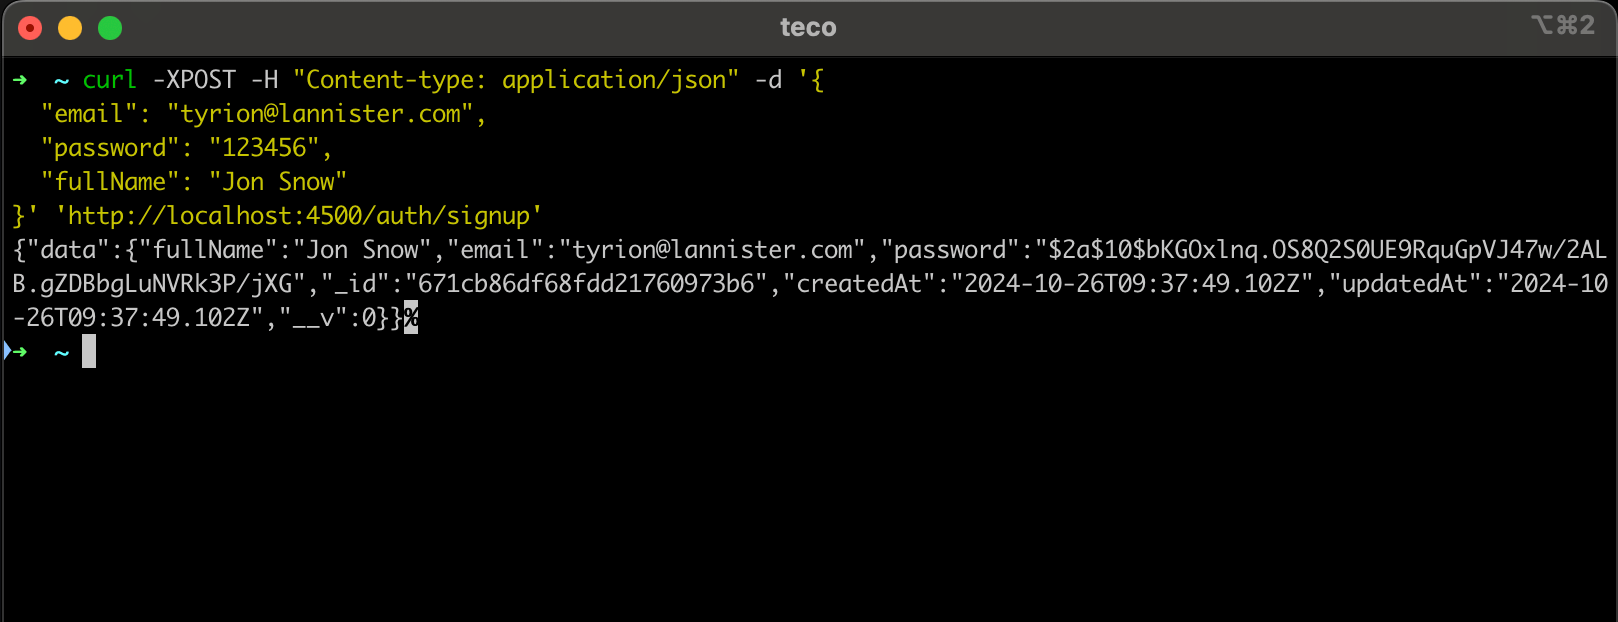
Let's register a user using the following cURL request.
curl -XPOST -H "Content-type: application/json" -d '{
  "email": "tyrion@lannister.com",
  "password": "123456",
  "fullName": "Jon Snow"
}' 'http://localhost:4500/auth/signup'
We get the following output.
Let's authenticate with the above user created using the following cURL request.
curl -XPOST -H "Content-type: application/json" -d '{
  "email": "tyrion@lannister.com",
  "password": "123456"
}' 'http://localhost:4500/auth/login'
We get the following output.
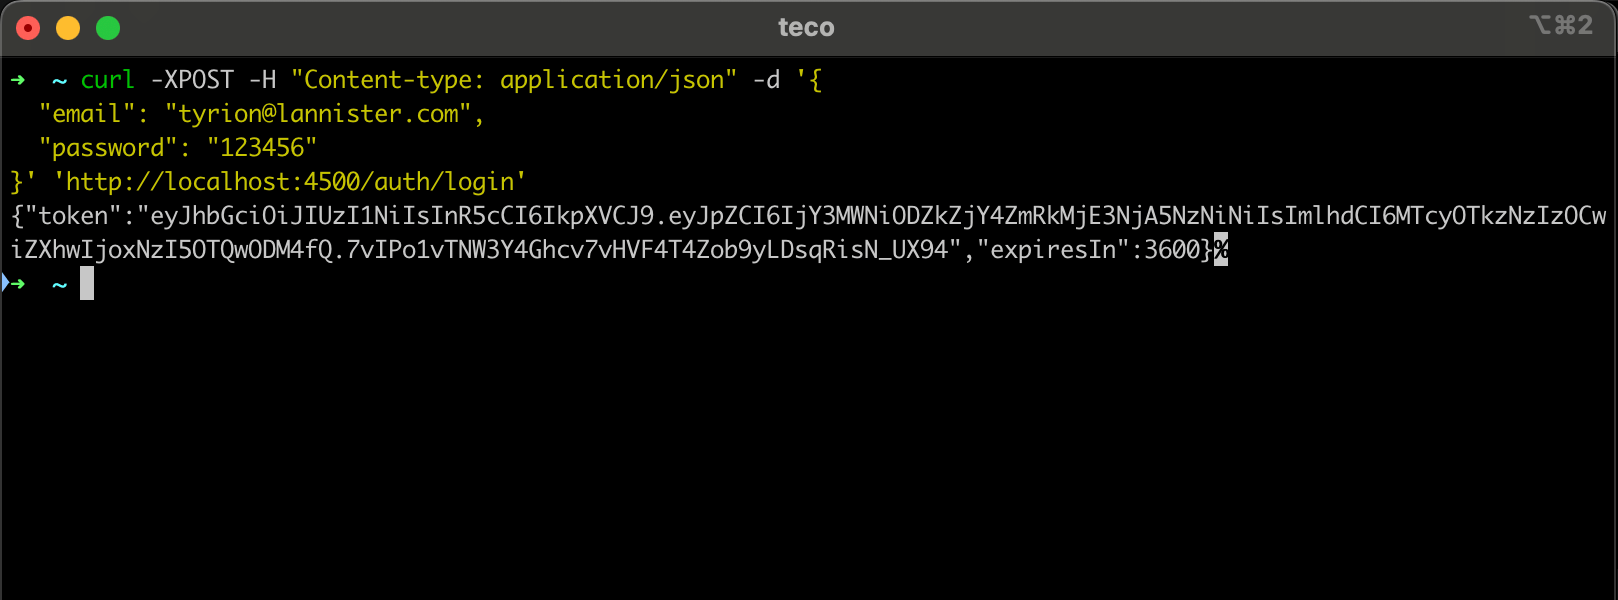
We can generate a JWT token for a user; with this token, you can access all the API's protected resources. Let's enhance the authentication by adding the role access control.
Create the role entity
The role entity will represent the different roles needed in our system.
We will define the role schema using Mongoose to create a MongoDB collection at the application startup.
Create the file "src/models/role.model.ts" and add the code below:
import mongoose, { Schema, Model, Document } from 'mongoose';

enum RoleType {
  USER = 'USER',
  ADMIN = 'ADMIN',
  SUPER_ADMIN = 'SUPER_ADMIN',
}

type RoleDocument = Document<string> & {
  name: RoleType;
  description: string;
};

type RoleInput = {
  name: RoleDocument['name'];
  description: RoleDocument['description'];
};

const rolesSchema = new Schema(
  {
    name: {
      type: Schema.Types.String,
      enum: Object.values(RoleType),
      required: true,
      unique: true,
    },
    description: {
      type: Schema.Types.String,
      required: true,
    },
  },
  {
    collection: 'roles',
    timestamps: true,
  },
);

const Role: Model<RoleDocument> = mongoose.model<RoleDocument>('Role', rolesSchema);

export { Role, RoleInput, RoleDocument };
Create pre-defined roles in the database
As defined in the beginning, the API needs the role USER, ADMIN, and SUPER ADMIN. We must create these roles in the database before assigning them to users.
We will create a function executed at the application startup to create user roles in the database if they don't exist.
Create a file "src/seeders/role-seeder.ts" and add the code below:
import { Role } from '../models/role.model';

export const seedRoles = async (): Promise<void> => {
  const roles = [
    {
      name: 'USER',
      description: 'Authenticated user with read access',
    },
    {
      name: 'ADMIN',
      description: 'Authenticated user with minimal write access',
    },
    {
      name: 'SUPER_ADMIN',
      description: 'Authenticated user with full access',
    },
  ];

  for (const role of roles) {
    const existingRole = await Role.findOne({ name: role.name });

    if (!existingRole) {
      await Role.create(role);
    }
  }
};
Update the main file "src/index.ts" to execute the seedRoles() function after the database connection.
// Existing imports...
import { seedRoles } from './seeders/role-seeder';

// Existing code...

app.listen(PORT, async () => {
  await connectToDatabase();

  await seedRoles();

  console.log(`Application started on URL ${HOST}:${PORT} 🎉`);
});
Re-run the application and verify the roles have been created in the database.

Update the User entity to include the role
We must add a property "role" to the user entity representing a user's role. A user can have one role at a time, which must be set when creating it.
Update the file "src/models/user.models.ts" with the code below:
import mongoose, { Schema, Model, Document } from 'mongoose';
import { RoleDocument } from './role.model';

type UserDocument = Document<string> & {
  fullName: string;
  email: string;
  password: string;
  role: RoleDocument;
};

type UserInput = {
  fullName: UserDocument['fullName'];
  email: UserDocument['email'];
  password: UserDocument['password'];
  role: string;
};

const usersSchema = new Schema(
  {
    fullName: {
      type: Schema.Types.String,
      required: true,
    },
    email: {
      type: Schema.Types.String,
      required: true,
      unique: true,
    },
    password: {
      type: Schema.Types.String,
      required: true,
    },
    role: {
      type: mongoose.Schema.Types.ObjectId,
      ref: 'Role',
      required: true,
      index: true,
      default: 'USER',
    },
  },
  {
    collection: 'users',
    timestamps: true,
  },
);

const User: Model<UserDocument> = mongoose.model<UserDocument>('User', usersSchema);

export { User, UserInput, UserDocument };
Set the role when creating a user
The user role is now required, so creating a user without one will throw an error. Let's update the "registerUser()" function in the file "src/controllers/auth.controller.ts"; replace the function with the code below:
export const registerUser = async (req: Request, res: Response) => {
  const { email, fullName, password } = req.body;

  if (!email || !fullName || !password) {
    return res.status(422).json({ message: 'The fields email, fullName and password are required' });
  }

  const role = await Role.findOne({ name: RoleType.USER });

  if (!role) {
    return res.status(500).json({ message: 'Role not found' });
  }

  const userInput: UserInput = {
    fullName,
    email,
    password: bcrypt.hashSync(password, 10),
    role: role._id,
  };

  const userCreated = await User.create(userInput);

  return res.status(201).json({ data: userCreated });
};
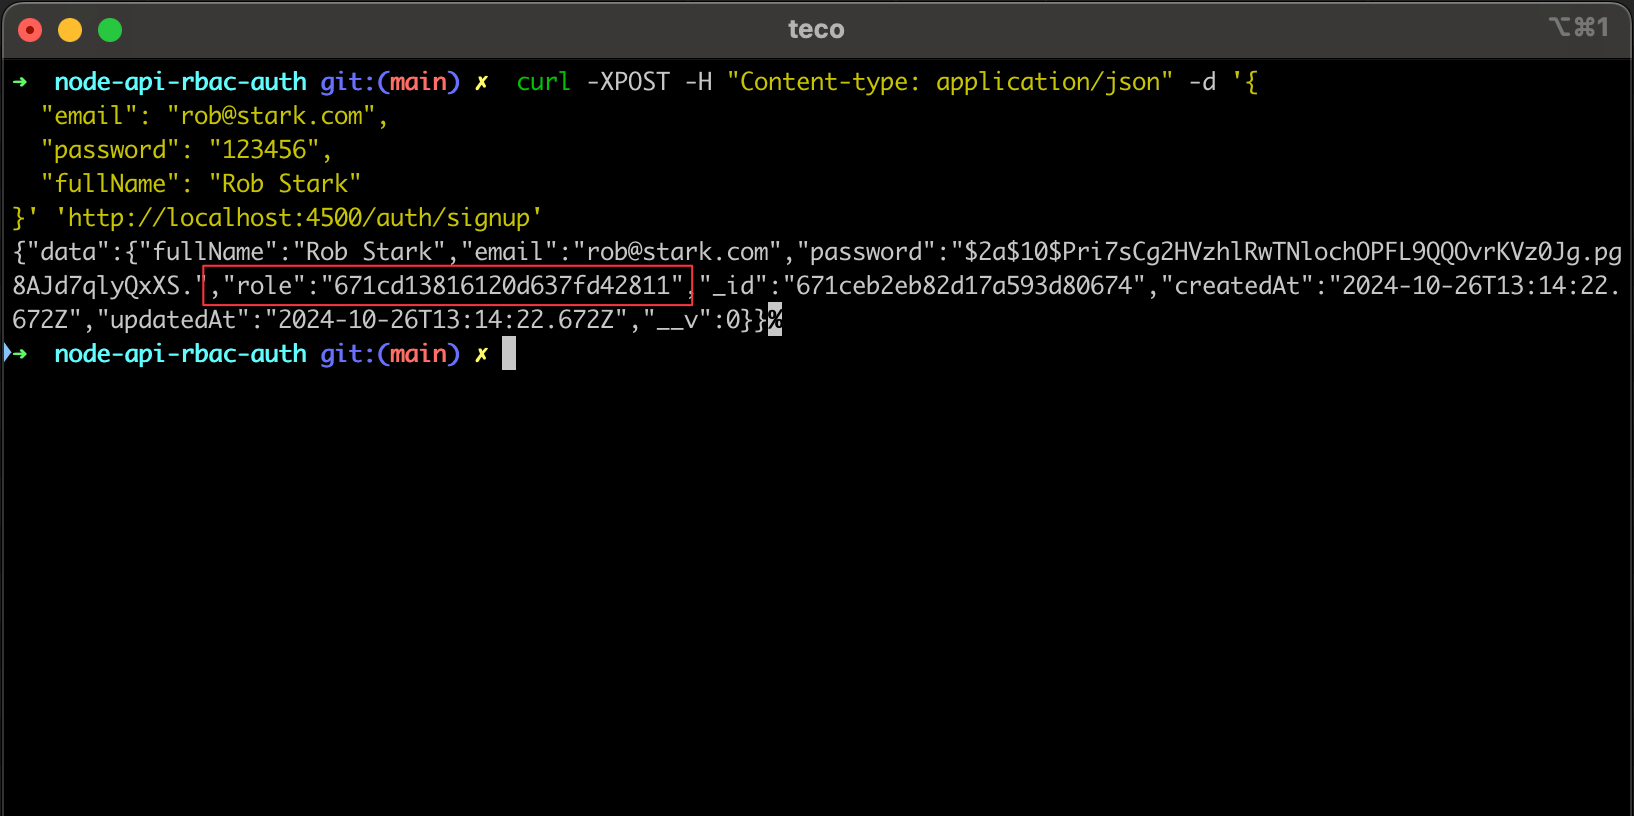
Re-run the application and try to register a user; we can see that the user's role is returned in the response.
Include the user role in the JWT payload
Now that a user has a role when accessing a protected resource, we want to determine his role to decide whether he should be allowed access to the resource.
When authenticating a user, we must include his role in the JWT payload to access it when we decode it.
Update the JWT token payload in the file "src/helpers/jwt.ts" to include the role
import { RoleType } from '../models/role.model';

export type TokenPayload = {
  id: string;
  role: RoleType;
};
Update the "authenticateUser()" function in the file "src/controllers/auth.controller.ts"; replace the function with the code below:
export const authenticateUser = async (req: Request, res: Response): Promise<Response> => {
  const { email, password } = req.body;

  const user = await User.findOne({ email }).populate('role').exec();

  if (!user) {
    return res.status(400).json({ message: 'Email or password is incorrect' });
  }

  const isMatch: boolean = bcrypt.compareSync(password, user.password);

  if (!isMatch) {
    return res.status(400).json({ message: 'Email or password is incorrect' });
  }

  const tokenInfo: TokenPayload = {
    id: user.id,
    role: user.role.name,
  };
  const token = generateJwtToken(tokenInfo, JWT_SECRET, JWT_EXPIRE);

  return res.json({ token, expiresIn: JWT_EXPIRE });
};
Protect the API routes for user and admin role
The API routes "/users/me" and "/users" must be accessible by users with respective roles USER and ADMIN;
We must take into account the role inheritance, which can be translated as follows:
- If a user with the role USER can access a resource, those with the roles ADMIN and SUPER ADMIN can also access it.
- If a user with the role ADMIN can access a resource, those with the role SUPER_ADMIN can also access it.
To configure role authorization on each protected route, we will define a mapping between the API route and the role authorized to access it.
When we retrieve the user role from the decoded JWT, we will check if it is included among those allowed for the current API route.
Update the file "src/config/auth.middleware.ts" and add the code below:
import { NextFunction, Request, Response } from 'express';
import { decodeJwtToken, TokenPayload } from '../helpers/jwt';
import { RoleType } from '../models/role.model';

export type CustomRequest = {
  user: { id: string };
} & Request;

const JWT_SECRET = process.env.JWT_SECRET || '';
const ALLOWED_ROUTES: string[] = ['/', '/health', '/auth/signup', '/auth/login'];

const ROUTES_ACL: Record<string, RoleType[]> = {
  '/users': [RoleType.ADMIN, RoleType.SUPER_ADMIN],
  '/users/me': [RoleType.USER, RoleType.ADMIN, RoleType.SUPER_ADMIN],
};

const isAuthorizedRoute = (currentRoute: string): boolean => {
  return ALLOWED_ROUTES.some((route) => currentRoute === route);
};

const isForbiddenRoute = (currentRoute: string, userRole: RoleType): boolean => {
  return ROUTES_ACL[currentRoute] && !ROUTES_ACL[currentRoute].includes(userRole);
};

export const authMiddleware = async (req: CustomRequest | any, res: Response, next: NextFunction) => {
  let routeName = '';

  if (req.originalUrl) {
    routeName = req.originalUrl;
  } else {
    return res.status(401).json({ message: 'Unauthorized access' });
  }

  if (isAuthorizedRoute(routeName)) {
    return next();
  }

  const token = req.headers['authorization'];

  if (token) {
    try {
      const decoded = (await decodeJwtToken(token.replace('Bearer ', ''), JWT_SECRET)) as TokenPayload | undefined;

      if (!decoded?.id) {
        return res.status(401).json({ message: 'Unauthorized access' });
      }

      if (isForbiddenRoute(routeName, decoded.role)) {
        return res.status(403).json({ message: 'Forbidden access' });
      }

      // Inject authenticated user in the Request object in order get access in the controllers
      req.user = decoded;

      return next();
    } catch (err) {
      console.error(err);
    }
  }

  return res.status(401).json({ message: 'Unauthorized access' });
};
Re-run the application and verify that a user with the role USER cannot access the API route "/users"
Test role-based access control on user API routes.
Protect the API route for the super admin role
The endpoint "/admins" creates a new admin in the system and is accessible only to a user with a super admin role.
Since the implementation doesn't exist, let's add the function "createAdmin()" in the file "src/controllers/auth.controller.ts"
export const createAdmin = async (req: Request, res: Response) => {
  const { email, fullName, password } = req.body;

  if (!email || !fullName || !password) {
    return res.status(422).json({ message: 'The fields email, fullName and password are required' });
  }

  const role = await Role.findOne({ name: RoleType.ADMIN });

  if (!role) {
    return res.status(500).json({ message: 'Role not found' });
  }

  const userInput: UserInput = {
    fullName,
    email,
    password: bcrypt.hashSync(password, 10),
    role: role._id,
  };

  const userCreated = await User.create(userInput);

  return res.status(201).json({ data: userCreated });
};
In the file "src/index.ts" link the API route "/auth/admins"
app.post('/auth/admins', createAdmin);
In the file "src/config/auth.middleware.ts", update the role configuration for the API route to include the route.
const ROUTES_ACL: Record<string, RoleType[]> = {
  '/users': [RoleType.ADMIN, RoleType.SUPER_ADMIN],
  '/users/me': [RoleType.USER, RoleType.ADMIN, RoleType.SUPER_ADMIN],
  '/auth/admins': [RoleType.SUPER_ADMIN],
};
There is no endpoint to create a user with the super admin role; let's create one at the application startup. Create a file "src/seeders/admin-seeder.ts" and add the code below:
import { Role, RoleType } from '../models/role.model';
import { User, UserInput } from '../models/user.model';
import * as bcrypt from 'bcryptjs';

export const seedAdmins = async (): Promise<void> => {
  const role = await Role.findOne({ name: RoleType.SUPER_ADMIN });

  if (!role) {
    console.error('Role not found');

    return;
  }

  const users: UserInput[] = [
    {
      fullName: 'Ned Stark',
      email: 'ned@stark.com',
      password: bcrypt.hashSync('123456', 10),
      role: role._id,
    },
  ];

  for (const user of users) {
    const existingUser = await User.findOne({ email: user.email });

    if (!existingUser) {
      await User.create(user);
    }
  }
};
Update the main file "src/index.ts" to execute the seedAdmins() function after the database connection.
// Existing imports...
import { seedRoles } from './seeders/role-seeder';
import { seedAdmins } from './seeders/admin-seeder';

// Existing code...

app.listen(PORT, async () => {
  await connectToDatabase();

  await seedRoles();

  await seedAdmins()

  console.log(`Application started on URL ${HOST}:${PORT} 🎉`);
});
Re-run the application and test the implementation:
Calling the API routes with super admin user.
We can see that a user with the super admin role can access all the API routes.
Wrap up
In this post, we saw how to implement a Role-based Access Control in a Node.js API to prevent authenticated users from accessing only the resources they are allowed. We can summarize the process in the following steps:
- Create an entity role to represent the access level in the application.
- Assign a role to a user and include it in the JWT payload.
- Create a mapping between each API route and the required access level.
- Retrieve the user role from the decoded JWT and verify if it is authorized.
By implementing an RBAC on our Node.js API, you strengthen the security of your system and prevent data leaks.
To go further, you can restrict resources based on permissions to enforce the least privilege on your user.
You can find the code source on the GitHub repository.
Follow me on Twitter or subscribe to my newsletter to avoid missing the upcoming posts and the tips and tricks I occasionally share.


