
Send email in Spring Boot with Thymeleaf and Mailgun

Photo by Rowan Freeman / Unsplash
In a Web application, we use email to notify users of an event that requires their attention. Spring Boot makes it easy to add this feature to our back-end application.
One of the most classic workflows in web applications is the registration process, where a user submits his information. The back-end retrieves the input, saves It in the database, sends a confirmation email, and finally sends the response to the user.
As you guessed, we will focus only on sending the confirmation email. At the end of this post, you will learn how to create an HTML template email with Thymeleaf, embed a picture in an email, and send an email asynchronously with Spring Boot.

Prerequisites
To follow this tutorial, you need the following tools:
- JDK 11 or higher - download link
- A Mailgun account
- Your preferred Java IDE
Set up the project
We will use the Spring Boot starter website start.spring.io to create a boilerplate with the necessary dependencies.
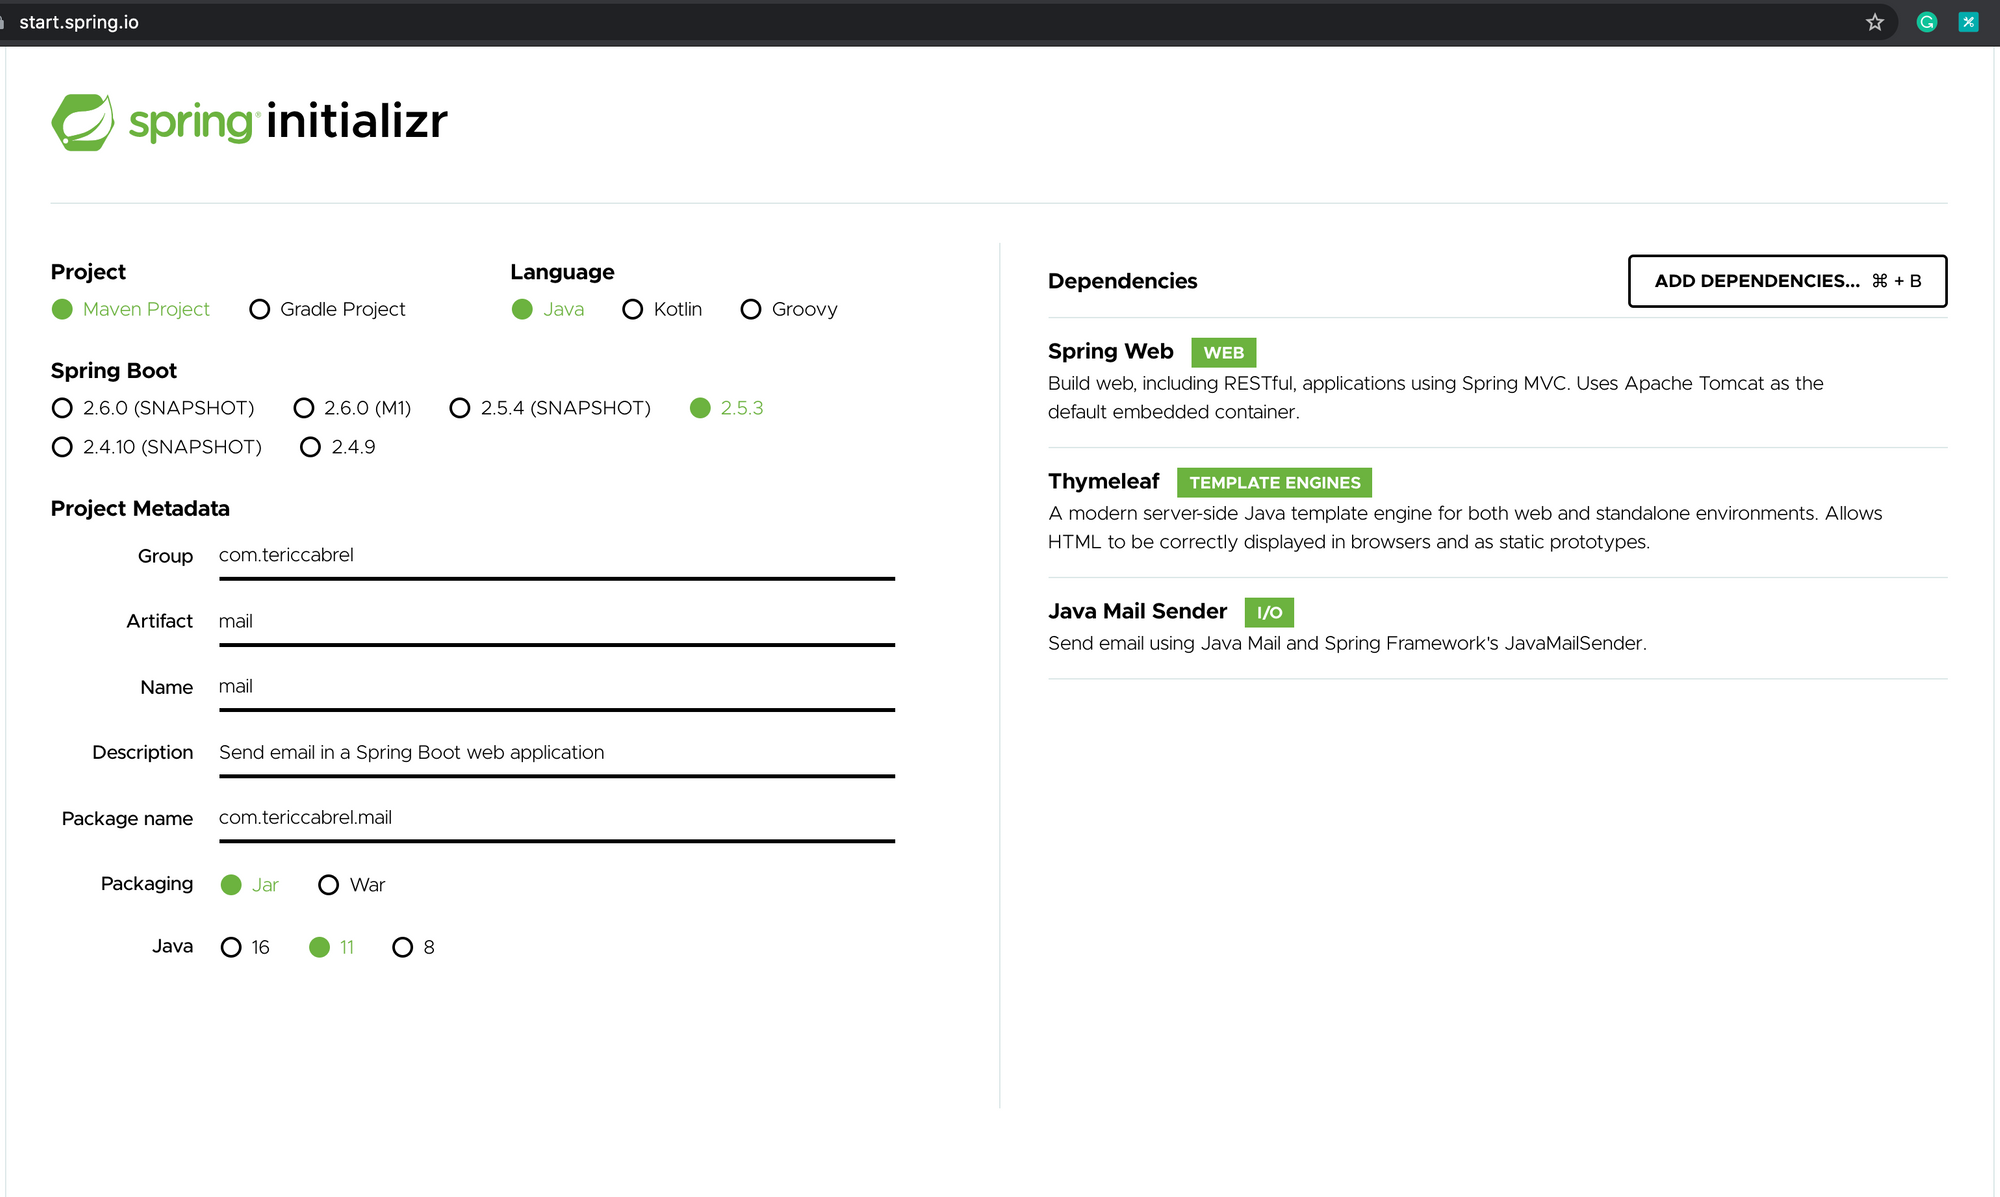
- Click on generate to download the zip file, unzip and open it in your IDE.
- Install Maven dependencies:
mvn install - Run the application:
mvn spring-boot run
I use IntelliJ from JetBrains, which installs dependencies automatically for me.
Build the email template
Thymeleaf is a server-side Java template engine for web and standalone environments making it easier to write dynamic content for web pages. It generates HTML and XHTML. If you want to learn more, check out the documentation.
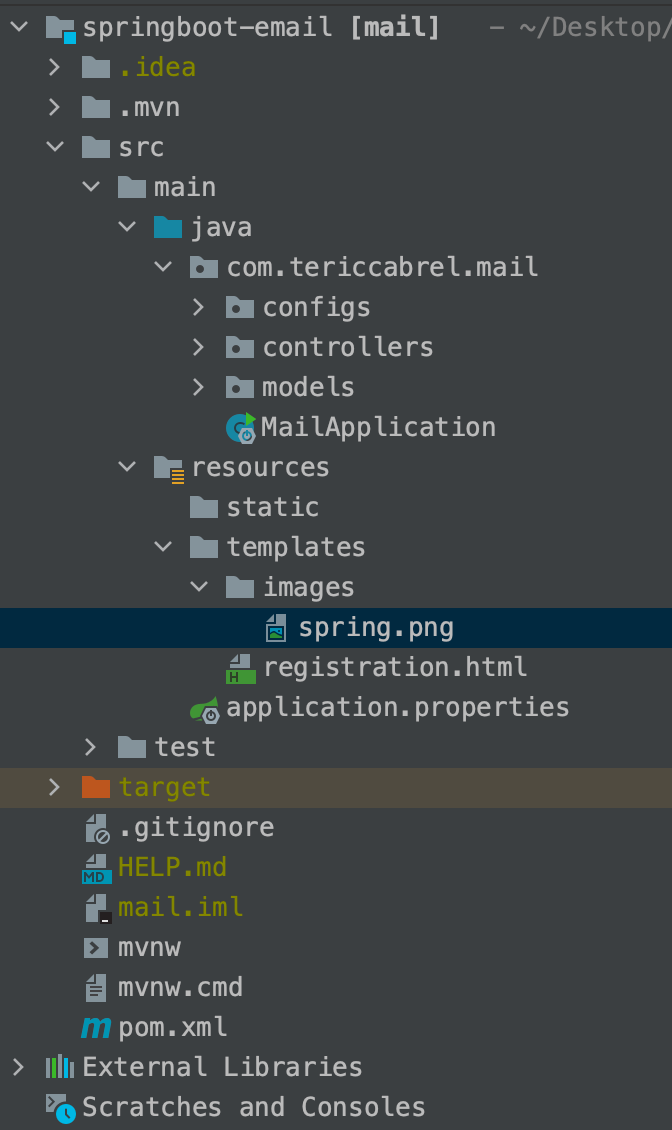
Create a file registration.html in the folder resources/templates. Also, create a folder images containing the picture we want to include in the email content.
Add the code below to the file registration.html:
<!DOCTYPE html>
<html xmlns:th="http://www.thymeleaf.org">
<head>
<title th:remove="all">Registration confirmation</title>
<meta http-equiv="Content-Type" content="text/html; charset=UTF-8" />
<style type="text/css">
body {
font-family: calibri, 'DejaVu Sans', Arial, Helvetica, sans-serif;
}
a.link {
border: solid 1px #000;
background-color: #000;
text-decoration: none;
color: #fff;
font-weight: bold;
display: block;
width: 360px;
text-align: center;
padding: 10px 0;
}
</style>
</head>
<body>
<h1>Confirm your account</h1>
<div>Welcome to AwesomeApp <b th:text="${name}">name</b> !</div>
<p>
Your account has been created on our platform; here is your login information
<br/><br/>
Email address : <b th:text="${email}">email</b><br/>
<br/>
To confirm the validity of your email address, please click on the link below
</p>
<p style="text-align: left;">
<a class="link" href="#" th:href="${url}">Confirm my account</a>
</p>
<br>
<p>
<img src="images/spring.png" data-th-src="|cid:springLogo|" height="80" />
</p>
<p>
Regards, <br />
  <em>The AwesomeApp Team</em>
</p>
</body>
</html>
The picture spring.png inside the folder images is the logo of the Spring Framework.

Configure the view engine template
We need to indicate to the template engine (Thymeleaf) where to read and parse the files. For that, let's create a file TemplateEngineConfig.java inside a package configs.
package com.tericcabrel.mail.configs;

@Configuration
public class TemplateEngineConfig implements WebMvcConfigurer {
  private static final String EMAIL_TEMPLATE_ENCODING = "UTF-8";

  @Bean
  @Primary
  public TemplateEngine emailTemplateEngine() {
    final SpringTemplateEngine templateEngine = new SpringTemplateEngine();
    // Resolver for HTML emails (except the editable one)
    templateEngine.addTemplateResolver(emailTemplateResolver());

    return templateEngine;
  }

  private ITemplateResolver emailTemplateResolver() {
    final ClassLoaderTemplateResolver templateResolver = new ClassLoaderTemplateResolver();
    templateResolver.setResolvablePatterns(Collections.singleton("*"));
    templateResolver.setPrefix("/templates/");
    templateResolver.setSuffix(".html");
    templateResolver.setTemplateMode(TemplateMode.HTML);
    templateResolver.setCharacterEncoding(EMAIL_TEMPLATE_ENCODING);
    templateResolver.setCacheable(false);

    return templateResolver;
  }
}
Now we defined the custom configuration for the template engine, we need to disable the auto-configuration for Thymeleaf. Update the entry file:
@SpringBootApplication(exclude = { ThymeleafAutoConfiguration.class })
public class MailApplication {
	public static void main(String[] args) {
		SpringApplication.run(MailApplication.class, args);
	}
}
Configure STMP settings
To send an email, we need to set SMTP settings from a provider who is Mailgun, for our case. Here are the steps to find the SMTP credentials:
- Login to your Mailgun account
- In the sidebar menu, click on the dropdown menu "Sending."
- Click on the submenu "Overview"
- On the page displayed, you have two boxes, API and SMTP; click on the latter.
- You will see a section with SMTP credentials.


Add SMTP settings in the Spring configuration file
Open the file application.properties and update with the code below:
spring.mail.host=smtp.mailgun.org
spring.mail.port=587
spring.mail.username=<mailgun_username>
spring.mail.password=<mailgun_password>
spring.mail.properties.mail.transport.protocol=smtp
spring.mail.properties.mail.smtp.starttls.enable=true
spring.mail.properties.mail.smtp.starttls.required=true
spring.mail.properties.mail.smtp.auth=true
spring.mail.properties.mail.smtp.from=contact@tericcabrel.com
spring.mail.default-encoding=UTF-8
spring.mail.test-connection=false
mail.from.name=AwesomeApp
Note: The property spring.mail.test-connection when set to true, test the SMTP connection on application launch, which means if the connection fails, an error will be thrown, and thus prevent the Web application from starting.
Create an endpoint to test
Let's create a controller called UserController.java and add the code below:
package com.tericcabrel.mail.controllers;

@RestController
public class UserController {
  private static final String TEMPLATE_NAME = "registration";
  private static final String SPRING_LOGO_IMAGE = "templates/images/spring.png";
  private static final String PNG_MIME = "image/png";
  private static final String MAIL_SUBJECT = "Registration Confirmation";

  private final Environment environment;

  private final JavaMailSender mailSender;

  private final TemplateEngine htmlTemplateEngine;

  public UserController(Environment environment, JavaMailSender mailSender, TemplateEngine htmlTemplateEngine) {
    this.environment = environment;
    this.mailSender = mailSender;
    this.htmlTemplateEngine = htmlTemplateEngine;
  }

  @PostMapping("/register")
  public ResponseEntity<Object> register(@RequestBody User user)
      throws MessagingException, UnsupportedEncodingException {

    // TODO save user in the database here

    String confirmationUrl = "generated_confirmation_url";
    String mailFrom = environment.getProperty("spring.mail.properties.mail.smtp.from");
    String mailFromName = environment.getProperty("mail.from.name", "Identity");

    final MimeMessage mimeMessage = this.mailSender.createMimeMessage();
    final MimeMessageHelper email;
    email = new MimeMessageHelper(mimeMessage, true, "UTF-8");

    email.setTo(user.getEmail());
    email.setSubject(MAIL_SUBJECT);
    email.setFrom(new InternetAddress(mailFrom, mailFromName));

    final Context ctx = new Context(LocaleContextHolder.getLocale());
    ctx.setVariable("email", user.getEmail());
    ctx.setVariable("name", user.getName());
    ctx.setVariable("springLogo", SPRING_LOGO_IMAGE);
    ctx.setVariable("url", confirmationUrl);

    final String htmlContent = this.htmlTemplateEngine.process(TEMPLATE_NAME, ctx);

    email.setText(htmlContent, true);

    ClassPathResource clr = new ClassPathResource(SPRING_LOGO_IMAGE);

    email.addInline("springLogo", clr, PNG_MIME);

    mailSender.send(mimeMessage);

    Map<String, String> body = new HashMap<>();
    body.put("message", "User created successfully.");

    return new ResponseEntity<>(body, HttpStatus.OK);
  }
}
Test the application
Start the application and use an HTTP client to send a POST request to the URL http://localhost:8080/register.
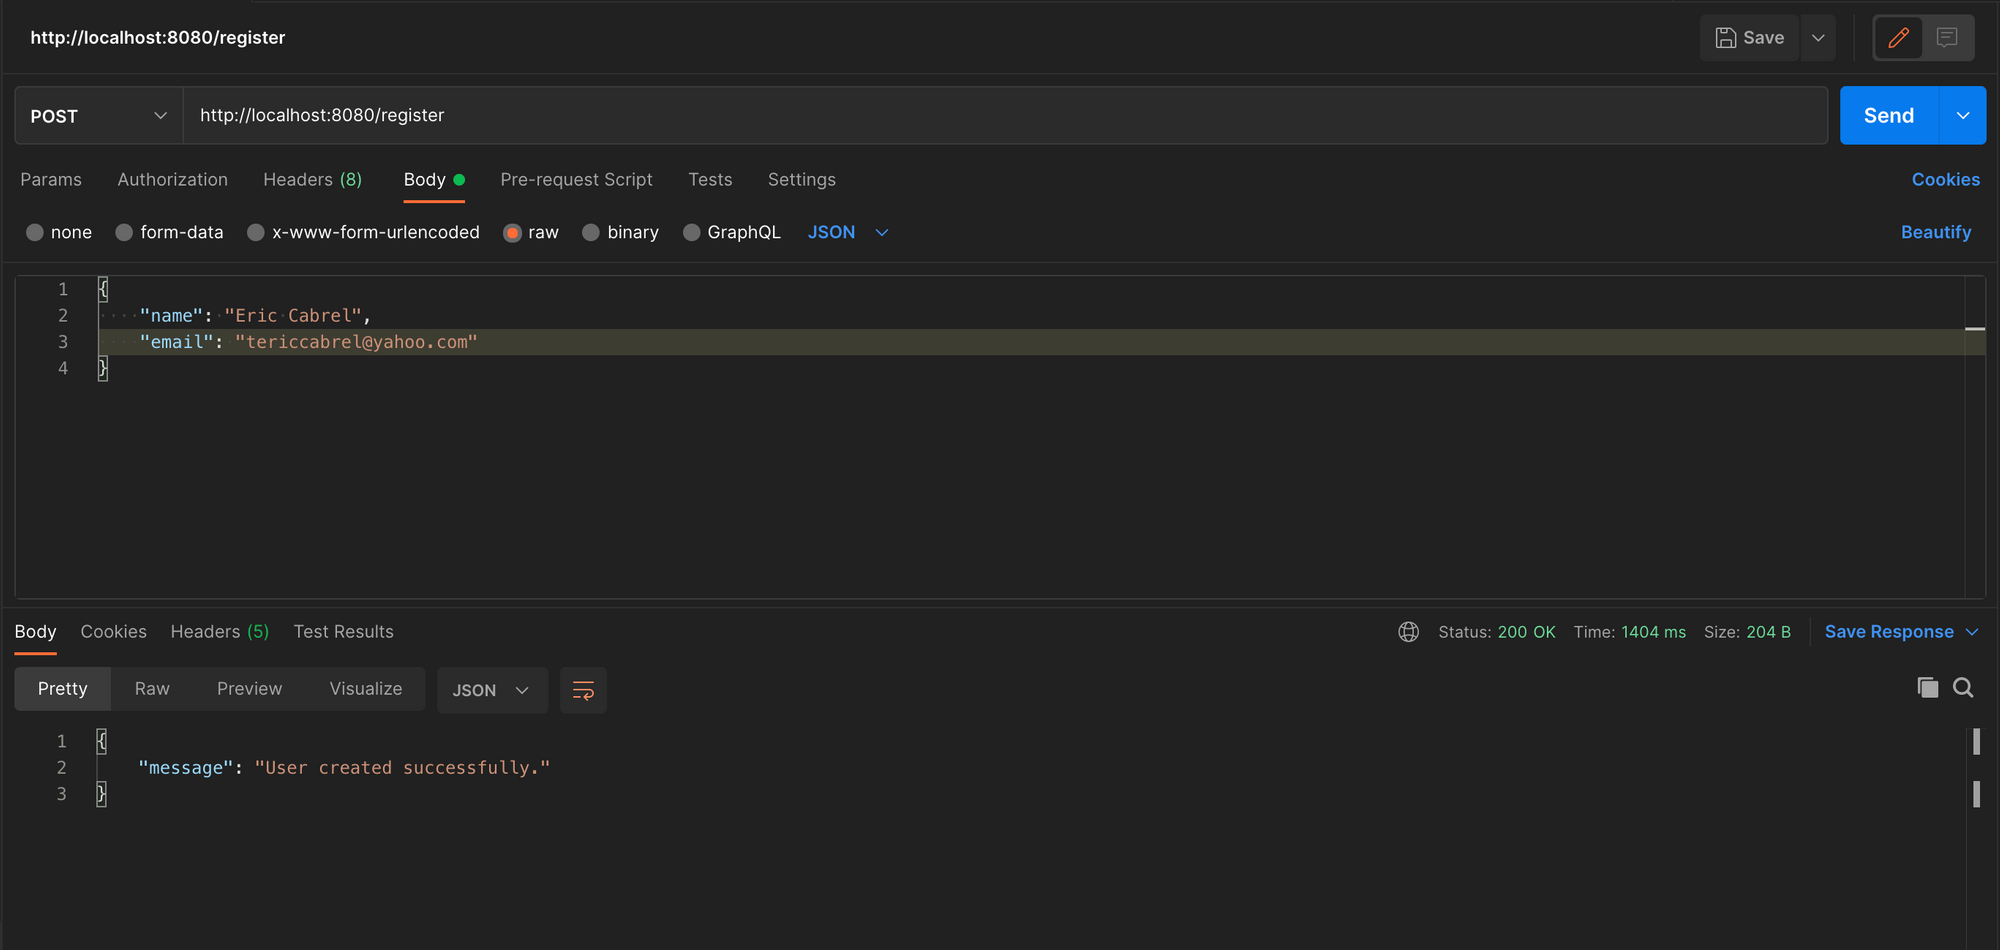
We get the following output in the inbox.

It was the end of the tutorial when we saw how to send an email with Spring Boot and combine it with Thymeleaf to design a beautiful template.
Find the complete source code on the Github repository.
Follow me on Twitter or subscribe to my newsletter to avoid missing the upcoming posts and the tips and tricks I occasionally share.