
Document a Spring Boot REST API with Swagger and Open API


Photo by Mediamodifier / Unsplash
When building a public API, providing API documentation is paramount to make the integration seamless for others developers. In the Spring ecosystem, there are many tools for building API documentation, and in this post, we will use Spring Doc, which uses Open API and Swagger.
The Open API specification defines a standard, language-agnostic interface to RESTful APIs, allowing humans and computers to discover and understand the service's capabilities without access to source code, documentation, or network traffic inspection.
Swagger UI generates a Web UI from the Open API metadata to browse and test API endpoints directly in the browser.
Prerequisites
You must need these tools installed on your computer to follow this tutorial:
- JDK 11 or higher - Download's link
- Maven 3.5 or higher - Download's link
- Docker - Download's link
We need Docker to run a container for MySQL 8; you can skip it if MySQL is installed on your computer.
Run the command below to start the Docker container from the MySQL image.
docker run -d -e MYSQL_ROOT_PASSWORD=secret -e MYSQL_DATABASE=taskdb --name mysqldb -p 3307:3306 mysql:8.0
Setup the project
We built a REST API using Spring Boot and MySQL in the previous blog post below; we will use the final project as the basis of this post.

This project exposes five endpoints to manage tasks to do. We aim to provide API documentation to help developers integrate the API seamlessly.
Let's clone the project and run it locally:
git clone https://github.com/tericcabrel/blog-tutorials

cd springboot-rest-api

mvn install

mvn  spring-boot:run
The application will start on port 8000. You can use an HTTP client to perform requests.
Install the Maven dependency for Swagger
Open the project in your favorite IDE, then let's open the maven configuration file pom.xml to add the Swagger dependencies:
<dependency>
	<groupId>org.springdoc</groupId>
	<artifactId>springdoc-openapi-ui</artifactId>
	<version>1.6.11</version>
</dependency>
Save and install the dependencies added with the command mvn install.
Set the global configuration
The first part of the API documentation is to initialize and define the general information about the API, like the author, the description, the base URL, the license, etc...
Open the main file TaskmanApplication.java and add the code below:
@Bean
public OpenAPI myOpenAPI() {
	Contact contact = new Contact();
	contact.setEmail("tericcabrel@yahoo.com");
	contact.setName("Eric Cabrel TIOGO");
	contact.setUrl("https://my-awesome-api.com");

	Server localServer = new Server();
	localServer.setUrl("http://localhost:8000");
	localServer.setDescription("Server URL in Local environment");

	Server productionServer = new Server();
	productionServer.setUrl("https://my-awesome-api.com");
	productionServer.setDescription("Server URL in Production environment");

	License mitLicense = new License()
			.name("MIT License")
			.url("https://choosealicense.com/licenses/mit/");

	Info info = new Info()
			.title("TASK MANAGER API")
			.contact(contact)
			.version("1.0")
			.description("This API exposes endpoints for users to manage their tasks.")
			.termsOfService("https://my-awesome-api.com/terms")
			.license(mitLicense);

	return new OpenAPI()
			.info(info)
			.servers(List.of(localServer, productionServer));
}
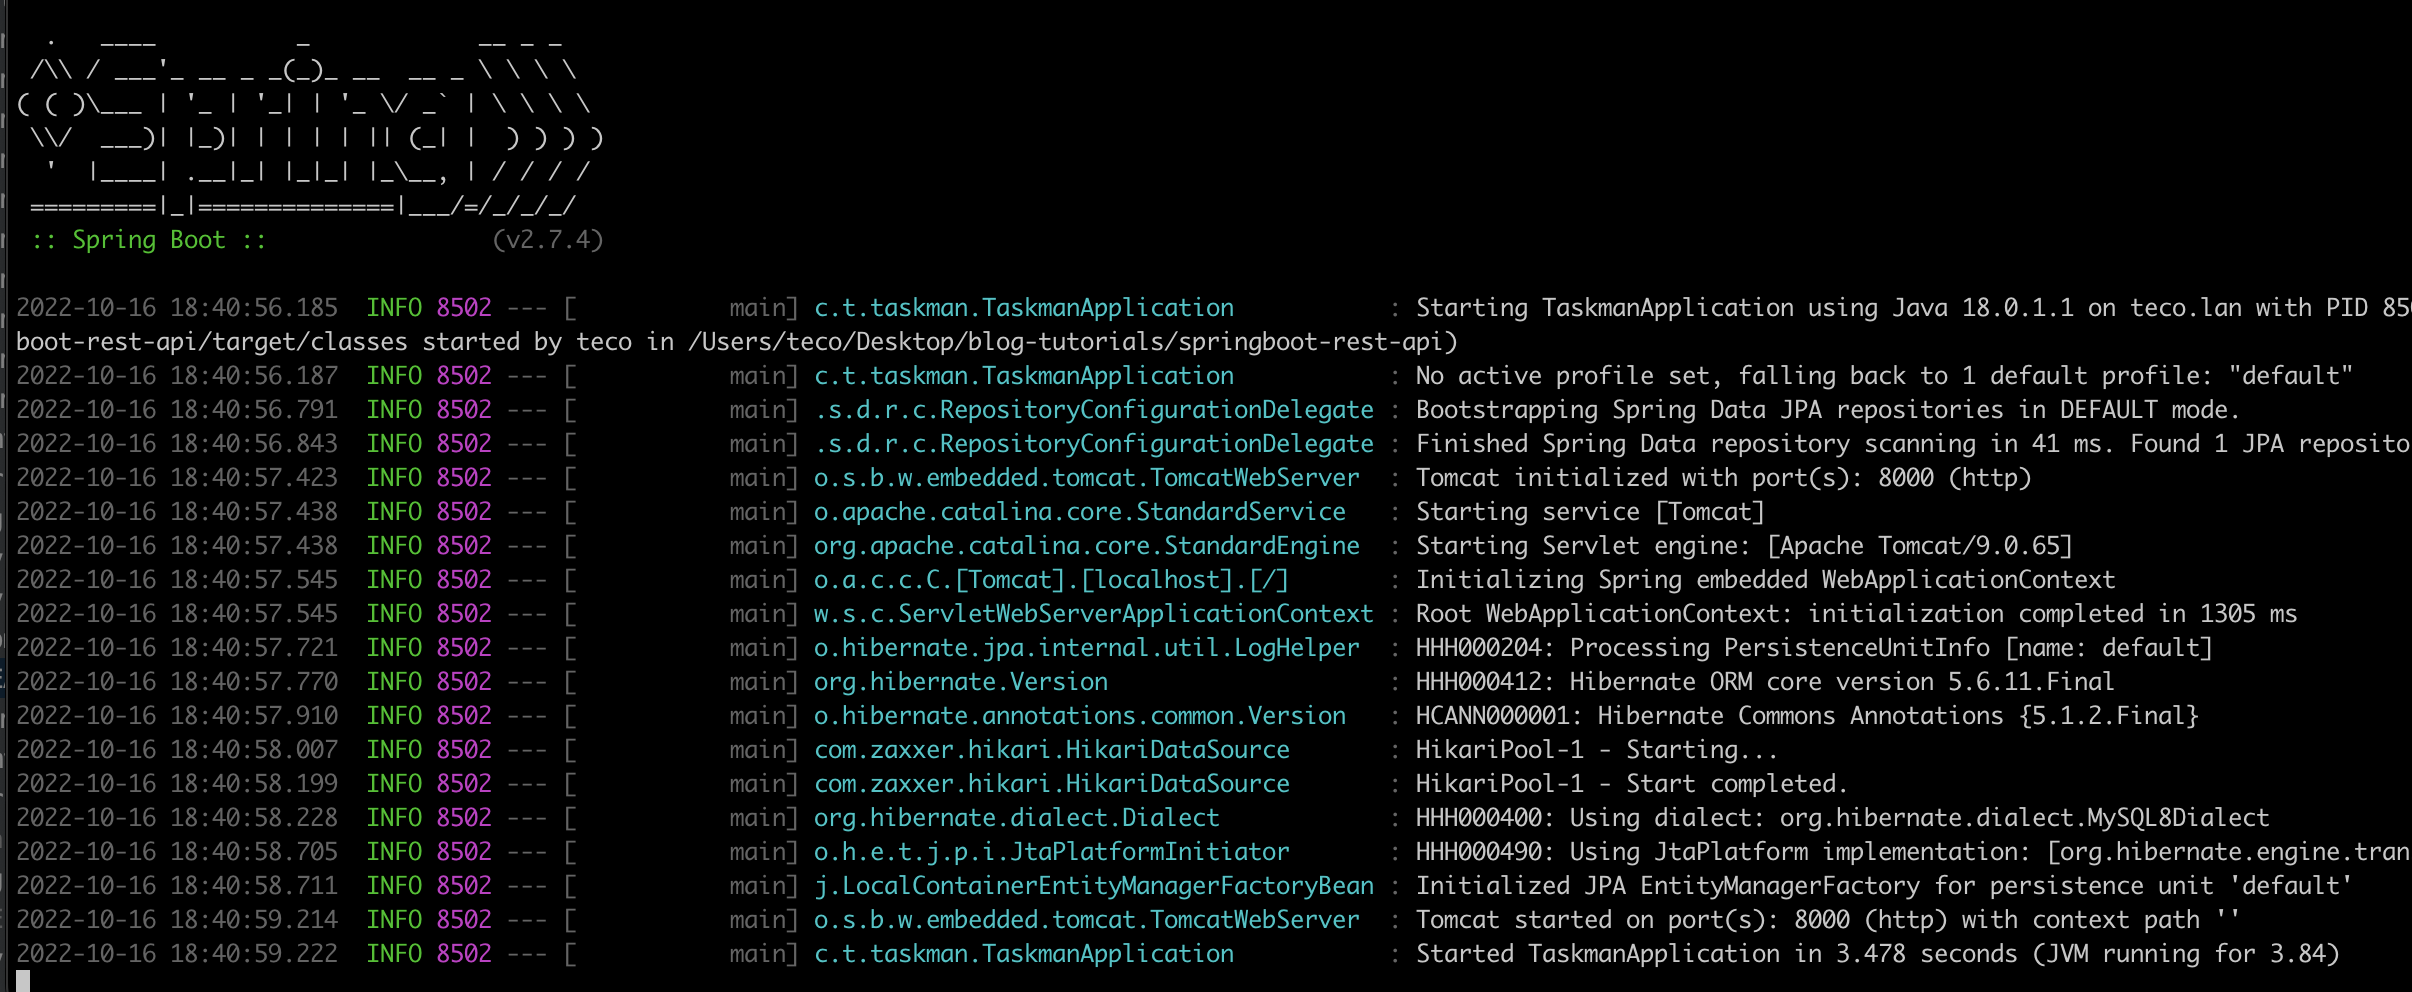
Save and run the project. The swagger configuration will be loaded, and the route /swagger-ui/index.html will be added.
Open your browser and navigate to http://localhost:8000/swagger-ui/index.html.
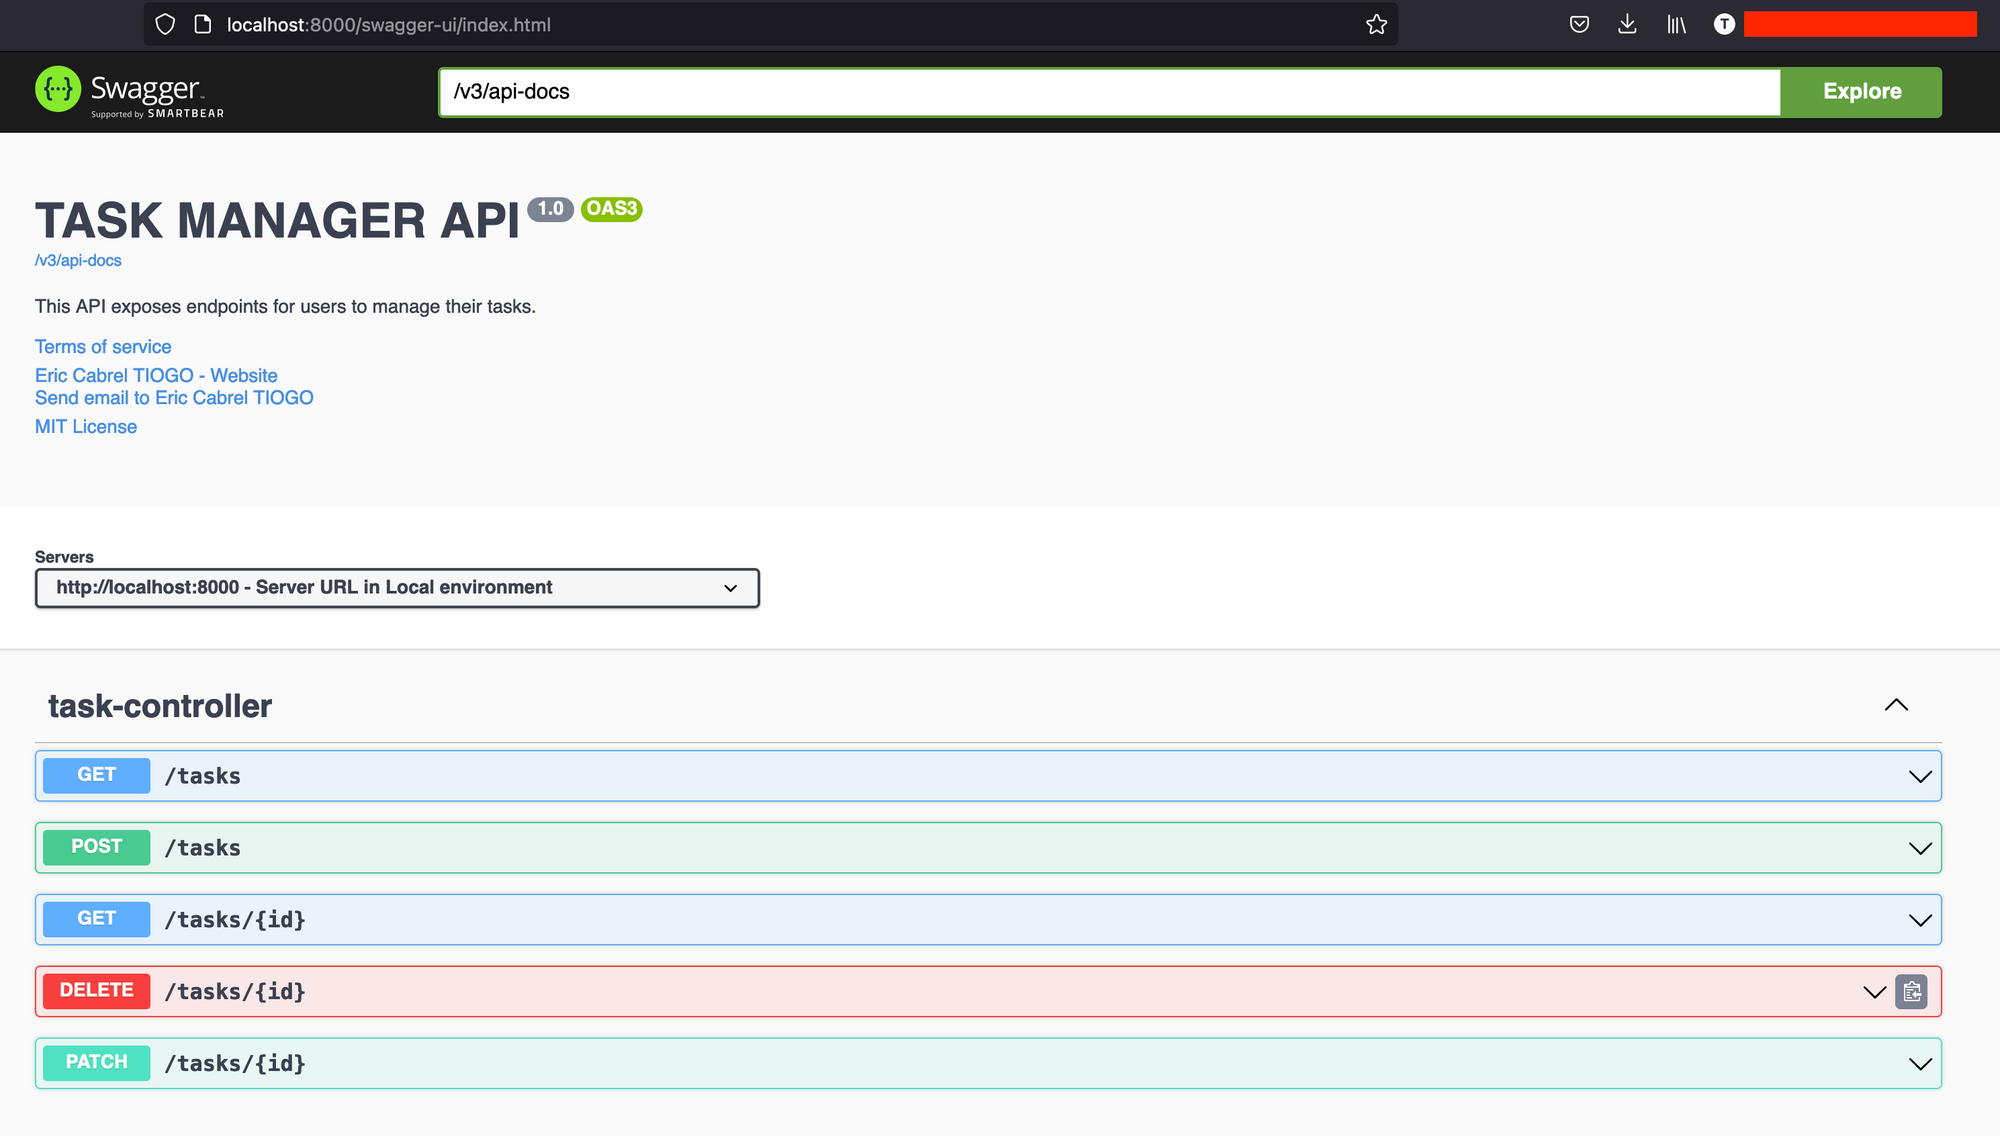
We have this nice-looking page with the information we set in the Swagger configuration.
All five API endpoints are visible, yet we didn't add any configuration to them. When Swagger is initialized at the startup, it scans the project to find the available routes and generates the API documentation for each one.
You might think it is done, but not really, because you can use Swagger annotation methods to add more description to your API endpoint. Let's see out to do that.
Change the endpoint group's name
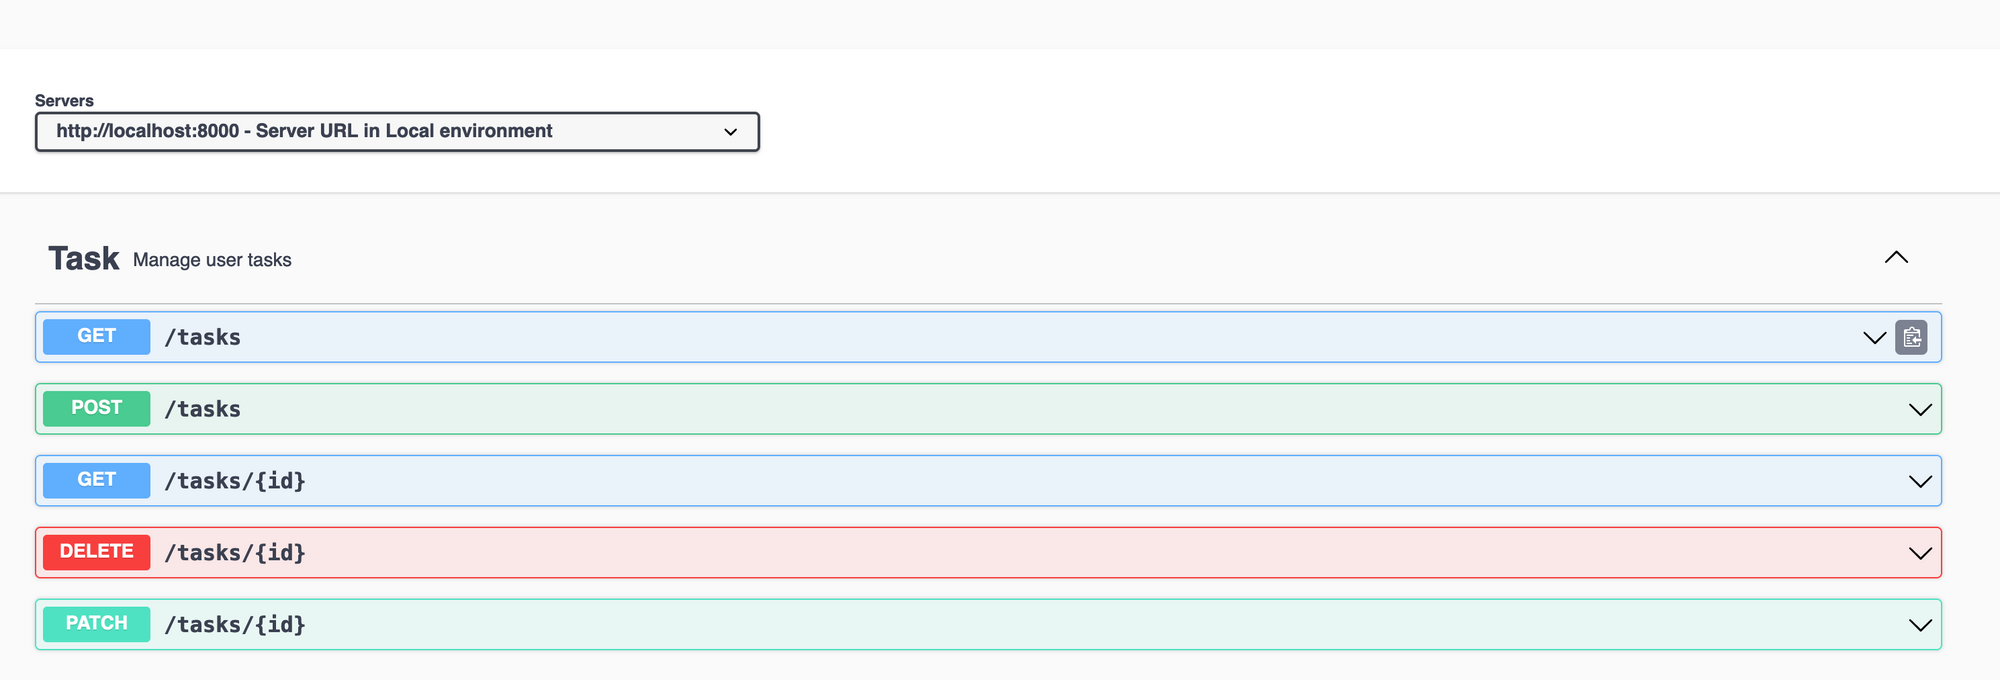
Our endpoints are grouped inside the file TaskController.java. We see in the picture above that the name for this group of endpoints is task-controller.
To change it, we can add the annotation @Tag ; update the file TaskController.java with the code below:
// Previous existing import here...

import io.swagger.v3.oas.annotations.tags.Tag;

@Tag(name = "Task", description = "Manage user tasks")
@RestController
public class TaskController {
// existing code here....
Re-run the application and browse the API documentation again:
Document the endpoint to create a task
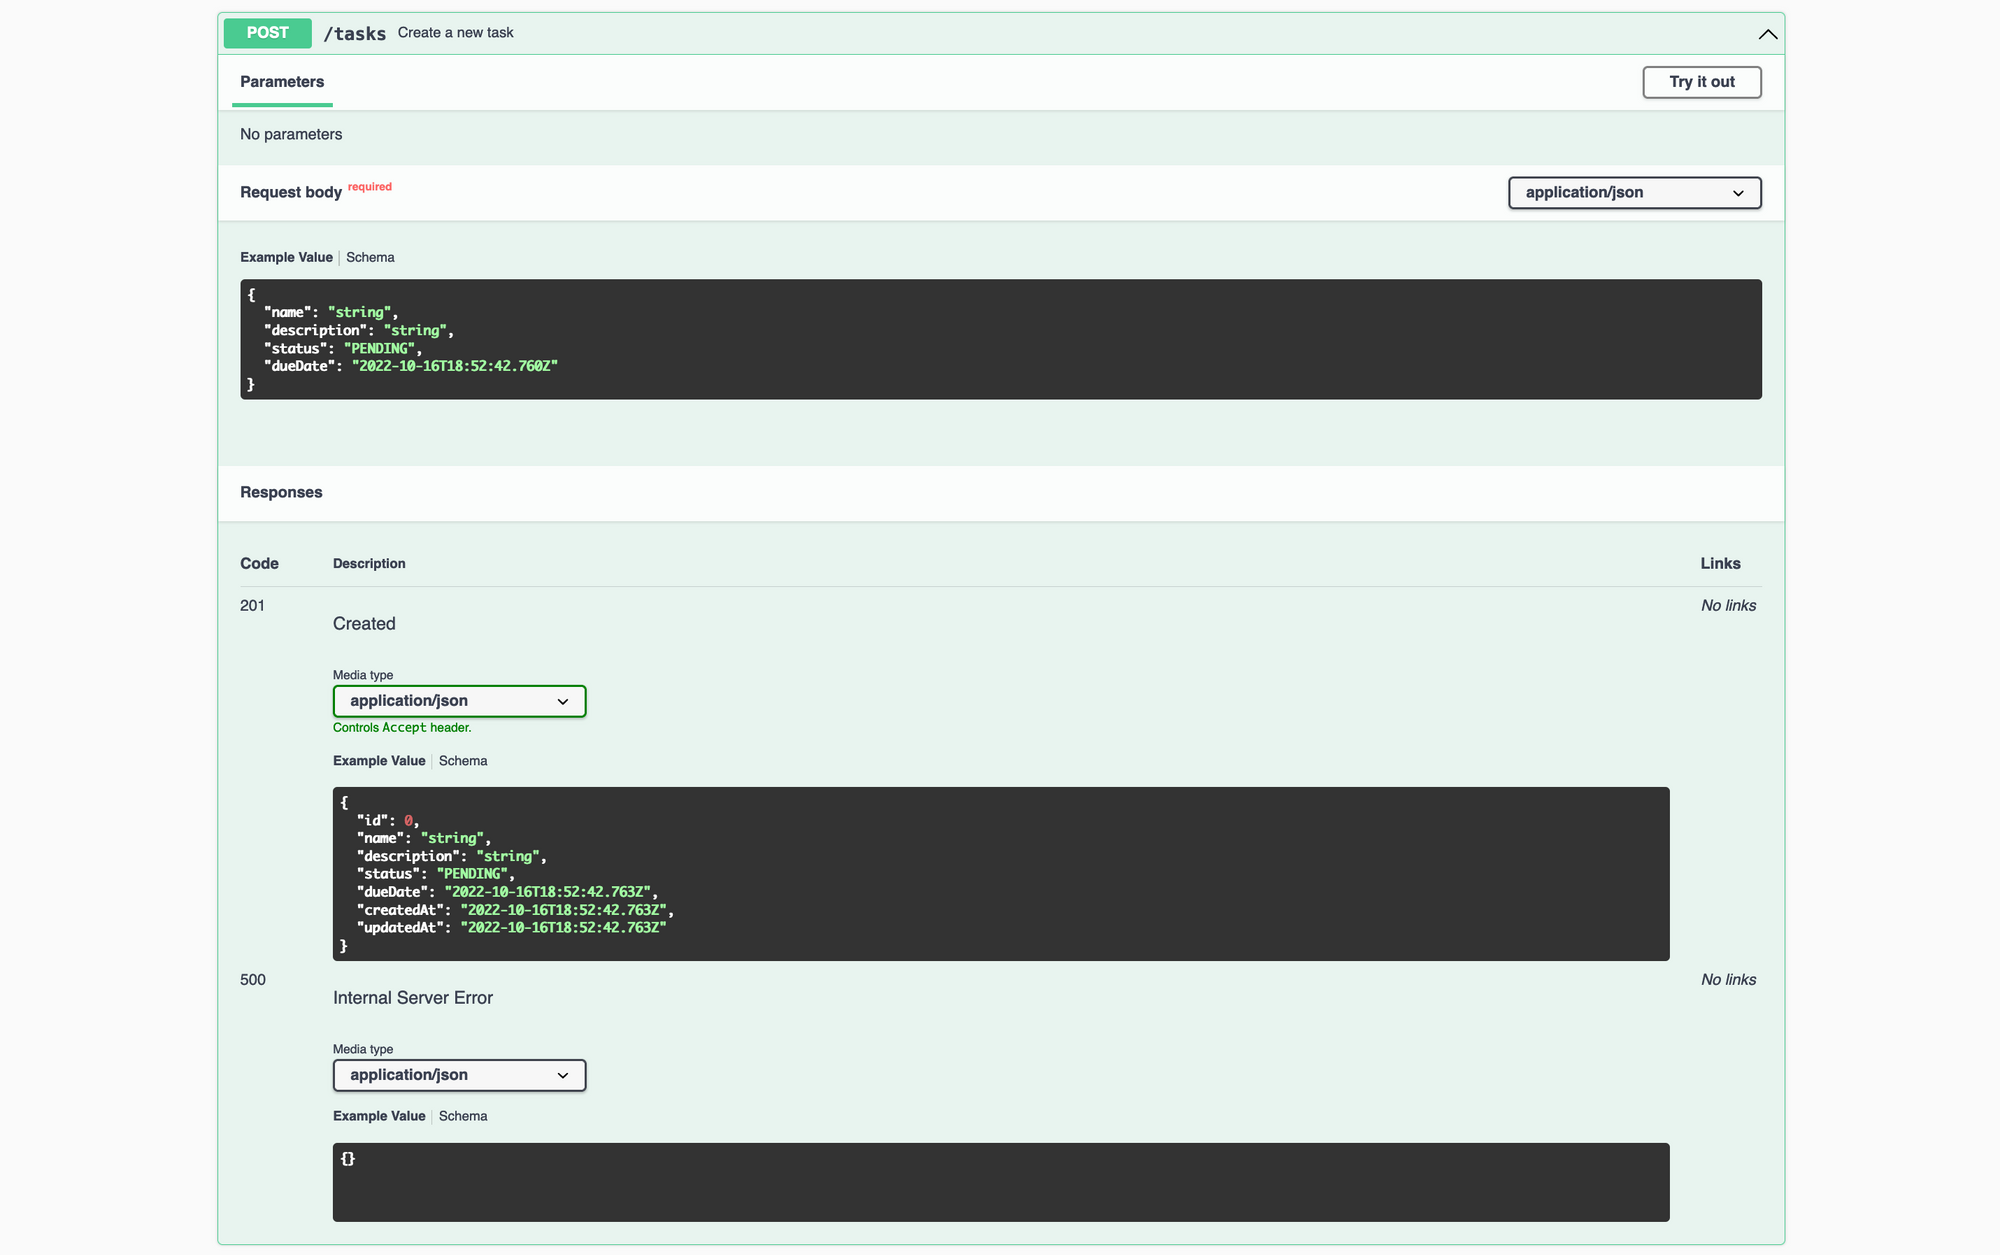
The endpoint for creating a task expected some input from the request body with a specific format and provided a response in a particular structure.
The code below describes this endpoint:
@Operation(summary = "Create a new task")
@ApiResponses({
    @ApiResponse(responseCode = "201", content = {
                @Content(schema = @Schema(implementation = Task.class), mediaType = "application/json")
    }),
    @ApiResponse(responseCode = "500", content = {
                @Content(schema = @Schema(implementation = ErrorResponse.class), mediaType = "application/json")
    }),
})
@PostMapping("/tasks")
public ResponseEntity<Task> createTask(@RequestBody CreateTaskInput createTaskInput) {
    Task taskCreated = taskService.create(createTaskInput.toTask());

    return new ResponseEntity<>(taskCreated, HttpStatus.CREATED);
}
We defined a description of the endpoint, and the possible responses to expect, including the HTTP status code and the response body data.
The properties in the request body are mapped to the class CreateTaskInput.java; we must define the properties description inside this file. Update the file in the code below:
@Schema(title = "CreateTaskInput", description = "Parameters required to create a task", required = true)
public record CreateTaskInput(String name, String description, TaskStatusEnum status, Date dueDate) {
	// Existing code here...
}
Re-run the application and browse the API documentation:
Document the endpoint to get all tasks
The API is pretty similar to the previous one; update code related to retrieving all tasks in the file TaskController.java with the code below:
@Operation(summary = "Retrieve all tasks")
@ApiResponses({
    @ApiResponse(responseCode = "200", content = {
        @Content(schema = @Schema(implementation = Task[].class), mediaType = "application/json")
    }),
    @ApiResponse(responseCode = "500", content = {
        @Content(schema = @Schema(implementation = ErrorResponse.class), mediaType = "application/json")
    })
})
@GetMapping("/tasks")
public ResponseEntity<List<Task>> allTasks() {
    List<Task> tasks = taskService.findAll();

    return new ResponseEntity<>(tasks, HttpStatus.OK);
}
Document the endpoint to get a task
Update code related to retrieving a task in the file TaskController.java with the code below:
@Operation(summary = "Retrieve a task")
@ApiResponses({
	@ApiResponse(responseCode = "200", content = {
        @Content(schema = @Schema(implementation = Task.class), mediaType = "application/json")
    }),
    @ApiResponse(responseCode = "500", content = {
        @Content(schema = @Schema(implementation = ErrorResponse.class), mediaType = "application/json")
    }),
    @ApiResponse(responseCode = "404", content = {
        @Content(schema = @Schema(implementation = ErrorResponse.class), mediaType = "application/json")
    })
})
@GetMapping("/tasks/{id}")
public ResponseEntity<Task> oneTask(@PathVariable int id) {
	Optional<Task> optionalTask = taskService.findById(id);

    if (optionalTask.isPresent()) {
       return new ResponseEntity<>(optionalTask.get(), HttpStatus.OK);
    }

    return new ResponseEntity<>(HttpStatus.NOT_FOUND);
}
Here we added another ApiResponse for the 404 status code.
Document the endpoint to update a task
Update code related to updating a task in the file TaskController.java with the code below:
@Operation(summary = "Update task information")
@ApiResponses({
    @ApiResponse(responseCode = "200", content = {
        @Content(schema = @Schema(implementation = Task.class), mediaType = "application/json")
    }),
    @ApiResponse(responseCode = "500", content = {
        @Content(schema = @Schema(implementation = ErrorResponse.class), mediaType = "application/json")
    }),
    @ApiResponse(responseCode = "404", content = {
        @Content(schema = @Schema(implementation = ErrorResponse.class), mediaType = "application/json")
    }),
})
@PatchMapping("/tasks/{id}")
public ResponseEntity<Task> updateTask(@PathVariable int id, @RequestBody UpdateTaskInput updateTaskInput) {
    Optional<Task> optionalTask = taskService.findById(id);

    if (optionalTask.isEmpty()) {
        return new ResponseEntity<>(HttpStatus.NOT_FOUND);
    }

    Task taskToUpdate = optionalTask.get();

    taskToUpdate.setStatus(updateTaskInput.status());
    taskToUpdate.setDueDate(updateTaskInput.dueDate());

    Task taskUpdated = taskService.update(taskToUpdate);

    return new ResponseEntity<>(taskUpdated, HttpStatus.OK);
}
We will also update the file UpdateTaskInput.java to add the description:
import io.swagger.v3.oas.annotations.media.Schema;

import java.util.Date;

@Schema(title = "UpdateTaskInput", description = "Parameters required to update a task", required = true)
public record UpdateTaskInput(TaskStatusEnum status, Date dueDate) {

}
Document the endpoint to delete a task
Update code related to deleting a task in the file TaskController.java with the code below:
@Operation(summary = "Delete a task")
@ApiResponses({
    @ApiResponse(responseCode = "206", content = {
        @Content(schema = @Schema(), mediaType = "application/json")
    }),
    @ApiResponse(responseCode = "500", content = {
        @Content(schema = @Schema(implementation = ErrorResponse.class), mediaType = "application/json")
    })
})
@DeleteMapping("/tasks/{id}")
public ResponseEntity<Void> deleteTask(@PathVariable int id) {
    taskService.delete(id);

    return ResponseEntity.noContent().build();
}
Customize Swagger from the Spring config file
Maven dependencies expose properties to configure our API documentation from the spring configuration file. These configurations are categorized into two groups:
- Open API properties: define how to scan the project to find API endpoints and generate the documentation from them.
- Swagger UI properties: describe how to customize the UI of the API documentation.
All these properties start with the prefix springdoc. Check out this page to see all the available properties and their purposes.
Below is an example of a configuration you can do:
springdoc.packages-to-scan=com.tericcabrel.taskman.controllers
springdoc.api-docs.enabled=true
springdoc.swagger-ui.path=documentation
springdoc.swagger-ui.enabled=true
springdoc.swagger-ui.operationsSorter=method
springdoc.swagger-ui.tryItOutEnabled=true
springdoc.swagger-ui.filter=true
springdoc.swagger-ui.tagsSorter=alpha
Wrap up
Writing API documentation helps to integrate your API easily, and Swagger and Open API make it easy to build one. We covered the basis required to build API documentation, and feel free to check out the Spring doc documentation to go further.
You can find the code source on the GitHub repository.
Follow me on Twitter or subscribe to my newsletter to avoid missing the upcoming posts and the tips and tricks I occasionally share.