
Build a REST API With Spring Boot and MySQL


Photo by Jerry Zhang / Unsplash
A REST API is an Application Programming Interface following REST architecture constraints. Today, we use it in various use cases, like a backend API to be consumed by a frontend application, a public API consumed by other clients, etc...
This post will show how to build a REST API using Java and Spring Boot.
The use case
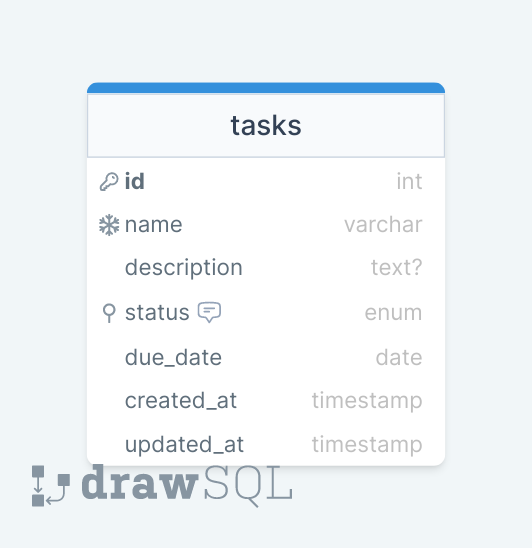
Let's say we will build the backend of a task manager that will allow users to manage their things to do. A simple database schema of the application will look like this:
The REST API will expose the following endpoints:
| Endpoint | Method | Actions |
|---|---|---|
| /tasks | POST | Create a new task |
| /tasks | GET | Retrieve all tasks |
| /tasks/:id | GET | Retrieve one task by its ID |
| /tasks/:id | PATCH | Update a task by its ID |
| /tasks/:id | DELETE | Delete a task by its ID |
Prerequisites
You must need these tools installed on your computer to follow this tutorial.
- JDK 11 or higher - Download link
- Maven 3.5 or higher - Download link
- Docker - Download's link
- An HTTP client such as Postman, Insomnia, cURL, etc...
We need Docker to run a container for MySQL 8; you can skip it if MySQL is installed on your computer. Run the command below to start the Docker container from the MySQL image:
docker run -d -e MYSQL_ROOT_PASSWORD=secret -e MYSQL_DATABASE=taskdb --name mysqldb -p 3307:3306 mysql:8.0
Create the project
There is an online project generator to create a Spring Boot project with the required dependencies. You can use or create a new project from the IDE IntelliJ. I guide you on how to do that in the post below:

We need three dependencies:
- The Spring Web: Build web, including RESTful, applications using Spring MVC. Uses Apache Tomcat as the default embedded container.
- The Spring Data JPA: Persist data in SQL stores with Java Persistence API using Spring Data and Hibernate.
- MySQL Driver for Java: The MySQL driver makes it possible to interact with a database from a Java application.
Using the first method, go to the URL start.spring.io to generate a new project.
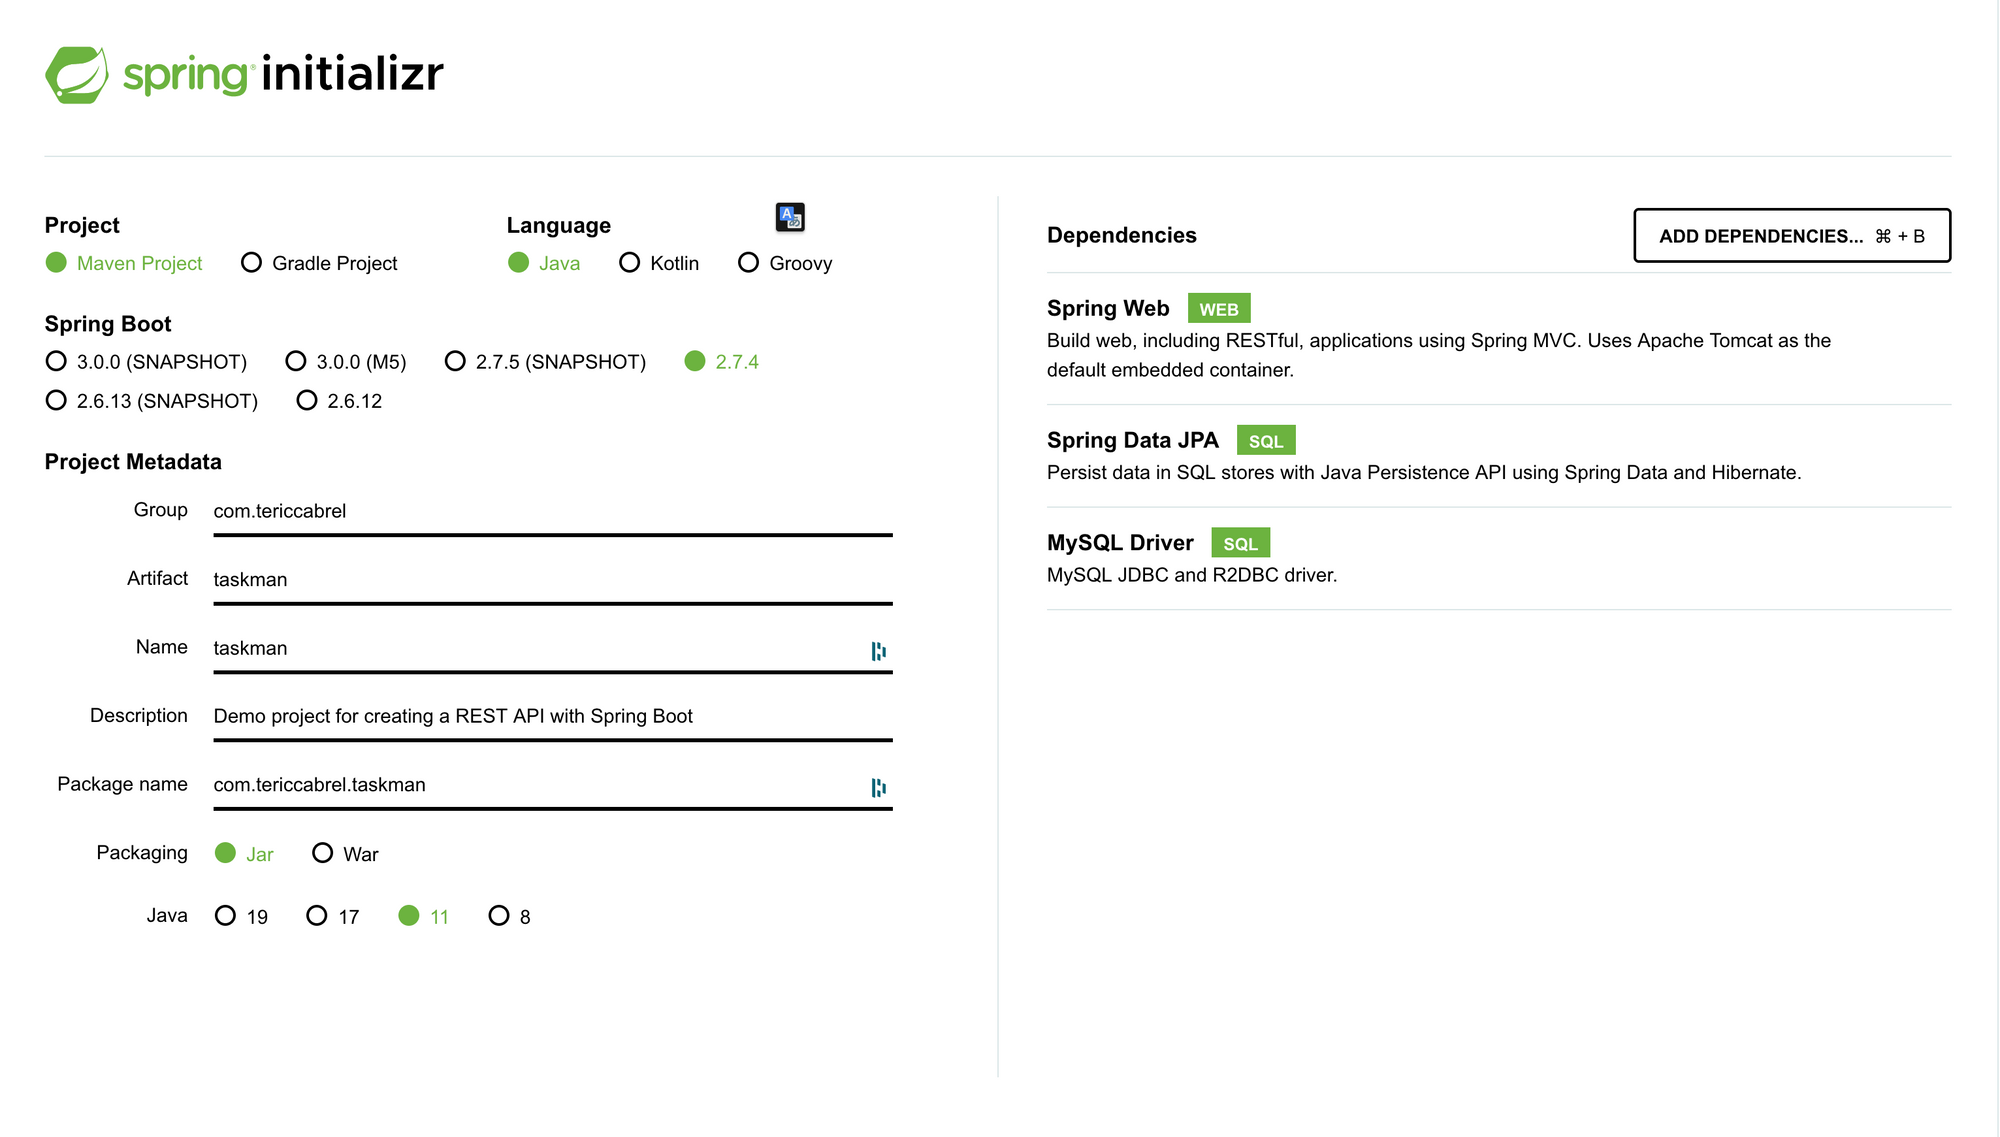
Click on the button "Generate" to download the project and open it in your IDE.
Define the model
We will use Hibernate to define the model of the entities in Java, and it will create the SQL-related queries for DDL and DML. Hibernate is a dependency Spring Data JPA uses, so you don't need to install it.
Create a package named entities then create a class called Task and add the code below:
package com.tericcabrel.taskman.entities;

import org.hibernate.annotations.CreationTimestamp;
import org.hibernate.annotations.UpdateTimestamp;

import javax.persistence.*;
import java.util.Date;

@Table(name = "tasks")
@Entity
public class Task {
    @Id
    @GeneratedValue(strategy = GenerationType.AUTO)
    @Column(nullable = false)
    private Integer id;

    @Column(unique = true, length = 200, nullable = false)
    private String name;

    @Lob
    private String description;

    @Column(nullable = false, columnDefinition = "varchar(20) not null default 'PENDING'")
    @Enumerated(EnumType.STRING)
    private TaskStatusEnum status;

    @Column(name = "due_date")
    private Date dueDate;

    @CreationTimestamp
    @Column(updatable = false, name = "created_at")
    private Date createdAt;

    @UpdateTimestamp
    @Column(name = "updated_at")
    private Date updatedAt;


    // Getter, setter and toString() methods here...
}
Below is the code of the enumeration TaskStatusEnum.
package com.tericcabrel.taskman.entities;

public enum TaskStatusEnum {
    PENDING,
    IN_PROGRESS,
    DONE,
    KILLED
}
Configure the database connection
Let's configure the application to connect to the database and perform database table creation (Hibernate under the hood). Open the application configuration file src/resources/application.properties and add the code below:
server.port=8000

spring.datasource.url=jdbc:mysql://localhost:3307/taskdb?serverTimezone=UTC&allowPublicKeyRetrieval=true&useSSL=false
spring.datasource.username=root
spring.datasource.password=secret

## Hibernate properties
spring.jpa.hibernate.use-new-id-generator-mappings=false
spring.jpa.hibernate.ddl-auto=create
spring.jpa.show-sql=false
spring.jpa.open-in-view=false
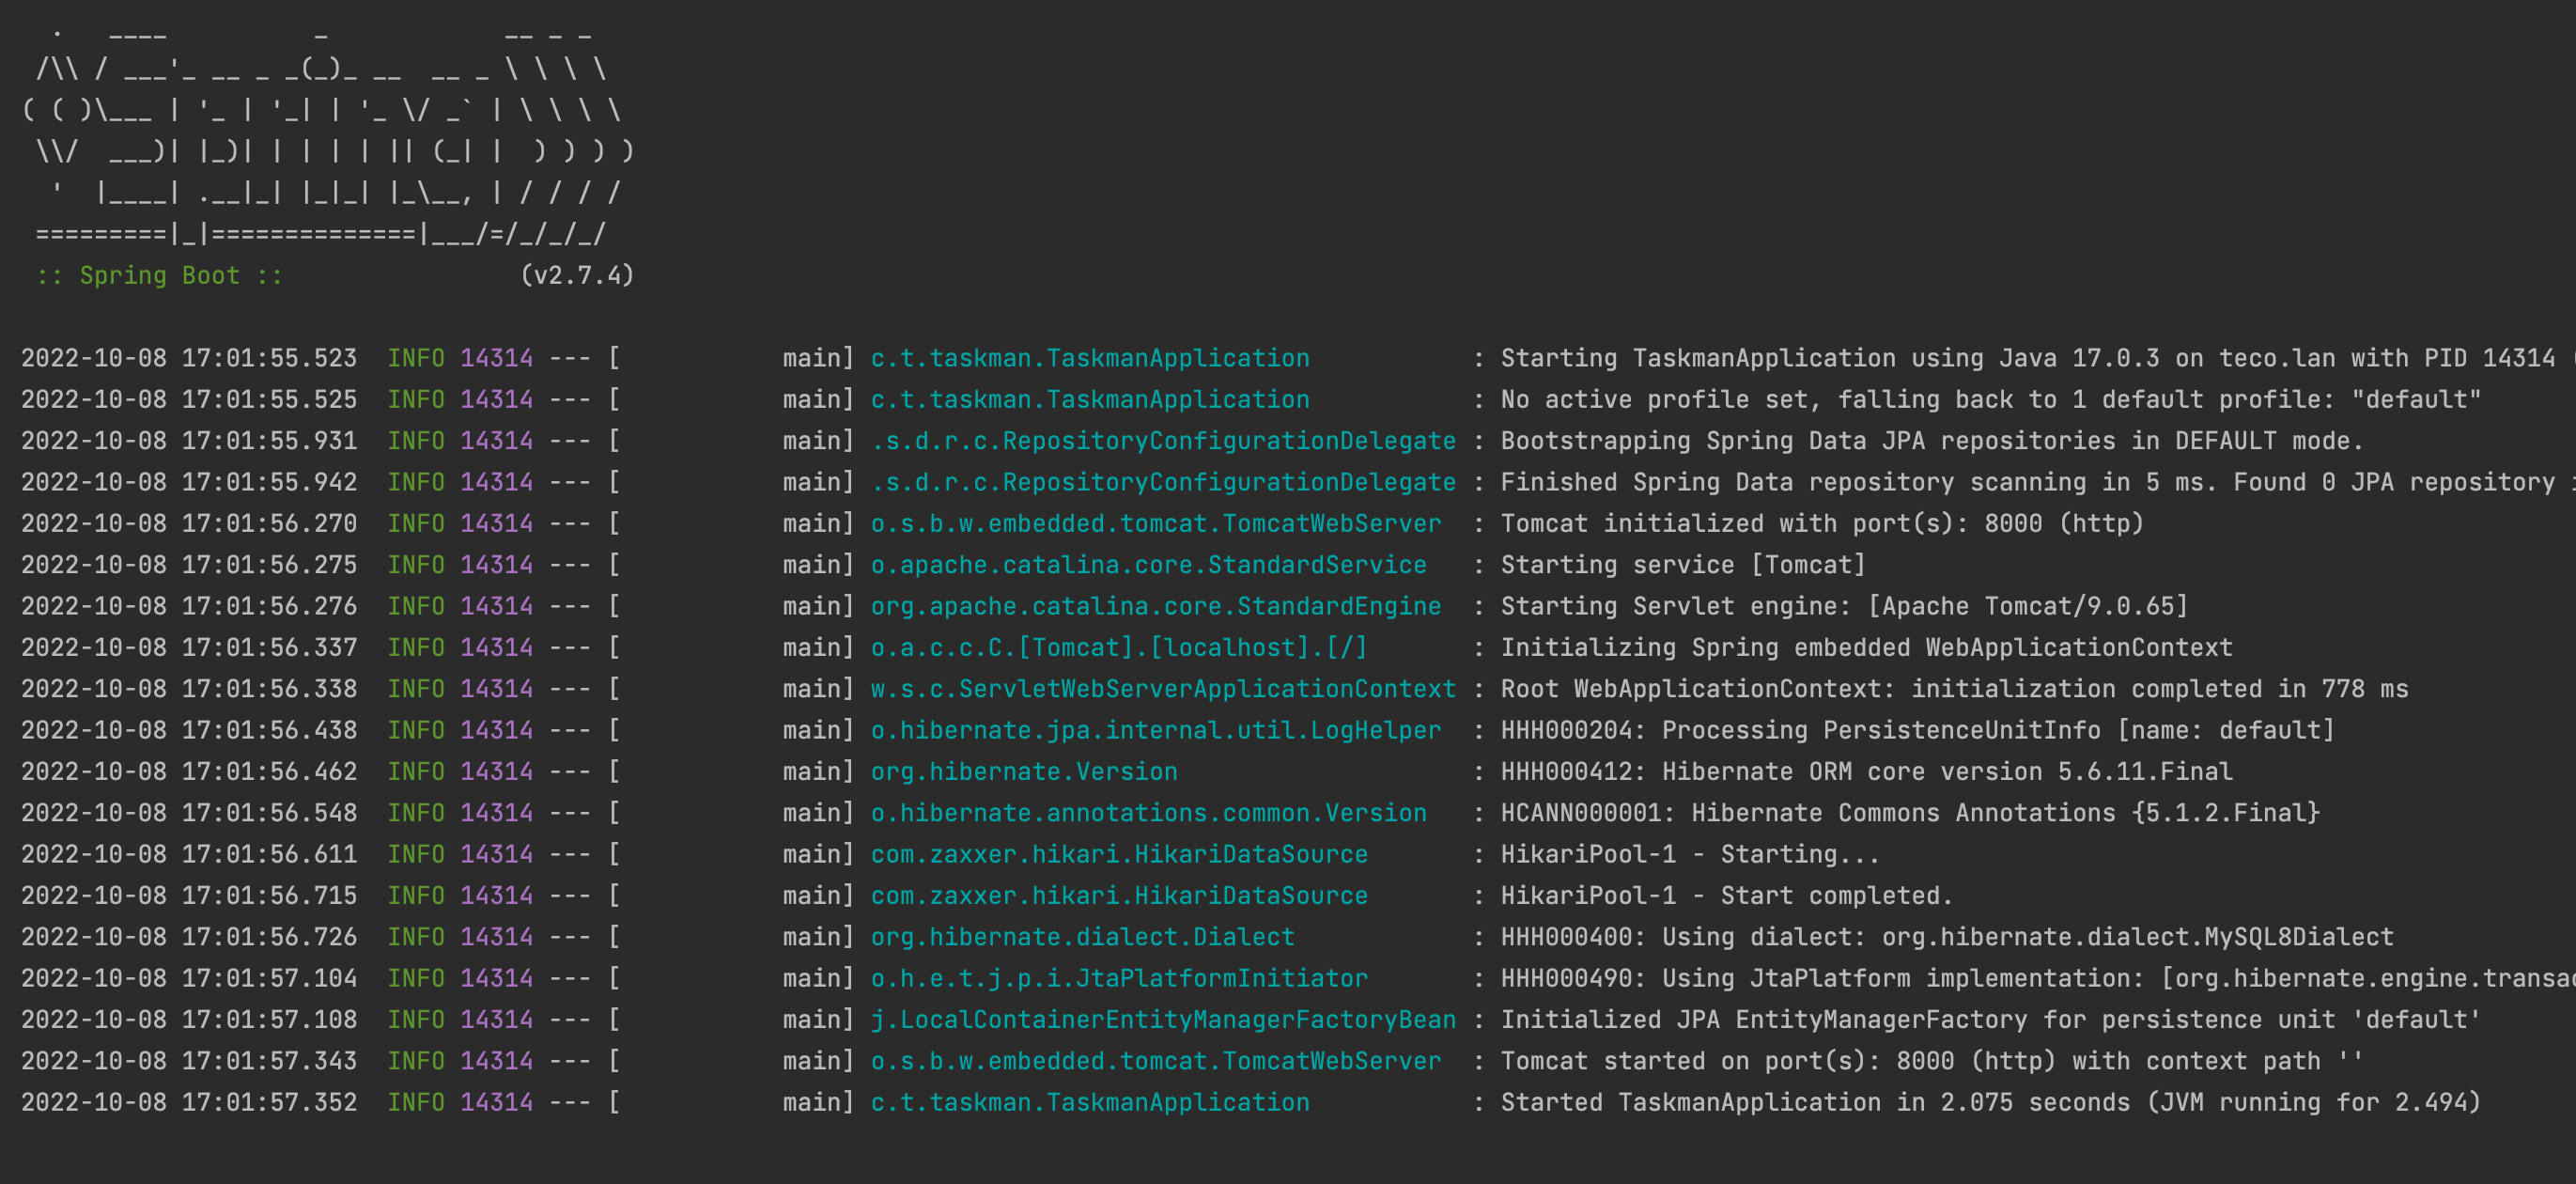
Run the application with the command mvn spring-boot:run; it will start at port 8000.
Note: Set the value of the property spring.jpa.hibernate.ddl-auto to validate after the tables are created to prevent them from being deleted and then re-created when starting the application
Create the JPA repository
The JPA repository for an entity acts as the interface between our application entity and the database. It will be responsible for transforming CRUD operations to SQL queries to execute against the database.
Create a package called repositories then create a file TaskRepository.java and add the code below:
package com.tericcabrel.taskman.repositories;

import com.tericcabrel.taskman.entities.Task;
import org.springframework.data.repository.CrudRepository;
import org.springframework.stereotype.Repository;

@Repository
public interface TaskRepository extends CrudRepository<Task, Integer> {

}
Create the service
The service for an entity is where to write the business logic. If there are any requirements to be met before creating/updating a task, they are expressed here.
Create a package called services then create a file TaskService.java and add the code below:
package com.tericcabrel.taskman.services;

import com.tericcabrel.taskman.entities.Task;
import com.tericcabrel.taskman.repositories.TaskRepository;
import java.util.ArrayList;
import java.util.List;
import java.util.Optional;
import org.springframework.stereotype.Service;

@Service
public class TaskService {

    private final TaskRepository taskRepository;

    public TaskService(TaskRepository taskRepository) {
        this.taskRepository = taskRepository;
    }

    public Task create(Task task) {
        return taskRepository.save(task);
    }

    public List<Task> findAll() {
        List<Task> tasks = new ArrayList<>();
        taskRepository.findAll().forEach(tasks::add);

        return tasks;
    }

    public Optional<Task> findById(int id) {
        return taskRepository.findById(id);
    }

    public Task update(Task taskToUpdate) {
        return taskRepository.save(taskToUpdate);
    }

    public void delete(int id) {
        taskRepository.deleteById(id);
    }
}
We defined the five CRUD methods we need to build our API. The next part is to create endpoints to receive requests from the world.
Create the controller
Create a package called controllers then a file called TaskController.java and add the code below:
package com.tericcabrel.taskman.controllers;

import com.tericcabrel.taskman.services.TaskService;
import org.springframework.web.bind.annotation.RestController;

@RestController
public class TaskController {
    public TaskService taskService;

    public TaskController(TaskService taskService) {
        this.taskService = taskService;
    }


}
The code above prepares the class to act as a controller; we can now create endpoints.
Create a task
To create a task, the following properties must be sent in the request's body: the name, the description, the status, and the due date. To catch these values in our controller, we must create a class called CreateTaskInput.java to map these properties.
Create a package called requests then create the file CreateTaskInput.java and add the code below:
package com.tericcabrel.taskman.requests;

import com.tericcabrel.taskman.entities.Task;
import com.tericcabrel.taskman.entities.TaskStatusEnum;

import java.util.Date;

public record CreateTaskInput(String name, String description, TaskStatusEnum status, Date dueDate) {
    public Task toTask() {
        Task task = new Task();

        task.setName(name)
            .setDescription(description)
            .setStatus(status)
            .setDueDate(dueDate);

        return task;
    }
}
Note: I used a record instead of a class that helps us eliminate getters and setters. It has been introduced in Java 16, so make sure you have JDK 16+. Here is an excellent video explaining it and its subtilities.
Additionally, you may want to validate the inputs sent by the user; I will not cover it, but luckily, I wrote a whole post about it.

Now update the file TaskController.java to add the code below:
@PostMapping("/tasks")
public ResponseEntity<Task> createTask(@RequestBody CreateTaskInput createTaskInput) {
    Task taskCreated = taskService.create(createTaskInput.toTask());

    return new ResponseEntity<>(taskCreated, HttpStatus.CREATED);
}
Run the application, open an HTTP client, and try to create a task:
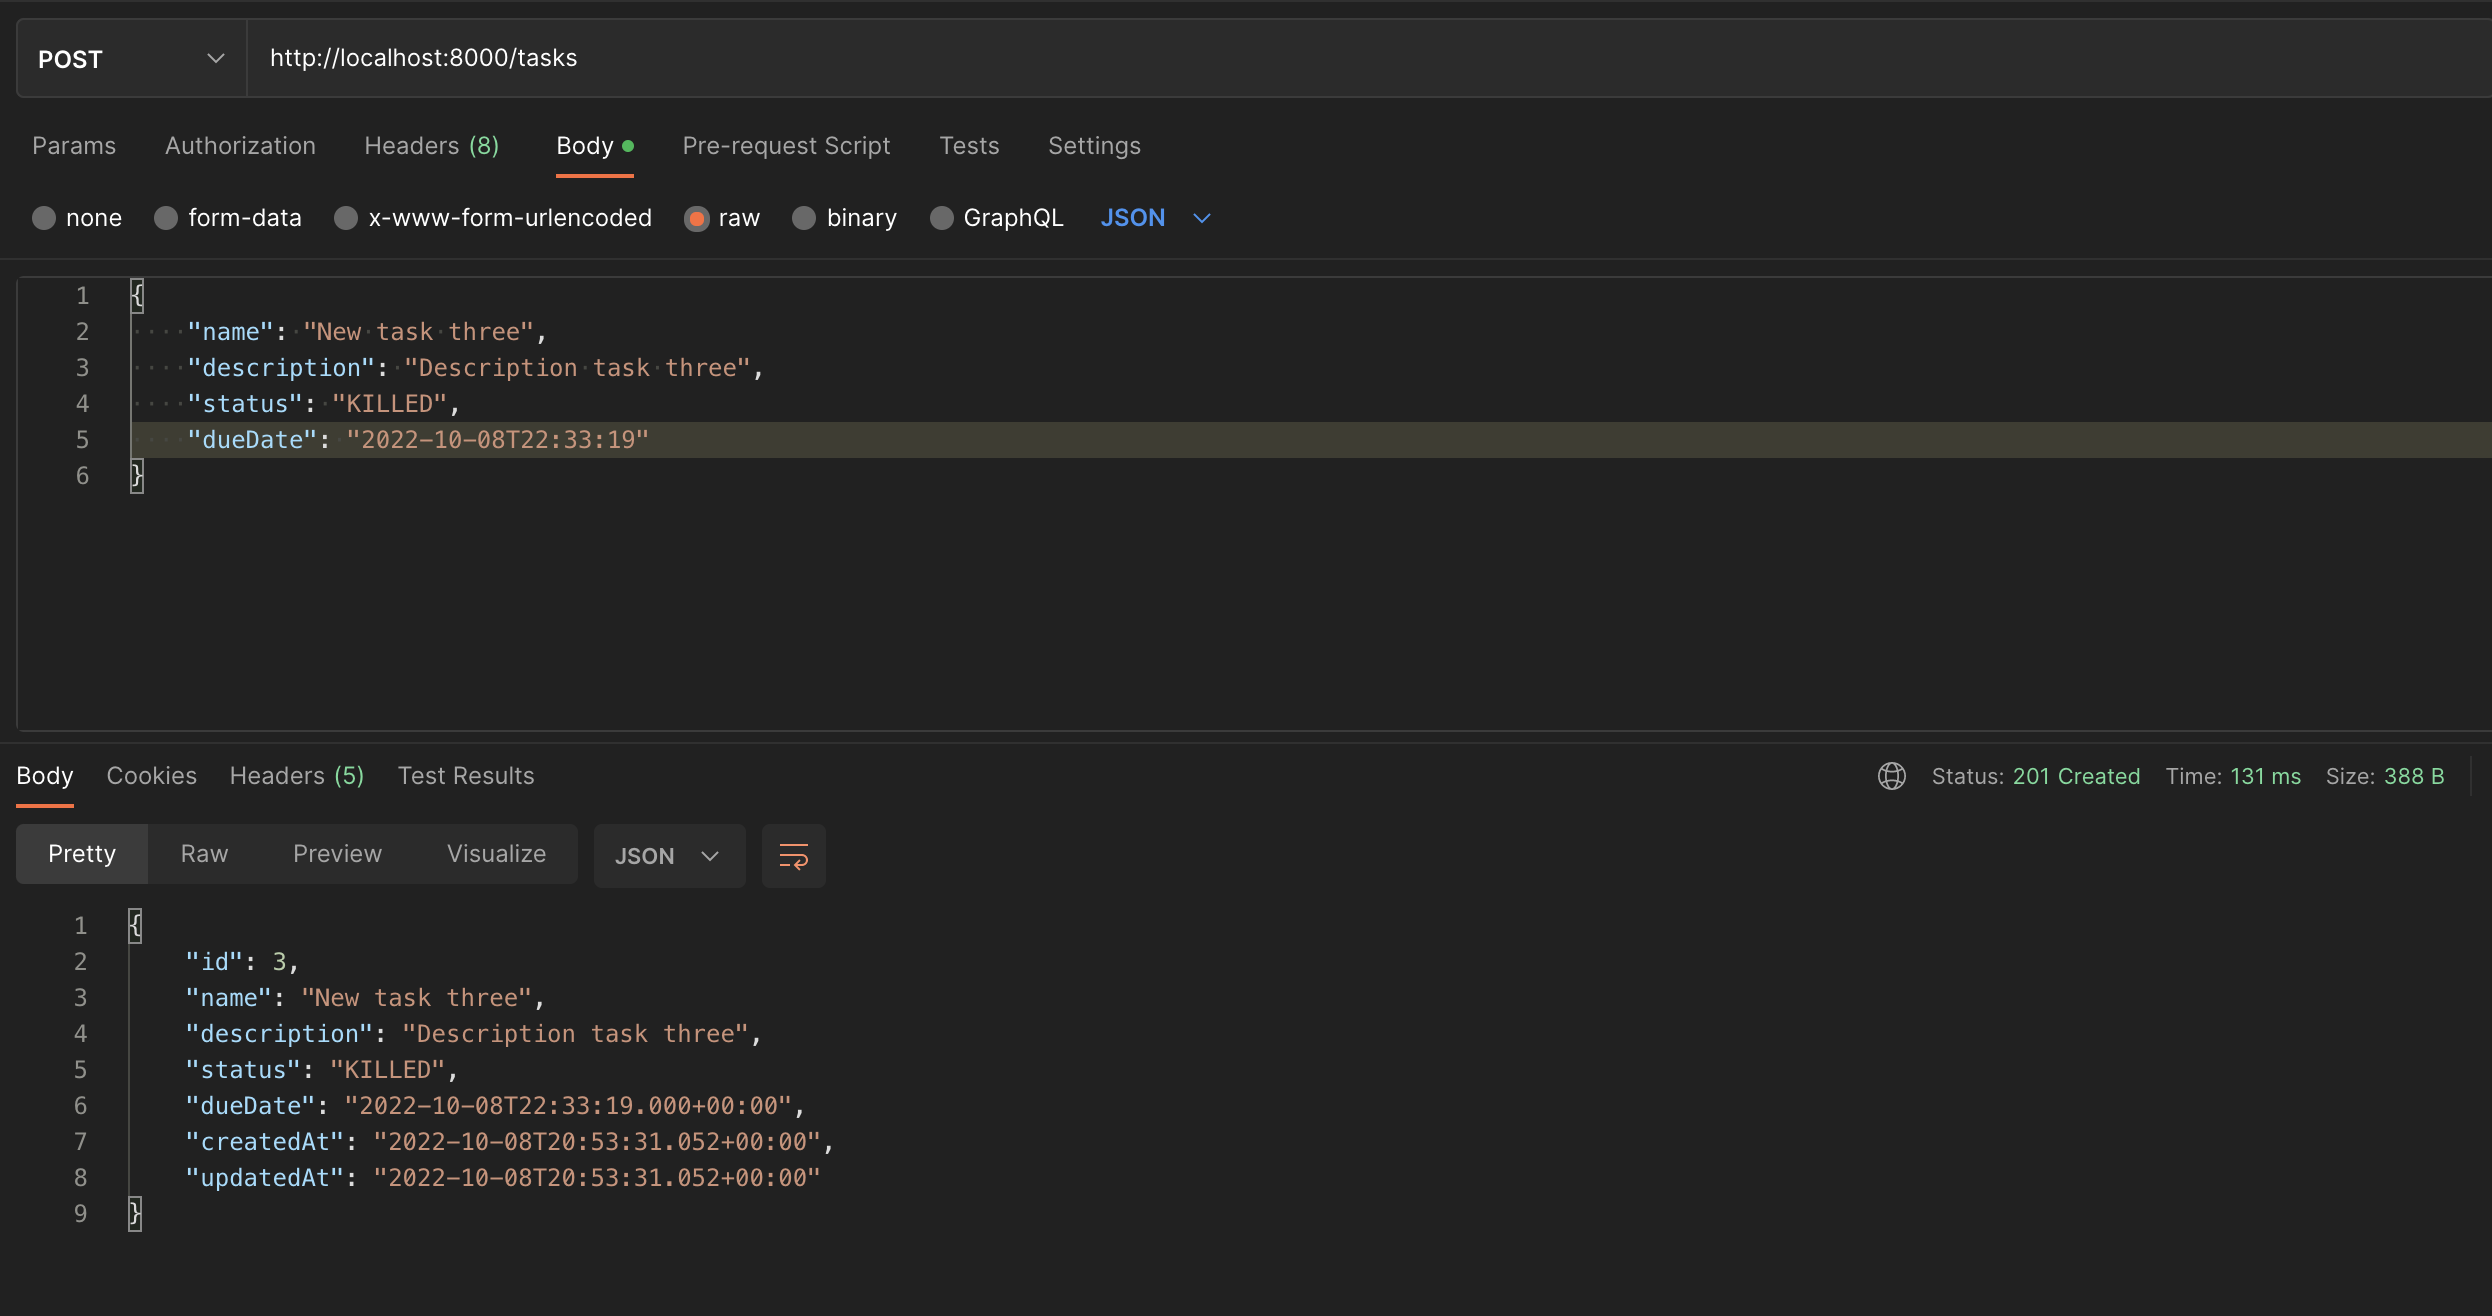
You can check the database table to see if the task has been saved as expected.
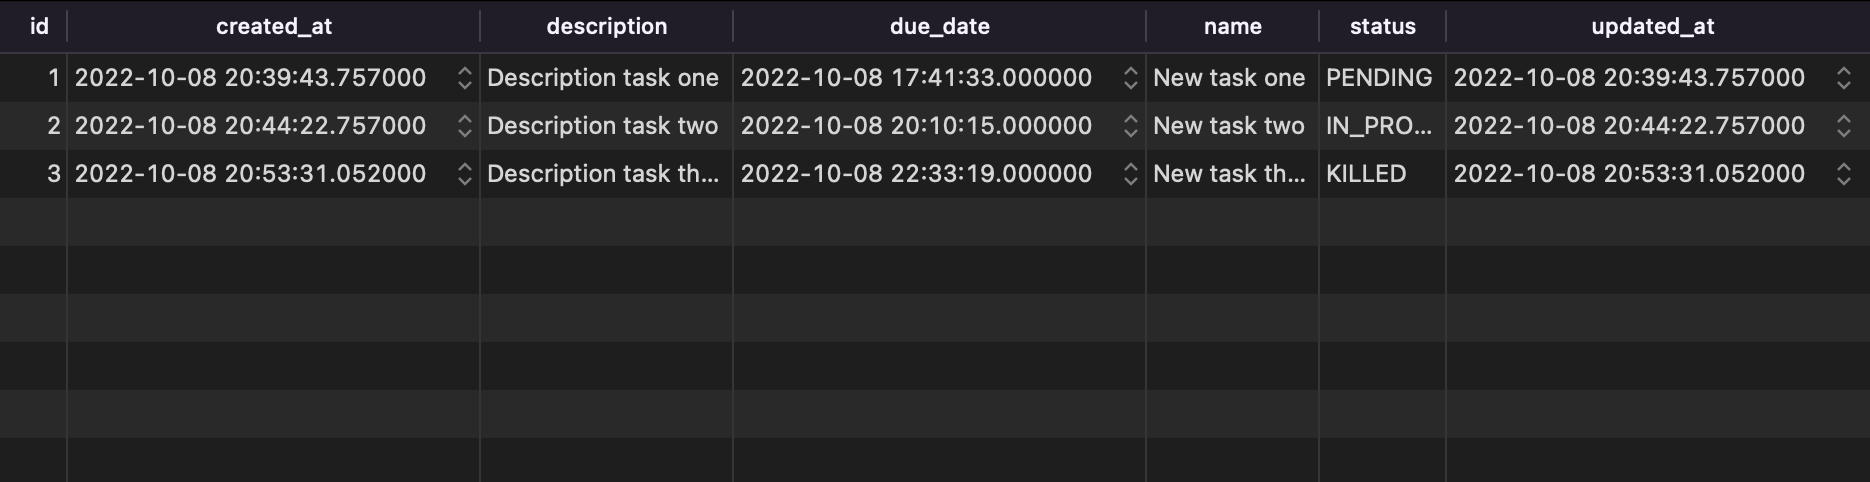
But let's create an endpoint to retrieve all the tasks so we don't have to browse the database.
Retrieve all tasks
Update the file TaskController.java to add the code below:
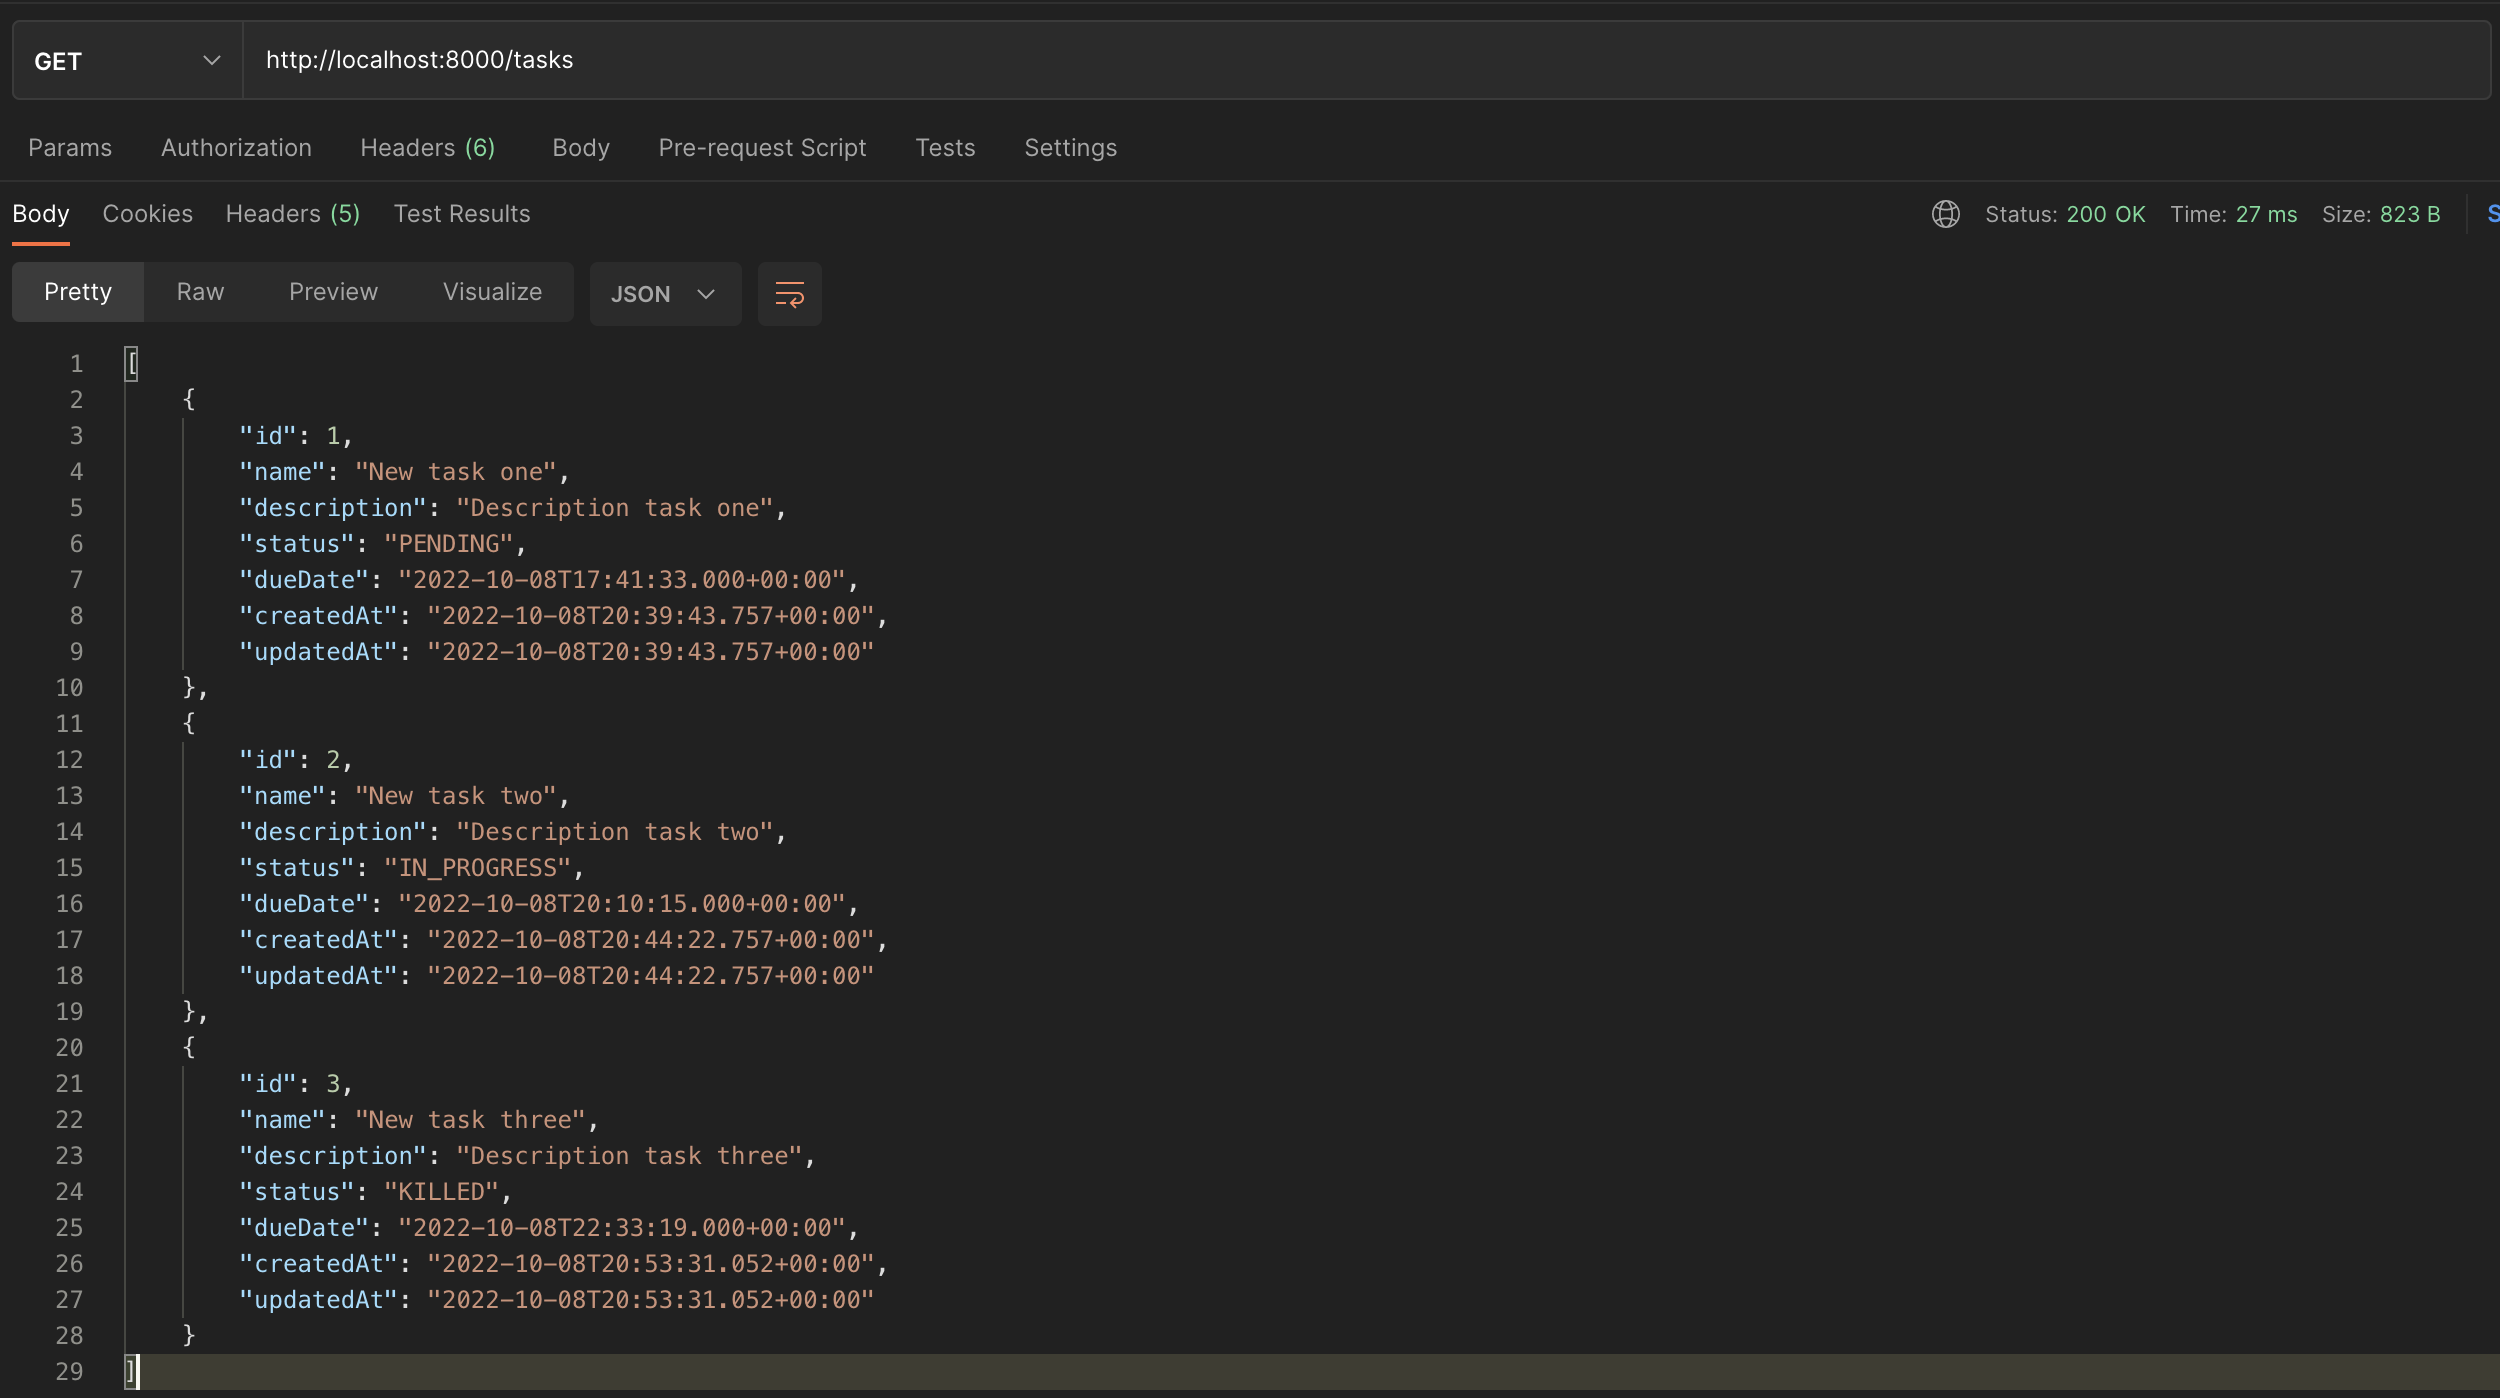
@GetMapping("/tasks")
public ResponseEntity<List<Task>> allTasks() {
    List<Task> tasks = taskService.findAll();

    return new ResponseEntity<>(tasks, HttpStatus.OK);
}
Re-run the application and test the endpoint.
Retrieve one task
Finding a task by its ID will return the task found or a not found message with the related HTTP status code.
@GetMapping("/tasks/{id}")
public ResponseEntity<Task> oneTask(@PathVariable int id) {
    Optional<Task> optionalTask = taskService.findById(id);

    if (optionalTask.isPresent()) {
        return new ResponseEntity<>(optionalTask.get(), HttpStatus.OK);
    }

    return new ResponseEntity<>(HttpStatus.NOT_FOUND);
}
Update a task
As for creating a task, we can update the following properties: the status and the due date. Let's create a class called UpdateTaskInput.java in the package requests.
package com.tericcabrel.taskman.requests;

import com.tericcabrel.taskman.entities.TaskStatusEnum;

import java.util.Date;

public record UpdateTaskInput(TaskStatusEnum status, Date dueDate) {

}
Update the file TaskController.java to add the code below:
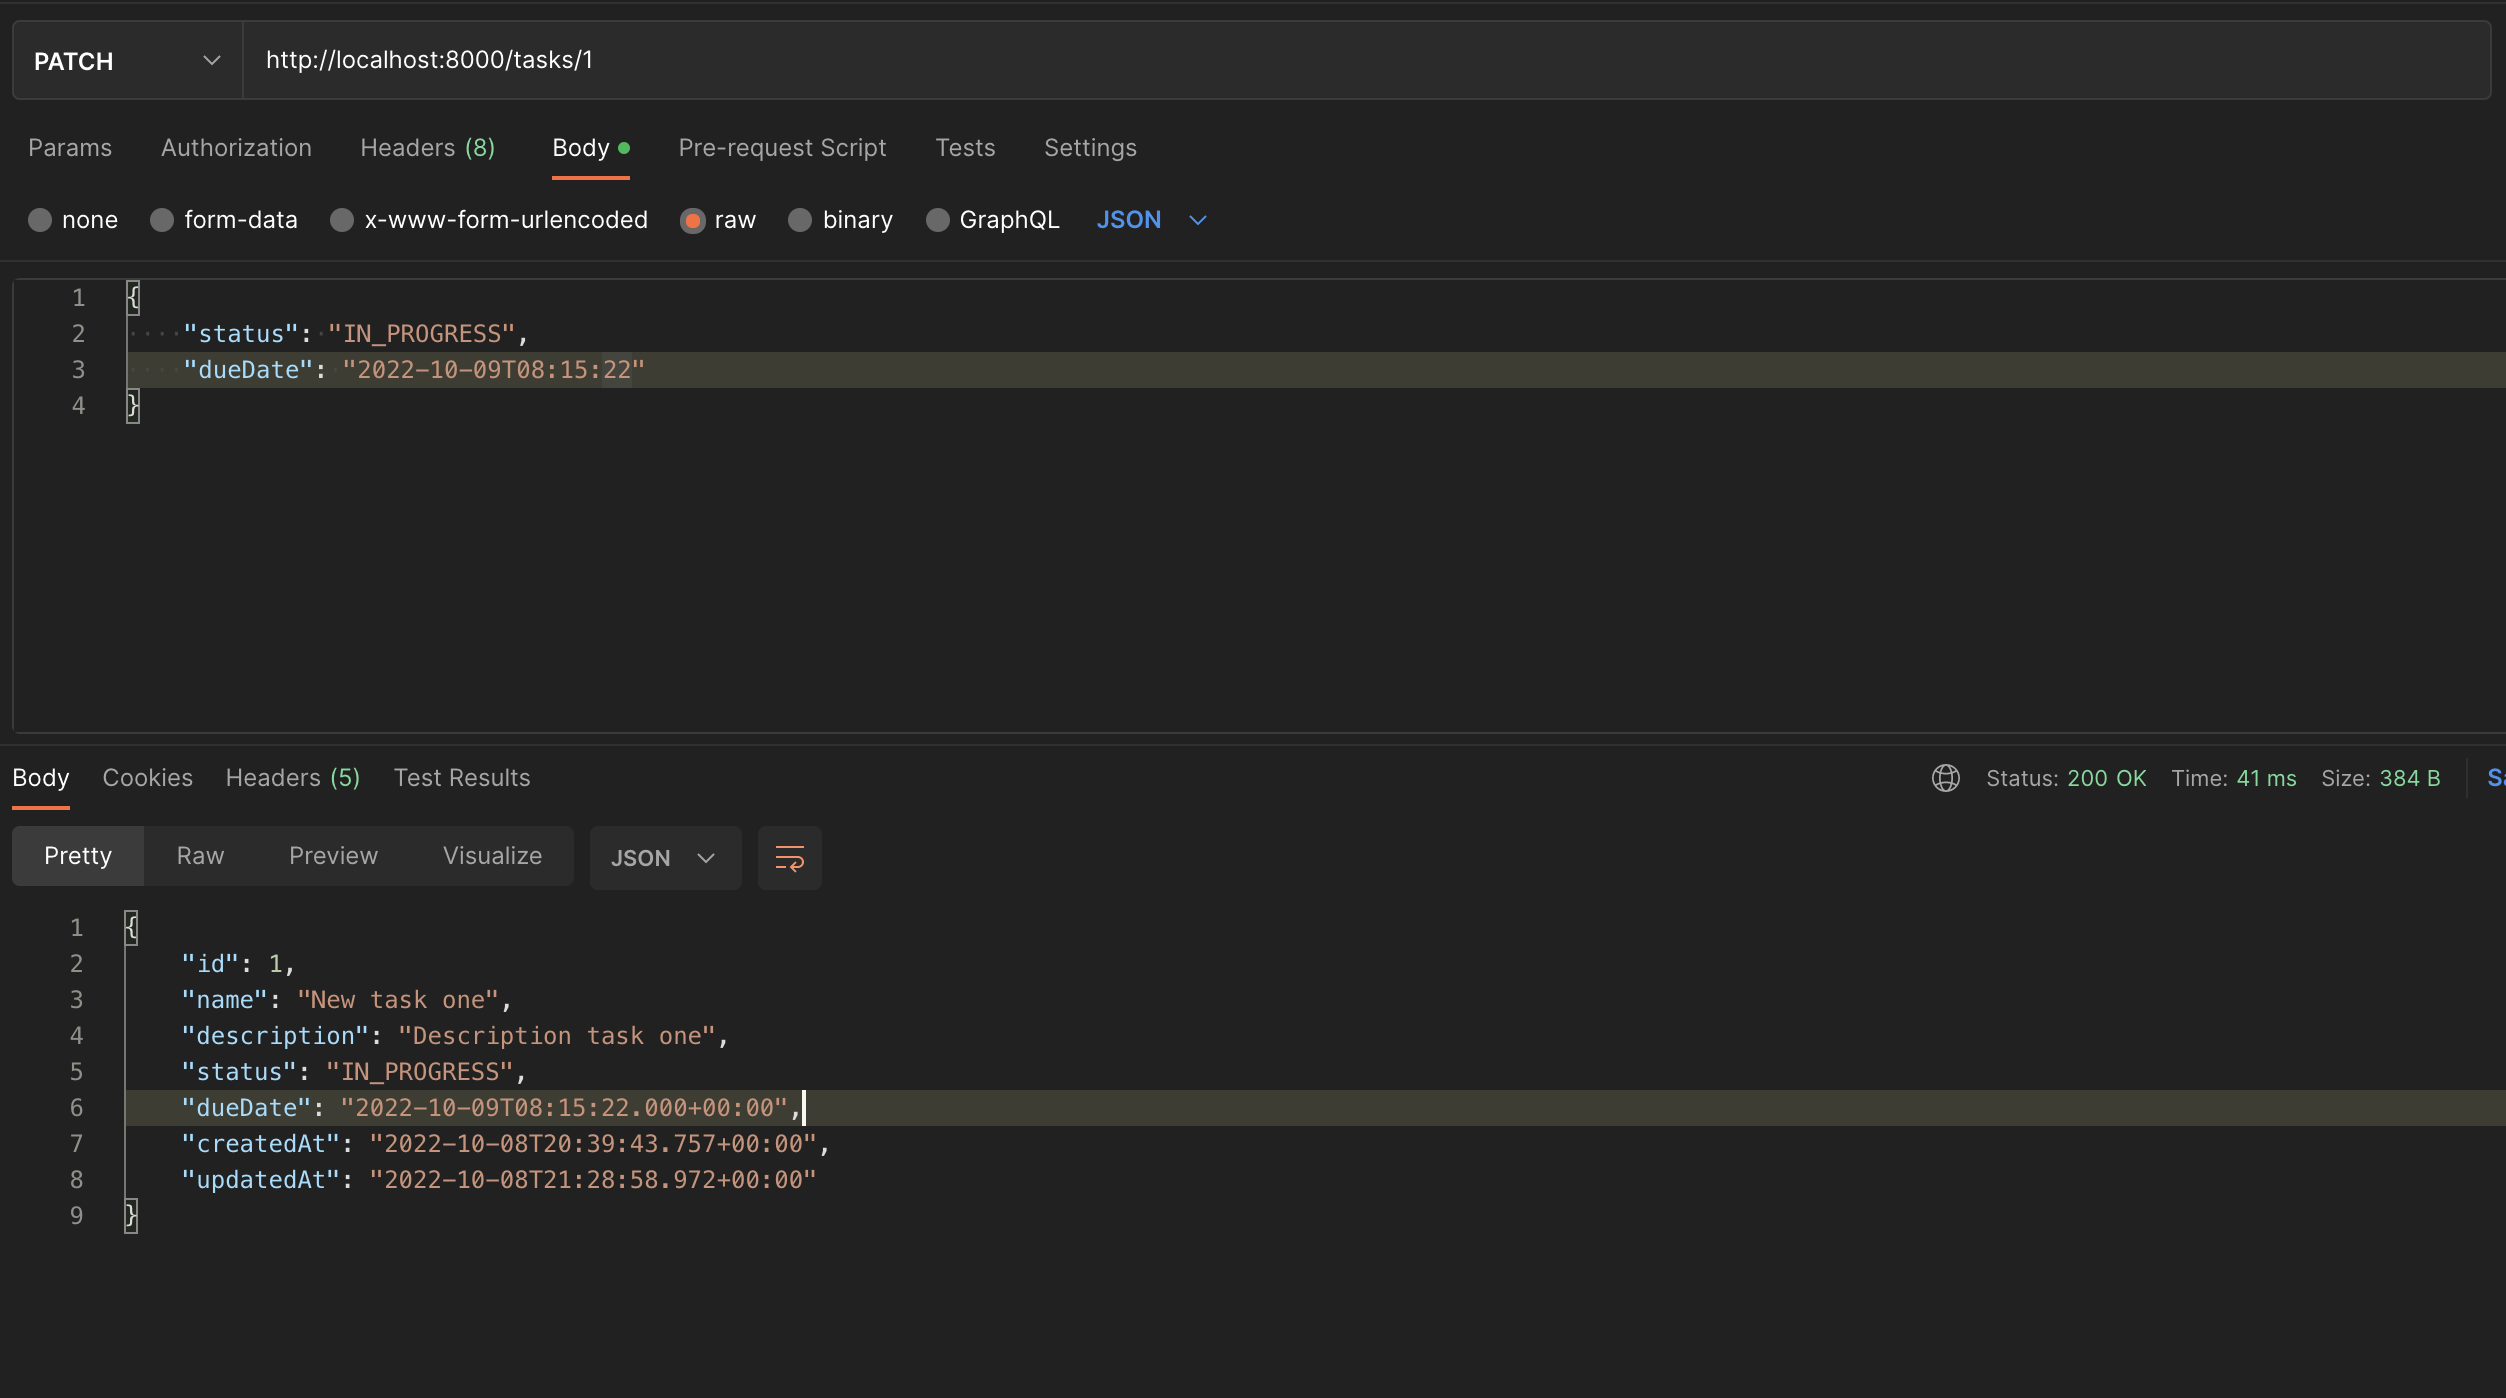
@PatchMapping("/tasks/{id}")
public ResponseEntity<Task> updateTask(@PathVariable int id, @RequestBody UpdateTaskInput updateTaskInput) {
    Optional<Task> optionalTask = taskService.findById(id);

    if (optionalTask.isEmpty()) {
        return new ResponseEntity<>(HttpStatus.NOT_FOUND);
    }

    Task taskToUpdate = optionalTask.get();

    taskToUpdate.setStatus(updateTaskInput.status());
    taskToUpdate.setDueDate(updateTaskInput.dueDate());

    Task taskUpdated = taskService.update(taskToUpdate);

    return new ResponseEntity<>(taskUpdated, HttpStatus.OK);
}
Re-run the application and test the endpoint.
Delete a task
Finally, deleting a task is easy, so update the TaskController.java to add the code below:
@DeleteMapping("/tasks/{id}")
public ResponseEntity<Void> deleteTask(@PathVariable int id) {
    taskService.delete(id);

    return ResponseEntity.noContent().build();
}
Re-run the application, delete a task, and retrieve the tasks list to ensure the task has been deleted.
Wrap up
Spring Boot provides everything to build a REST API. Combined with a database, you can build real-world applications. To easily consume your REST AP by other developers, you must provide documentation that you can make following this tutorial I wrote about building API documentation with Open API and Swagger.
You can find the code source on the GitHub repository.
Follow me on Twitter or subscribe to my newsletter to avoid missing the upcoming posts and the tips and tricks I occasionally share.