
Write data in an Excel file using Node.js and Typescript


Photo by Mika Baumeister / Unsplash
Excel files are increasingly used to export data from a Web application to share with other applications or just for reporting and business decision-making. In Node.js, you can export data as PDF or CSV, but Excel can also be the preferred output format. We will see how to write data in an Excel file in this post.
If you are interested in how to generate a CSV file with Node.js, check out this article:
 Eric Cabrel TIOGO
Set up the project
Make sure you have Node.js installed on your computer before continuing. I prepared a project starter to quickly start a Node.js project with Typescript. Let's clone it and make it works locally.
git clone https://github.com/tericcabrel/node-ts-starter node-excel-write

cd node-excel-write

yarn install # or npm install

yarn start # or npm run start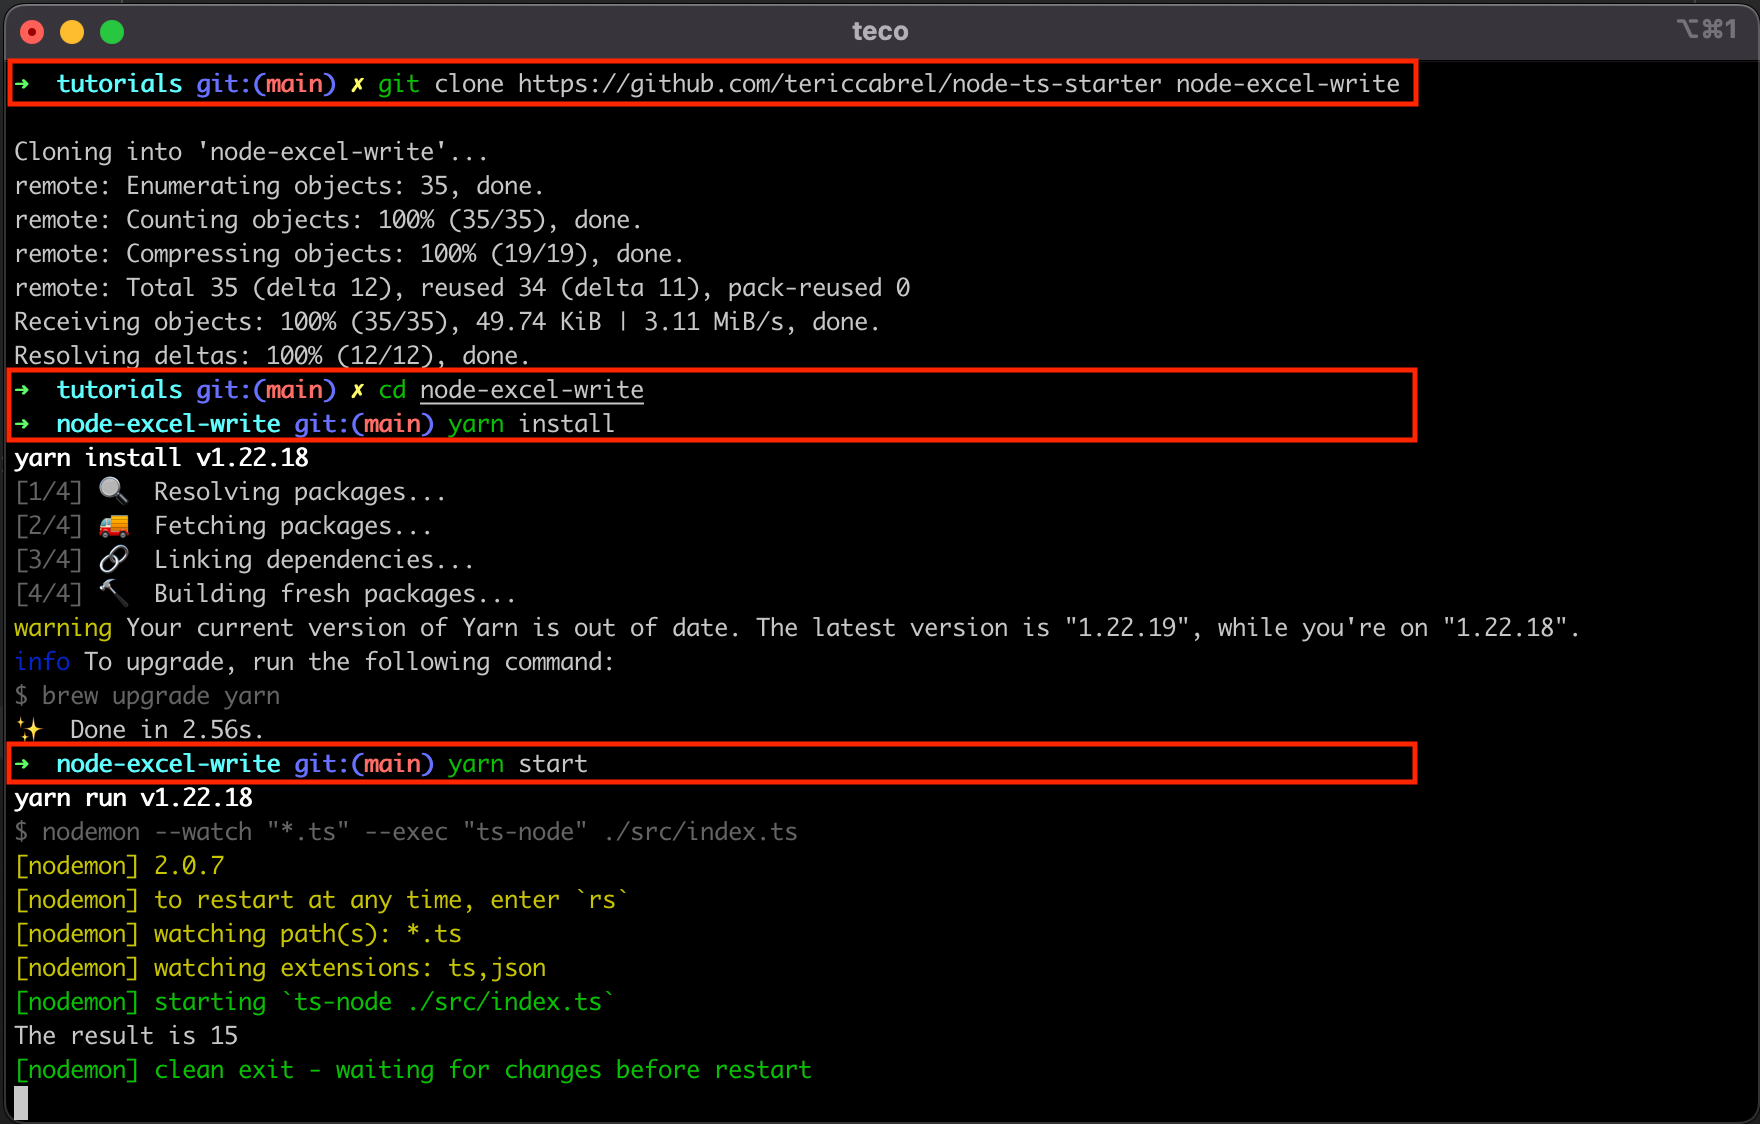
Define the data to write
Let's say we retrieve a list of countries from the database, and we want to write them in an Excel file. The first is to define the sample of data we want to write.
Replace the content of the file src/index.ts with the code below:
type Country = {
  name: string;
  countryCode: string;
  capital: string;
  phoneIndicator: number;
};

const countries: Country[] = [
  { name: 'Cameroon', capital: 'Yaounde', countryCode: 'CM', phoneIndicator: 237 },
  { name: 'France', capital: 'Paris', countryCode: 'FR', phoneIndicator: 33 },
  { name: 'United States', capital: 'Washington, D.C.', countryCode: 'US', phoneIndicator: 1 },
  { name: 'India', capital: 'New Delhi', countryCode: 'IN', phoneIndicator: 91 },
  { name: 'Brazil', capital: 'Brasília', countryCode: 'BR', phoneIndicator: 55 },
  { name: 'Japan', capital: 'Tokyo', countryCode: 'JP', phoneIndicator: 81 },
  { name: 'Australia', capital: 'Canberra', countryCode: 'AUS', phoneIndicator: 61 },
  { name: 'Nigeria', capital: 'Abuja', countryCode: 'NG', phoneIndicator: 234 },
  { name: 'Germany', capital: 'Berlin', countryCode: 'DE', phoneIndicator: 49 },
];
Note: I get the information about countries here: https://restcountries.com
Install the package ExcelJS
ExcelJS is an excellent library for manipulating an Excel file from Node.js. We will use it in this post, so let's install it:
npm install exceljsCreate a sheet
With Excel, you can create many sheets where everything sheet contains different kinds of data.
The first to do with ExcelJS is to create the sheet that will hold the countries list. In the file, index.ts add the code below:
import Excel from 'exceljs';

const workbook = new Excel.Workbook();
const worksheet = workbook.addWorksheet('Countries List');
You can use as many sheets as you want; just give a proper variable name for each sheet.
const worksheetCountries = workbook.addWorksheet('Countries List');
const worksheetContinents = workbook.addWorksheet('Continents List');
const worksheetCities = workbook.addWorksheet('Cities List');
For this post, we only need one sheet.
Define the columns' header
To create the table header, we need to map each column of the header to a property of the Country object.
Update the file src/index.ts, to add the code below:
const countriesColumns = [
  { key: 'name', header: 'Name' },
  { key: 'countryCode', header: 'Country Code' },
  { key: 'capital', header: 'Capital' },
  { key: 'phoneIndicator', header: 'International Direct Dialling' },
];

worksheet.columns = countriesColumns;
The value of the property key must be a key of the object Country (name, countryCode, capital and phoneIndicator).
The property header can be anything, and it will be displayed as the header in the CSV file.
Write the data to the file
It is straightforward to write the file in the sheet.
countries.forEach((country) => {
  worksheet.addRow(country);
});
That's it.
The remaining part is to generate the Excel file by providing the path to write the file. The code below does that:
import * as path from 'path';

const exportPath = path.resolve(__dirname, 'countries.xlsx');

await workbook.xlsx.writeFile(exportPath);
If you work with Excel and want to level up your skill, I recommend the guide below, containing 36 tutorials covering Excel basics, functions, and advanced formulas.
 Akshat Biyani
Wrap up
Here is what the index.ts the file looks like this:
import Excel from 'exceljs';
import path from 'path';

type Country = {
  name: string;
  countryCode: string;
  capital: string;
  phoneIndicator: number;
};

const countries: Country[] = [
  { name: 'Cameroon', capital: 'Yaounde', countryCode: 'CM', phoneIndicator: 237 },
  { name: 'France', capital: 'Paris', countryCode: 'FR', phoneIndicator: 33 },
  { name: 'United States', capital: 'Washington, D.C.', countryCode: 'US', phoneIndicator: 1 },
  { name: 'India', capital: 'New Delhi', countryCode: 'IN', phoneIndicator: 91 },
  { name: 'Brazil', capital: 'Brasília', countryCode: 'BR', phoneIndicator: 55 },
  { name: 'Japan', capital: 'Tokyo', countryCode: 'JP', phoneIndicator: 81 },
  { name: 'Australia', capital: 'Canberra', countryCode: 'AUS', phoneIndicator: 61 },
  { name: 'Nigeria', capital: 'Abuja', countryCode: 'NG', phoneIndicator: 234 },
  { name: 'Germany', capital: 'Berlin', countryCode: 'DE', phoneIndicator: 49 },
];

const exportCountriesFile = async () => {
  const workbook = new Excel.Workbook();
  const worksheet = workbook.addWorksheet('Countries List');

  worksheet.columns = [
    { key: 'name', header: 'Name' },
    { key: 'countryCode', header: 'Country Code' },
    { key: 'capital', header: 'Capital' },
    { key: 'phoneIndicator', header: 'International Direct Dialling' },
  ];

  countries.forEach((item) => {
    worksheet.addRow(item);
  });

  const exportPath = path.resolve(__dirname, 'countries.xlsx');

  await workbook.xlsx.writeFile(exportPath);
};

exportCountriesFile();
Execute the file with the command: yarn start.
A file named countries.xlsx will be generated in the same folder containing the file index.ts. Open the file with an Excel file visualizer.
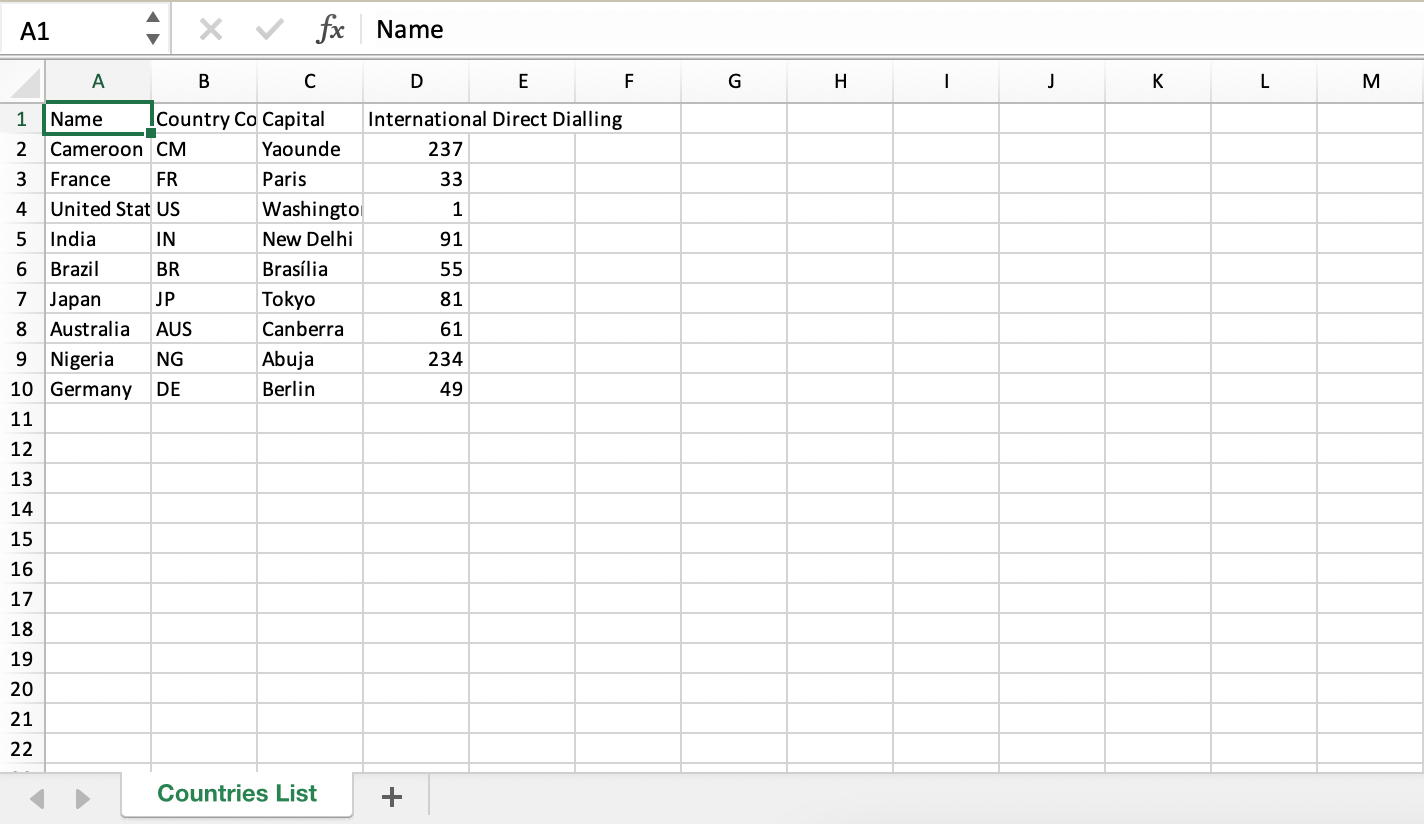
Yeah! it works
Styling the sheet
There is no distinction between the header and other rows on the spreadsheet, and the text's header overlaps the column width.
We can apply styling on the header to customize the text and increase the column width.
Update the index.ts file with the code below:
worksheet.columns.forEach((sheetColumn) => {
    sheetColumn.font = {
      size: 12,
    };
    sheetColumn.width = 30;
});

worksheet.getRow(1).font = {
    bold: true,
    size: 13,
};
The forEach() on the worksheet columns will apply the styling, so we first want the font size for all the columns to be 12px and the column width to be 30px.
We want to make the header's text bold and increase the font size to 13px. We know it is the first line of the sheet. Yeah, the index doesn't start at 0 but at 1 ?.
Rerun the code to generate a new file, open the generated file again, and tadaaa!

Wrap up
ExcelJS helps you with creating Excel file and writing data inside, but it also allows styling the spreadsheet columns. The support for TypeScript makes the experience of working with great.
Check out the package documentation to learn about other options.
You can find the code source on the GitHub repository.
Follow me on Twitter or subscribe to my newsletter to avoid missing the upcoming posts and the tips and tricks I occasionally share.