
Deploy a Spring Boot application JAR file with Nginx reverse proxy


Spring Boot provides two ways to package the application: JAR and WAR. Both processes generated a single file you can execute using the JRE.
This is not enough in production since you must expose the application to the internet through a URL. You should also ensure that the requests between the client and the server are secured and that no one can spy on them.
This post shows how to deploy a Spring Boot JAR application on a server and configure a reverse proxy to expose it to the Internet.
Prerequisites
Before following this tutorial, make sure you have the following tools installed on your computer; this is only required to run and package the project locally:
Prepare the Virtual Private Server
We will deploy the application on a server; if you already have one, you can proceed to the next step.
You can buy a VPS on Hetzner, which provides affordable servers with good performance. The server running this blog and all my side projects are hosted here. Use my referral link to sign up and get €20 credit.
Once you get the server, you will need to configure it so that it can make a web application accessible to the Internet. I wrote a post on a minimal configuration you need to do to host a Web application here.
 Eric Cabrel TIOGO
I use a Virtual Private Server running Ubuntu 20.04, so the instructions might differ if you use another Linux distribution.
Install the required software
To run a JAR file, we must install the Java Runtime Engine (JRE); the application will start the webserver on a specific port (8080 by default).
At this step, the application is running on the server but is not accessible to the Internet; Nginx comes to the rescue to allow us to set up a reverse proxy.
Install the Java Runtime Environment
Run the command below to install the JRE:
sudo apt install default-jre

java -version
We get the following output.

Install Nginx
Run the command below to install Nginx:
sudo apt update
sudo apt install nginx

sudo ufw allow 'Nginx Full'

systemctl status nginx
The third command enables the HTTP (80) and HTTPS (443) ports in the Firewall, while the last command verifies that Nginx is running well.
Set up the project locally
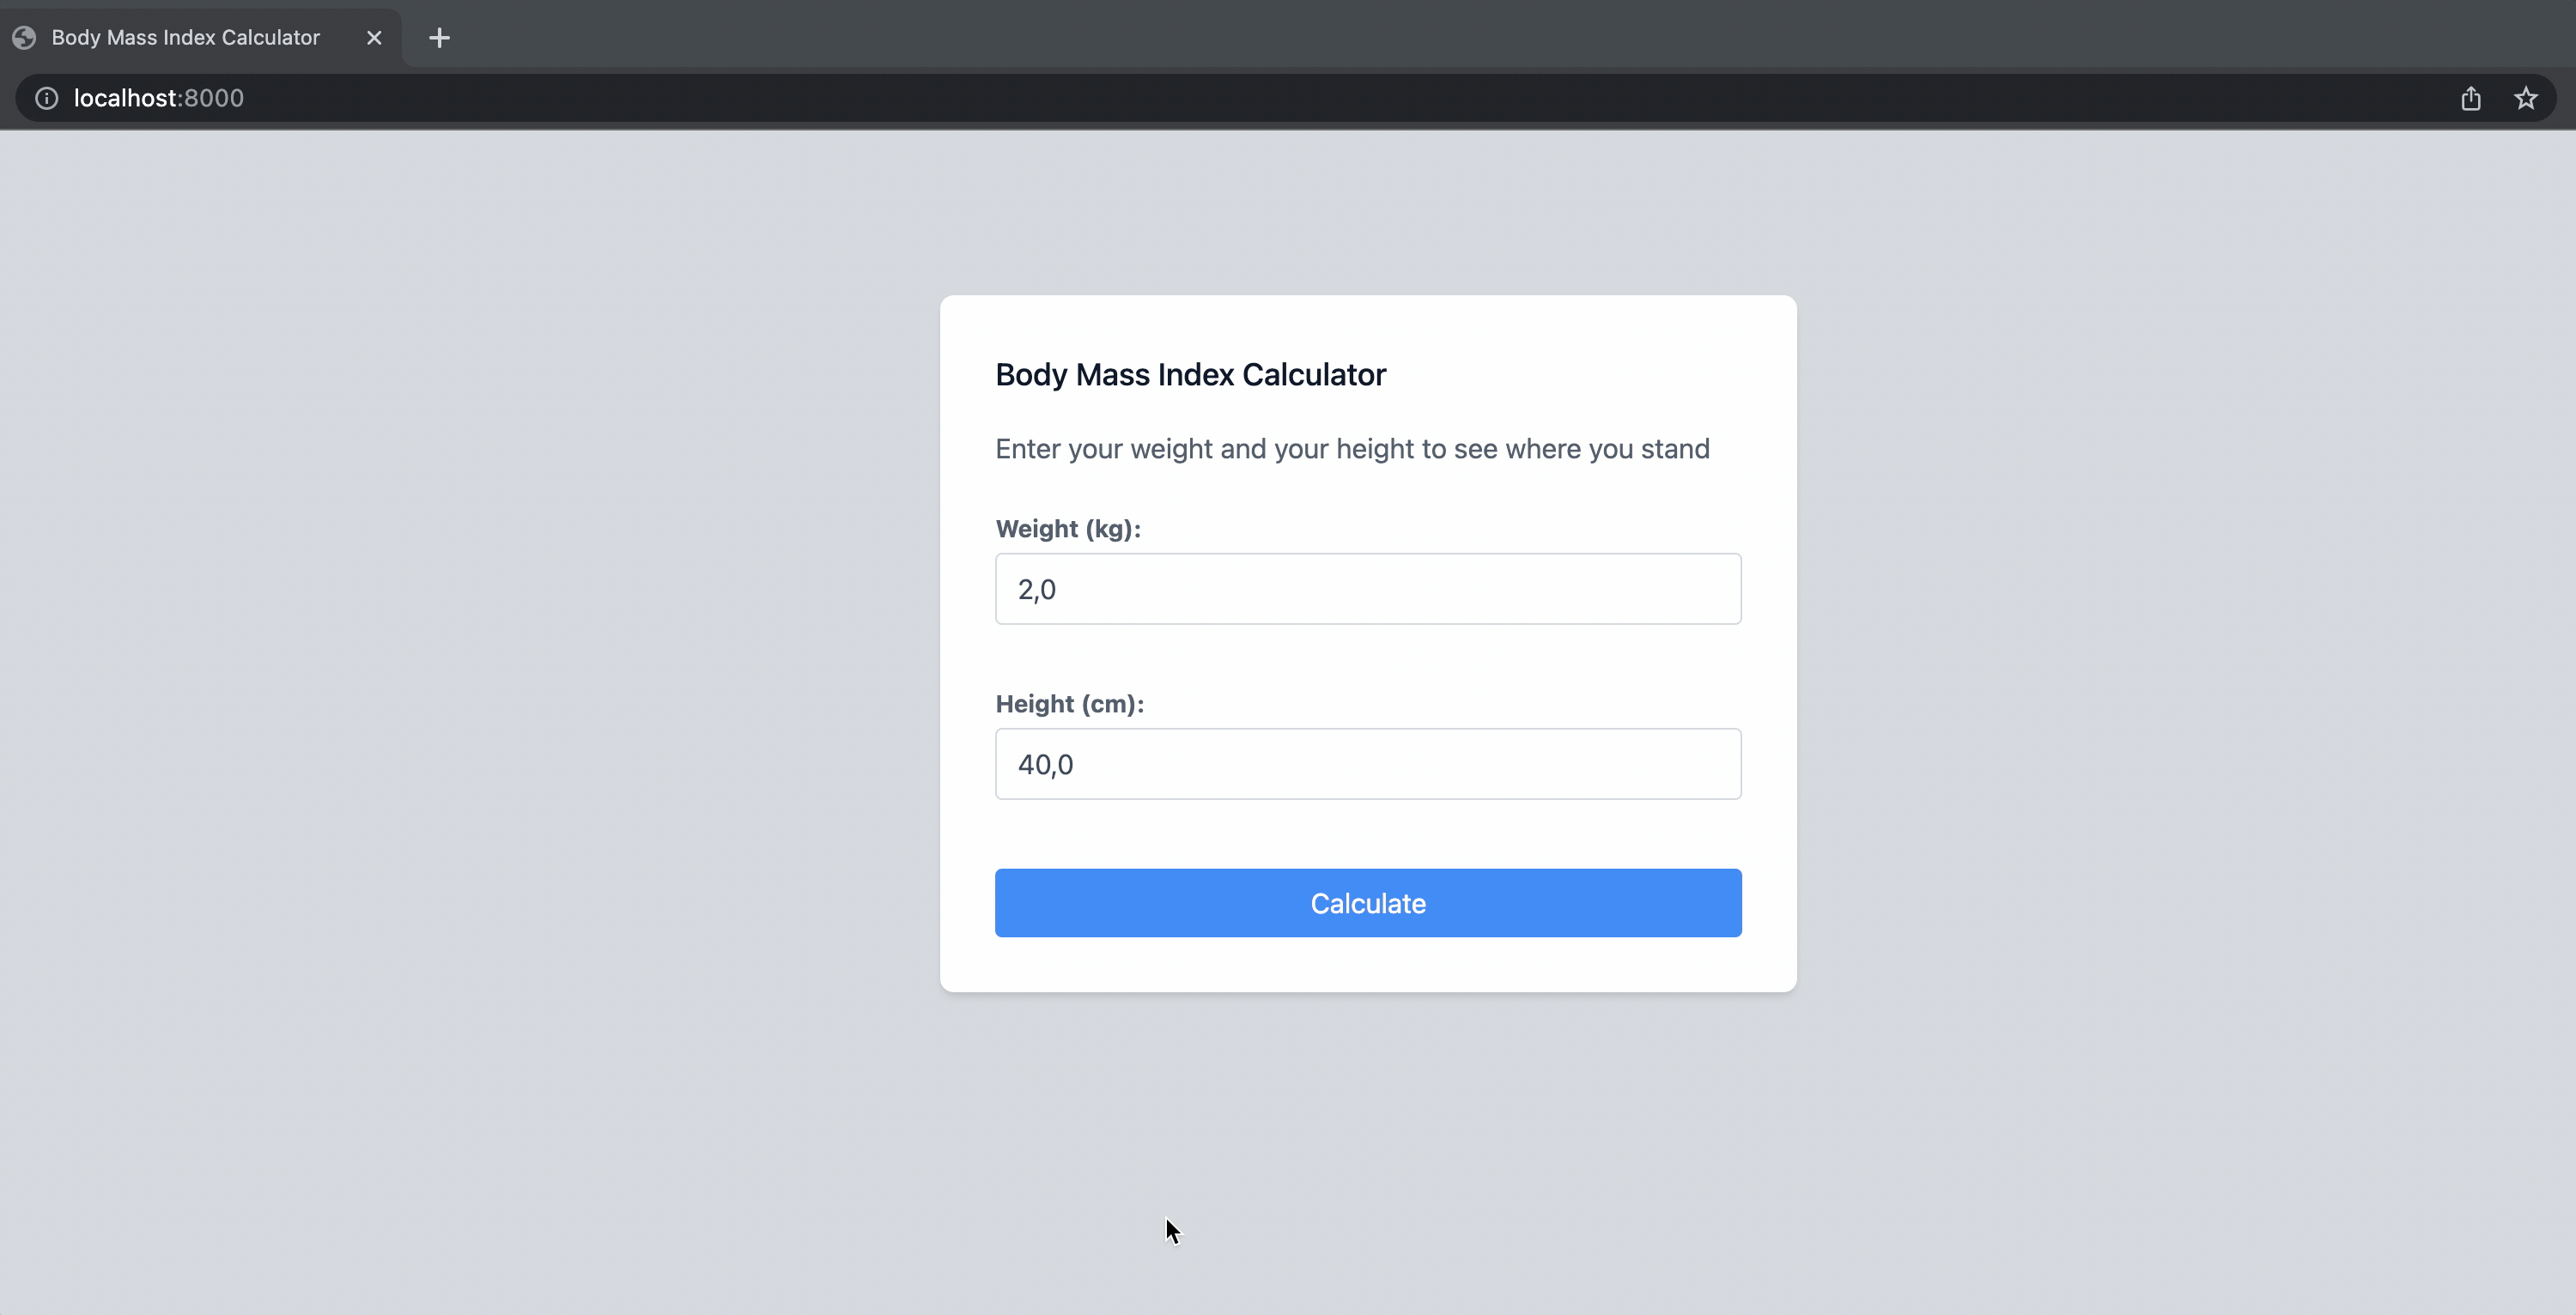
I prepared a Spring Boot project for this post. It is a web application for calculating the Body Mass Index. The source code is on my GitHub repository.
 tericcabrel
Run the following commands to clone it and run it locally.
git clone https://github.com/tericcabrel/bmi.git

cd bmi

mvn install

mvn spring-boot:run
Navigate to http://localhost:8000 on your browser.
The application runs locally; let's make it available on the internet.
Generate the JAR file
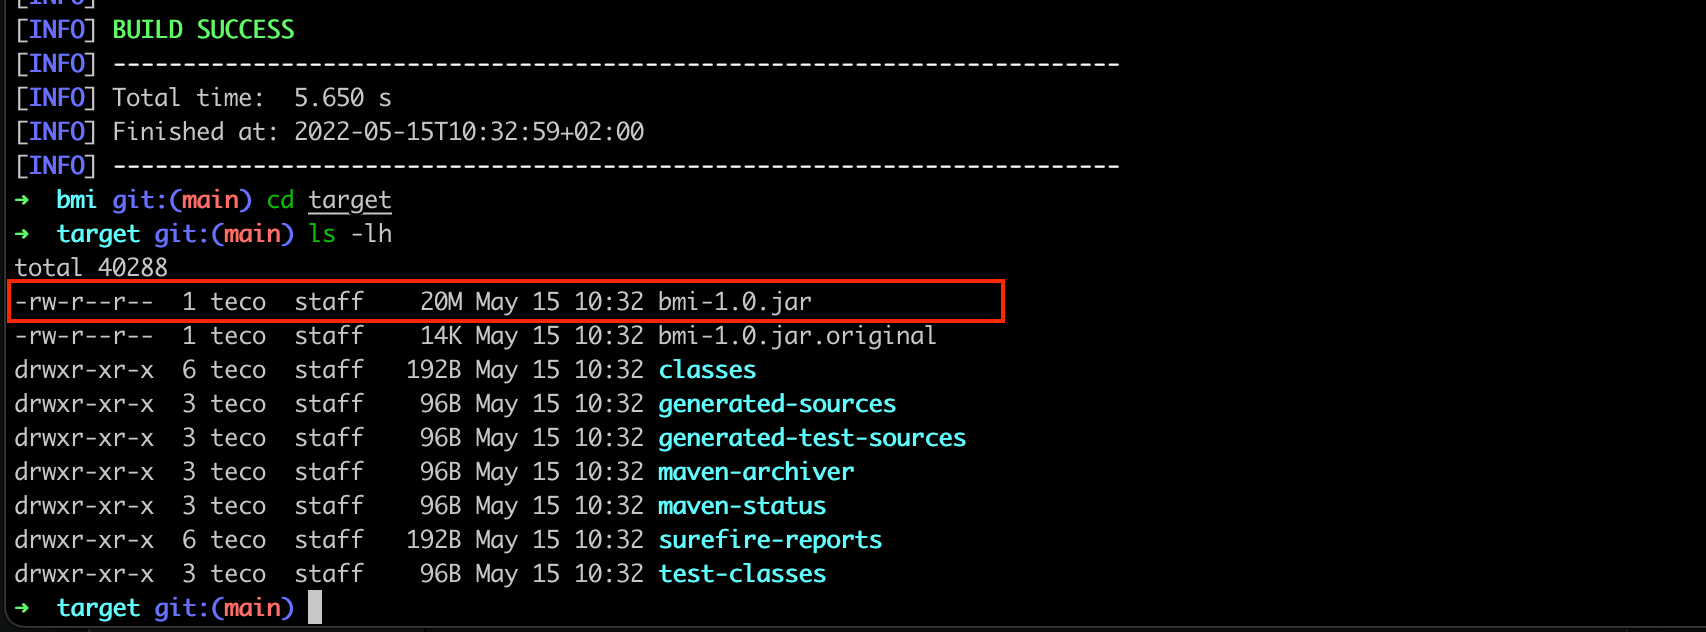
Packaging a Spring Boot application is straightforward. Run the command below to generate the JAR file:
mvn clean package
The JAR file can be found in the "target" folder under the name "bmi-1.0.jar".
Copy the JAR file to the server
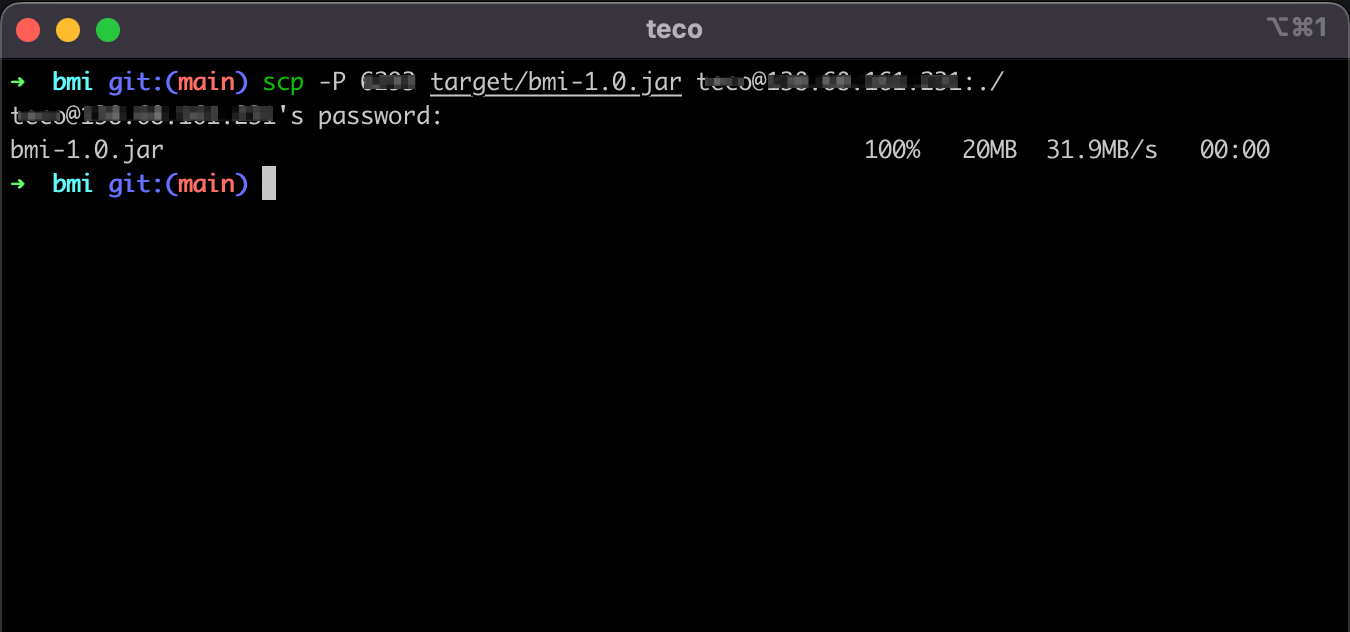
To copy the JAR file to the server in the $HOME folder, we will use SCP, which stands for Secure Copy. It allows files to be copied to a distant computer.
I wrote a complete blog post about copying files over SSH.
The syntax is:
scp -P $PORT $JAR_FILE $USER@$HOST:./
- $PORT: Replace this with the port of your VPS
- $JAR_FILE: It is the JAR file on the local computer we want to copy to the server.
- $USER: Replace the username created on your VPS
- $HOST: Replace this with the IP address of your VPS.
An example of the whole expression is:
scp -P 1234 bmi-1.0.jar user@192.186.11.12
Wait for the file copy to complete.
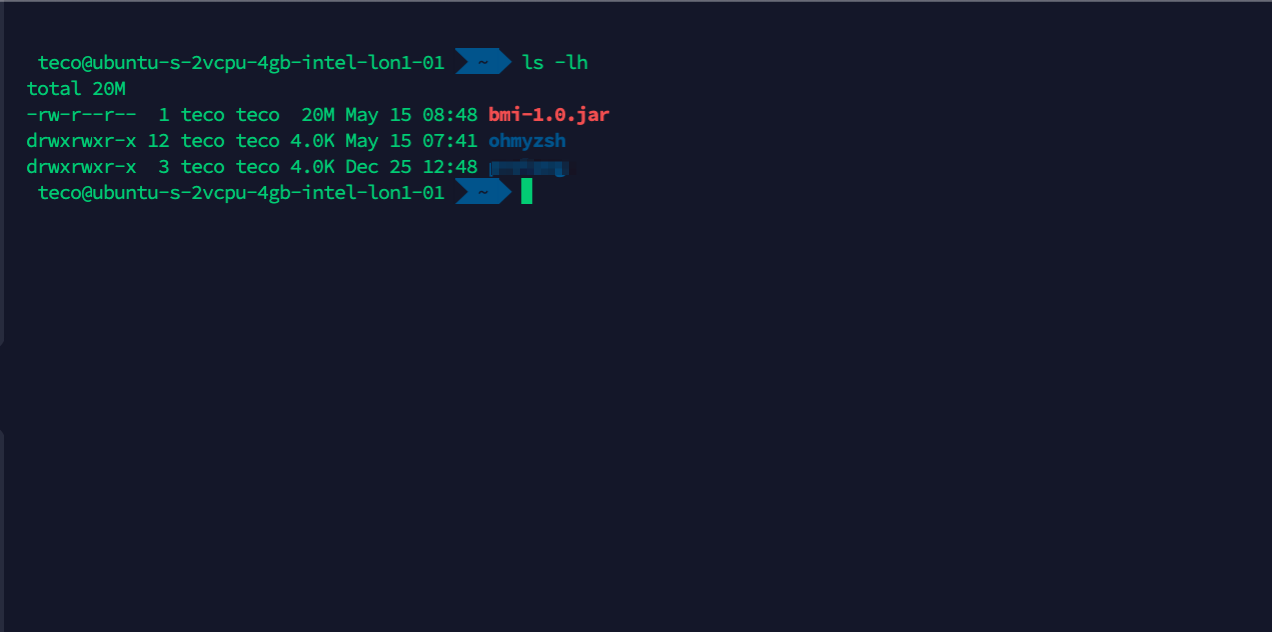
Verify the file is on your VPS in the $HOME folder.
Run the JAR file on the server
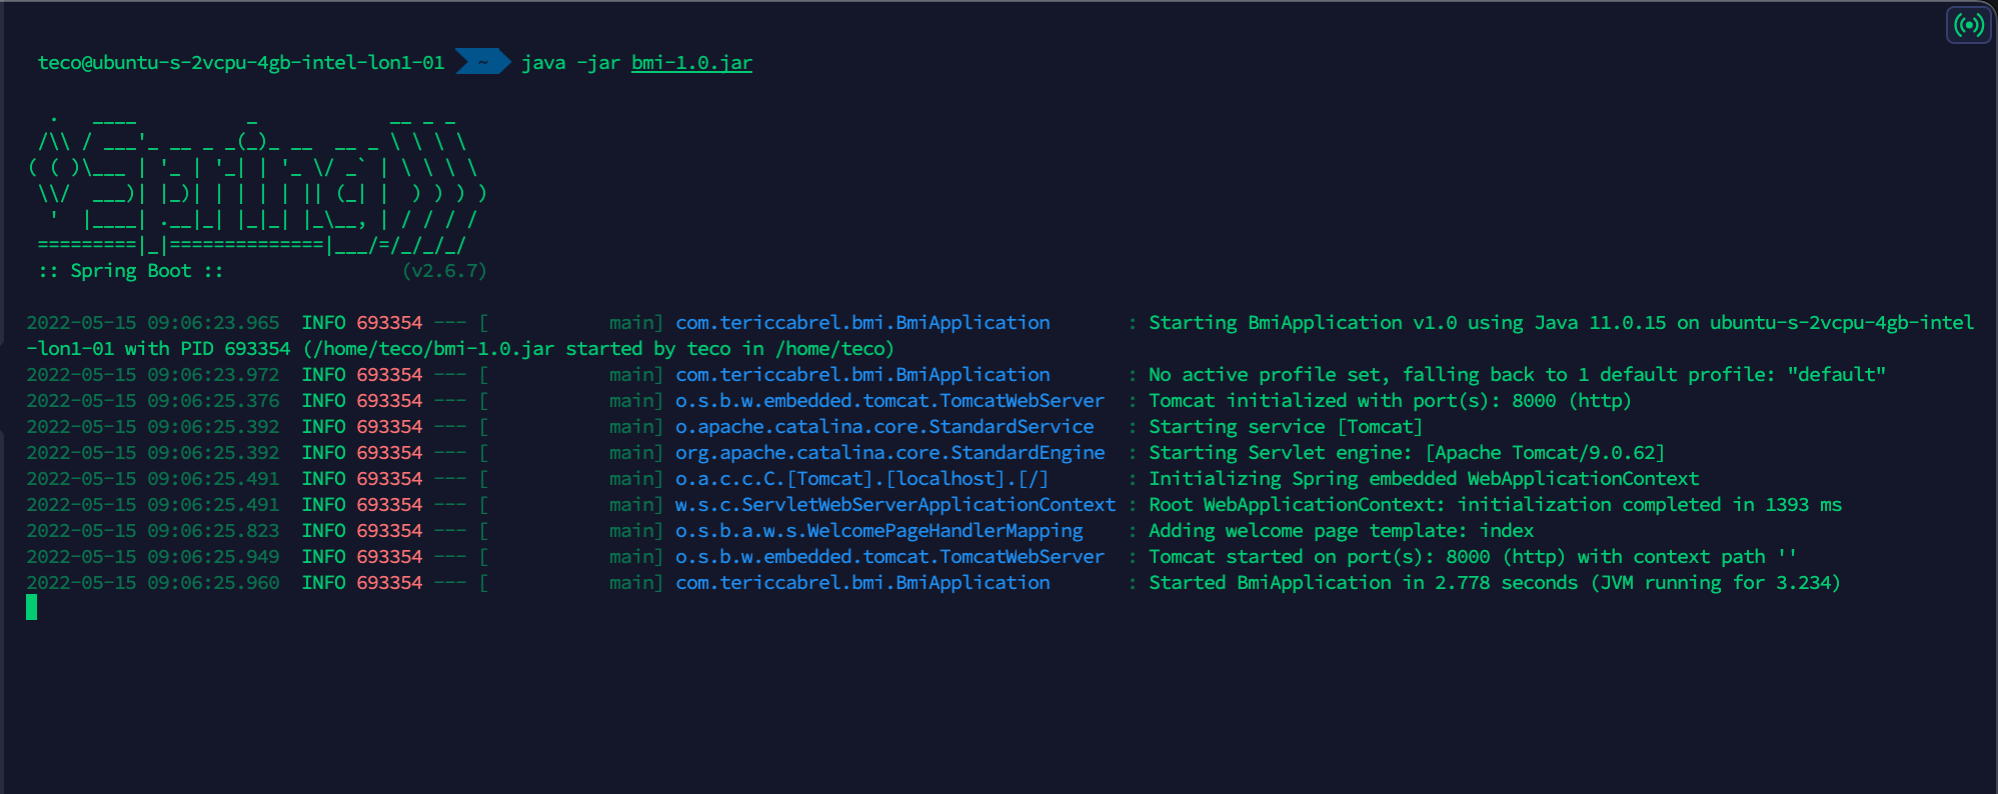
To run the JAR file with the JRE, run the command below:
java -jar bmi-1.0.jar
You will get the following output.
But there is a problem because running an application this way locks the usage of the terminal session and prevents you from doing anything on the server.
Even worse, if you log out of the server, the application stops running. To fix this, you must run the JAR file in the background.
Nohup is a Unix command that allows the launch of a process that will remain active even after the user has initiated the disconnection.
The command will be now:
nohup java -jar bmi-1.0.jar &
Don't forget the operator "&".
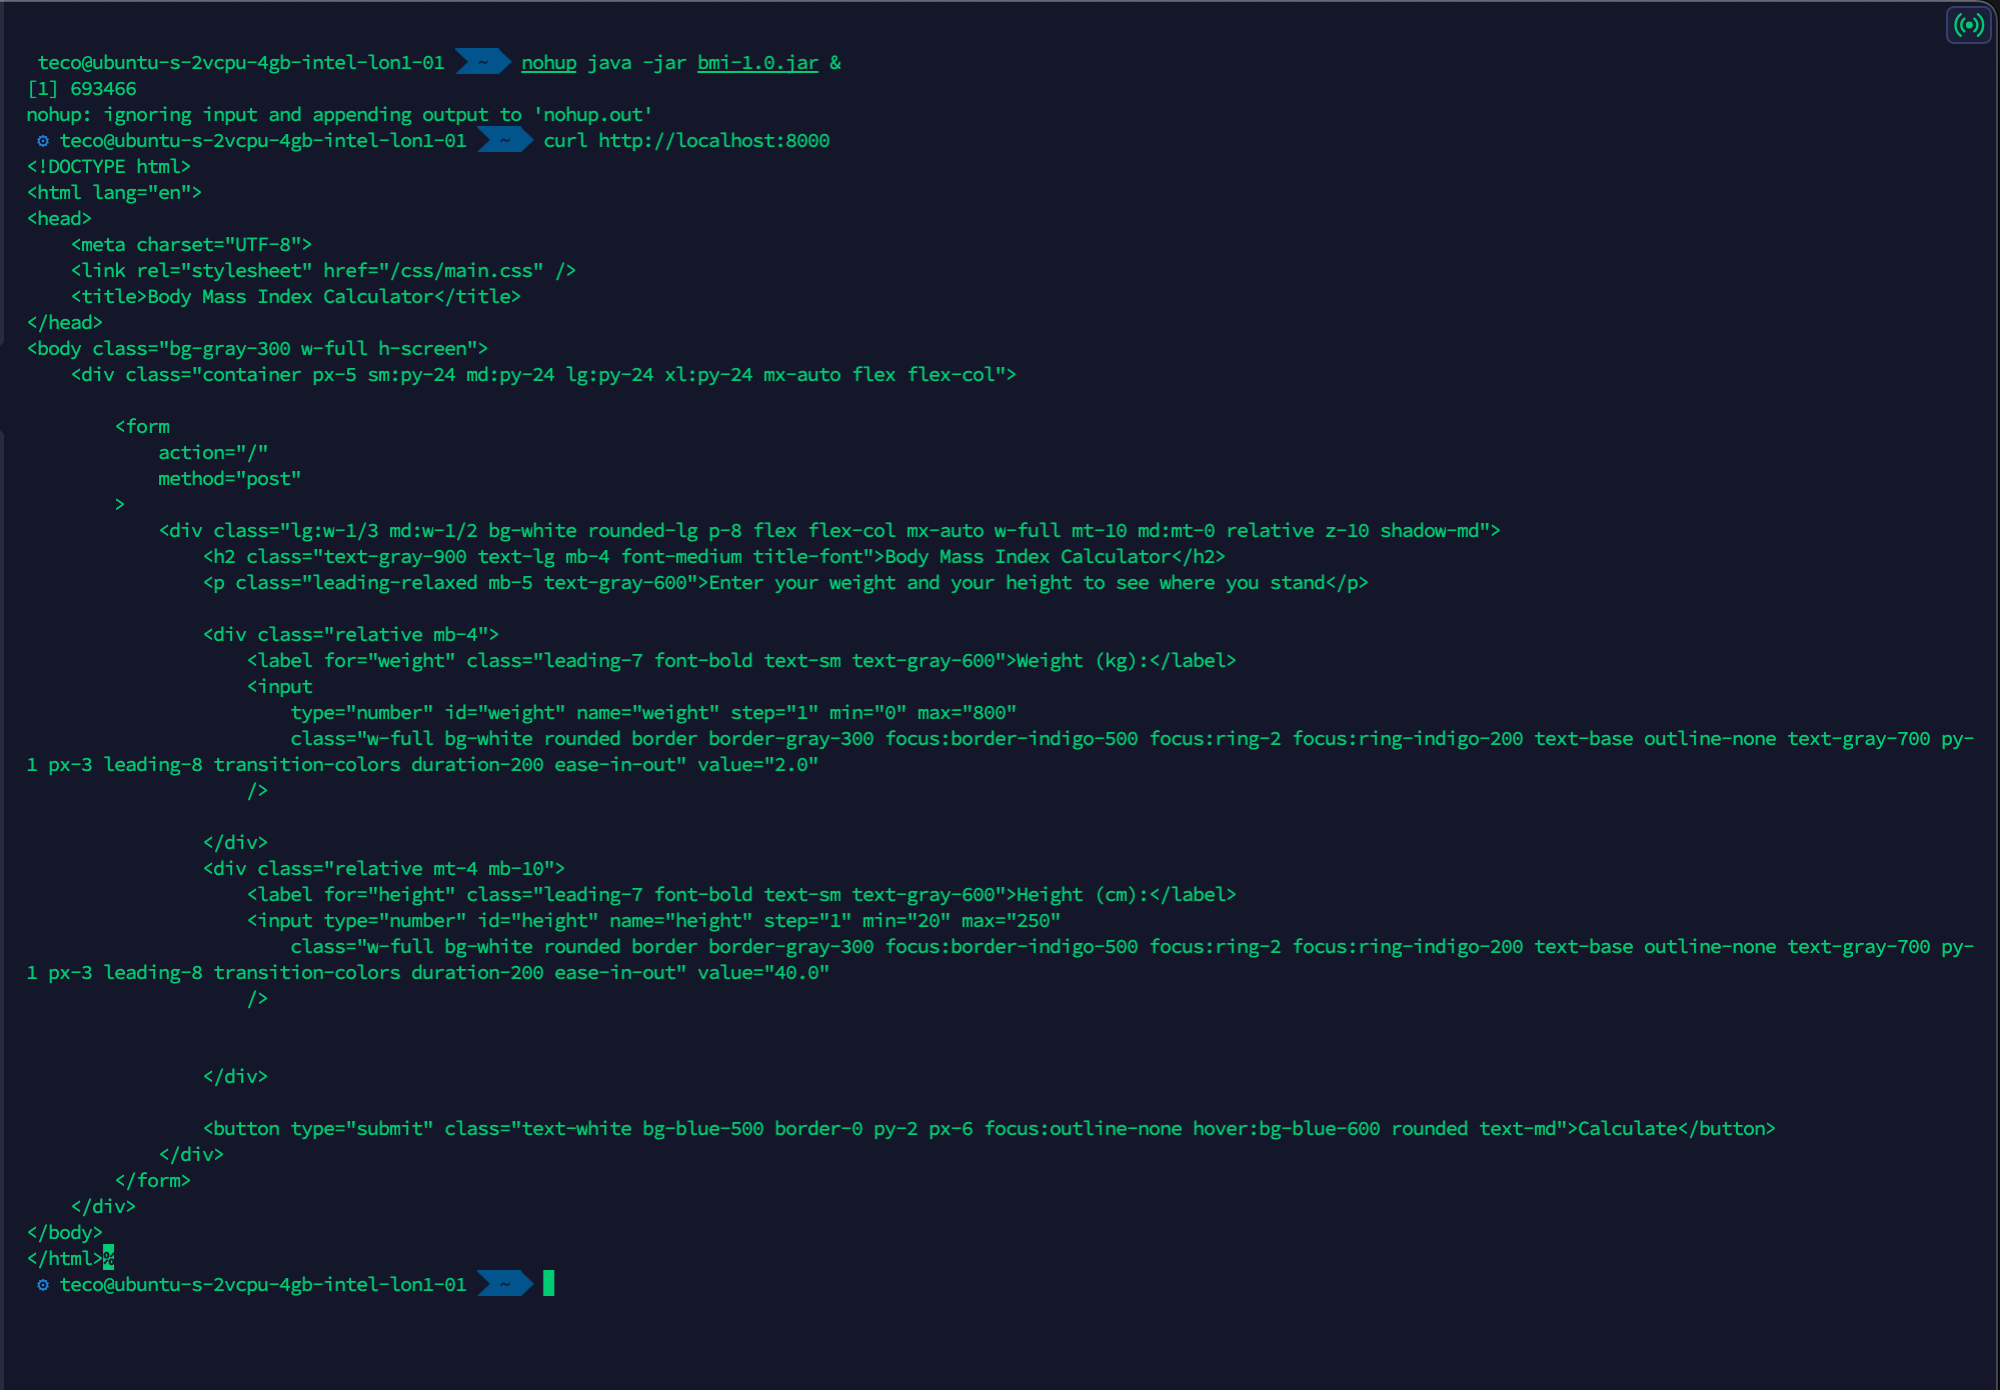
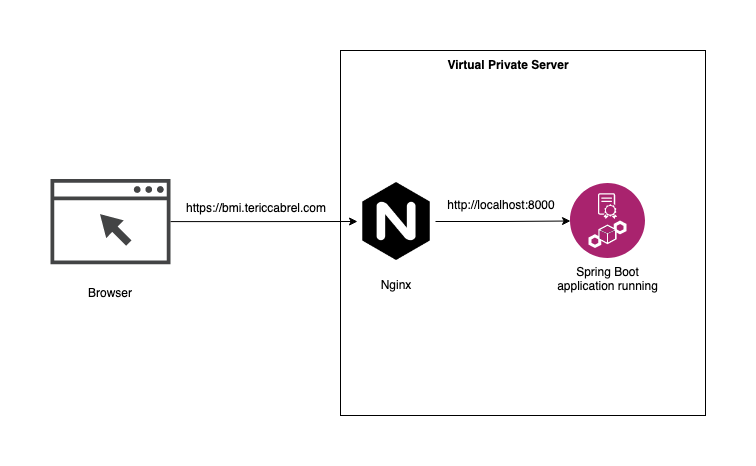
When we send a request to http://localhost:8000, we get a response with HTML content. However, we cannot access it through the browser yet.
Create the DNS record
My domain name is tericcabrel.com; I will create a subdomain bmi.tericcabrel.com that points to the IP address of my VPS.
Log into the client space of your hosting platform and configure it. My domain name is registered at OVH.
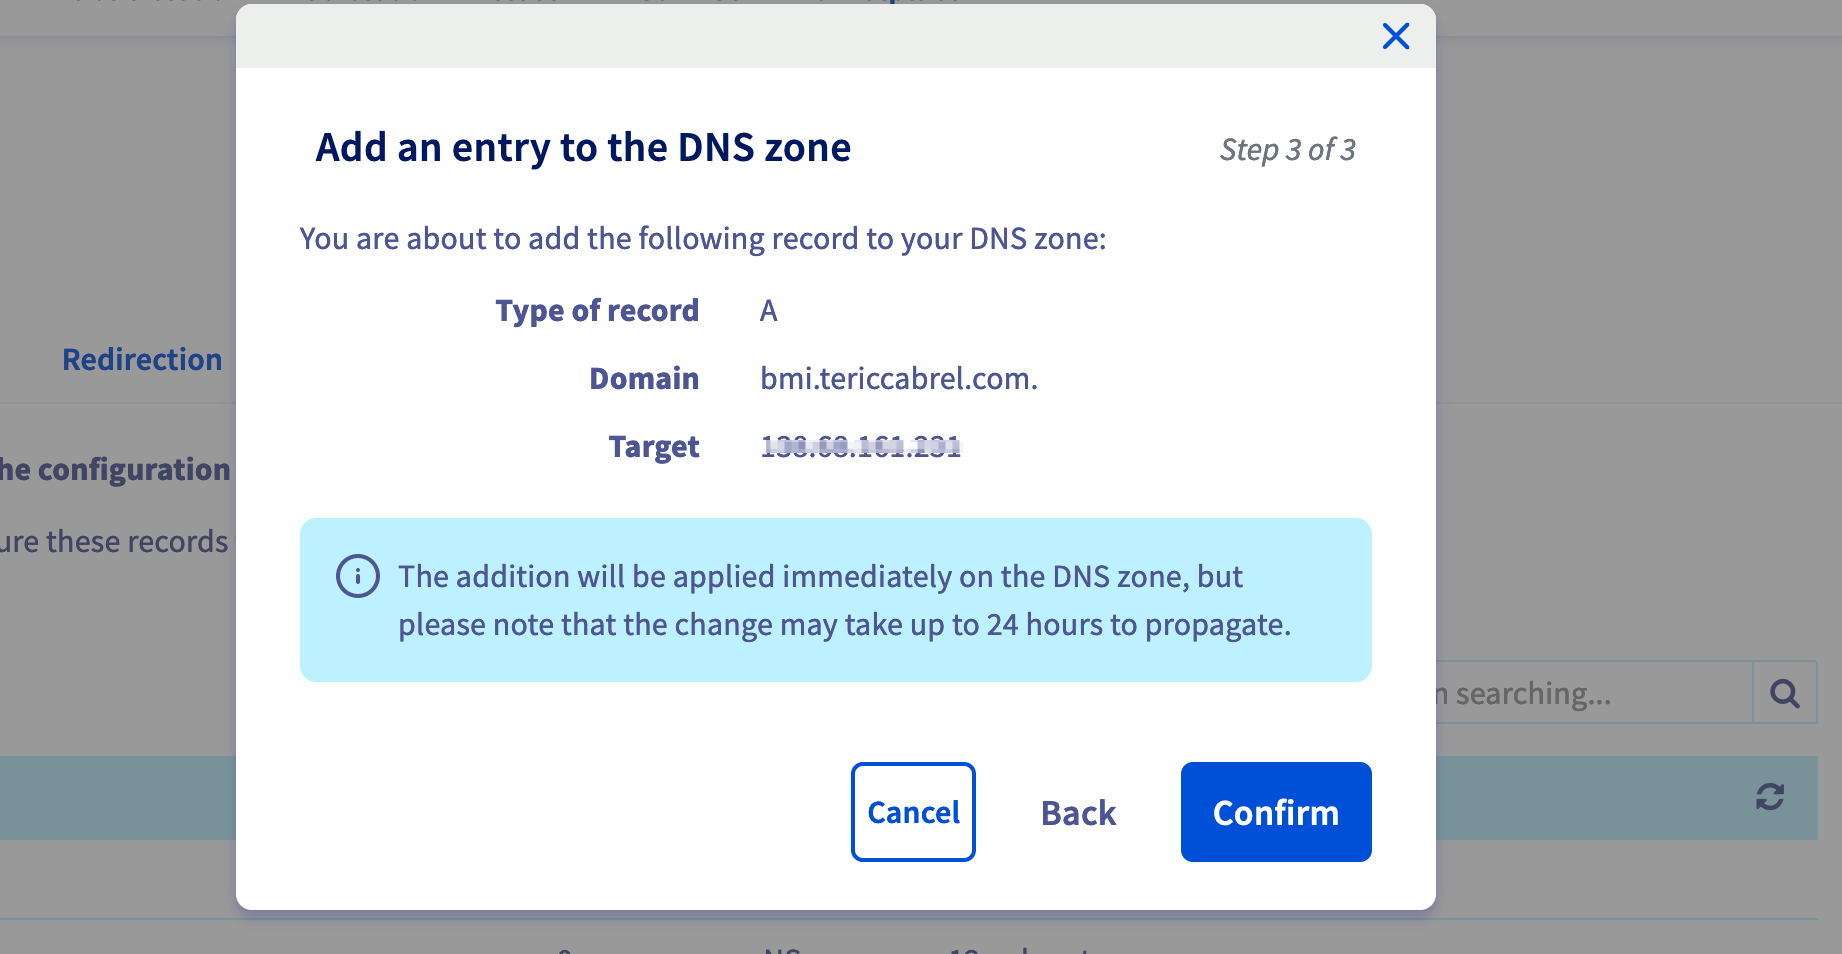
The change can take up to 24 hours to propagate. You can use this website to check if the DNS is ready.
Configure the reverse proxy with Nginx
Nginx has already been installed on the VPS. Create an Nginx configuration for the website with the command below:
sudo nano /etc/nginx/sites-available/bmi.tericcabrel.com
bmi.tericcabrel.com I usually name it like that to quickly find the application I want to apply for a change. Feel free to call it as you wish.Paste the code below inside the file, save, and exit:
server {
    server_name  bmi.tericcabrel.com;
    index index.html index.htm;
    access_log /var/log/nginx/bmiapp.log;
    error_log  /var/log/nginx/bmiapp-error.log error;

    location / {
        proxy_set_header X-Forwarded-For $proxy_add_x_forwarded_for;
        proxy_set_header X-Forwarded-Proto $scheme;
        proxy_set_header X-Real-IP $remote_addr;
        proxy_set_header Host $http_host;
        proxy_pass http://127.0.0.1:8000;
        proxy_redirect off;
    }
}
Don't forget to replace "bmi.tericcabrel.com" with your domain or subdomain.
Enable the website with the command below:
sudo ln -s /etc/nginx/sites-available/bmi.tericcabrel.com /etc/nginx/sites-enabled/bmi.tericcabrel.com
The above command creates a symbolic link to the configuration file inside the folder "/etc/nginx/sites-enabled". Nginx only considers the websites present in this folder to activate reverse proxy.
Let's verify if there is no Nginx error, then reload it to take the changes into account:
sudo nginx -t

sudo nginx -s reload
Navigate to http://bmi.tericcabrel.com to see the result:

Youhou 🎉
Add SSL certificate with Letsencrypt
Install Certbot, which is the tool responsible for certificate generation:
sudo apt install snapd
sudo snap install --classic certbot
Generate and install an SSL certificate for our domain
sudo certbot --nginx -d bmi.tericcabrel.com
In the above command, replace "bmi.tericcabrel.com" with your domain's name.
Reload Nginx configuration: sudo nginx -s reload
Navigate to https://bmi.tericcabrel.com.

Wrap up
To deploy a Spring Boot application packaged. as a JAR file on a server requires the following:
- Package the application as a JAR file.
- Copy the JAR file to the remote server via SSH.
- Run the JAR file to start the application in the background process.
- Configure the reverse proxy to expose the application to the Internet.
- Configure the SSL certificate to secure the communication.
Although this deployment method runs well, managing the running application is not easy. You can go further by improving this deployment process by doing the following:
- Package the Spring Boot application with Docker.
- Use a CI/CD pipeline like GitHub Actions to deploy your Spring Boot application.
You can find the code source of the application deployed in this post on the GitHub repository.
Follow me on Twitter or subscribe to my newsletter to avoid missing the upcoming posts and the tips and tricks I occasionally share.