
Generate a PDF in a Node.js application with Puppeteer


Photo by Marcin Jozwiak on Unsplash
Generating PDF files from a web application is one of the most tedious tasks nowadays. When it comes to generating a summary that will be exported in PDF format, many libraries help to achieve this task, but there can be limited in features like:
- CSS styling is the most crucial part if you want a nice report.
- It doesn't give the freedom to customize the design
- Take too much to draw the design of the report since we are doing it in imperative
In this tutorial, we will see how to generate a PDF using Node.js to handle the logic, a view template engine called Handlebars to design and style the report and finally, use a headless browser called puppeteer to print PDFs of the view generated.
The use case
As the use case, let's take an e-commerce website where a customer can browse products and make an order for the products he is interested in.
An order requires a billing and shipping address which can be different or the same. Our goal is to generate an invoice for the order in PDF format.
The data are stored in a MongoDB database, and we will use Node.js to connect through and retrieve the order to generate an invoice. Check out my previous tutorial if you want to know how to connect a Node.js application to MongoDB.

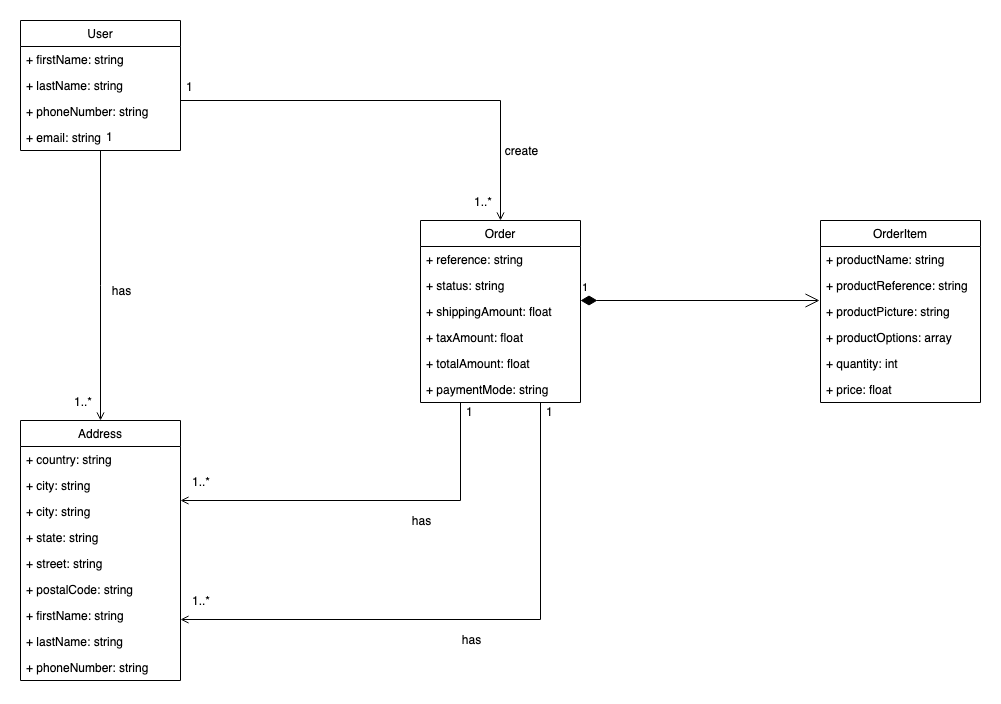
The picture below shows the structure of our database and the relationship between the collection:
Set up the project
To have a starter project to start, I prepared a Node.js project that populates MongoDB with orders and exposes two to retrieve these orders. We will use this data to generate the invoice.
The file generateData.ts contains the logic to generate random data using the library faker.
1- Clone the project, navigate to the project directory and install node modules
git clone https://github.com/tericcabrel/blog-tutorials.git -b node-webapp-pdf

cd blog-tutorials/node-webapp-pdf

yarn install
2- Create a configuration file a replace database credentials with your own. Check out this tutorial if you don't know how to create one.
cp .env.example .env

nano .env
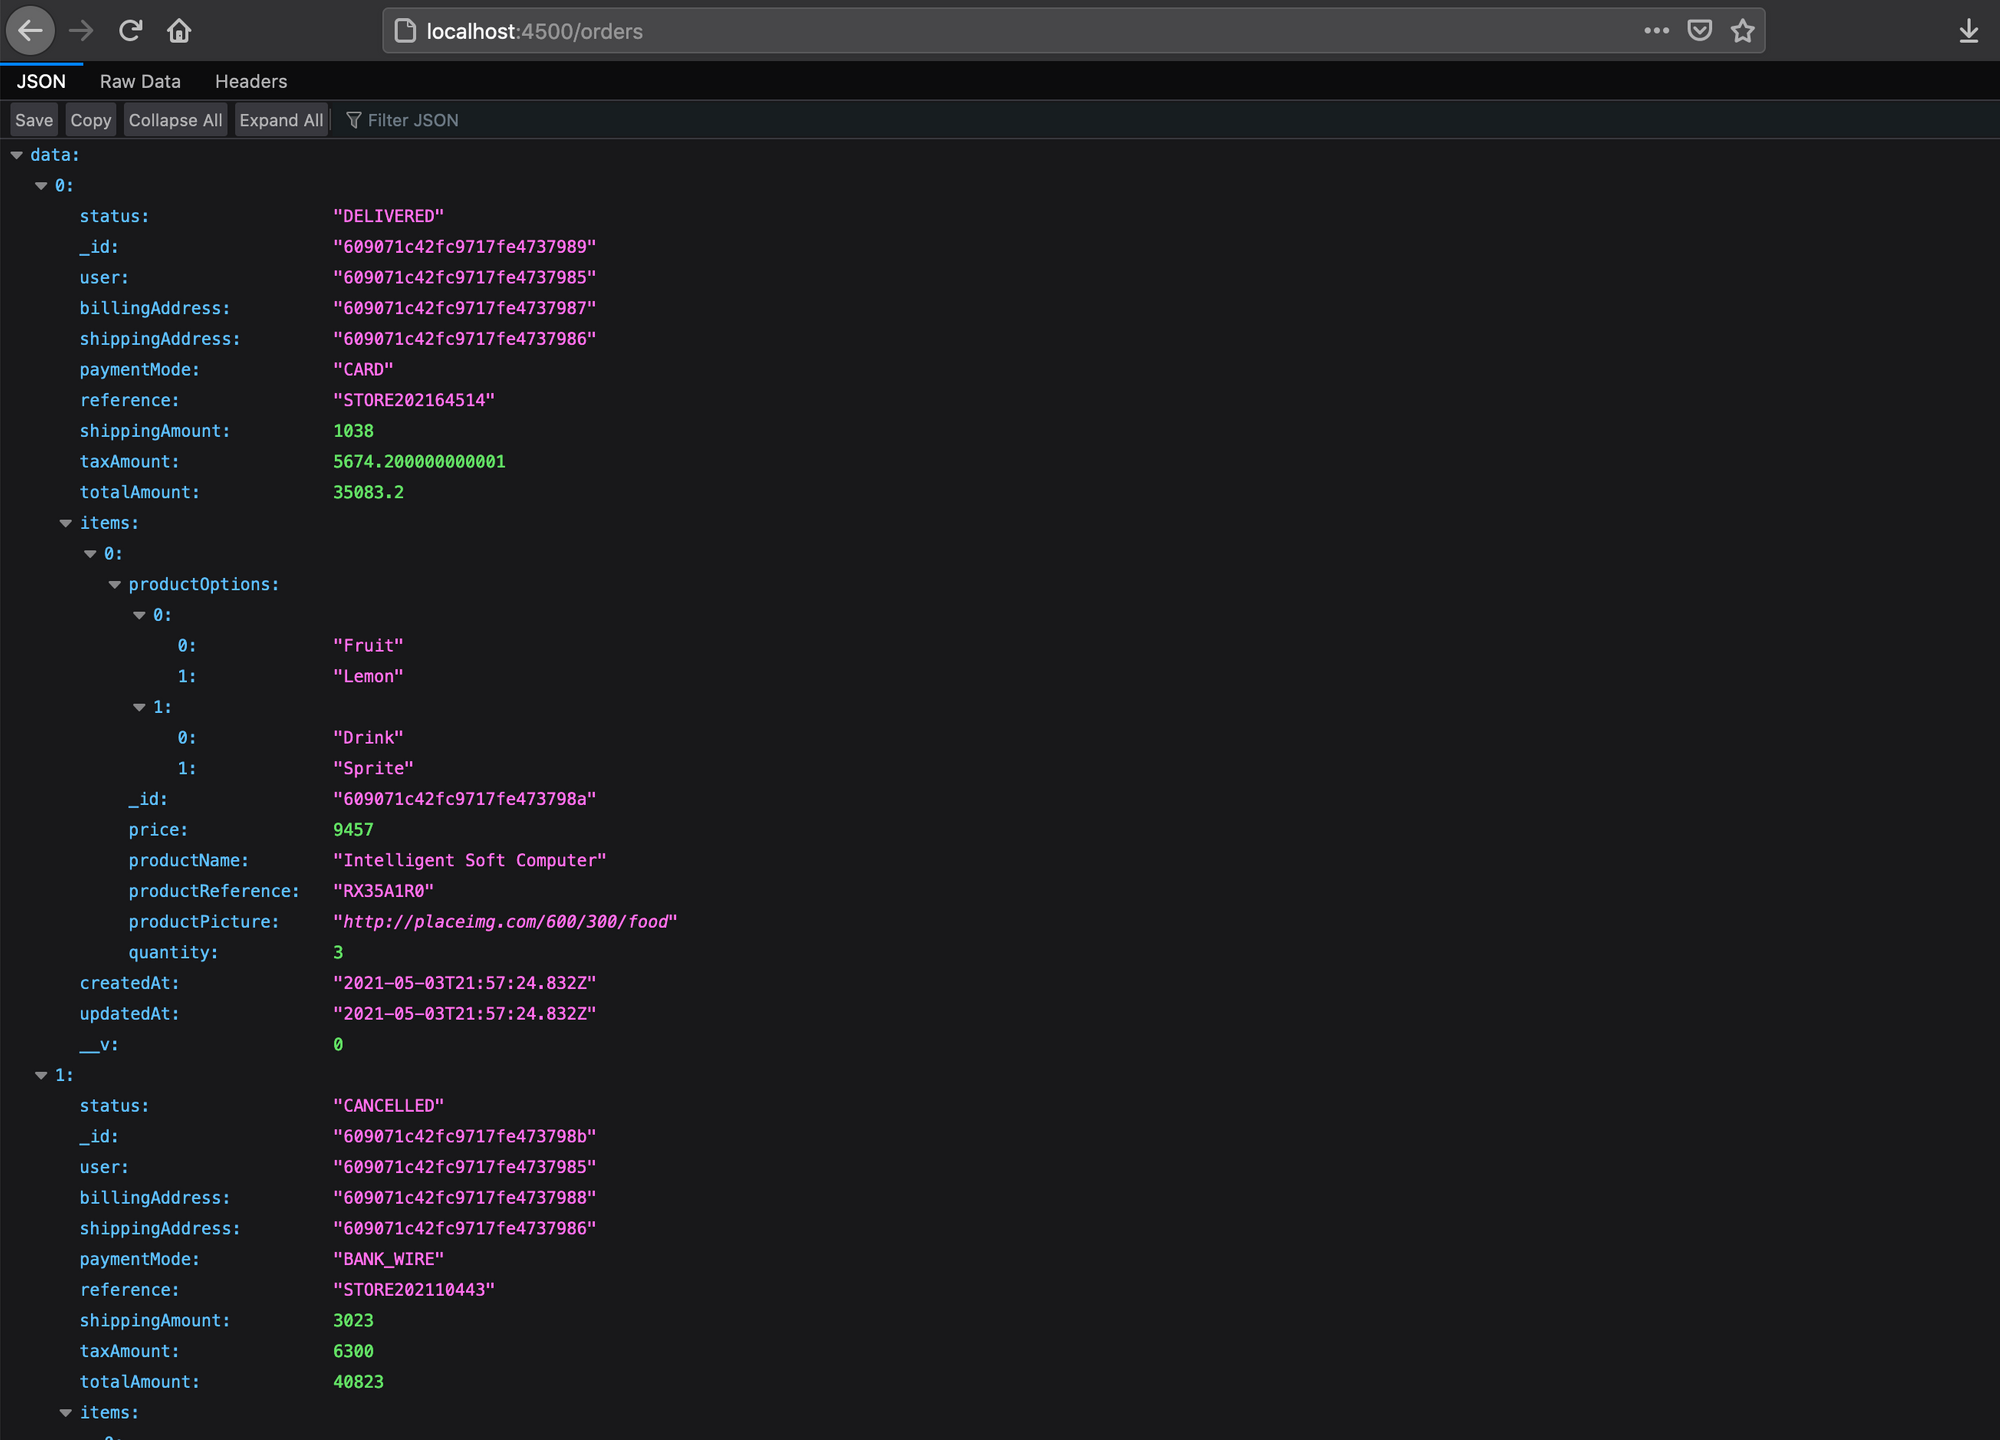
3- Launch the app and navigate to http://localhost:4500/orders in your favorite browser. You will have a result similar to this:
Render the invoice as a page
There is the route /orders/:id, which returns a JSON response of the order matching the id provided in the route parameter.
Let's create a route /orders/:id/view which will produce an HTML page displaying the invoice of the order matching the id provided in the route parameter.
How to render a dynamic page with Node.js?
But there is a problem! Node.js doesn't have a view template to render HTML with dynamic value. Fortunately, there are many view templates like handlebars, swig, and pug.
Based on NPM downloads, Handlebars is the most used at the moment I'm writing this, and since we are using Express Framework, there is a package called express-handlebars that made the configuration easy. This is the one we are going to set up and use.
Setup Handlebars
Install express-handlebars node package:
yarn install -D @types/express-handlebars
yarn install express-handlebars
Open the file src/index.ts and the code below after the code app.use(express.json()); :
import expressHandlebars from 'express-handlebars';

// .......... existing code here ..........

app.engine('handlebars', expressHandlebars());
app.set('view engine', 'handlebars');
app.set('views', path.resolve(__dirname, './views'));

// .......... existing code here ..........
This code sets Handlebars as the view engine to render pages. The last line indicates the folder where the view engine will look up the files to render.
In the src folder, create the folder called views, then add another folder called layouts.
Inside the layouts folder, Create a file called main.handlebars and add the code below inside:
<!DOCTYPE html>
<html lang="en">
<head>
    <meta charset="utf-8">
    <meta name="viewport" content="width=device-width, initial-scale=1">
    <title>E-Store</title>
    <link href="https://fonts.googleapis.com/css?family=Inter:400,400i,800,800i" rel="stylesheet">

    <style>
        html, body {
            font-family: Inter, sans-serif;
            font-max-size:  14px;
        }
    </style>
</head>
<body>
    {{{ body }}}
</body>
</html>
At this point, here is the folder structure:
src
├── index.ts
└── views
    └── layouts
        └── main.handlebars
Render the template
Our template is ready, and the only thing that remains is to render it when we hit the route /orders/:id/view.
Update the file order.controller.ts by adding the code below, which is responsible for rendering the invoice template in the browser:
// .......... existing code here ...........

const viewOrder = async (req: Request, res: Response) => {
  const order = await Order.findOne({ _id: req.params.id })
    .populate({ path: 'user', model: User })
    .populate({ path: 'shippingAddress', model: Address })
    .populate({ path: 'billingAddress', model: Address })
    .exec();

  res.render('invoice', { order: order?.toJSON() });
};

export { findAll, findOne, viewOrder };
Here, we find among the orders the one whose id matches with the one passed in the URL as a parameter and, finally, pass the order found as the data to render the page.
Note 1: The method populate() retrieves the document with all its properties instead of just the ObjectId.
Note 2: the variable order is a Mongo document containing data and methods. If we pass in without the toJSON(), we get an error from Handlebars.

Inside the file src/index.ts, add the code below:
// .......... existing code here ..........

app.get('/orders/:id/view', viewOrder);

// .......... existing code here ..........
Don't forget to import viewOrder from order.controller.ts file.
Build the invoice's template
Previously, we passed the order's object to the res.render() method to access his properties in the invoice template.
Create a file called invoice.handlebars inside the folder views, then add the code below:
<style>
body {
font-family: Inter, sans-serif;
font-max-size: 14px;
}
.right {
text-align: right;
}
.width-50 {
width: 50%;
}
.mb-10 {
margin-bottom: 10px;
}
.container {
width: 730px;
margin: auto;
border: solid 2px #f5f5f5;
min-height: 800px;
padding: 15px;
}
.container .header {
display: flex;
flex-direction: column;
align-items: center;
}
.container .header .company-name {
margin-top: 10px;
color: #009efa;
font-size: 18px;
font-weight: bold;
}
.invoice-ref-row {
display: flex;
justify-content: space-between;
}
.invoice-address-title {
font-weight: bold;
font-size: 16px;
border-bottom: solid 2px #000;
display: flex;
justify-content: space-between;
padding-bottom: 5px;
}
.invoice-address {
display: flex;
justify-content: space-between;
}
.product-title {
background-color: #f5f5f5;
font-size: 16px;
font-weight: bold;
text-align: center;
width: 100%;
padding: 12px 0 7px 0;
}
.product-item {
display: flex;
margin-bottom: 25px;
}
.product-item .product-item-picture {
width: 20%;
display: flex;
align-items: center;
}
.product-item .product-item-info {
width: 60%;
display: flex;
flex-direction: column;
justify-content: center;
}
.product-item .product-item-price {
width: 20%;
display: flex;
flex-direction: column;
justify-content: center;
align-items: end;
padding-right: 20px;
}
.product-item .product-item-info .product-item-info-name {
font-weight: bold;
font-size: 16px;
color: #211e1e;
}
.product-item .product-item-info .product-item-info-options {
color: grey;
font-size: 13px;
}
.table-order-price {
width: 100%;
border-collapse: collapse;
}
.table-order-price td {
padding: 4px 15px;
}
.footer {
text-align: center;
width: 100%;
font-size: 12px;
}
</style>
<div class="container">
<div class="header">
<img src="/logo.svg" alt="Logo" />
<div class="company-name">E-STORE</div>
</div>
<div style="height: 20px"></div>
<div class="invoice-ref">
<div class="invoice-ref-row">
<div><b>Customer</b>: {{ order.user.firstName }} {{ order.user.lastName }}</div>
<div><b>Date</b>: {{date order.createdAt}}</div>
</div>
<div style="height: 15px"></div>
<div class="invoice-ref-row right">
<div><b>Reference</b>: <a href="https://blog.tericcabrel.com">{{ order.reference }}</a></div>
</div>
</div>
<div style="height: 30px"></div>
<div class="invoice-address-title">
<div class="width-50">SHIPPING ADDRESS</div>
<div class="right width-50">BILLING ADDRESS</div>
</div>
<div style="height: 10px"></div>
<div class="invoice-address">
<div class="invoice-address-shipping width-50">
<div class="mb-10">{{ order.shippingAddress.firstName }} {{ order.shippingAddress.lastName }}</div>
<div class="mb-10">{{ order.shippingAddress.city }}, {{ order.shippingAddress.country }}</div>
<div class="mb-10">{{ order.shippingAddress.postalCode }}, {{ order.shippingAddress.street }}</div>
</div>
<div class="invoice-address-shipping width-50 right">
<div class="mb-10">{{ order.billingAddress.firstName }} {{ order.billingAddress.lastName }}</div>
<div class="mb-10">{{ order.billingAddress.city }}, {{ order.billingAddress.country }}</div>
<div class="mb-10">{{ order.billingAddress.postalCode }}, {{ order.billingAddress.street }}</div>
</div>
</div>
<div style="height: 20px"></div>
<div class="product-title">
PRODUCTS
</div>
<div style="height: 20px"></div>
<div class="products">
{{#each order.items}}
<div class="product-item">
<div class="product-item-picture">
<img src="{{ this.productPicture }}" width="80" height="80" alt="product-picture" />
</div>
<div class="product-item-info">
<div class="product-item-info-name">{{ this.productName }}</div>
<div style="height: 8px"></div>
<div class="product-item-info-options">
<span style="padding-right: 50px">{{ this.productOptions.[0].[0] }}: <b>{{ this.productOptions.[0].[1] }}</b></span>
<span>{{ this.productOptions.[1].[0] }}: <b>{{ this.productOptions.[1].[1] }}</b></span>
</div>
</div>
<div class="product-item-price">
<div>Qty: {{ this.quantity }}</div>
<div style="height: 8px"></div>
<div><b>€{{round this.price }}</b></div>
</div>
</div>
{{/each}}
</div>
<div style="margin-top: 20px; border-bottom: solid 2px #f5f5f5"></div>
<div style="height: 20px"></div>
<table border="1" class="table-order-price">
<tbody>
<tr>
<td>Subtotal</td>
<td class="right">€{{round orderSubTotal }}</td>
</tr>
<tr>
<td>Shipping</td>
<td class="right">€{{round order.shippingAmount }}</td>
</tr>
<tr>
<td>Sales Tax</td>
<td class="right">€{{round order.taxAmount }}</td>
</tr>
<tr>
<td style="padding-top: 10px"><b>TOTAL</b></td>
<td style="padding-top: 10px" class="right"><b>€{{round order.totalAmount }}</b></td>
</tr>
</tbody>
</table>
<div style="height: 30px"></div>
<div class="footer">© 2021 E-Store Ltd.</div>
</div>Note: Handlebars has a feature called helper function, which allows applying a custom logic on a property when rendering the view.
I created two handlebars round and date helpers to round a number and format the date following the format MM/JJ/YYYY. Do it requires an update on how we set handlebars as the view engine in src/index.ts.
Without helpers function:
app.engine('handlebars', expressHandlebars());
app.set('view engine', 'handlebars');
With helpers function:
const hbs = expressHandlebars.create({
  helpers: {
    round: function (number) {
      return Math.round(number) / 100;
    },
    date: function (dateString) {
      const date = new Date(dateString);

      return `${date.getMonth() + 1}/${date.getDate() + 1}/${date.getFullYear()}`;
    },
  },
});

app.engine('handlebars', hbs.engine);
This is how to use these helper functions in the invoice template.
<div><b>Date</b>: {{date order.createdAt}}</div>
<td class="right">€{{round order.shippingAmount }}</td>
View the order's invoice
Run the application by typing yarn start , then navigate to the URL http://localhost:4500/orders in your browser, which will respond with all the orders stored in your local database. Pick one order's id among the data.

To view the order, open a new tab in your browser and navigate to http://localhost:4500/orders/{orderId}/view.
If I pick the second order's id in the picture, the URL will be: http://localhost:4500/orders/6097a12e46e63c06bfaec3b1/view
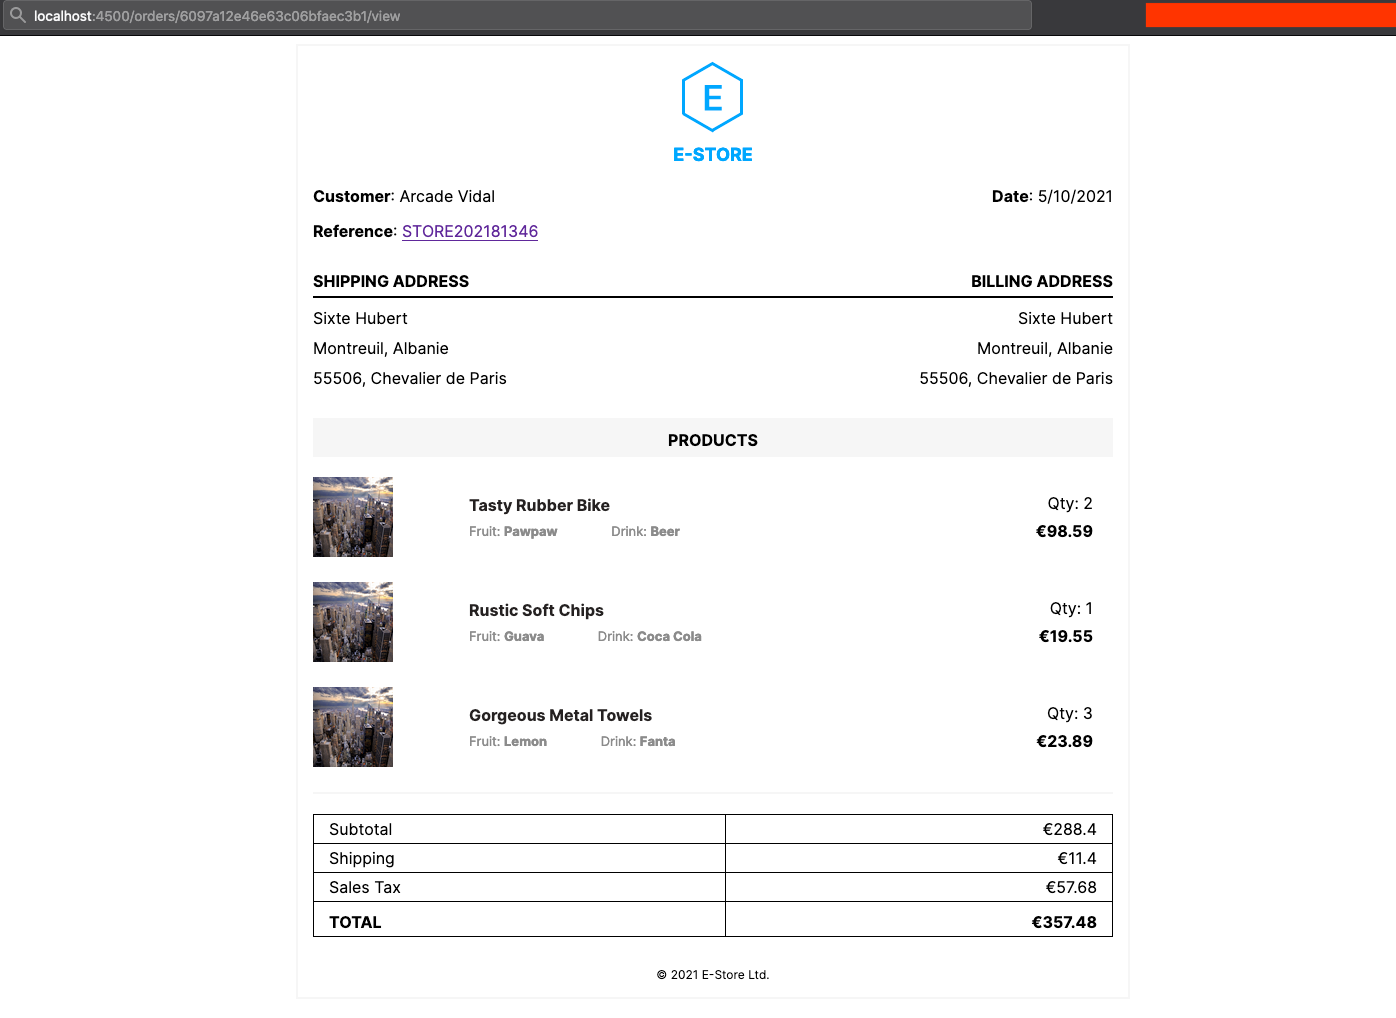
Our invoice is rendered as expected 🎉.
Generate the PDF
The first step is to install the Puppeteer node package in the project. One thing to mention is what the installation will do in the background.
On the NPM page of the package, we can read:
When you install Puppeteer, it downloads a recent version of Chromium (~170MB Mac, ~282MB Linux, ~280MB Win) that is guaranteed to work with the API.
Let's install the package by running the following command:
yarn add puppeteer
We will use the route /orders/{id}/download to download the invoice. First, let's write the logic in src/order.controller.ts add the code below:
import puppeteer from 'puppeteer';

// ......... existing code ..........

const downloadOrder = async (req: Request, res: Response) => {
  const order = await Order.findOne({ _id: req.params.id });

  const baseUrl = `${req.protocol}://${req.get('host')}`;
  const url = `${baseUrl}/orders/${req.params.id}/view`;

  const filePath = path.resolve(__dirname, `../../public/ORDER-${order?.reference}.pdf`);

  const browser = await puppeteer.launch();
  const page = await browser.newPage();

  await page.goto(url);
  await page.pdf({ path: filePath, format: 'a4', printBackground: true });
  await browser.close();

  res.download(filePath);
};

export { findAll, findOne, viewOrder, downloadOrder };
Here we retrieve the order by its id, then generate the path to save the PDF file on the server. We start the puppeteer instance and capture the page rendered when navigating to http://localhost:4500/orders/{id}/view.
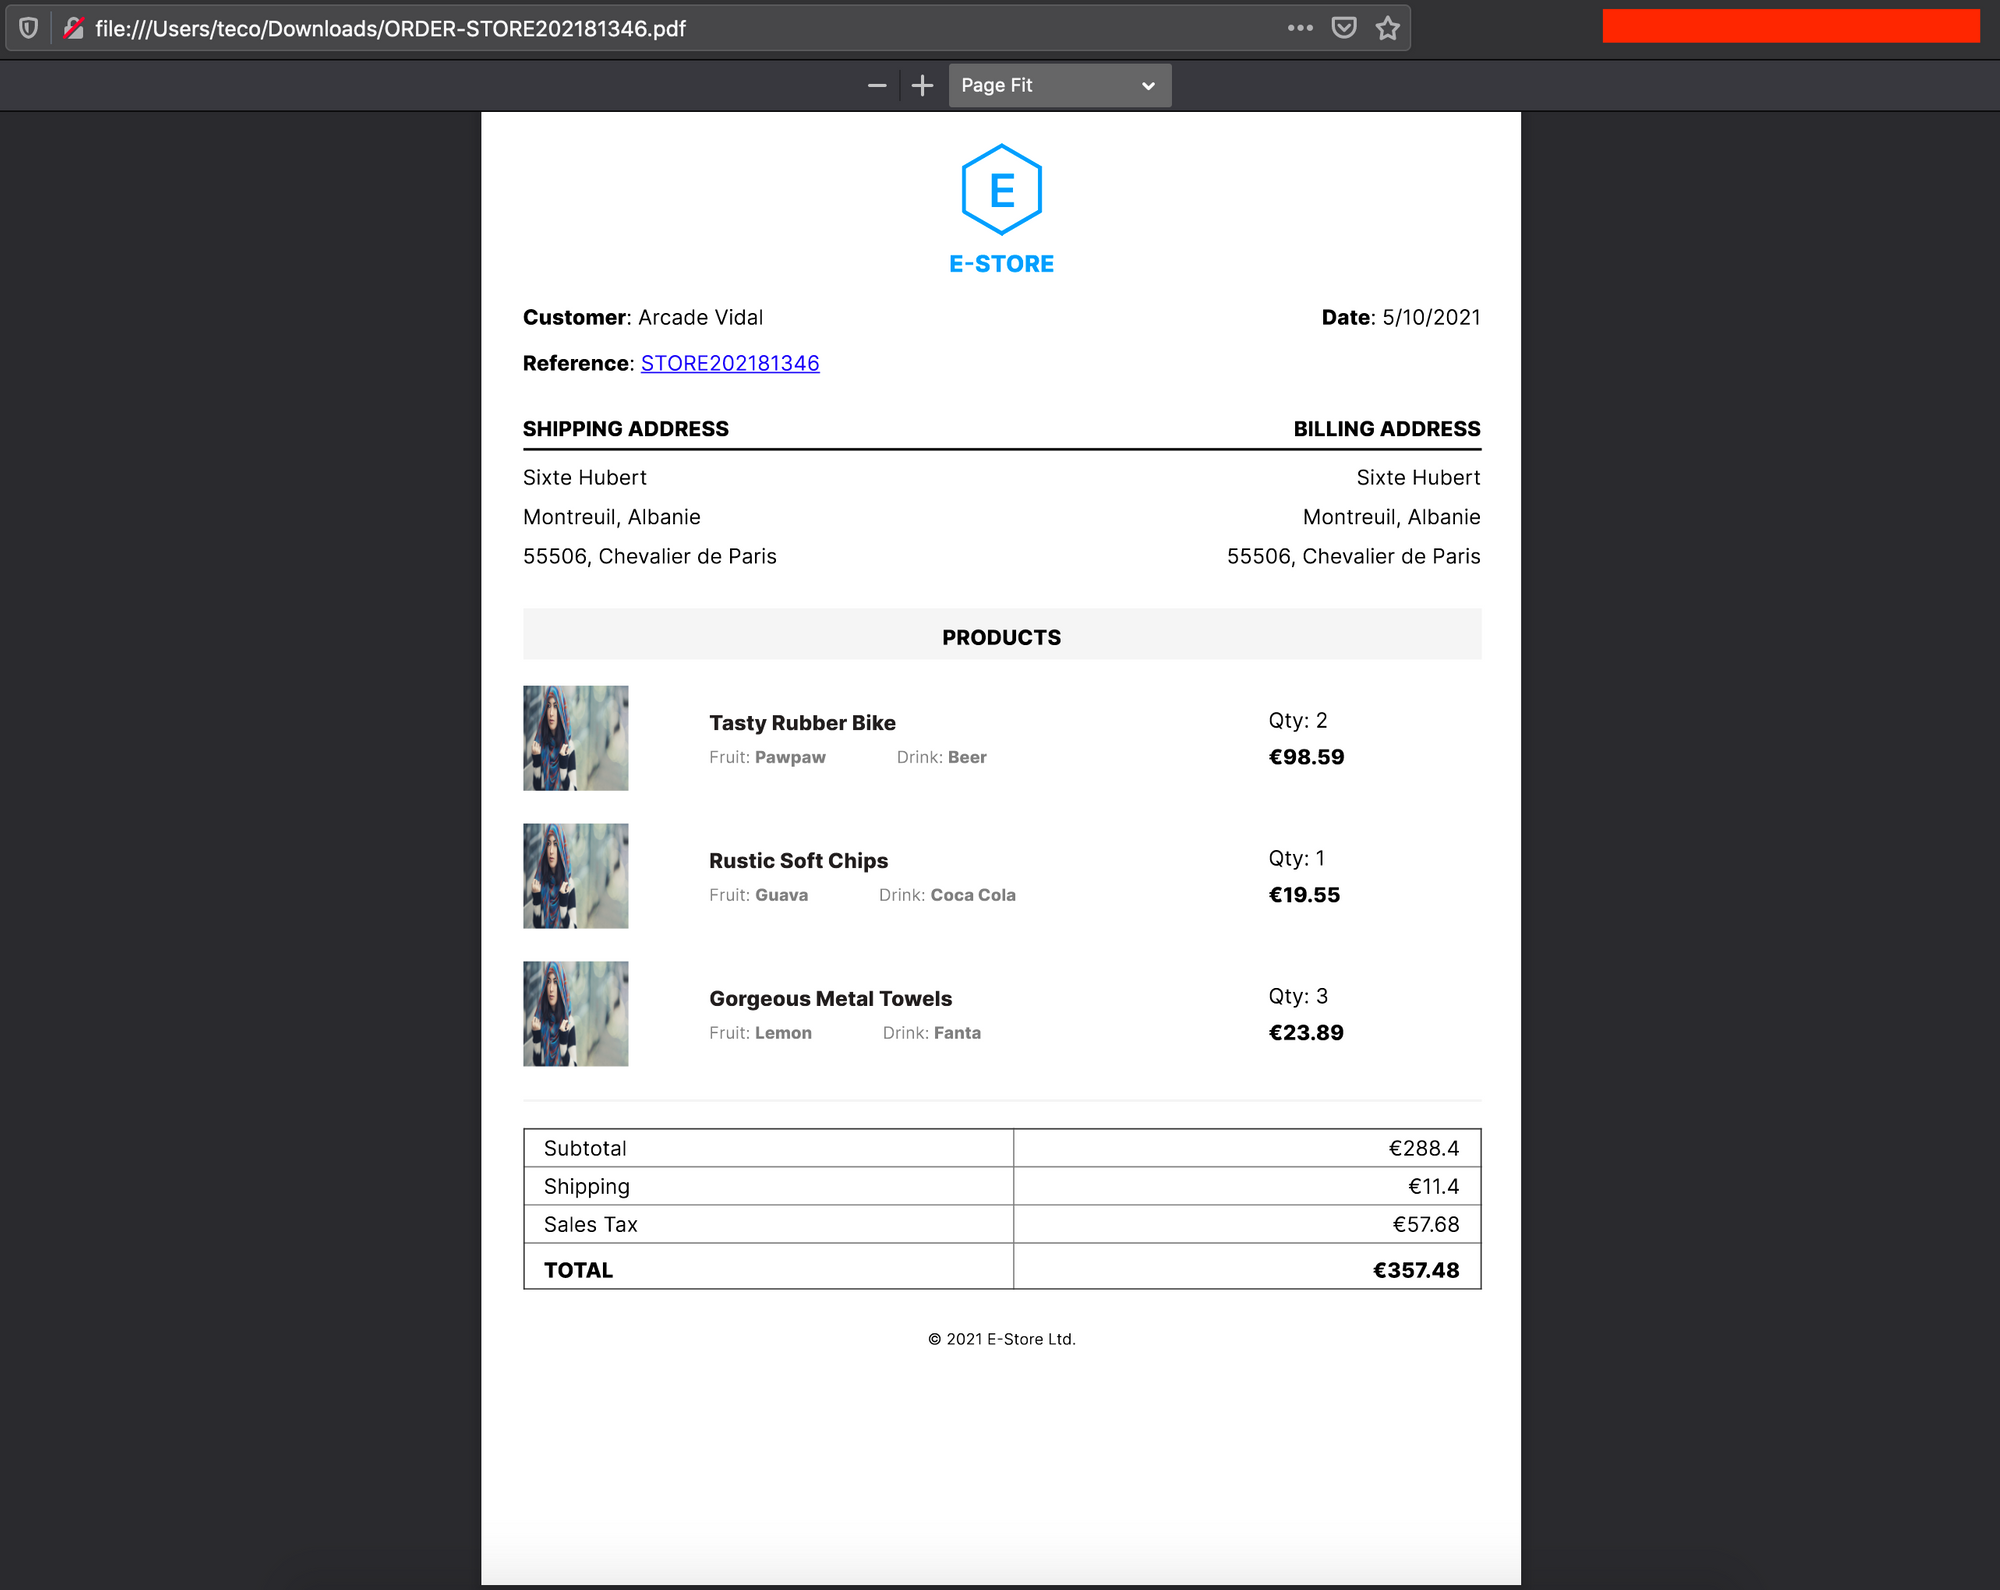
Finally, download the PDF generated.
Before testing the solution, register the route by adding the code below in src/index.ts:
// .......... existing code here ..........

app.get('/orders/:id/download', downloadOrder);

// .......... existing code here ..........
Remember to import downloadOrder from order.controller.ts file.
Run the application, pick an order's id, then navigate to the download URL.
Wrap up
We Node.js and Puppeteer, you can easily generate a PDF document in the backend. Check out the Puppeteer documentation to see what other things you can do with it.
You can find the code source on the GitHub repository.
Follow me on Twitter or subscribe to my newsletter to avoid missing the upcoming posts and the tips and tricks I occasionally share.