
Make HTTP requests in a Java application using Spring RestTemplate


Photo by Saad Chaudhry / Unsplash
In a real-world backend web application, you may need to make a synchronous call to another backend. This can be an internal service (in a microservice application ) or an external service (calling the Currency Exchange Rates API).
In this case, you need an HTTP client library to build your request, send it, wait for a response, parse it and use the result in our business logic.
In the Java ecosystem, there are various HTTP client libraries like Retrofit, Feign, etc... The Spring Framework comes with a library called RestTemplate.
We will use it because it doesn't require adding a new dependency in the project and being included in the Spring Framework, the update is done along with other core libraries of the Framework.
Prerequisites
You must need these tools installed on your computer to follow this tutorial.
- JDK 11 or higher - Download's link
- Maven 3.5 or higher - Download's link
The API to consume
The API we will consume from our Spring Boot application is the one I built on a side project. Check out the project on GitHub.
The API documentation shows the available endpoints of the application. There are endpoints to manage a ToDo list:
GET: /tasks- Retrieve all tasksPOST: /tasks/create- Create a taskPUT: /tasks/{id}- Update a taskDELETE: /tasks/{id}- Delete a taskGET: /tasks/{id}- Retrieve one task
Let's see how to consume them using the RestTemplate library.
Set up the project
Let's use the online project generator to create a Spring Boot project. If you have IntelliJ, you can create a new project directly with it, I wrote a tutorial on how to do that.

The only dependencies we need is the Spring Web:
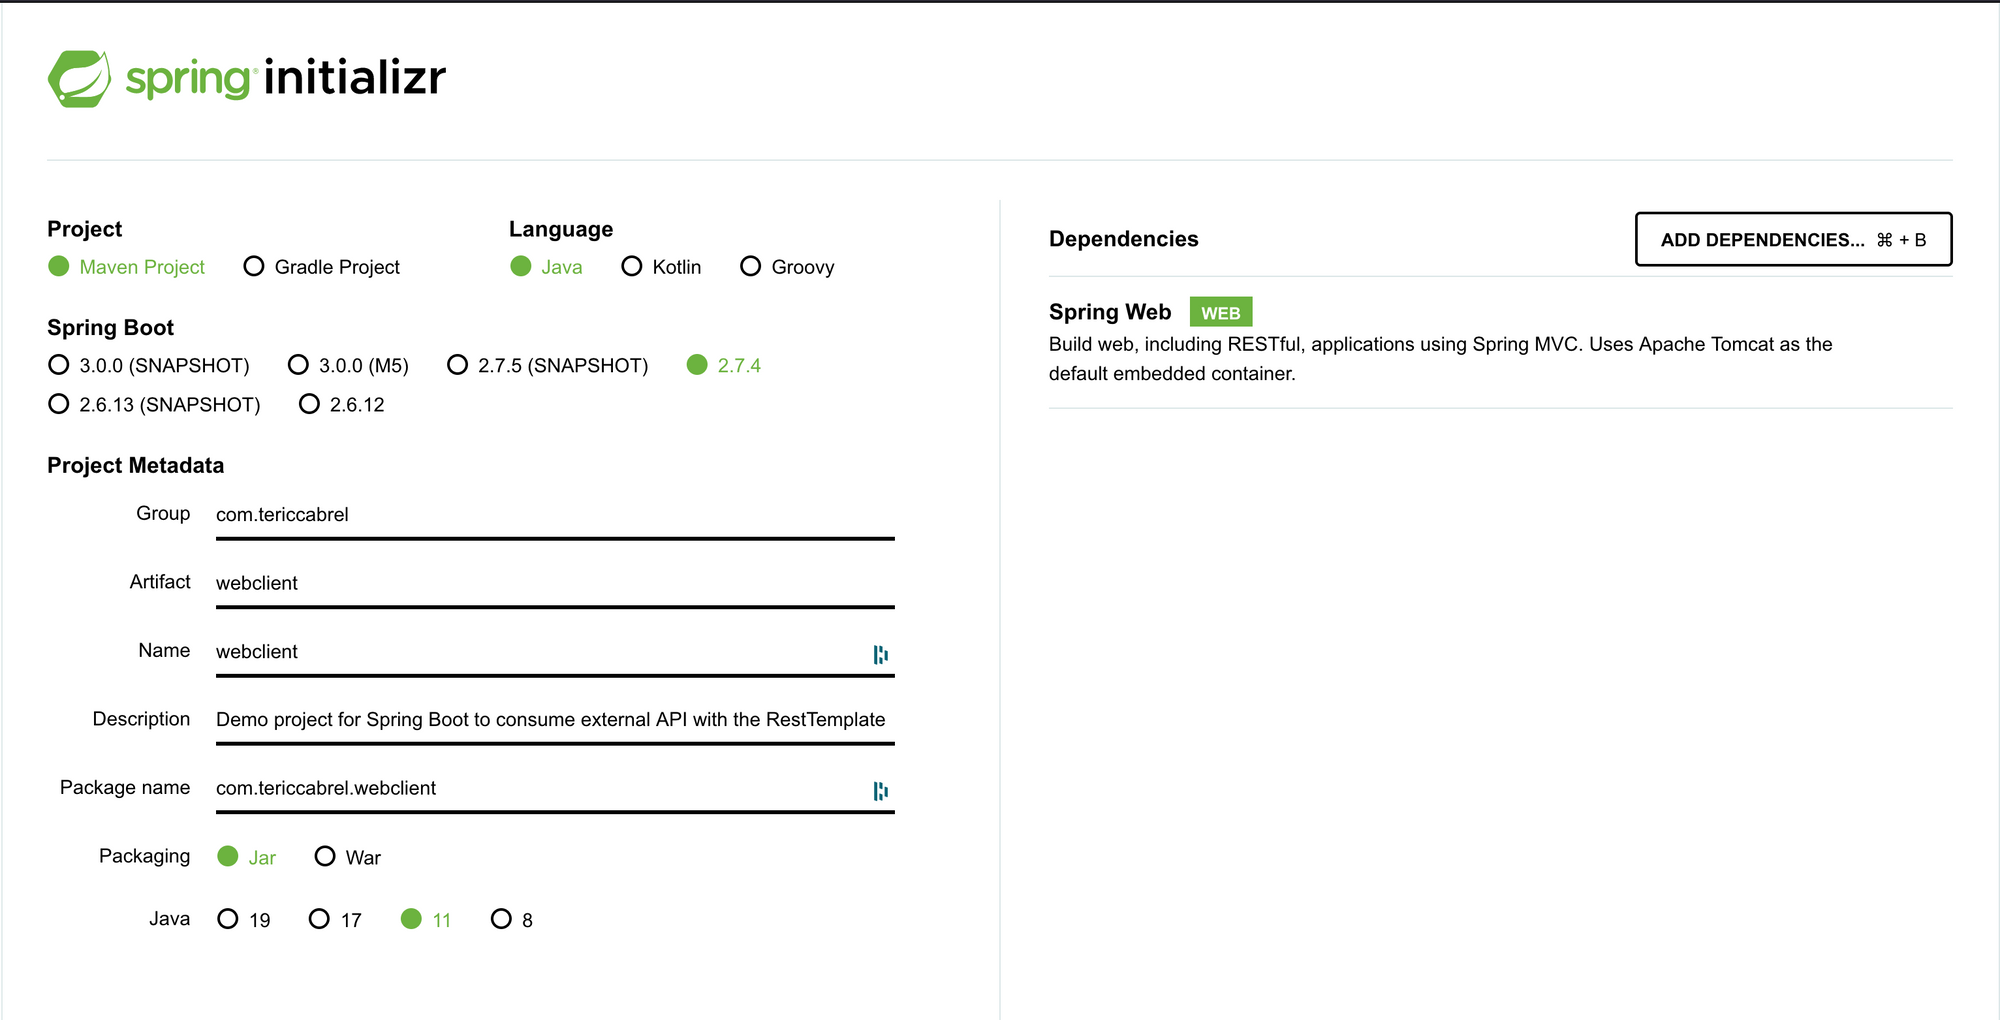
Click on the button "Generate" to download the code and open it in your IDE.
Create a package called controllers and create a file TaskController.java.
Set HTTP Headers
The API required an access token to perform actions in the system. This token must be passed in the header for every request we make.
The header's token key is x-access-token, and the value must be the token generated after successful authentication. I generated a token, so you don't have to; below is the code to set the header:
package com.tericcabrel.httpclient.controllers;

import org.springframework.http.HttpHeaders;
import org.springframework.http.MediaType;
import org.springframework.web.client.RestTemplate;

public class TaskController {
  private RestTemplate restTemplate;

  private HttpHeaders headers;

  public TaskController(RestTemplate restTemplate) {
    this.restTemplate = restTemplate;

    headers = new HttpHeaders();
    headers.setContentType(MediaType.APPLICATION_JSON);
    headers.set("x-access-token", "eyJhbGciOiJIUzI1NiIsInR5cCI6IkpXVCJ9.eyJpZCI6IjYzMmYyZDFjN2UwNWJiMDUwY2RkYTRjYiIsImlhdCI6MTY2NDcxMTI1OSwiZXhwIjoxNjY0NzExMzQ1fQ.4nI9KCat1GJZaMp1RkRHhn99STBg17RA6EwLknMxDO4");
  }

}
The HttpHeaders class provides method to set the value for known header key like Bearer authorization (setBearerAuth()), Accept(setAccept()), etc...
Make a POST
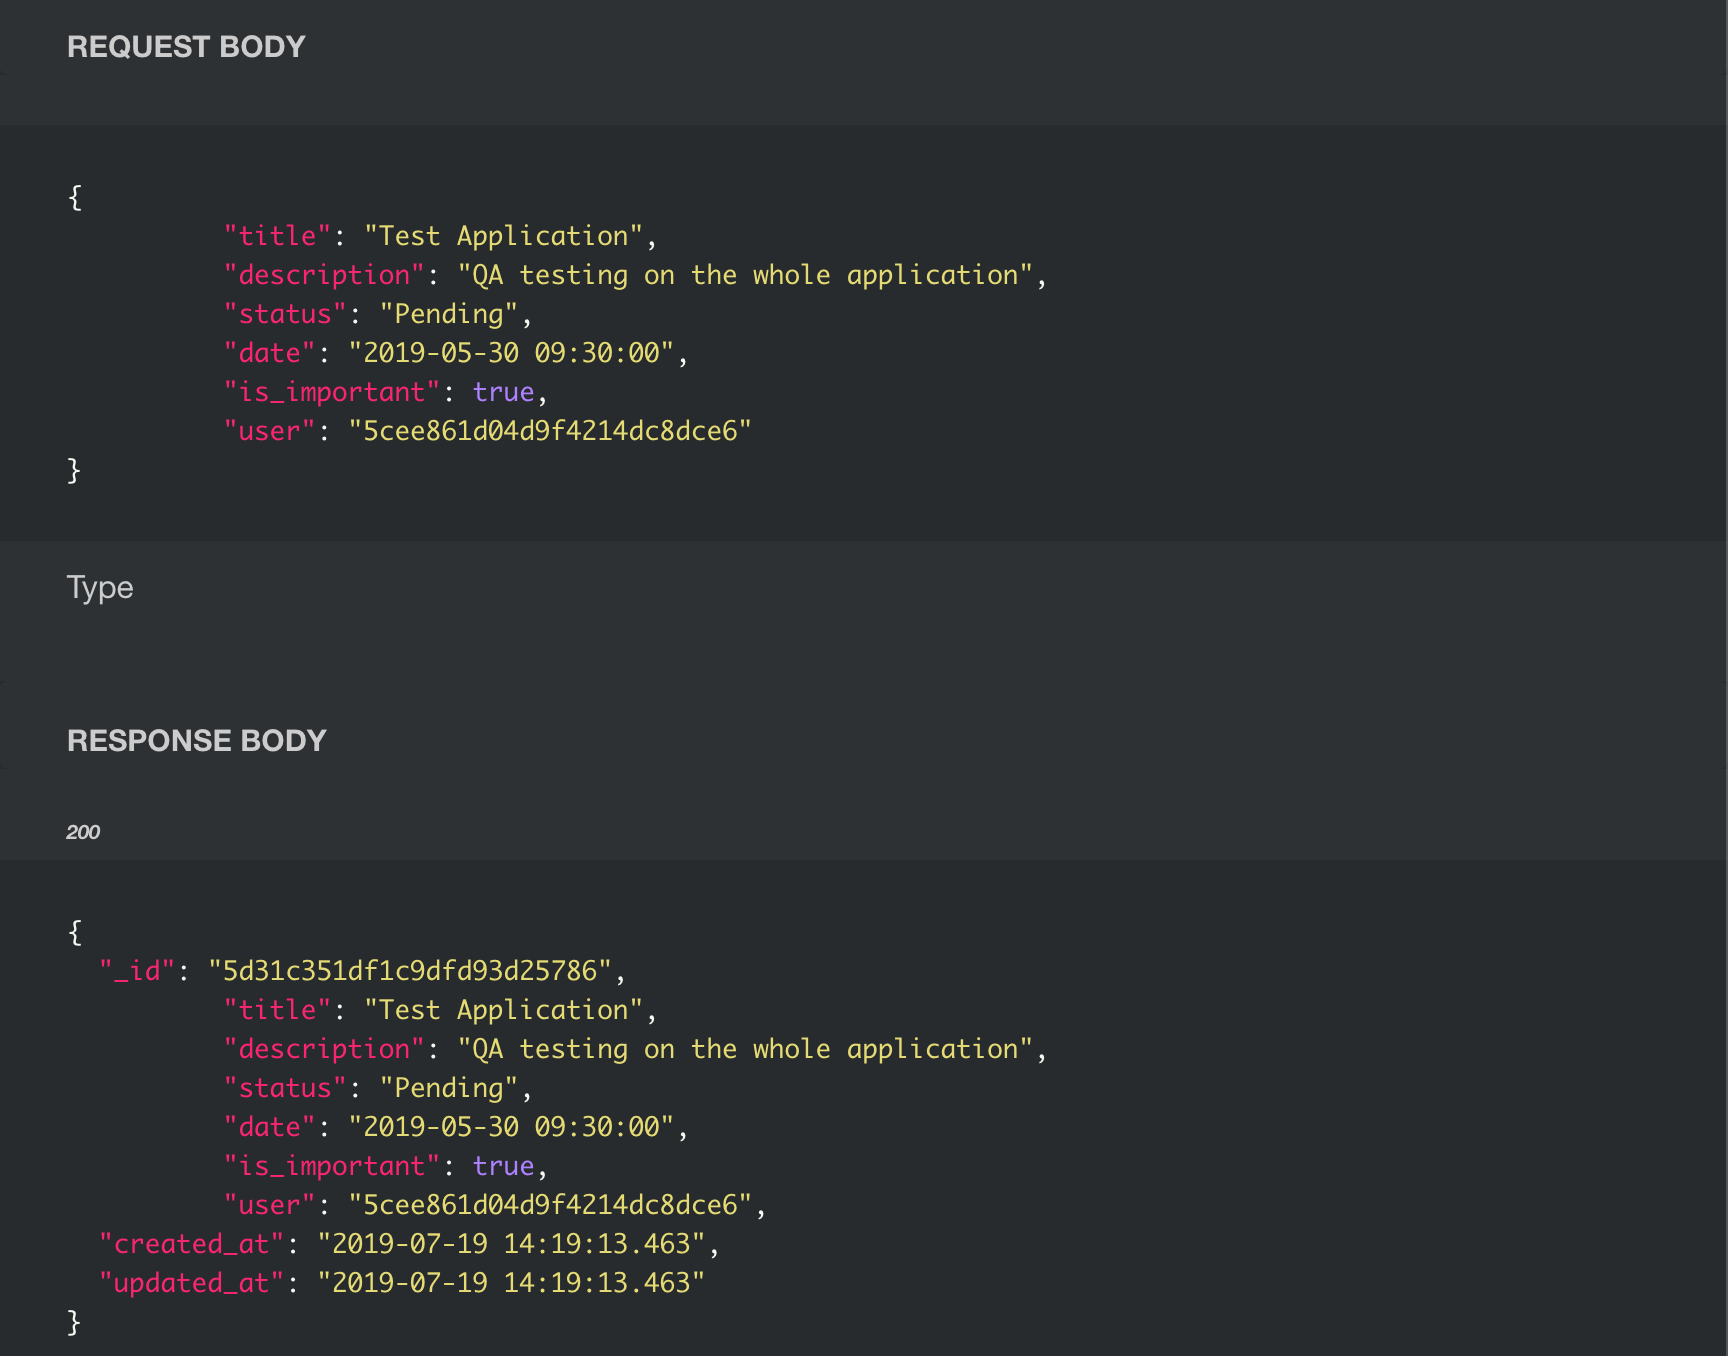
To create a task, let's see what API documentation requires.
We must create two models:
- CreateTaskInput: it encapsulates the data to be sent into the request body.
- TaskItem: it encapsulates the data returned in the response body.
Create a new package called models, then create the file called CreateTaskInput.java and add the code below:
package com.tericcabrel.httpclient.models;

import com.fasterxml.jackson.annotation.JsonProperty;
import java.time.LocalDateTime;
import java.time.format.DateTimeFormatter;

public class CreateTaskInput {
  @JsonProperty(required = true)
  private String title;

  @JsonProperty(required = true)
  private String description;

  @JsonProperty(required = true)
  private String status;

  @JsonProperty(value = "is_important", required = true)
  private boolean isImportant;

  @JsonProperty(value = "date", required = true)
  private String dueDate;

  @JsonProperty(value = "user", required = true)
  private String userId;

  // Getters and setters here...
}
Create another file called TaskItemResponse.java and add the code below:
package com.tericcabrel.httpclient.models;

import com.fasterxml.jackson.annotation.JsonProperty;
import java.time.LocalDateTime;

public class TaskItemResponse {
  @JsonProperty(required = true)
  private String _id;

  @JsonProperty(required = true)
  private String title;

  private String description;

  @JsonProperty(required = true)
  private String status;

  @JsonProperty(value = "is_important", required = true)
  private boolean isImportant;

  @JsonProperty(value = "date", required = true)
  private LocalDateTime dueDate;

  @JsonProperty(value = "user", required = true)
  private String userId;

  private LocalDateTime createdAt;

  private LocalDateTime updatedAt;

  // Getters and setters here...
}
Inside the file TaskController.java, add the code below:
@PostMapping("/create-task")
public ResponseEntity createTask() {
    CreateTaskInput createTaskInput = new CreateTaskInput();

    createTaskInput
      .setTitle("My task one")
      .setDescription("Description of my task one")
      .setStatus("Pending")
      .setImportant(true)
      .setDueDate(LocalDateTime.now().plusDays(7))
      .setUserId("632f2d1c7e05bb050cdda4cb");

    HttpEntity<CreateTaskInput> request = new HttpEntity<>(createTaskInput, headers);
    String url = generateUrl("/tasks/create");

    ResponseEntity<TaskItemResponse> result = restTemplate.postForEntity(url, request, TaskItemResponse.class);
    TaskItemResponse task = result.getBody();

    assert task != null;

    return ResponseEntity.ok().body(task);
}
Start the application with mvn springboot:run; open an HTTP client like Postman and call the endpoint http://localhost:8080/create-task with a POST method.

We received the API response as expected. The request input is hard-coded in the controller method. You can update the code to receive it from the request body of our Spring Boot application. Check out the article I wrote about

Make a GET
Let's retrieve all the tasks of a user. Inside the file TaskController.java, add the code below:
@GetMapping("/all-tasks")
public ResponseEntity allTasks() {
    HttpEntity<CreateTaskInput> request = new HttpEntity<>(headers);
    String url = generateUrl("/tasks");

    ResponseEntity<TaskItemResponse[]> result = restTemplate.exchange(url, HttpMethod.GET, request, TaskItemResponse[].class);
    TaskItemResponse[] tasks = result.getBody();

    assert tasks != null;

    return ResponseEntity.ok().body(tasks);
}
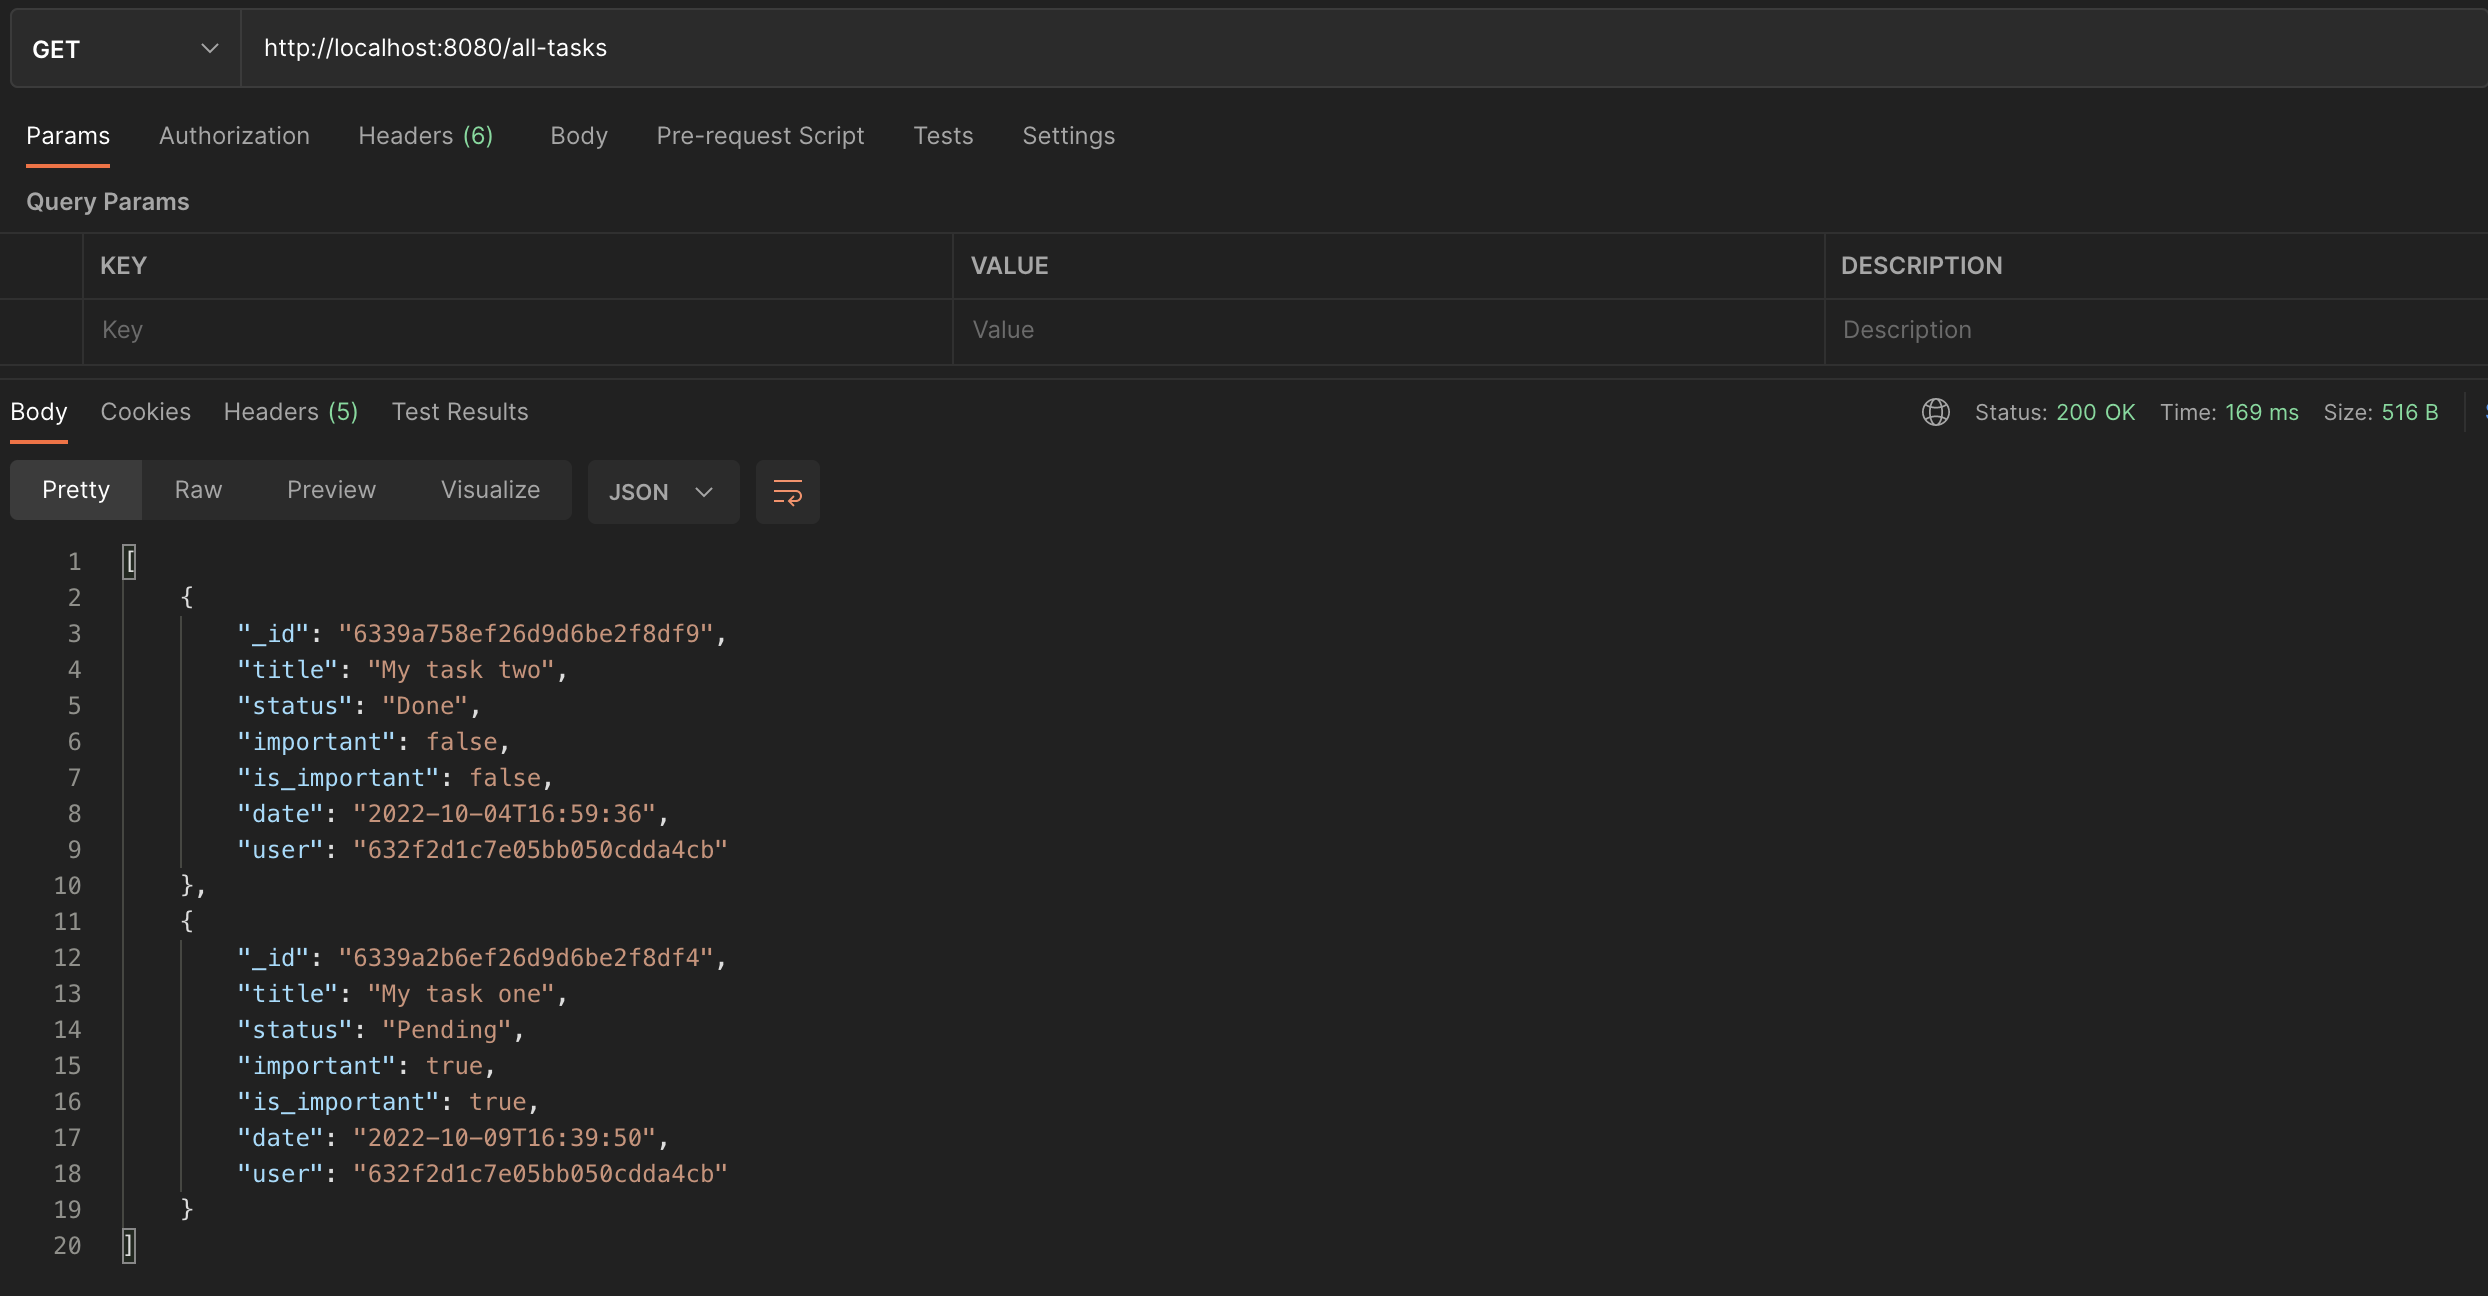
Re-run the application and call the endpoint http://localhost:8080/all-tasks with a POST method.
Note: We used the method exchange() to make the call because its signatures allow passing request headers.
If you are making a call that doesn't have some request header variables, use the method getForEntity(). In our case, it would be:
ResponseEntity<TaskItemResponse[]> result = restTemplate.getForEntity(url, TaskItemResponse[].class);
Make a PUT
As for creating a task, updating a task requires some data to be passed in the request body. Will create a class called UpdateTaskInput.java to encapsulate the input.
Below is the code to update the task and add it to the file TaskController.java:
@PostMapping("/update-task")
public ResponseEntity updateTask() {
    String taskId = "6339a2b6ef26d9d6be2f8df4";

    UpdateTaskInput updateTaskInput = new UpdateTaskInput();

    updateTaskInput
        .setTitle("My Updated task two")
        .setDescription("Updated description of my task two")
        .setStatus("Done")
        .setImportant(false)
        .setDueDate(LocalDateTime.now().plusDays(2));

    HttpEntity<UpdateTaskInput> request = new HttpEntity<>(updateTaskInput, headers);
    String url = generateUrl("/tasks/" + taskId);

    ResponseEntity<TaskItemResponse> result = restTemplate.exchange(url, HttpMethod.PUT, request, TaskItemResponse.class);
    TaskItemResponse task = result.getBody();

    assert task != null;

    return ResponseEntity.ok().body(task);
}
Note: There is a method put() that returns nothing, so if you don't need to do something with the response body, you can use this one.
Make a DELETE
Using delete is relatively easy since it is done we everything we already saw; update the file TaskController.java and add the code below:
@PostMapping("/delete-task")
public ResponseEntity deleteTask() {
    String taskId = "6339a2b6ef26d9d6be2f8df4";

    HttpEntity<UpdateTaskInput> request = new HttpEntity<>(headers);
    String url = generateUrl("/tasks/" + taskId);

    restTemplate.exchange(url, HttpMethod.DELETE, request, Void.class);

    return ResponseEntity.noContent().build();
}
Handle HTTP Errors
Until now, we show only the happy path; what happens if there is an error?
- What if the access token is not provided? => Error 401
- What if bad inputs are provided for creating a task => Error 422
- When a task doesn't exist => Error 404
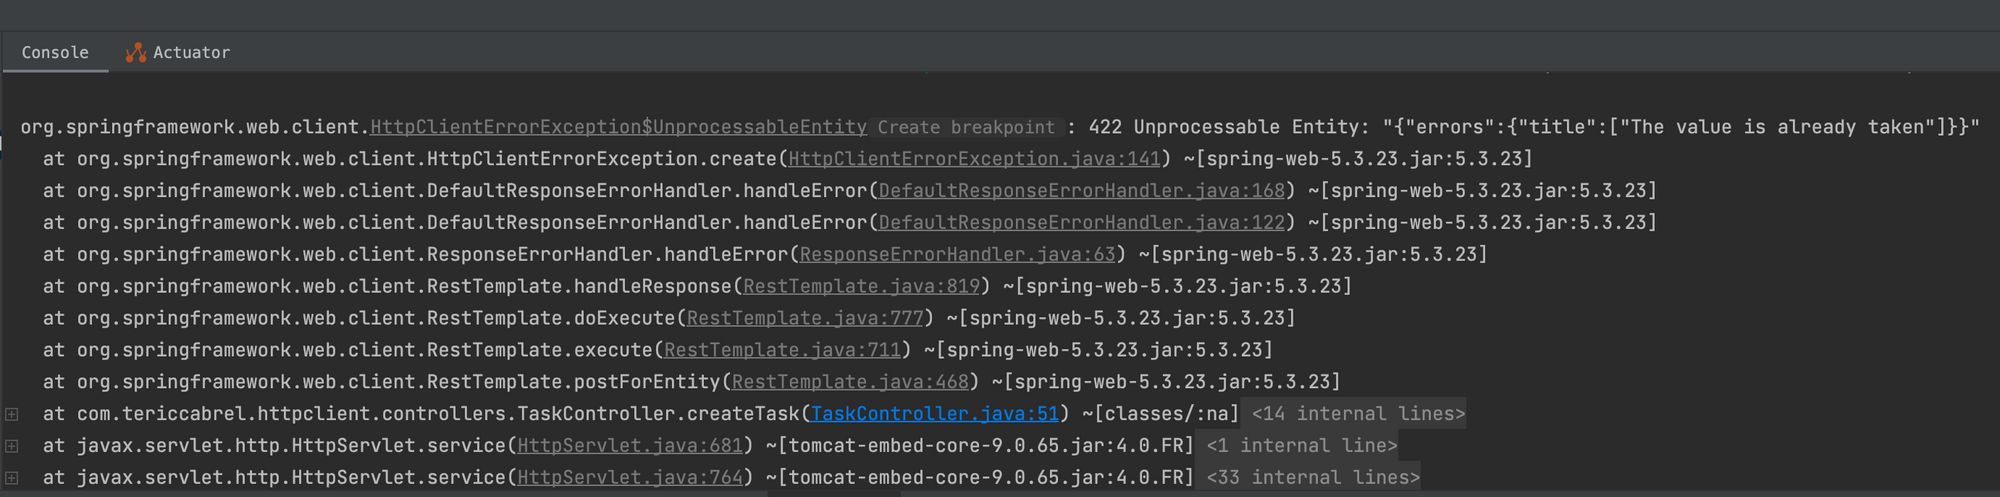
The RestTemplate methods throw an exception HttpClientErrorException so we can catch it and behave according to what is returned.
The code to create a task will look like this:
@PostMapping("/create-task")
public ResponseEntity createTask() {
    CreateTaskInput createTaskInput = new CreateTaskInput();

    createTaskInput
      .setTitle("My task two")
      .setDescription("Description of my task two")
      .setStatus("Done")
      .setImportant(false)
      .setDueDate(LocalDateTime.now().plusDays(2))
      .setUserId("632f2d1c7e05bb050cdda4cb");

    HttpEntity<CreateTaskInput> request = new HttpEntity<>(createTaskInput, headers);
    String url = generateUrl("/tasks/create");

    try {
      ResponseEntity<TaskItemResponse> result = restTemplate.postForEntity(url, request, TaskItemResponse.class);
      TaskItemResponse task = result.getBody();

      assert task != null;

      return ResponseEntity.ok().body(task);
    } catch (HttpClientErrorException exception) {
      switch (exception.getRawStatusCode()) {
        case 401:
          // TODO do something
          break;
        case 422:
          // TODO do something
          break;
        default:
          // TODO do something
          break;
      }
    }
}
Wrap up
RestTemplate allows you to consume external services exposing HTTP endpoints from a Spring Boot application. We covered the basics of performing CRUD operations against a web service.
Check out the documentation to see other methods of the RestTemplate class.
You can find the code source on the GitHub repository.
Follow me on Twitter or subscribe to my newsletter to avoid missing the upcoming posts and the tips and tricks I occasionally share.