
Install and use the AWS CLI v2 locally


AWS is the most popular cloud computing provider, with hundreds of services for various use cases. While managing services can be done from the AWS Console (the Web interface), there are cases where more flexibility, automation, or integration with other systems is needed.
The AWS CLI allows developers to manage their AWS services from a command-line interface. It is helpful for:
- Automated script to create/update or delete AWS resources.
- Integration in a CI/CD pipeline to deploy a service to AWS.
- Easily access AWS services data when working locally.
- Complex authentication and authorization access to AWS resources.
- Working with AWS Development Kits for local testing.
This post will show how to install the AWS CLI, configure the AWS credentials, and interact with some AWS accounts.
Prerequisites
You must have an AWS account with some services running to follow this tutorial. A free tier account is enough.
You must have an operating system running on Linux or MacOS.

Install the AWS CLI v2 on MacOS
Working with AWS CLI requires Mac OS 10.9 or higher; the MacOS version history can help verify where your OS version stands.
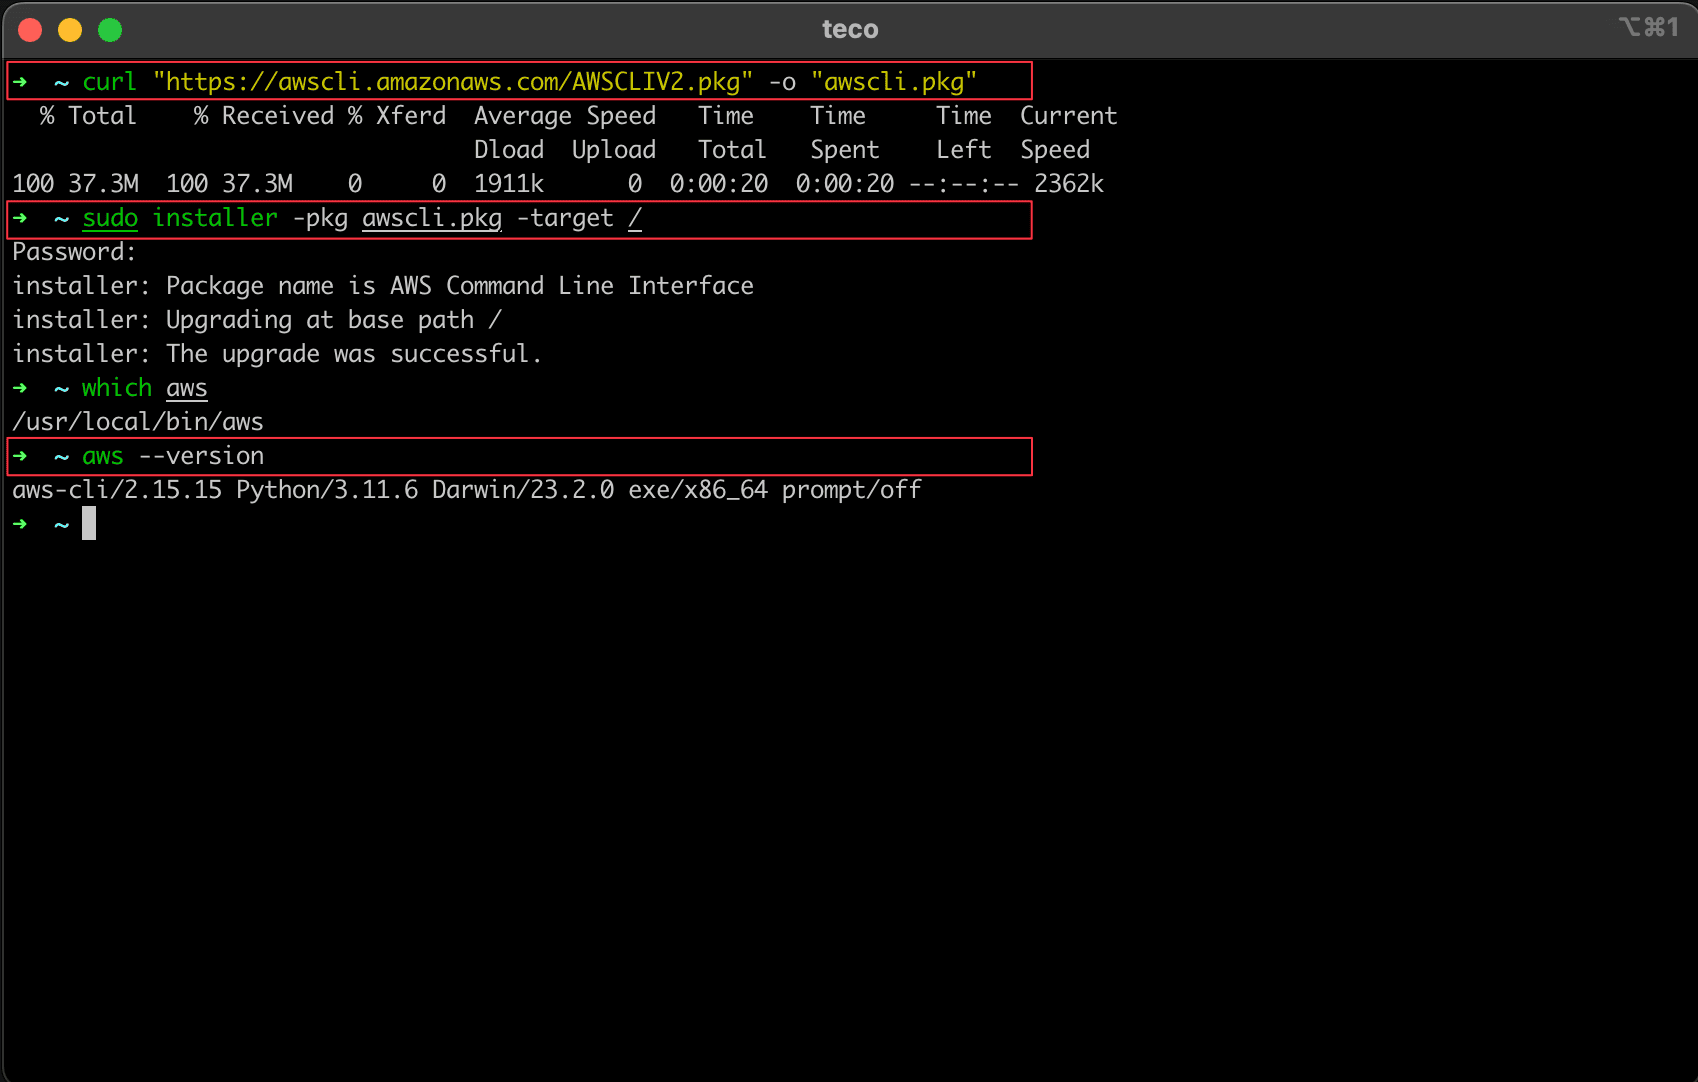
Open the Terminal and run the command below:
curl "https://awscli.amazonaws.com/AWSCLIV2.pkg" -o "awscli.pkg"
sudo installer -pkg awscli.pkg -target /
The first command download the AWS CLI package and save it in the current folder under the name awscli.pkg.
The second command installs the AWS CLI on the MacOS drive from the root folder; the sudo command is required to grant write permissions to those folders.
Verify the aws command is available in the shell by running the command below:
aws --version
Executing this instruction will output the AWS version installed.
Now that the AWS CLI v2 is installed remove the installation package:
rm awscli.pkg
Install the AWS CLI v2 on Linux
The AWS CLI runs on the 64-bit versions of the most recent Linux distributions, such as Ubuntu, Debian, CentOS, Fedora, Amazon Linux 1, 2, and 2023, and Linux ARM.
We will show the installation process for Ubuntu and Debian.
Install dependencies
The AWS CLI installation is released in a Zip file that must be unzipped to perform the installation. Most Linux distributions don't provide a built-in tool to unzip files, so let's install one named unzip.
sudo apt update

sudo apt install unzip

unzip --version
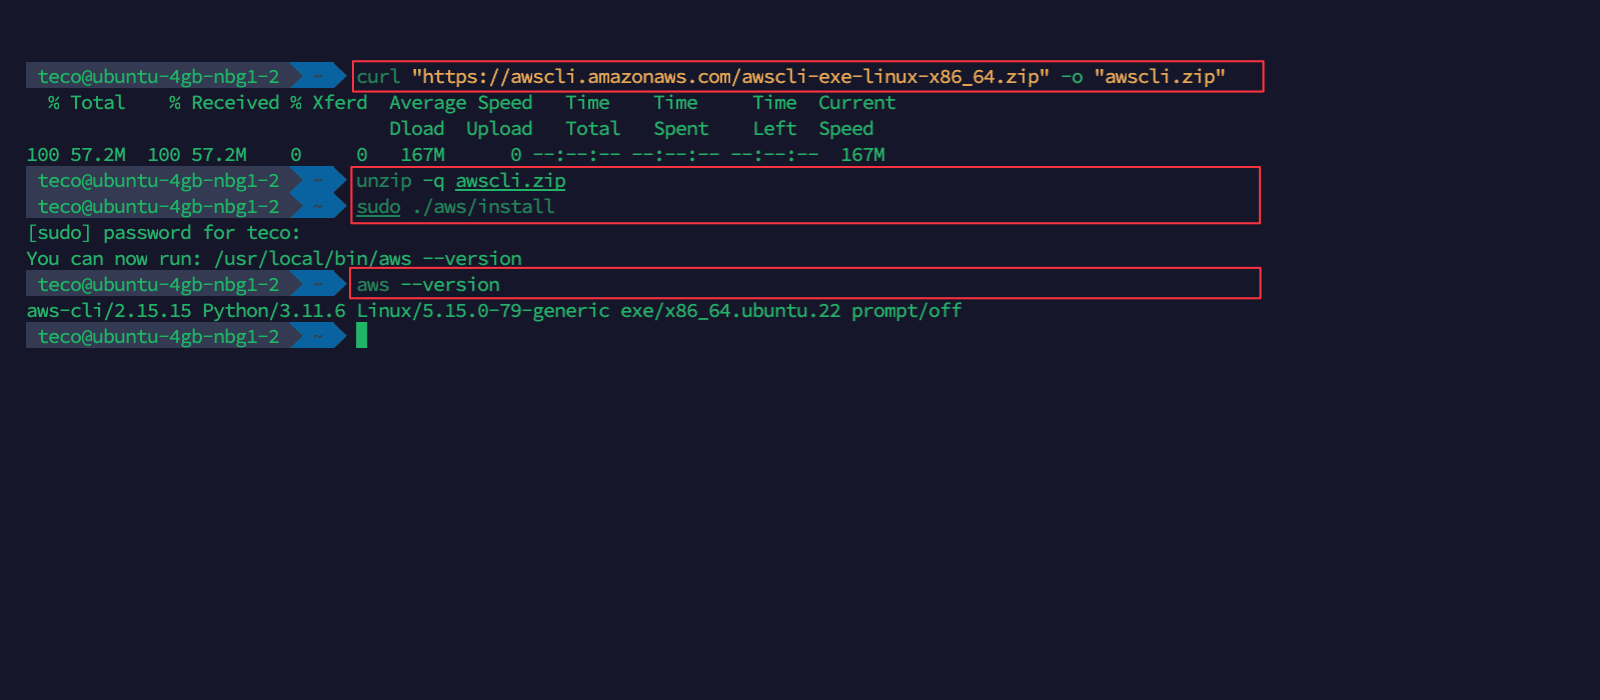
Now that unzip is installed, proceed to the AWS CLI installation by running the command below:
curl "https://awscli.amazonaws.com/awscli-exe-linux-x86_64.zip" -o "awscli.zip"

unzip -q awscli.zip

sudo ./aws/install
The first command download the AWS CLI package for Linux and save it in the current folder under the name awscli.zip.
The second command uncompressed the file awscli.zip and put its content into a folder named "aws".
The last command installs the AWS CLI v2; the sudo command grants write permissions to those folders.
Verify the aws command is available in the shell by running the command below:
aws --version
Executing this instruction will output the AWS version installed.
Now that the AWS CLI v2 is installed remove the installation package:
rm -rf aws
rm awscli.zip
Configure the AWS CLI v2
To use the CLI with the services of your AWS account, you must authorize the CLI to perform actions on your services by generating two AWS credentials:
- The AWS access key ID.
- The AWS access secret key.
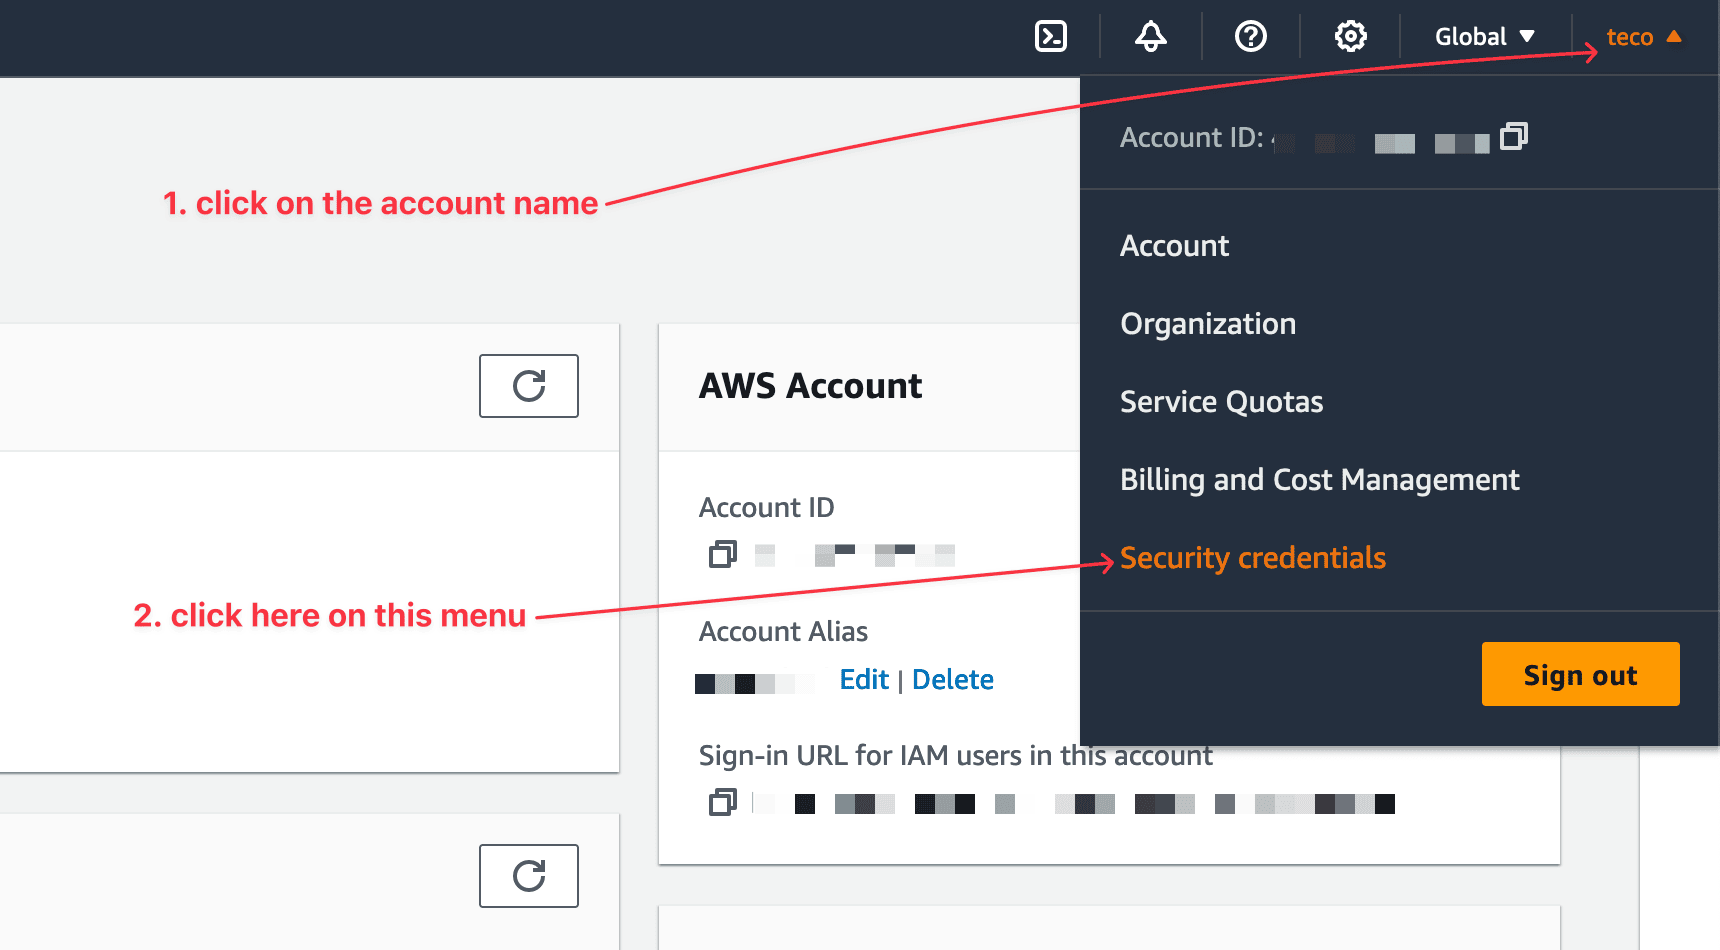
Generate AWS credentials
Log into your AWS account and go to the "Security Credentials" sub-menu in the user account menu.
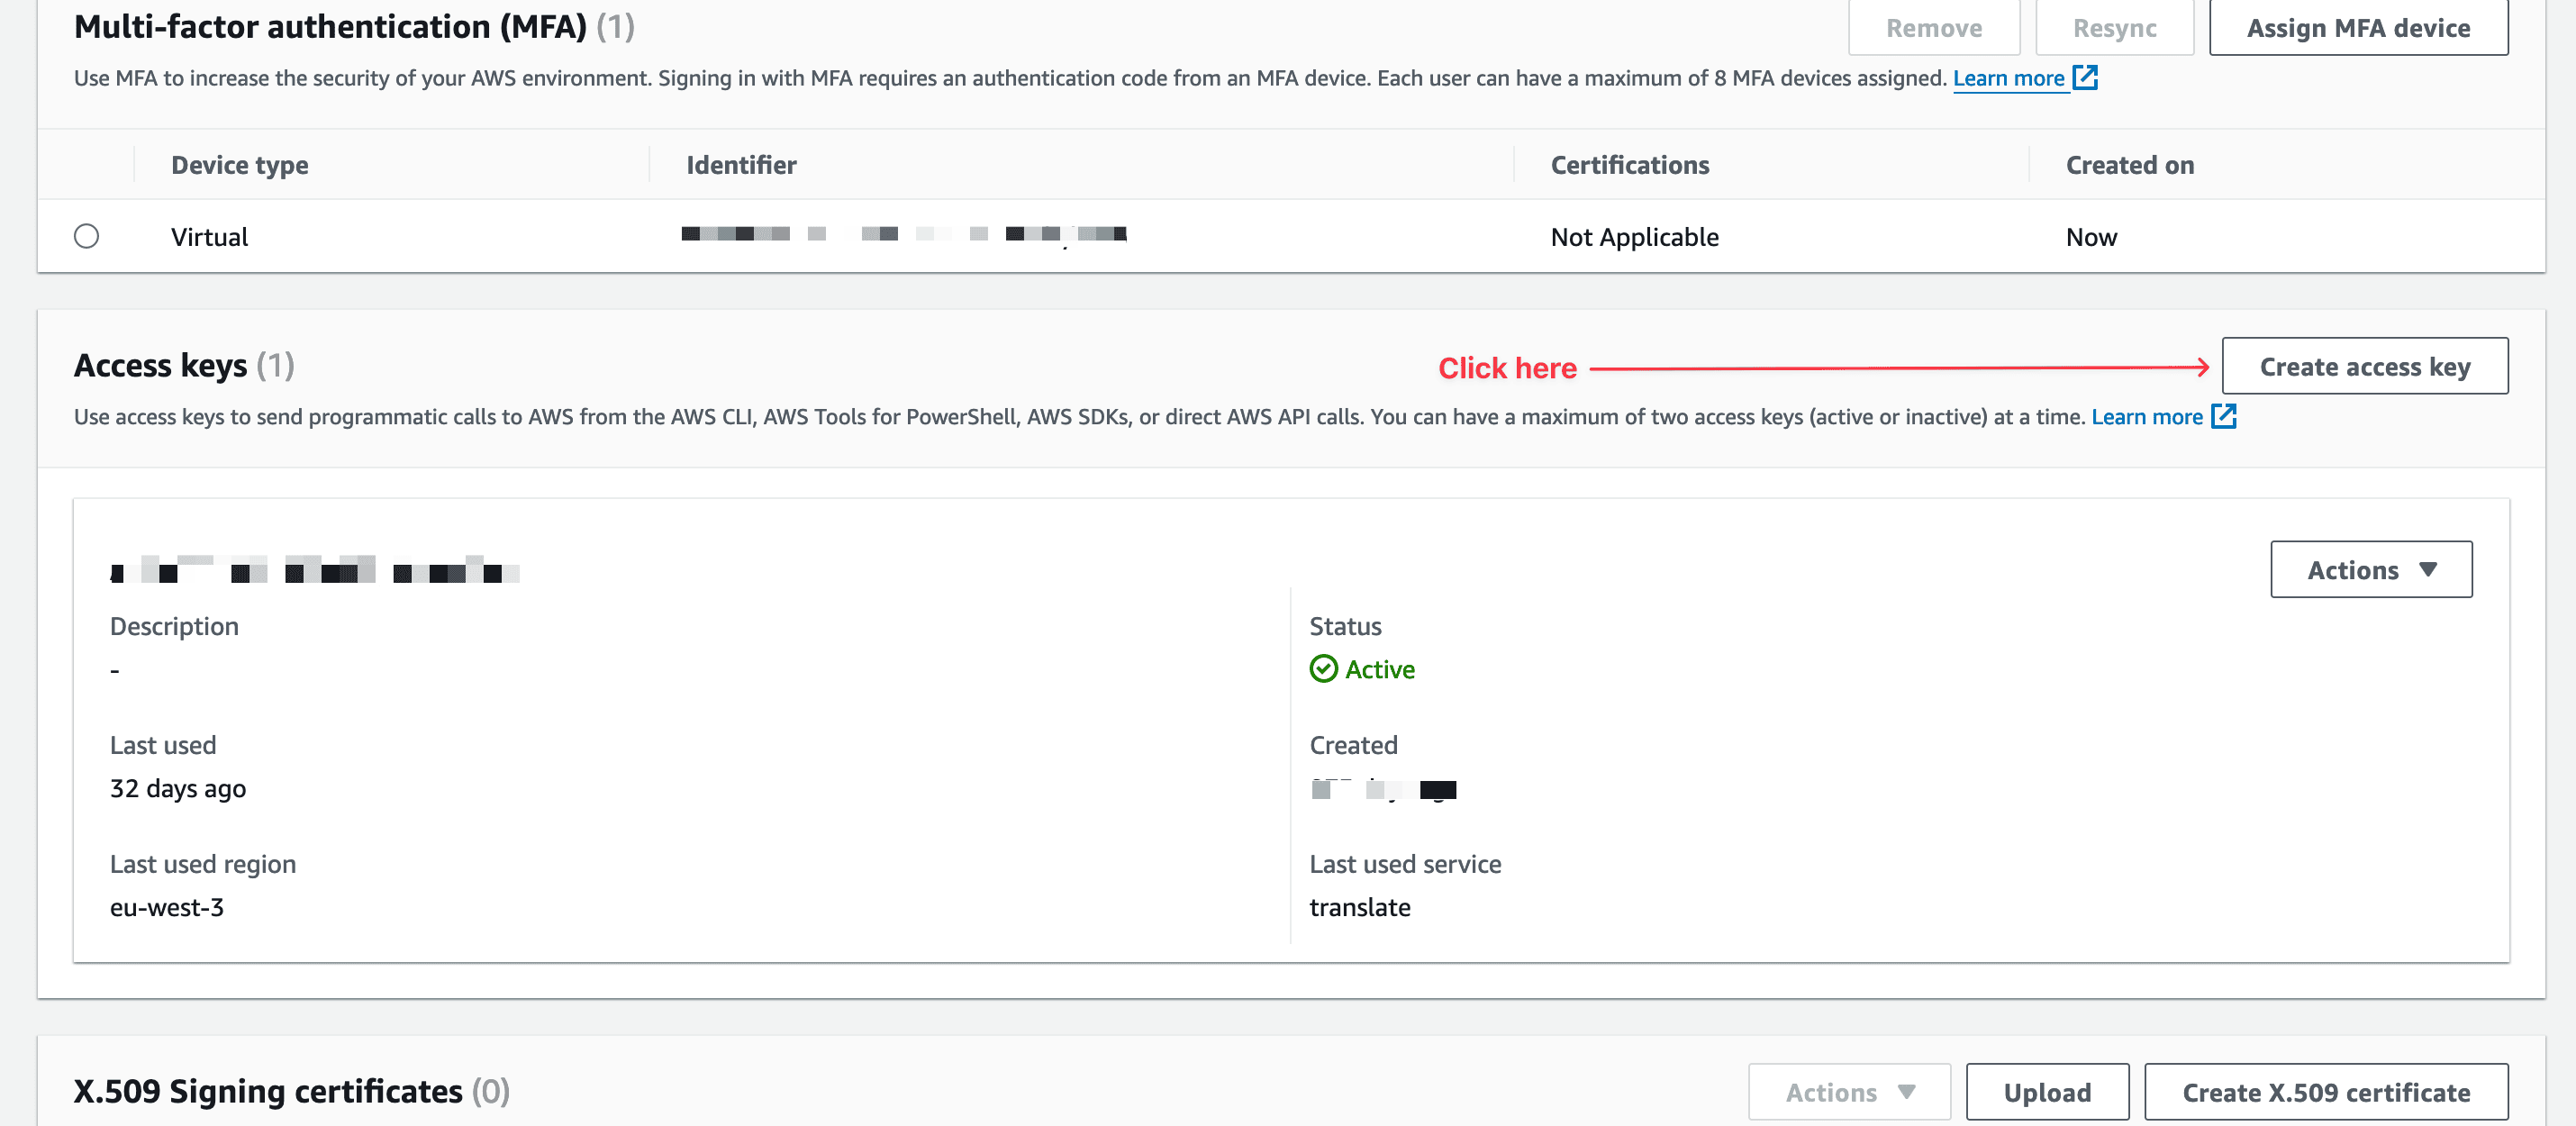
In the page displayed, locate the section named "Access keys" and click on the button "Create access key"
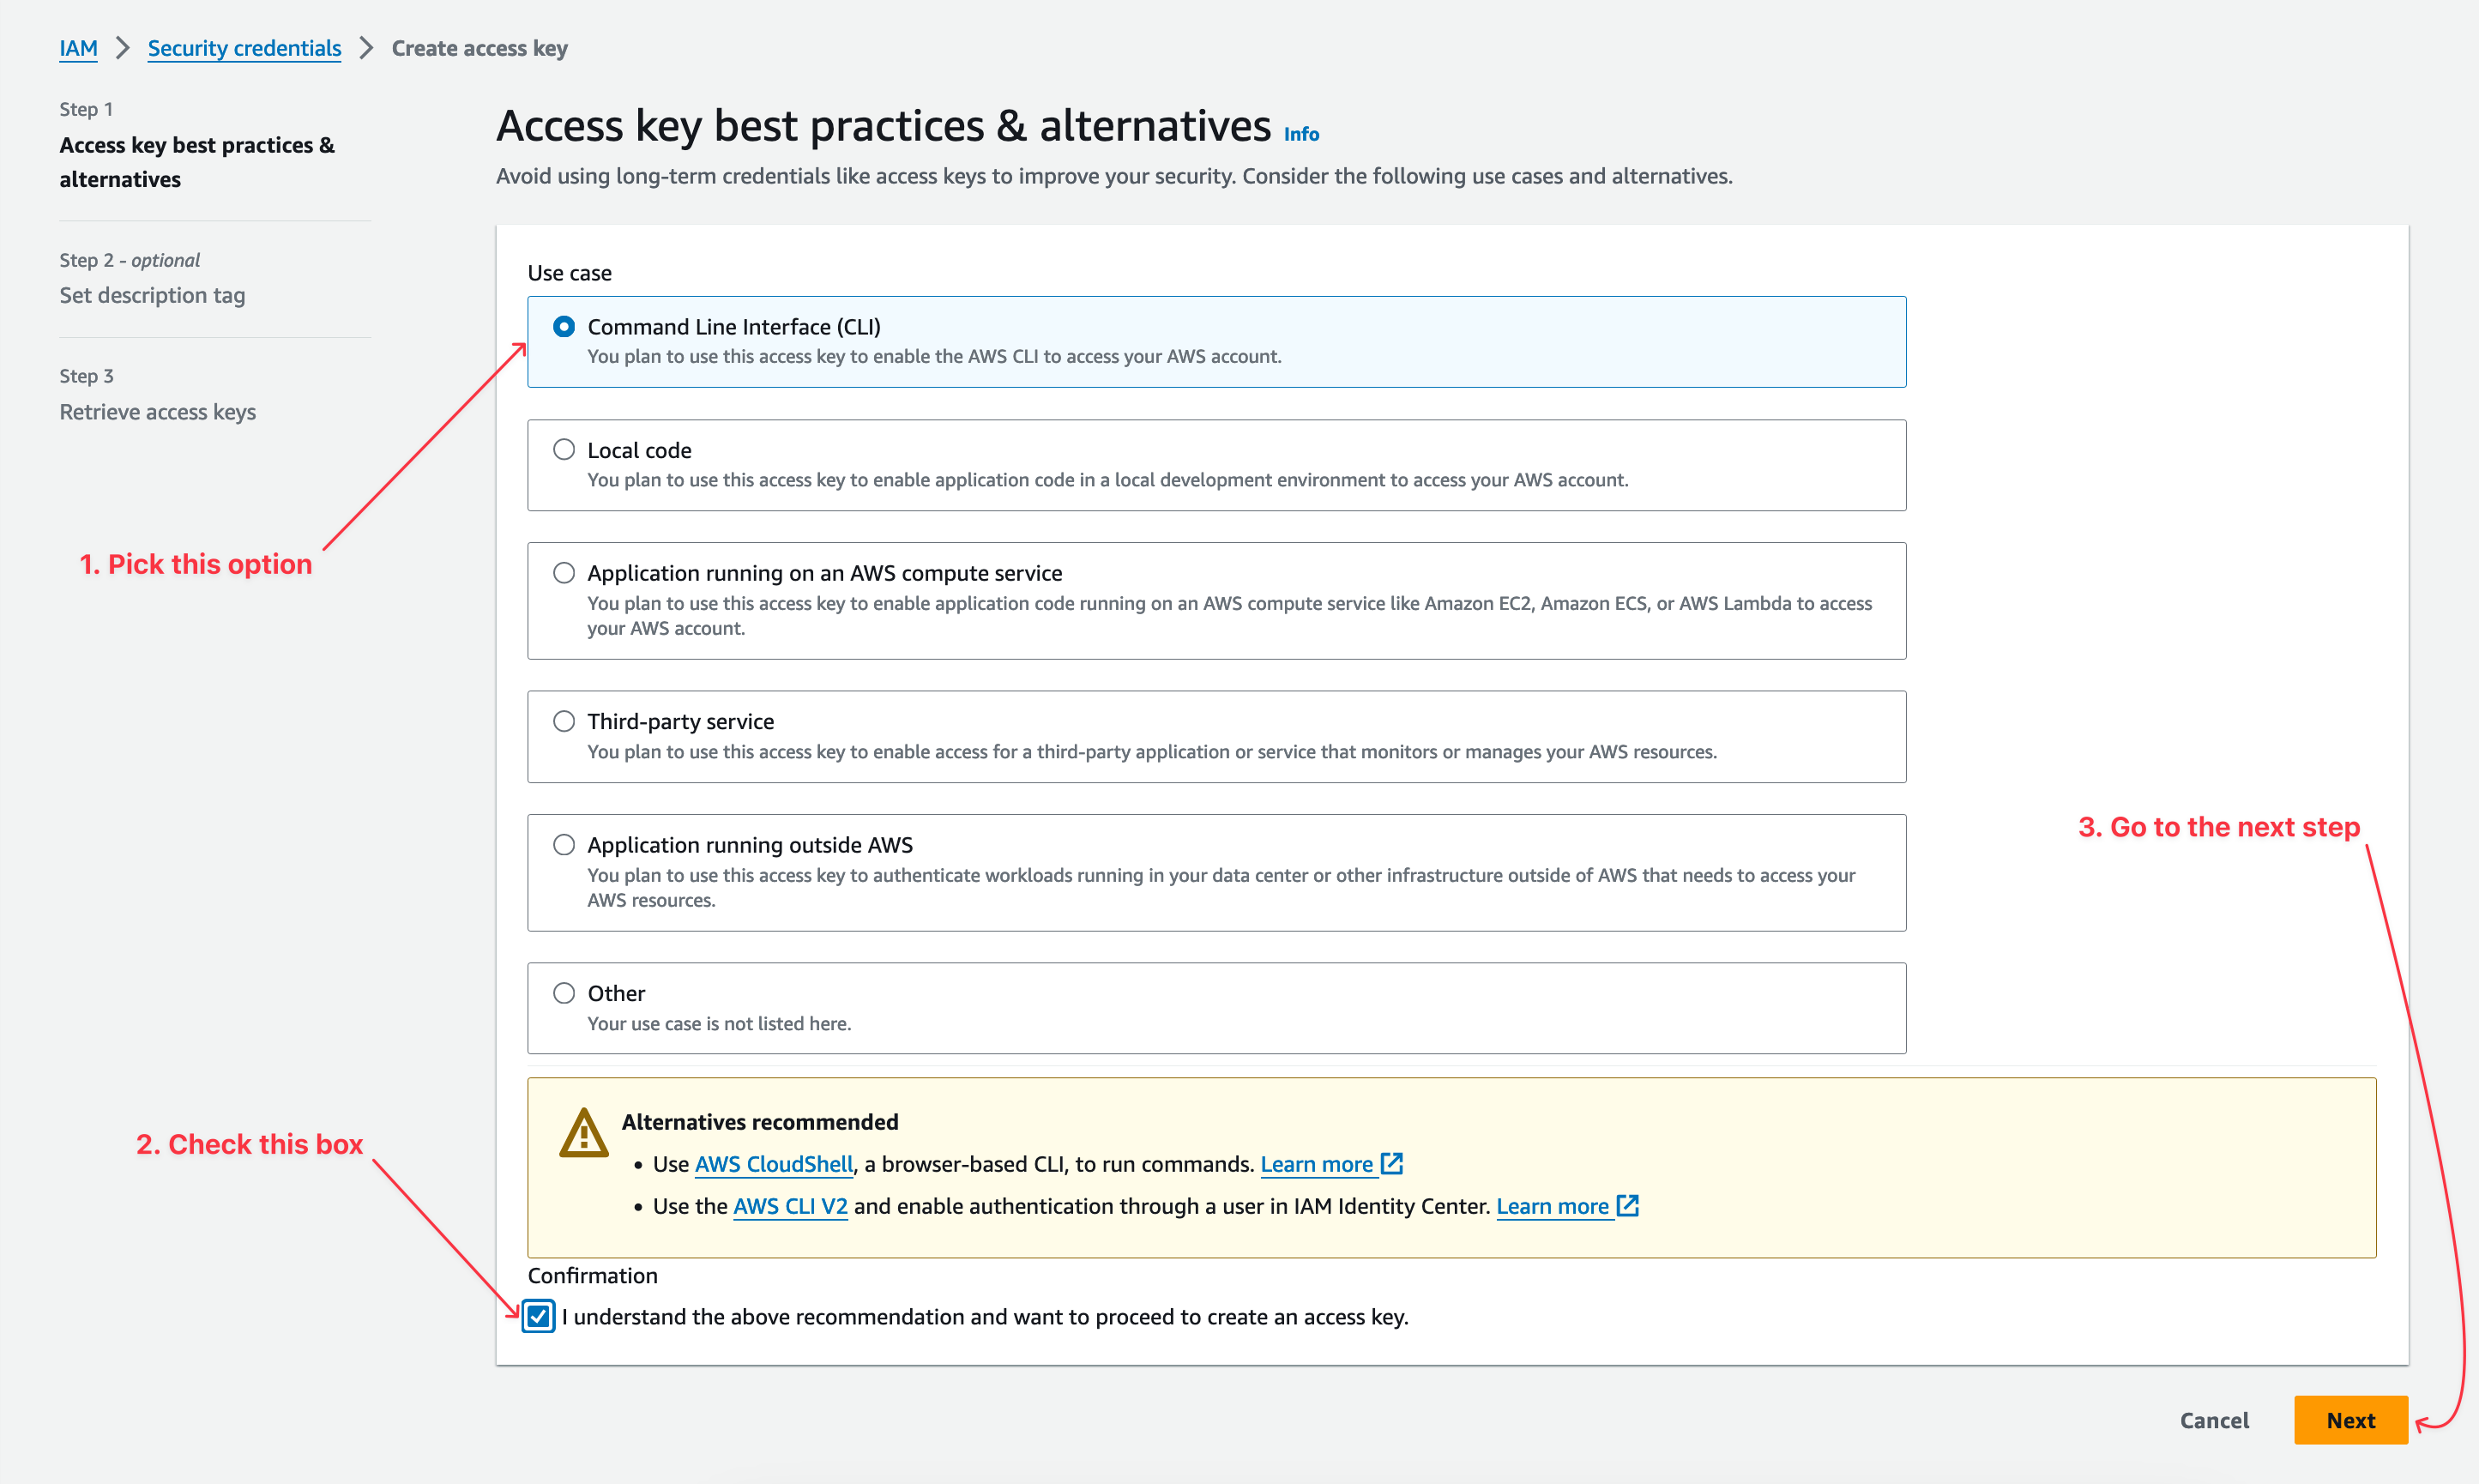
On the page displayed, select the use case for which you want to generate the Access key; choose "Command Line Interface (CLI)".
A modal will appear with some recommended alternatives by AWS; we will ignore it as our use case doesn't match. So, check the box confirming you want to continue your selection.
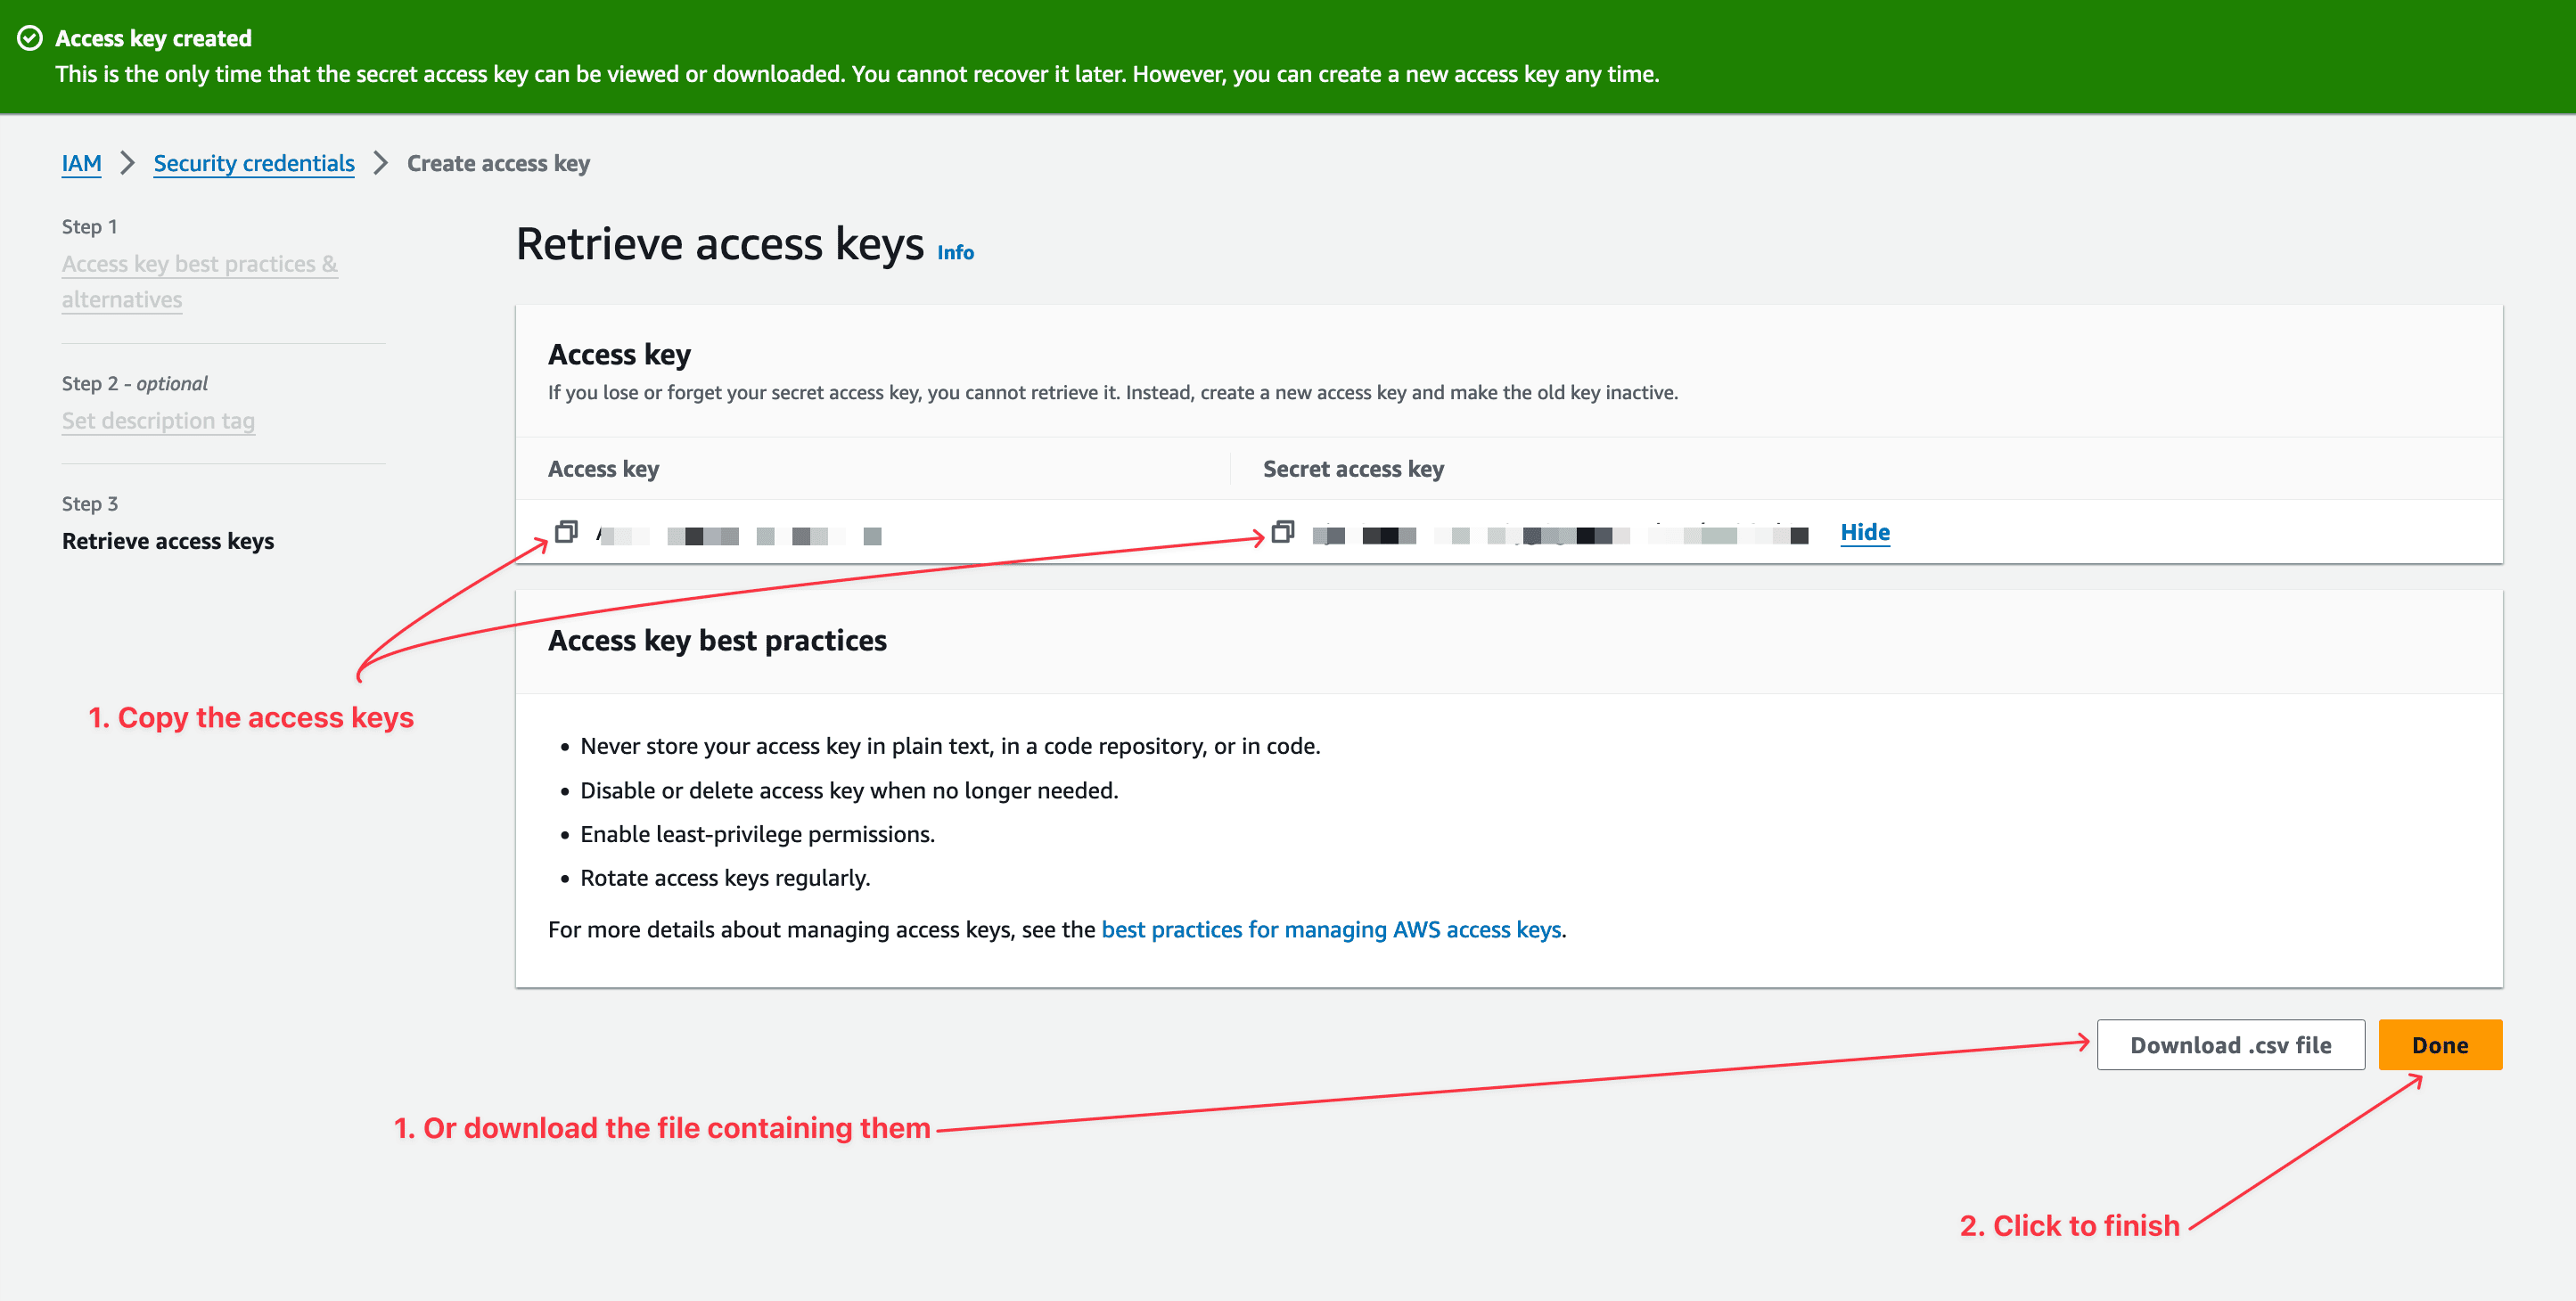
The next step allows you to define an optional description tag. Provide a value, and click on the button "Create access key".
The next page will display the values generated, copy and keep them as we will use them later.
Configure the AWS CLI locally
The AWS CLI provides a command to configure the AWS account and credentials to interact with. The command will ask for the following information:
- The AWS access key ID
- The AWS access secret key
- The AWS default region to target when running a command
- The output format of the configuration file, the JSON format, is the default.
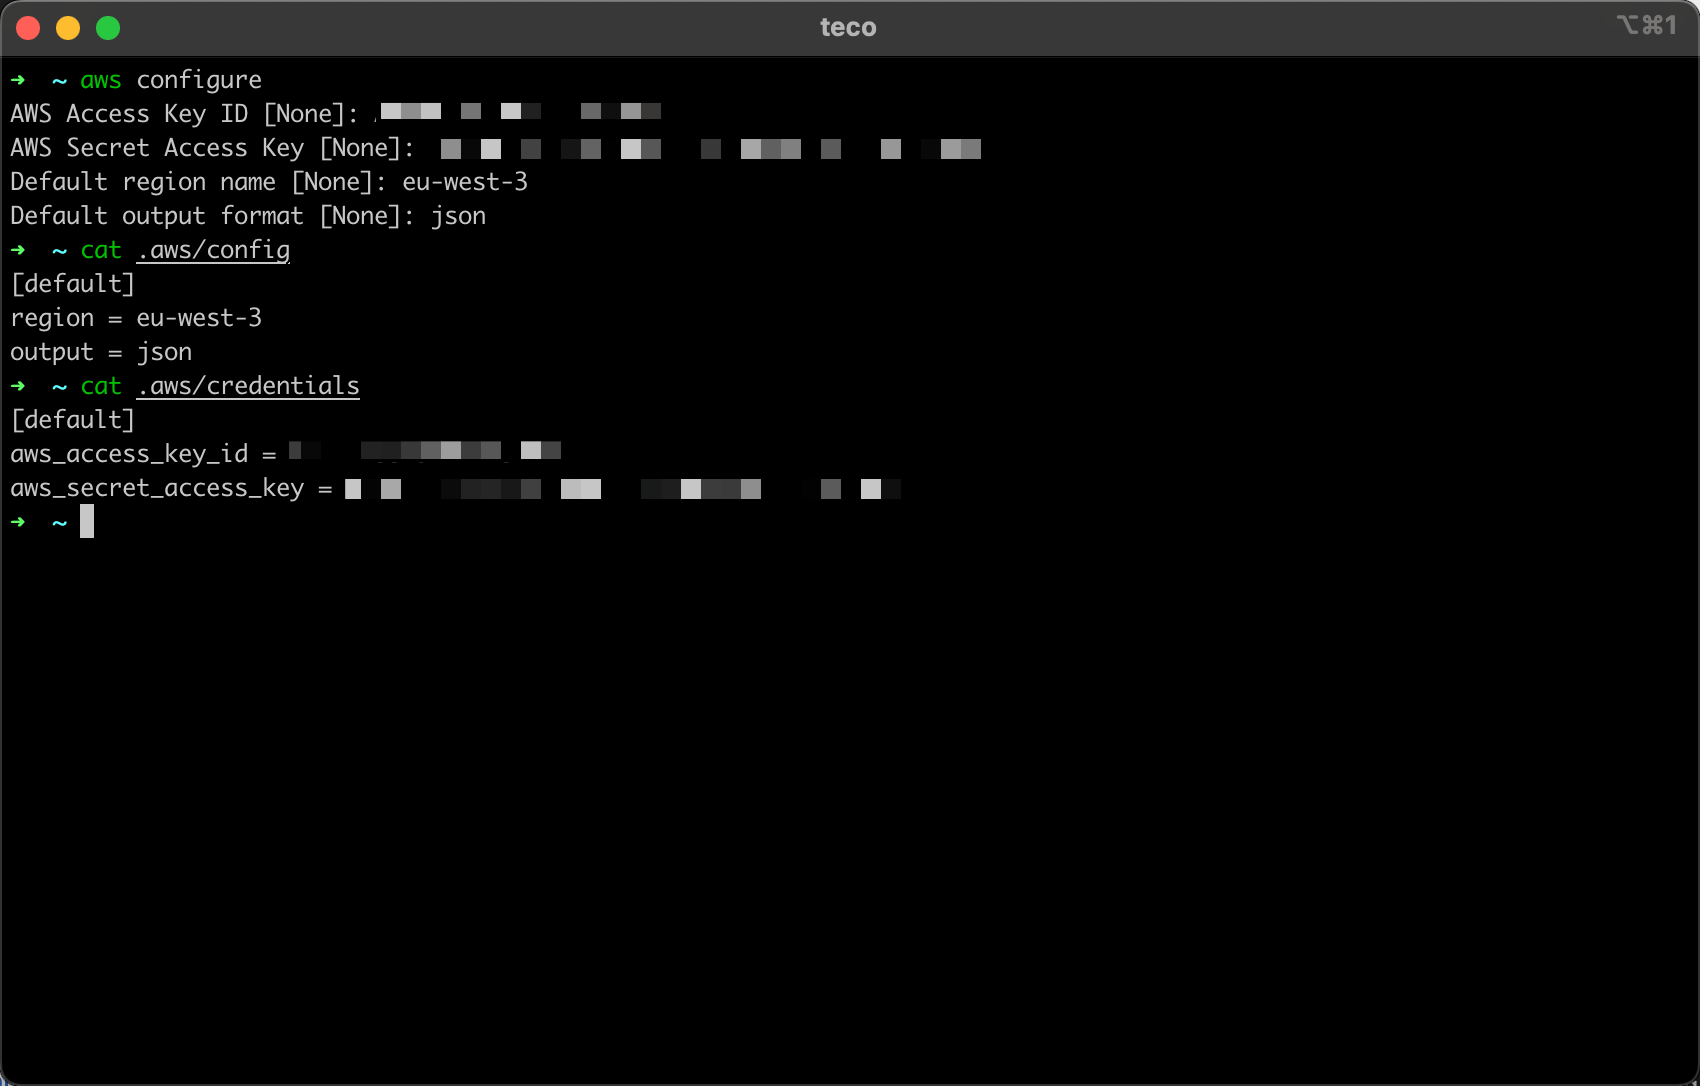
Run the command below and provide the information; it is good.
aws configure
This is what it will look like:
Interact with AWS services from the AWS CLI v2
We are now ready to manage the AWS services of our accounts. Here are some commands you can run:
- Get all the buckets in AWS S3
aws s3 ls
- Get the list of Lambda functions
aws lambda list-functions --output text
- Create a SNS topic
aws sns create-topic --name payment-topic
Work with AWS CLI profiles
When building applications deployed in many environments (testing, staging, and production) where each environment is equal to one AWS account.
It is common to want to deploy a Lambda function in the testing environment, then download some assets on AWS S3 in the staging environment, and finally retrieve some CloudWatch logs in production.
Each AWS has a different Access Key and Secret Key; having to edit the configuration file every time you want to switch between two environments is not efficient. This is where profiles come in.
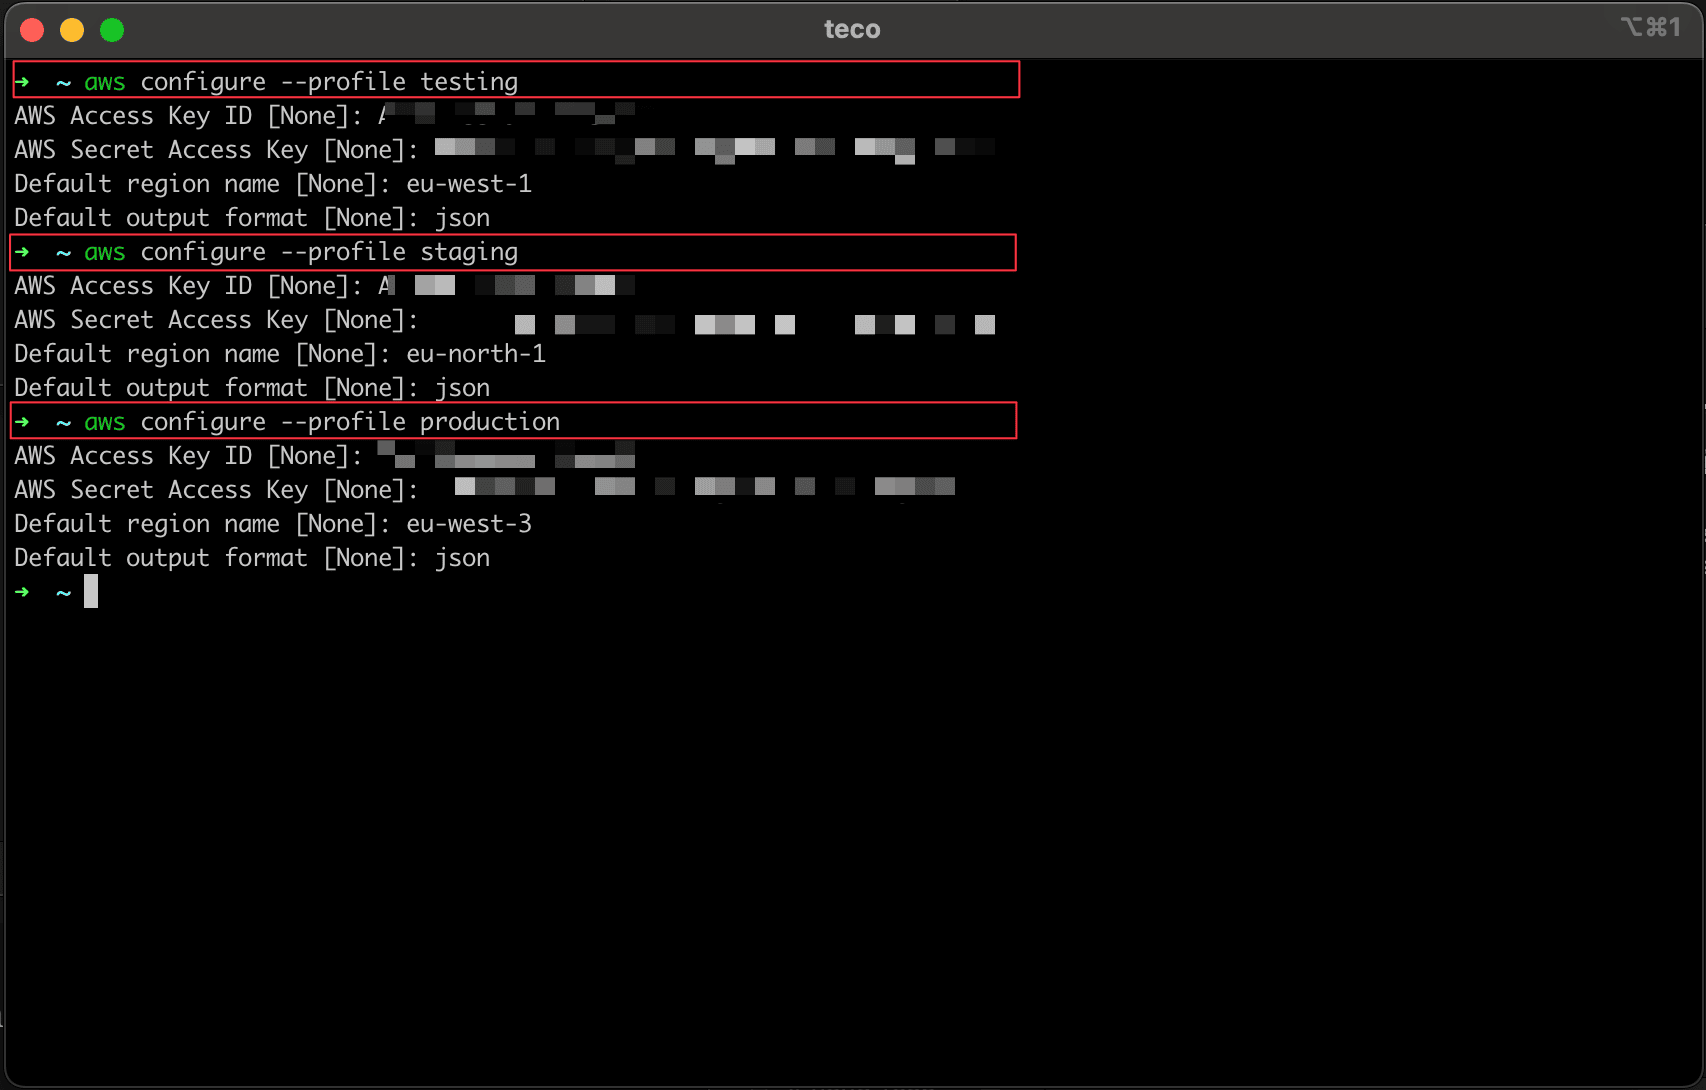
When configuring your AWS credentials, you must have an additional option --profile to define the profile name. Here is the command to create the three AWS profiles:
aws configure --profile testing

aws configure --profile staging

aws configure --profile production
The picture below shows what the output will looks like:
Running the command with AWS CLI will now require providing the profile to target the correct AWS account. The commands to execute in our case are the following.
# Deploy a Lambda function in the testing environment
aws lambda create-function \
    --function-name PaymentService \
    --runtime nodejs18 \
    --role arn:aws:iam::7947739202:role/TecoExecutionRole \
    --handler main \
    --zip-file fileb:./function-code.zip \
    --profile testing

# Download assets from the S3 bucket in the staging environment
aws s3 cp s3://teco-website/images.zip ./project --recursive --profile staging

# Retrieve Cloudwatch logs in the production environment
aws logs filter-log-events \
    --log-group-name PaymentServiceLog \
    --start-time 1705959430 \
    --end-time 1705966630 \
    --filter-pattern "Error" \
    --profile production
Upgrade the AWS CLI v2
Upgrading the CLI is a simple process and is not much different from installing it. On MacOS and Linux, follow the same instructions as if it were the first installation.
Wrap up
Setting the AWS CLI locally allows developers to easily manage AWS services, which can be summarized into the following steps:
- Install the AWS CLI executable for your operating system.
- Generate the AWS credentials in the AWS account to manage.
- Configure the AWS CLI to work with the AWS credentials generated.
Configuring many profiles allows working across many AWS accounts from a single computer.
To go further, check out the AWS CLI documentation.
Follow me on Twitter or subscribe to my newsletter to avoid missing the upcoming posts and the tips and tricks I occasionally share.