
Host a static website on AWS with S3 and CloudFront


AWS provides many services to deploy a web application. These applications are grouped into two categories:
- Frontend applications usually consist of static files generated from a Single Page Application library such as React or Vue
- Backend applications that run on a server, a container, or a Lambda function and interact with a database or other backend applications following an Event-driven architecture.
Although you can also host static files using backend AWS services, it can be beneficial to use dedicated services such as CloudFront and S3.
AWS CloudFront is a content delivery network (CDN). It integrates with other AWS services to give developers an easy way to distribute content to end users with low latency, high data transfer speeds, and no minimum usage commitments.
Prerequisites
To follow this post, you must have the following things:
- An AWS account, a free tier is enough
- Node.js 18 or higher - Download link
- The Node Package Manager (NPM)
Set up a React project with Vite
To have a static website to host on AWS S3 and CloudFront, let's set up a React project with Vite and then generate the static files.
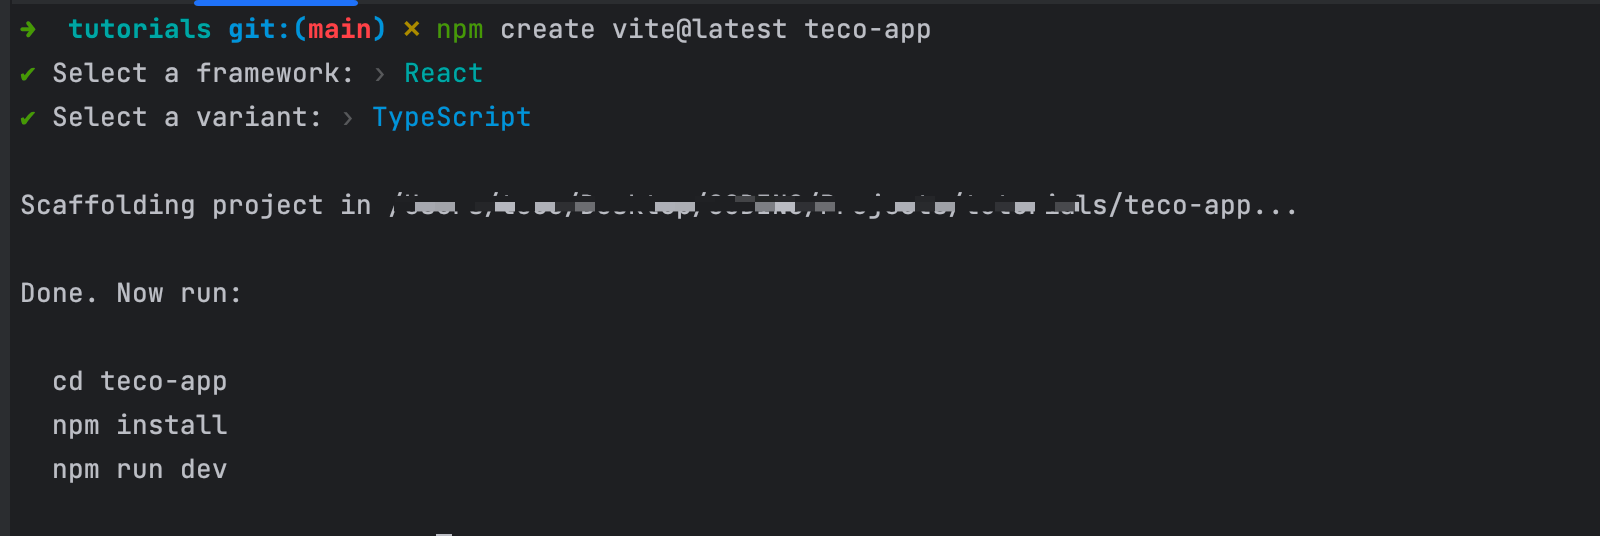
Run the command below to scaffold a new React project using the Vite CLI:
npm create vite@latest teco-app --template react-ts
The CLI asks two questions, the first to select a framework and the second to choose a variant; choose "React" for the former and "Typescript" for the latter.
"teco-app" is the project's folder name, so change it if you want.
The project is generated; run the commands below to install the dependencies and run the project:
cd teco-app
npm install
npm run dev
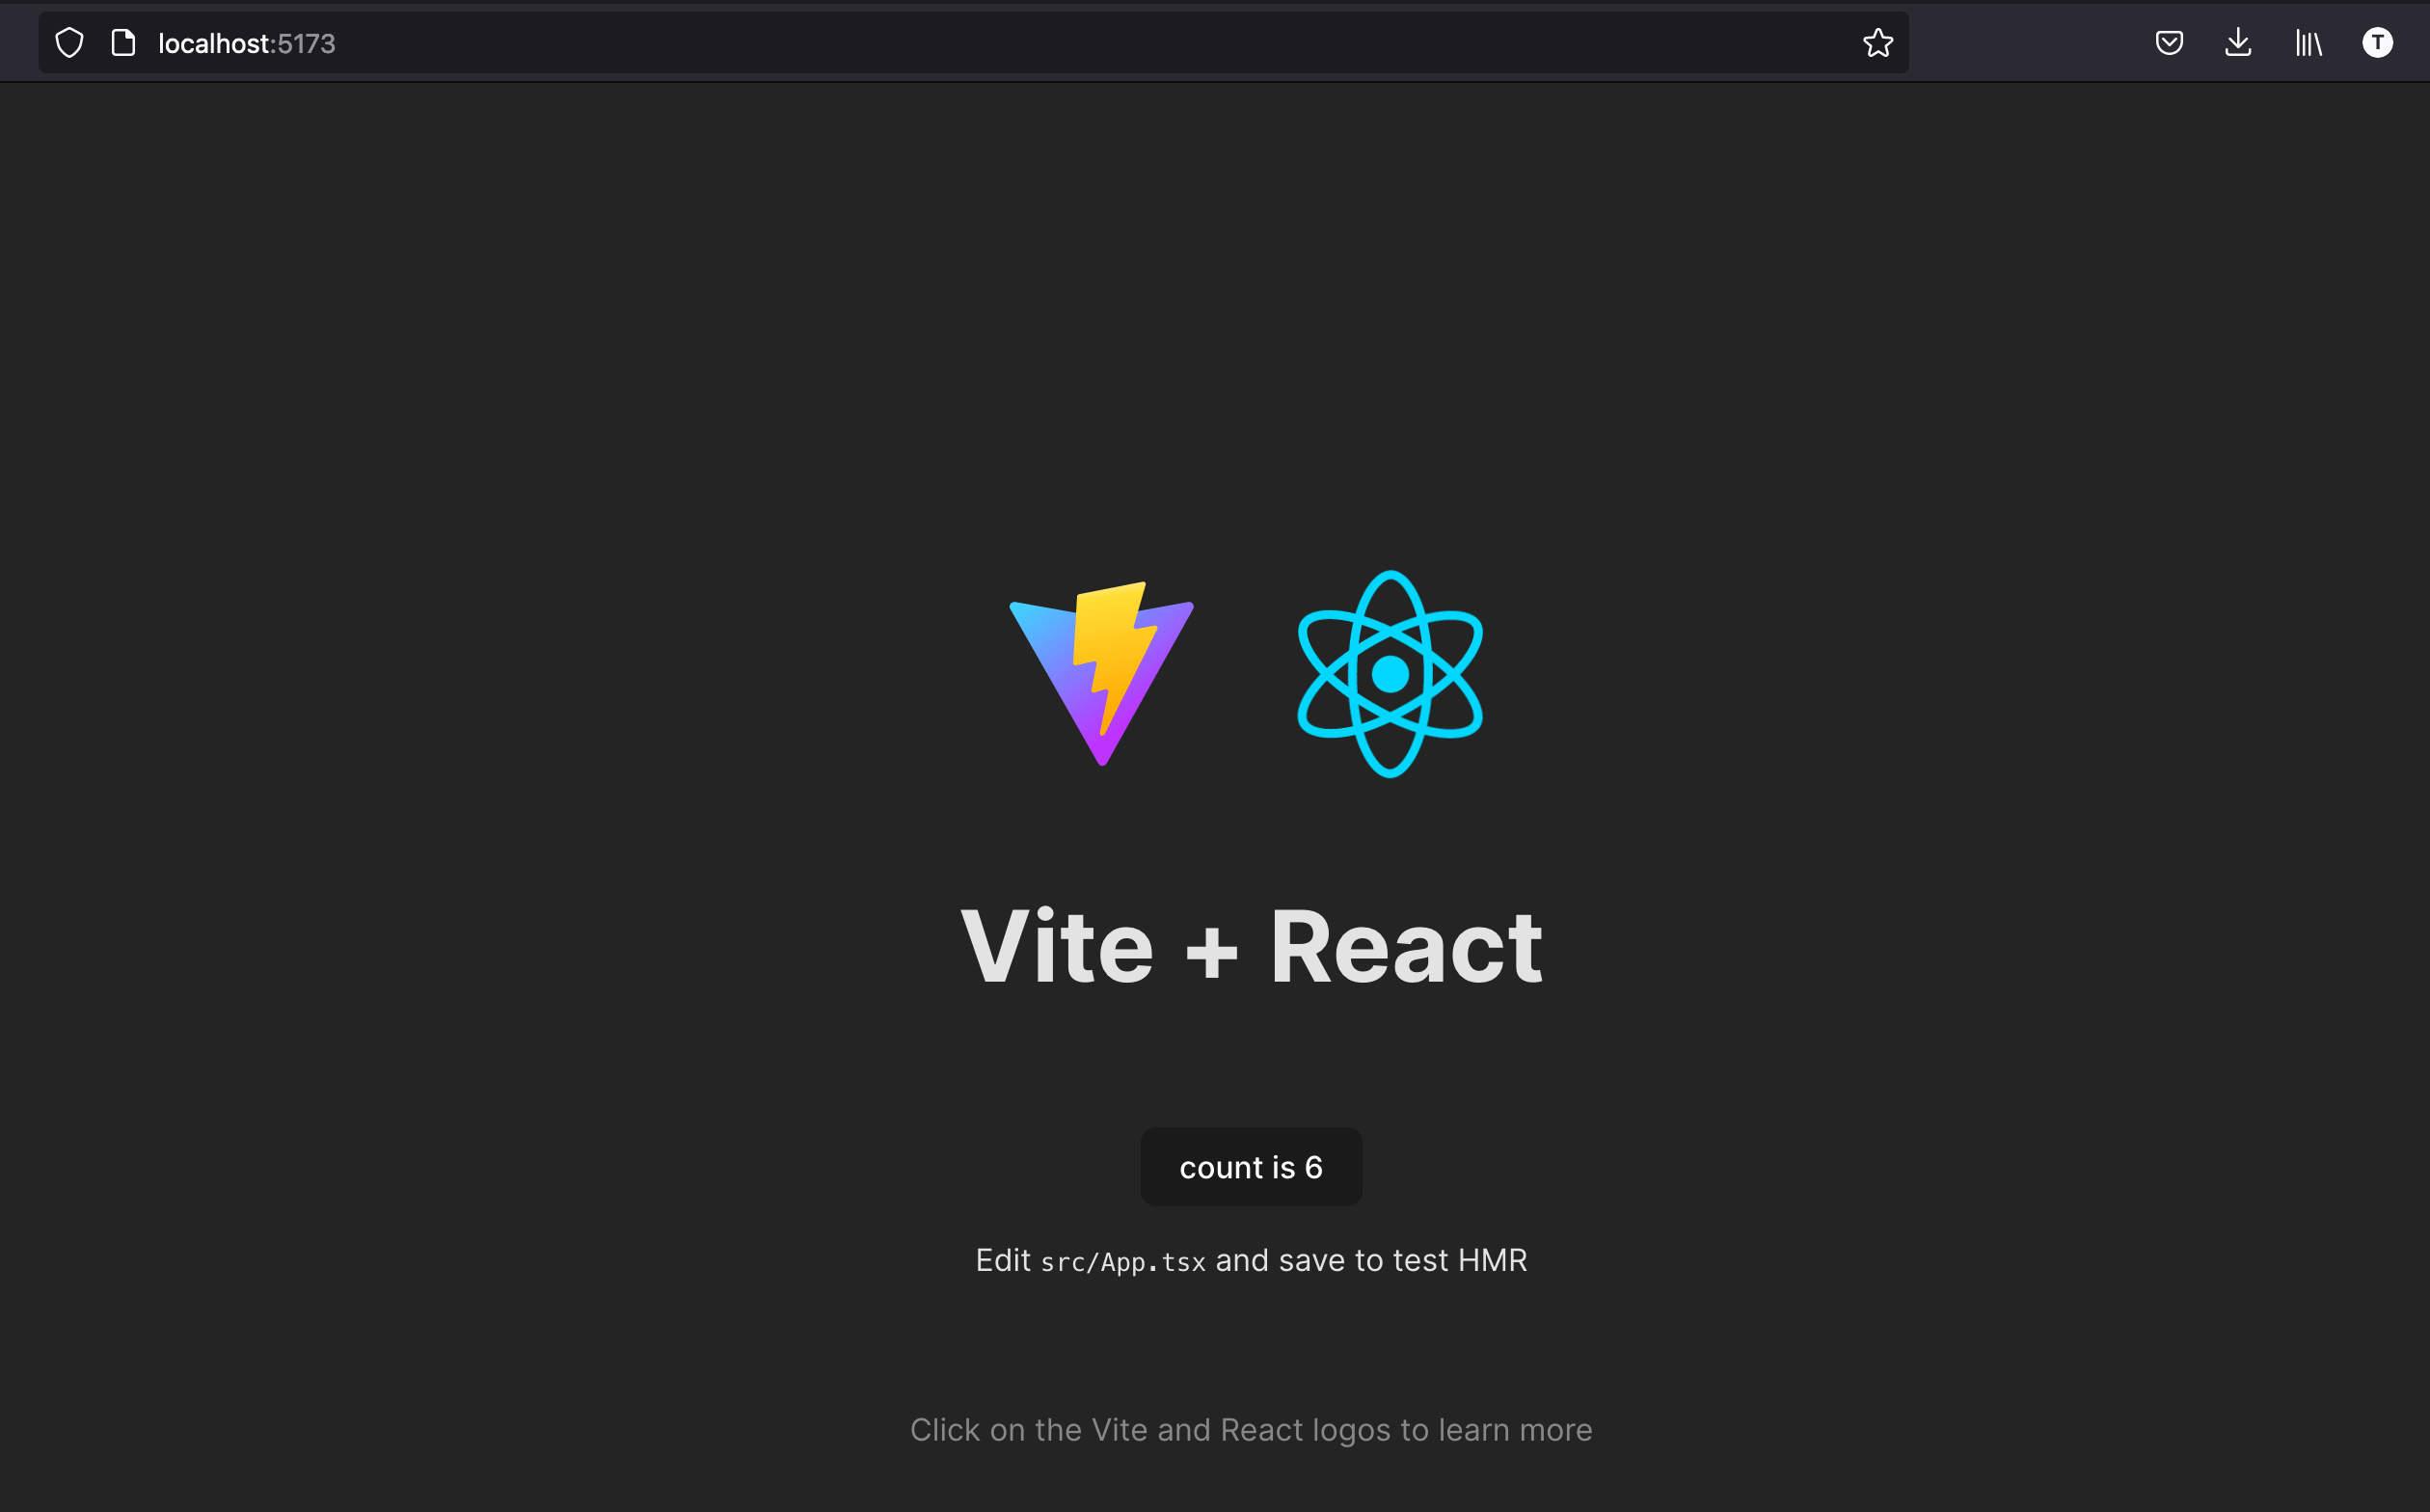
Navigate to http://localhost:5173/, and you will see the page below:
Generate the static bundle of the website
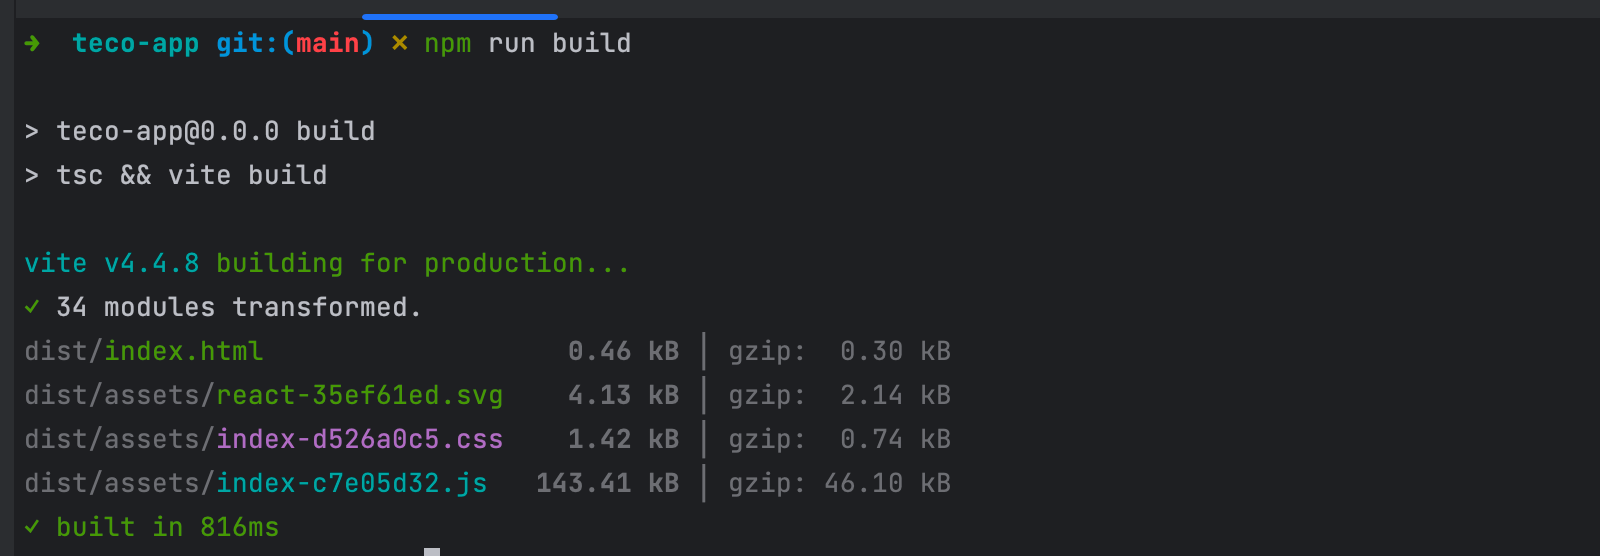
The project runs locally, and we want to deploy the static website on AWS S3 and CloudFront. Let's generate the static files by running the command below:
npm run build
This command will generate a "dist" folder with all the static files.
To verify the static files will run the website as expected, you can use the Node.js package serve to start a web server locally to serve a static folder. Run the command below:
npx serve dist -p 5001
Navigate to http//:localhost:5001, and you will see the web page:
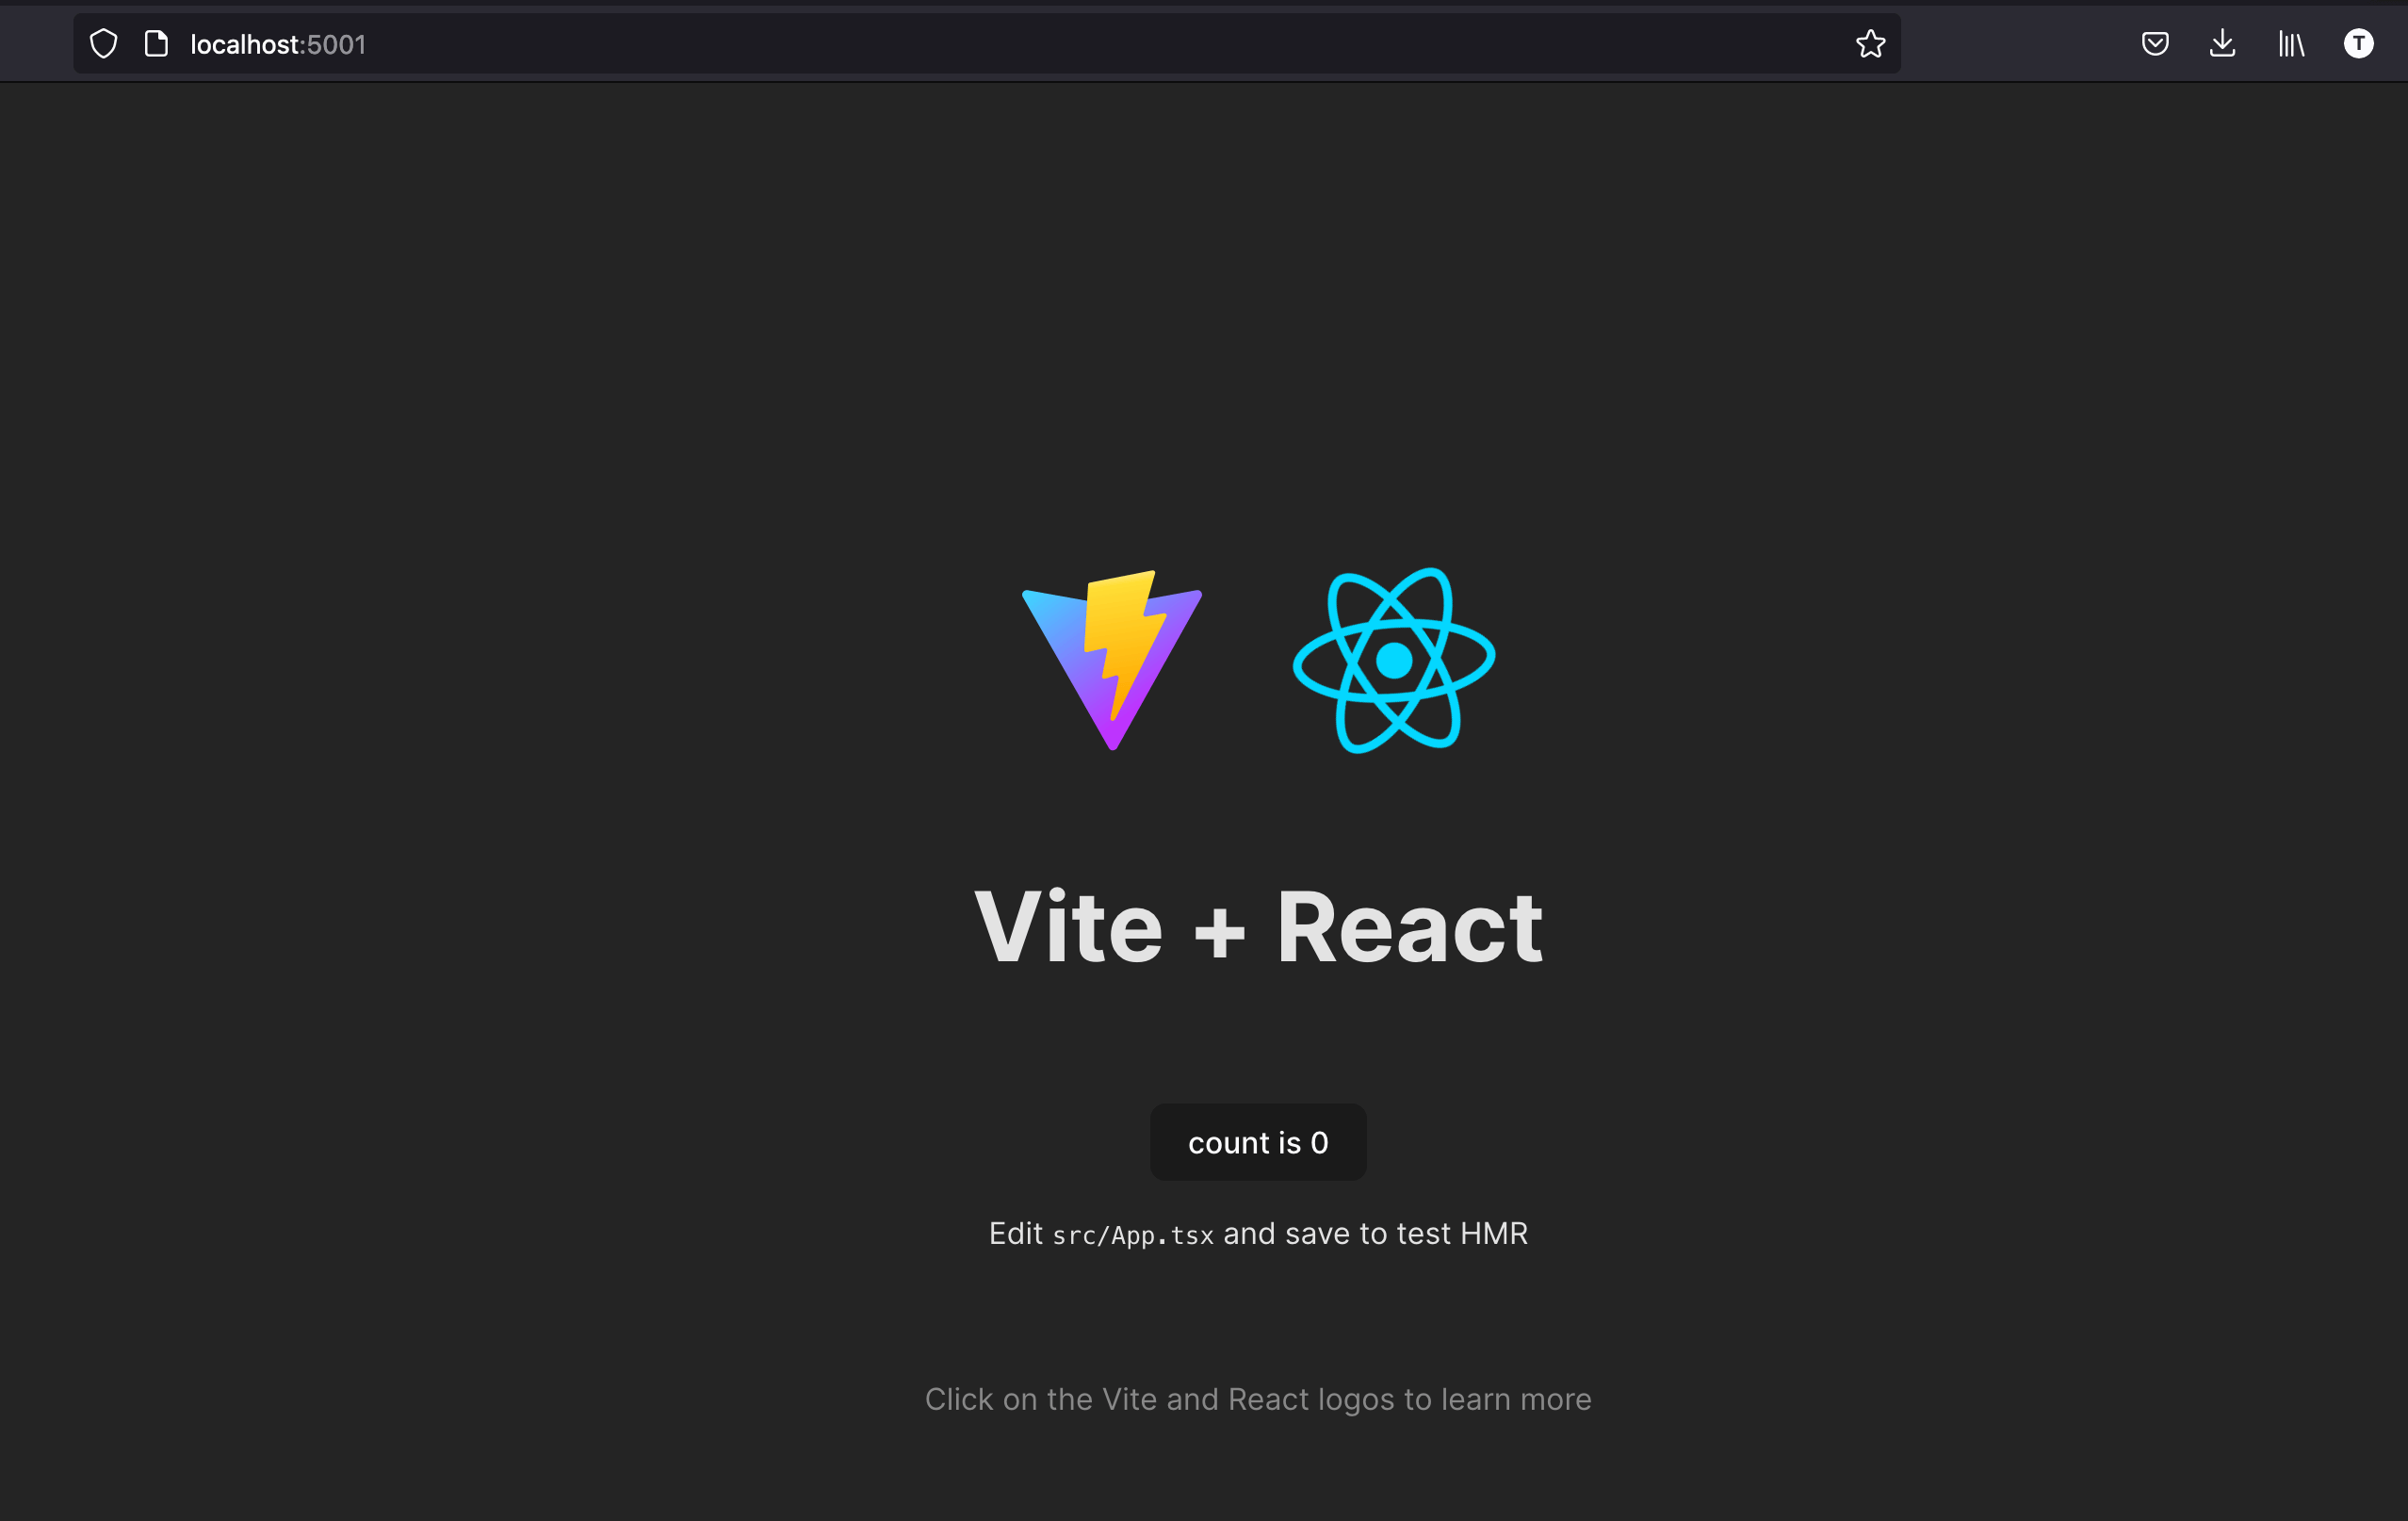
The static files of the website work as expected; we can proceed to host them on AWS S3.
Create the S3 bucket on AWS
Log into your AWS account, search for the AWS services named S3, or click on this link. Click on the "Create bucket" button.
On the page displayed,
- Type a bucket name; it must be unique globally and not just in your AWS account.
- Select the region where to host the S3 bucket.
- In the
Object Ownershipsection, leave it as is. - In the section
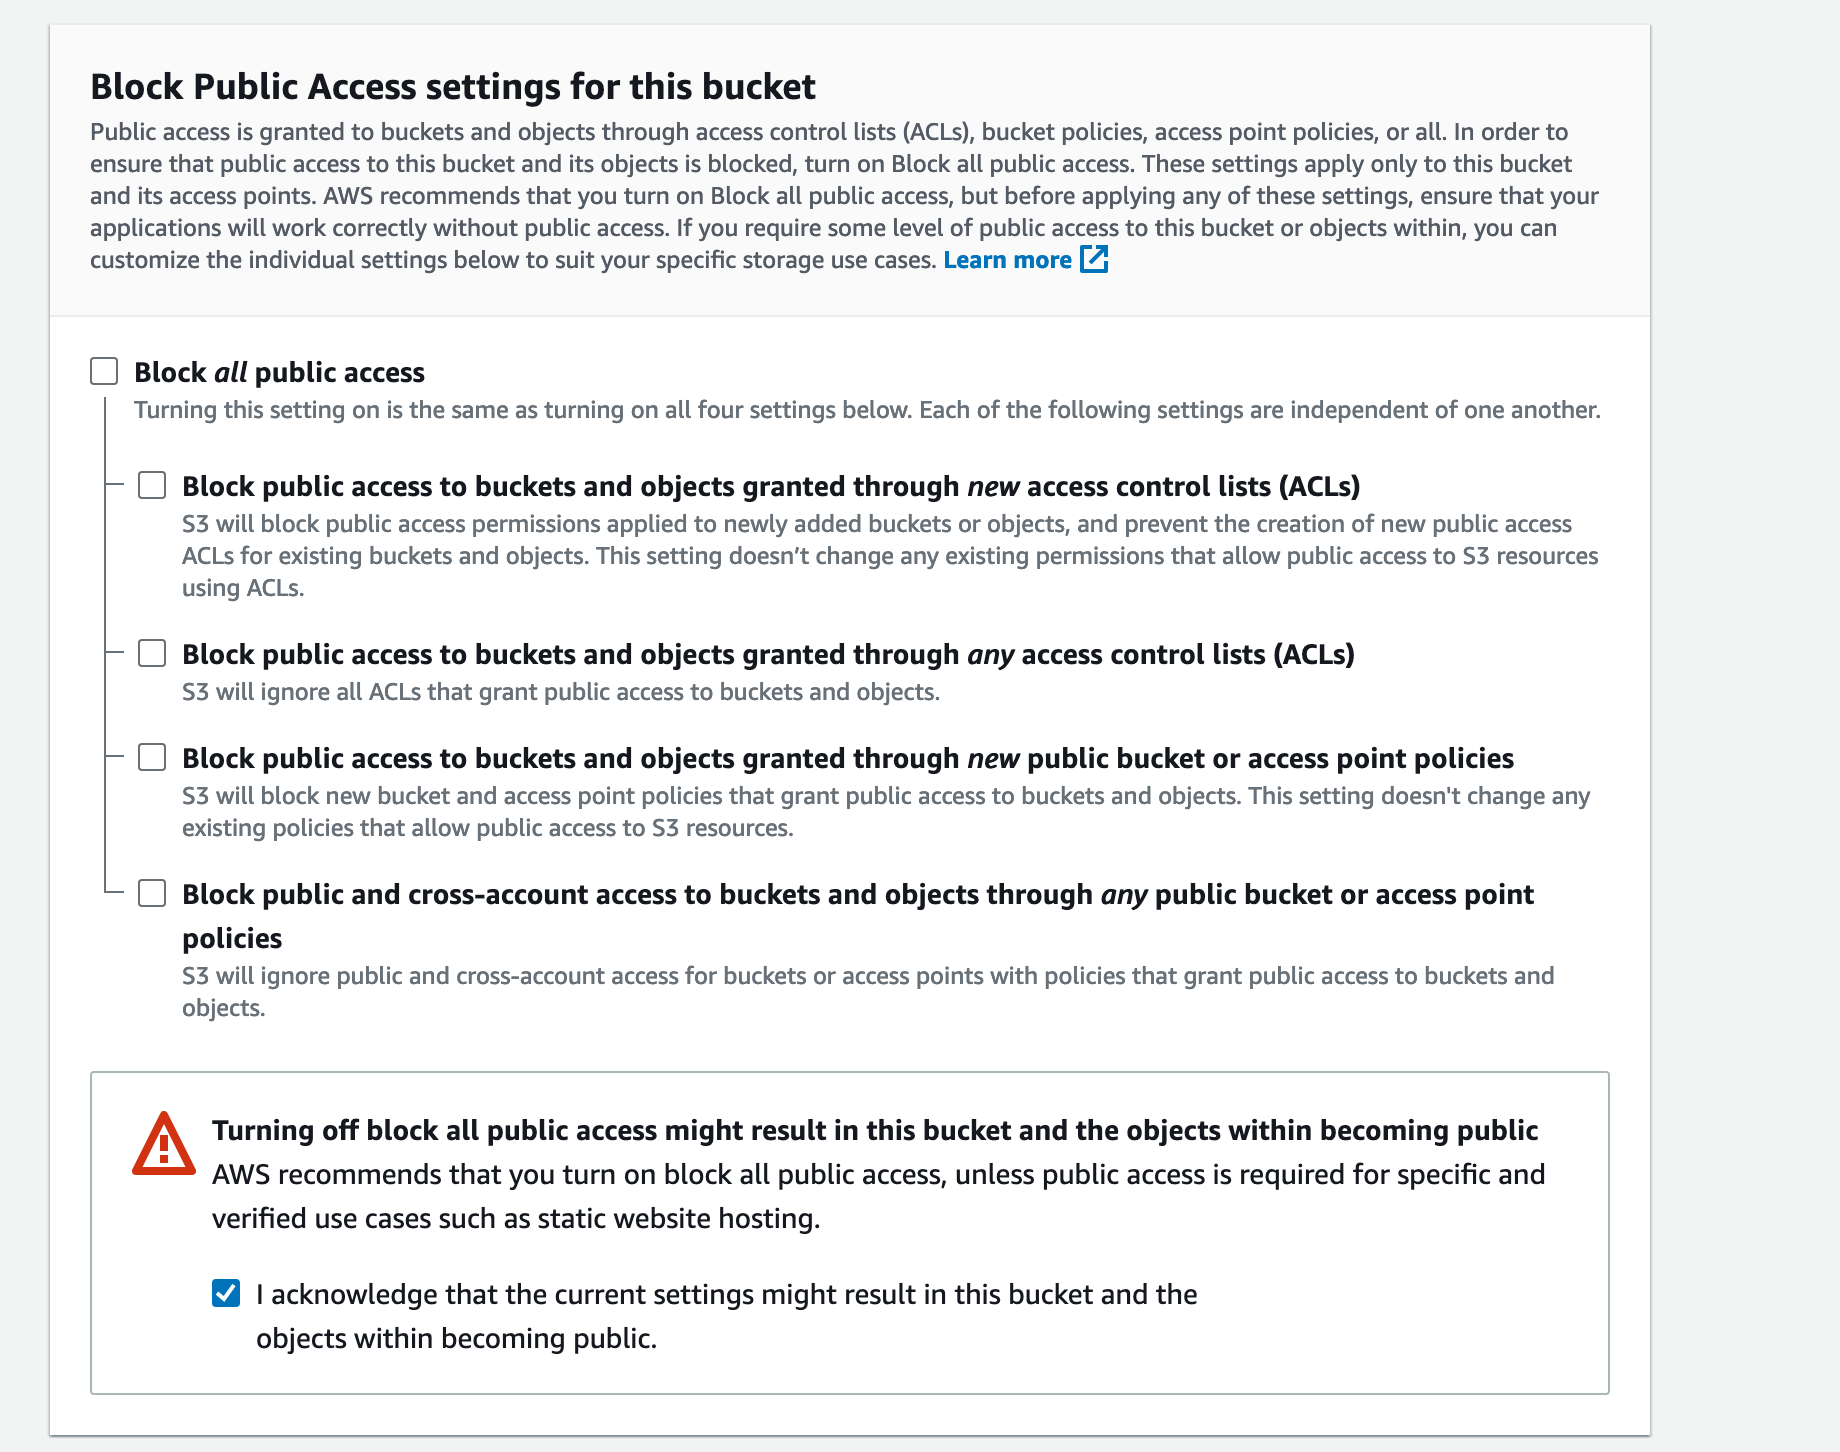
Block Public Access settings for this bucket, untick the checkboxBlock all public accessand tick the checkbox labeledI acknowledge that the current settings might result in this bucket and the objects within becoming public.
- In the section "Bucket Versioning", enable the bucket version if you need; I will leave it disabled.
- In the section "Tags", add one or more if needed.
- In the section "Default encryption", leave the
Encryption key typeas is, but disable theBucket key(should find why) - Skip advanced settings
- Click on the button
Create bucket
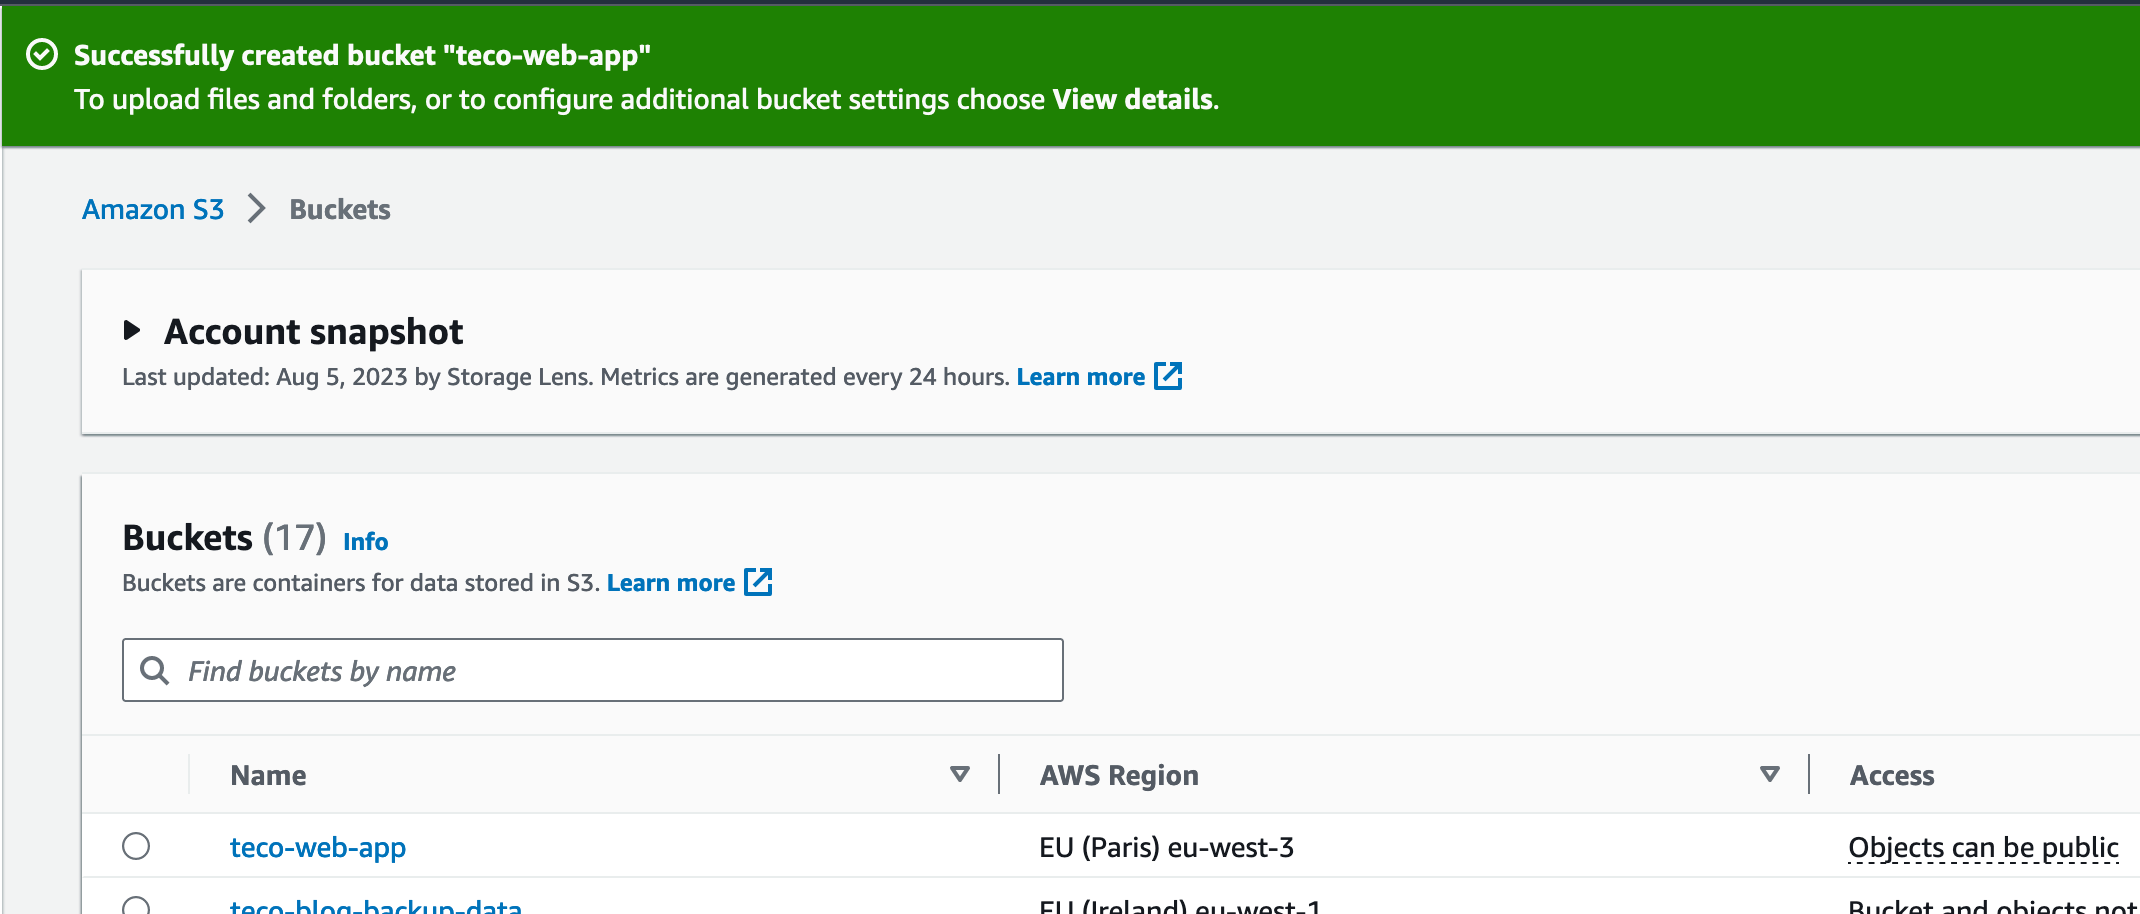
You can see the bucket name created in the bucket list.
Upload the file to the S3 bucket
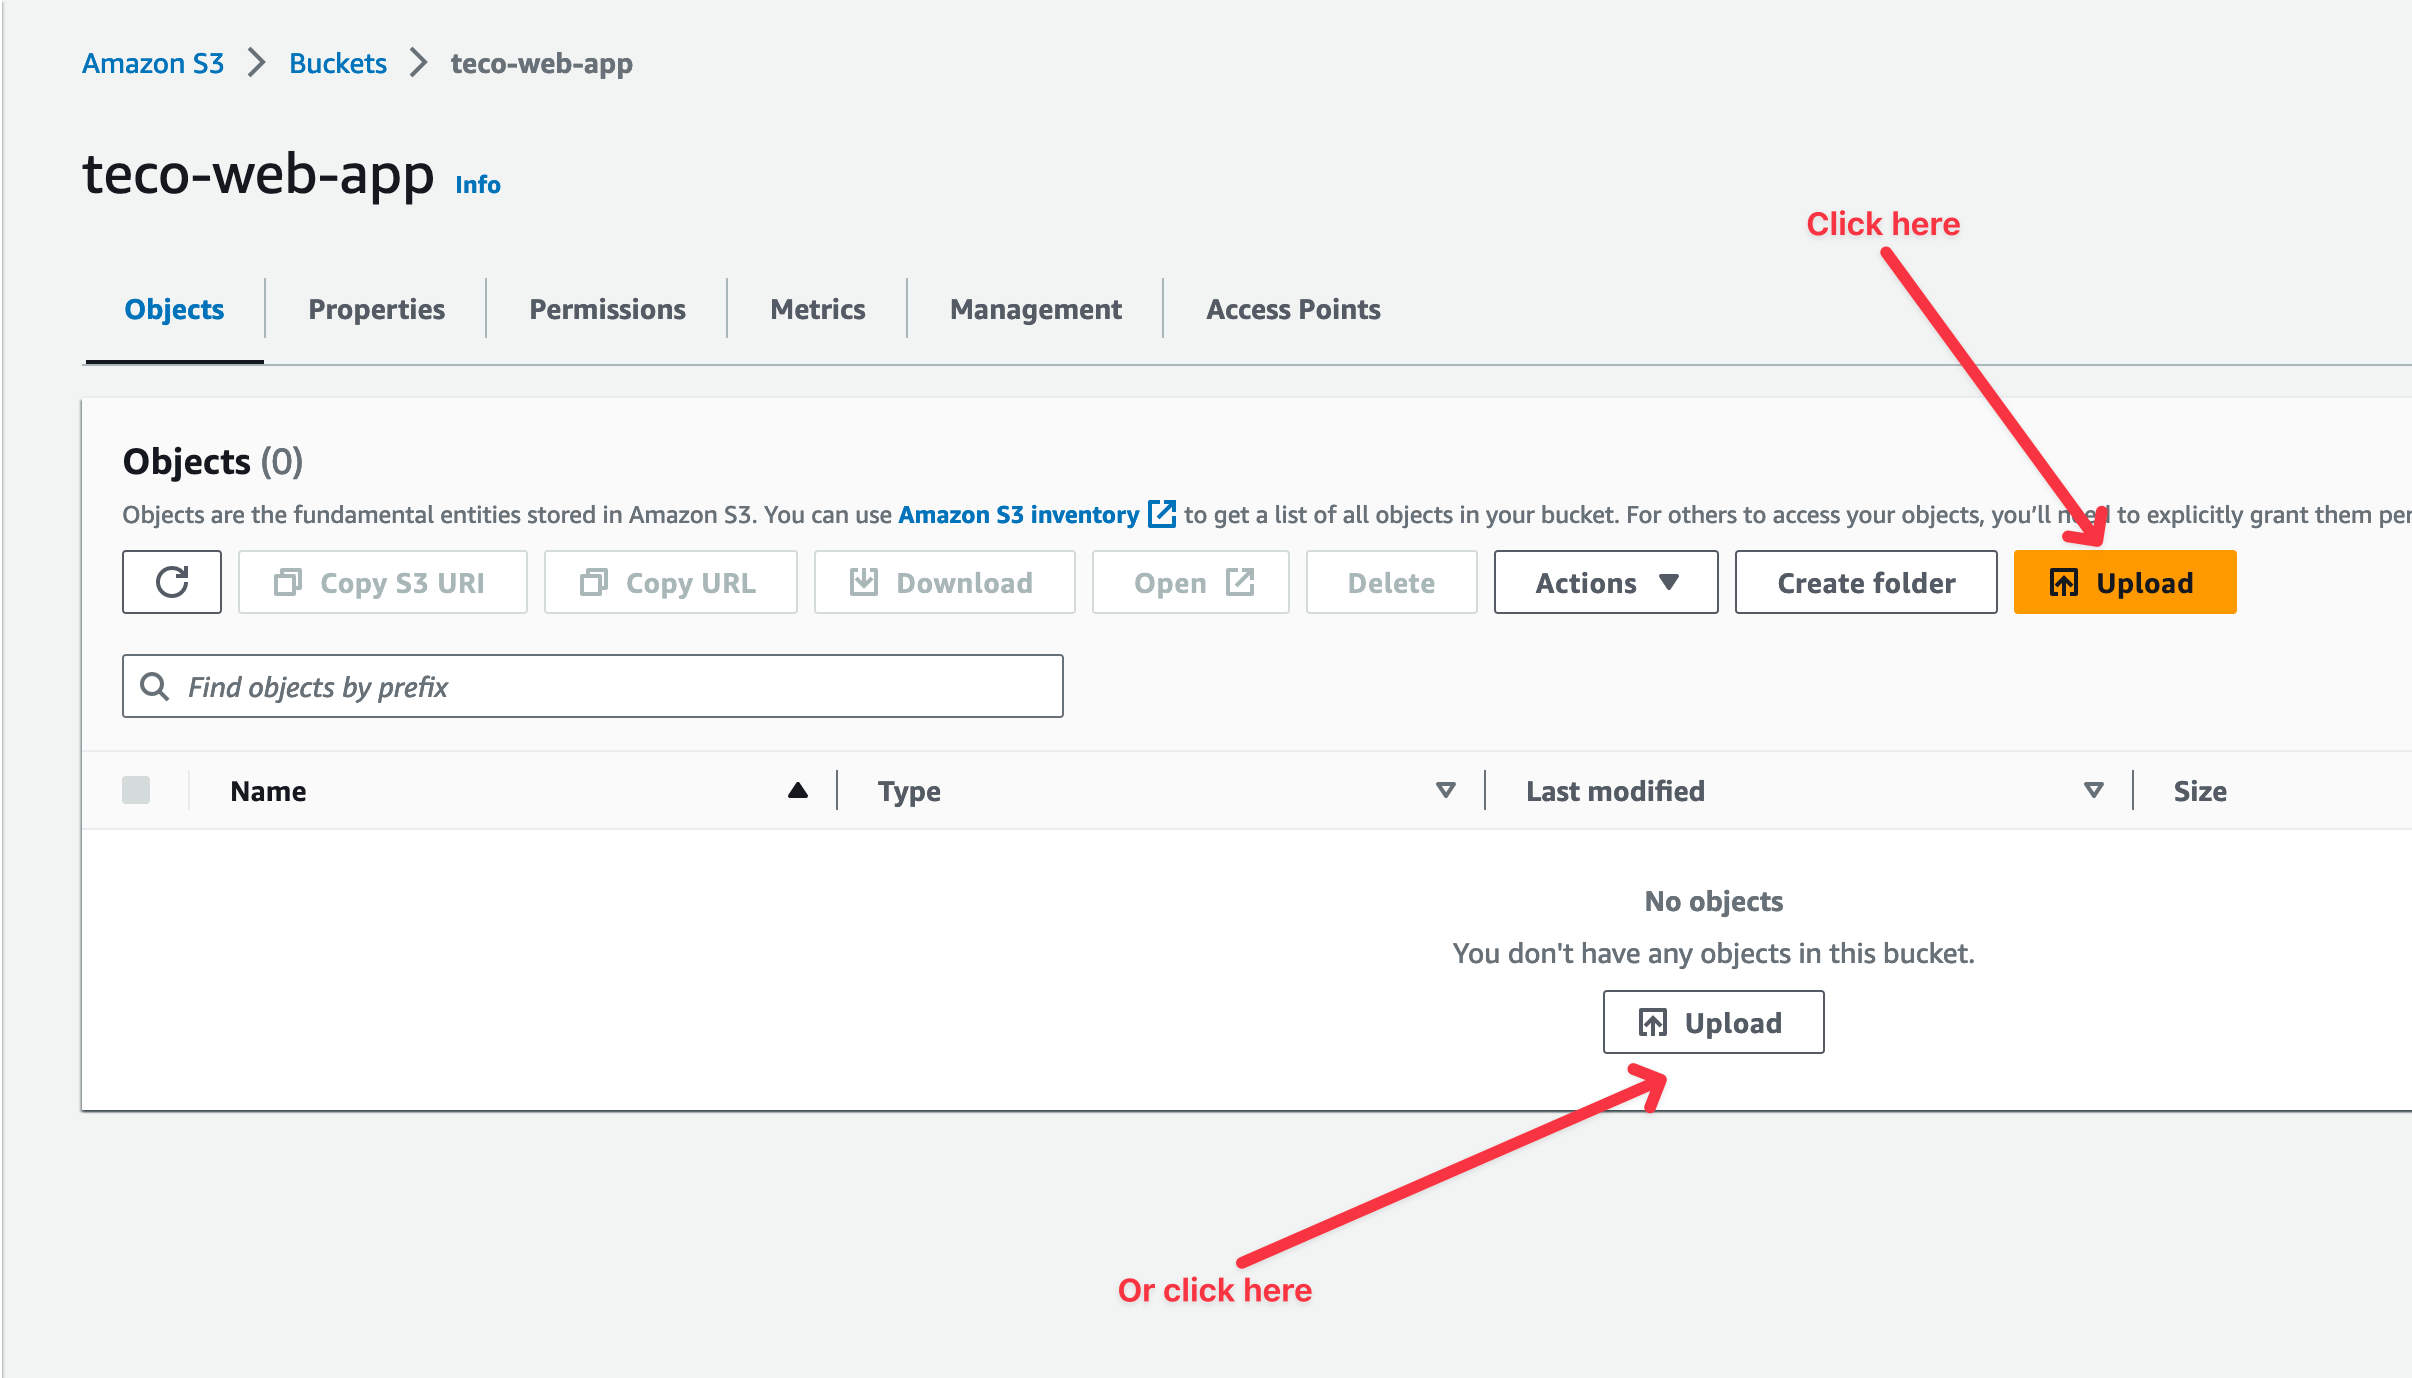
Click on the bucket created previously, and on the page displayed, click on the "Upload":
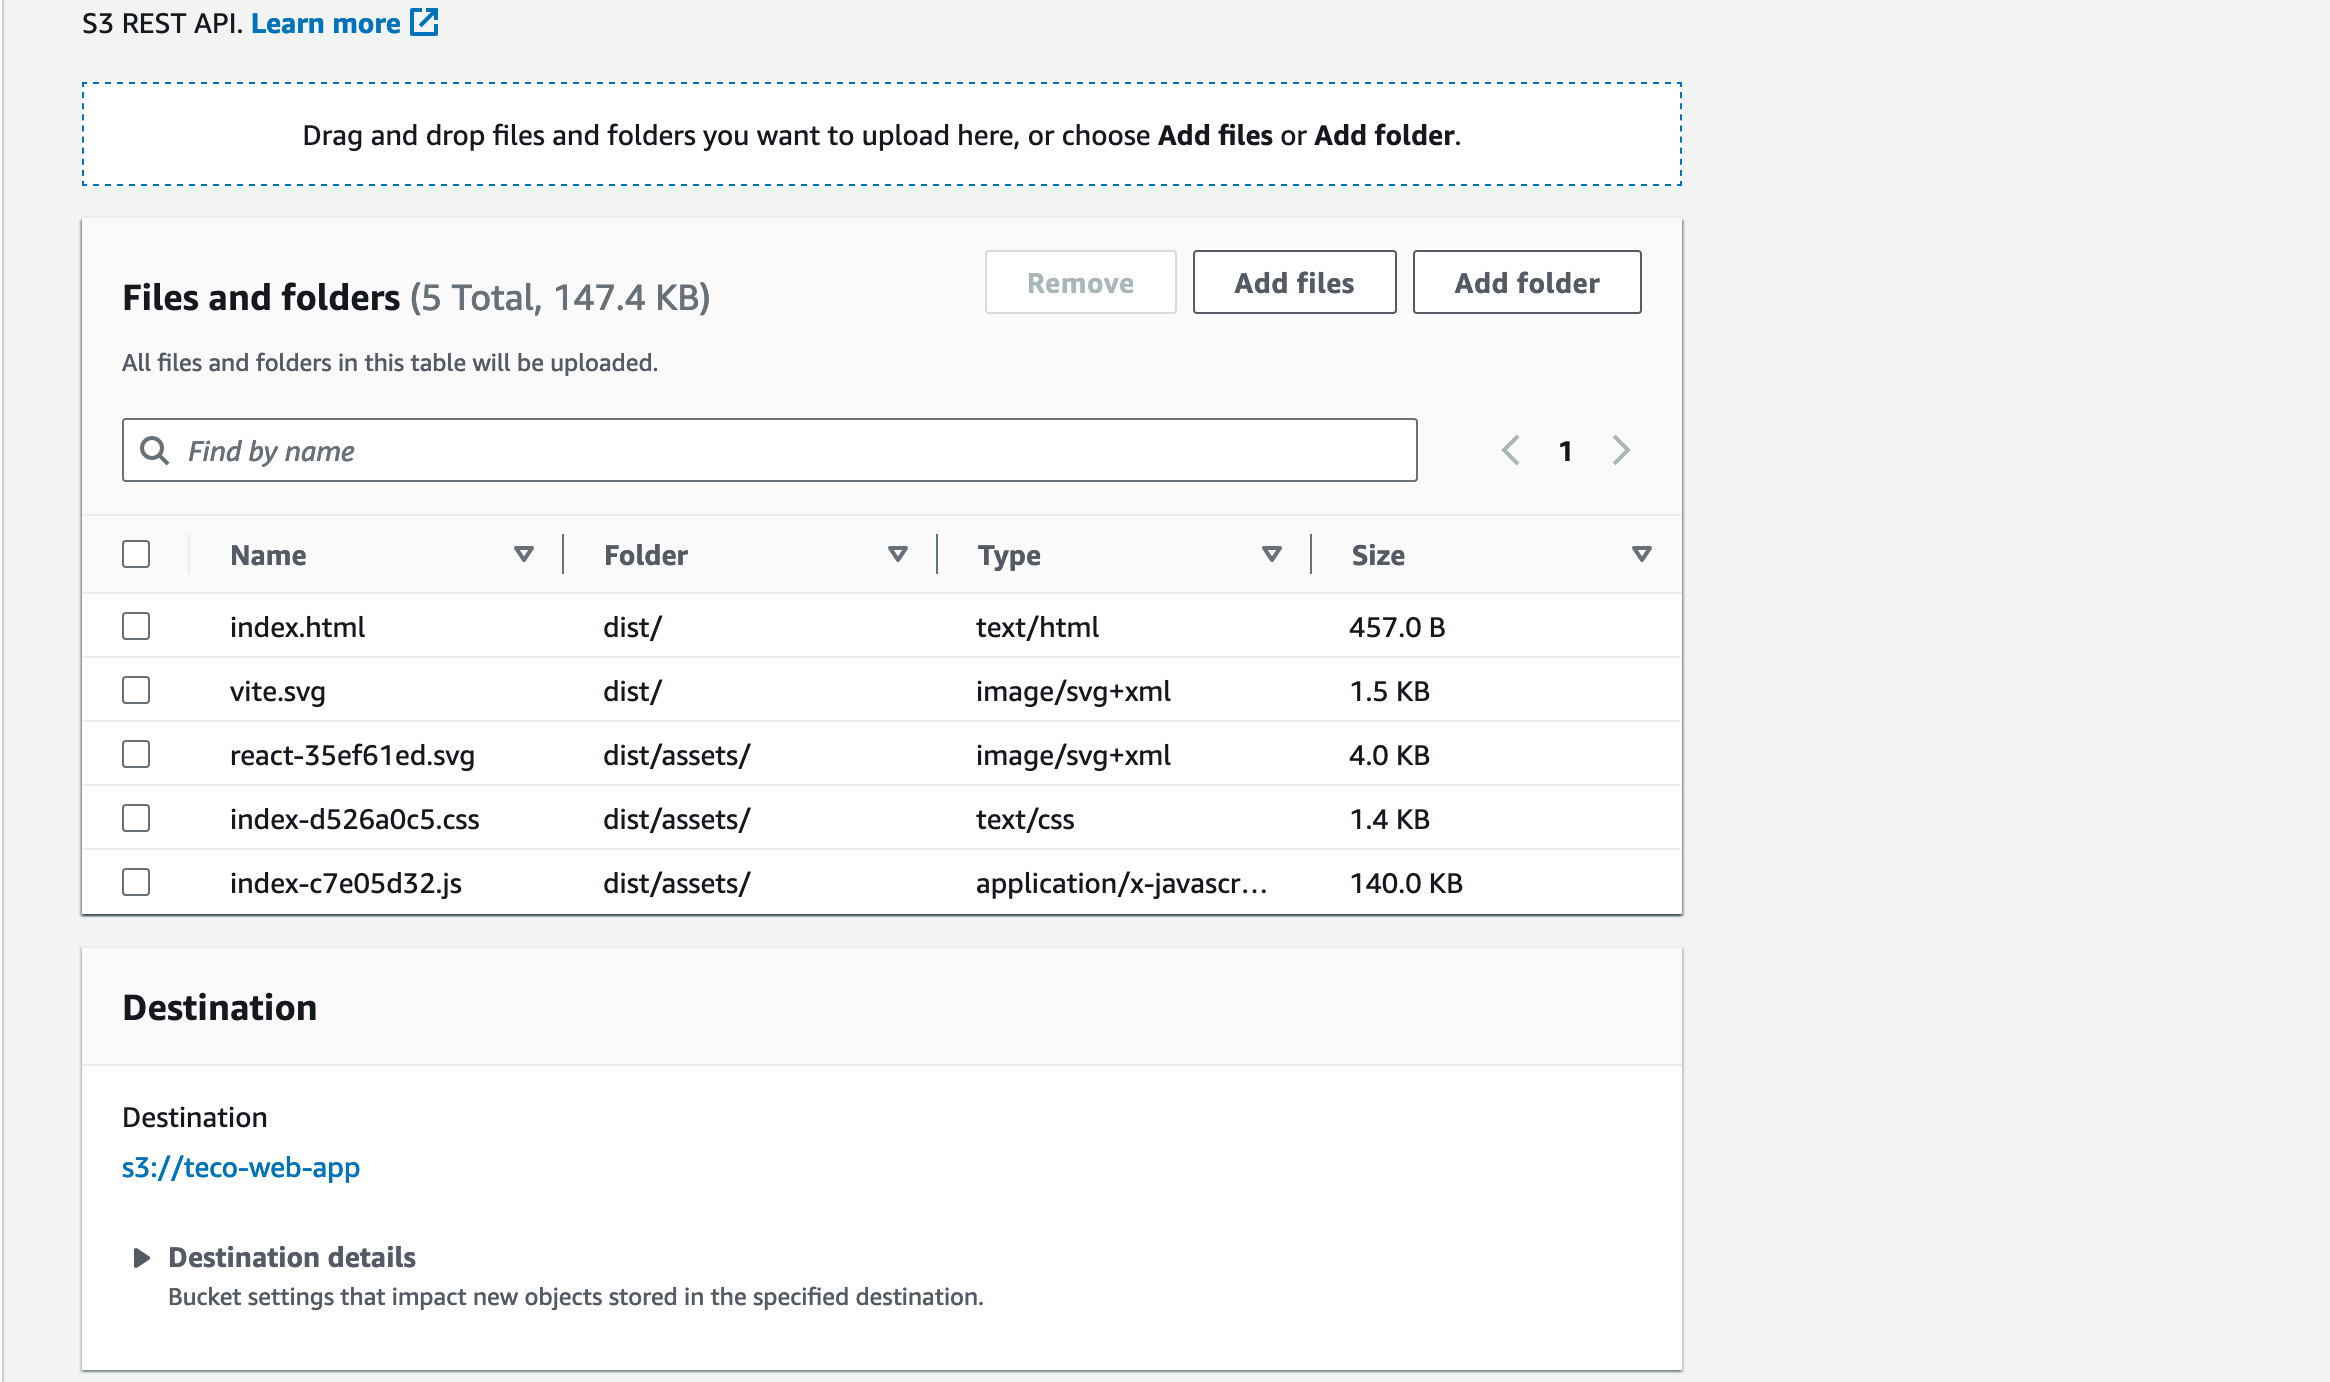
Upload the "dist" folder containing the static files. Click on the Upload button to submit.
Wait for the upload to complete, and verify the files are on the S3 bucket.
Upload files to the S3 bucket using the AWS CLI
You can also use the AWS CLI to upload the file to the S3 bucket; this is very helpful when you use a script to deploy your website or inside an automated CI/CD pipeline.
The syntax to copy a folder from the computer to an S3 bucket is the following:
aws s3 cp <folder> s3://<bucket-name> --recursive
The recursive option allows copying subfolders. The command to upload the "dist" folder to the S3 bucket "teco-web-app" is the following:
aws s3 cp dist s3://teco-web-app --recursive
Here is the output you will get

If you don't have the AWS CLI on your computer, follow this link to install it.
Enable static website hosting on the S3 bucket
In your bucket, click on the bucket properties tab; scroll to the bottom till the section Static website hostingclick on the "Edit" button.
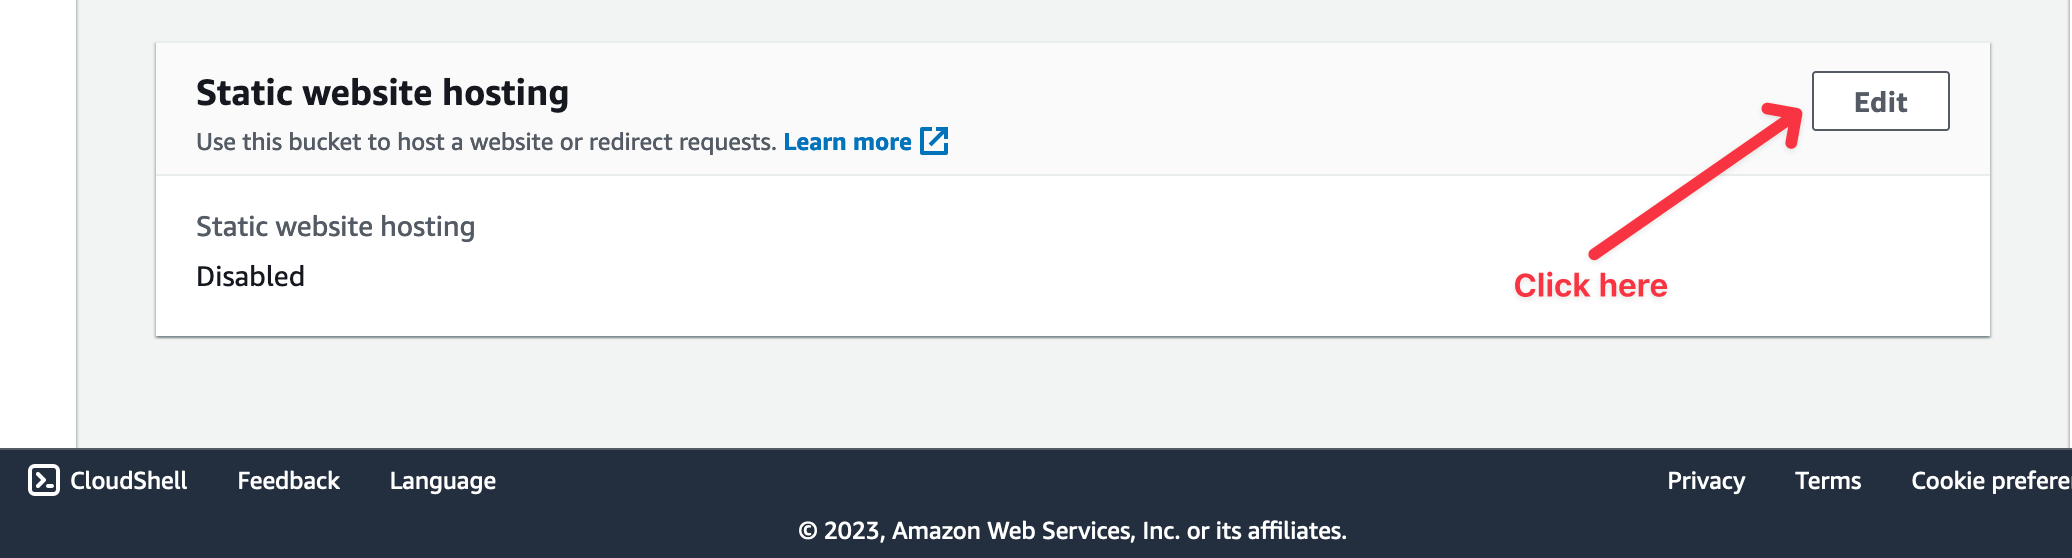
Change the Static website hosting to Enable; leave the Hosting type to Host a static website.
In the text input with the label "Index document", type "index.html", which represents the entry file of the website.
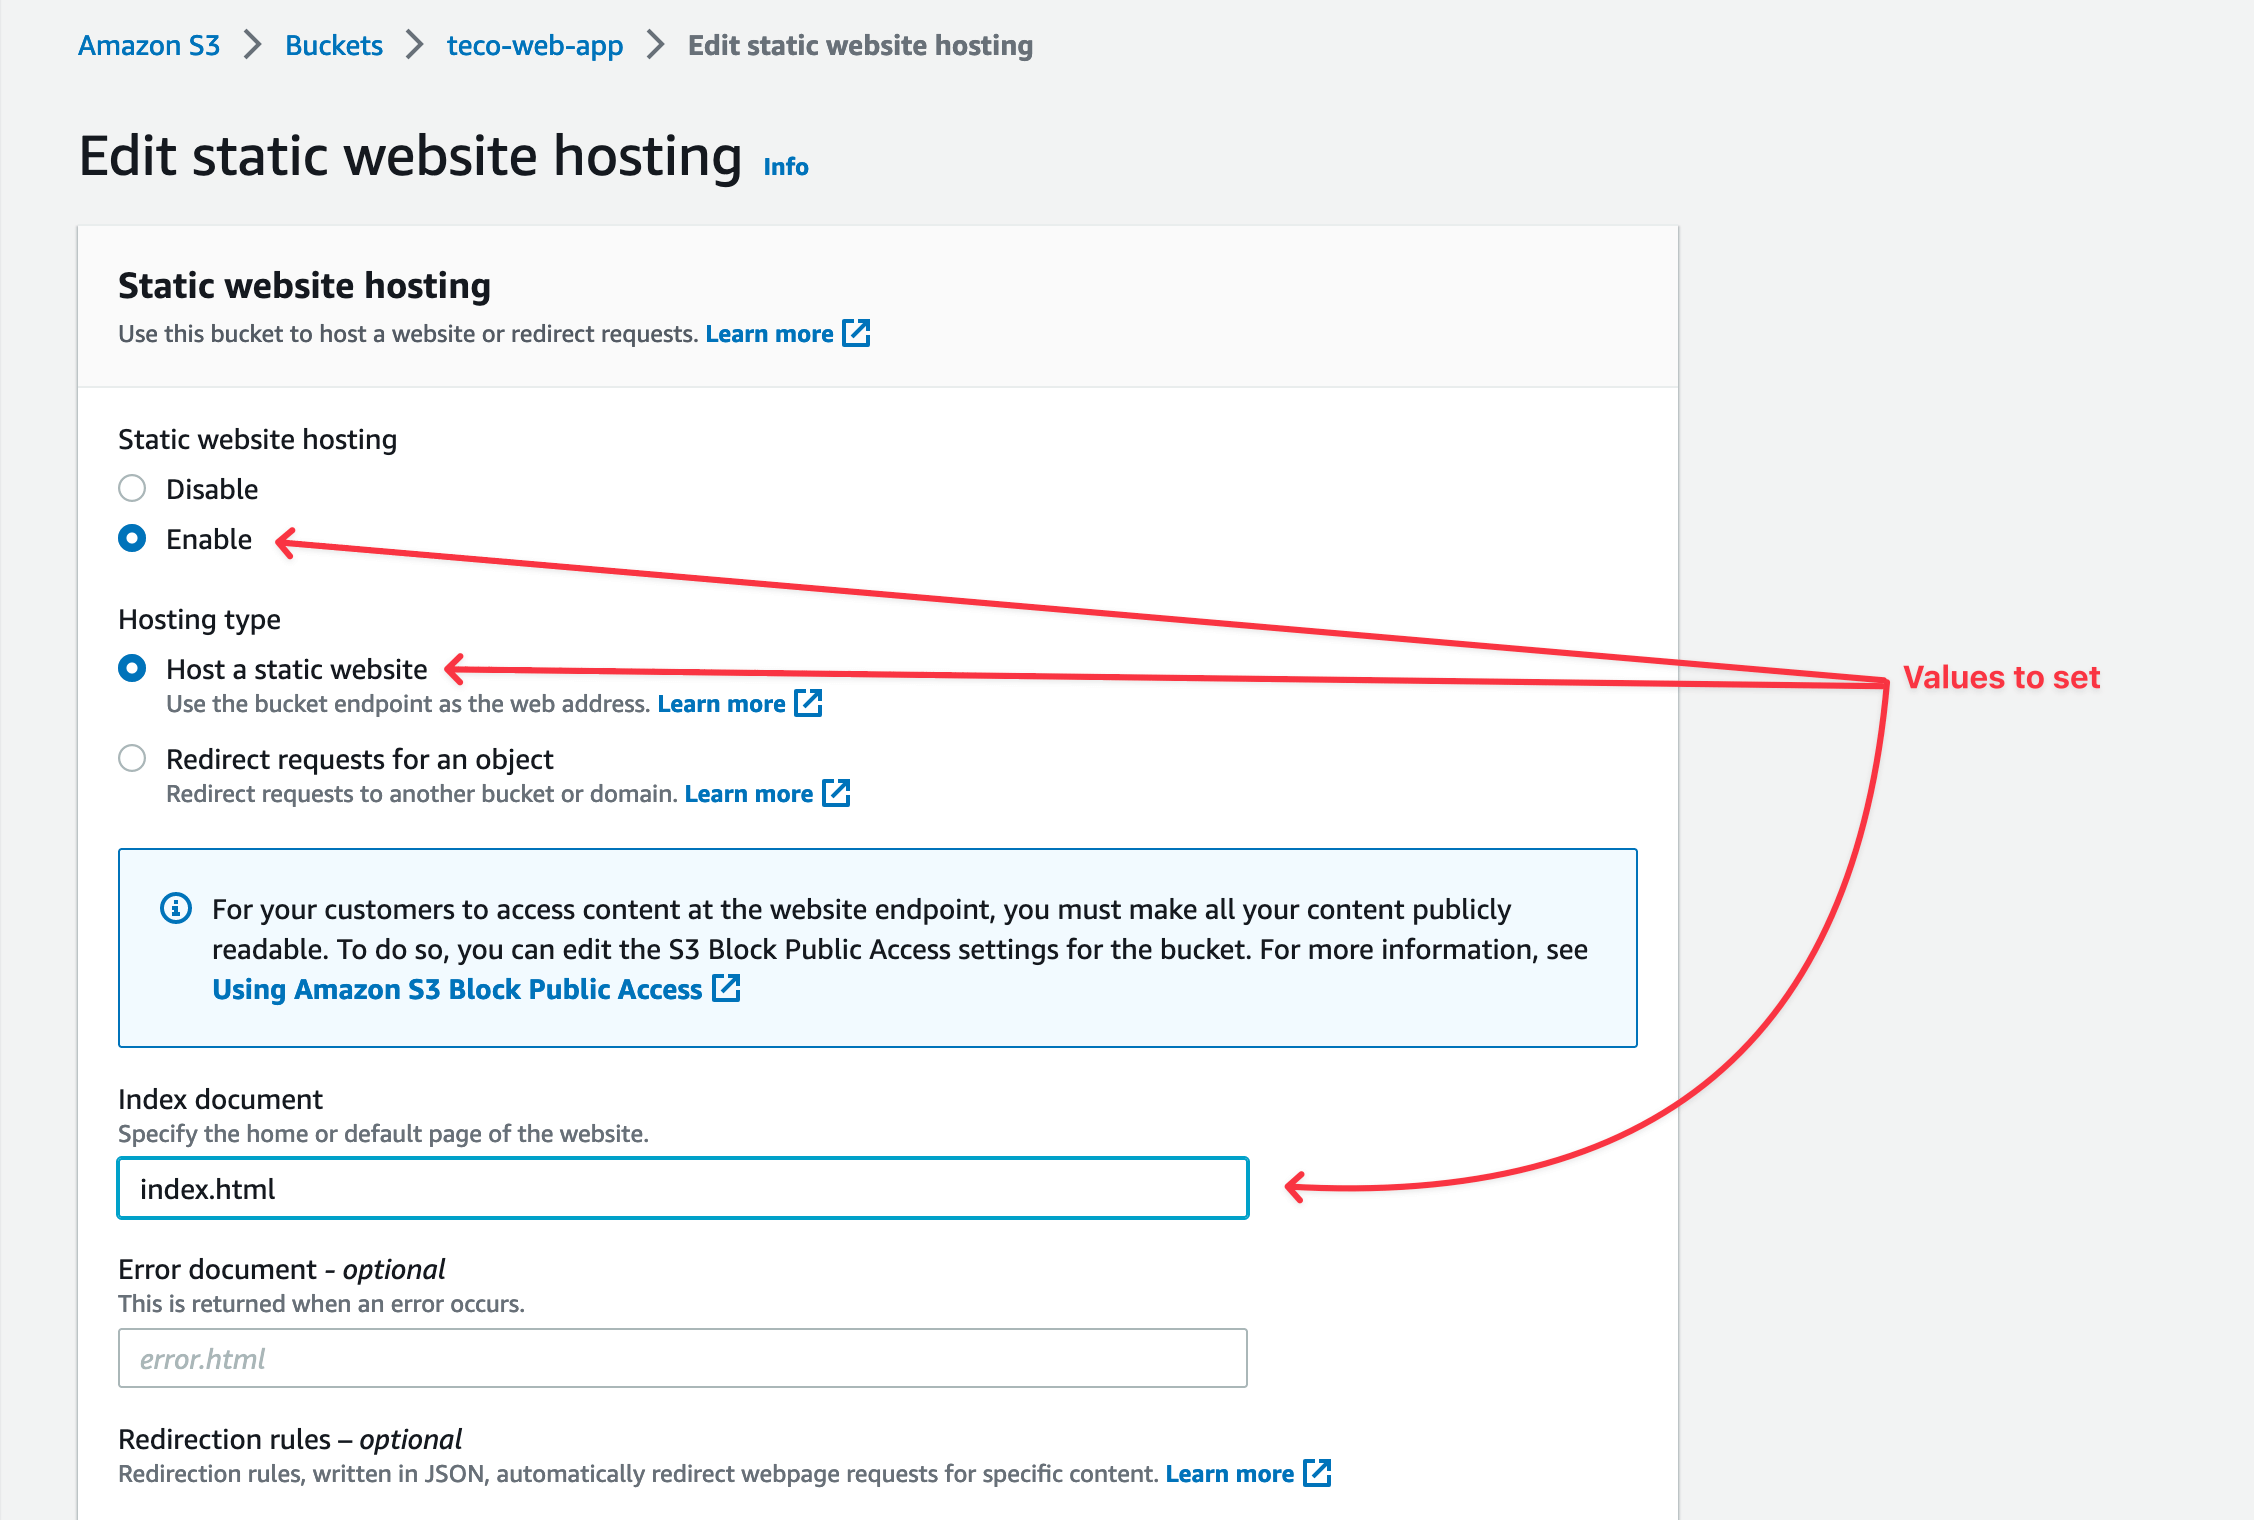
Click on the "Save changes" button at the bottom right of the page.
Create the CloudFront distribution
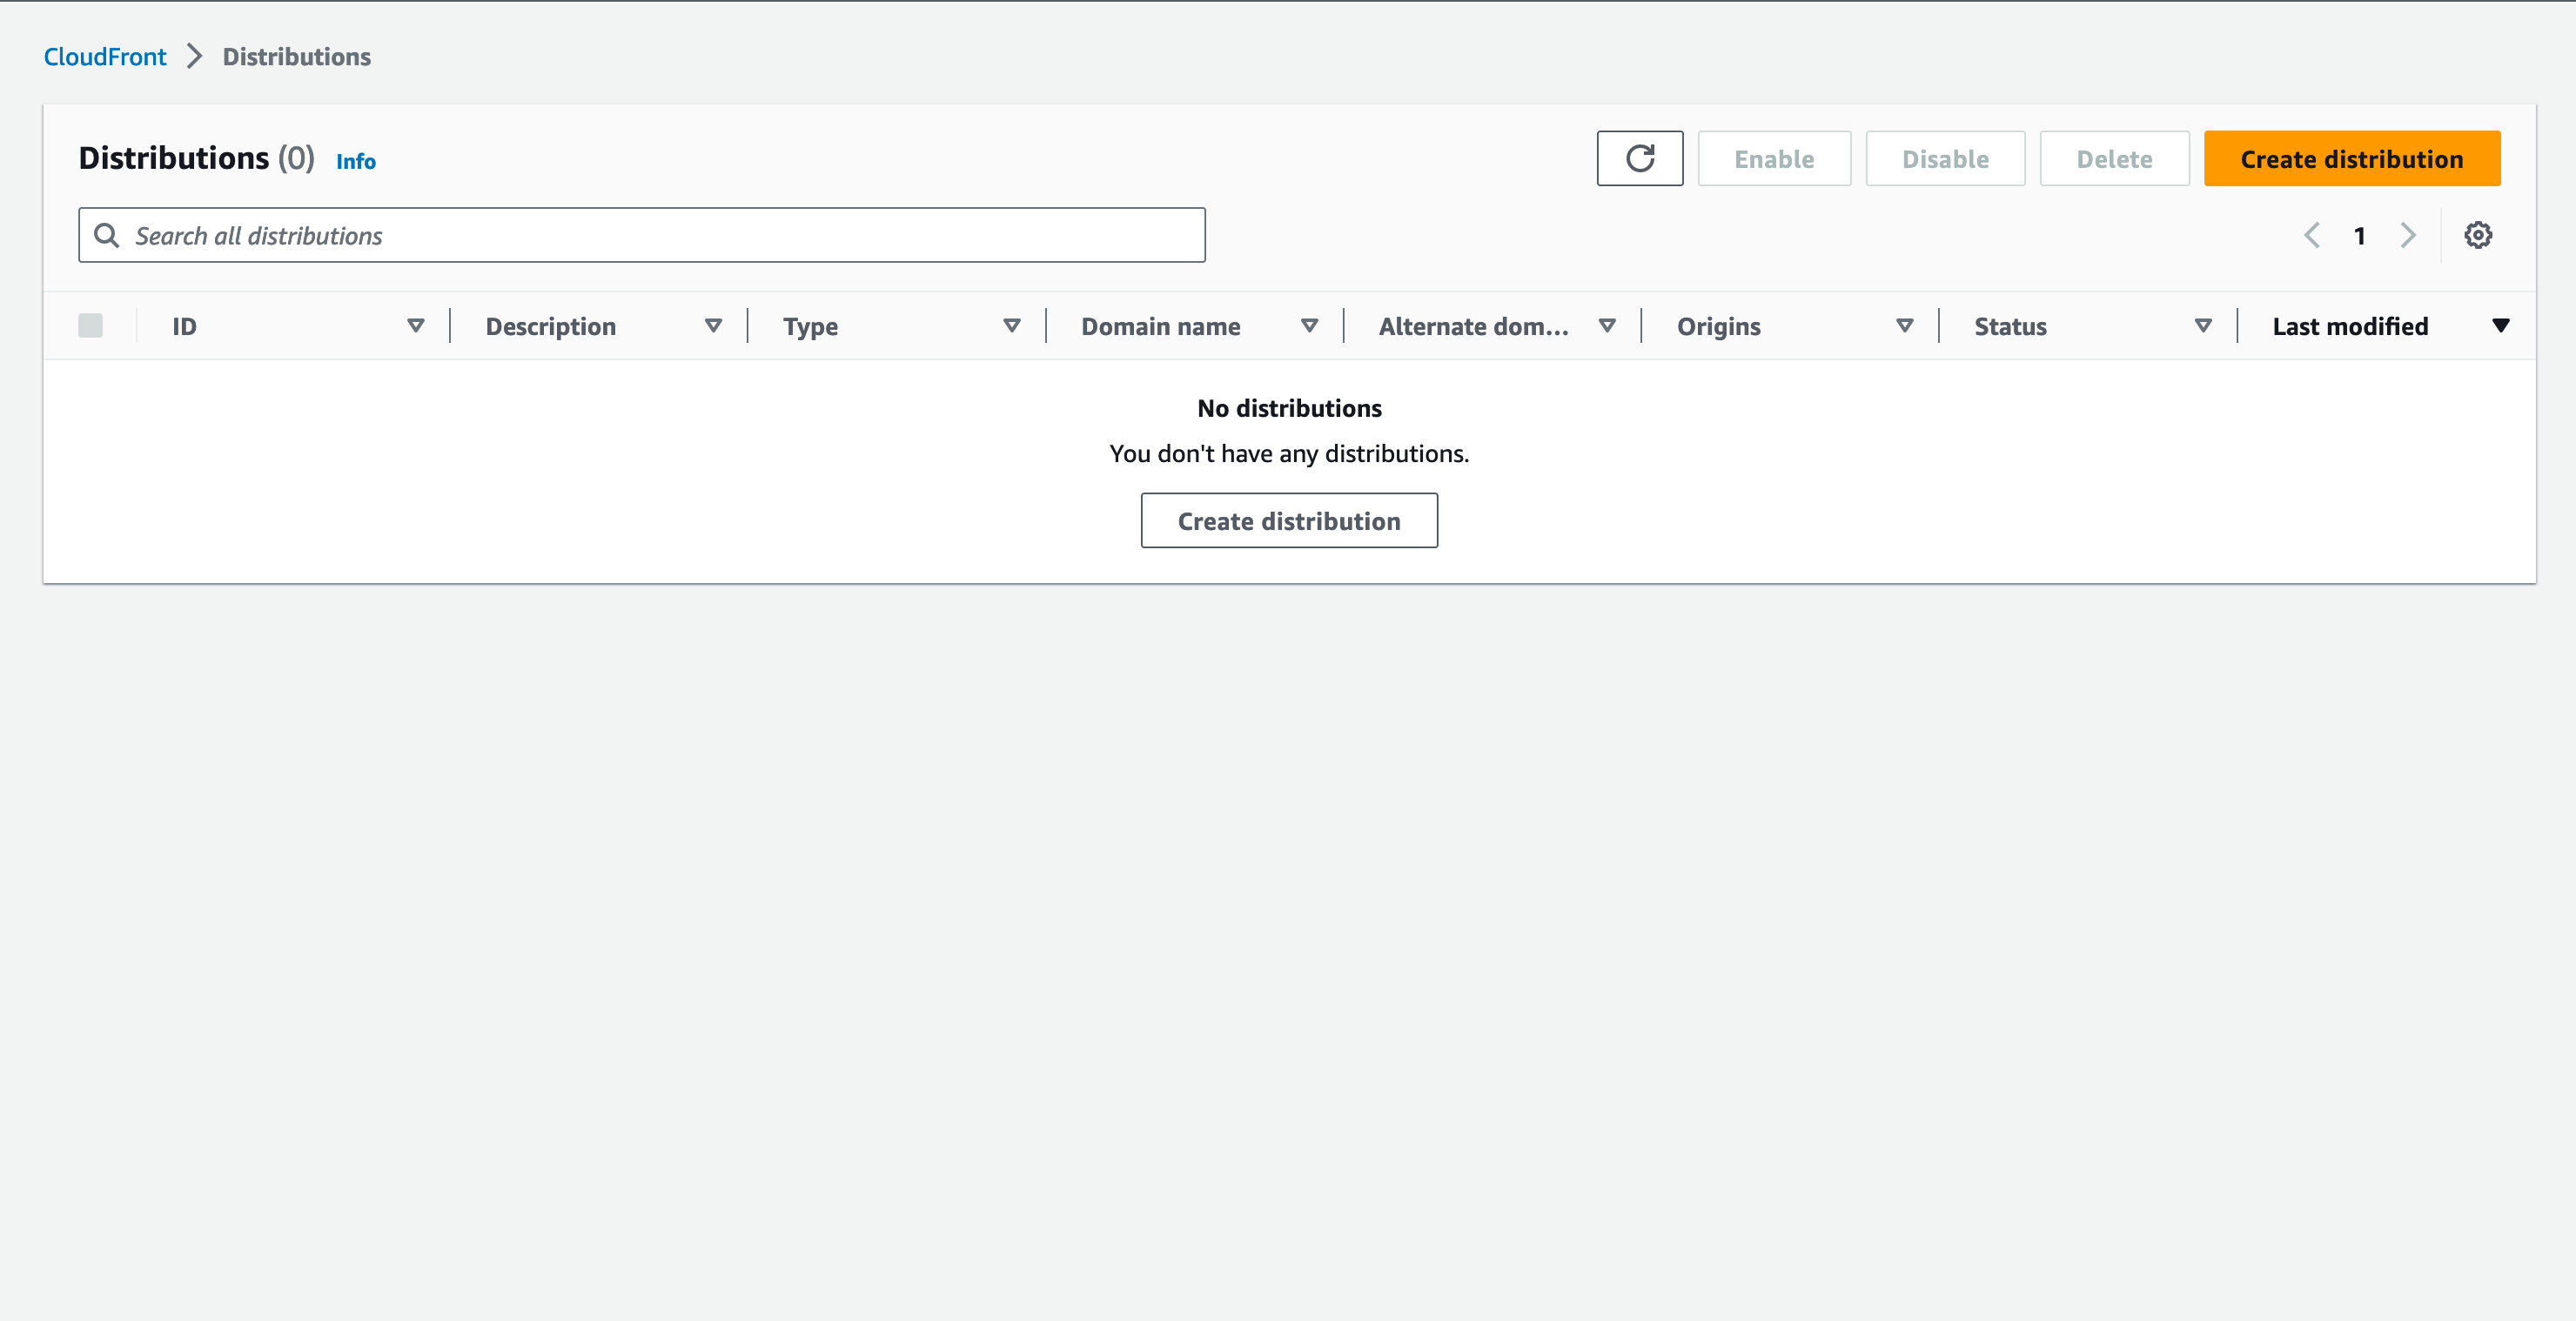
Search for the CloudFront service and click on it.
The page displayed shows the list of existing CloudFront distributions and a button to create a new distribution at the top right; click on it.
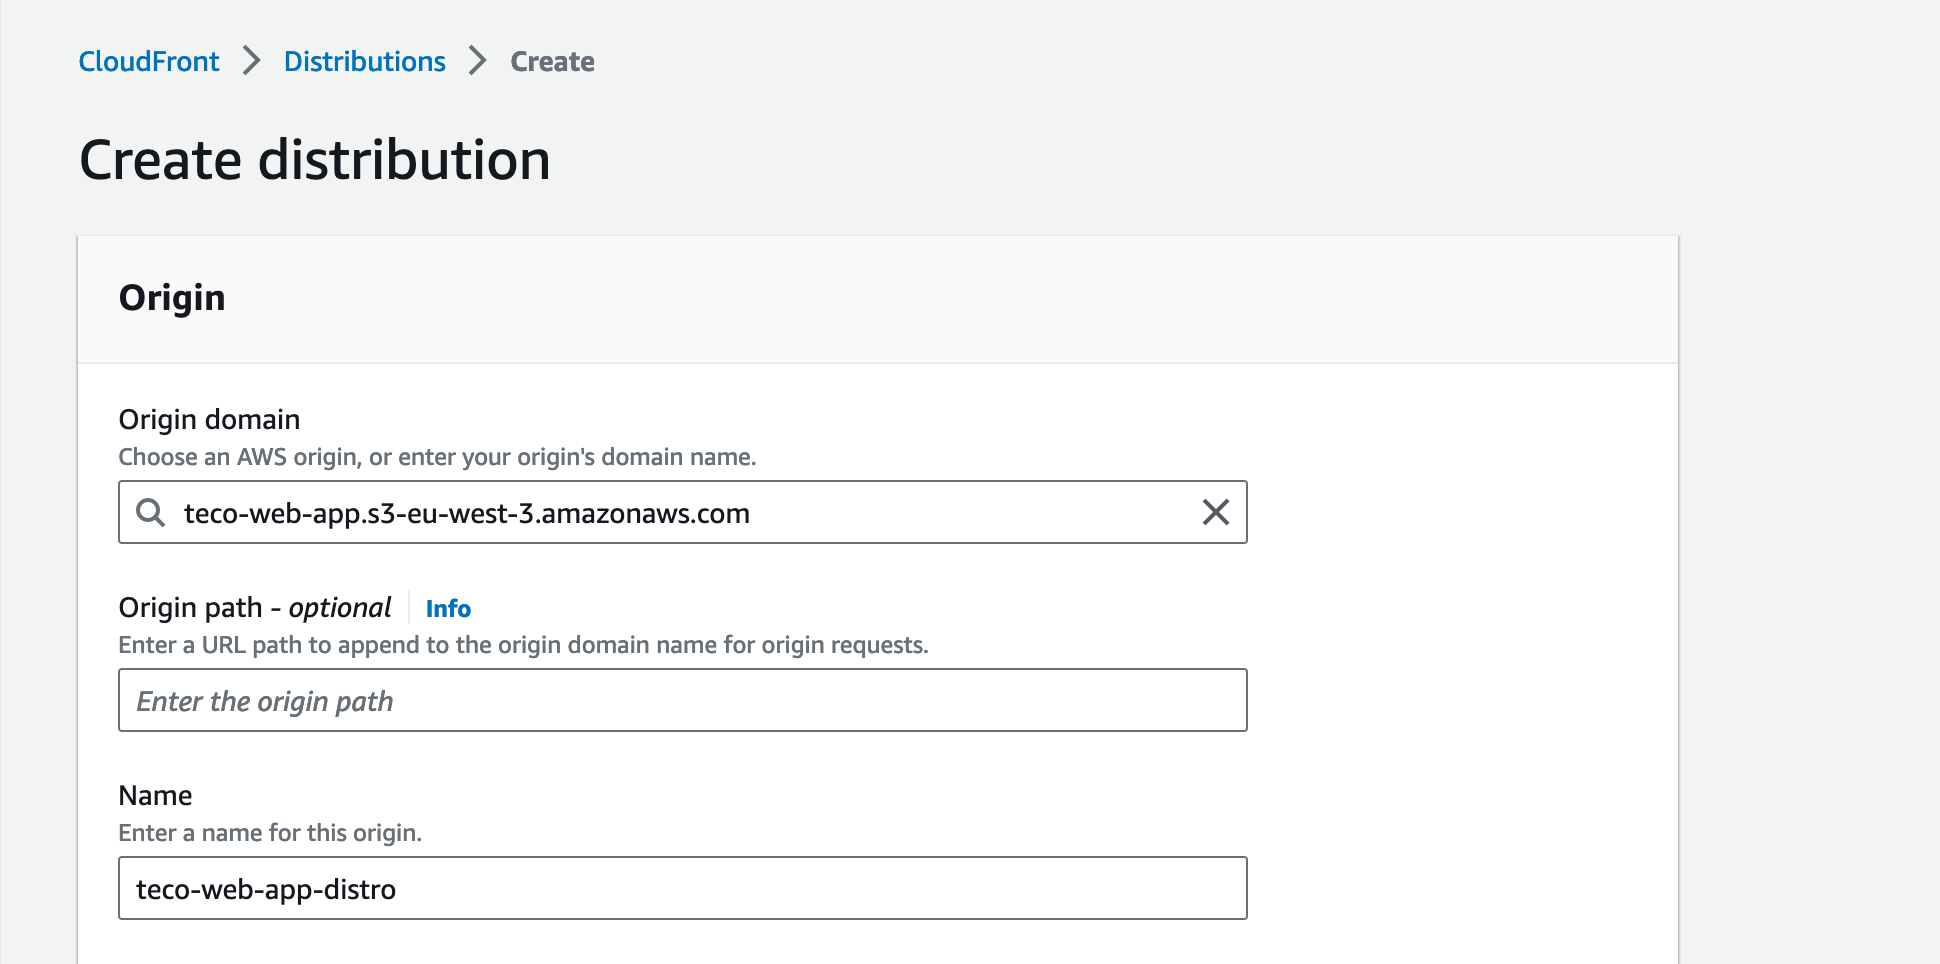
The page displayed shows the form to create the distribution.
In the text input labeled "Origin domain", type the origin domain related to our S3 bucket; it has the following format: <bucket-name>.s3-<aws-bucket-region>.amazonaws.com.
If your bucket name is "teco-web-app" and the bucket region is "eu-west-3", the value of the origin domain is teco-web-app.s3-eu-west-3.amazonaws.com.
Leave an empty value for the text input labeled "Origin path".
Change the origin name; give a name that makes it easier to find among the distributions list. E.g.: teco-web-app-distro
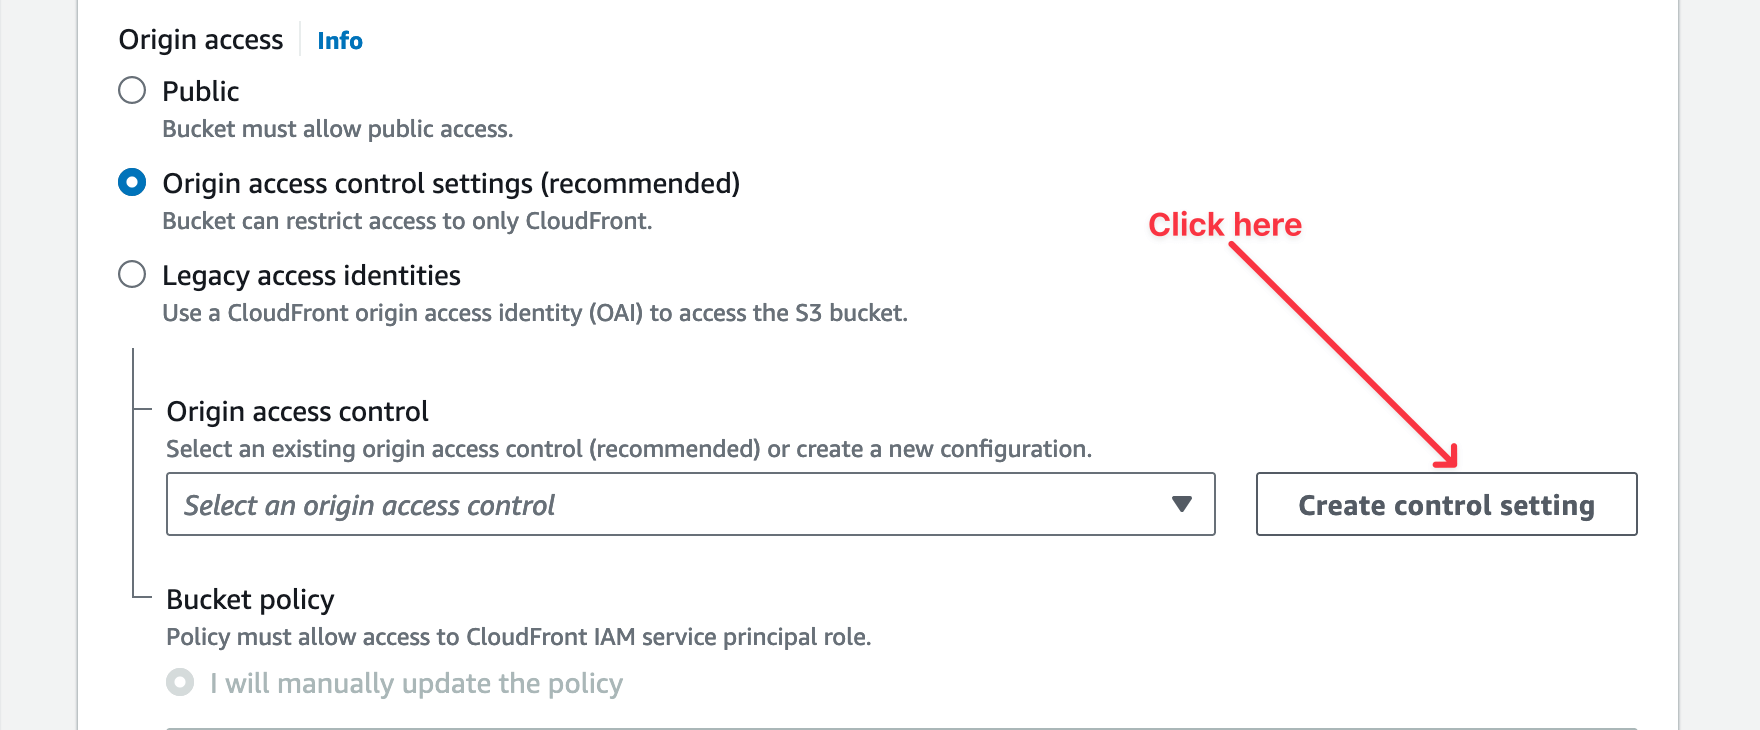
In the "Origin access" section, tick the radio button with the label "Origin access control settings (recommended)" to restrict bucket access to CloudFront only.
A section will appear to select an origin access control; click on the button at the right to create a new one.
A modal will appear with fields having predefined values. You can change the name, add a description, but do not change the value for the Signing behavior.
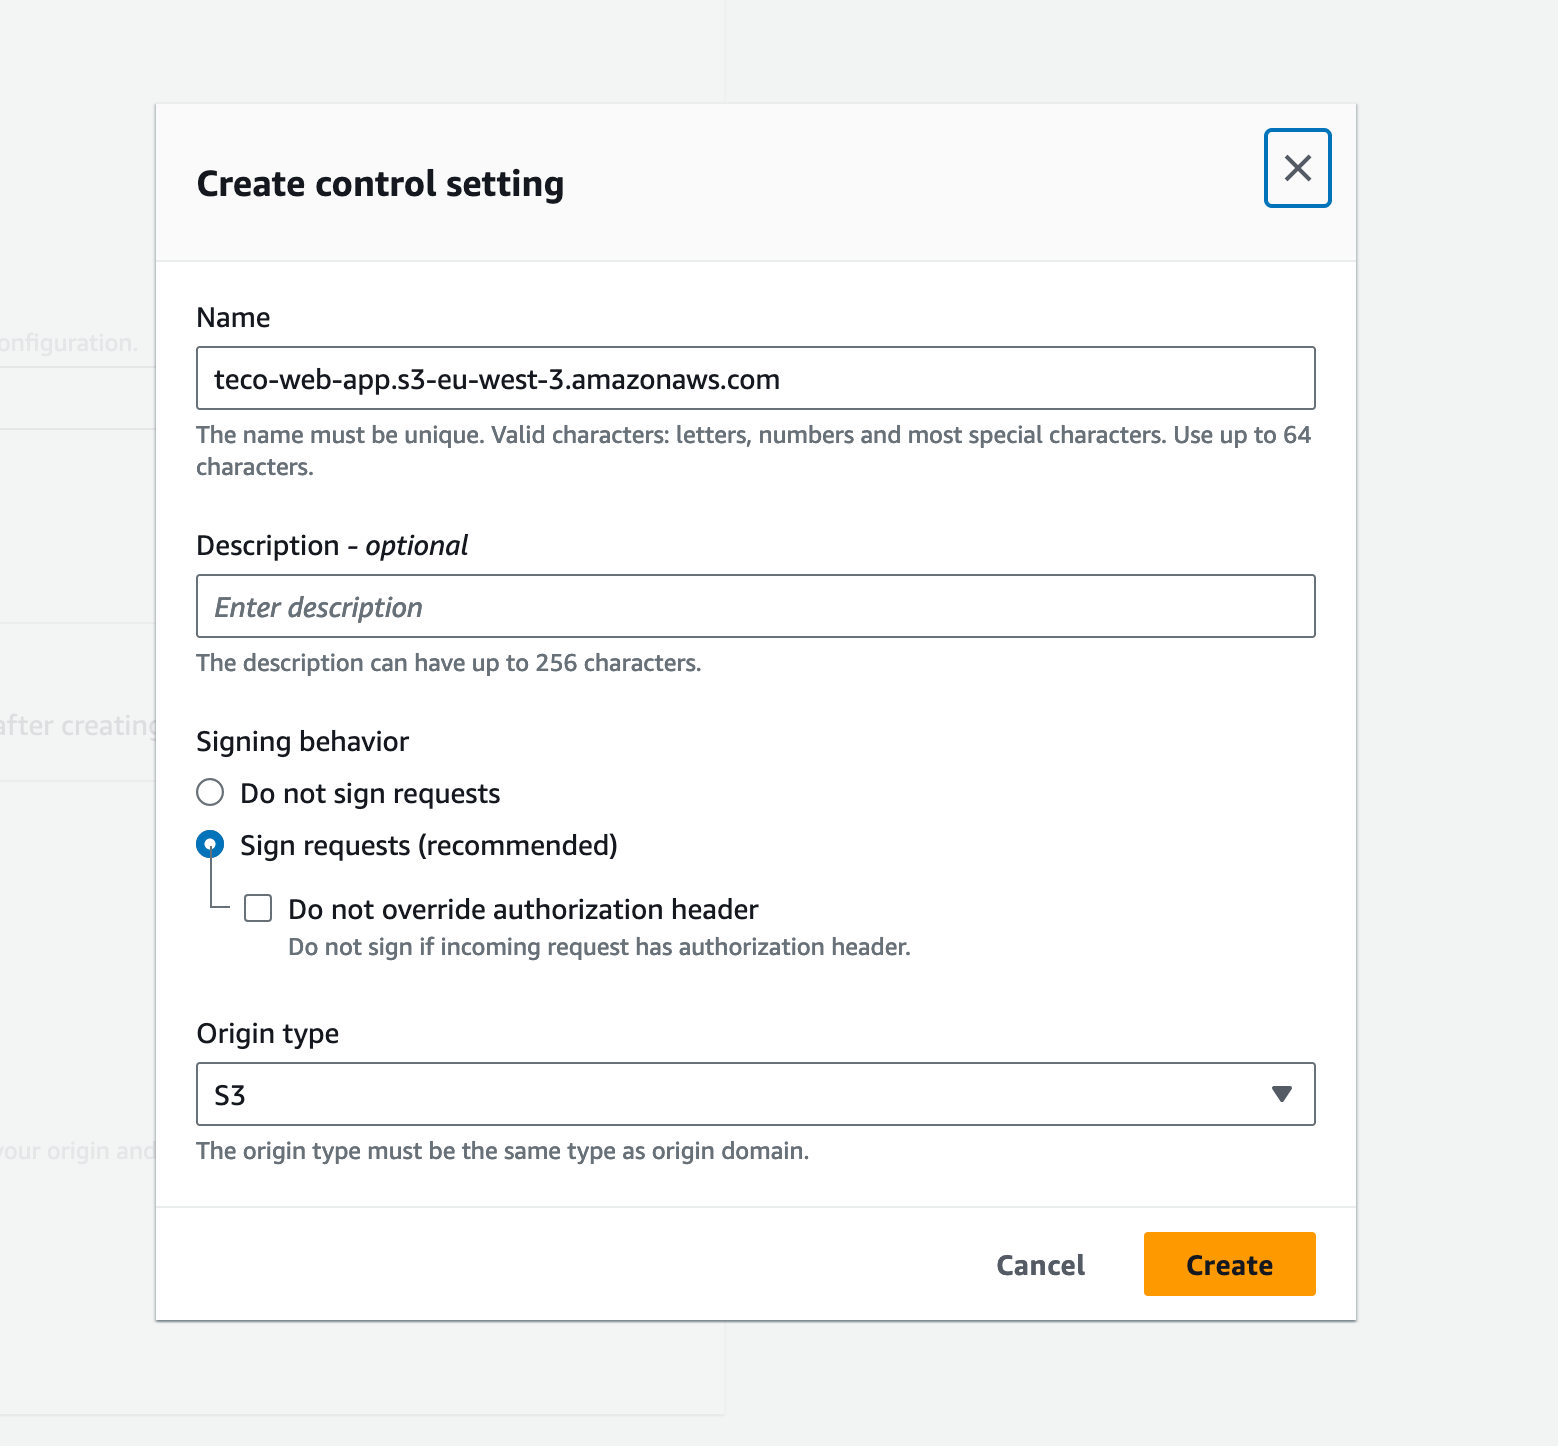
Leave everything as is and click the button to create the access control.
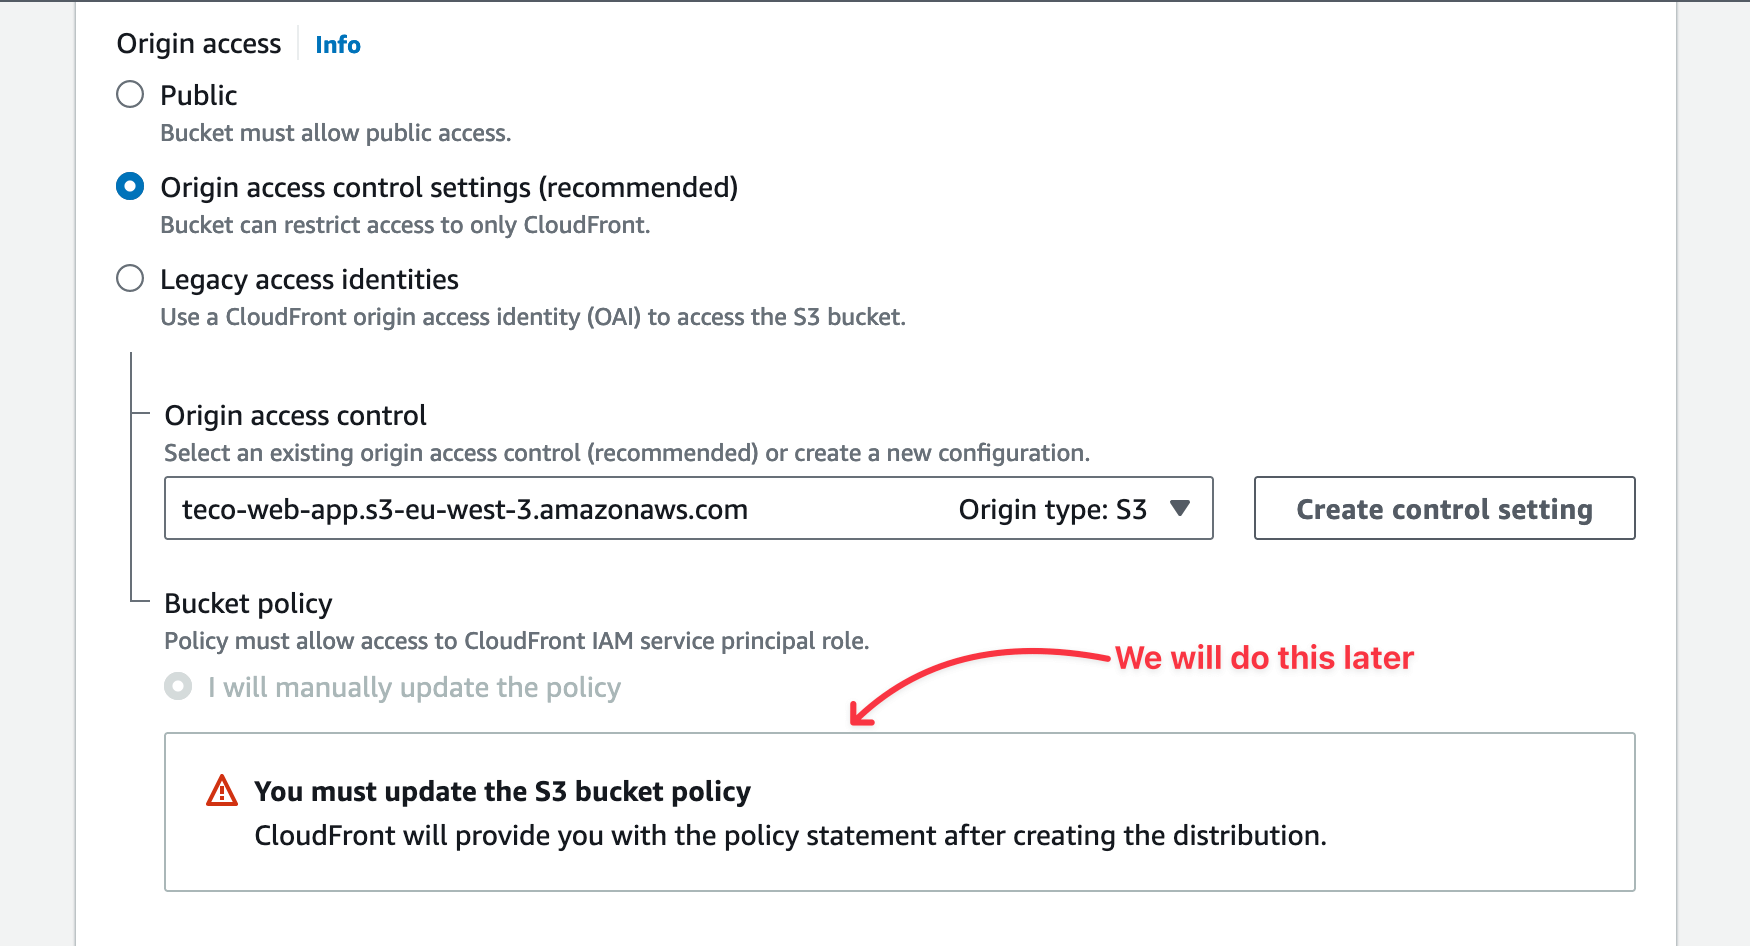
An alert will notify you that we must add a policy to allow CloudFront distribution to access the S3 bucket files; we will do it later.
In the section "Default cache behavior", find the label "Viewer protocol policy" and change the value to "Redirect HTTP to HTTPS".
In the section "Web Application Firewall (WAF)", tick the option "Do not enable security protections".
Leave the rest of the settings and click the "Create Distribution" button.
The distribution is created; copy the ARN and keep it somewhere because we will need it in the next section.
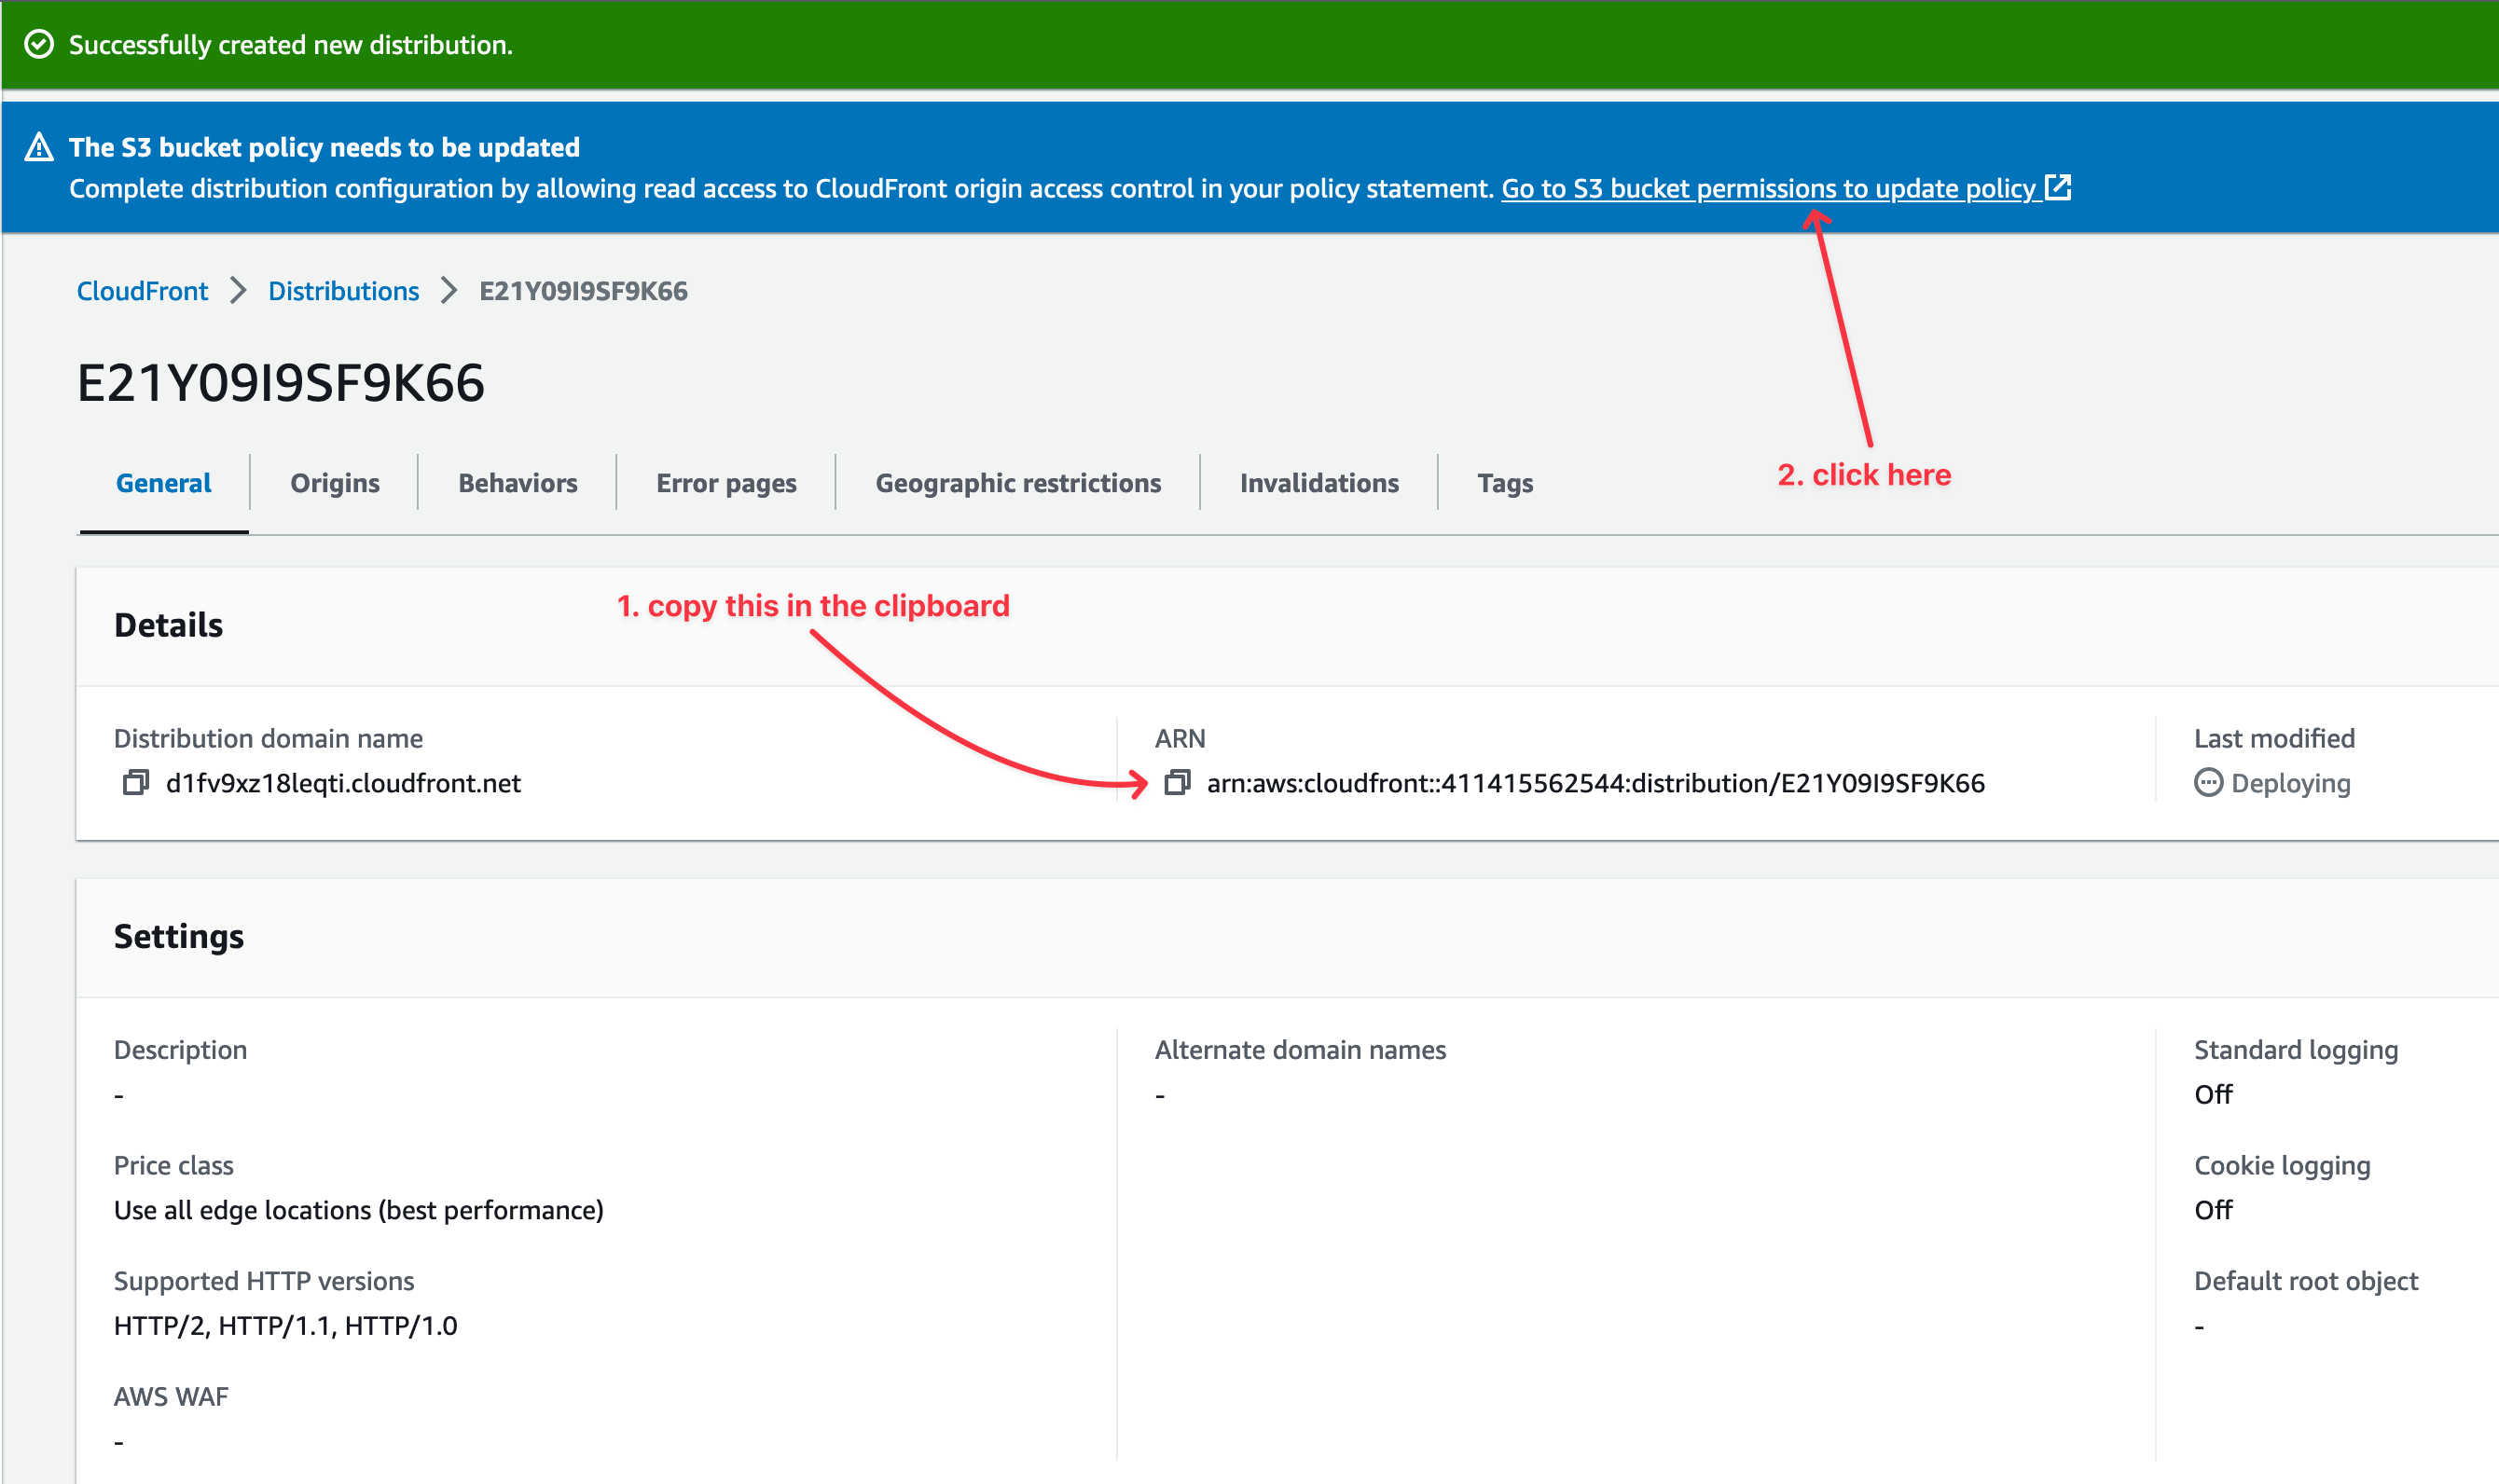
Allow the CloudFront distribution to access the S3 bucket
Go to your bucket and click on the "permissions" tab.
On the page displayed, scroll down to the section "Bucket policy" and click on the edit button. In the Text editor, paste the policy below:
{
    "Version": "2008-10-17",
    "Id": "PolicyForCloudFrontPrivateContent",
    "Statement": [
        {
            "Sid": "AllowCloudFrontServicePrincipal",
            "Effect": "Allow",
            "Principal": {
                "Service": "cloudfront.amazonaws.com"
            },
            "Action": "s3:GetObject",
            "Resource": "arn:aws:s3:::<bucket-name>/*",
            "Condition": {
                "StringEquals": {
                    "AWS:SourceArn": "<distribution-arn>"
                }
            }
        }
    ]
}
Replace the <bucket-name> and the <distribution-arn>, respectively, with the bucket name and CloudFront distribution ARN we created previously.
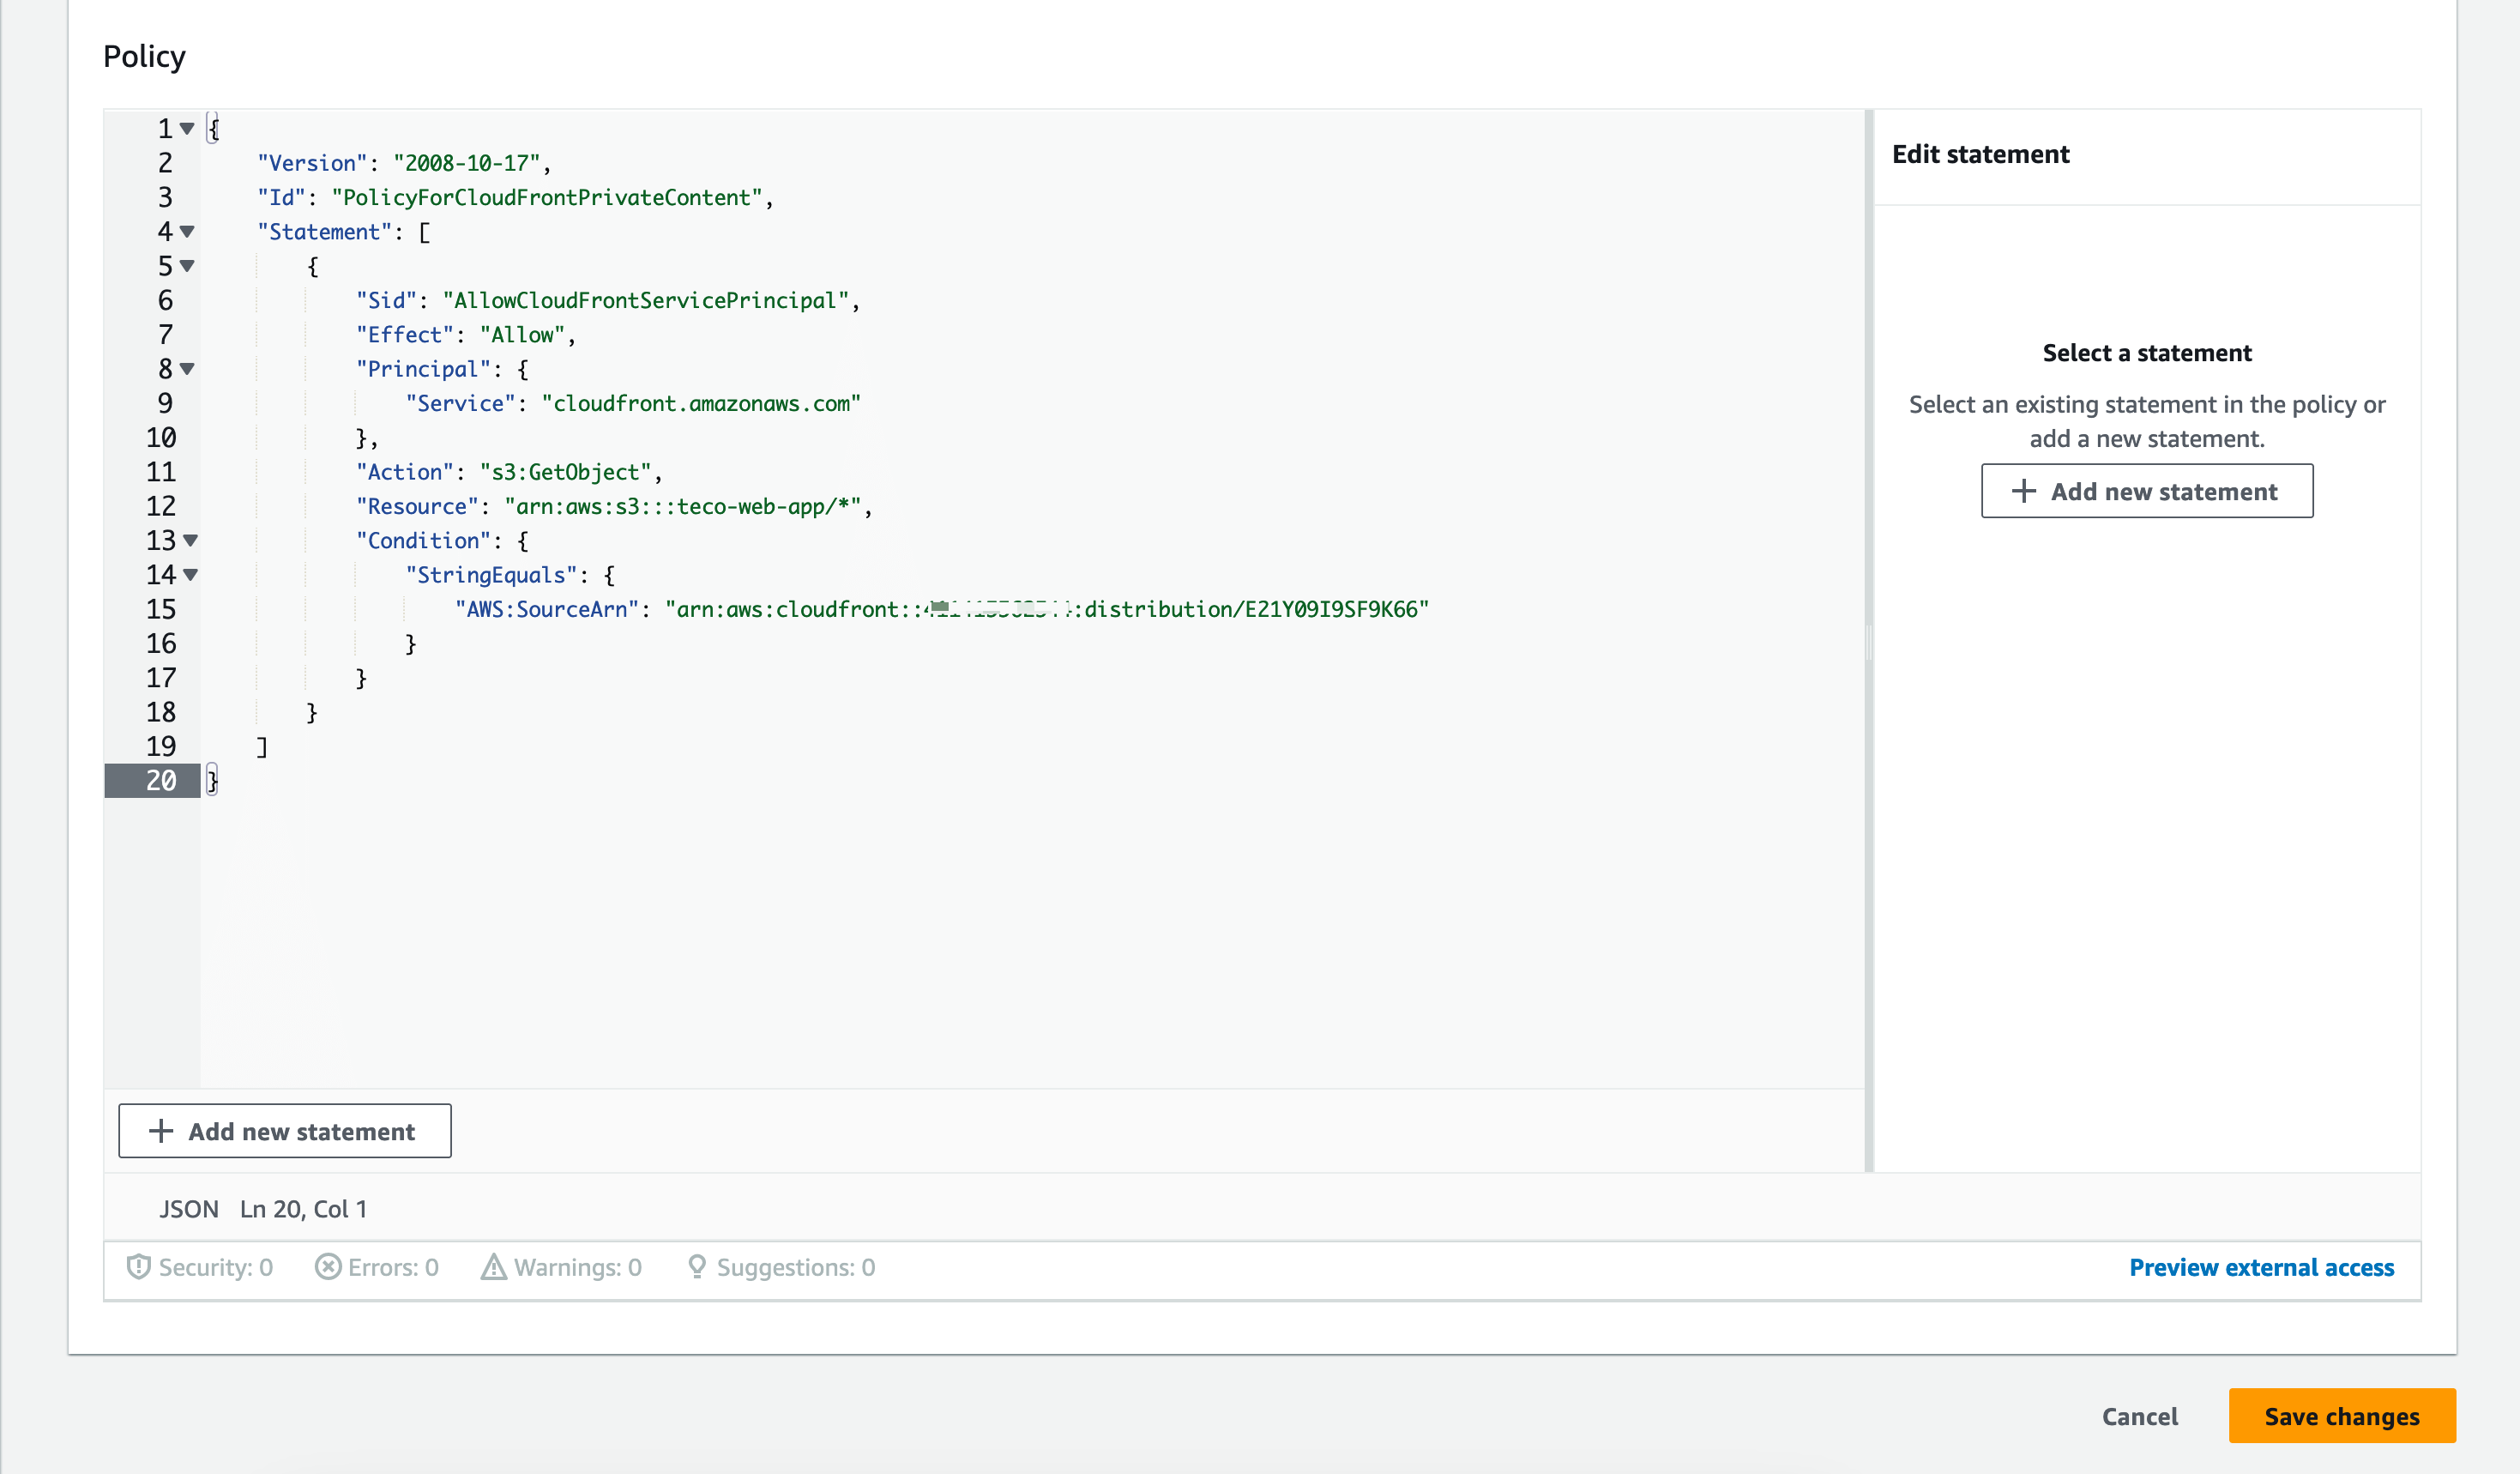
Click the "Save changes" button; the CloudFront distribution can now get files in the S3 bucket.
Set the entry point of the CloudFront Distribution
From the CloudFront distribution, we should define the file in the S3 bucket that must be loaded when we hit the / path of the CloudFront distribution URL.
Go to the CloudFront distribution created; in the "Settings" section, click on the "Edit" button.
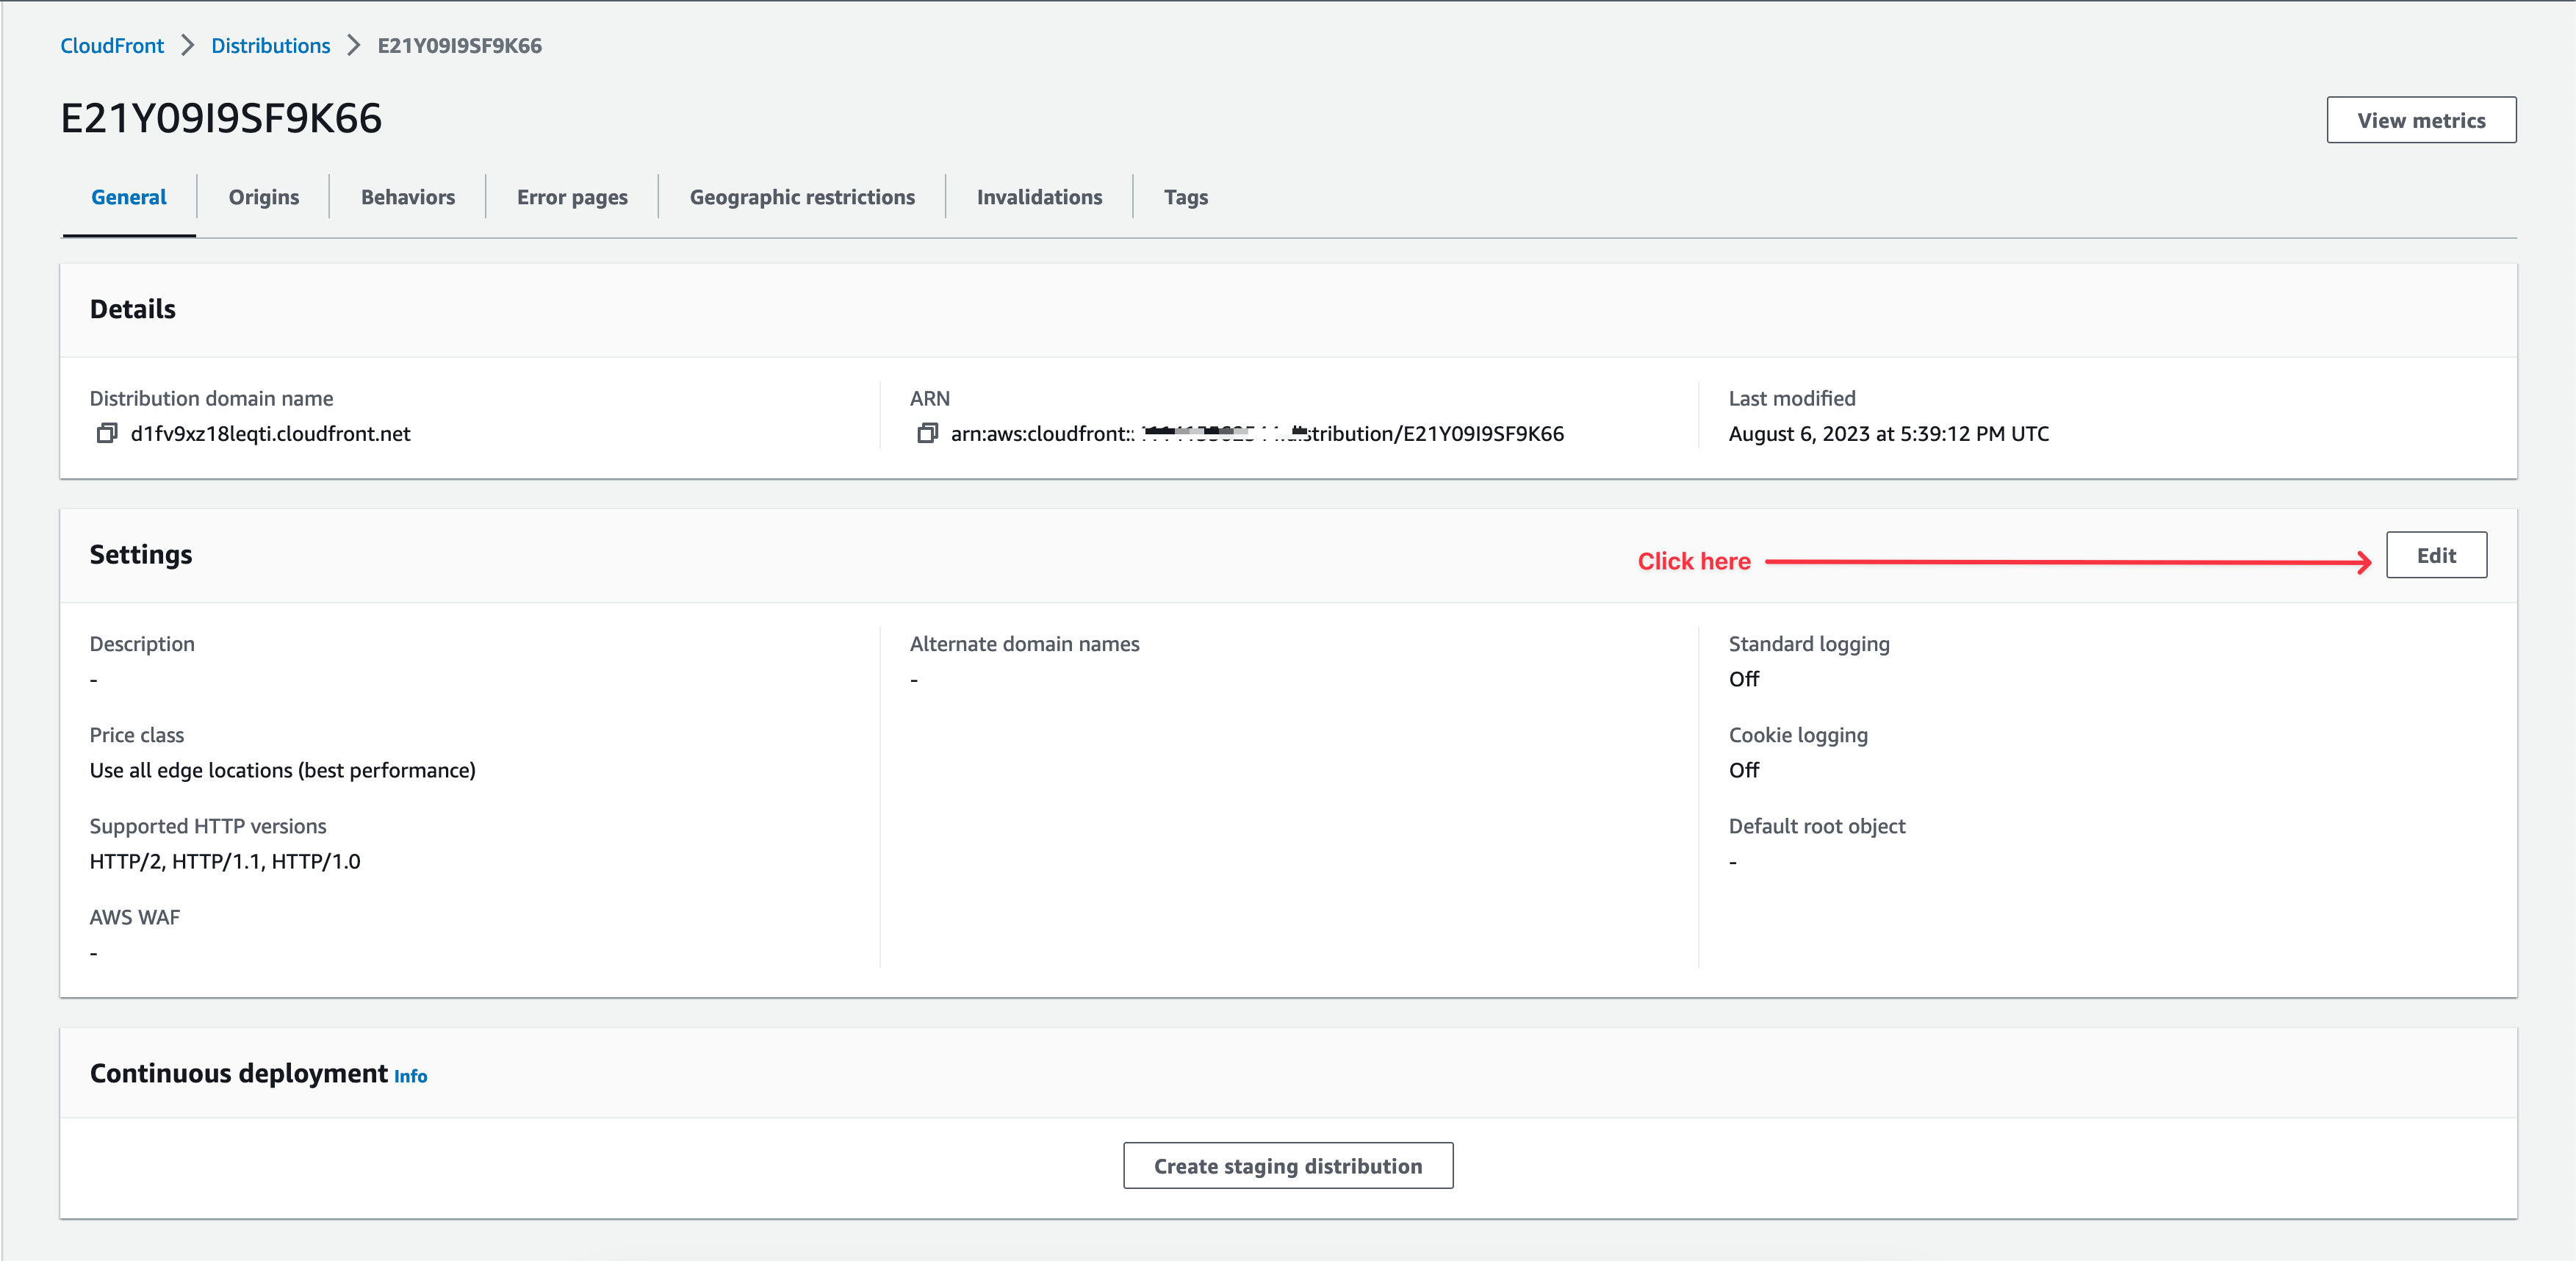
Locate the text input with the label "Default root object" and type the value "index.html".
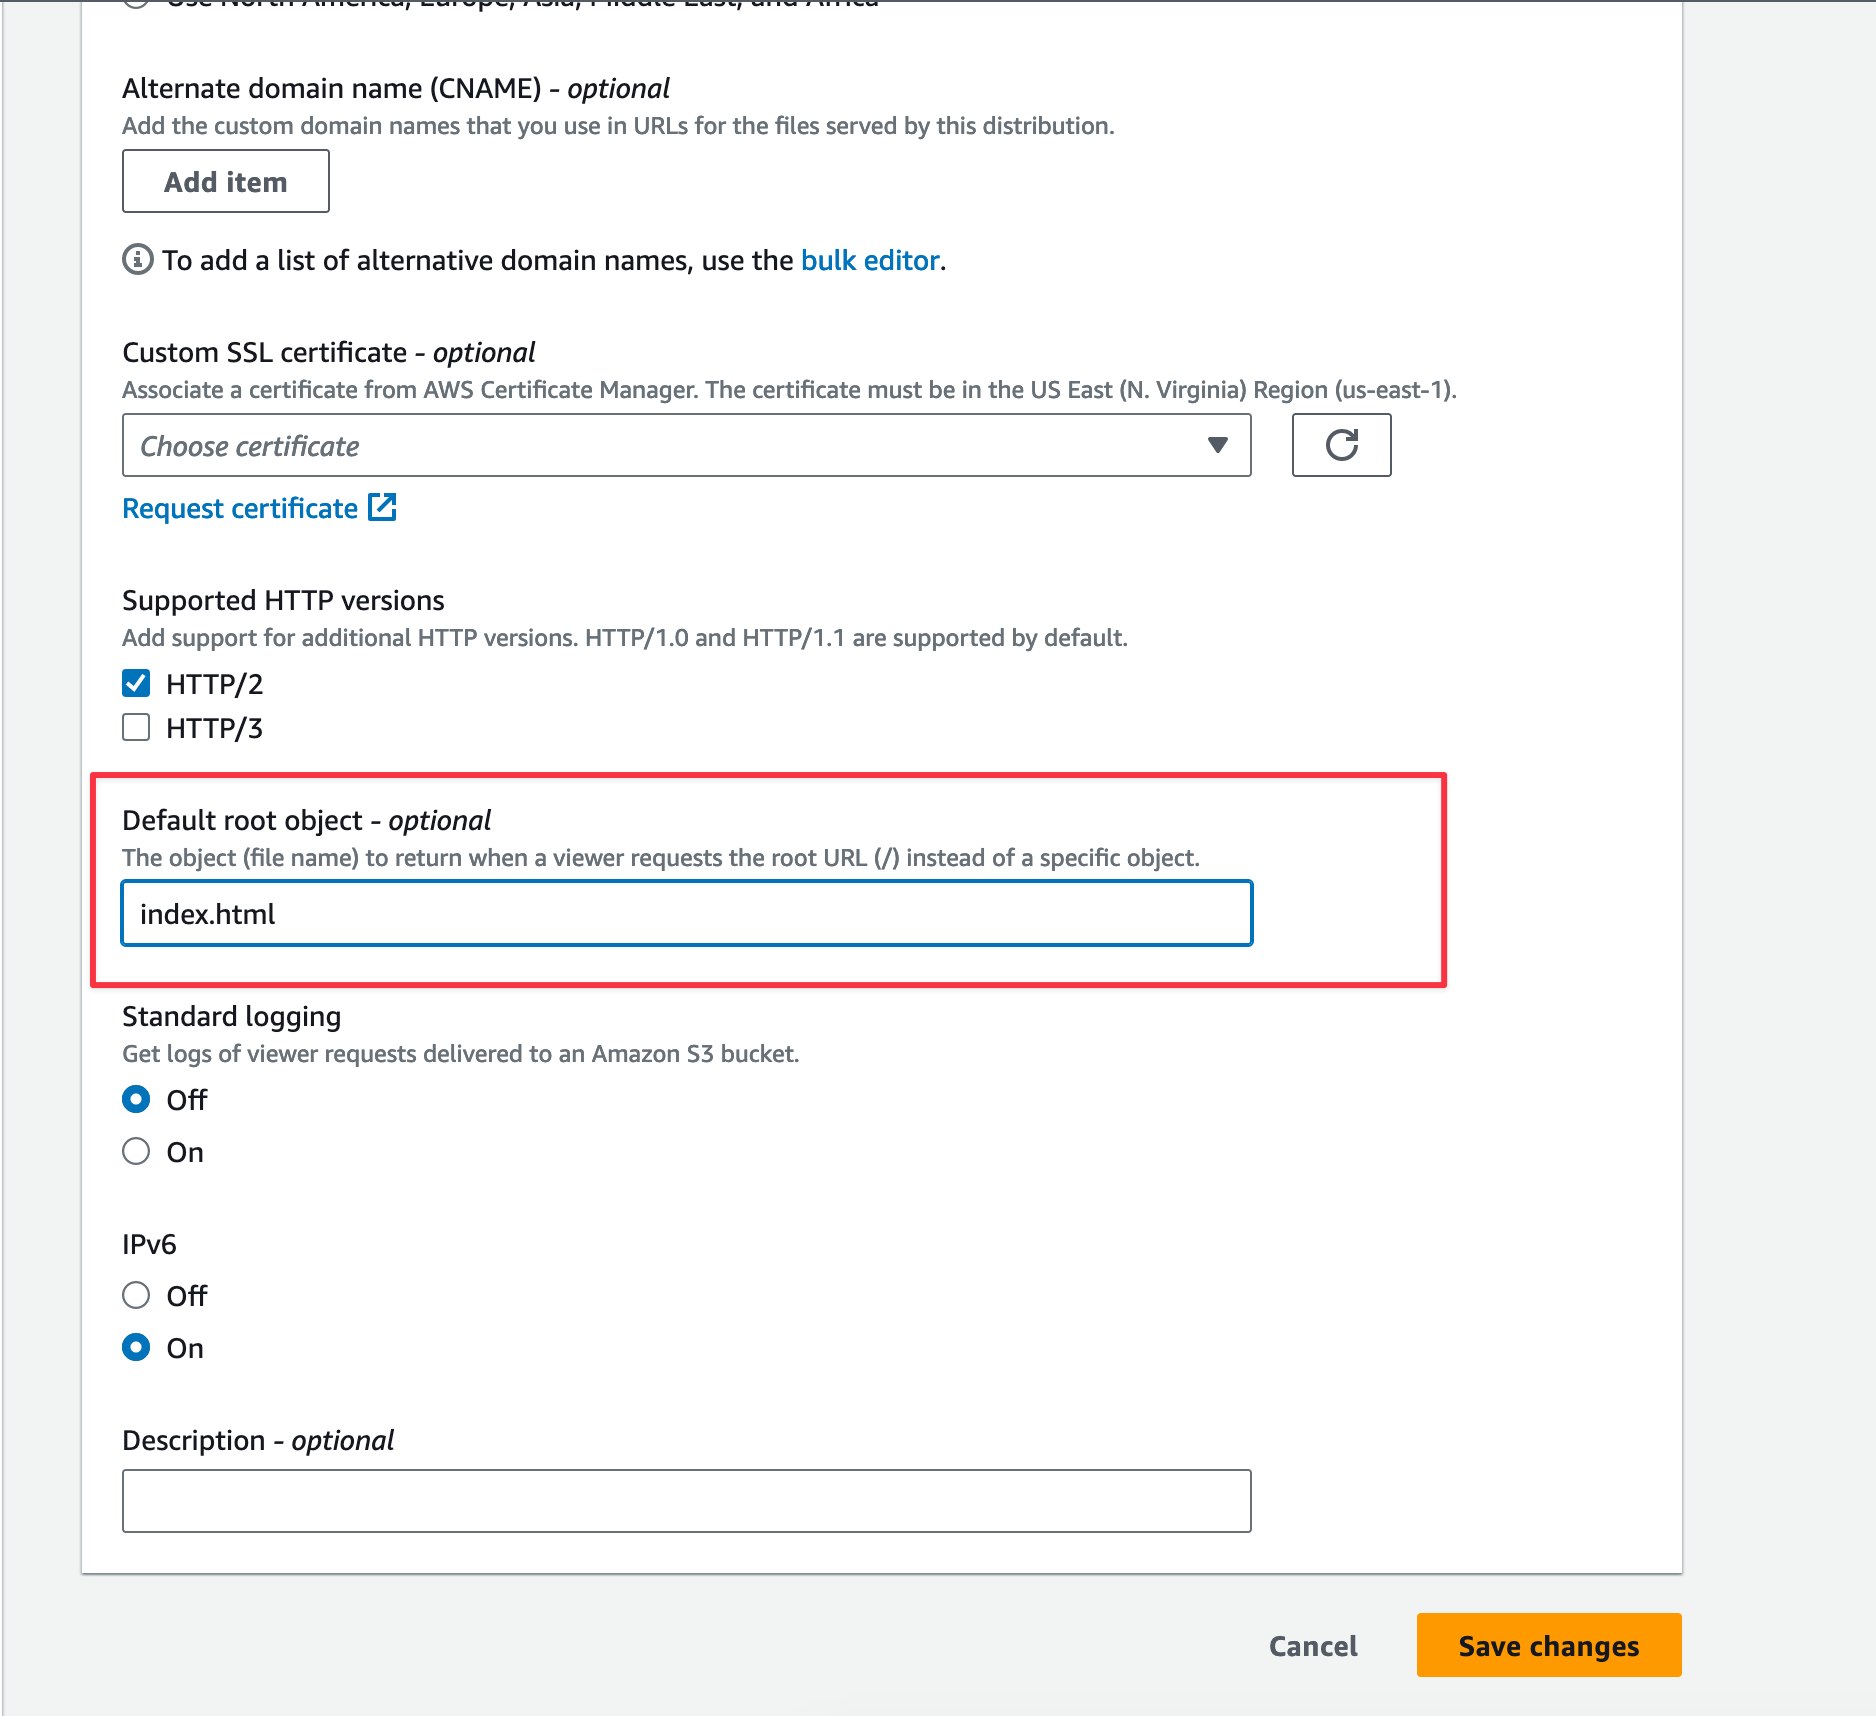
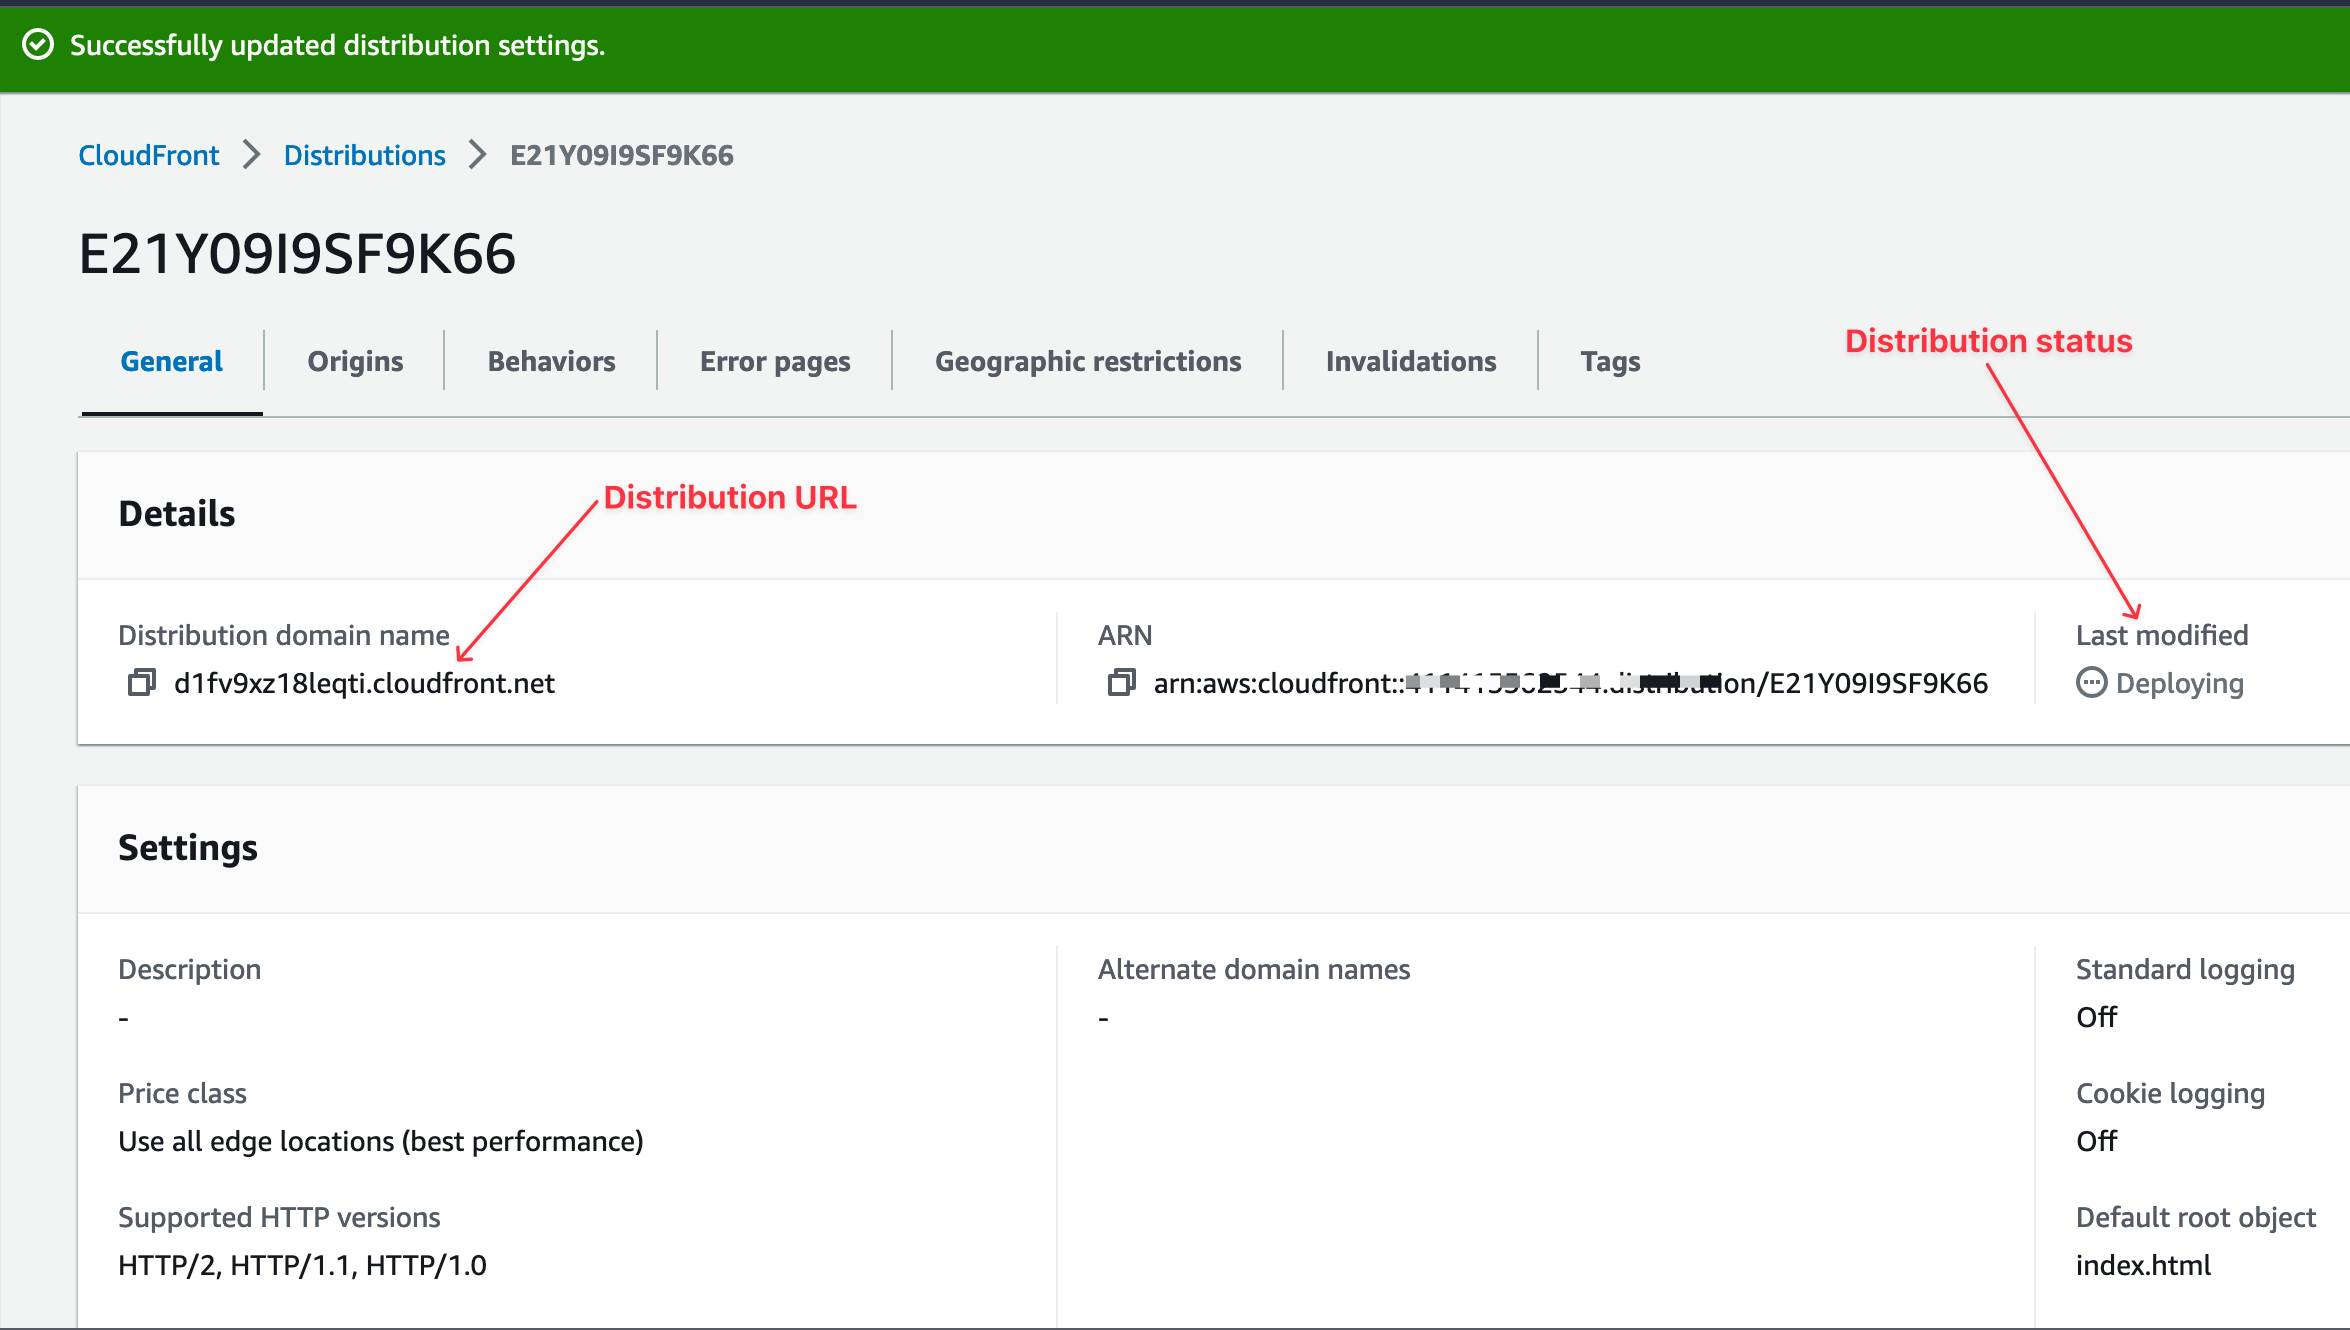
Click the "Save changes" button and wait for the changes to apply. You can verify the progress of the CloudFront changes by looking at the field with the label "Last modified". When the value is "Deploying...", the application of the changes is in progress; when done, the last modification date will be displayed instead.
Test it
Once the CloudFront distribution changes are applied, copy the distribution URL, open a browser tab, paste it, and navigate to it.
Wrap up
Hosting a static website on AWS using S3 and CloudFront is a tedious task that we broke down in this post; here are the main steps to host a static website:
- Create a S3 bucket
- Upload the static files to the S3 bucket
- Enable static website hosting on the S3 bucket
- Create the CloudFront distribution
- Link the CloudFront distribution to the S3 bucket and authorize the former access to S3.
The website is accessible from the CloudFront subdomain, which is not user-friendly. The following tutorial will show how to set the custom domain to CloudFront distribution and generate an SSL certificate.
Are you interested in seeing how to achieve this using the AWS CDK? Check out this post I wrote about using the AWS CDK to host a static website.
Follow me on Twitter or subscribe to my newsletter to avoid missing the upcoming posts and the tips and tricks I occasionally share.