
Schedule background tasks in Node.js with node-cron


Photo by Sonja Langford / Unsplash
Most back-end web applications are built to serve client request synchronously: the client sends a request, the server receives the request, process it, and send the response to the client.
For some use cases, the process can be asynchronous, meaning we don't the back end doesn't need to wait for execution to complete before sending a response to the client. Usually, there is a system to notify the client when the execution is done.
Some applications must execute background tasks periodically at a specific time or date. These kinds of tasks are also called Cron Jobs.
Use cases
The are many cases where you might need to run a Cron job; here are some examples:
- Back up the database every Sunday at 2:00am
- Delete older application logs on the disk every week
- Send an email to users about their pricing plan expiration
- Update the status of an account after a specific month
- etc...
Cron syntax
The two main properties of a cron job are:
- The task to execute
- The time and the frequency at which this task will be executed
To define the time and the frequency of a cron job, we use the following cron expression * * * * * . The illustration below shows the meaning of each *
 ┌────────────── second (0 - 59) (optional)
 │ ┌──────────── minute (0 - 59)
 │ │ ┌────────── hour (0 - 23)
 │ │ │ ┌──────── day of the month (1 - 31)
 │ │ │ │ ┌────── month (1 - 12)
 │ │ │ │ │ ┌──── day of the week (0 - 6) (0 and 7 both represent Sunday)
 │ │ │ │ │ │
 │ │ │ │ │ │
 * * * * * *
Let's say we want to run a task every day at 2:30 pm; the cron expression will be: * 30 2 * * *
To run a task at 10:15 am between Monday and Friday, the cron expression will be: 0 15 10 * * MON-FRI
This website can help you to write and validate your cron expression; it is straightforward and provides great detail about your cron expression.
Set up the project
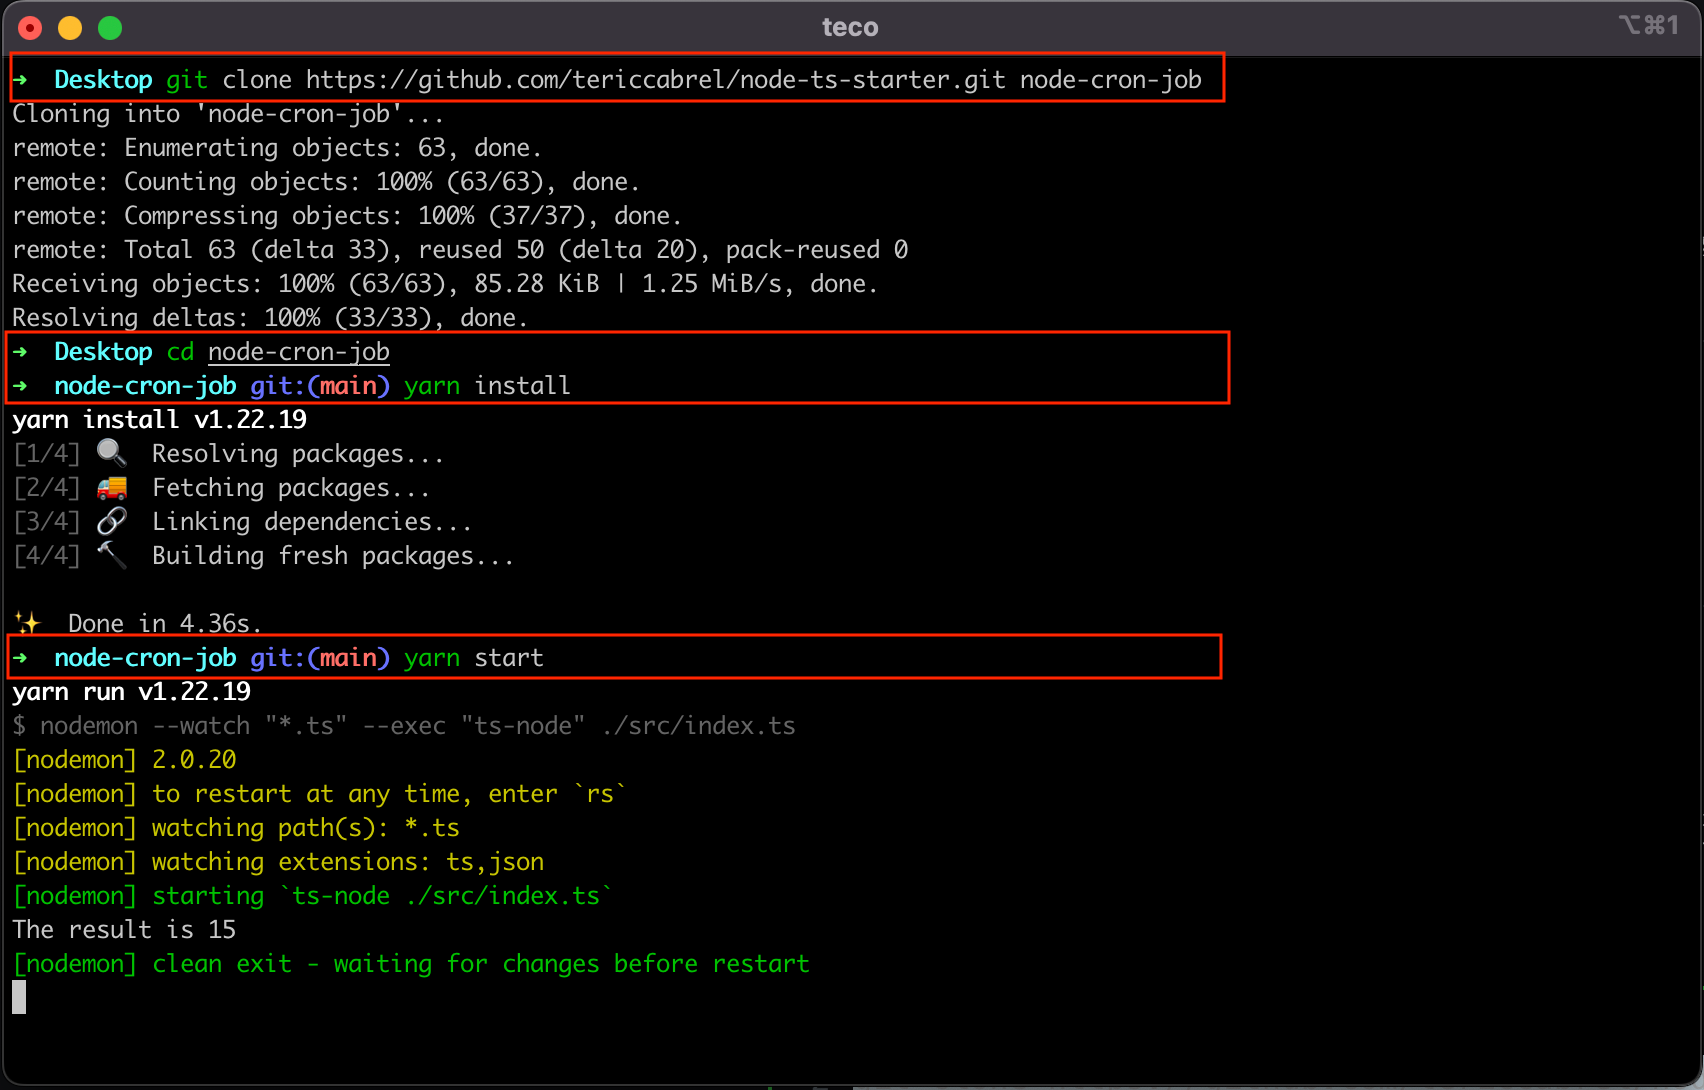
I created a minimal starter project for Node.js and Typescript; I wrote a blog post about it. Let's clone the project from GitHub and run it locally:
git clone https://github.com/tericcabrel/node-ts-starter.git node-cron-job

cd node-cron-job

yarn install

yarn start
We get the following output:
Install node-cron
There are many Node.js packages for creating Cron jobs; we will use node-cron, so let's install it from NPM:
yarn add node-cron
yarn add -D @types/node-cron
We also installed the package @types/cron that provides the TypeScript types definition for node-cron.
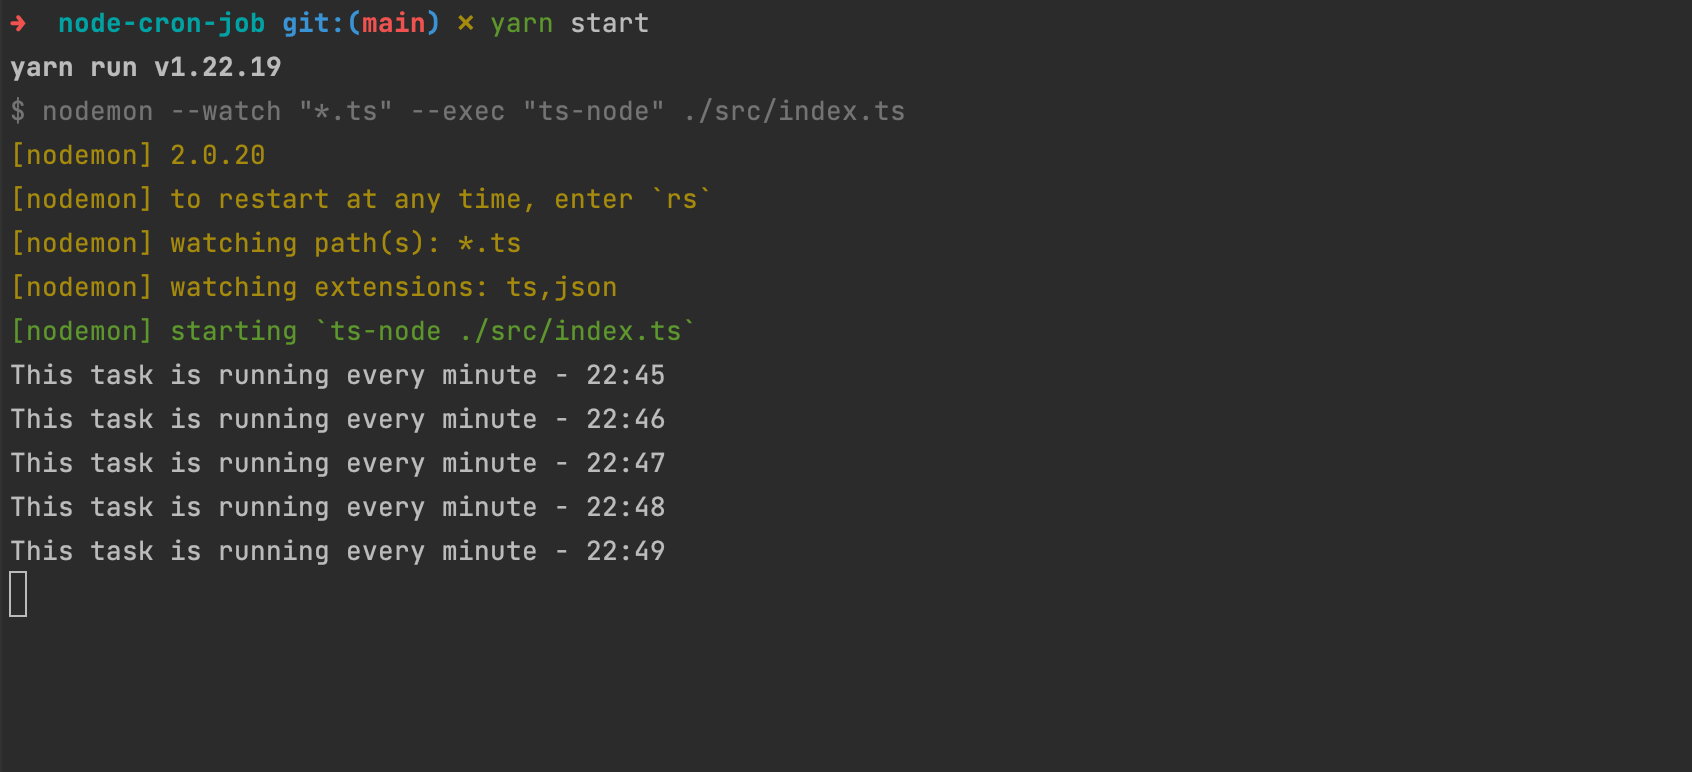
Schedule a simple task
node-cron offers a simple API to schedule a task. To create a task that runs every minute, replace the content of the file scr/index.ts with the code below:
import cron from 'node-cron';

cron.schedule('* * * * *', () => {
  const date = new Date();

  console.log(`This task is running every minute - ${date.getHours()}:${date.getMinutes()}`);
});
We get the following output:
node-cron schedule options
When scheduling a new task, you can provide four options:
- Name: the name of your scheduled task.
- Scheduled: it's a boolean value indicating whether the cron job is running. It's true by default, so the cron job immediately starts when you run your application.
- Timezone: it allows you to specify the timezone for the job scheduling. The possible values can be found on this page.
- recoverMissedExecutions: specifies whether to recover missed executions instead of skipping them.
The cron job for the simple task above with the options look like this:
import cron from 'node-cron';

cron.schedule(
  '* * * * *',
  () => {
    const date = new Date();

    console.log(`This task is running every minute - ${date.getHours()}:${date.getMinutes()}`);
  },
  {
    scheduled: true,
    timezone: 'Europe/Paris',
    name: 'simple-task',
    recoverMissedExecutions: false,
  },
);
Manually schedule tasks
With the option scheduled set to false, the scheduled task is not running, and you must call the function start() to run the task scheduler. This is great if you need to run or pause a scheduled task.
Let's say our application sends an email address usage report every Monday at 7:30am. For some reason, we might want to pause and resume it.
We will create two API routes /start-scheduler and /stop-scheduler respectively for starting and stopping the scheduler.
To quickly generate API routes, we will install Express, which makes it easier to build Node REST API.

Run the command below to add Express and his types definition.
yarn add express
yarn add -D @types/express
Create a file src/scheduler.ts and add the code below:
import cron, { ScheduleOptions } from 'node-cron';

const scheduleOptions: ScheduleOptions = {
  scheduled: false,
  timezone: 'Europe/Paris',
  name: 'simple-task',
  recoverMissedExecutions: true,
};

const scheduleAction = async () => {
  const currentDate = new Date();

  console.log(`Build and send the weekly report - ${currentDate.getHours()}:${currentDate.getMinutes()}`);

  // Build and send the weekly report
};

const weeklyReportScheduler = cron.schedule('30 7 * * MON', scheduleAction, scheduleOptions);

export { weeklyReportScheduler };
Now replace the content of the file src/index.ts with code below:
import express from 'express';
import { weeklyReportScheduler } from './scheduler';

const PORT = 4500;

const app = express();

app.use(express.urlencoded({ extended: true }));
app.use(express.json());

app.post('/start-scheduler', async (req, res) => {
  await weeklyReportScheduler.start();

  return res.json({ message: 'OK' });
});

app.post('/stop-scheduler', async (req, res) => {
  await weeklyReportScheduler.stop();

  return res.json({ message: 'OK' });
});

app.listen(PORT, () => {
  console.log(`Application started on URL http://localhost:${PORT} 🎉`);
});
Run the command yarn start and open an HTTP client like Postman to send POST requests to start and stop the scheduler.
Now you can manually control your task scheduler.
Wrap up
node-cron provides a simple API to create scheduled background tasks from your Node.js application.
You can find the code source on the GitHub repository.
Follow me on Twitter or subscribe to my newsletter to avoid missing the upcoming posts and the tips and tricks I occasionally share.