
Spring Boot 3 and Docker compose integration


Storing data the right way is one of the crucial parts of a web application. When building a Spring Boot application connected to a database, having a working database locally is not easy.
With Docker, starting a Docker container from the database image you want is simple, but this might still not be the best experience because you have to remember to start the Docker image and ensure it is up and running; let's not talk about remembering where the Docker volume is located.
Starting version 3.1 of Spring Boot, integration with Docker Compose is available to quickly set up your database and manage it from Spring Boot. This tutorial will show you how to configure the integration with Docker Compose for a MySQL database.
Prerequisites
To follow this tutorial, make sure you have the following tools installed on your computer.
- JDK 11 or higher - Download link
- Maven 3.8 or higher - Download link
- Docker and Docker Compose - Installation guide
- Experience working with Docker Compose
Set up the project
We will start from the final project of the previous tutorial since it is the continuity. The project is in the blog repository GitHub.
We will do a sparse checkout to only clone the project folder we want in the Git repository.
Run the commands below to configure the project locally and launch it:
git clone --no-checkout https://github.com/tericcabrel/blog-tutorials.git

cd blog-tutorials

git sparse-checkout init --cone

git sparse-checkout set springboot-jwt-auth

git checkout @

mv springboot-jwt-auth springboot-docker-compose

cd springboot-docker-compose

mvn install -DskipTests

mvn spring-boot:run
The application will fail at the startup because the database is not available.
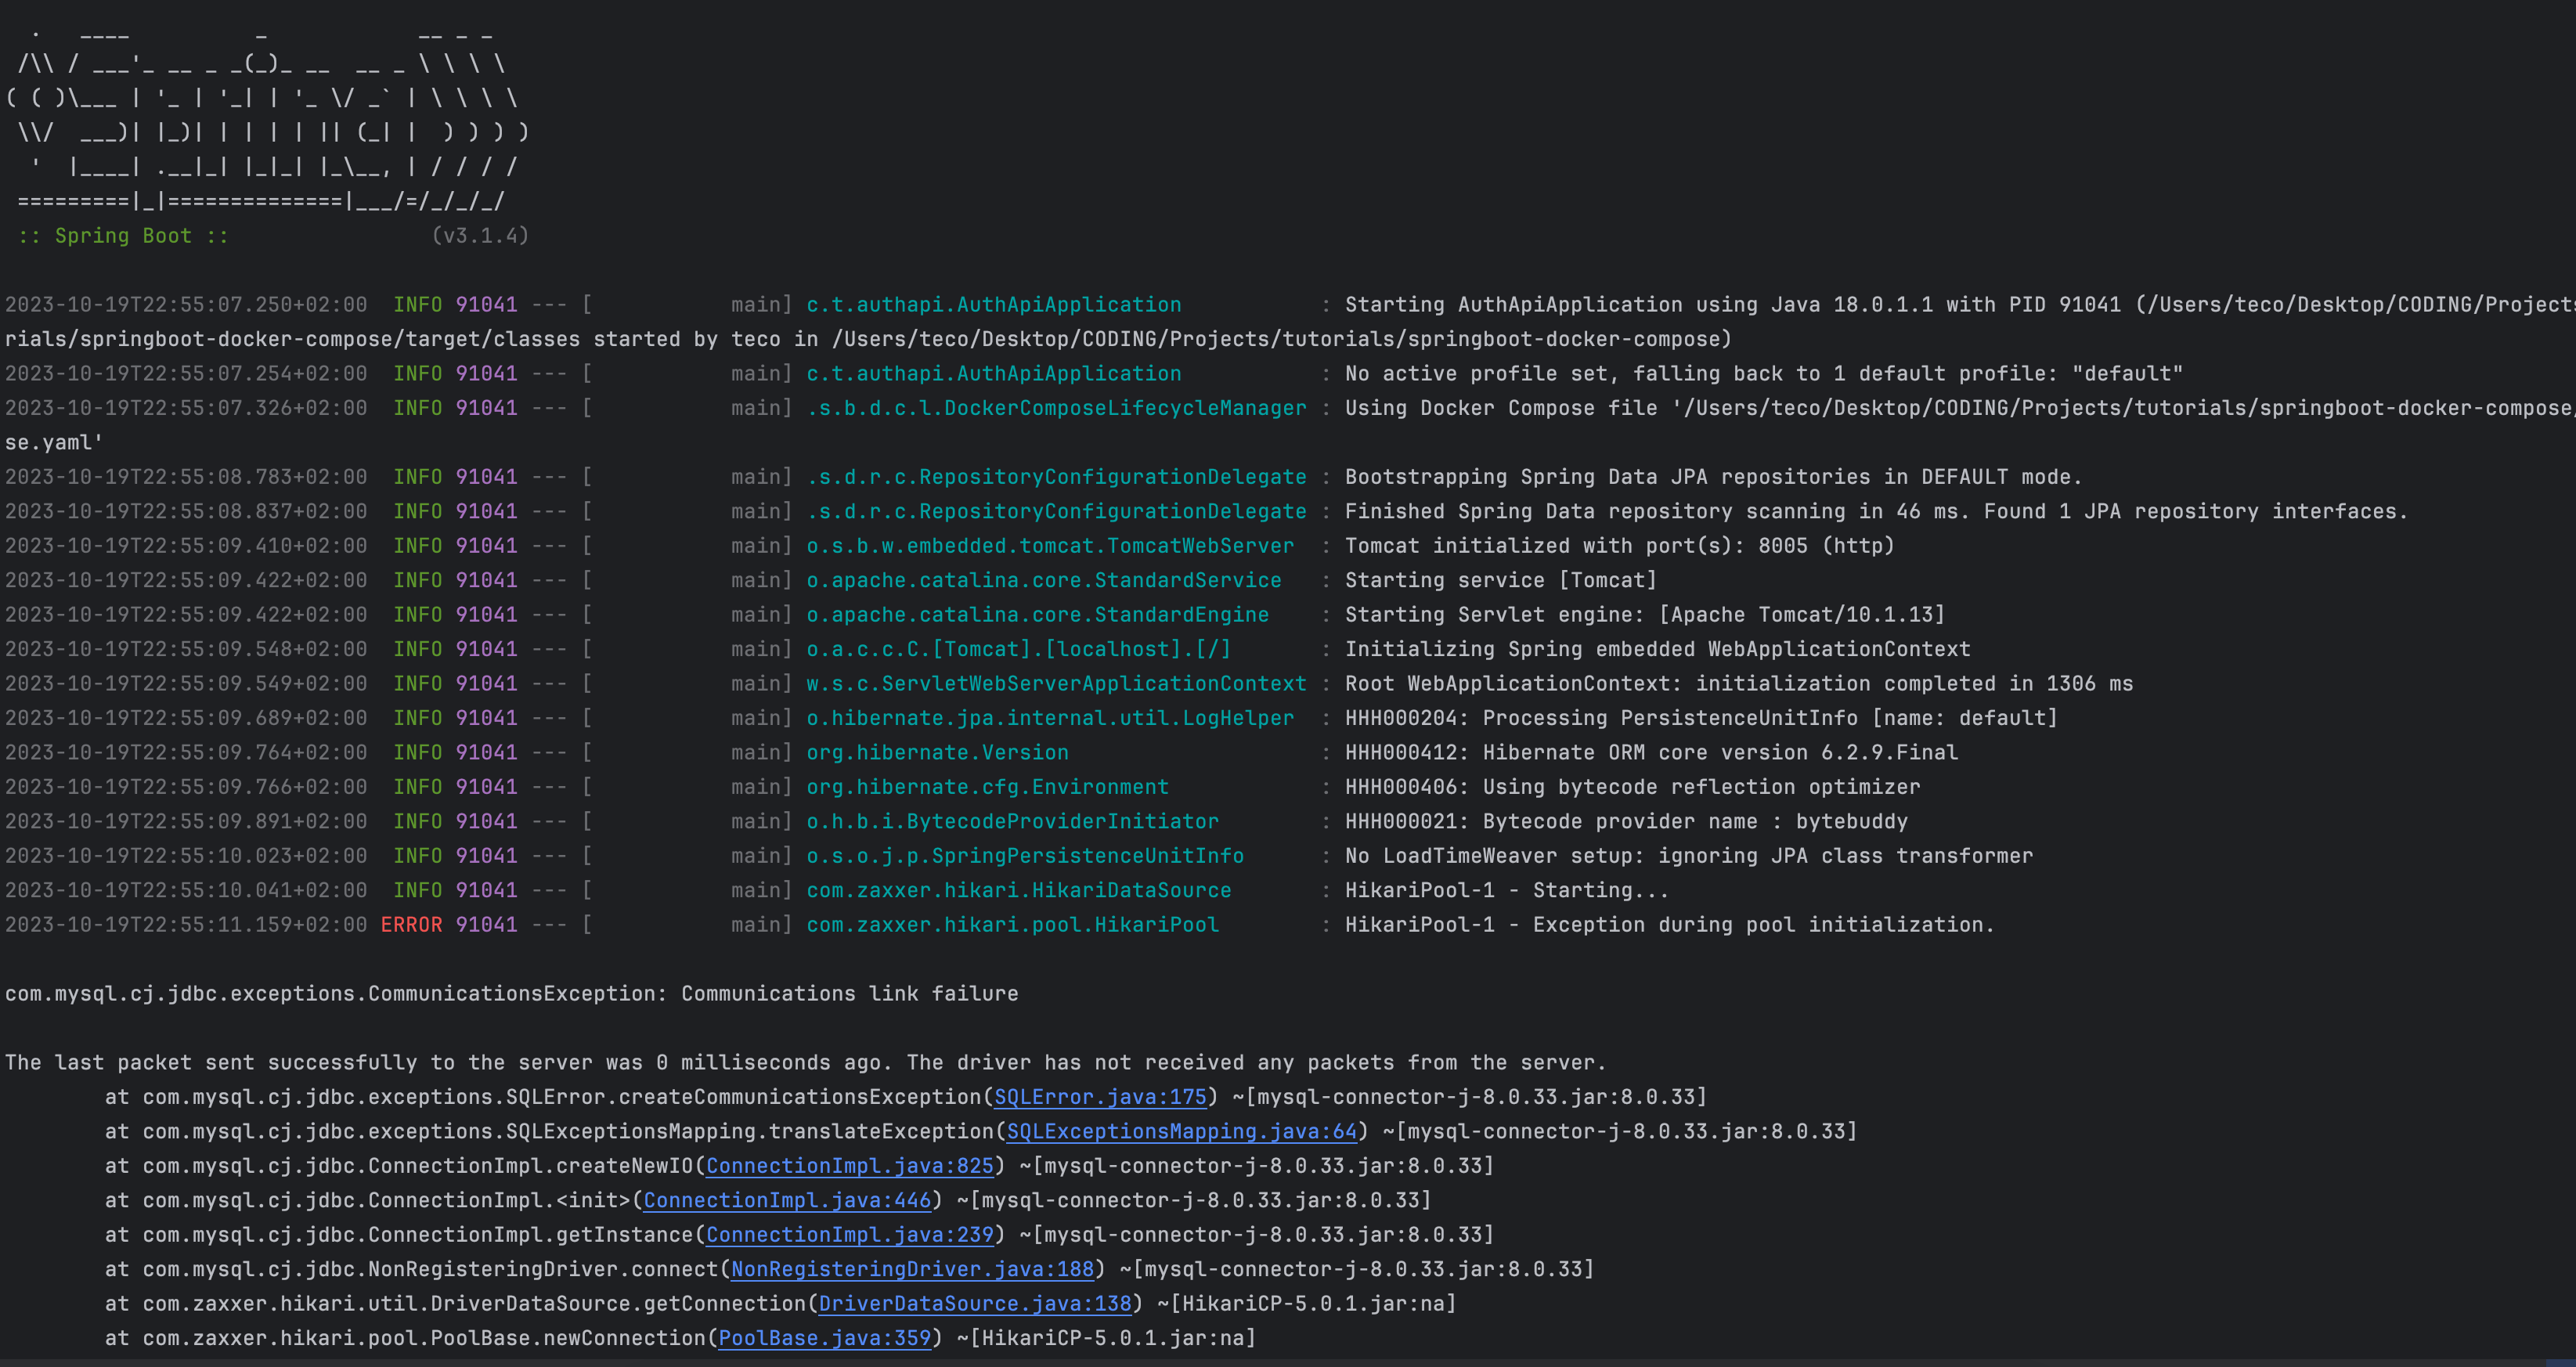
Indeed, if you look at the application configuration file src/main/resources/application.properties, we can see the following database connection settings:
spring.datasource.url=jdbc:mysql://localhost:3307/taskdb?serverTimezone=UTC&allowPublicKeyRetrieval=true&useSSL=false
spring.datasource.username=root
spring.datasource.password=secret
| Database Host | localhost |
| Database Port | 3307 |
| Database User | root |
| Database Password | secret |
Let's see how to set this up using the Spring Boot integration for Docker Compose.
Configure the Docker compose file
At the project root directory, create a file compose.yaml and add the code below:
services:
  mysql:
    container_name: mysql
    image: mysql:8.0
    restart: unless-stopped
    volumes:
      - "./db-data:/var/lib/mysql"
    ports:
      - 3307:3306
    environment:
      - MYSQL_ROOT_PASSWORD=secret
      - MYSQL_DATABASE=taskdb
This file declares a new service named mysql from the MySQL Docker image and maps the container's port on port 3307 of the host. Finally, we set the MySQL password for the root user and give a database's name.
Install the Maven dependency
Let's install the Maven dependency, allowing Spring Boot to integrate with Docker Compose. Open the pom.xml and append the code below in the dependencies property.
<dependencies>
    <!-- Existing Maven package -->
    <dependency>
        <groupId>org.springframework.boot</groupId>
        <artifactId>spring-boot-docker-compose</artifactId>
        <optional>true</optional>
    </dependency>
</dependencies>
Run the command below to resolve the dependency added:
mvn install -DskipTests
Run the Spring Boot application with Docker compose
The great thing about this integration is that it works out of the box; no configuration is required. When you start the application, Spring Boot will find any YAML file having the word "compose" in the file name.
Let's start the application and see the Docker compose integration in action:
mvn spring-boot:run
We get the following output:
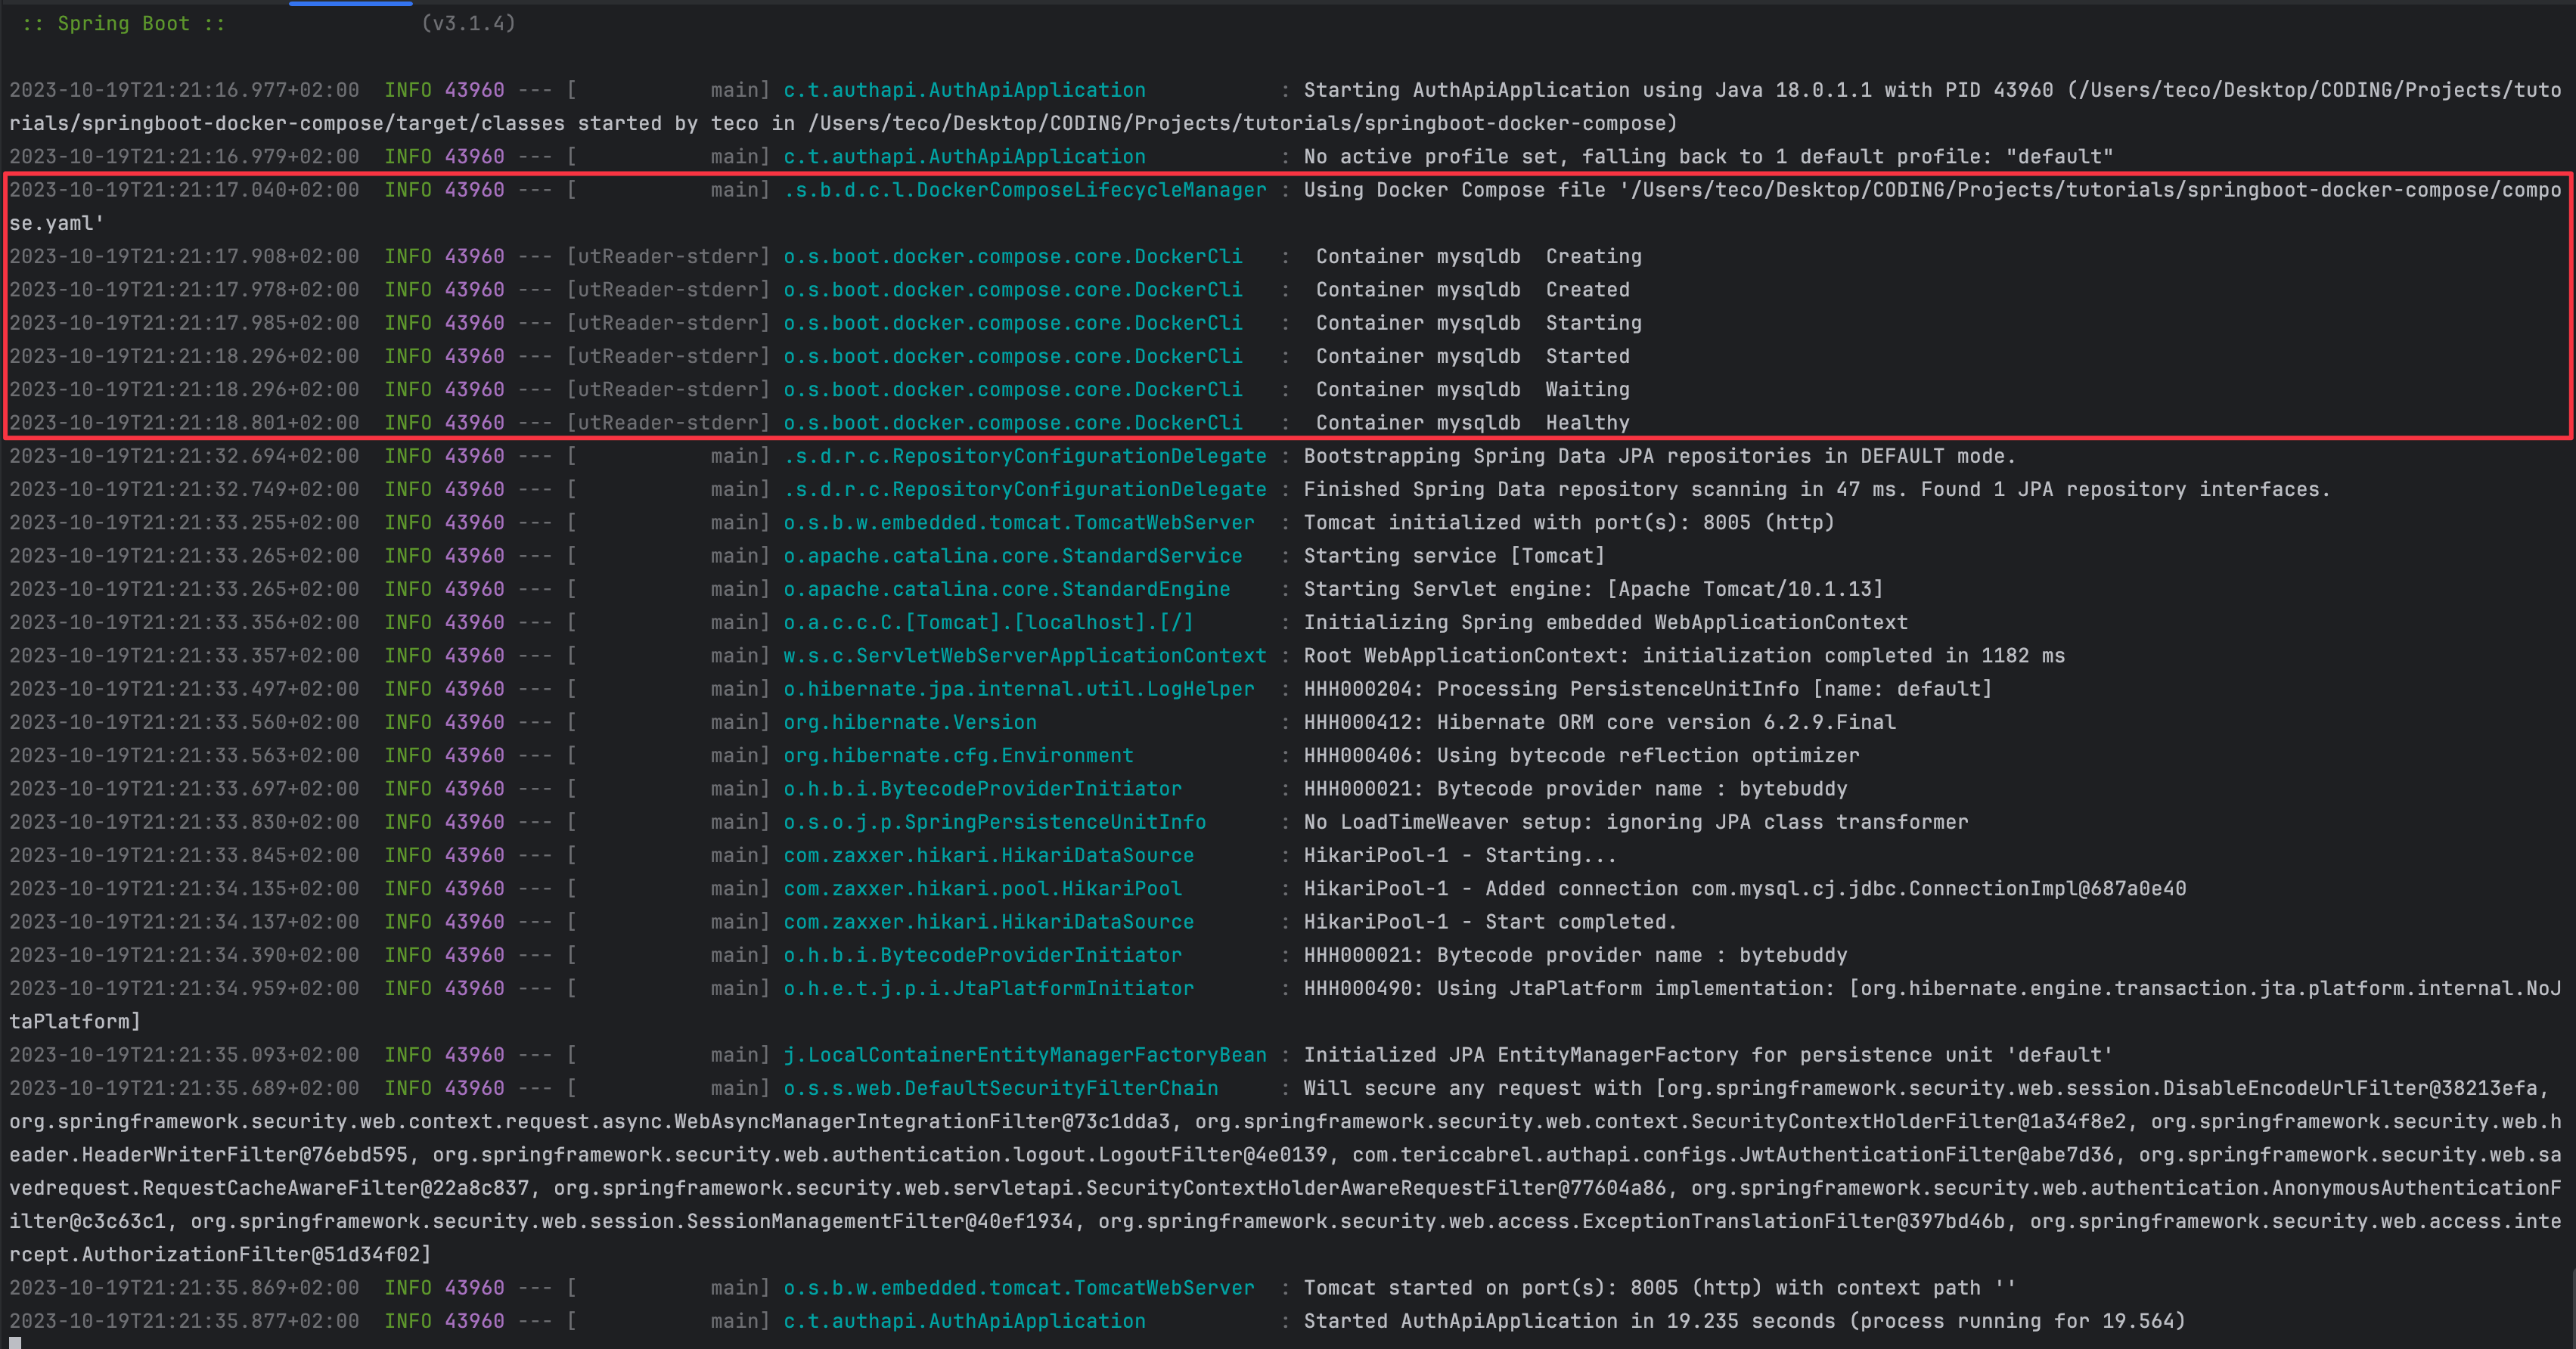
In the above picture, you can see Spring Boot locate the Docker compose configuration file, start the Docker container, and log the update about the container lifecycle. Once the container is ready, the application can now start.
The application startup time is almost 20 seconds, which is concerning, but let's see how we can reduce it.
Controlling the Docker Compose lifecycle
If you stop the application, you will realize the Docker container of the database is not running anymore; this is because Spring Boot also destroys it.
The typical behavior when working locally will be to not stop the Docker container, which can be done by setting the value of the property spring.docker.compose.lifecycle-management to start-only. The other possible values are: "none" and "start-and-stop" which is the default.
Update the application.properties file to add the line below:
spring.docker.compose.lifecycle-management=start-only
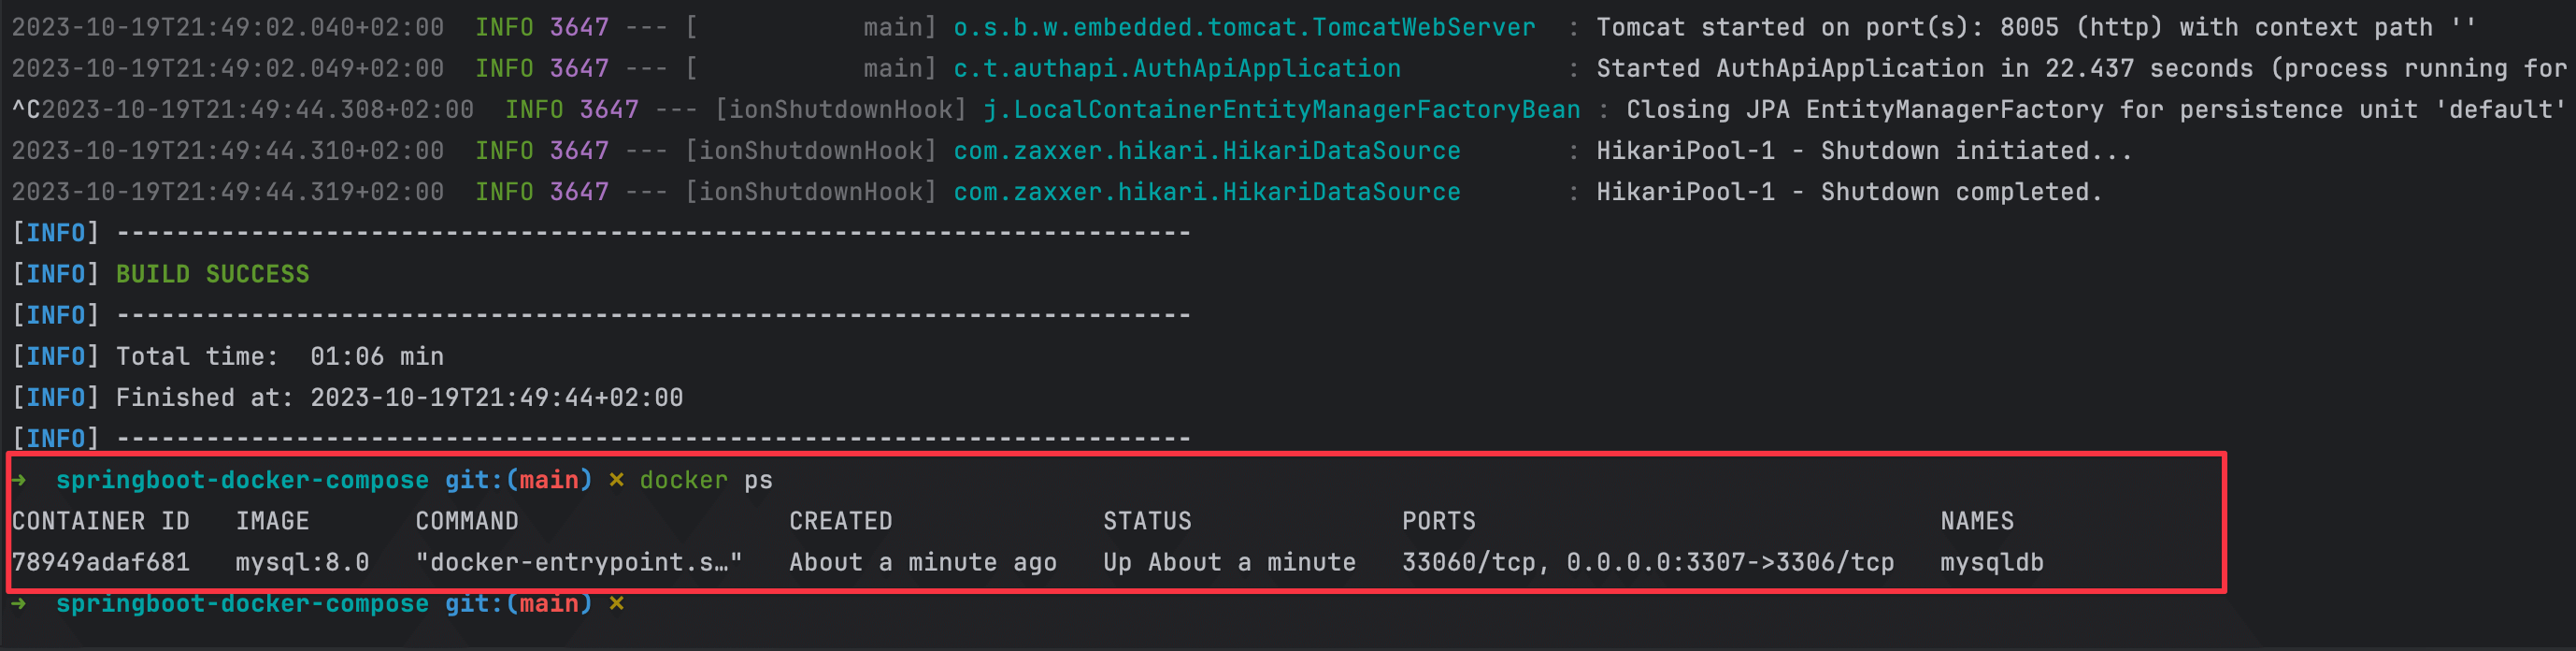
Re-run the application, send a few requests to the API, and stop it; run docker ps to verify the container status, you will see it is still up.
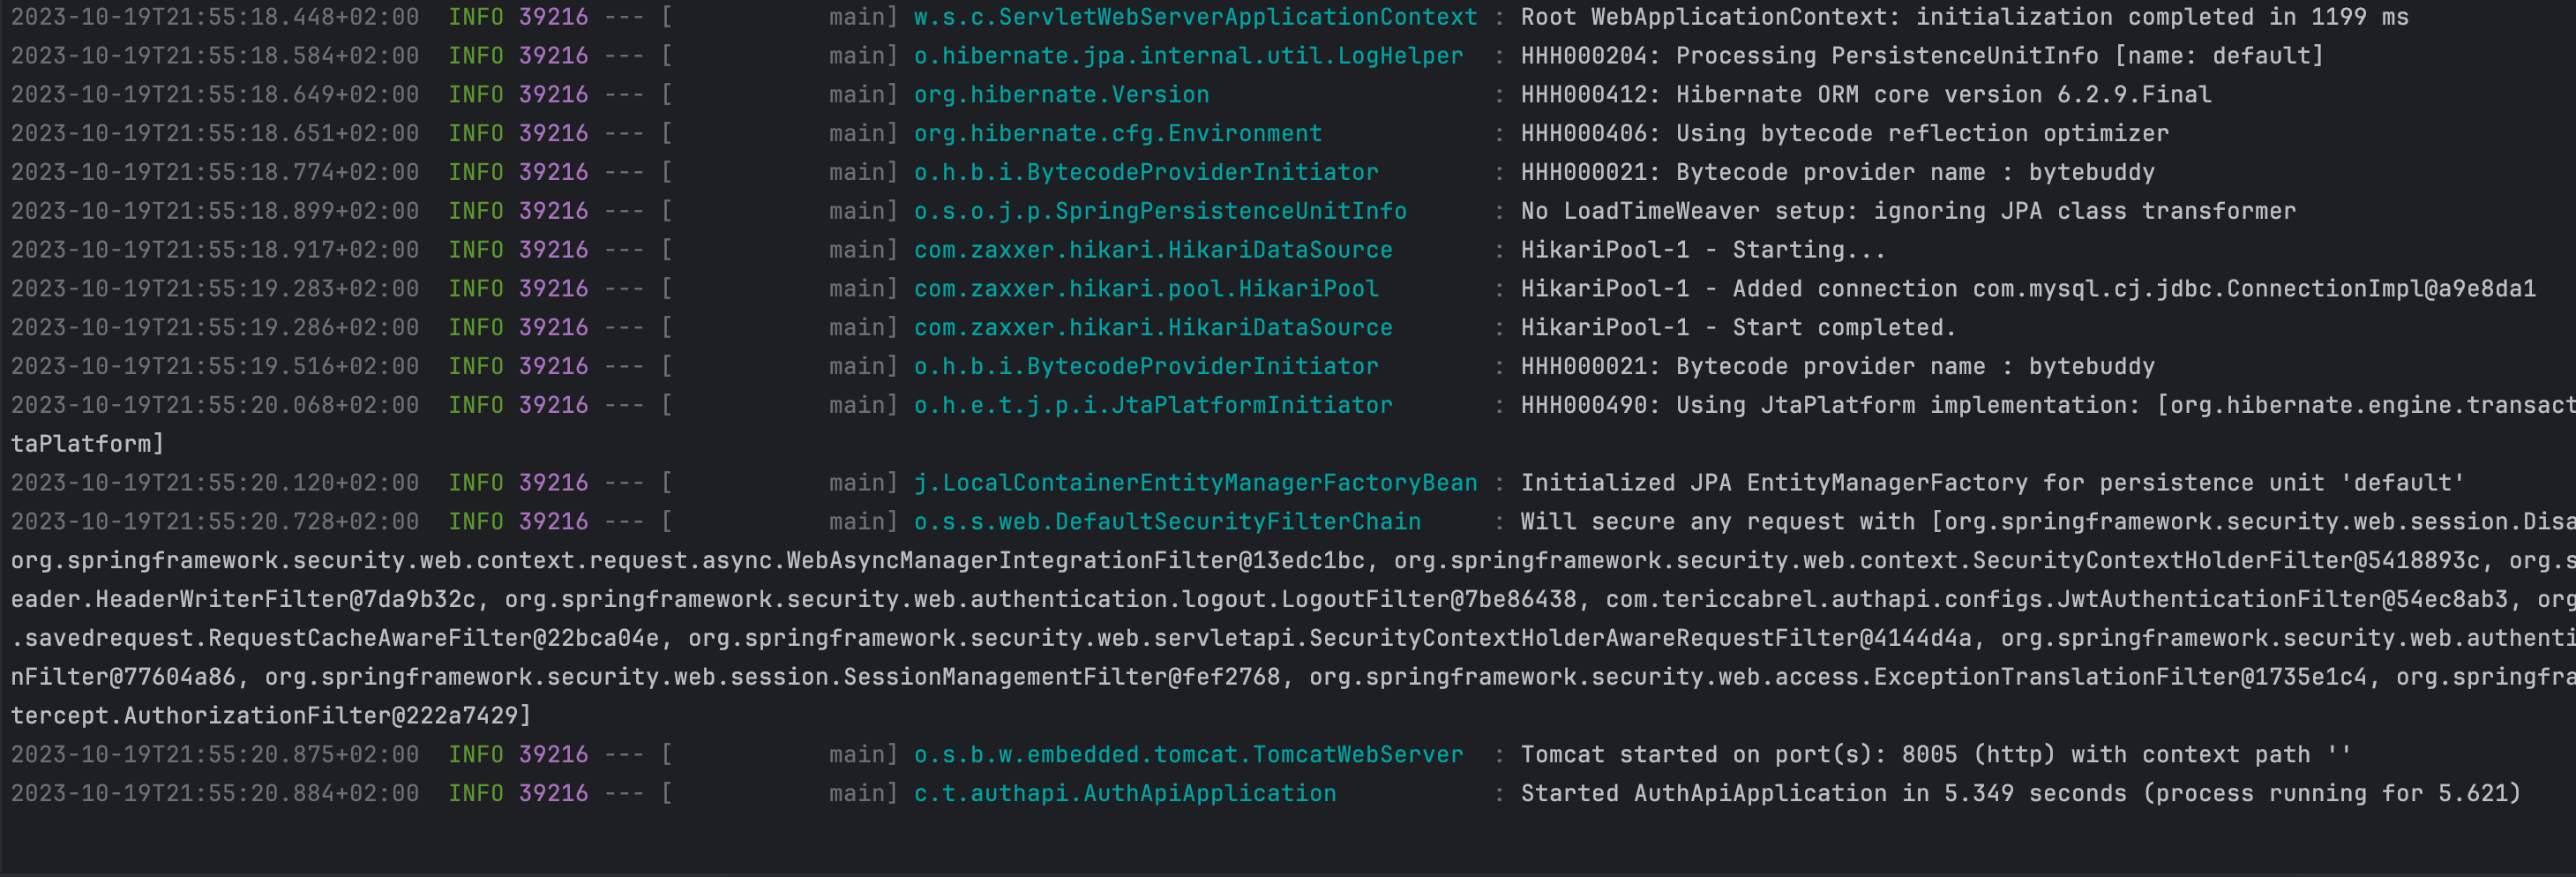
Re-run the Spring Boot application again; we can see that the startup time reduced to a standard Spring Boot application startup time.
Supported Docker images
The Docker Compose integration for Spring Boot supports the Docker images for the following databases and services:
| Database/Service | Container's name | Image's link |
|---|---|---|
| Cassandra | cassandra | Docker Hub |
| Elasticsearch | elasticsearch | Docker Hub |
| Oracle database | gvenzl/oracle-xe | Docker Hub |
| MariaDB | mariadb | Docker Hub |
| Microsoft SQL Server | microsoft-mssql-server | Docker Hub |
| MySQL | mysql | Docker Hub |
| PostgreSQL | postgres | Docker Hub |
| MongoDB | mongo | Docker Hub |
| RabbitMQ | rabbitmq | Docker Hub |
| Redis | redis | Docker Hub |
| Zipkin | openzipkin/zipkin | Docker Hub |
Using a custom Docker image
If you are using a custom Docker image of the service listed earlier, you can use it in the Docker compose file with the condition to declare the label org.springframework.boot.service-connection and set the value to the base image name.

Example: if you use a custom image of MySQL, the value of the label org.springframework.boot.service-connection will be mysql.
The Docker compose file will look like this:
services:
  mysql:
    container_name: mysql
    image: tericcabrel/mysql:1.5
    restart: unless-stopped
    volumes:
      - "./db-data:/var/lib/mysql"
    ports:
      - 3307:3306
    environment:
      - MYSQL_ROOT_PASSWORD=secret
      - MYSQL_DATABASE=taskdb
    labels:
      org.springframework.boot.service-connection: mysql
Wrap up
Integrating Docker Compose with Spring Boot eases the experience of developing applications locally. Here are the main steps to make it work:
- Declare the Docker compose with the supported images you want to run.
- Install the Maven dependency for the Docker Compose integration.
- Configure the Docker Compose lifecycle.
- Start building your application locally.
You can use a custom Docker image and define some integration-related properties in the Spring Boot configuration file.
Read the documentation to see what you can do more with this integration.
You can find the code source on the GitHub repository.
Follow me on Twitter or subscribe to my newsletter to avoid missing the upcoming posts and the tips and tricks I occasionally share.