
Understand the shadow database feature of Prisma ORM


Prisma is the Next-generation Node.js and TypeScript ORM. It is widely used in the Node.js community to make the developer experience with the database easier.
The release of version 2.17.0 of Prisma introduced a new feature called shadow database that solves interesting problems developers face when creating a new migration from the Prisma schema.
In this post, we will understand the shadow database feature of Prisma, when you need and how to get the most out of it.
Prerequisites
To follow this tutorial, you will need a MySQL instance installed on your local computer, or Docker must be installed to create a container from the MySQL Docker image. Here is the command to start a container:
docker run -it --rm -e MYSQL_ROOT_PASSWORD=secret -e MYSQL_DATABASE=taskdb --name mysqldb -p 3307:3306 mysql:8.0
The connection string is : mysql://root:secret@localhost:3307/taskdb. Keep it somewhere because we will use it later.
The use case
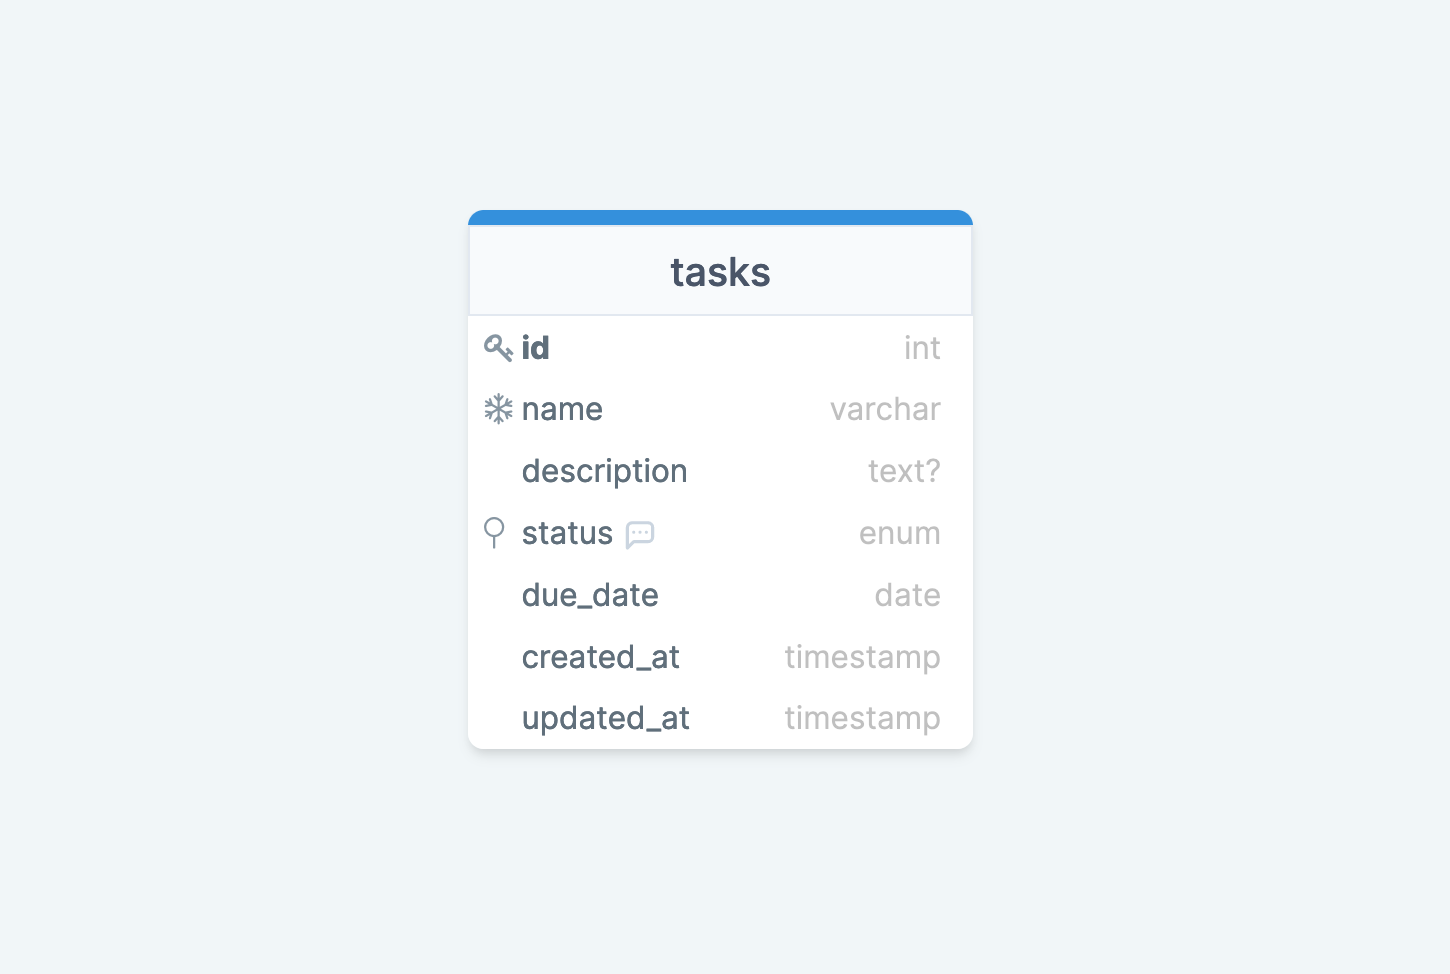
To explore this Prisma feature, let's say we will build a simple task manager and focus on the database schema creation through Prisma migration. Below is the schema of our database:
In a previous tutorial, we built a REST API for a task manager using PlanetScale and TypeORM.

Setup Node.js project and Prisma
Let's initialize a project with Typescript and Prisma:
# create a folder and enter inside
mkdir prisma-shadow-db && cd prisma-shadow-db

# initialize a node.js project
yarn init -y

# install typescript and prisma dependencies
yarn add -D typescript ts-node @types/node prisma

# initialize Typescript for the project
yarn tsc --init

# initialize prisma
yarn prisma init
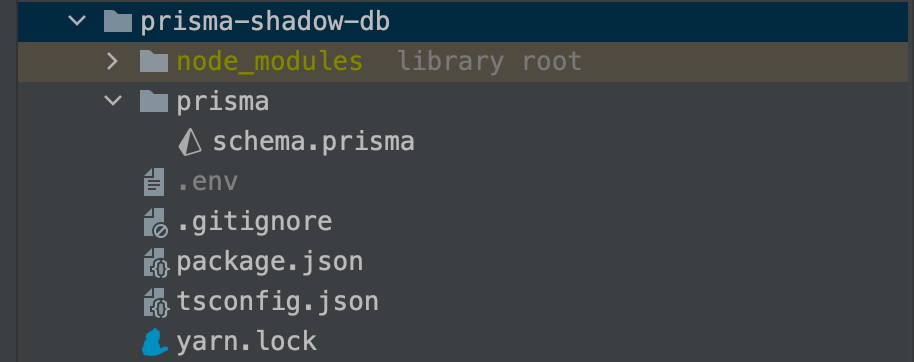
At this step, your project structure will look like this:
Open the file .env, and update the DATABASE_URL with the connection string of the MySQL instance running in Docker.
DATABASE_URL=mysql://root:secret@localhost:3307/taskdb
Create the tasks table and run the migration
Update the file prisma/schema.prisma to add the schema for the tasks table; your file will look like this:
generator client {
  provider = "prisma-client-js"
}

datasource db {
  provider = "mysql"
  url      = env("DATABASE_URL")
}

enum Status {
  PENDING
  IN_PROGRESS
  DONE
}

model Task {
  id          Int      @id @default(autoincrement())
  name        String   @unique @db.VarChar(255)
  description String?  @db.Text
  status      Status   @default(PENDING)
  dueDate     DateTime @map("due_date") @db.Date
  createdAt   DateTime @default(now()) @map("created_at")
  updatedAt   DateTime @updatedAt @map("updated_at")

  @@map("tasks")
}
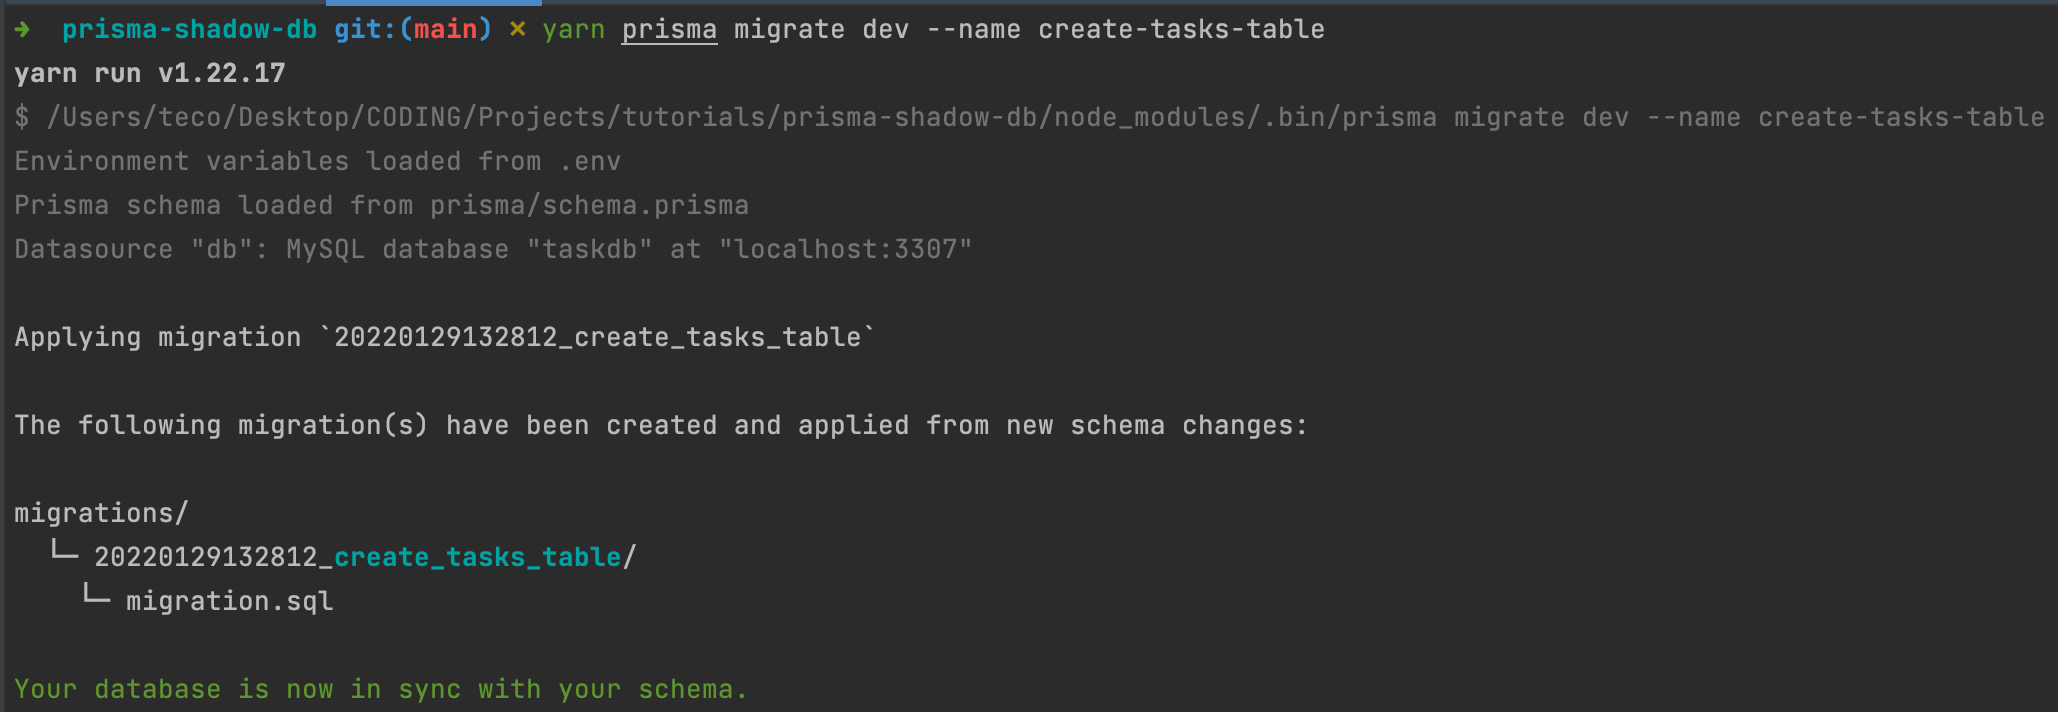
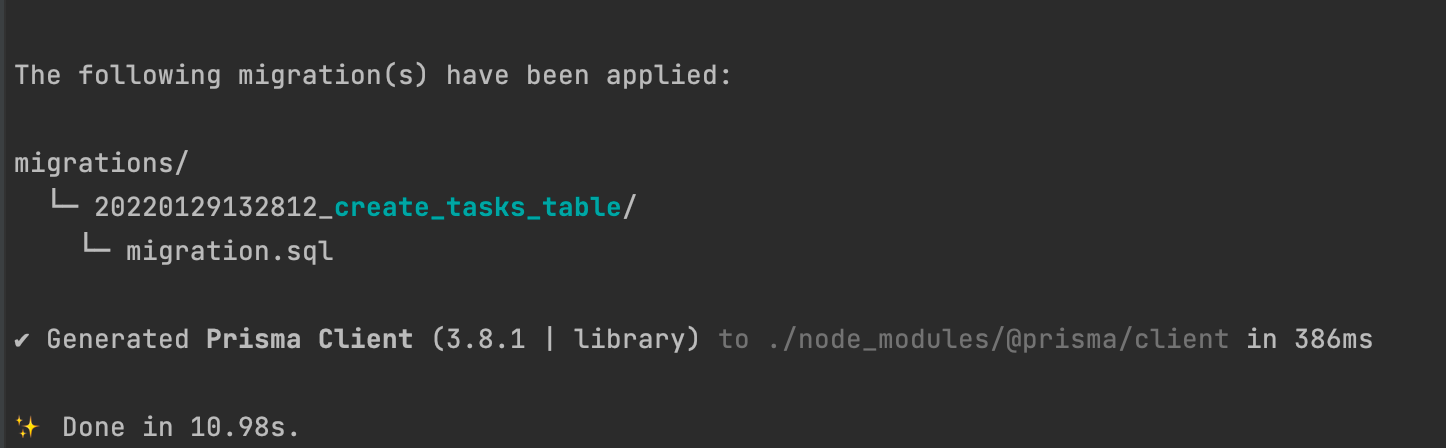
Run the command to create the migration and apply it to the local database:
yarn prisma migrate dev --name create-tasks-table
We get the output below:
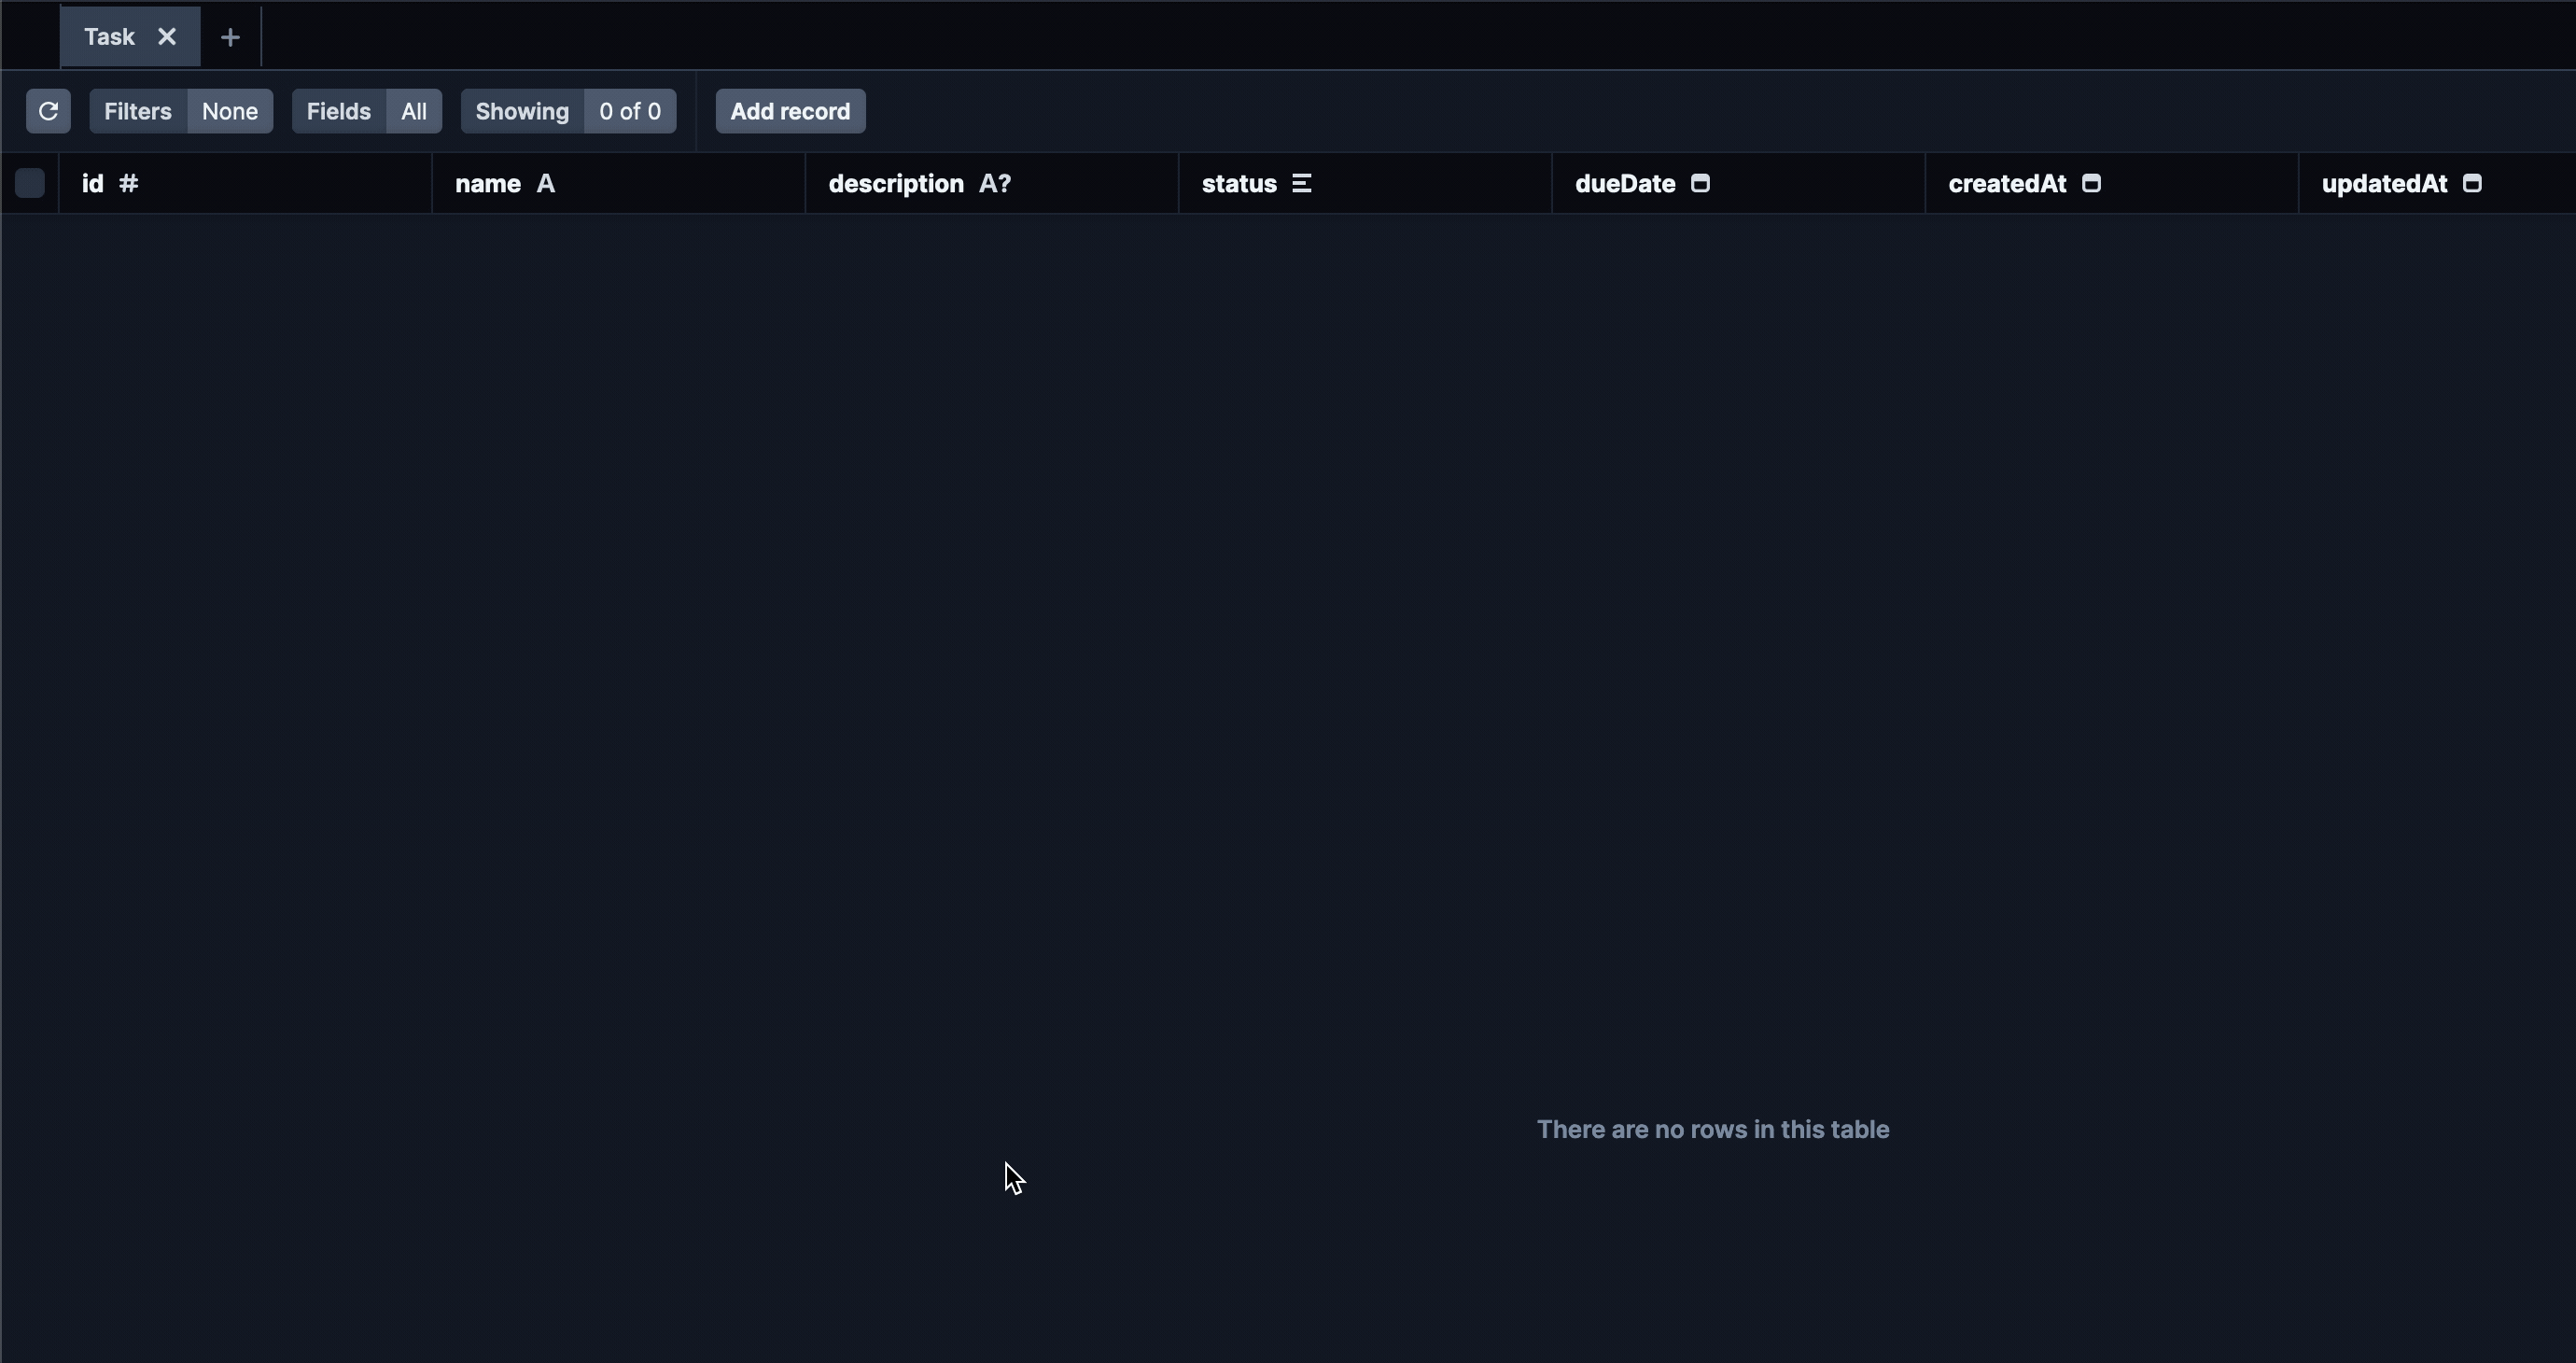
We can explore the table using Prisma Studio; run the command below:
yarn prisma studio
A tab will automatically open on your default browser, and you can add, edit, delete, and view records in the table.
So, at this step of a classic development workflow, you will write code for CRUD operations on the table tasks , create endpoints in your application, test if it works, and deploy to production with the database changes using prisma db push.
The problem when running Prisma migrate
Here, everything is fine, and you might wonder what the problem is?
To start, let's analyze what Prisma does under the hood when you run yarn migrate dev.
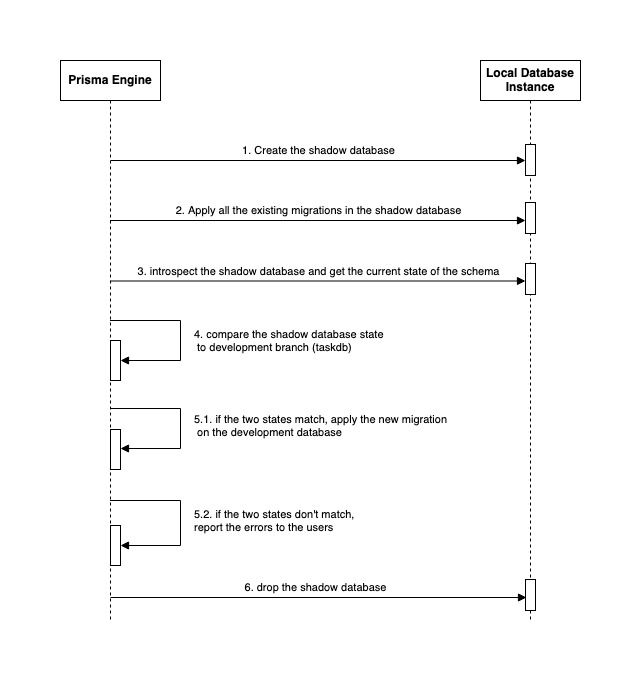
In the picture above, step one is crucial because if the Prisma engine fails to create the database, we can't do the following steps. Two reasons can make this step fails:
- Invalid database credentials
- The credentials are valid, but the user doesn't have enough privileges to create a database.
In our case, we are connected with the root user with all the privileges.
When working with a Cloud-hosted database, the user you connect to the database doesn't have that right. This means you cannot create a new migration on your development database when hosted on the cloud.
Why will I have my development database in the cloud?
There are many reasons for that:
- The local environment is unpredictable: you run a lot of software on your computer; apply custom configurations that might indirectly affect other software. You know the classic sentence "It works on my machine"?
- Easy onboarding: to build a feature, you need to install MySQL in your database or use Docker to start a container, make sure it is running, etc... With your database in the cloud, you find the credentials, and you are good to go.
- IDE in the Cloud: we see many solutions to code on the cloud. Even companies like GitHub are moving to the cloud to improve teams' productivity. This comes with the cost that you can't install your tool like a local database.
Here are some cloud-hosted database offers:
PlanetScale is a serverless database with a branching concept that makes it easier to manage your database. I wrote a whole post on how to start with.

Run migration on a cloud-hosted database
We will create two database branches on PlanetScale, one as the development and the other as the shadow.
You must log in to PlanetScale, create the database, and create the required branch. You can do it from the Web UI, but I will go for the CLI; here are the commands to run:
# log into planetscale
pscale auth login

# create the database
pscale database create taskdb

# create the development branch
pscale branch create taskdb create-tasks-table

# create the shadow database
pscale branch create shadowdb
With this new configuration, the Prisma migrate workflow changes a little bit. In the picture below, the lines in red are the ones that changed from the previous:
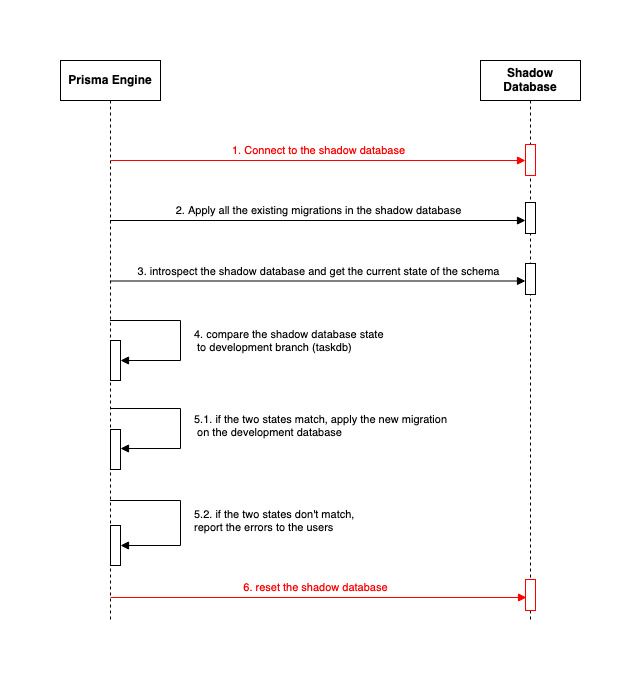
As we can see, when working with a cloud-hosted database, we cannot create the database automatically or drop the database. The shadow database reset deletes the foreign keys, indexes, and tables created.
Execute the migration
We need the credentials of the development database and shadow databases' credentials, although we can find them in the Planetscale Web console. We can connect our computer and the remote database with the CLI, so we don't need to expose the credentials.
- Create a proxy to the development branch:
Open a terminal, then run the command below:
pscale connect taskdb create-tasks-table --port 3308
The connection string for this database is: mysql://root@localhost:3308/taskdb
- Create a proxy to the shadow branch:
Open another terminal, then run the command below:
pscale connect taskdb shadowdb --port 3309
The connection string for this database is: mysql://root@localhost:3309/taskdb
Update our .env file to set the database URL and the shadow database URL.
DATABASE_URL="mysql://root@localhost:3308/taskdb"
SHADOW_DATABASE_URL="mysql://root@localhost:3309/taskdb"
Update the file prisma.schema to add the shadow database URL:
generator client {
  provider = "prisma-client-js"
}

datasource db {
  provider            = "mysql"
  url                 = env("DATABASE_URL")
  shadowDatabaseUrl   = env("SHADOW_DATABASE_URL")
}
Run the migration: yarn prisma migrate dev
Wrap up
The shadow database feature of Prisma makes it possible to create new migrations on a cloud-hosted database which doesn't allow the database to create or drop a database.
Prisma will connect to a second database created manually to validate the current migration state with the migration state of our production database and decide if the migration should be created.
Check out this link to learn more about the shadow database feature.
You can find the code source on the GitHub repository.
Follow me on Twitter or subscribe to my newsletter to avoid missing the upcoming posts and the tips and tricks I occasionally share.