
Using Docker and Docker-compose with Node.js and MongoDB


Photo by Victoire Joncheray on Unsplash
Manager: I cloned the project and followed the Readme but it doesn't work because of an error about a missing dependency.
Developer: Hmmm weird! Yet, it works on my computer ??
If you have been a developer for a while, you have already faced this kind of discussion with your manager or teammates.
Indeed, we usually build applications through many releases, and we need to share the code with our peers for each release. Unfortunately, at this point, many problems often happen:
- The incompatibility between operating systems. You code the project on MacOS, but the production environment runs on Ubuntu.
- Even if you are on the same OS, an update can break a library used in the project, leading to a non-working project.
- Even if everything works as expected, sometimes the steps to run the project are hard.
- It is hard to keep a history of working code ready to run in production.
Above are some problems Docker solves very well. Adding Docker Compose to compose many Docker image make it more powerful.
Prerequisites
To follow this tutorial, you need Docker to be installed and working. If not installed, follow this link to install it according to your operating system.
We will take the Node.js project we have done in this tutorial to generate a PDF and make it run through Docker Compose.

Here are the steps:
- Create a Docker image of the project
- Run a Docker image of a Mongo database
- Run a Docker image of the project
- Make them communicate together
- Use Docker Compose to easily manage them.
Setup the project
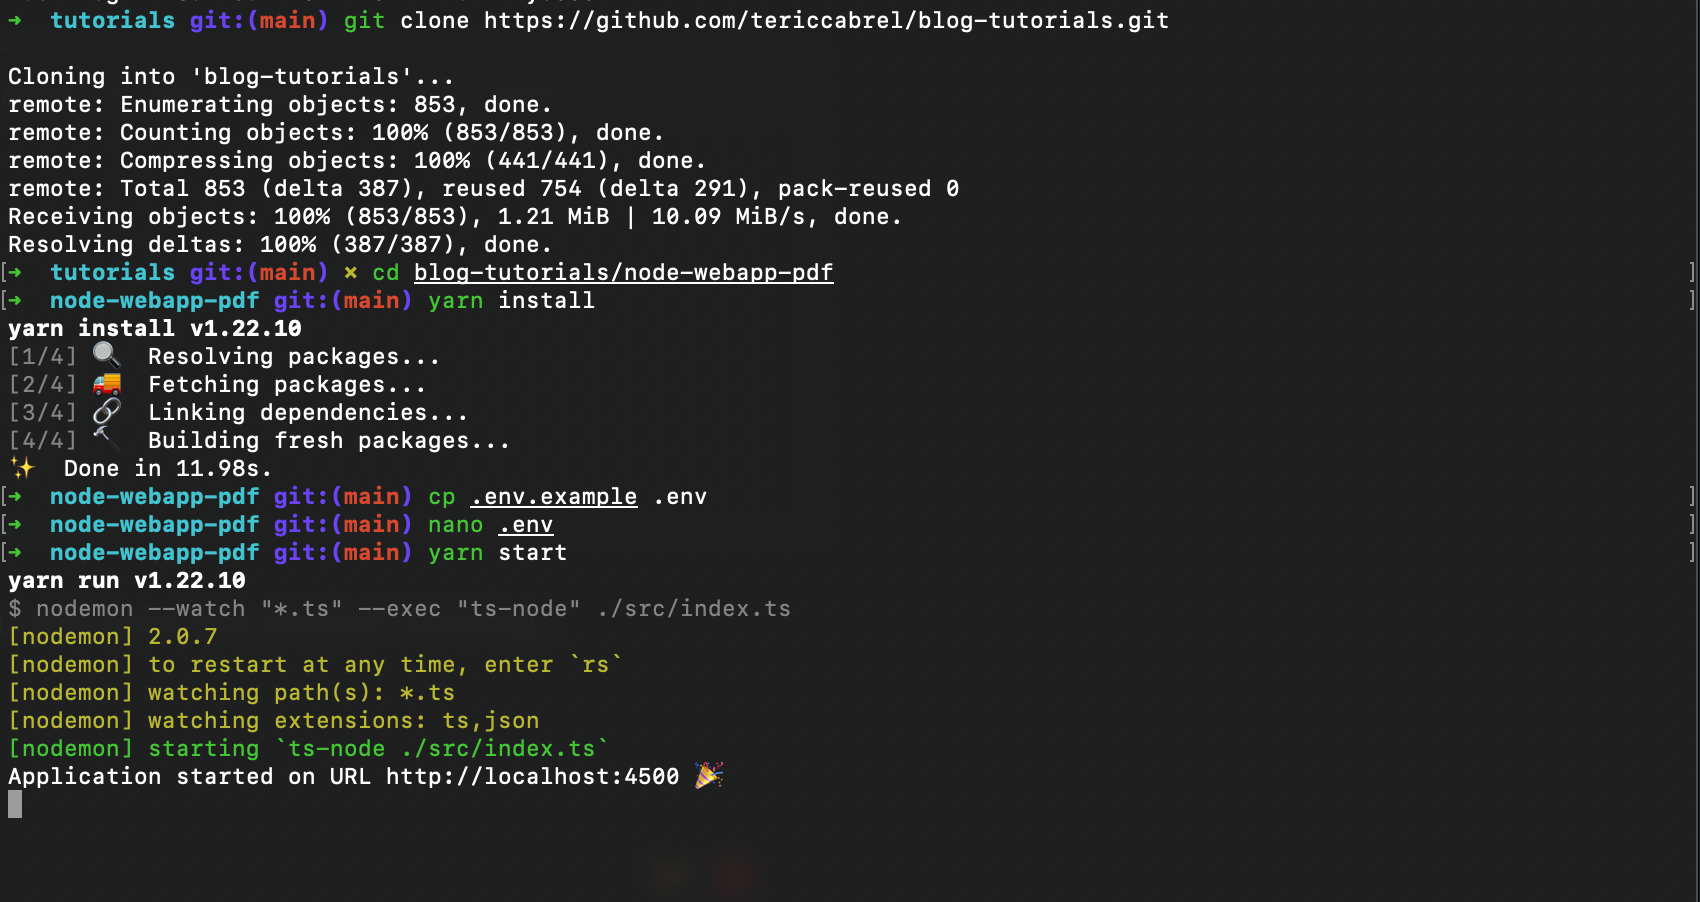
Clone the project from this GitHub repository and follow the Readme file to set it up locally. If you don't have a Mongo database, you can follow this tutorial to install it; otherwise, just continue the tutorial.
git clone https://github.com/tericcabrel/blog-tutorials.git

cd blog-tutorials/node-webapp-pdf

yarn install

cp .env.example .env
nano .env

yarn start
If everything is configured as expected, you will have the project running.
Create a Docker image of the project
Building a Docker image of the project makes it agnostic of operating systems. We should expect the same behavior no matter the operating system on which we run the Docker image.
Build the project
We use Typescript in the project, but, Node.js run only the Javascript file, so we need to transpile our .ts file to .js which can be achieved by running yarn tsc.
tsconfig.json file, then add the following code:
{
  "skipLibCheck": true,
}
The command above will generate a directory named build containing the .js files, but if you pay attention, there is a missing directory views that includes the handlebars file.
This is because the tsc command only handles .ts files and ignores others. Since the folder is necessary for the project, we have to copy it inside the build folder using a bash command:
cp -r src/views build
Here is the summary building the project for production:
# update tsconfig.json to set "skipLibCheck"

yarn tsc

cp -r src/views build
Build the Docker image
At the root project directory, create a file named Dockerfile. We will write the instructions to build an image. Open the file, then add the code below:
FROM node:18-alpine3.17

RUN mkdir -p /home/app

WORKDIR /home/app

COPY build ./build
COPY public ./public
COPY package.json .

RUN yarn install --frozen-lockfile --production

EXPOSE 4500

ENTRYPOINT ["node", "build/index.js"]
Save the file, then run the command below to build the image. Here is the Docker build command signature:
docker build <username>/<image_name>:<image_tag> <dockerfile_path
We can add other options; check out the documentation to learn more.
Run this command to build the image:
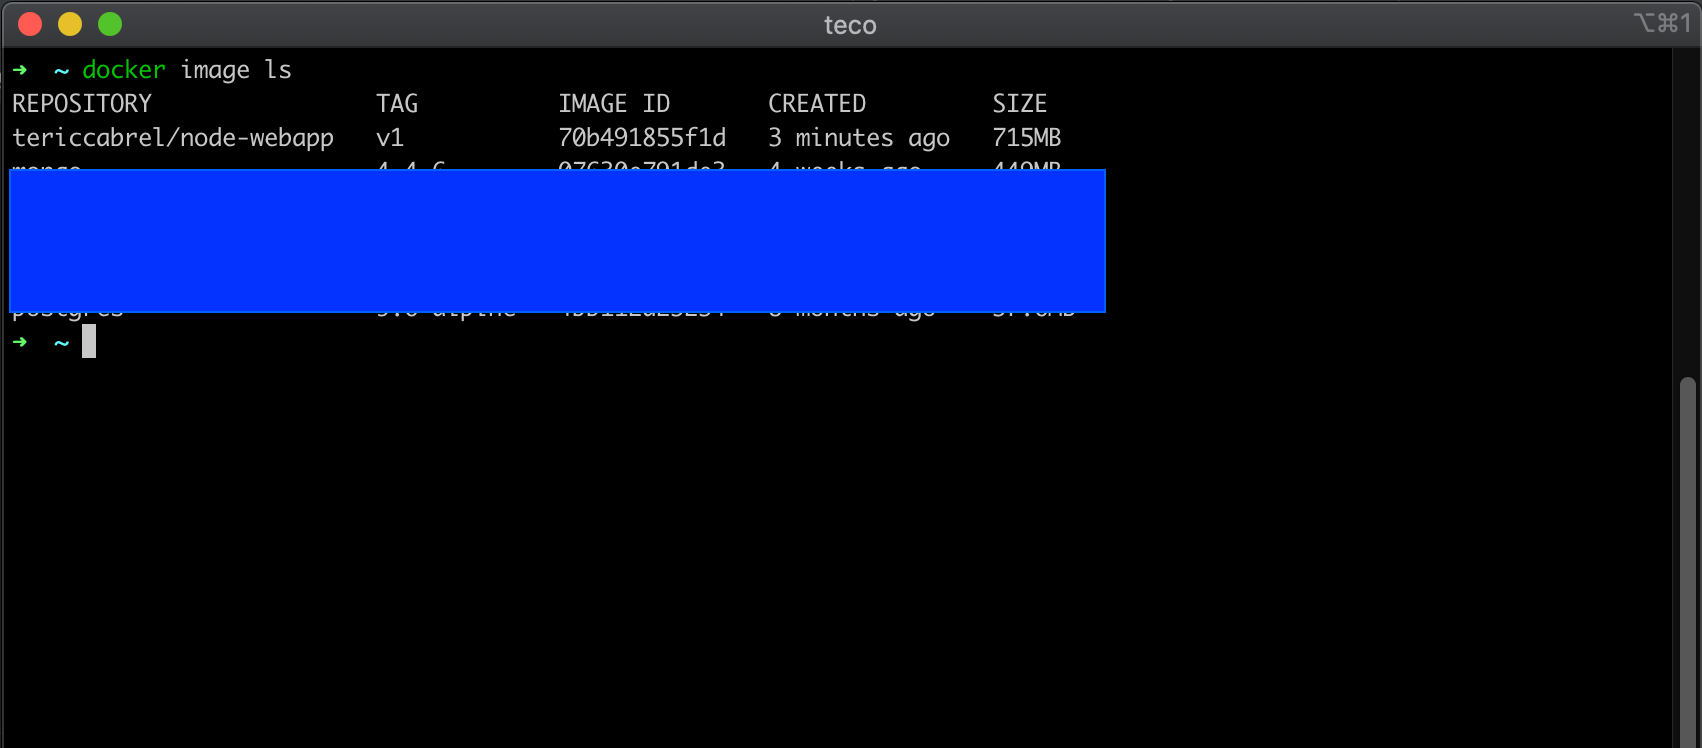
docker build -t tericcabrel/node-webapp:v1 .
Once completed, run docker image ls to view the list of docker images:
Run a container from the image
Let's start a container from our Docker image in an interactive way to view the logs by running this command:
docker run -it -p 4500:4500 --name node_pdf --rm tericcabrel/node-webapp:v1
The picture below shows the output we get:
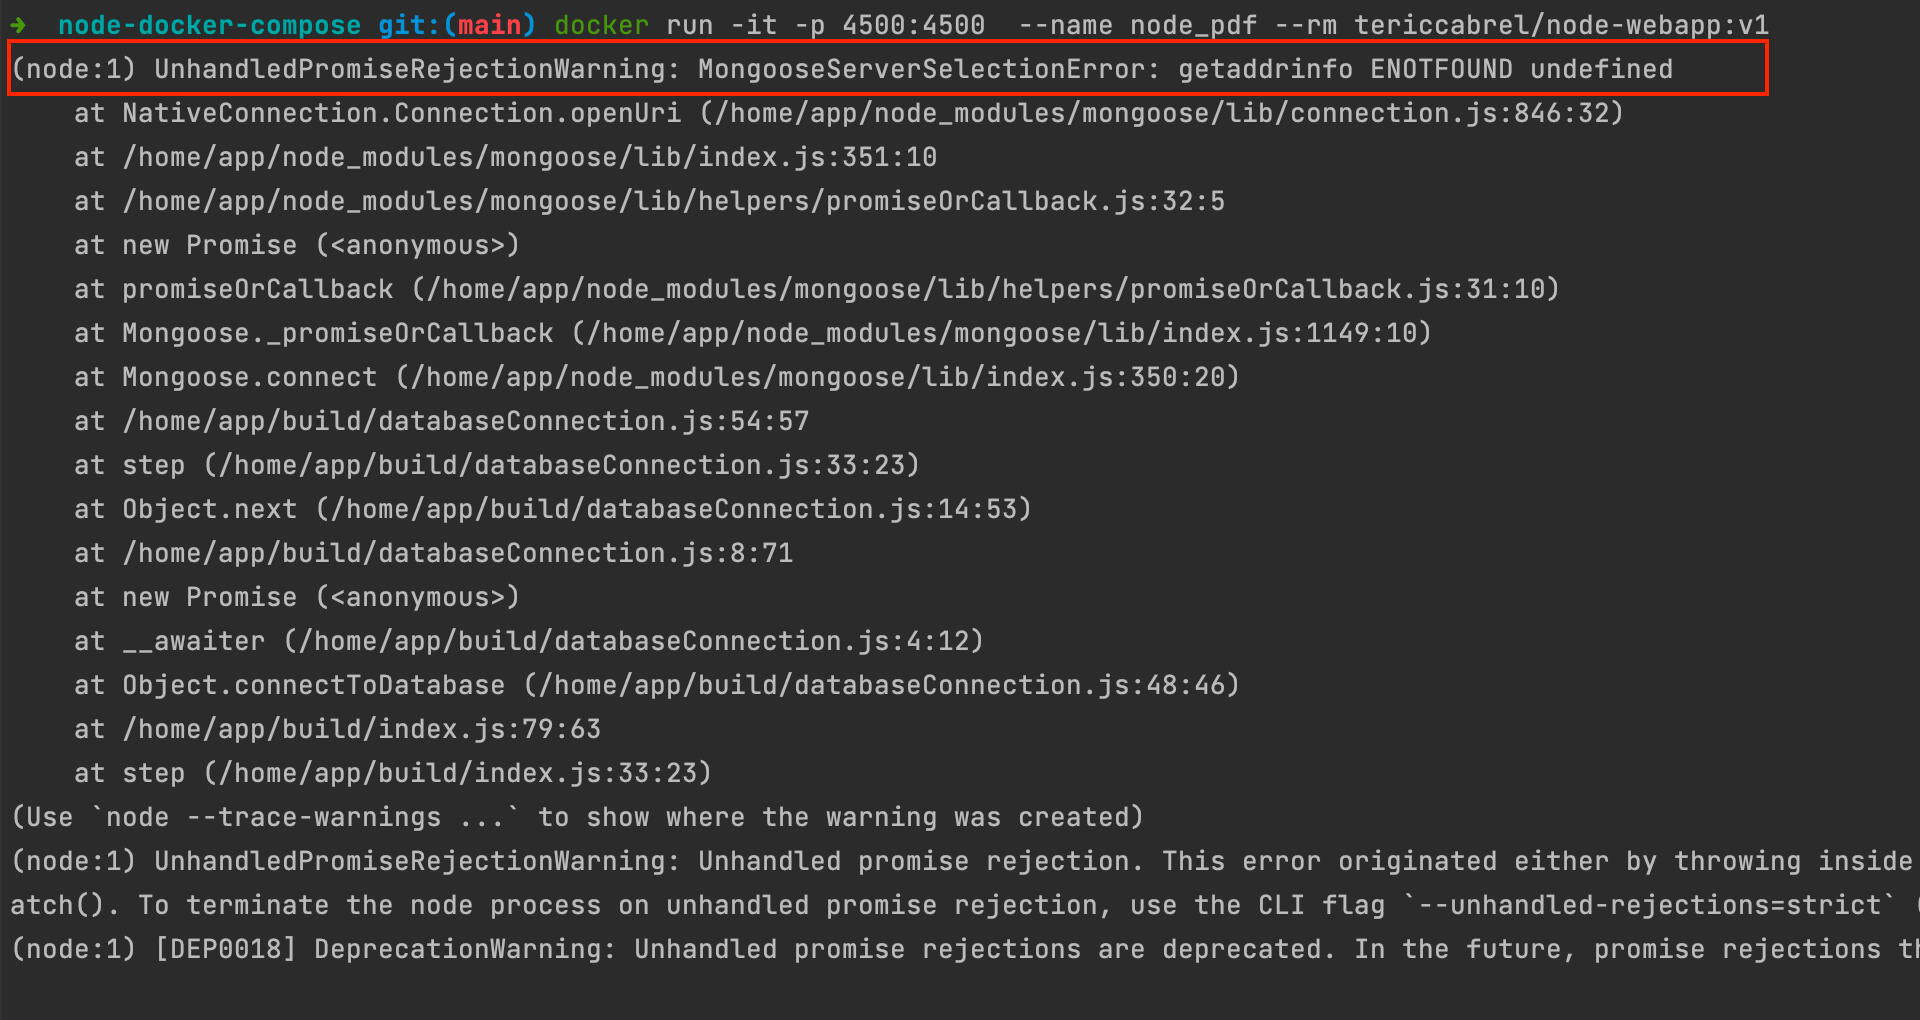
Oops, we got an error saying we can connect to the database host called undefined. This is because we read database credentials from a .env file not copied in the Docker image.
This was done intentionally because Docker provides an option --env-file for adding an environment variable went starting a container. Let's start the container using this option:
docker run -it -p 4500:4500 --name node_pdf --rm --env-file .env tericcabrel/node-webapp:v1
Oops, we got an error saying we can connect to the database host called 127.0.0.1:27017. This happens because the Docker container can't reach the MongoDB instance installed on the host.
Create a network to host containers
We need to run a Docker container from the MongoDB image and then run a Docker container of our app. But it still will not work because the containers aren't on the same network.
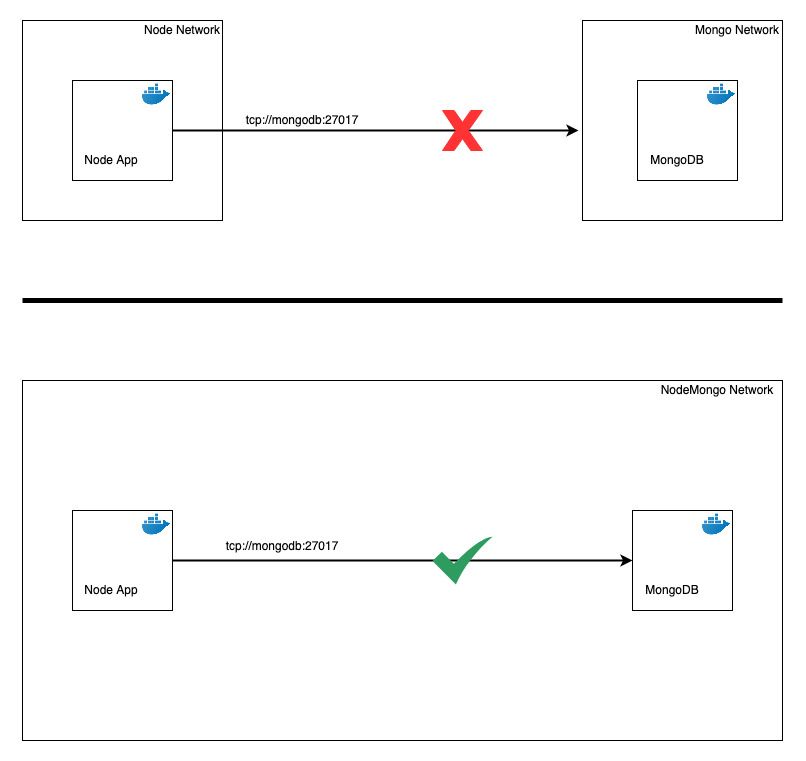
We will start by creating a network and then start two containers inside this network:
docker network create node-webapp-network

docker run -d --network node-webapp-network --name mongodb mongo:6.0

docker run -it -p 4500:4500 --network node-webapp-network --name node_pdf --rm --env-file .env tericcabrel/node-webapp:v1
The picture below shows the output we get:
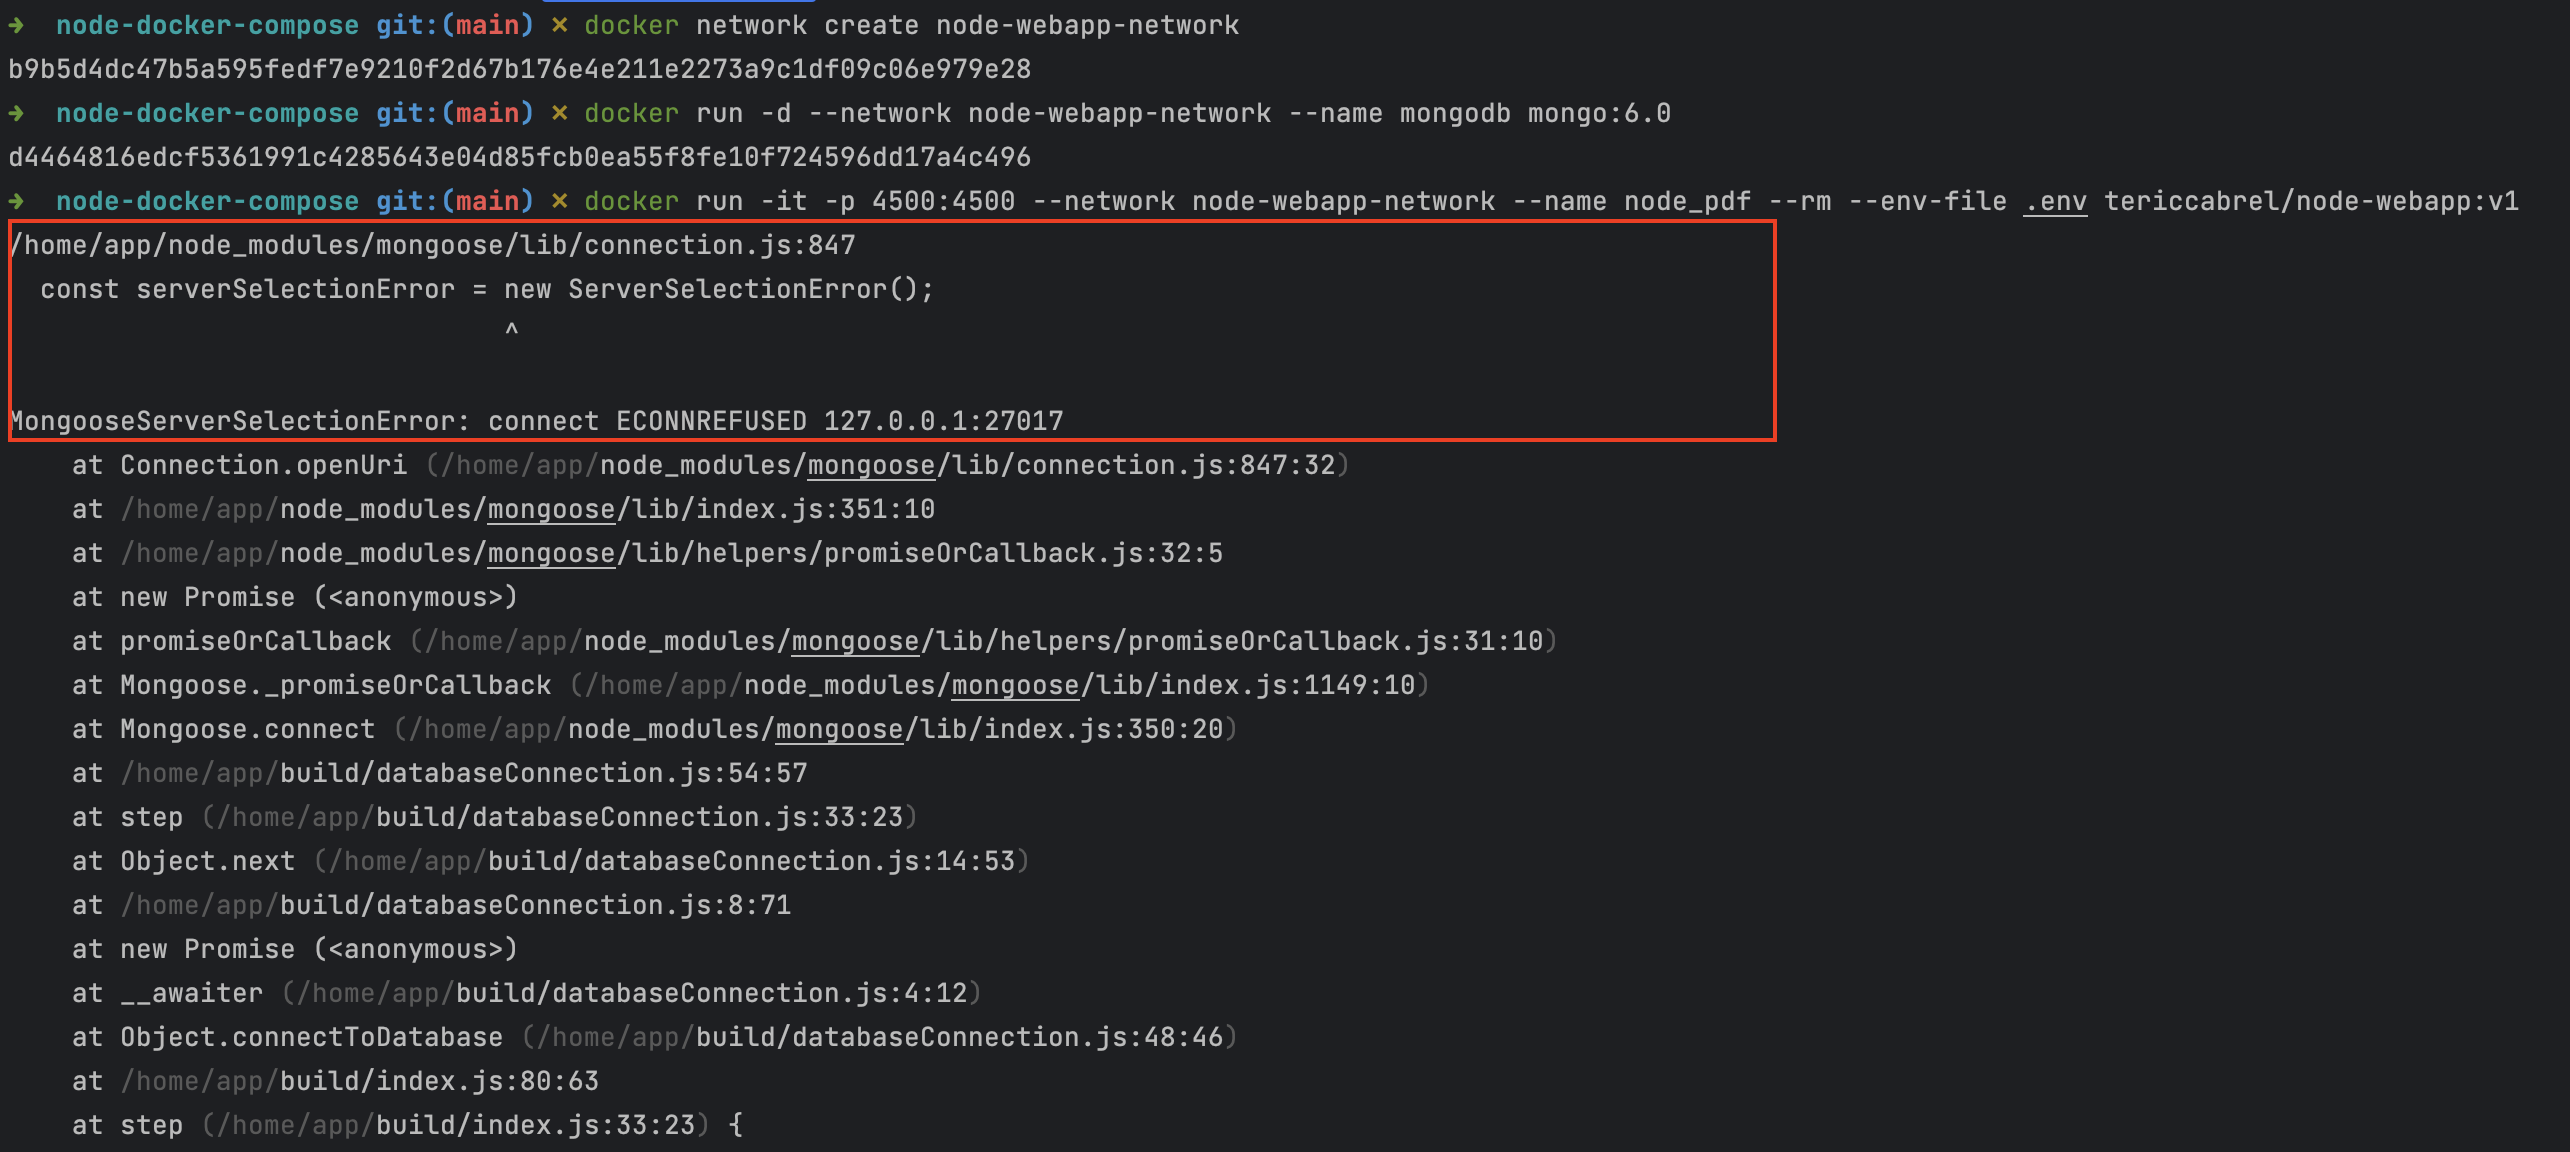
The app still can't connect to the database for two reasons:
- Since the two containers are in the same network, using 127.0.0.1 as the database host is not good because it points to the host, and we should use the container's name instead, and Docker will resolve the correct IP address.
- Our
.envfile contains the database username and password value, but we didn't set them when starting the MongoDB container.
Update database credentials
To set the value for username and password, will set two environment variables MONGO_INITDB_ROOT_USERNAME and MONGO_INITDB_ROOT_PASSWORD when starting the container:
# Display running container to get the container ID of mongodb
docker ps

# Kill the running container
docker container kill <mongodb_container_id>

# Remove all stopped containers
docker container prune -f

# Run the container with database credentials
docker run -d --network node-webapp-network -e MONGO_INITDB_ROOT_USERNAME=app_user -e MONGO_INITDB_ROOT_PASSWORD=app_password  --name mongodb mongo:6.0
Now, let's edit our .env to update database credentials with these values.
DB_HOST=mongodb
DB_PORT=27017
DB_USER=app_user
DB_PASS=app_password
DB_NAME=admin
Now start a container for our app.
docker run -it -p 4500:4500 --network node-webapp-network --name node_pdf --rm --env-file .env tericcabrel/node-webapp:v1
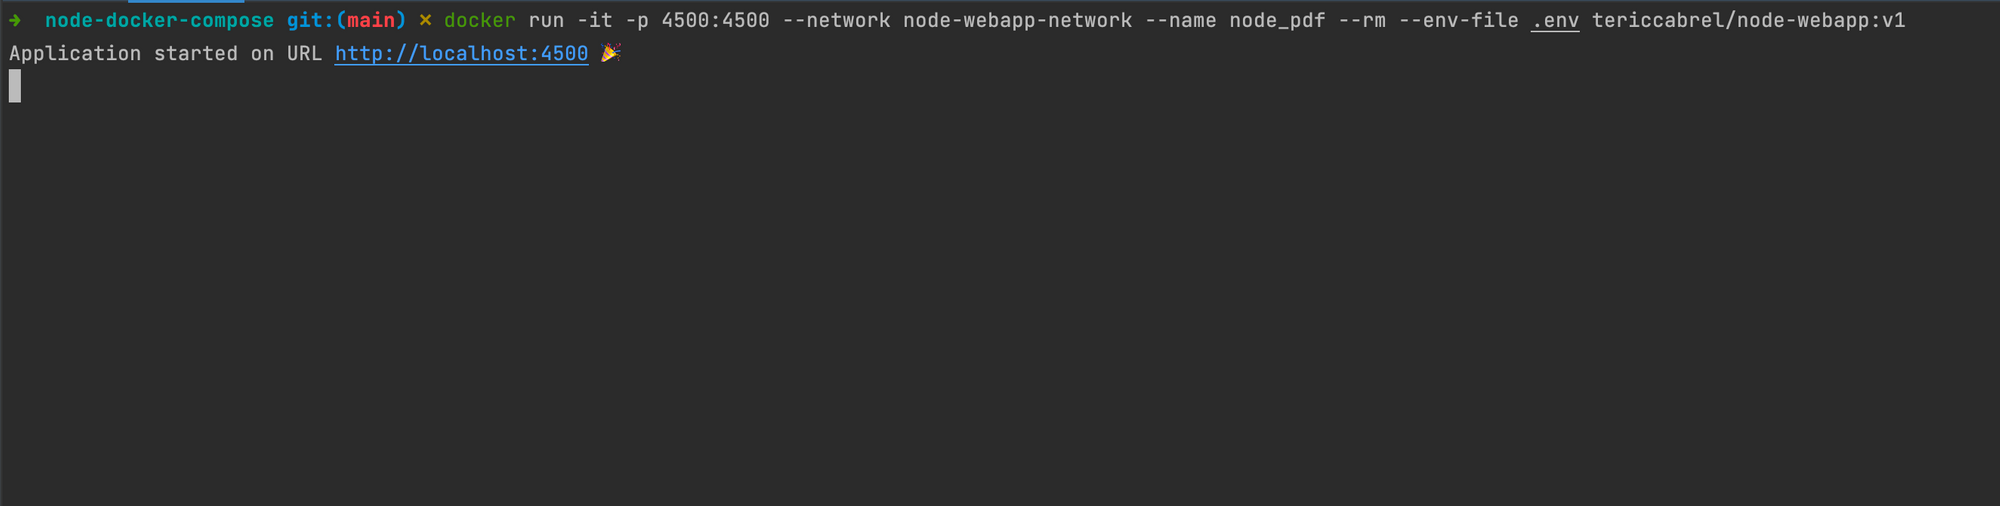
Hoooooraaay 🎉🎉🎉
Use Docker Compose to manage containers
As you can see, we did many things to make our app work, and all this in an imperative way which requires knowing every command and option and also remembering which container to start before another.
Fortunately, Docker Compose is here to simplify the work for us. We will create a docker-compose.yml file and define what we want, and Docker Compose will do the job.
This is a declarative way. Check out this link to learn more about the difference between a declarative and imperative style.
Create a docker-compose.yml and add the code below:
version: "3"
services:
  nodeapp:
    container_name: node_pdf
    restart: always
    build:
      context: .
      dockerfile: Dockerfile
    env_file: .env
    ports:
      - "4500:4500"
    links:
      - mongodb
    depends_on:
      - mongodb
    environment:
      WAIT_HOSTS: mongodb:27017
    networks:
      - node-webapp-network
  mongodb:
    container_name: mongodb
    image: mongo:6.0
    volumes:
      - ~/mongo:/data/db
    ports:
      - "27017:27017"
    environment:
      - MONGO_INITDB_ROOT_USERNAME=app_user
      - MONGO_INITDB_ROOT_PASSWORD=app_password
      - MONGO_INITDB_DATABASE=admin
    networks:
      - node-webapp-network
networks:
  node-webapp-network:
    driver: bridge
The instructions in the file above produce the same result as the instructions we did with Docker. Build and run with the following command:
docker-compose build

docker-compose up
That's it!
Now you can share your project, and the only thing someone has to do is run the two previous commands, and the project is running.
Wrap up
The Docker CLI provides commands to build a Docker image of your application, and we saw how to create the Docker image of a Node.js application. Docker network can make communication between many containers.
Docker Compose allows you to declare the instructions for building and running containers in a YAML file. This makes it easy to run and test a project with many applications packaged as Docker images that communicate together.
You can find the code source on the GitHub repository.
Follow me on Twitter or subscribe to my newsletter to avoid missing the upcoming posts and the tips and tricks I occasionally share.