
Handle custom data type in a GraphQL application with Node.js


Photo by Freddy Castro / Unsplash
When building applications, we use data types to represents the kind of information we are using. We usually have primitive data types like integer, boolean, string to represent simple information. We often want to manage complex information, and we need to create a complex data type for that.
In Javascript, the type Date is one of the most used. When working with GraphQL, only the primitive's types are supported so, to use a custom data type, you need to indicates to GraphQL how to parse and validate it.
In this article, we will see how to create custom data types to handle the date and time in our GraphQL application.
Setup the project
We need to set up a basic GraphQL application where we can experience it. We already created one in this tutorial so let's clone it a make it work locally.
git clone https://github.com/tericcabrel/blog-tutorials.git

cd blog-tutorials/node-graphql

yarn install

yarn start
Navigate to localhost:4000/graphql; you will see the UI of Apollo Sandbox.
Add the date data types
type User {
 	id: ID!
    firstName: String!
    lastName: String!
    email: String!
    password: String!
}
Above is the current User schema, and we want to add a property createdAt to now when the user registered to our system. We will achieve it in four steps.
Write custom logic for the Date's type
The graphql package provides a class GraphQLScalarType that we can use to tell GraphQL how to parse the value. The code below is minimal code required to write the logic of a custom type:
import { GraphQLScalarType } from 'graphql';

export const dateTimeScalar = new GraphQLScalarType({
  name: 'DateTime',
  description: 'Data type representing the date and time',
  parseValue: (value) => {
    // TODO write logic here
  },
  serialize: (value) => {
    // TODO write logic here
  },
});
We first define the type's name; The value is what we will use in our GraphQL schema. We give a description so we can easily know the purpose of this latter.
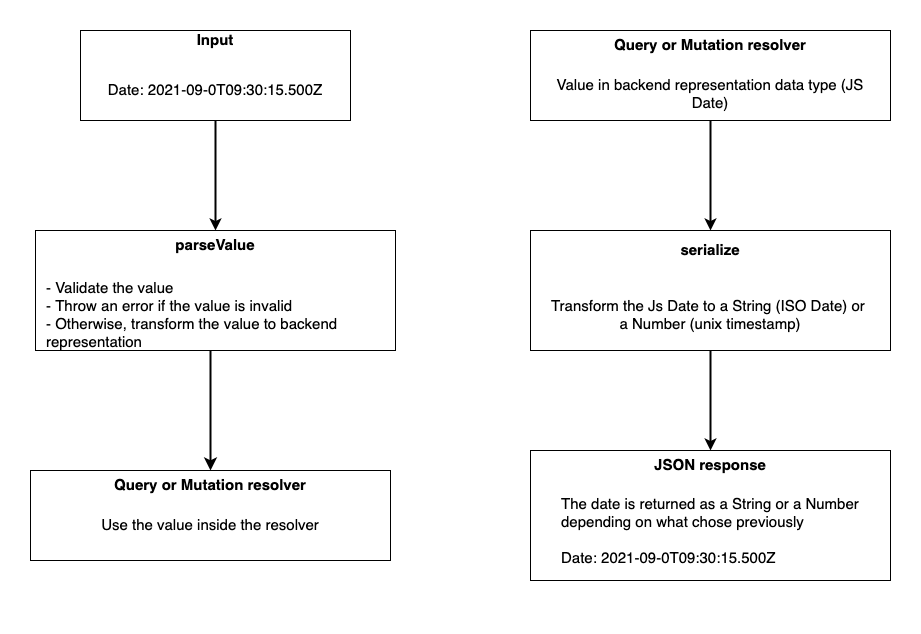
Now we have these two methods that are the most important. Let's explain their roles:
- parseValue: Take value from the input and transform it to the backend representation, which is the Javascript Date.
- serialize: Take the value from the backend representation (JS Date) and transform it to a JSON-compatible format like String, Number, or Boolean before sending the response to the client.
Here is the picture for more clarity:
Now we understand how it works, let's write the logic for our custom scalar type. Create a file named datetime.ts and add the code below:
import { GraphQLScalarType } from 'graphql';

const naiveIsoDateRegex = /(\d{4})-(\d{2})-(\d{2})T((\d{2}):(\d{2}):(\d{2}))\.(\d{3})Z/;

export const dateTimeScalar = new GraphQLScalarType({
  name: 'DateTime',
  description: 'Data type representing the date and time',
  parseValue: (value) => {
    if (!naiveIsoDateRegex.test(value)) {
      throw new Error('Invalid date format');
    }

    return new Date(value);
  },
  serialize: (value: Date) => {
    return value.toISOString();
  },
});
In the parseValue, we validate the date string to ensure it is a valid ISO date string and throw an error if it is not valid. If the string is valid, we create a Date object from the string and return it to manipulate the Date object in the resolver.
Register the custom type
At this step, GraphQL still doesn't know what to do when it meets a property of type DateTime. We need to register our custom logic, and we do that in the resolver. Update the file resolvers.ts with the code below:
import { dateTimeScalar } from './types/datetime';

const resolvers: Resolvers = {
  DateTime: dateTimeScalar,
  Mutation: {
    registerUser: createUser,
  },
  Query: {
    users: findAllUsers,
  },
};
Use the custom in the GraphQL schema
GraphQL can now parse the field of type DateTime. We will add a field createdAt in the User schema and require it when registering a new user. Update the file schema.ts with the code below:
type User {
    id: ID!
    firstName: String!
    lastName: String!
    email: String!
    password: String!
    createdAt: DateTime!
  }

  input CreateUserInput {
    firstName: String!
    lastName: String!
    email: String!
    password: String!
    createdAt: DateTime!
  }
Save and run the command to generate type with GraphQL codegen yarn graphql-codegen
Update the resolver
Here is what the createUser resolver looks like:
const createUser: MutationResolvers['registerUser'] = (parent, args) => {
  const { createdAt, email, firstName, lastName, password }: CreateUserInput = args.input;

  const user = {
    email,
    firstName,
    id: `${datasource.length + 1}`,
    lastName,
    password,
    createdAt,
  };

  console.log('timestamp => ', createdAt.getTime());

  datasource.push(user);

  return user;
};
Save and start the server, then go to Apollo sandbox to execute the query:
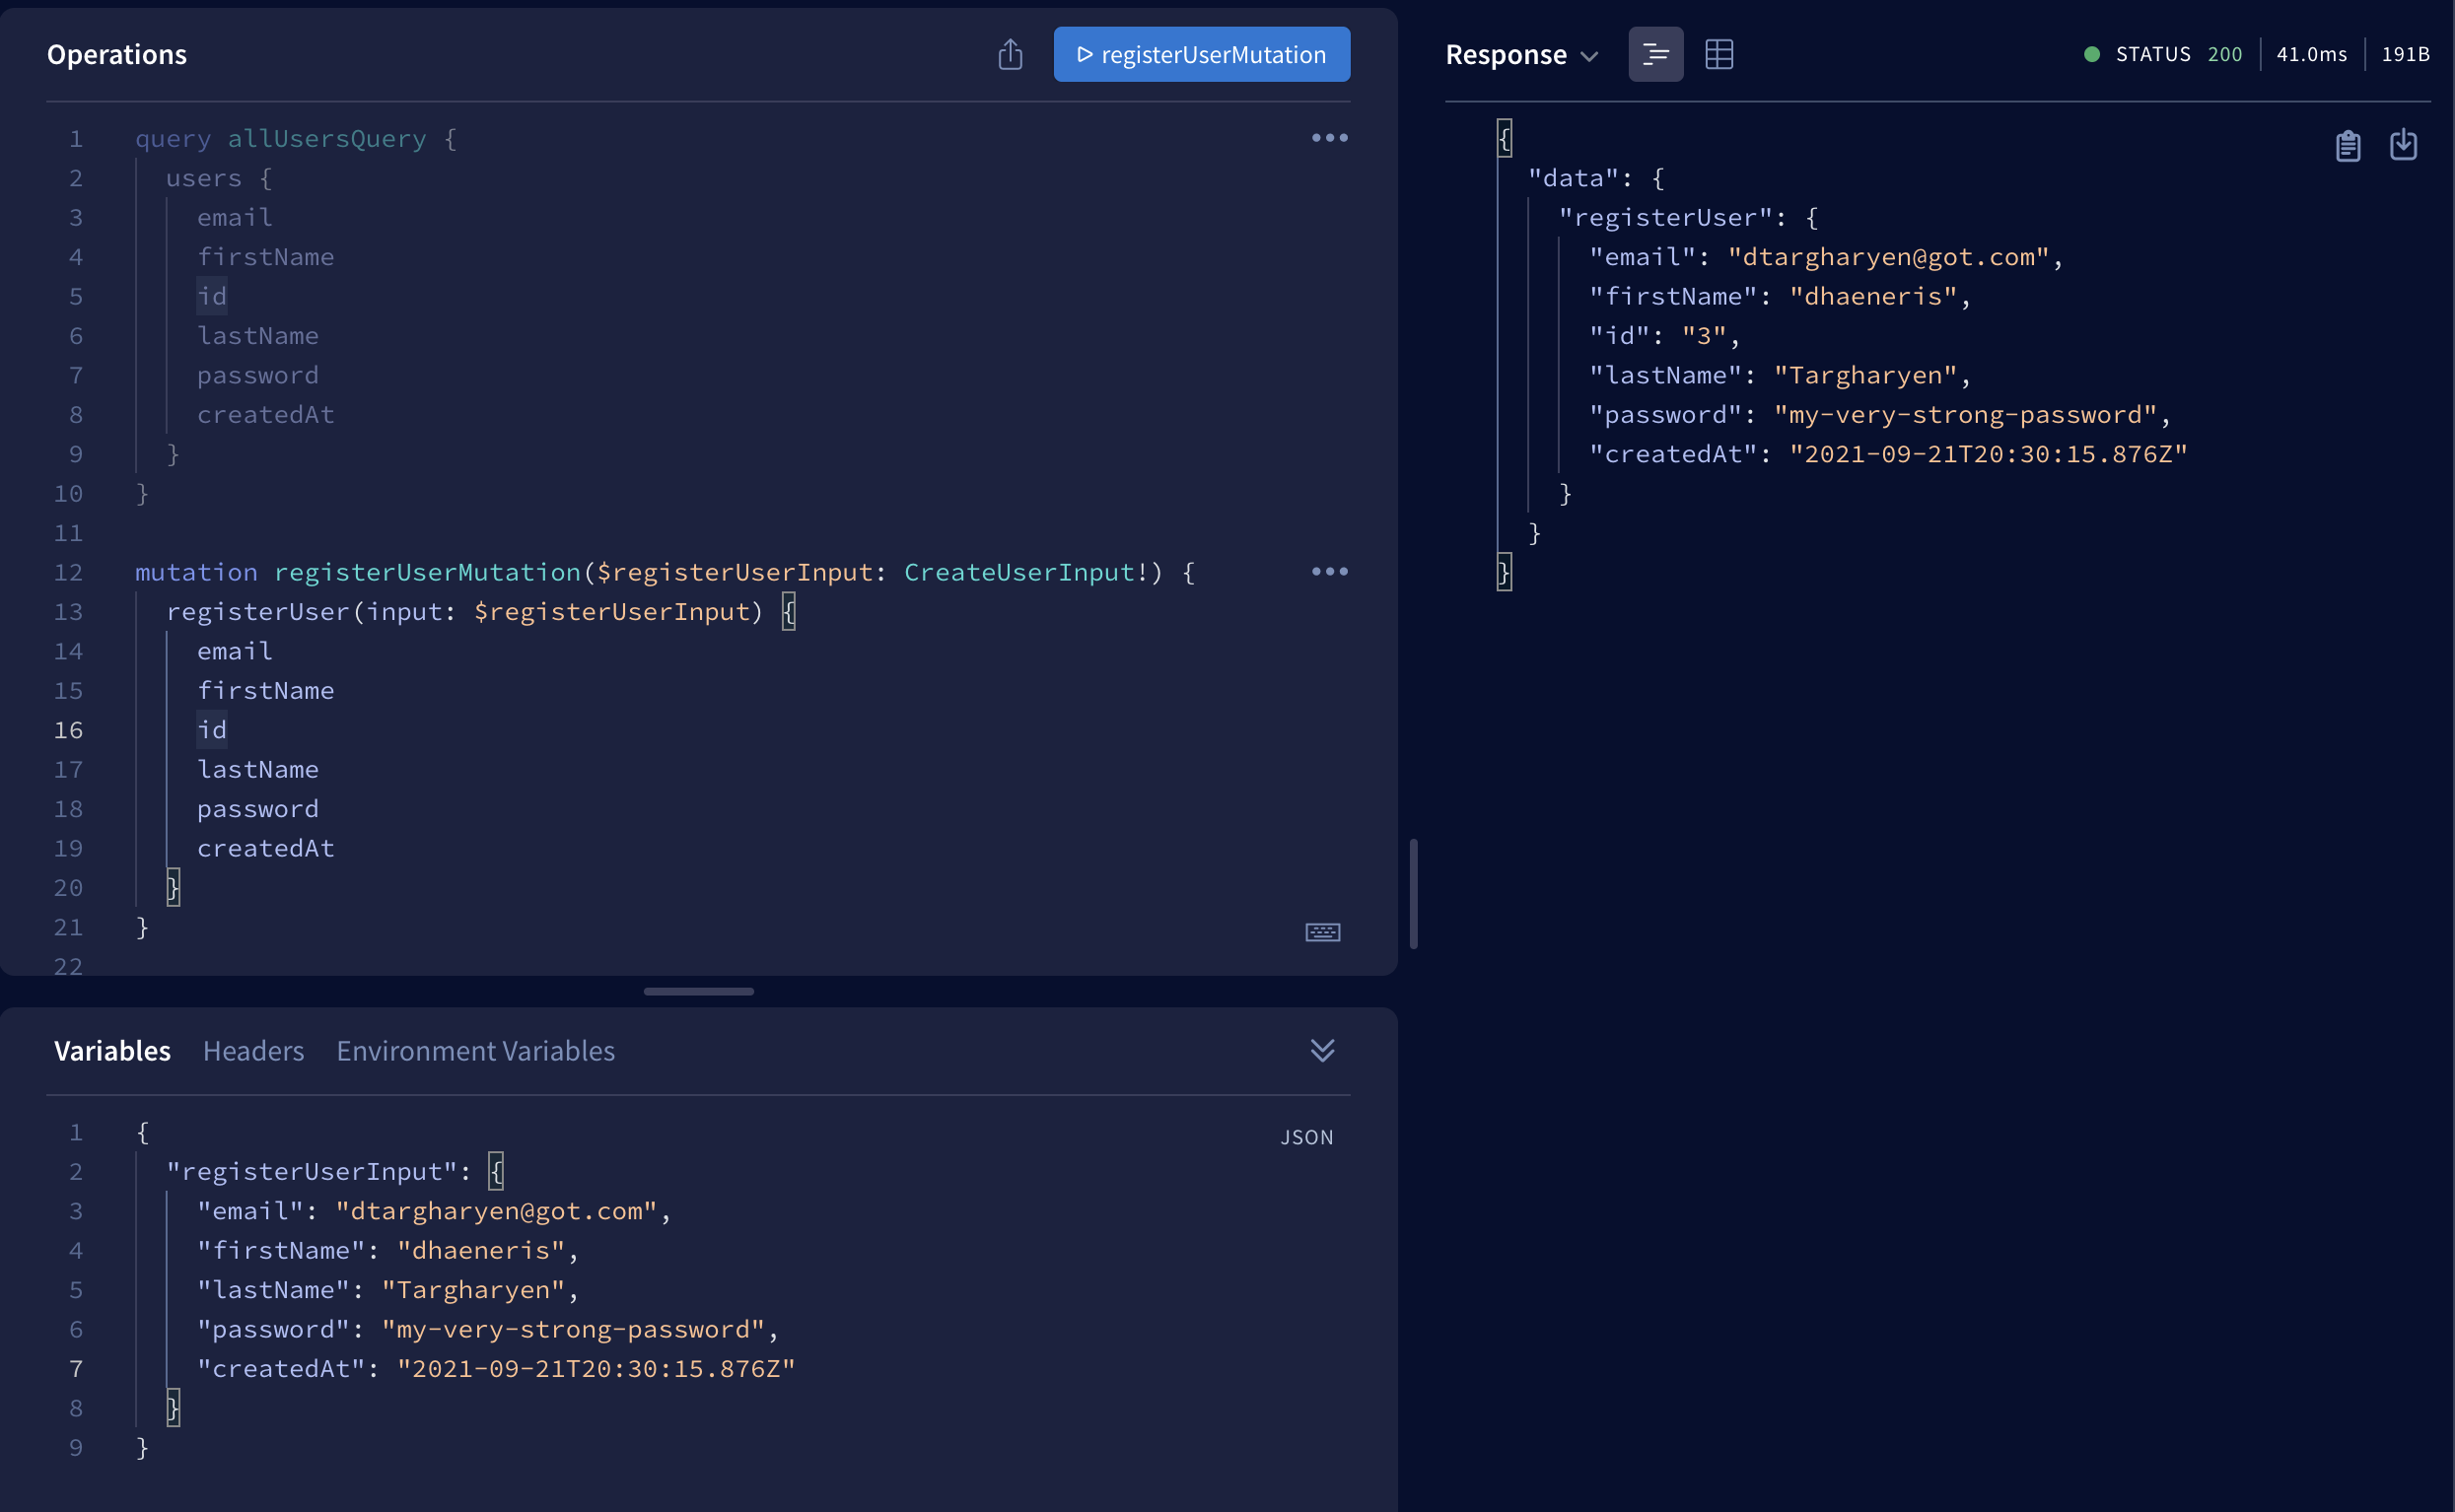
The request succeeds, and the field createdAt is well parsed! If you check your console, you will see a log like this.
timestamp => 1632256215876
This confirms we effectively have a Date object in our resolver.
Improve typing for custom type
In our resolver for createUser mutation, the autocomplete doesn't work on the createdAt variable.
console.log('timestamp => ', createdAt.getTime());It is because the GraphQL code generator, by default, set the type for custom graphql type to any. Fortunately, there is a way the change that. Update the codegen.yml to look like this:
overwrite: true
schema: src/schema.ts
documents: null
generates:
  src/types/types.d.ts:
    plugins:
      - "typescript"
      - "typescript-resolvers"
    config:
      scalars:
        DateTime: Date
On the last line, we create a mapping of GraphQL custom type DateTime to the Javascript Date object. Save and run yarn graphql-codegen and now we have good typing.
Find the final code source on the Github Repository.
Follow me on Twitter or subscribe to my newsletter to not miss the upcoming posts.