
Publish a Docker image to Amazon ECR from a GitHub Actions


Automating the deployment of an application to the Cloud is essential for a good and deterministic way to release an application in production. GitHub Actions is a CI/CD platform that simplifies building pipelines for deploying applications.
Developers widely use Docker to package and run applications in the Cloud. A crucial step for a production-ready environment is to store them in a registry such as the Docker Hub or Amazon Elastic Registry.
This article will guide you through publishing a Docker image to Amazon Elastic Container Registry (ECR) using GitHub Actions.
Prerequisites
You need these tools installed on your computer to follow this tutorial.
- An AWS account with a free tier is enough.
- Docker Desktop for local development - Download's link
- Basic knowledge of using GitHub, GitHub Actions, and YAML syntax.
Create the private ECR repository in AWS
On AWS, you can create a Docker registry using the following tools:
- The AWS Console, the Web UI to access services.
- The AWS CLI v2, the Command Line tool.
- CloudFormation is the service that creates your AWS resources.
- The AWS CDK, the Infrastructure as Code tool of AWS.
We will create it from the AWS Console; I will be in the AWS region eu-west-2, but feel free to choose the one you want.
Log into the console, search for the service Elastic Container Registry, and click on it.
On the left menu, click on the sub-menu "Repositories" under the menu "Private Registry" to browse the repositories.
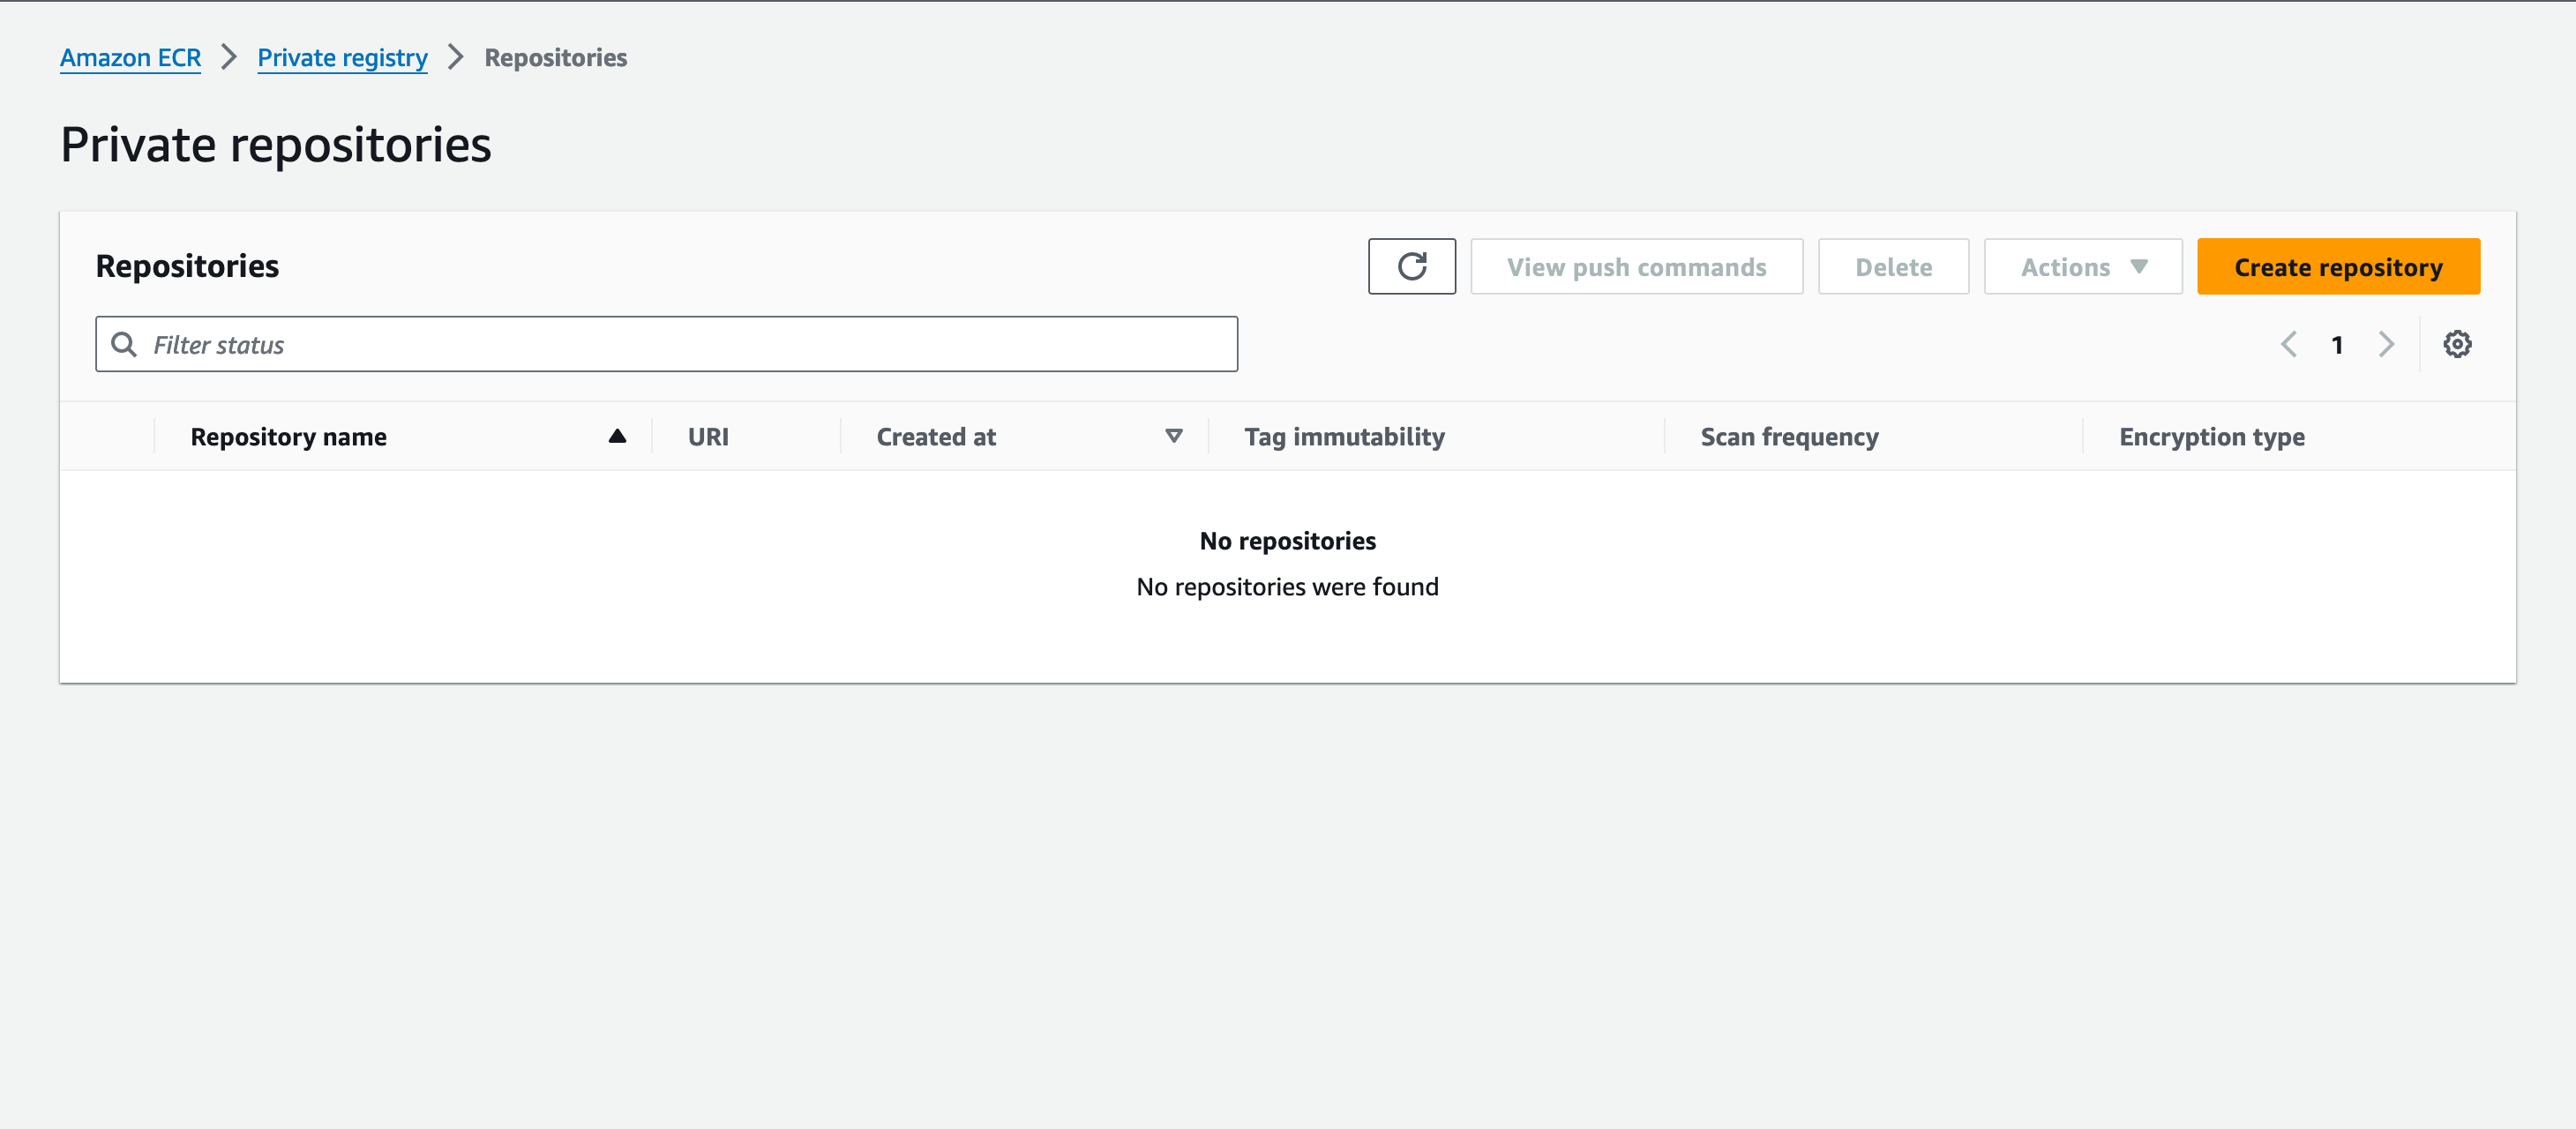
Click the "Create repository" button, and you are redirected to a page with a form to create a repository.
- The repository visibility is set to private by default.
- Give the name of the repository,
github-actions-repoin my case. - Do not disable tag immutability.
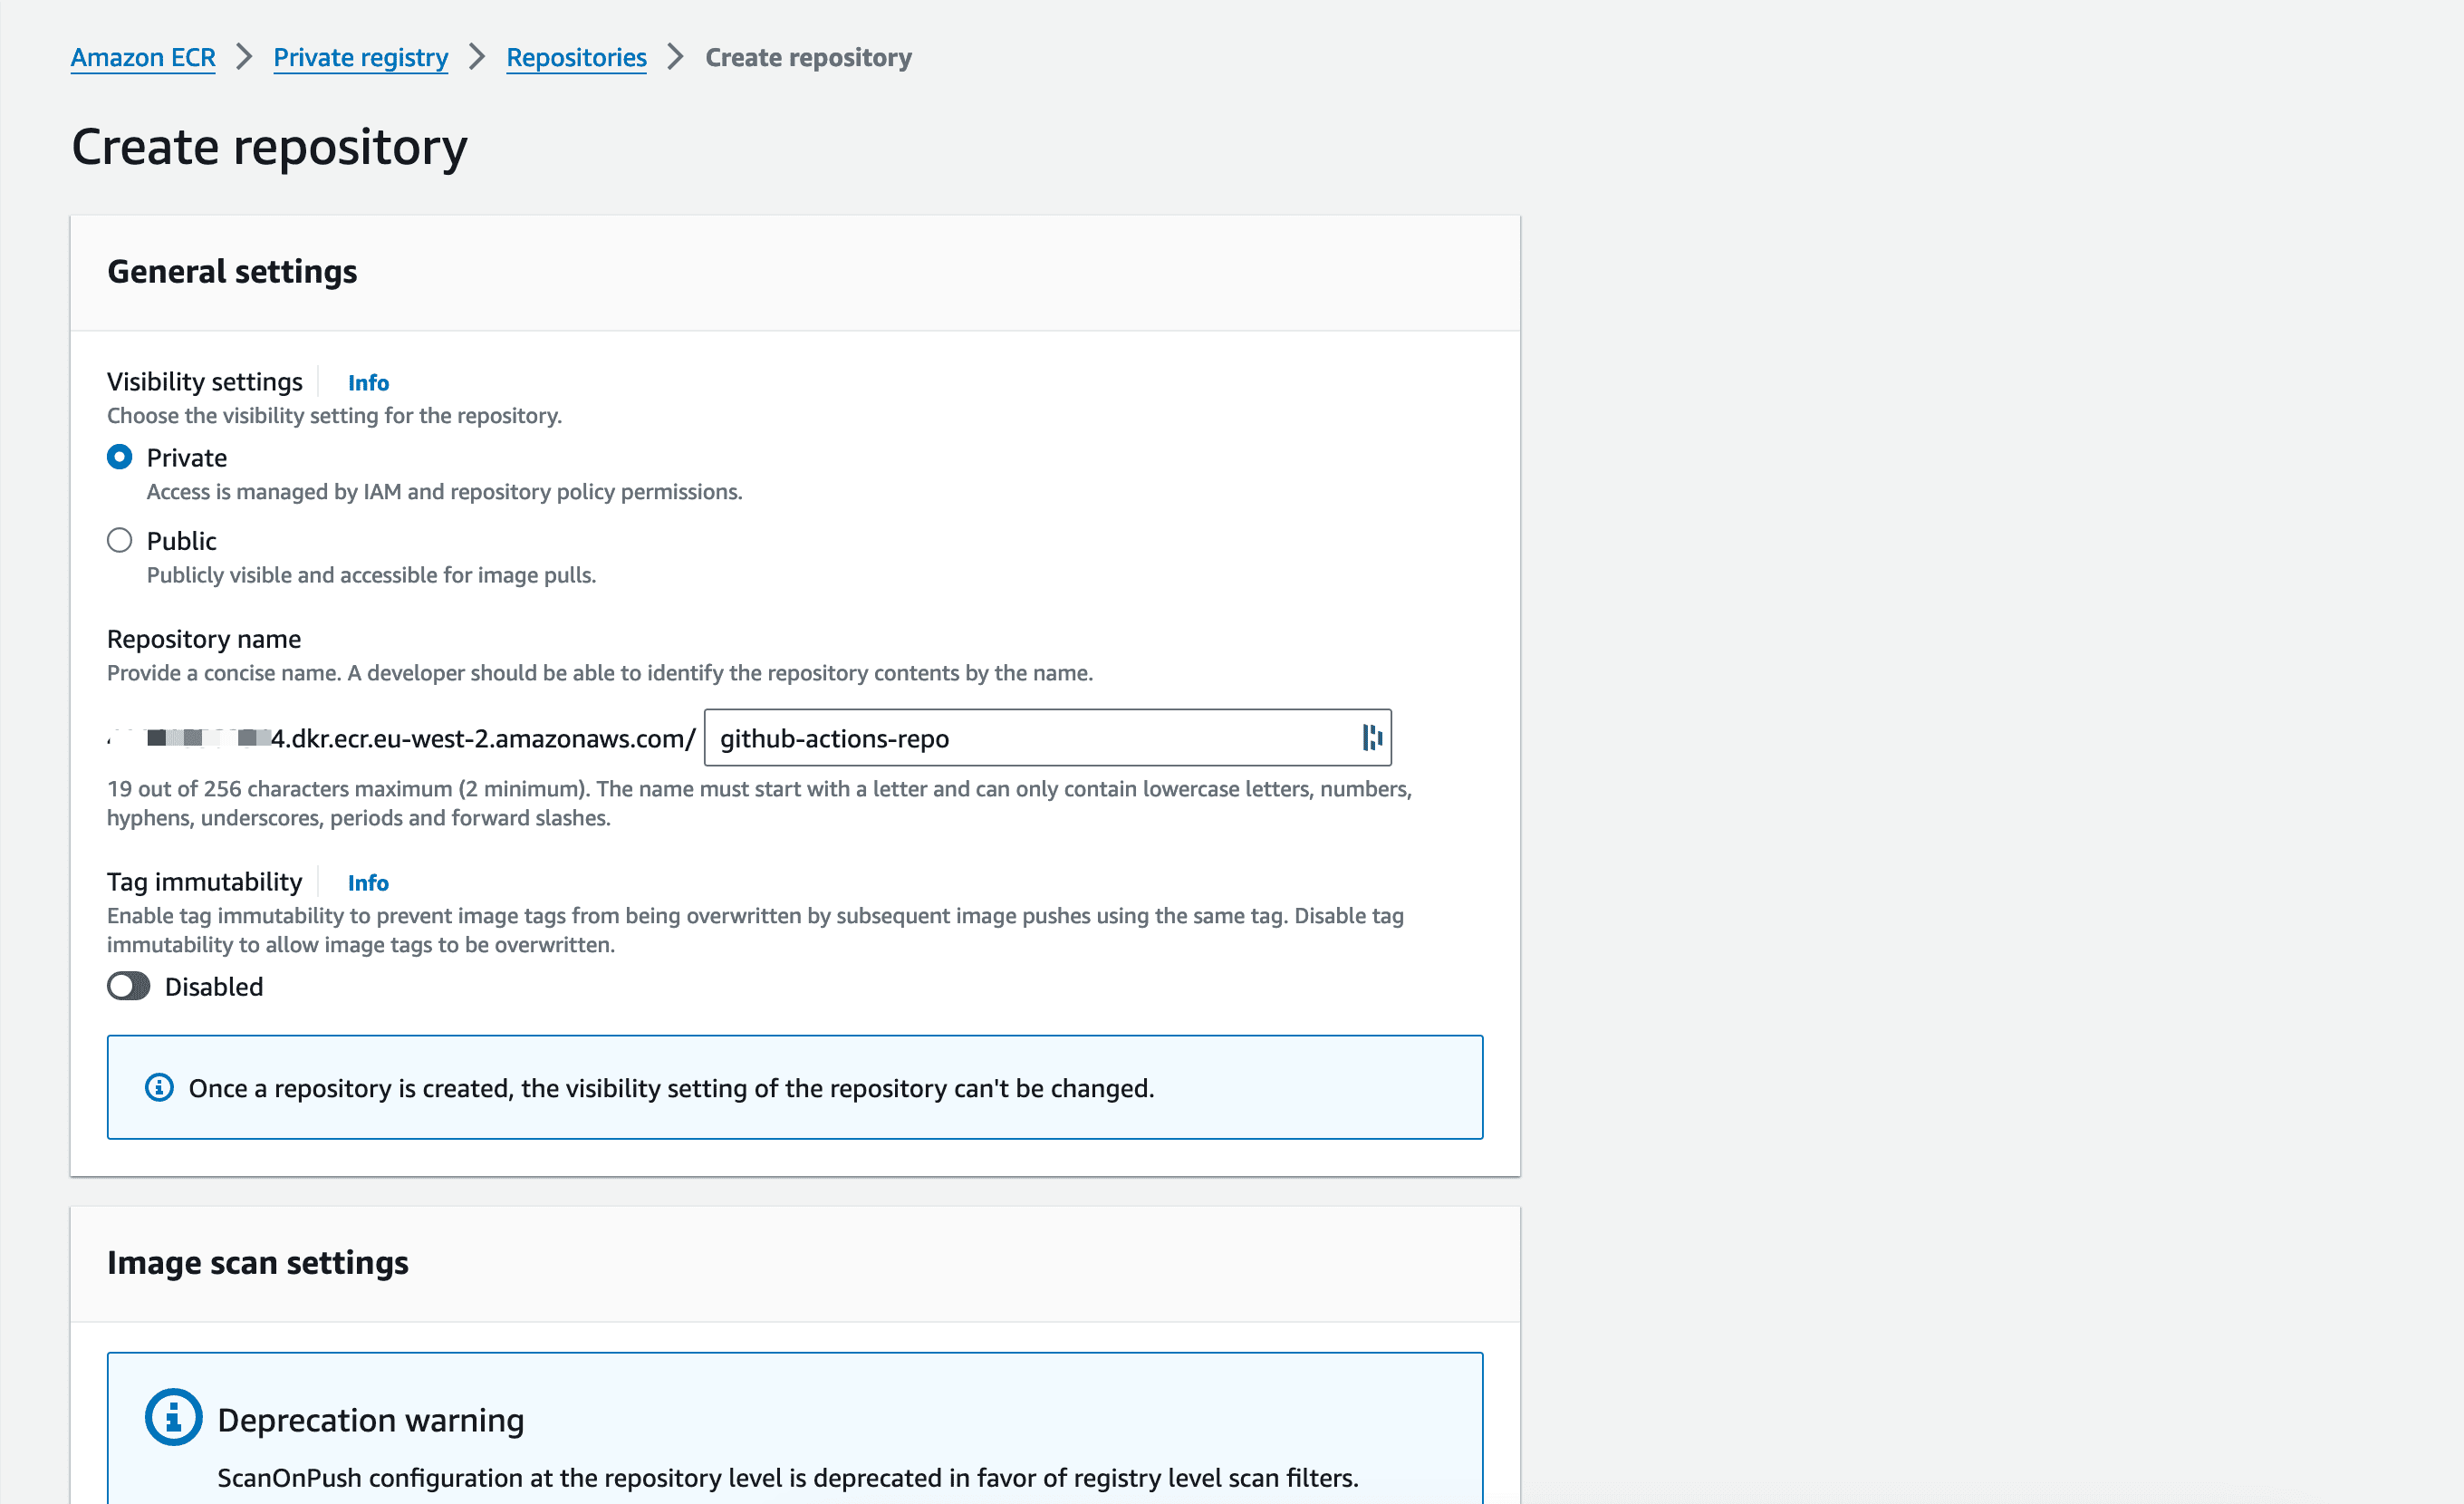
Scroll to the bottom and click the button to create the ECR repository.
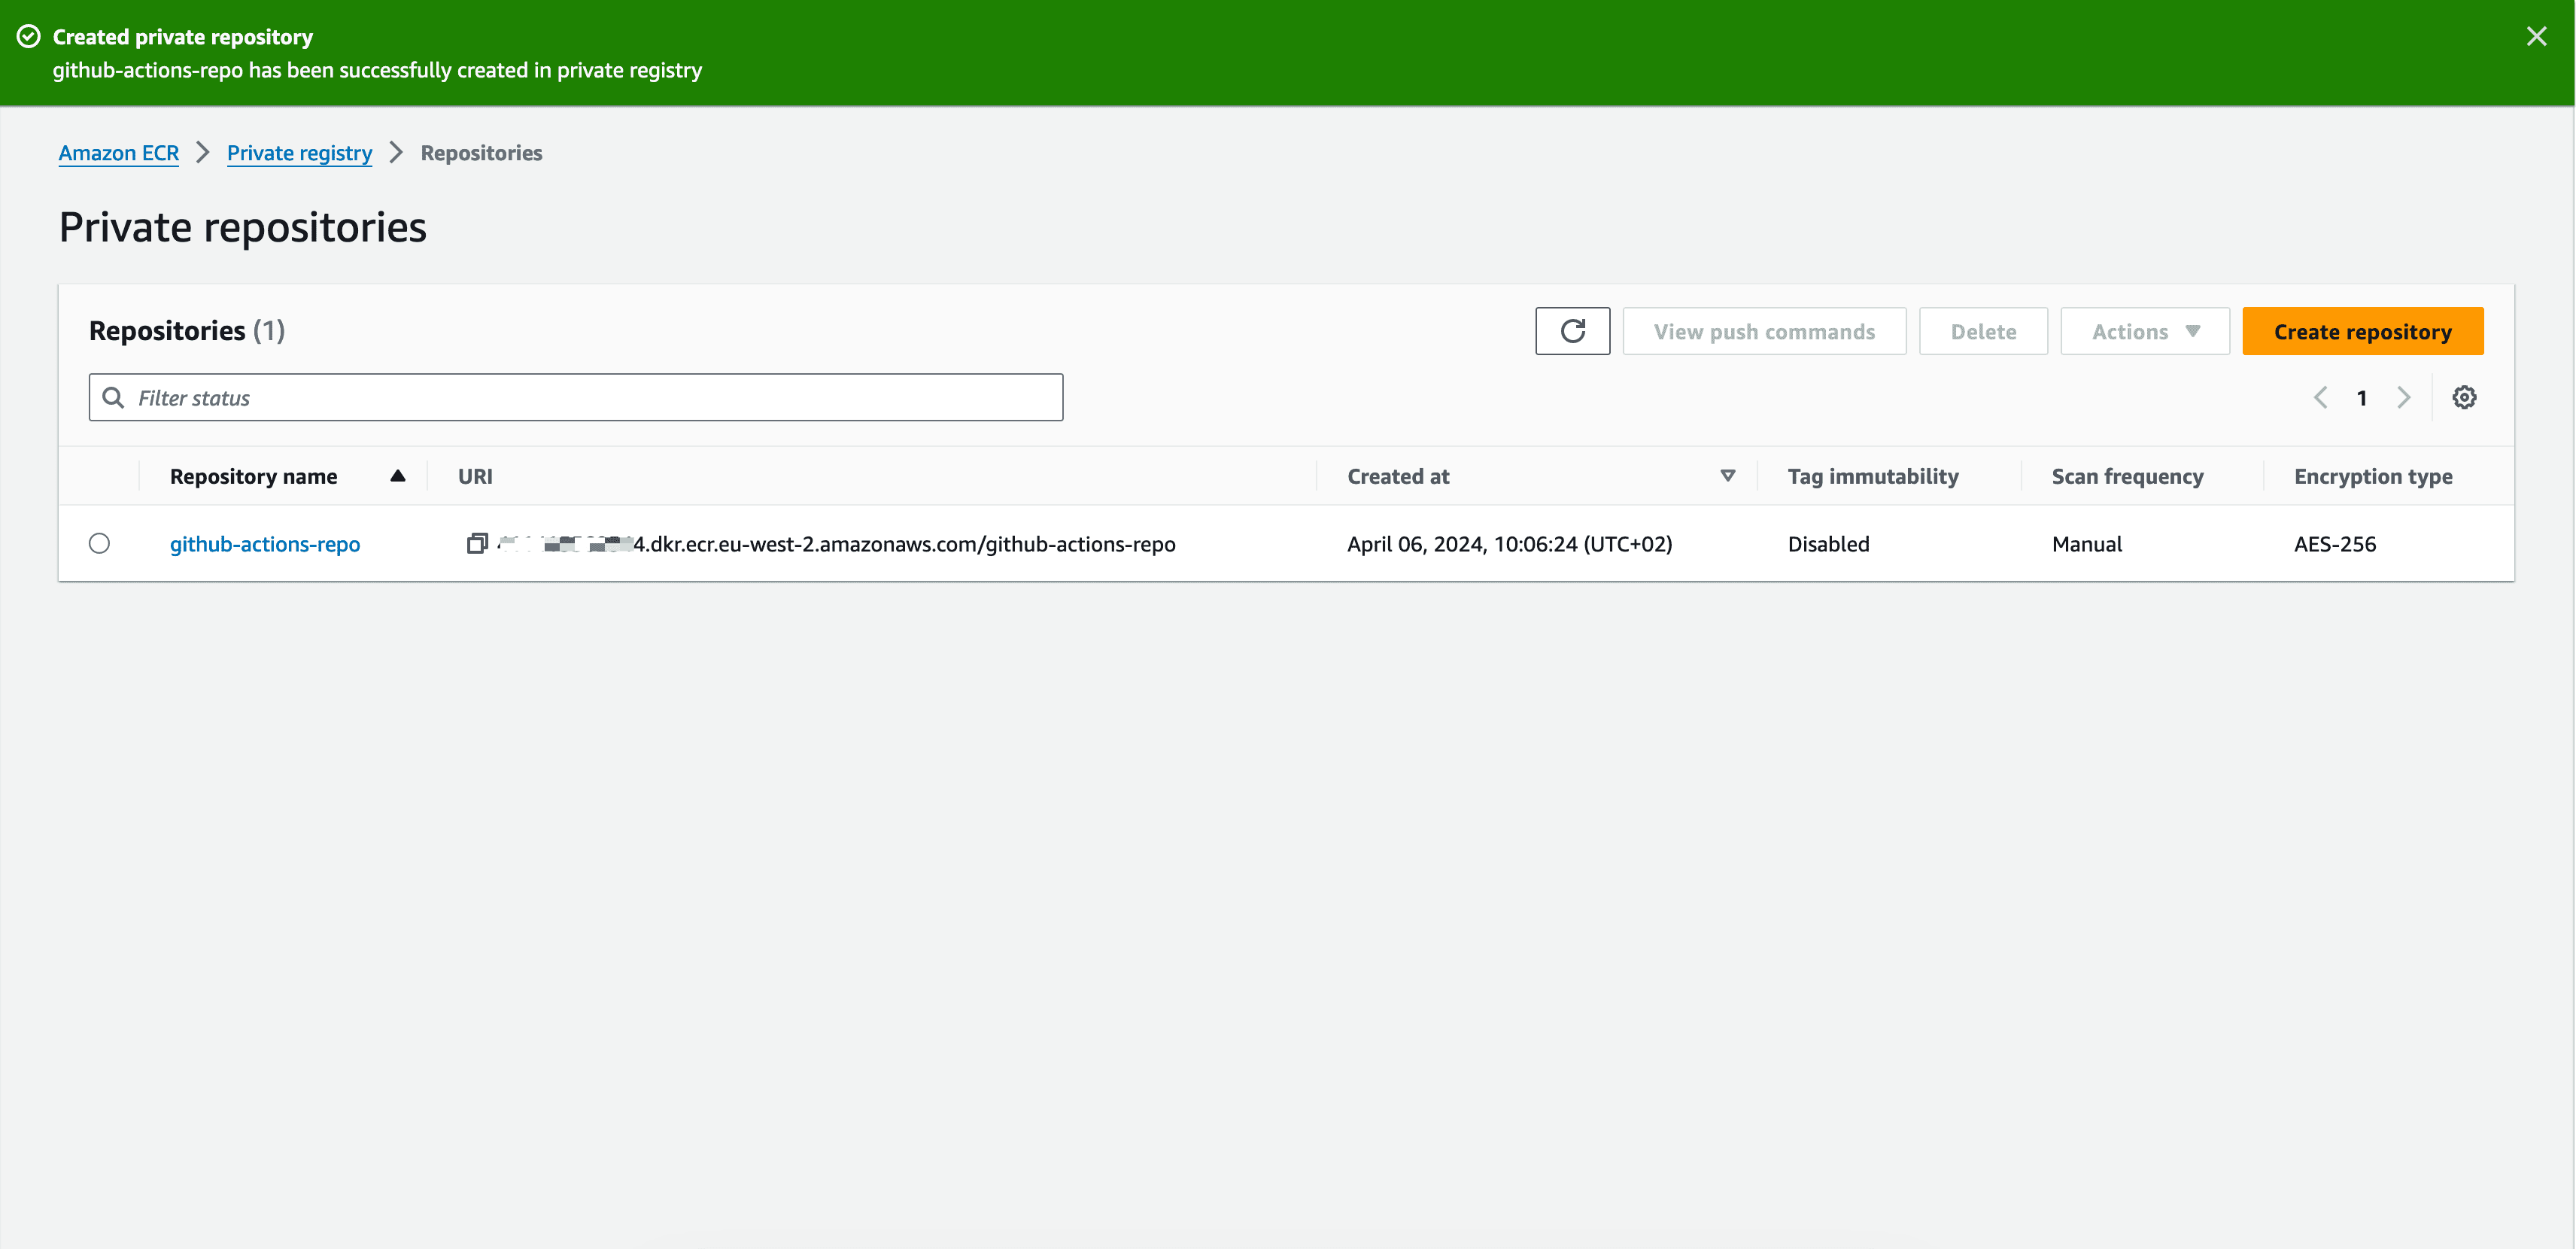
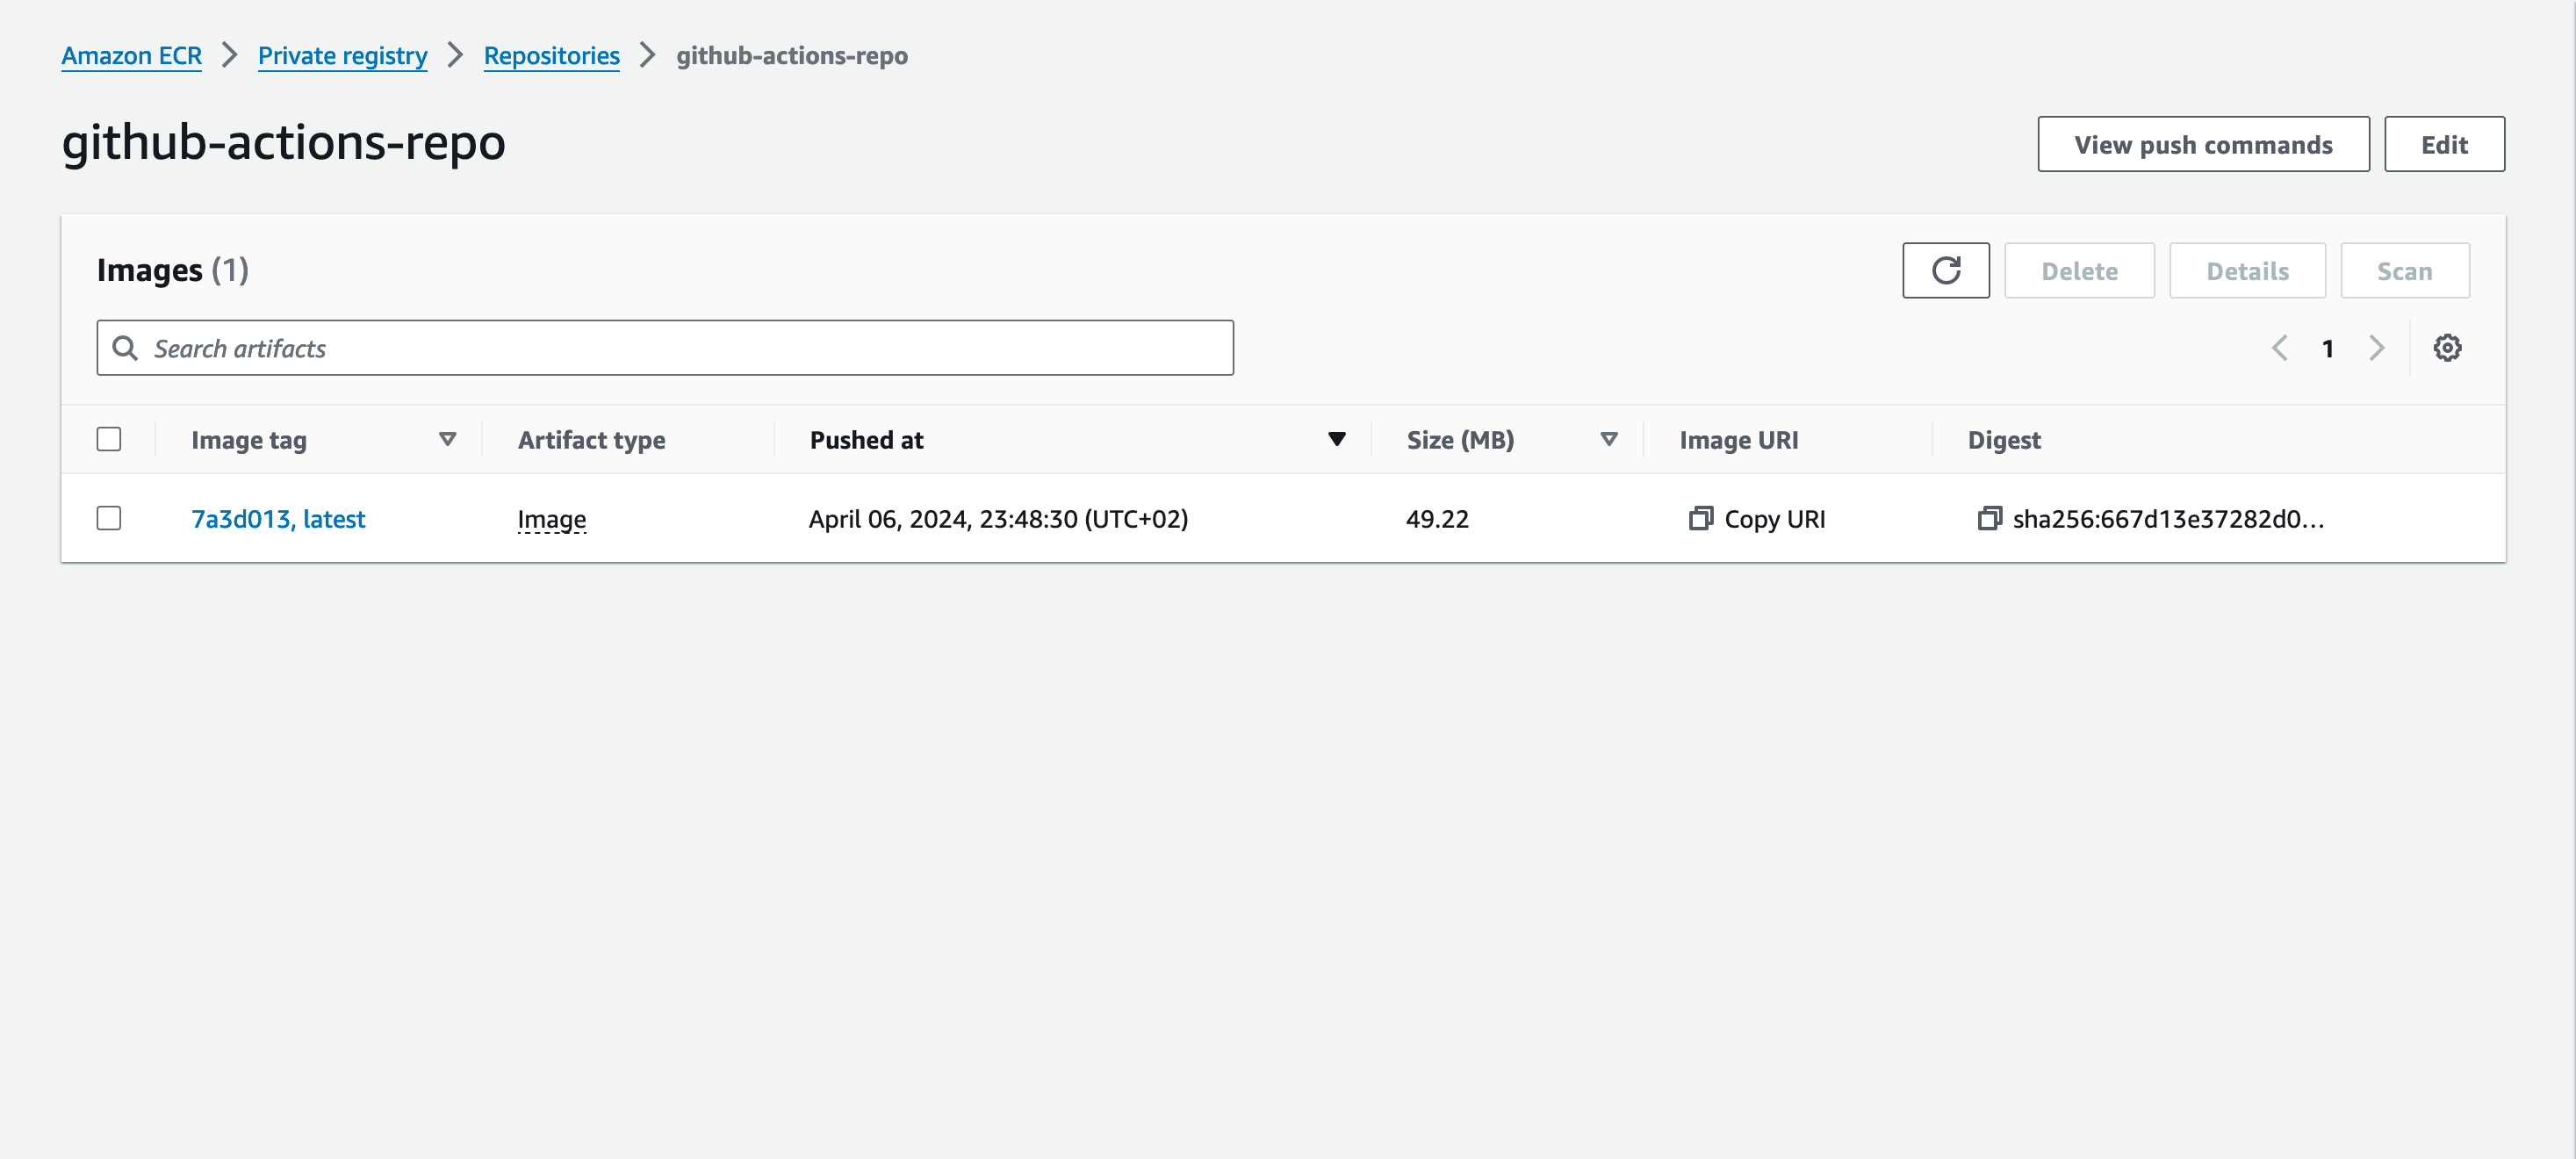
The ECR repository is ready to receive the Docker image at this step.
Set up the project
To stay focused on GitHub Actions and Docker ECR, I prepared a project with a Dockerfile; it is the final code of the tutorial about building a Docker image of a Node.js application.
Let's clone the project and build the Docker image locally to ensure the Docker build is correct. Verify Docker Desktop is running and run the command below:
git clone https://github.com/tericcabrel/docker-push-ecr.git
cd docker-push-ecr
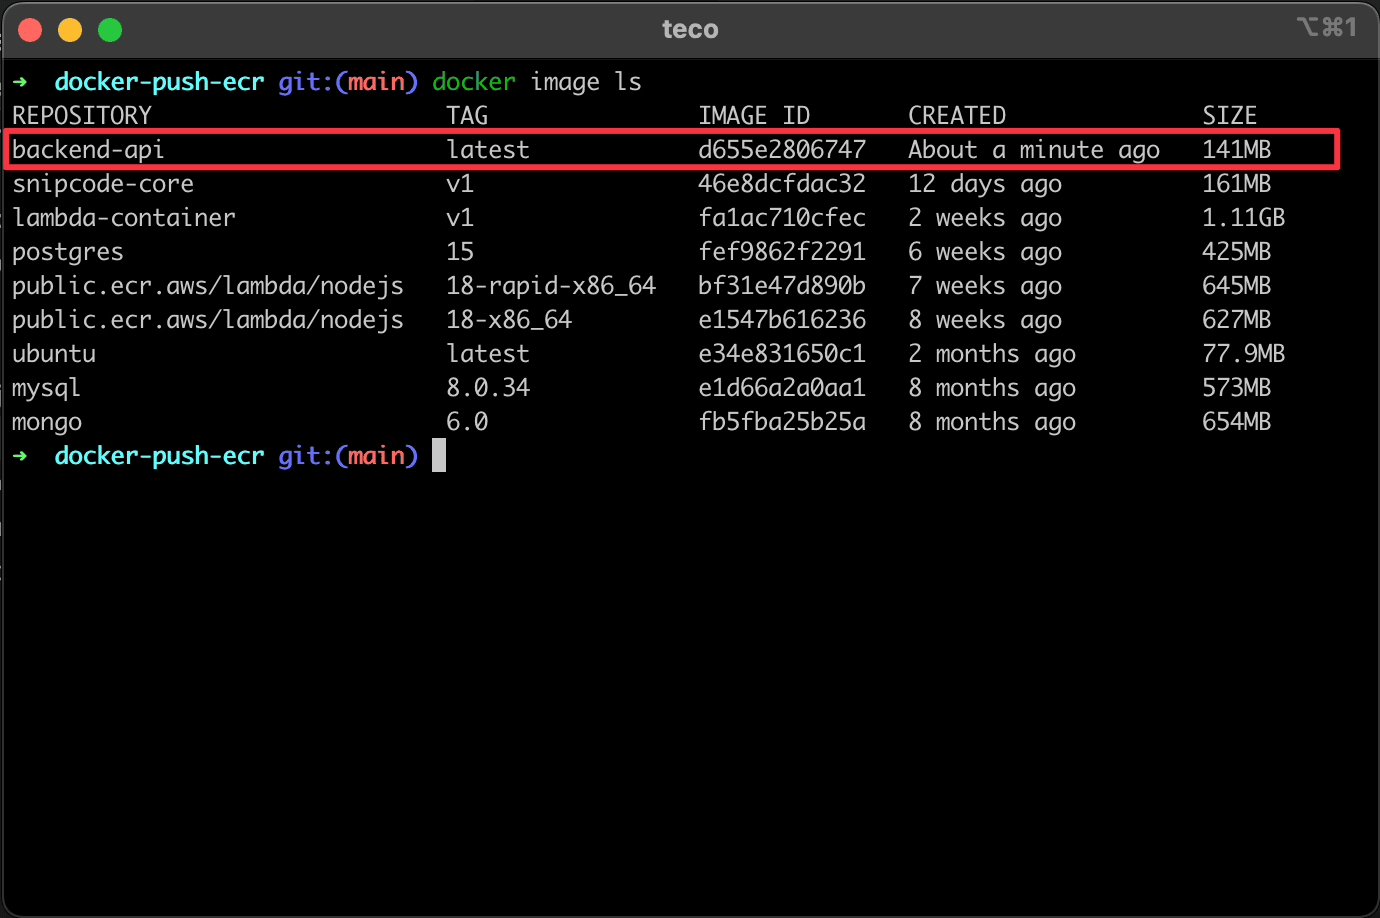
docker build -t backend-api .
docker image ls
The last command displays the Docker images stored locally, where you can see the image we just built.
Create the GitHub Actions workflow
A GitHub Actions workflow is configured using the YAML syntax found in the documentation.
These are the main parts of a workflow file
- Define when the GitHub Actions are triggered when we create a pull request. Find other events on this documentation.
- Create a job to build and push the image to the ECR repository.
- In the job, we will define steps to perform specific tasks.
A workflow must stored in a specific folder .github/workflows; let's create it and then create a file push-image.yaml .
mkdir -p .github/workflows

cd .github/workflows

touch push-image.yaml
Open the YAML file and add the code below:
name: Push Docker Image

on: [pull_request]

concurrency:
  group: ${{ github.workflow }}-${{ github.head_ref || github.run_id }}
  cancel-in-progress: true

jobs:
  build-push-image:
    timeout-minutes: 10
    runs-on: ubuntu-latest

    steps:
      - uses: actions/checkout@v4
The above code does the following:
- Give the Action's name and trigger it on every pull request
- The concurrency property is used to cancel the current actions when new changes are pushed on the branch on which the pull request has been created.
- Define a job "build-push-image", use the latest Ubuntu version in the GitHub Actions runner and stop the job after 10 minutes of execution.
- Define the step of the job that clones the project in Runner.
Configure AWS credentials
We must be authenticated since we will perform actions on AWS resources from our GitHub Actions workflow. AWS has an action in the GitHub Actions marketplace that helps achieve that.
Let's update our workflow to add a step for configuring the AWS credentials.
- name: Configure AWS credentials
  uses: aws-actions/configure-aws-credentials@v4
  with:
    aws-region: ${{ secrets.AWS_REGION }}
    aws-access-key-id: ${{ secrets.AWS_ACCESS_KEY_ID }}
    aws-secret-access-key: ${{ secrets.AWS_SECRET_ACCESS_KEY }}
We define the action with three parameters: the AWS region, the secret key ID, and the secret access key.
Read my post to learn how to generate the AWS credentials.
Once you have generated your AWS credentials, you must add them in the GitHub repository secret to access them in the GitHub Actions workflow. The video below shows you how to add a GitHub Action secret.
Add a GitHub Actions secret in a repository.
Repeat this process for the AWS_SECRET_ACCESS_KEY and the AWS_REGION.
Log into Amazon ECR
Before pushing an image to the Elastic Container Registry, you must log into the repository to store images inside. We will use the Amazon ECR "Login" Action. Update our workflow by adding the step below:
- name: Login to Amazon ECR
  id: login-to-ecr
  uses: aws-actions/amazon-ecr-login@v2
That's it! Behind the scenes, the action will retrieve the credentials from the previous step and perform the login. To see the detailed command this action executes, check out my article below:

Build, Tag, and Push the image
The last step is to build the Docker image effectively, tag it, and push it to the ECR repository. We will add two steps doing the following:
- Generate the Docker image tag from the commit SHA.
- Build the Docker image, tag it, and push it.
Update the workflow by adding the two steps below:
- name: Set short git commit SHA
  id: short-sha
  run: |
    shortSha=$(git rev-parse --short ${{ github.sha }})
    echo "COMMIT_SHORT_SHA=$shortSha" >> $GITHUB_ENV

- name: Build, tag, and push docker image to Amazon ECR
  env:
    REGISTRY: ${{ steps.login-to-ecr.outputs.registry }}
    REPOSITORY: github-actions-repo
    IMAGE_TAG: ${{ env.COMMIT_SHORT_SHA }}
  run: |
    docker build -t github-actions-repo .
    docker tag github-actions-repo:latest $REGISTRY/$REPOSITORY:$IMAGE_TAG
    docker tag github-actions-repo:latest $REGISTRY/$REPOSITORY:latest
    docker push --all-tags $REGISTRY/$REPOSITORY
The step related to building, tagging, and pushing the image defines three environment variables:
- REGISTRY: is the URL to the Private ECR repository generated and exported after a successful login in the Amazon ECR "Login" Action.
- REPOSITORY: is the name of the repository we used when creating the ECR from the AWS Console.
- IMAGE_TAG: is the seven first characters of the commit SHA generated in the previous step, "Set short git commit SHA".
Run the GitHub Actions
Here is the full code of the GitHub Actions workflow:
name: Push Docker Image

on: [pull_request]

concurrency:
  group: ${{ github.workflow }}-${{ github.head_ref || github.run_id }}
  cancel-in-progress: true

jobs:
  build-push-image:
    timeout-minutes: 10
    runs-on: ubuntu-latest

    steps:
      - uses: actions/checkout@v4

      - name: Configure AWS credentials
        uses: aws-actions/configure-aws-credentials@v4
        with:
          aws-region: ${{ secrets.AWS_REGION }}
          aws-access-key-id: ${{ secrets.AWS_ACCESS_KEY_ID }}
          aws-secret-access-key: ${{ secrets.AWS_SECRET_ACCESS_KEY }}

      - name: Login to Amazon ECR
        id: login-to-ecr
        uses: aws-actions/amazon-ecr-login@v2

      - name: Set short git commit SHA
        id: short-sha
        run: |
          shortSha=$(git rev-parse --short ${{ github.sha }})
          echo "COMMIT_SHORT_SHA=$shortSha" >> $GITHUB_ENV

      - name: Build, tag, and push docker image to Amazon ECR
        env:
          REGISTRY: ${{ steps.login-to-ecr.outputs.registry }}
          REPOSITORY: github-actions-repo
          IMAGE_TAG: ${{ env.COMMIT_SHORT_SHA }}
        run: |
          docker build -t github-actions-repo .
          docker tag github-actions-repo:latest $REGISTRY/$REPOSITORY:$IMAGE_TAG
          docker tag github-actions-repo:latest $REGISTRY/$REPOSITORY:latest
          docker push --all-tags $REGISTRY/$REPOSITORY
Let's make a commit, push, and create a pull request
git checkout -b docker-github-actions
git add .
git commit -m "create github action workflow to push docker image"
git push origin docker-github-actions
Git will generate a link to create a pull request on GitHub; click on it to create it. We can see the GitHub Actions workflow running on the pull request.
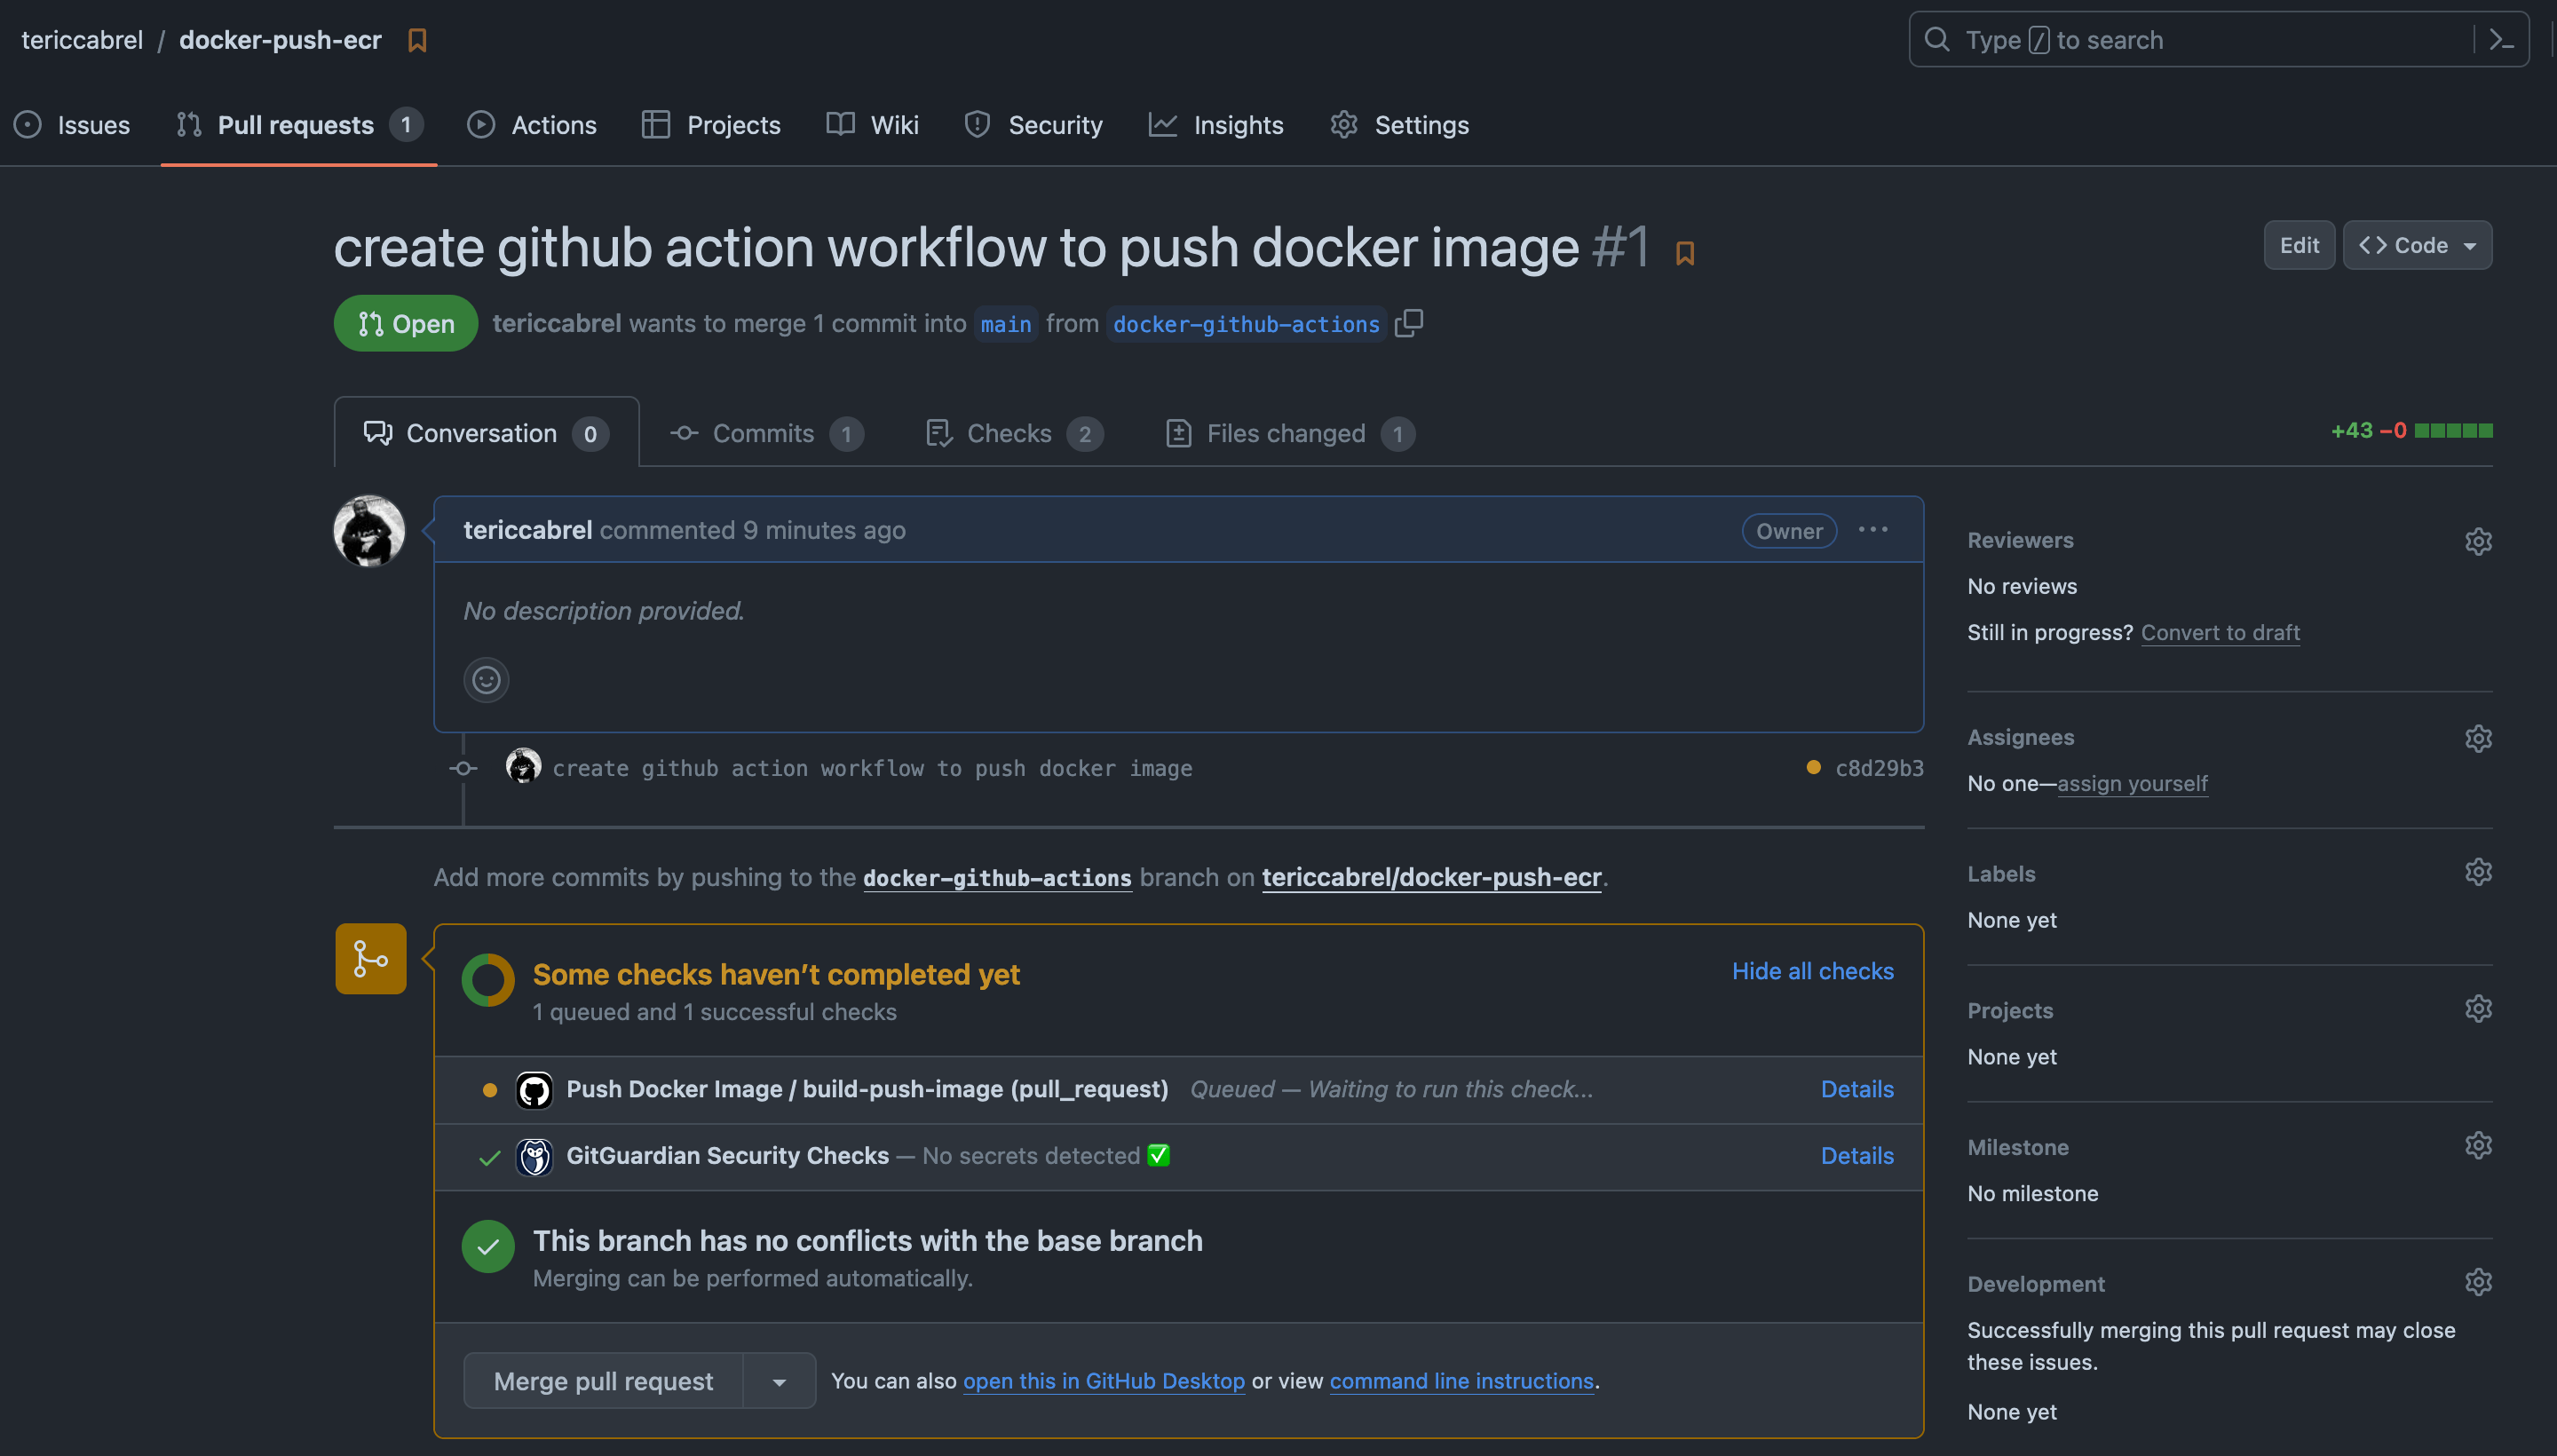
You can click on it to see the progress until it is complete.
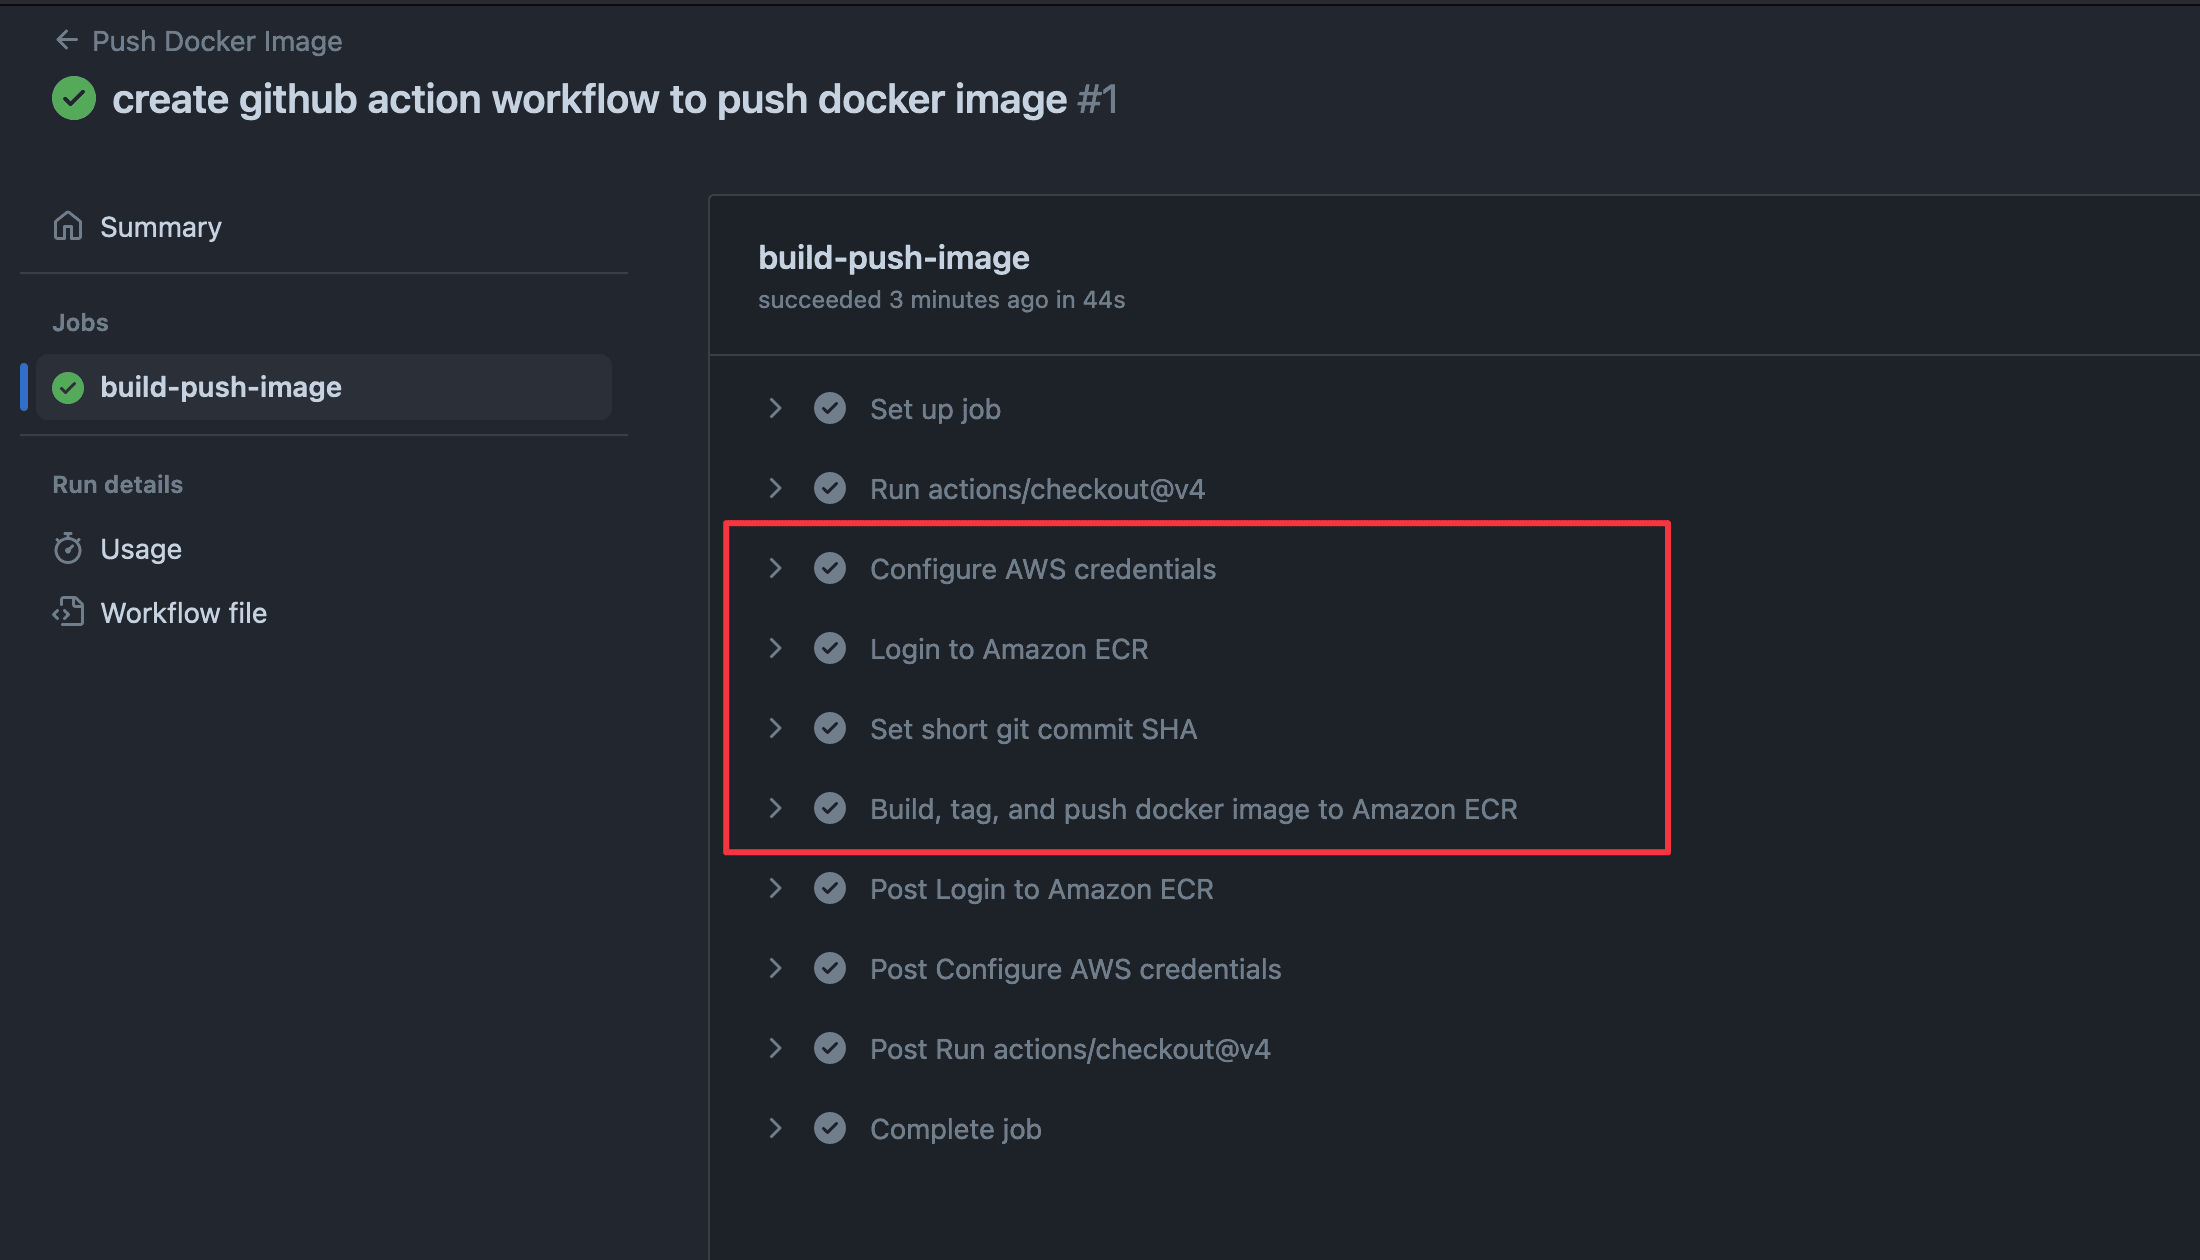
The Action workflow was completed successfully; let's check the ECR repository.
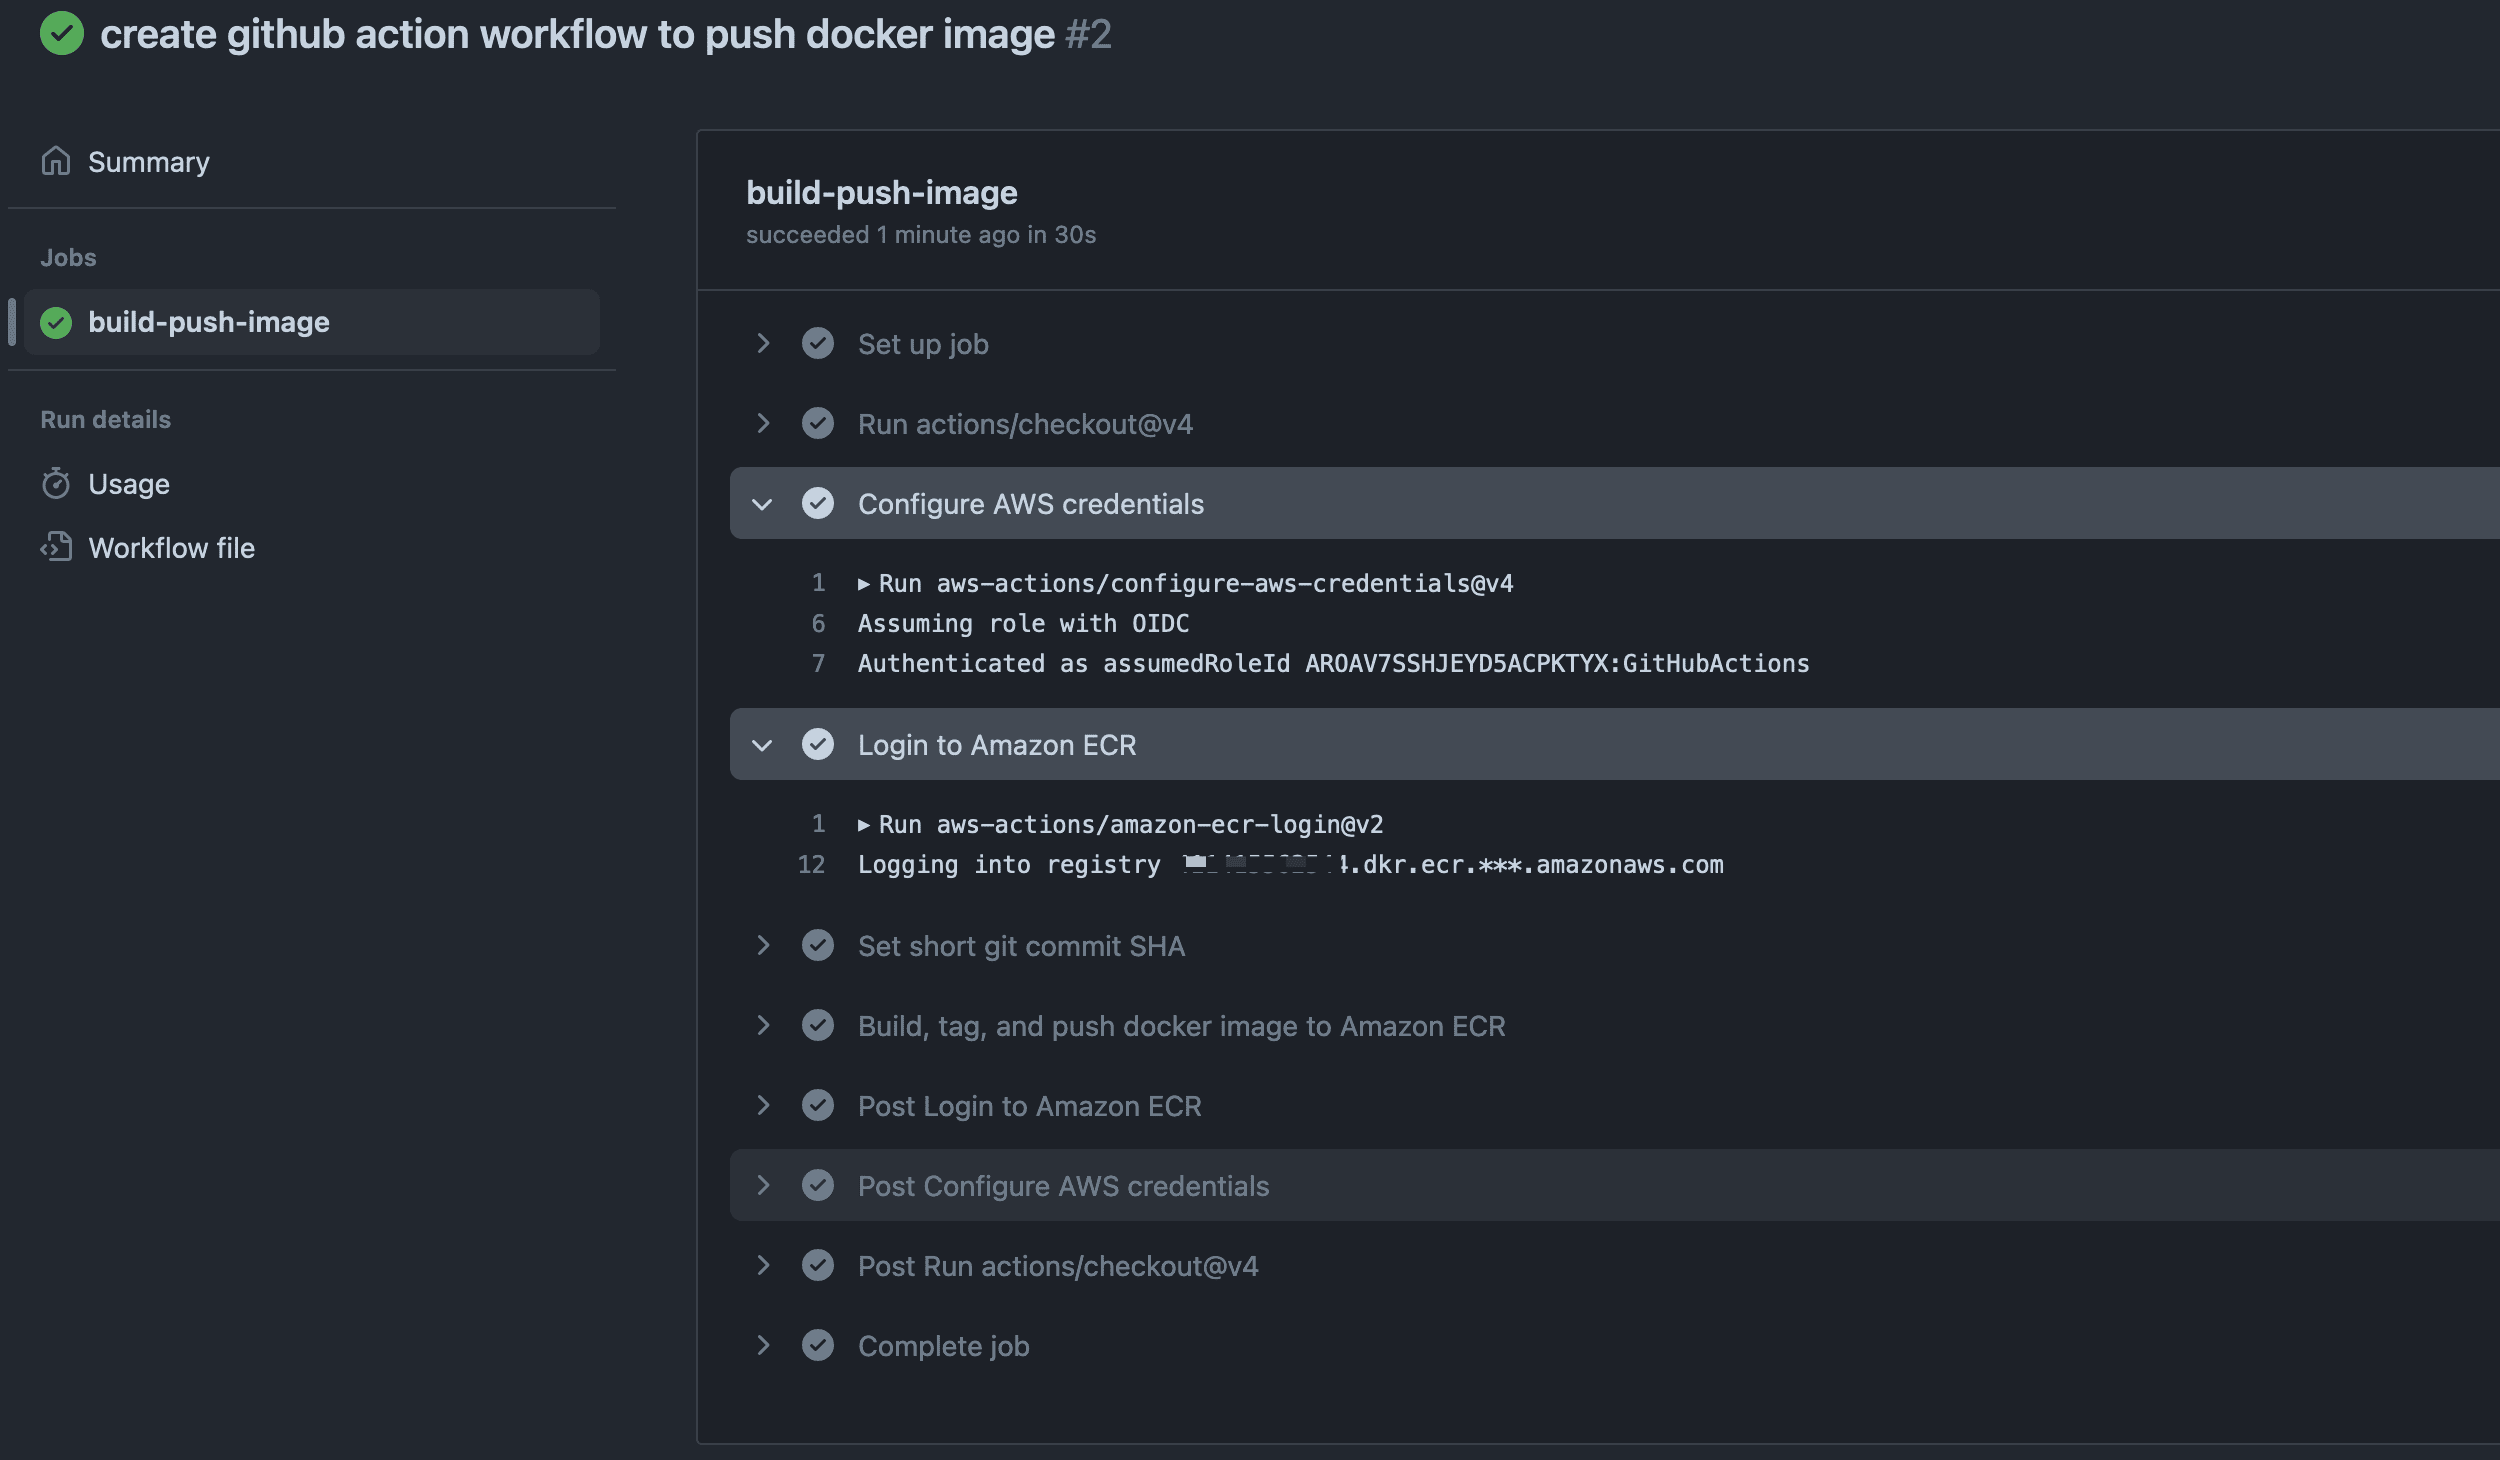
Create an AWS IAM role in GitHub Actions
To authenticate to AWS and access the Elastic Container Registry, we used an access key ID and secret access key that grants access to all resources managed by the AWS account user.
Using these credentials in the Action workflow has the following concerns:
- The AWS credentials give more permission than needed and should follow the least privilege principle, which recommends giving only the permissions needed.
- If the credentials leak, someone can use them to create services that will grow your monthly bill.
- The credentials never expire until you manually invalidate them and regenerate new ones so they can used forever (not really because your bill will alert you 😝).
To fix these issues, we can create an IAM role to attach to the GitHub Identity Provider through OpenID Connect; the IAM role will have the policies required to publish the Docker image in Amazon ECR.
I wrote a complete tutorial about creating an OpenID Connect for GitHub on AWS.
Once completed, the ARN of the IAM role looks like this:
arn:aws:iam:<account-id>:role/<role-name>
Update the workflow file to change the step about configuring the AWS credentials with the code below:
- name: Configure AWS credentials
  uses: aws-actions/configure-aws-credentials@v4
  with:
    role-to-assume: arn:aws:iam:<account-id>:role/<role-name>
    aws-region: ${{ secrets.AWS_REGION }}
We must update the permissions of the GITHUB_TOKEN to request the JWT authentication by adding the code below before the definition of the workflow steps.
permissions:
  id-token: write
  contents: read
Here is the GitHub Actions workflow file after the edition.
name: Push Docker Image

on: [pull_request]

concurrency:
  group: ${{ github.workflow }}-${{ github.head_ref || github.run_id }}
  cancel-in-progress: true

permissions:
  id-token: write
  contents: read

jobs:
  build-push-image:
    timeout-minutes: 10
    runs-on: ubuntu-latest

    steps:
      - uses: actions/checkout@v4

      - name: Configure AWS credentials
        uses: aws-actions/configure-aws-credentials@v4
        with:
          aws-region: ${{ secrets.AWS_REGION }}
          role-to-assume: arn:aws:iam:<account-id>:role/<role-name>

      - name: Login to Amazon ECR
        id: login-to-ecr
        uses: aws-actions/amazon-ecr-login@v2

      - name: Set short git commit SHA
        id: short-sha
        run: |
          shortSha=$(git rev-parse --short ${{ github.sha }})
          echo "COMMIT_SHORT_SHA=$shortSha" >> $GITHUB_ENV

      - name: Build, tag, and push docker image to Amazon ECR
        env:
          REGISTRY: ${{ steps.login-to-ecr.outputs.registry }}
          REPOSITORY: github-actions-repo
          IMAGE_TAG: ${{ env.COMMIT_SHORT_SHA }}
        run: |
          docker build -t github-actions-repo .
          docker tag github-actions-repo:latest $REGISTRY/$REPOSITORY:$IMAGE_TAG
          docker tag github-actions-repo:latest $REGISTRY/$REPOSITORY:latest
          docker push --all-tags $REGISTRY/$REPOSITORY
Create a Git commit, push, and wait for the action workflow to be completed. You can see everything works as before for the AWS authentication and the push to the ECR registry.
Wrap up
We saw how to push a Docker image to Amazon ECR, and the process can summarized in these five steps:
- Create the repository in Amazon ECR.
- Generate the IAM role to authenticate in AWS from GitHub Actions.
- Configure the OIDC authentication for AWS and log into Amazon ECR.
- Generate the image tag from the commit SHA.
- Build, tag, and push the Docker image to Amazon ECR.
Also, the credentials should be protected when using them in a CI/CD platform like GitHub Actions.
To go further, here are some actions you can take:
- Build and push only when the branch is merged with the main branch to reduce cost, as the Private ECR is not free.
- Pull the image from ECR and run it.
- Automatically detect the push of an image in the repository and redeploy the application with the new Docker image.
You can find the code source on the GitHub repository.
Follow me on Twitter or subscribe to my newsletter to avoid missing the upcoming posts and the tips and tricks I occasionally share.