
Upload files to the Node.js server with Express and Multer


Photo by Zachary XU on Unsplash
We can store data inside various cloud storage sources like S3, Google Drive, Dropbox, or simply on the same server where our backend is hosted. In this tutorial, we will see how to do it for the latter as the storage target.
We need a real-world use case to better view how this implementation can apply to your own. Here is a good one:
We have a web application where an user can register by filling his full name and a picture of him. When the user submit the data, our backend should store the picture inside a directory on the server then save user in the database. The backend should allow us to view or download the picture of an user through his id.
Set up the project
We will use a boilerplate for the Node.js project I built throughout this tutorial. The main branch contains a simple Node.js app. The branch express contains a project with the Framework express and the Node.js package dotenv for managing environment variables.
git clone https://github.com/tericcabrel/node-ts-starter.git -b express node-upload-files

cd node-upload-files

cp .env.example .env

nano .env

yarn install

yarn start
We get in the terminal with this message : Application started on URL http://localhost:4500 ?
Navigate to the URL in the browser, and we'll get a JSON response:
{
  "message":"Hello World!"
}
At the root directory, create a directory public and create another directory uploads, all the files uploaded will leave in this folder. Finally, give the write access to the directory. You can find more on Linux permission at this link.
mkdir -p public/uploads

chmod -R 755 public
Modeling user schema
We will use MongoDB to store user data. We have already seen how to use it with Node.js in this tutorial.
Configure Mongoose
yarn add mongoose
yarn add -D @types/mongoose
Open the file .env and add variables related to the MongoDB connection property. Your file will now look like this:
HOST=http://localhost
PORT=4500

DB_HOST=localhost
DB_PORT=27017
DB_USER=blogUser
DB_PASS=blogUserPwd
DB_NAME=blog
Replace the database variable with the value that matches your local environment. I show you how to secure your Mongo database with a username and a password here.
Inside src folder, create a folder utils then create a file named databaseConnection.ts and add the code below:
import mongoose, { ConnectionOptions } from 'mongoose';

mongoose.Promise = global.Promise;

const { DB_HOST, DB_NAME, DB_PASS, DB_PORT, DB_USER } = process.env;

const connectToDatabase = async (): Promise<void> => {
  const options: ConnectionOptions = { useNewUrlParser: true, useFindAndModify: false, useCreateIndex: true, useUnifiedTopology: true };

  await mongoose.connect(`mongodb://${DB_USER}:${DB_PASS}@${DB_HOST}:${DB_PORT}/${DB_NAME}`, options);
};

export { connectToDatabase };
Update src/index.ts to connect to the database on the application's start.
// Previous code here

app.listen(PORT, async () => {
  await connectToDatabase();

  console.log(`Application started on URL ${HOST}:${PORT} ?`);
});
Create the schema
Create a folder model then create a file user.model.ts with the following code:
import mongoose, { Document, Schema, Model } from 'mongoose';

type UserDocument = Document & {
  name: string;
  picture: string;
};

type UserInput = {
  name: UserDocument['name'];
  picture: UserDocument['picture'];
};

const userSchema = new Schema(
  {
    name: {
      type: String,
      required: true,
    },
    picture: {
      type: String,
      required: true,
    },
  },
  {
    timestamps: true,
    collection: 'col_users',
  },
);

const User: Model<UserDocument> = mongoose.model('User', userSchema);

export { User, UserDocument, UserInput };Upload a file to the server
Most backend servers handle requests with the body containing a JSON object. Express parse this body and return the object so we can use it as we want.
When a file is sent, the content type is set to multipart/form-data. Express doesn't handle this, so we need an external library to handle that for us. The package Multer is the tool for the situation ?.
yarn add multer
yarn add -D @types/multerCreate a function to handle upload
Now create a file named uploadSingle.ts inside utils folder and add the code below:
import * as path from 'path';
import { Request, Response } from 'express';
import multer from 'multer';

const uploadFilePath = path.resolve(__dirname, '../..', 'public/uploads');

const storageFile: multer.StorageEngine = multer.diskStorage({
  destination: uploadFilePath,
  filename(req: Express.Request, file: Express.Multer.File, fn: (error: Error | null, filename: string) => void): void {
    fn(null, `${new Date().getTime().toString()}-${file.fieldname}${path.extname(file.originalname)}`);
  },
});

const uploadFile = multer({
  storage: storageFile,
  limits: { fileSize: 5 * 1024 * 1024 },
  fileFilter(req, file, callback) {
    const extension: boolean = ['.png', '.jpg', '.jpeg'].indexOf(path.extname(file.originalname).toLowerCase()) >= 0;
    const mimeType: boolean = ['image/png', 'image/jpg', 'image/jpeg'].indexOf(file.mimetype) >= 0;

    if (extension && mimeType) {
      return callback(null, true);
    }
    callback(new Error('Invalid file type. Only picture file on type PNG and JPG are allowed!'));
  },
}).single('picture');

const handleSingleUploadFile = async (req: Request, res: Response): Promise<any> => {
  return new Promise((resolve, reject): void => {
    uploadFile(req, res, (error) => {
      if (error) {
        reject(error);
      }

      resolve({ file: req.file, body: req.body });
    });
  });
};

export { handleSingleUploadFile };
Let's explain what this file does:
In line 5, we define the directory where we store our files. __dirname is a global variable of Node.js that returns the absolute path of the folder that contains uploadSingle.ts
In line 7, we create a storage engine with two options: the path where the file to upload will be stored and the rule for generating the file's name. For this case, The file name results from the concatenation of the current timestamp, the original name, and the extension: 1614122095-myPicture.png.
In line 15, we create a function to handle file upload, and it begins with the definition of the storage engine configured previously; then, we define the file size limit to 5 MB.
We finally define a filter to validate the file by checking the extension and the mime type since someone can rename a .exe file to .png and upload it, so it is important to prevent that. Finally, we chain the function with .single("picture") which indicates the input's name will be picture and will contain only one file.
To pass multiple files to the input, just replace .single() by .array()
In line 28, we create a function handleSingleUploadFile who wraps the function uploadFile inside a Promise and return an object containing information on the file uploaded and the request's body. The request body at this step includes only the input that is not a file (string, number, and boolean).
Create a route to handle upload
Our file upload handler is ready, so let's create a route to send the file and the logic for that route. Create a folder routes then add file a file appRoute.ts with the following content:
import { Router } from 'express';

import { handleSingleUploadFile } from '../utils/uploadSingle';
import { User, UserInput } from '../models/user';

export type UploadedFile = {
  fieldname: string; // file
  originalname: string; // myPicture.png
  encoding: string; // 7bit
  mimetype: string; // image/png
  destination: string; // ./public/uploads
  filename: string; // 1571575008566-myPicture.png
  path: string; // public/uploads/1571575008566-myPicture.png
  size: number; // 1255
};

const appRoute = Router();

appRoute.post('register/user', async (req, res) => {
  let uploadResult;

  try {
    uploadResult = await handleSingleUploadFile(req, res);
  } catch (e) {
    return res.status(422).json({ errors: [e.message] });
  }

  const uploadedFile: UploadedFile = uploadResult.file;
  const { body } = uploadResult;

  const newUserInput: UserInput = {
    name: body.name,
    picture: uploadedFile.filename,
  };

  const createdUser = await User.create(newUserInput);

  return res.json({ data: createdUser });
});

export { appRoute };
We use Express Router to define a route /register/user called with the HTTP method POST. We start by handling files uploaded by calling our function handleSingleUploadFile wrap inside try { } catch {} to catch validation errors like Invalid file type, file size bigger than 5MB, storage folder that doesn't have write permission, etc.
If one of these errors occurs, we return a 422 HTTP status code with the error message thrown.
When the file is uploaded successfully, we retrieve the user's name inside the request's body and the name of the uploaded file inside the storage directory, then create a user in the database and return the result to the user. Own endpoint is ready to receive data.
Open src/index.ts and add the line below before the call of app.listen() to register the route we created with Express routing:
app.use('/', appRoute);
Run the app and open your favorite REST client and test the endpoint. I use Postman to try my REST API.

Access uploaded files
Now we store files on the server as we want. Make sure the file is present inside the folder public/uploads. We need to access the picture through the browser. We will see two ways to achieve that, and you feel free to choose what suits you.
The simple way
It is possible to view the picture on the browser by pointing to the location of the file on the server by formatting the URL like this:
- The host + port: http://localhost:4500
- The folder where pictures are stored starts at the public folder: uploads
- The file's name:
1614124882278-picture.jpg(from my screenshot above).
This results to: http://localhost:4500/uploads/1614124882278-picture.jpg. Let's open the browser and see what happens.
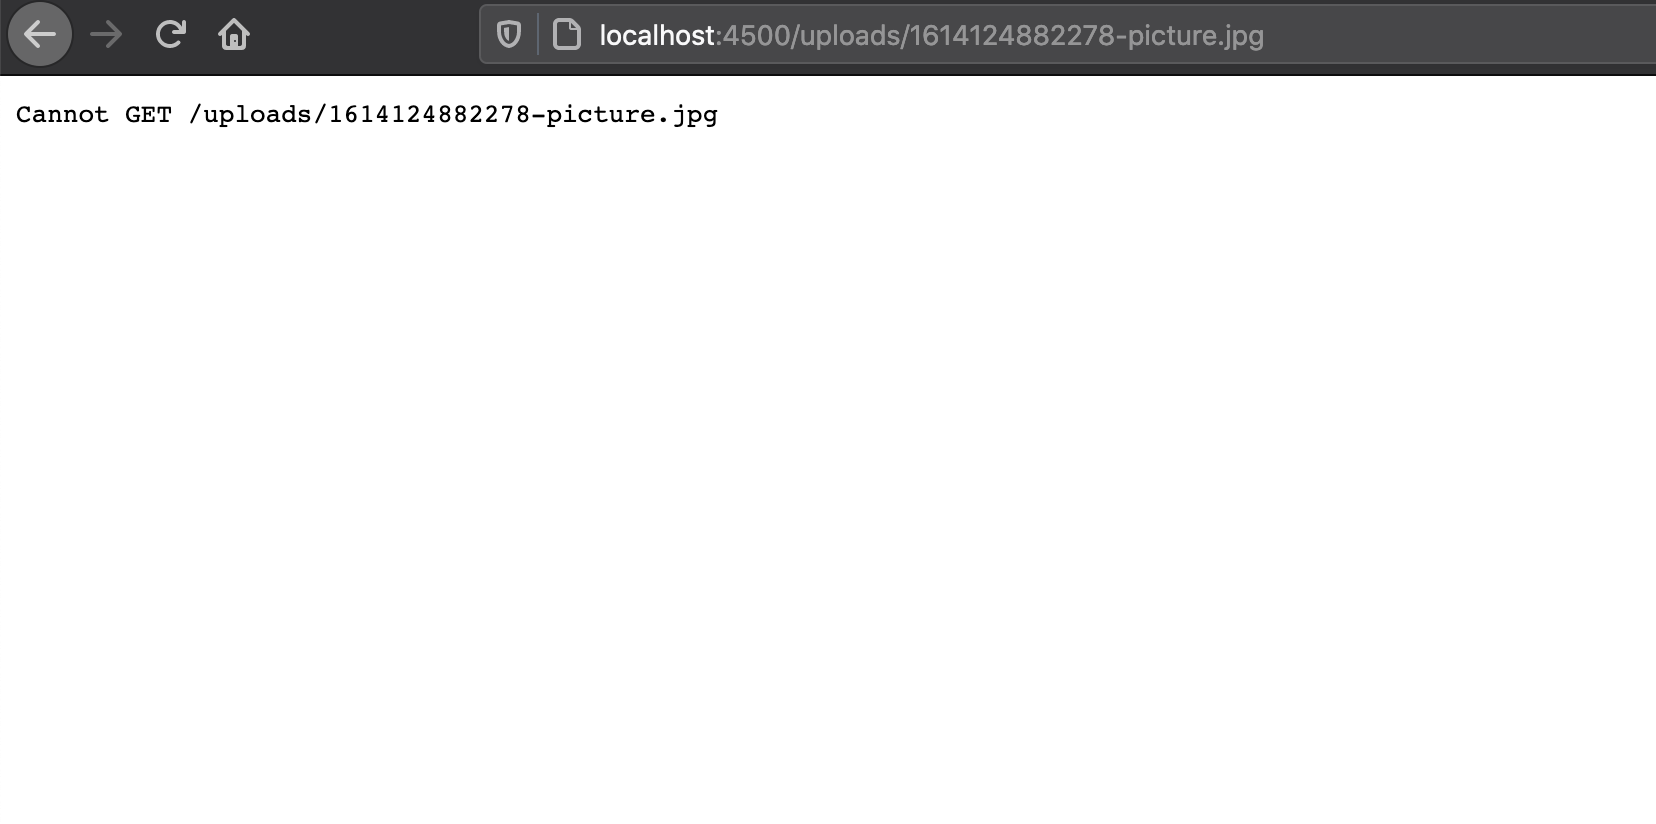
We cannot view the file because Express can't resolve the route. The thing is, we don't want Express to treat everything located inside public the folder as an application's route.
To prevent that, we need to mark the public directory static So Express will load the file (usually called "asset") correctly.
Open the file src/index.ts and add the code below before app.listen()
app.use(express.static(path.join(__dirname, '../public')));
Restart the app and browse the URL again.
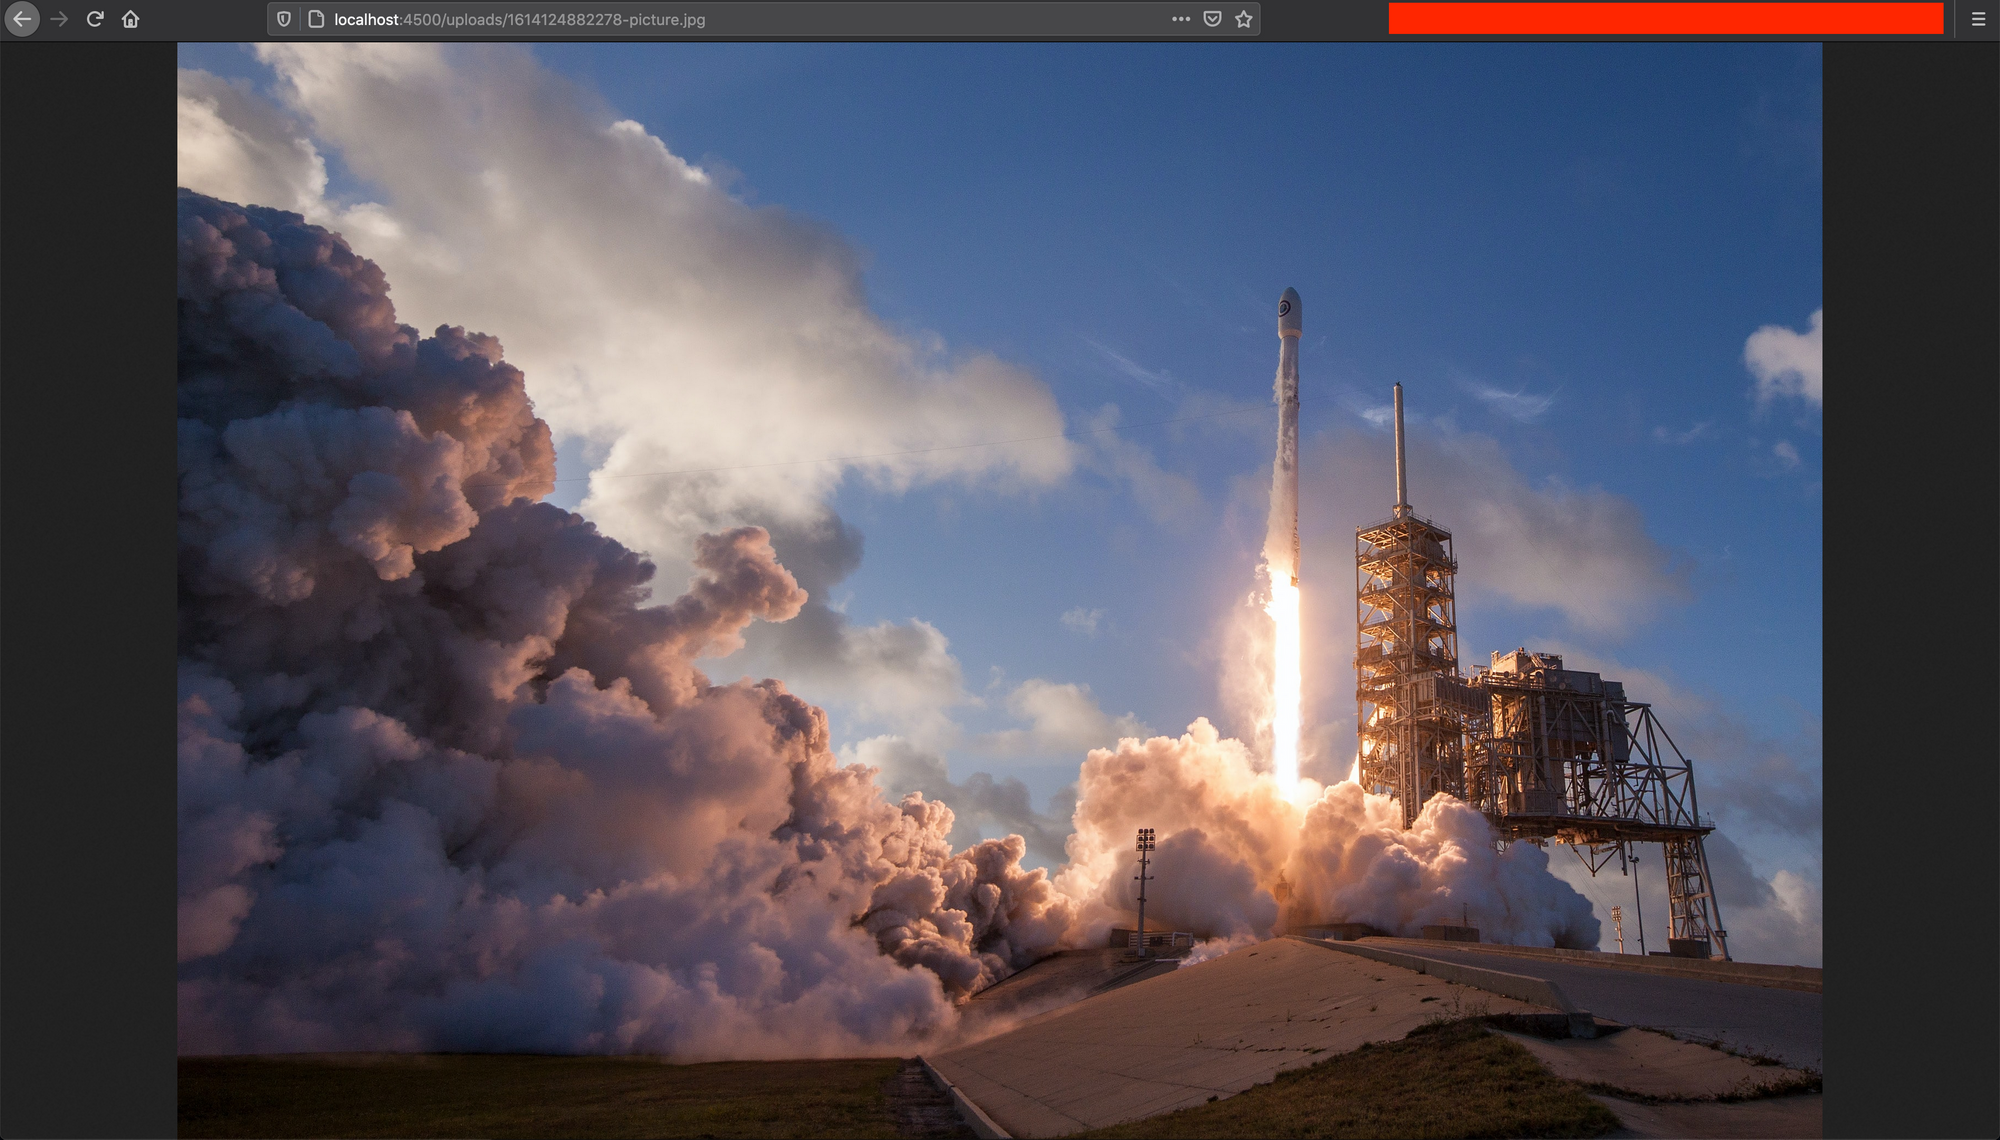
We can view the file now, but there is an issue we need to know about. We are exposing a folder of our application through the Internet.
Of course, the directory is not accessible, but just one mistake can lead to a breach of data stored on the server.
Also, an attacker can run a script that generates a random picture file's name and then browse this URL. We need a better way to protect this.
The secure way
Since the picture is stored in the database as a part of user information, it means with the user's id, we can find the picture file's name.
We will create two routes /user/:id/generate-link and /view-file.
We will use the first route to generate a link to view the file. This link will contain a token with enough information to guess which file to browse.
We will need a package to generate the token, so let's install it:
yarn add jsonwebtoken
yarn add -D @types/jsonwebtoken
Update the file src/routes/appRoute.ts by adding the code below:
import * as jwt from 'jsonwebtoken';
import path from 'path';


appRoute.get('/user/:id/generate-link', (req, res) => {
  const { id } = req.params;
  const action = req.query.action as string;

  const payload = { userId: id };

  const token = jwt.sign(payload, 'My#SecretKey007', { expiresIn: 1800 });

  const url = `${req.protocol}://${req.hostname}:${process.env.PORT}/view-file?token=${token}&action=${action}`;

  return res.json({ url });
});

appRoute.get('/view-file', async (req, res) => {
  const { action, token } = req.query as { token: string; action: string };

  try {
    const decoded: any = jwt.verify(token, 'My#SecretKey007');

    const user = await User.findOne({ _id: decoded.userId });

    if (!user) {
      return res.status(404).json({ message: 'User not found!' });
    }

    const filePath = path.resolve(__dirname, '../../public/uploads', user.picture);

    if (action === 'view') {
      return res.sendFile(filePath);
    } else {
      return res.download(filePath);
    }
  } catch (err) {
    return res.status(400).json({ message: err.message });
  }
});The first route takes a user's id as a route parameter, a query parameter named action indicating whether we want to view or download the file.
We continue by creating a token with a lifetime of 30 minutes which means after 30 minutes from the generation time, it will be impossible to view the file with this token. It will be required to generate a new one. Finally, we create the URL and return it.
The second route receives two query parameters named token and action then decode the token to get the user's id. Then find the user associated with this id, get the picture file's name, and resolve the server's path.
Finally, if the value of the query parameter action is equal view, Express renders the picture in the browser res.sendFile() otherwise Express download the file res.download().
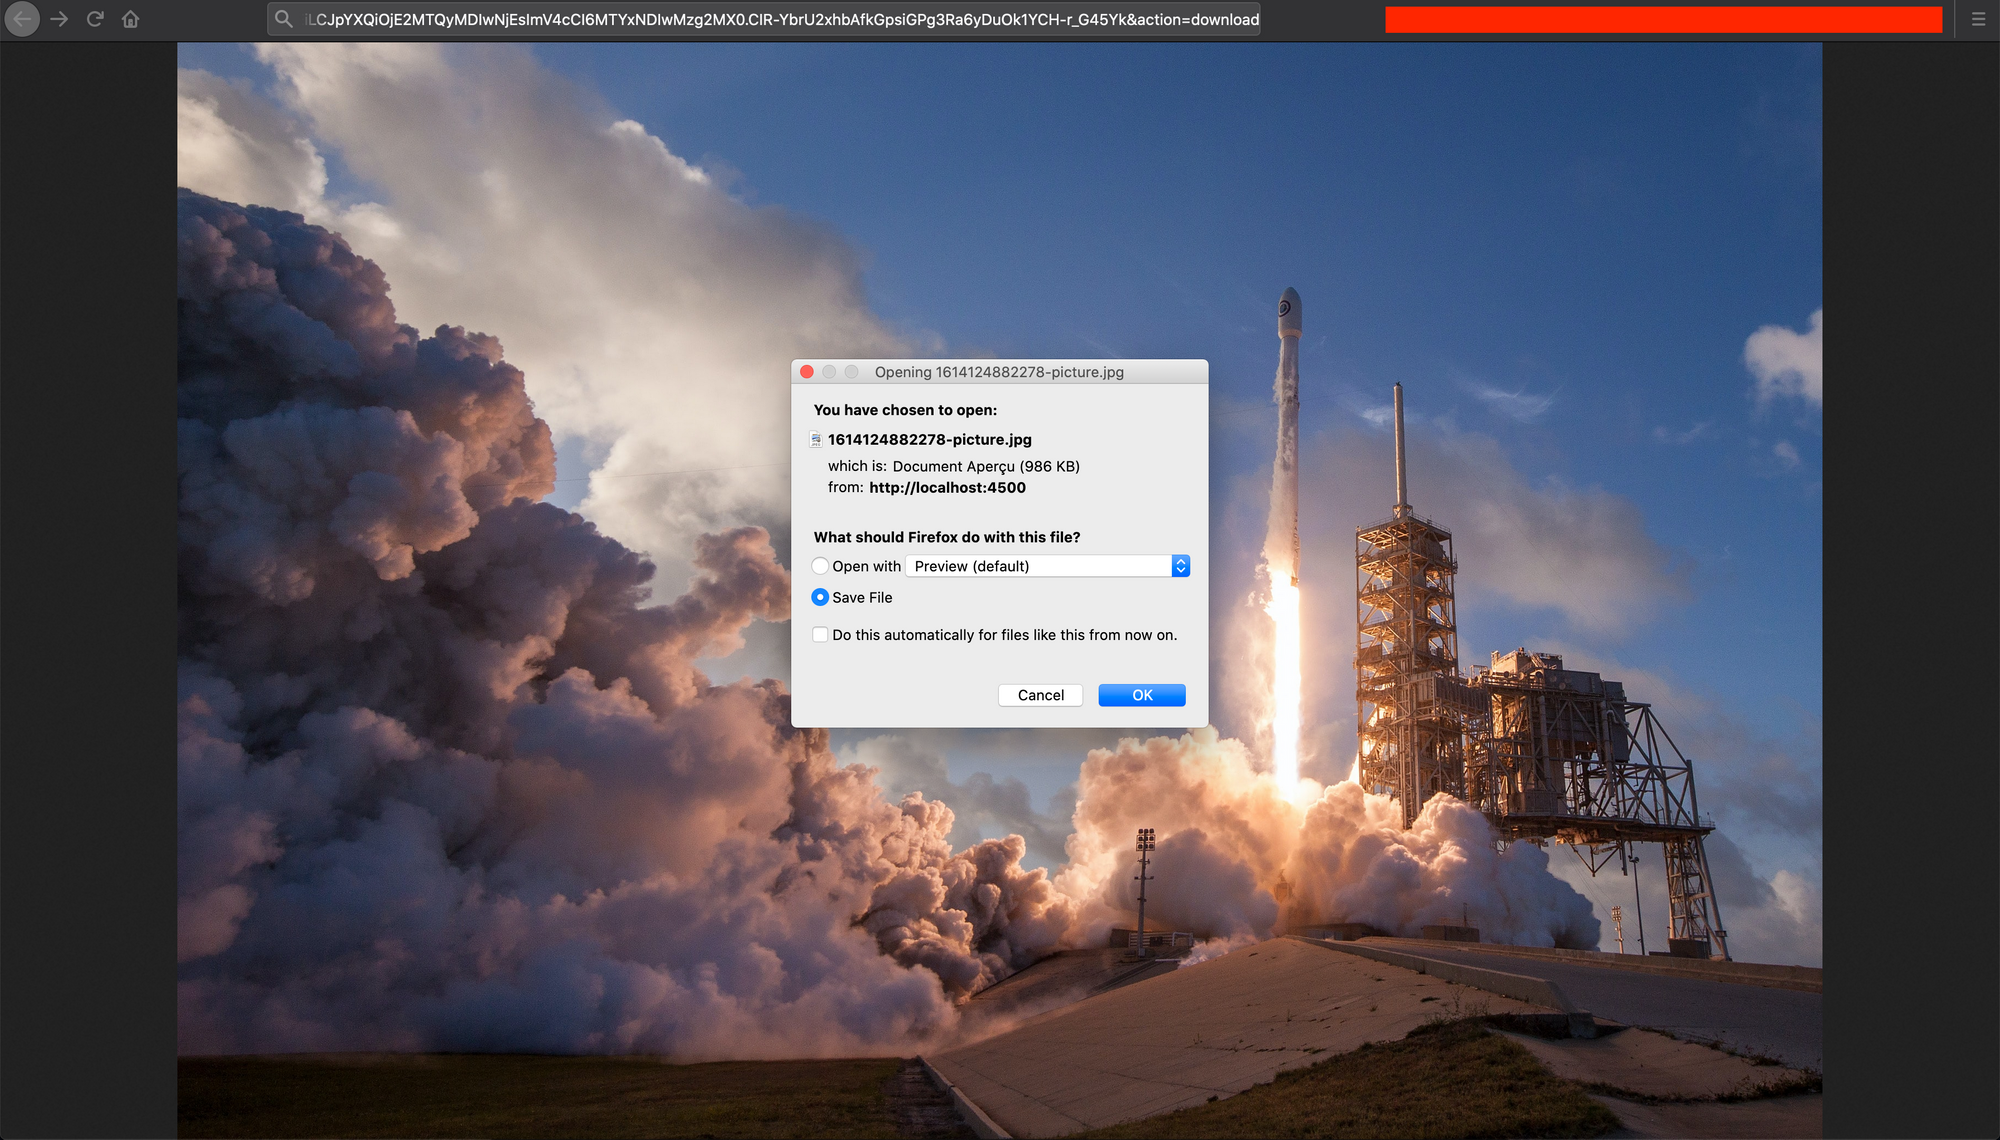
Run the app and open this link http://localhost:4500/user/<userId>/generate-link?action=view . Replace <userId> with a valid id in your user's collections.
This request will respond with an URL, copy it, open another browser tab, paste it, and see the result ?.
You can find the code source on the GitHub repository.
Follow me on Twitter or subscribe to my newsletter to avoid missing the upcoming posts and the tips and tricks I occasionally share.