
Deploy a Next.js application on a VPS with Docker and Nginx


Many cloud providers provide a simple way to deploy a Next.js application by connecting your Git provider, such as GitHub, GitLab, etc. This has the advantage of letting the cloud provider manage the infrastructure your application is running on and monitoring it.
You may want to deploy your Next.js application on your own server for various reasons, but you might wonder how to do that.
In this previous tutorial, I have shown how to package a Next.js application as a Docker image. This post will show how to deploy it on a server and make it accessible from a subdomain.

Prerequisites
To complete this tutorial, you must have the following requirements met:
- The Docker image of the Next.js application on your local computer; follow my tutorial that helps you build your own.
- A Docker image registry account such as Docker Hub, Amazon ECR, etc...
- A Virtual Private Server to deploy your application
- A domain name for people to access your application from the Internet. I will use my domain "tericcabrel.com" and make the application accessible on "nextjs.tericcabrel.com"
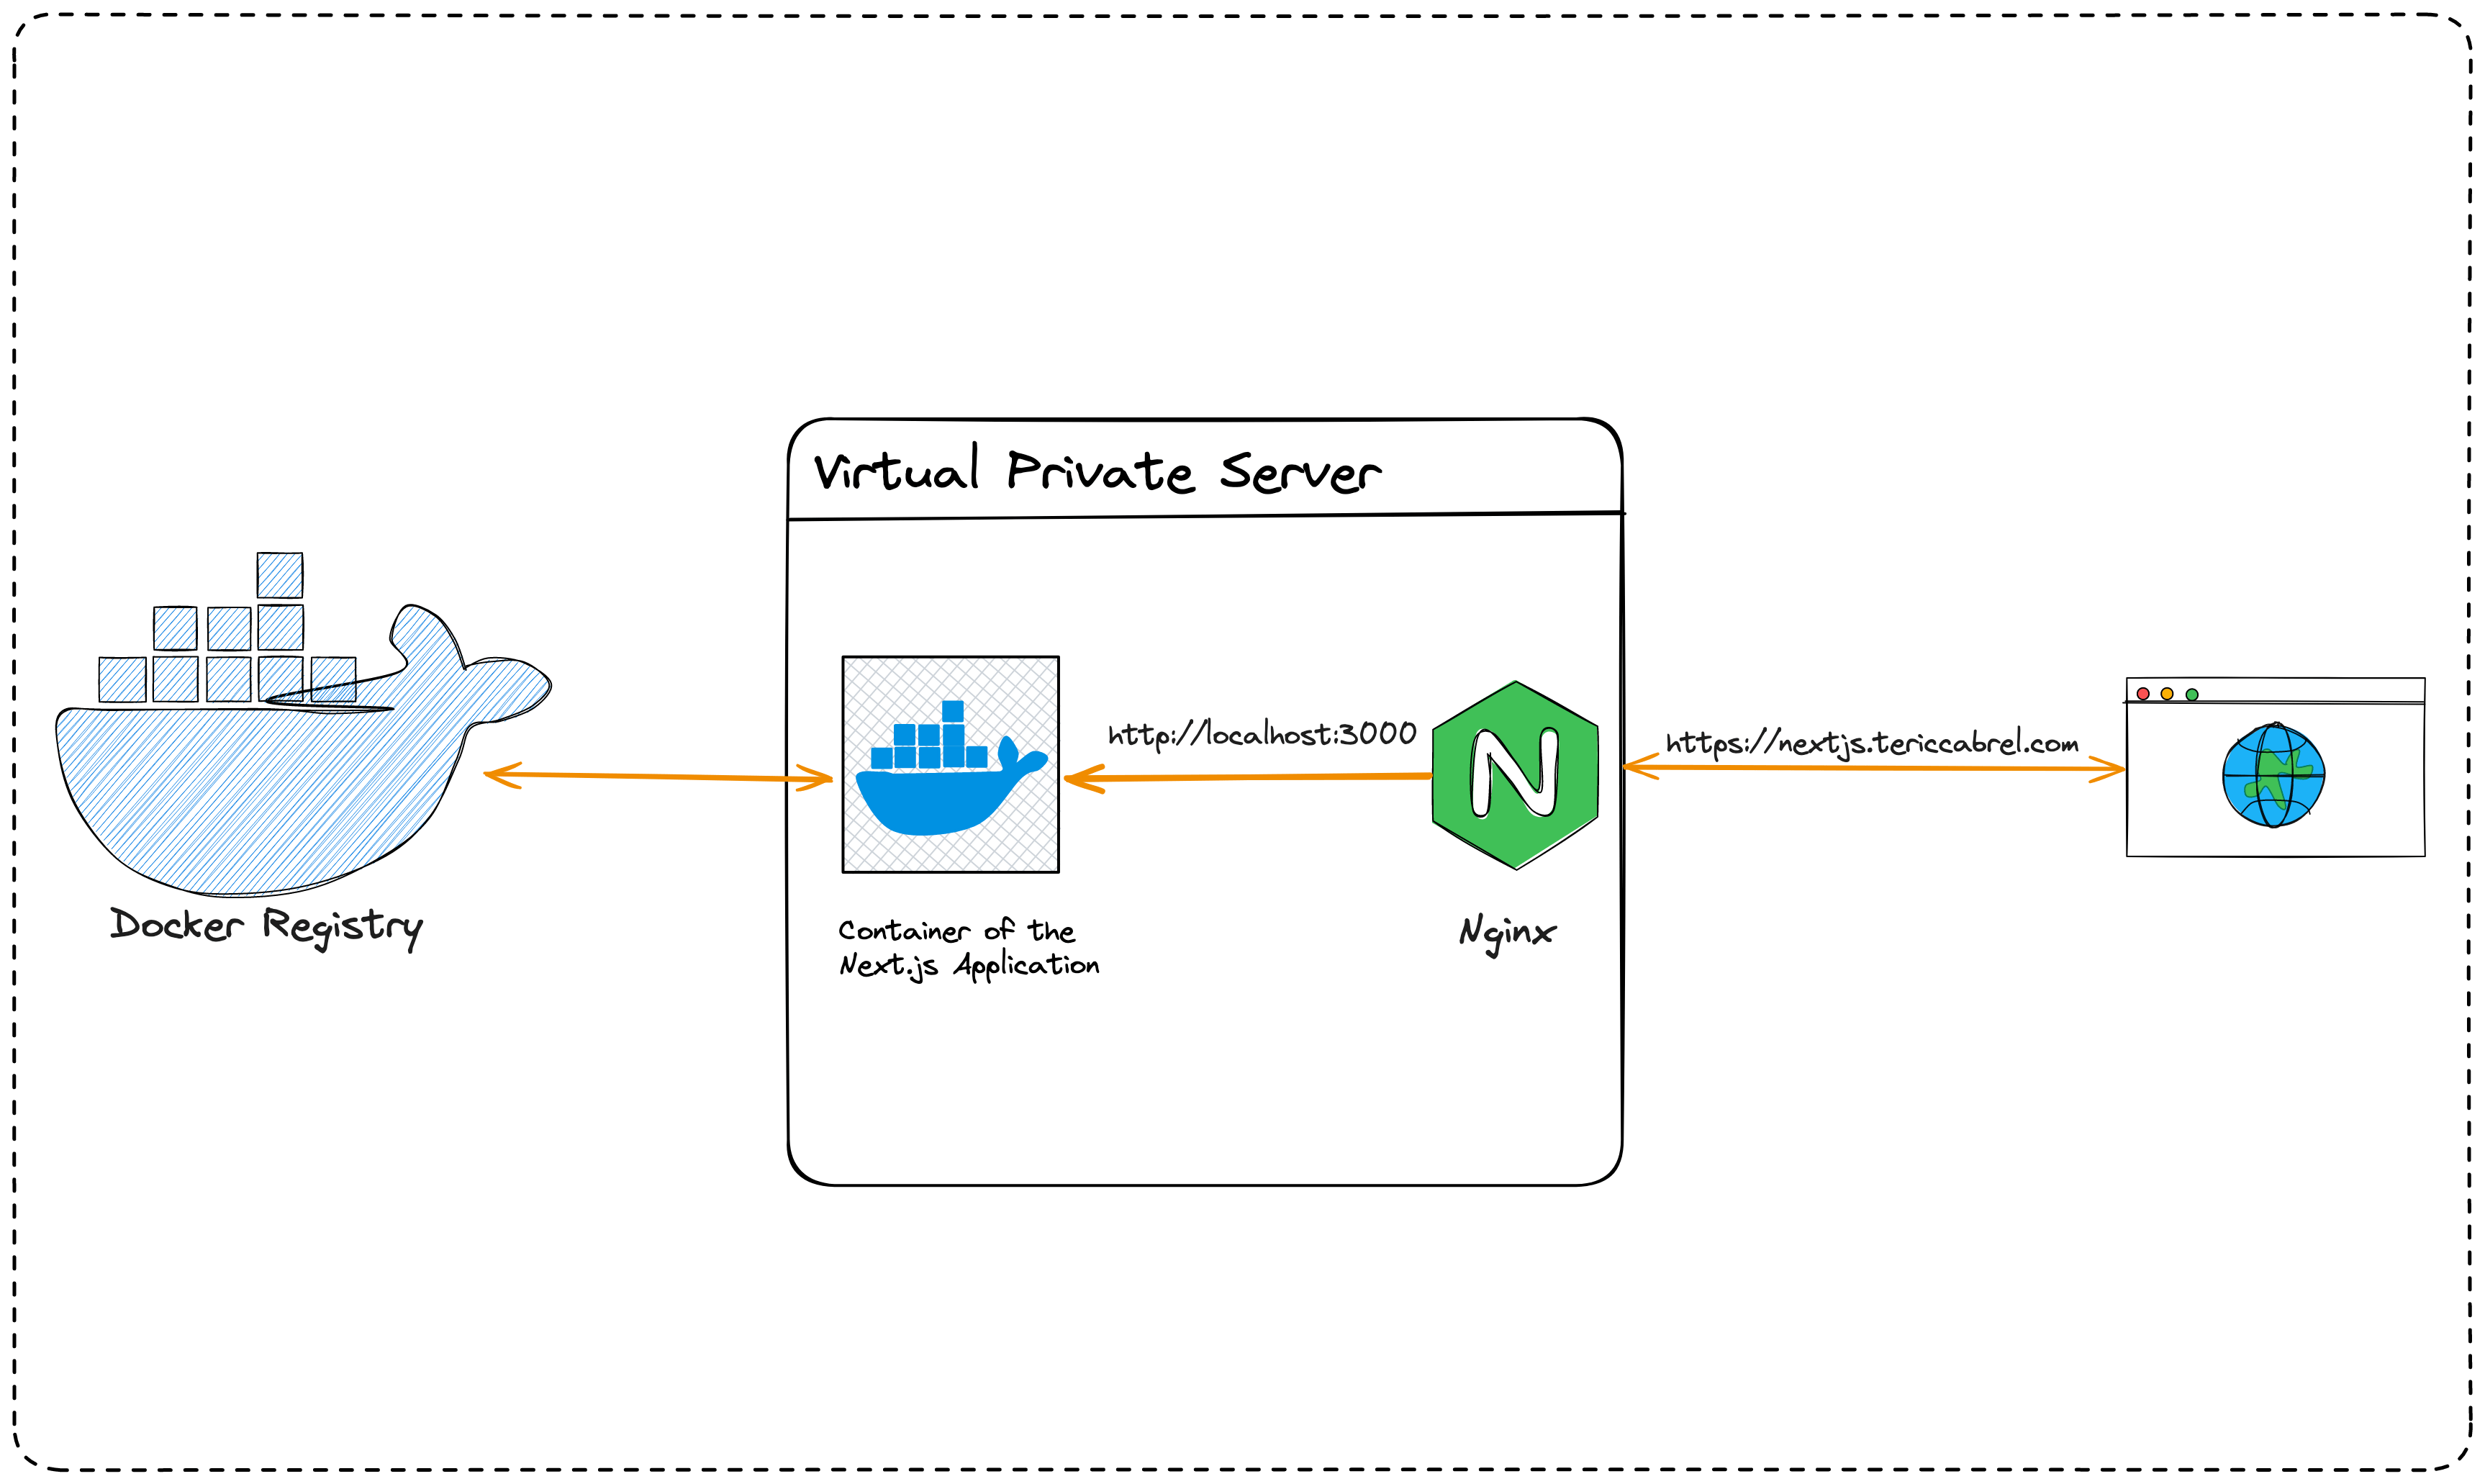
The diagram below shows the high-level architecture of the server running and exposing the Next.js application to the Internet.
Prepare the Virtual Private Server
You can proceed to the next step if you already have a server ready to use.
You can buy a VPS on Hetzner, which provides affordable server with good performance. The server running this blog is hosted there. Use my referral link to get €20 after you sign up.
Once you get the server, you will need to configure it so that it can make a web application accessible to the Internet. I wrote a post on a minimal configuration you need to do to host a Web application.

My VPS runs on Ubuntu 22.04, so the instructions might differ if you use another Linux distribution.
Install Docker on the server
We will install the Docker engine on the server; the installation process will vary depending on the operating system running on your server.
The Docker documentation lists the supported platforms with the installation process. To install it on Ubuntu, run the following commands:
# Add Docker's official GPG key:
sudo apt-get update

sudo apt-get install ca-certificates curl

sudo install -m 0755 -d /etc/apt/keyrings

sudo curl -fsSL https://download.docker.com/linux/ubuntu/gpg -o /etc/apt/keyrings/docker.asc

sudo chmod a+r /etc/apt/keyrings/docker.asc

# Add the repository to Apt sources:
echo \
  "deb [arch=$(dpkg --print-architecture) signed-by=/etc/apt/keyrings/docker.asc] https://download.docker.com/linux/ubuntu \
  $(. /etc/os-release && echo "$VERSION_CODENAME") stable" | \
  sudo tee /etc/apt/sources.list.d/docker.list > /dev/null

sudo apt-get update

sudo apt-get install docker-ce docker-ce-cli containerd.io docker-buildx-plugin docker-compose-plugin
The installation is done; check the Docker version.
docker --version

Docker version 26.1.4, build 5650f9b
Install Nginx on the server
Nginx is the web server that will receive the request from the Internet and forward it to the Docker container of the Next.js application.
The Nginx documentation lists the supported operating systems and the installation process. Run the following commands on Ubuntu.
sudo apt update
sudo apt install nginx
sudo ufw allow 'Nginx Full'
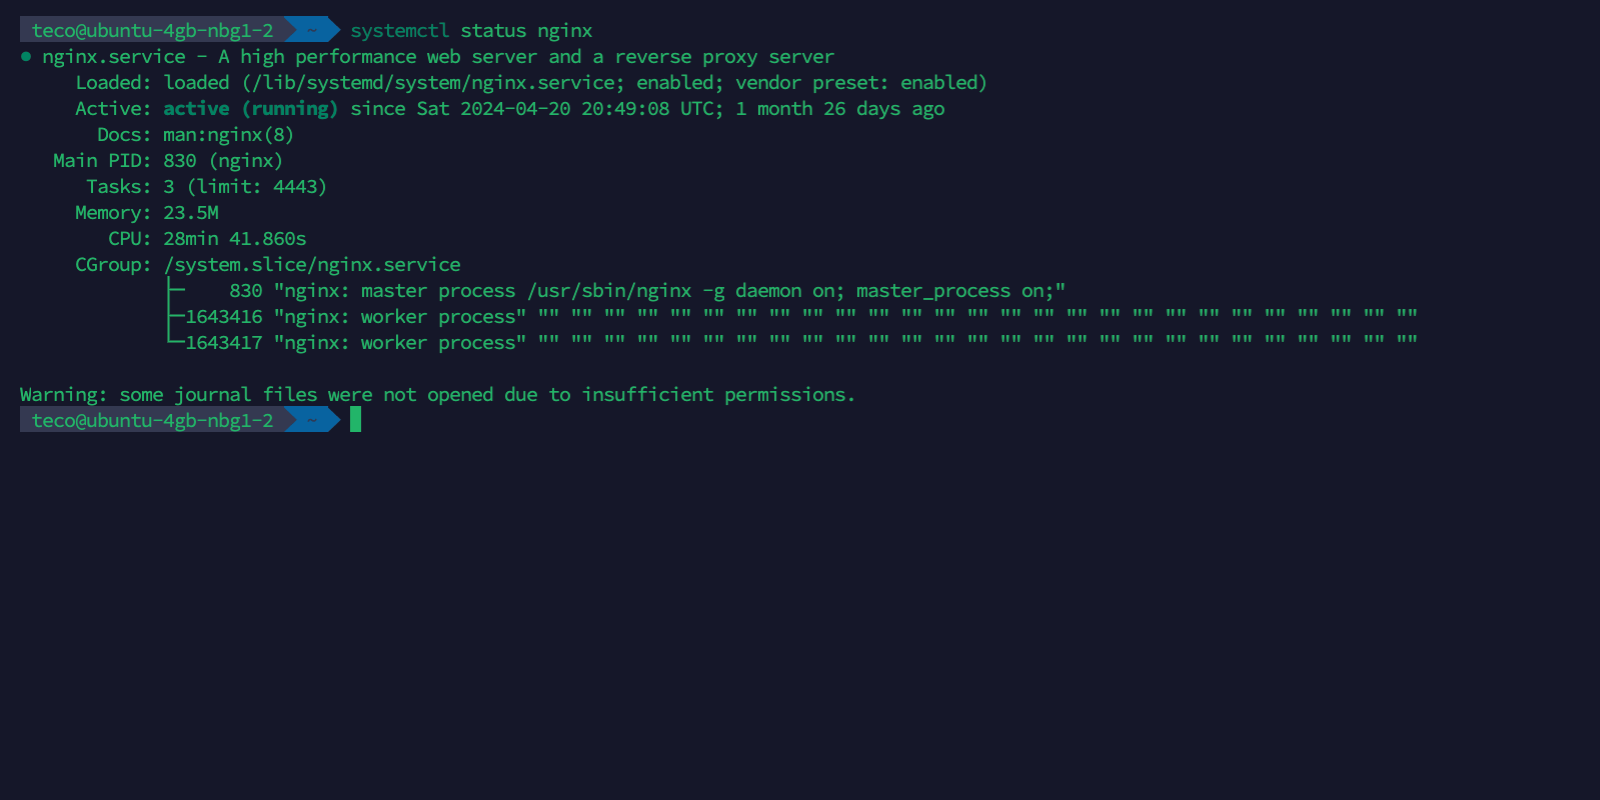
systemctl status nginx
Nginx listens to requests on port 80 for HTTP and 443 for HTTPS; the third command tells the Firewall to open ports 80 and 443 and then allows incoming requests.
The last command ensures Nginx is installed and runs as expected.
Push the image to the Docker Hub
The Docker image of the Next.js application is on the local computer; you can run the command docker image ls to view Docker images.

From the above picture, The Docker image name is blog-site, and the image tag is v2. I will use these values for the rest of the tutorial; replace them with your Docker image and tag.
We will push the image to the Docker Hub so we can pull it available from everywhere (our VPS). Run the following commands:
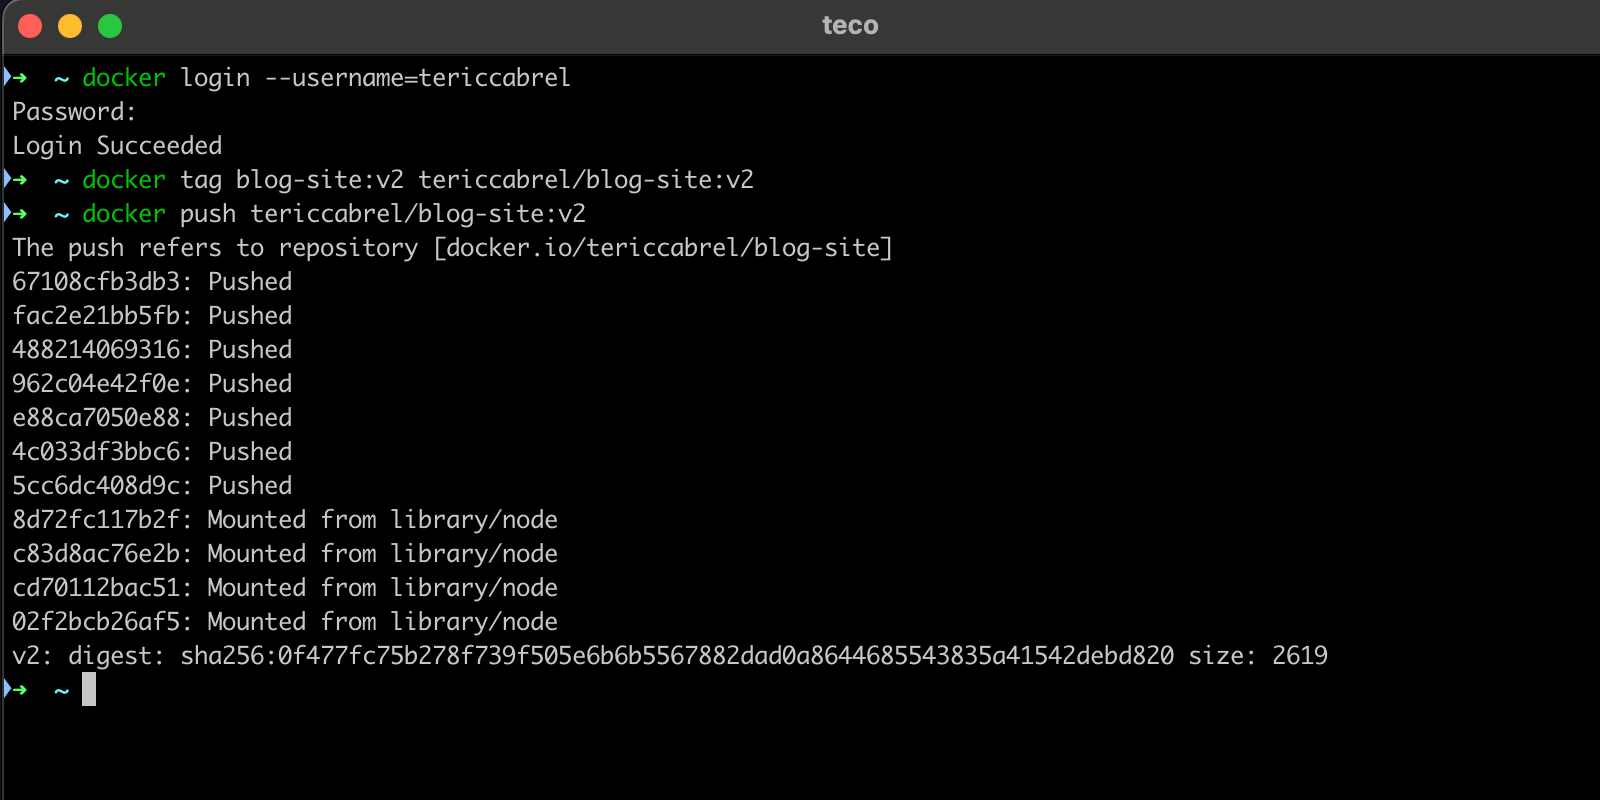
docker login --username=tericcabrel

docker tag blog-site:v2 tericcabrel/blog-site:v2

docker push tericcabrel/blog-site:v2
Here is the picture of the output:
Pull and run the image on the server
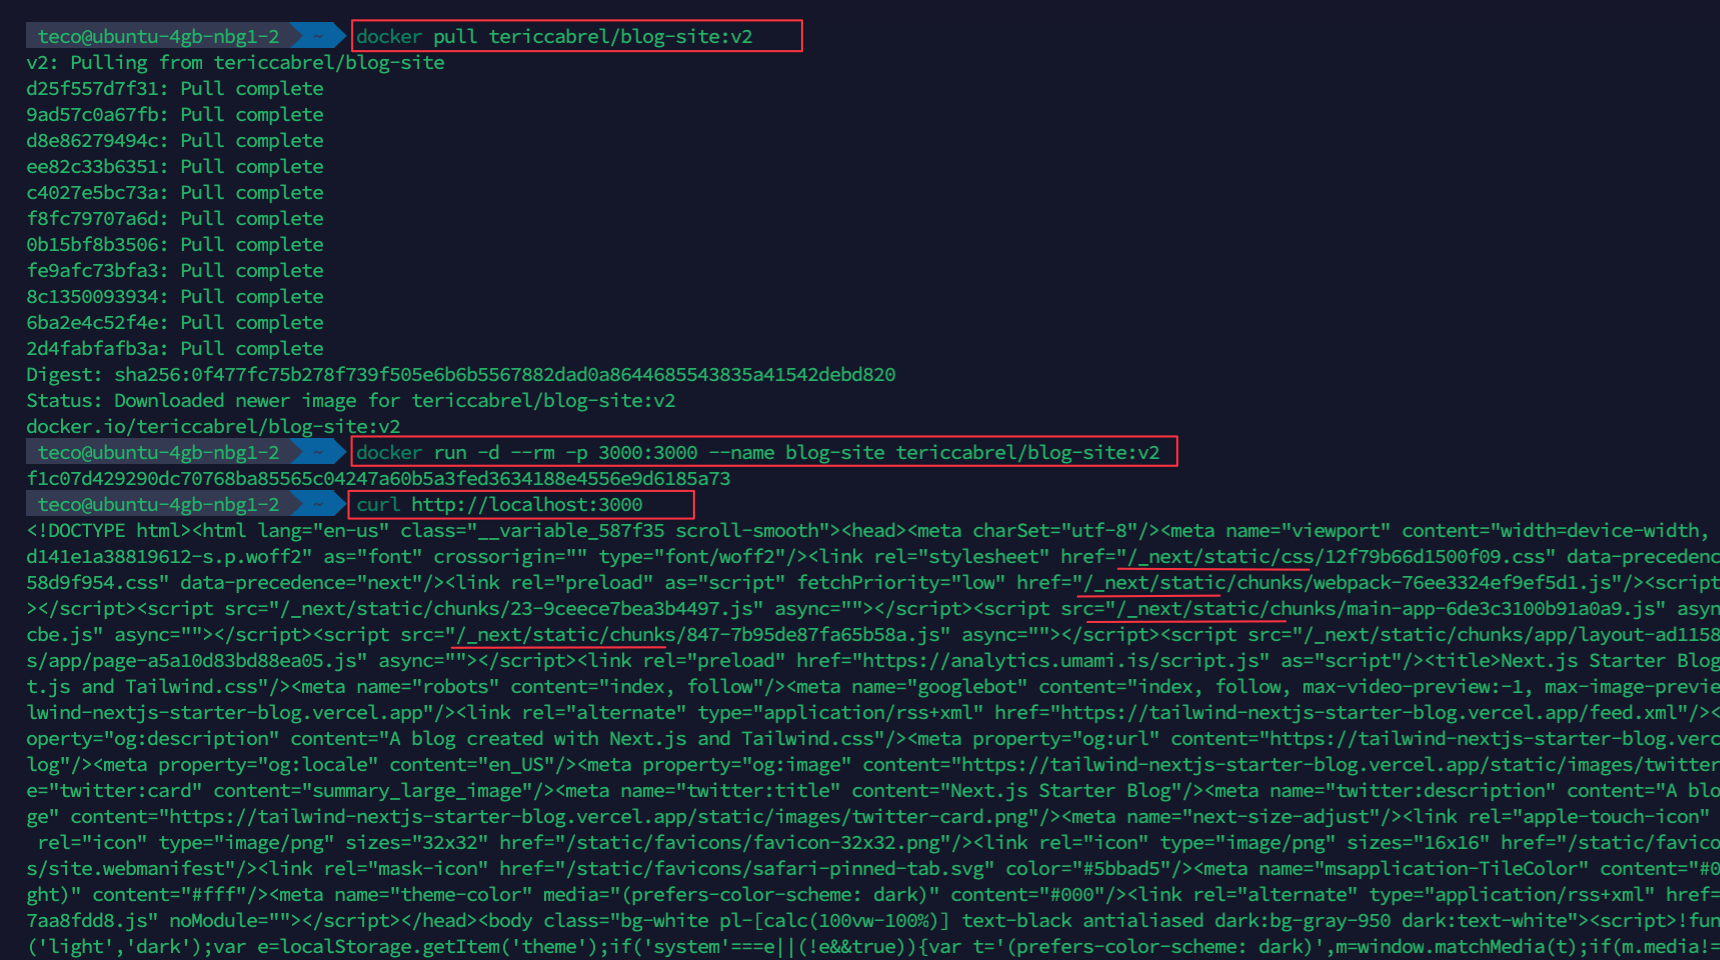
Run the commands below to pull the Docker image from the Docker Hub and run a container of the image in the background.
docker pull tericcabrel/blog-site:v2

docker run -d --rm -p 3000:3000 --name blog-site tericcabrel/blog-site:v2

curl http://localhost:3000
The last command sends a GET request to the application running on port 3000.
The application runs on the server but is not accessible from the outside yet.
Create the DNS record
My domain's name is tericcabrel.com; I will create a subdomain nextjs.tericcabrel.com that points to the VPS IP address. Log into your hosting platform's client space and create the subdomain's DNS record of type A. My domain name is registered at OVH.
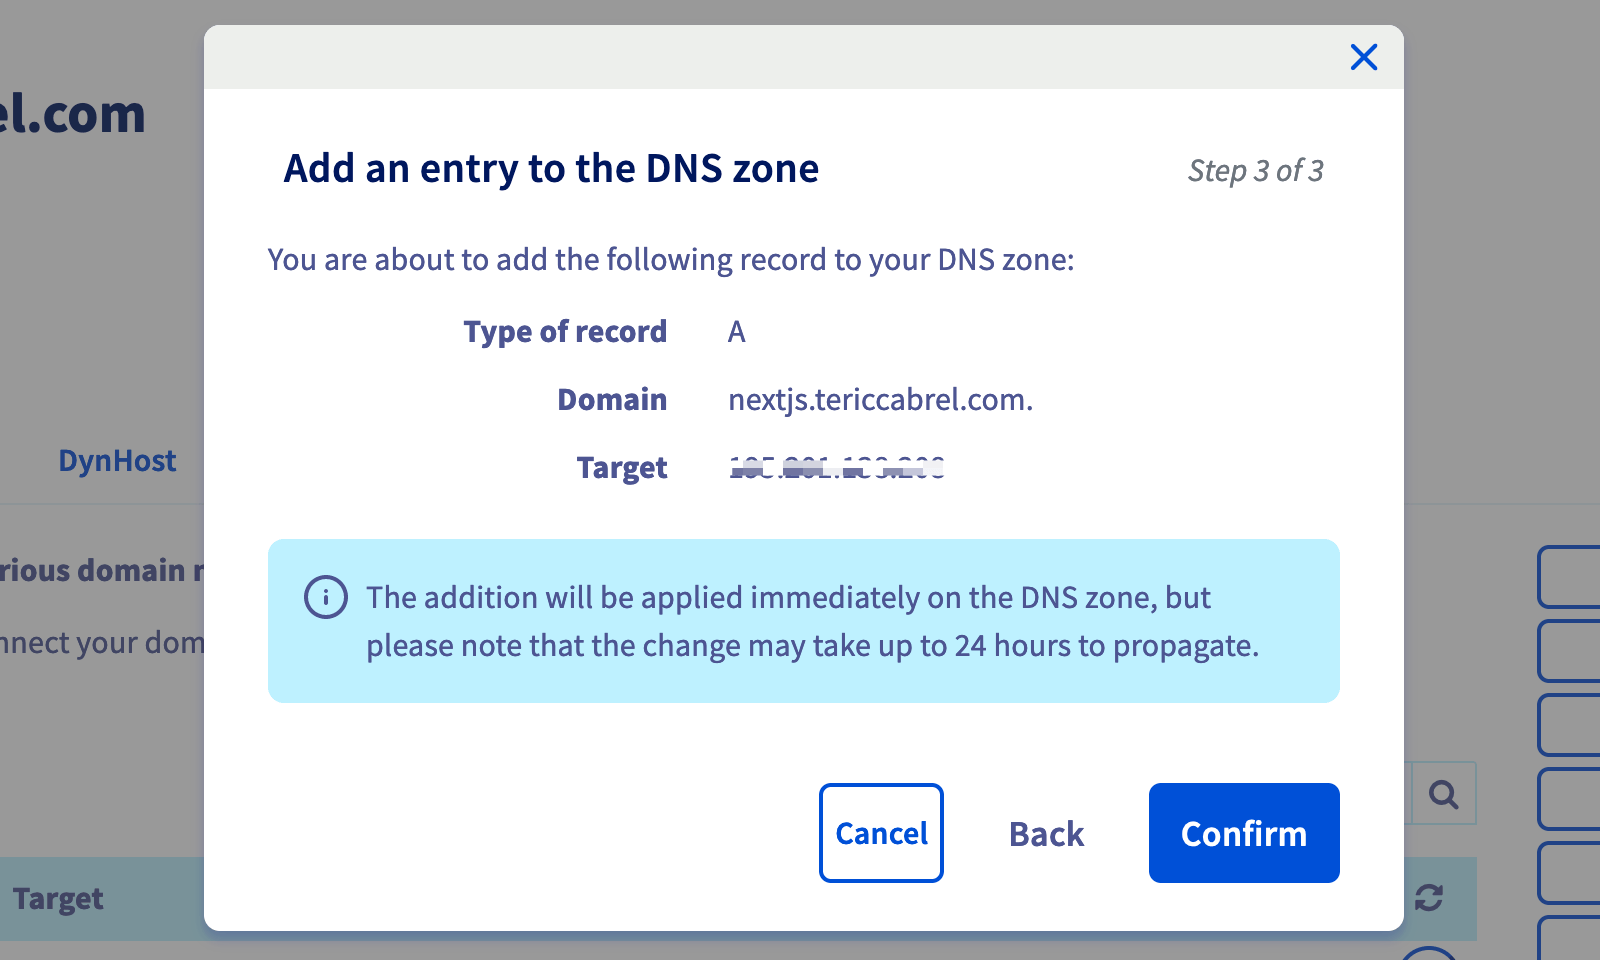
The change can take up to 24 hours to propagate. You can use this website to check if the DNS is ready.
Configure the reverse proxy with Nginx
On the VPS, create a Nginx configuration for the Next.js application with the command below:
sudo nano /etc/nginx/sites-available/nextjs.tericcabrel.com
Paste the code below inside the file, save, and exit:
server {
    server_name  nextjs.tericcabrel.com;
    index index.html index.htm;
    access_log /var/log/nginx/bmiapp.log;
    error_log  /var/log/nginx/bmiapp-error.log error;

    location / {
        proxy_set_header X-Forwarded-For $proxy_add_x_forwarded_for;
        proxy_set_header X-Forwarded-Proto $scheme;
        proxy_set_header X-Real-IP $remote_addr;
        proxy_set_header Host $http_host;
        proxy_pass http://127.0.0.1:3000;
        proxy_redirect off;
    }
}
Don't forget to replace nextjs.tericcabrel.com by your domain or subdomain.
Enable the website with the command below:
sudo ln -s /etc/nginx/sites-available/nextjs.tericcabrel.com /etc/nginx/sites-enabled/nextjs.tericcabrel.com
We created a symbolic link of our config file inside the folder sites-enabled; it is because Nginx only considers the websites present in this folder.
Let's verify if there is no Nginx error, then reload it to take the changes into account:
sudo nginx -t

sudo nginx -s reload
Navigate to http://nextjs.tericcabrel.com and see the result:
Access the Next.js application from the subdomain.
Add SSL certificate with Letsencrypt
Install Certbot, which is the tool responsible for certificate generation:
sudo apt install snapd
sudo snap install --classic certbot
Generate and install an SSL certificate for our domain and reload the Nginx configuration
sudo certbot --nginx -d nextjs.tericcabrel.com

sudo nginx -s reload
Navigate to https://nextjs.tericcabrel.com
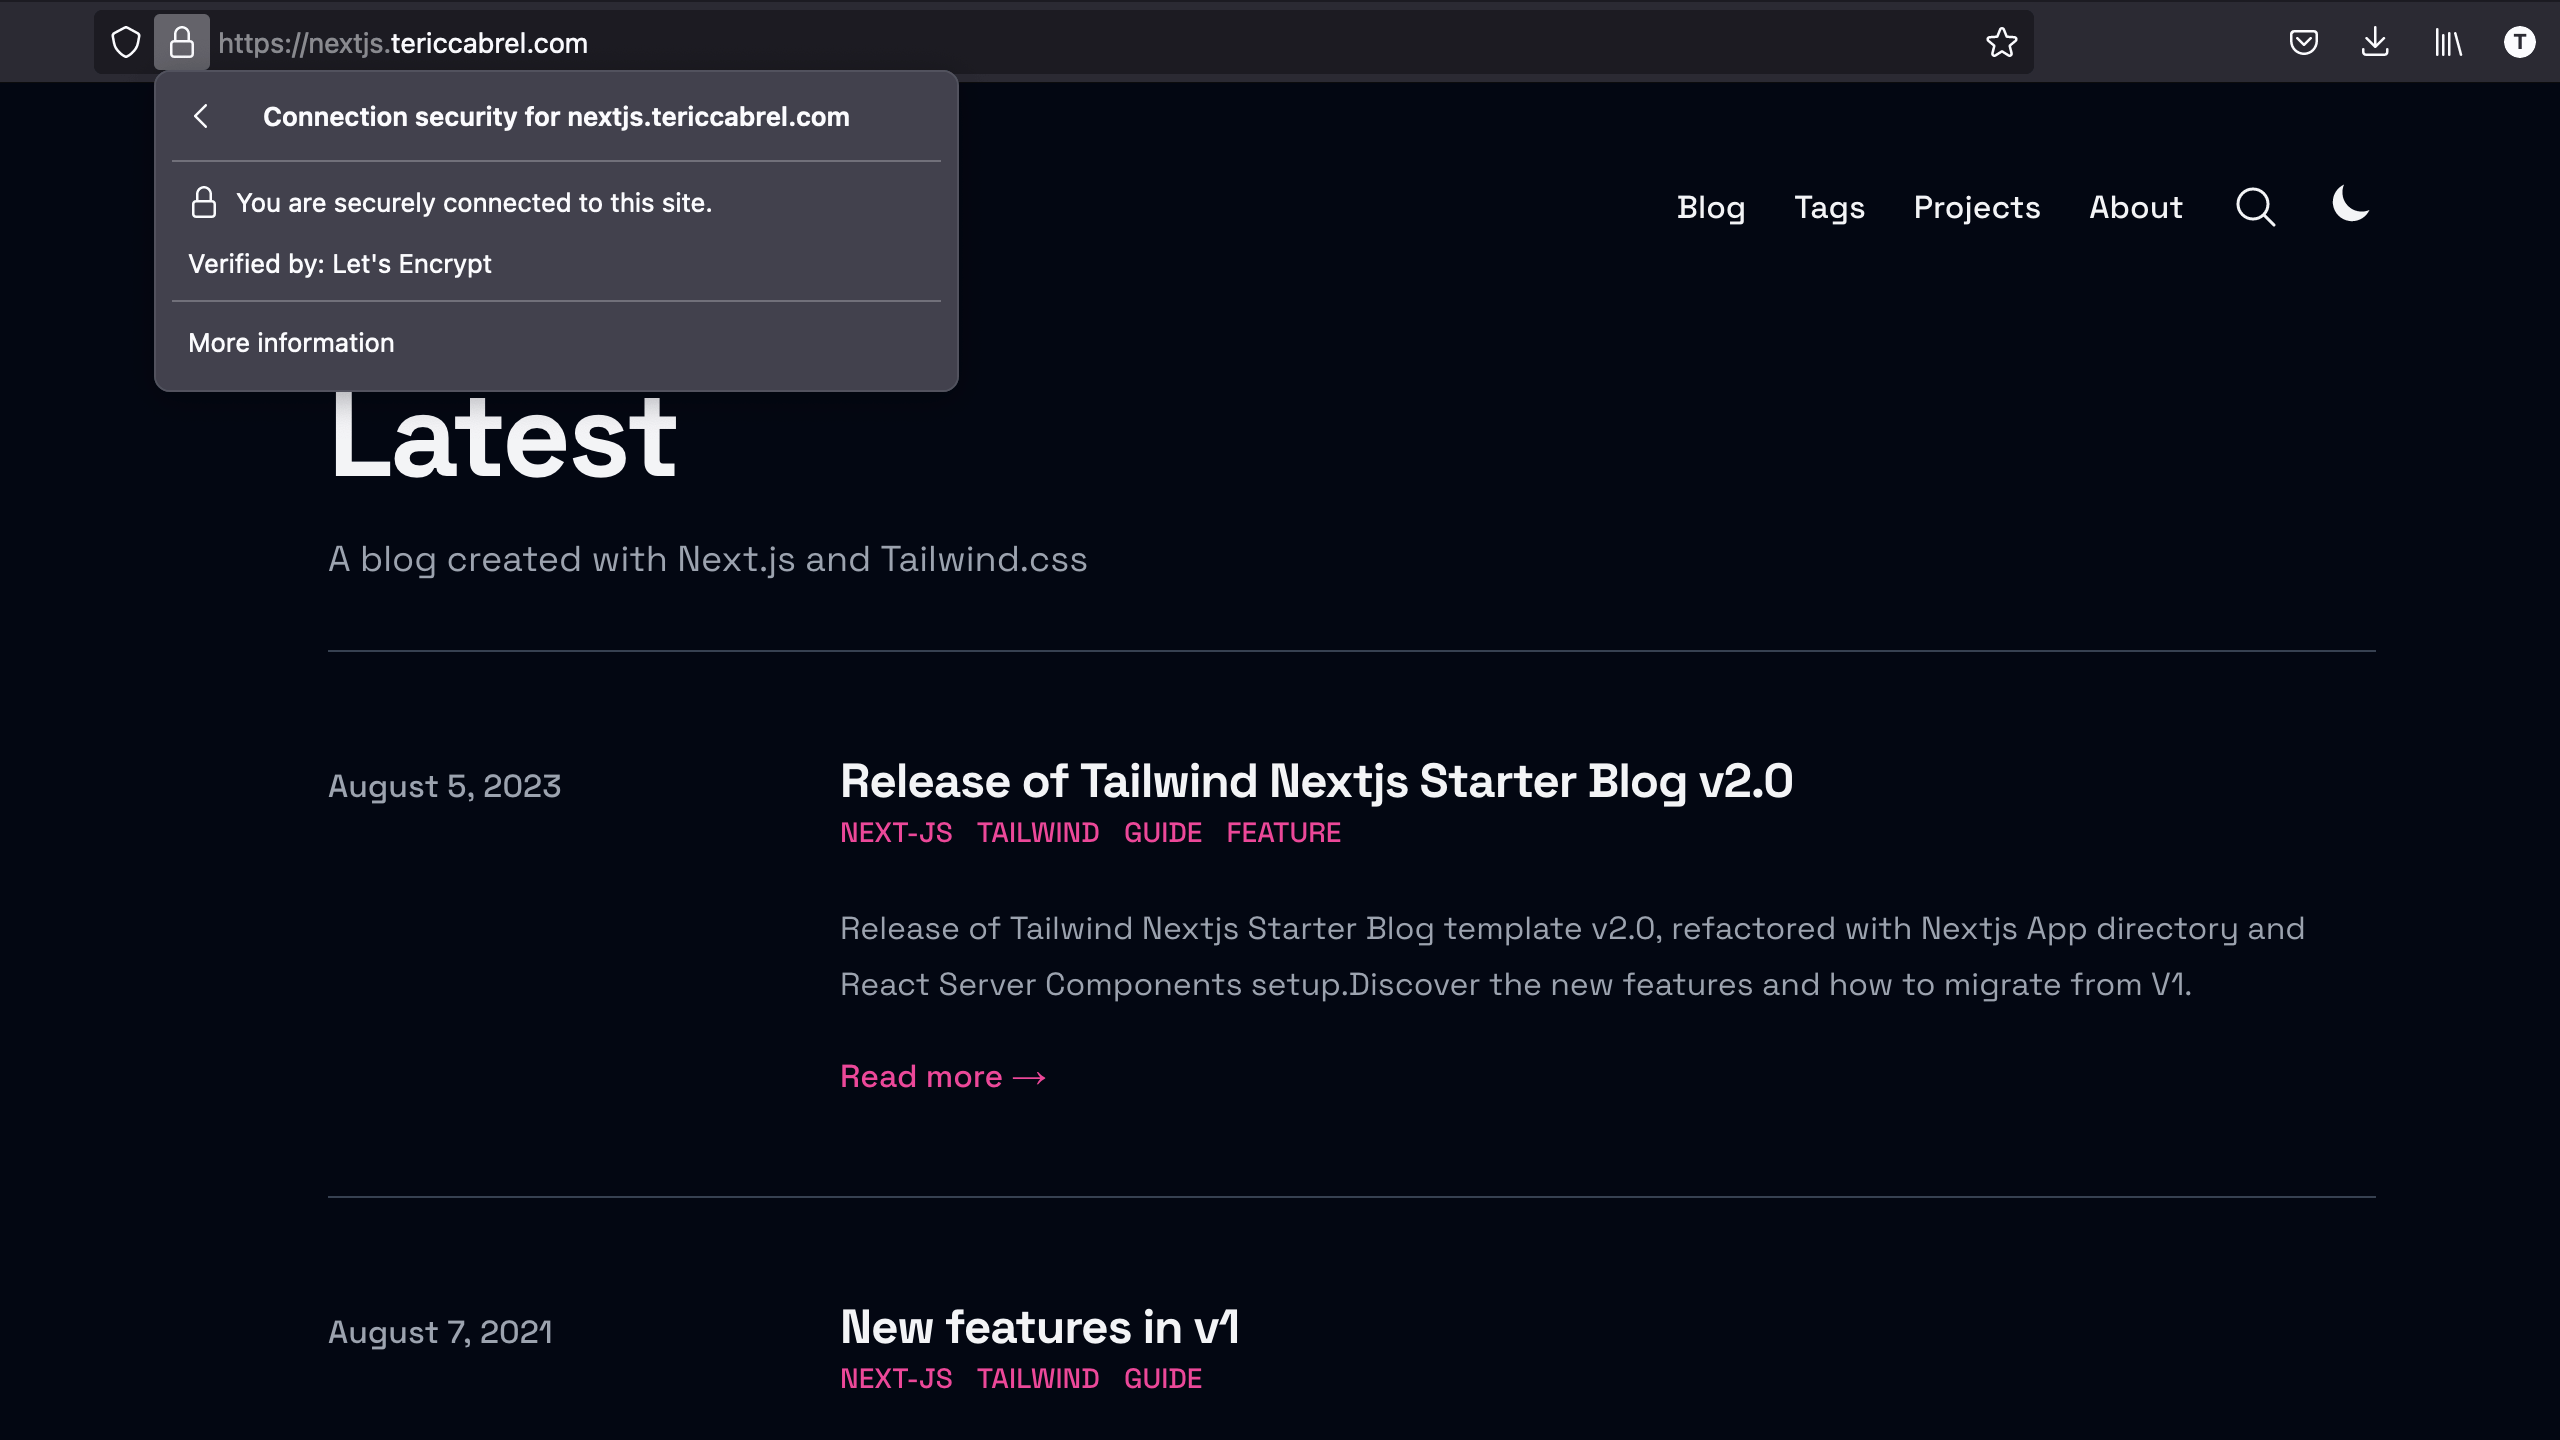
The website is now secure with a free SSL certificate issued by Let's Encrypt. To protect your website with a Paid SSL certificate, follow my tutorial.

Wrap up
We saw how to deploy a Docker image of a Next.js application on a Virtual Private Server, which is a convenient alternative to hosting a cloud provider.
Remember that you are responsible for the application availability and the server infrastructure. Solutions like Docker Swarm and Kubernetes integrate easily with Docker.
After this, the next step is to automate this process inside the CI/CD pipeline. I wrote a complete post about deploying our application in a CI/CD on GitHub Actions.
Follow me on Twitter or subscribe to my newsletter to avoid missing the upcoming posts and the tips and tricks I occasionally share.