
Retrieve YouTube API v3 key with Node.js


YouTube is the most popular video-sharing platform and one of the most visited websites in the world. Due to the number of videos uploaded daily, some content creators need a way to automate their video publishing process.
YouTube exposes an API that makes integration with external services possible. Using the API, you can perform tasks such as uploading a video, searching a video, editing channel information, etc...
Ensuring only authenticated users access the data requires an API key, which can be tedious to find for developers.
In this post, we will see how to generate a YouTube API access token to retrieve information about a YouTube channel from the YouTube Data API v3.
Prerequisites
To follow this tutorial, make sure you have the following tools installed on your computer.
- A Google account - Create a Google account
- Node.js 18 or higher - Download's link
- A Node package manager such as NPM or Yarn.
Create the Google Application
The Google application will perform requests on our behalf, which is helpful when consuming the YouTube API from different Web Applications. A successful application's creation generates a client ID and the client Secret.
Step 1: Create a project
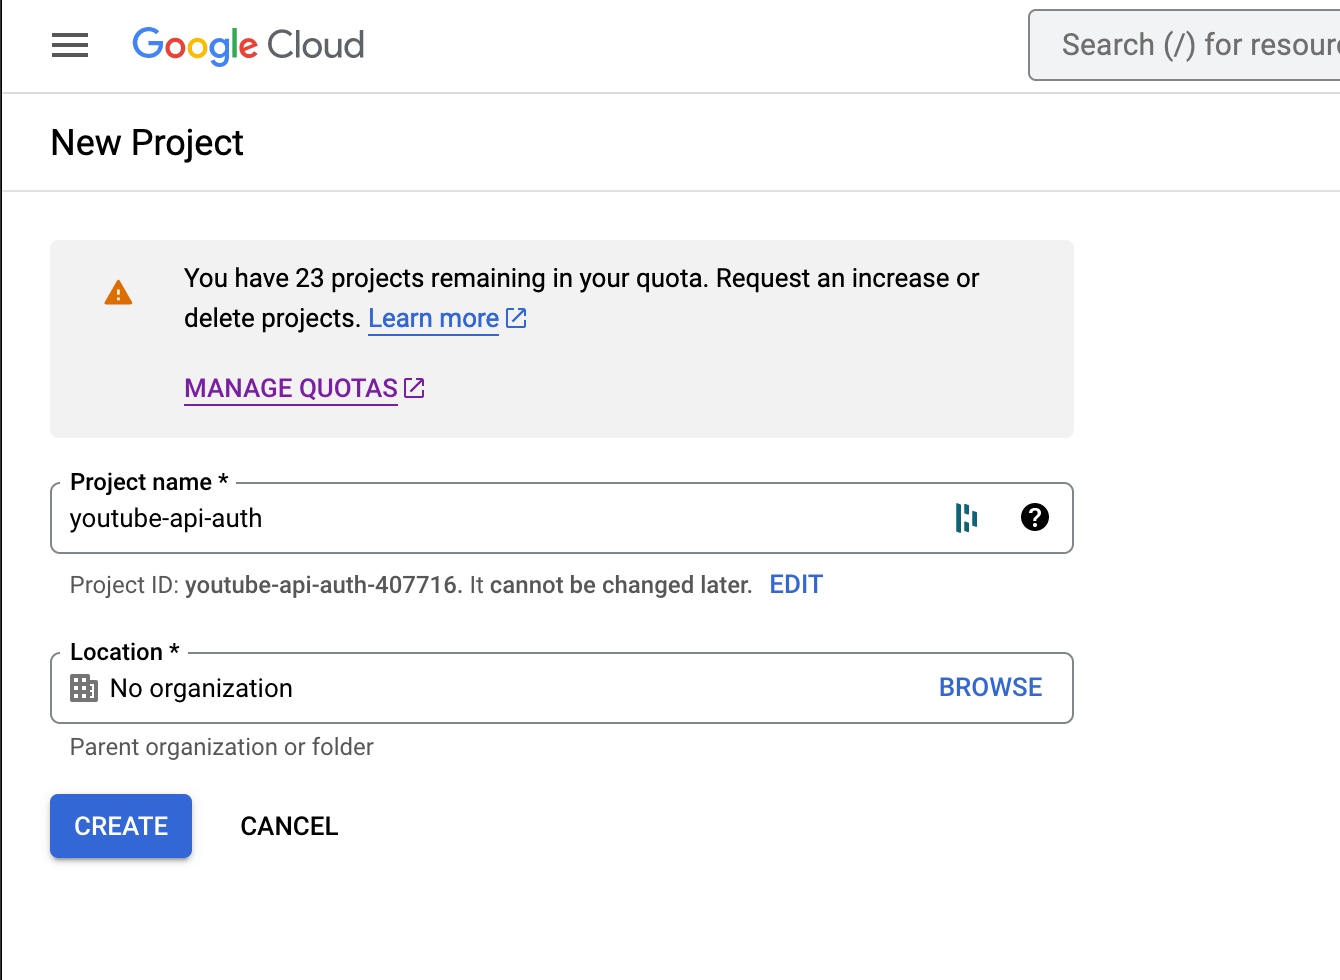
Go to https://console.cloud.google.com/welcome and click on the button "Create Project."
Give the project a name, click "Create" to submit, and wait for the creation to complete.
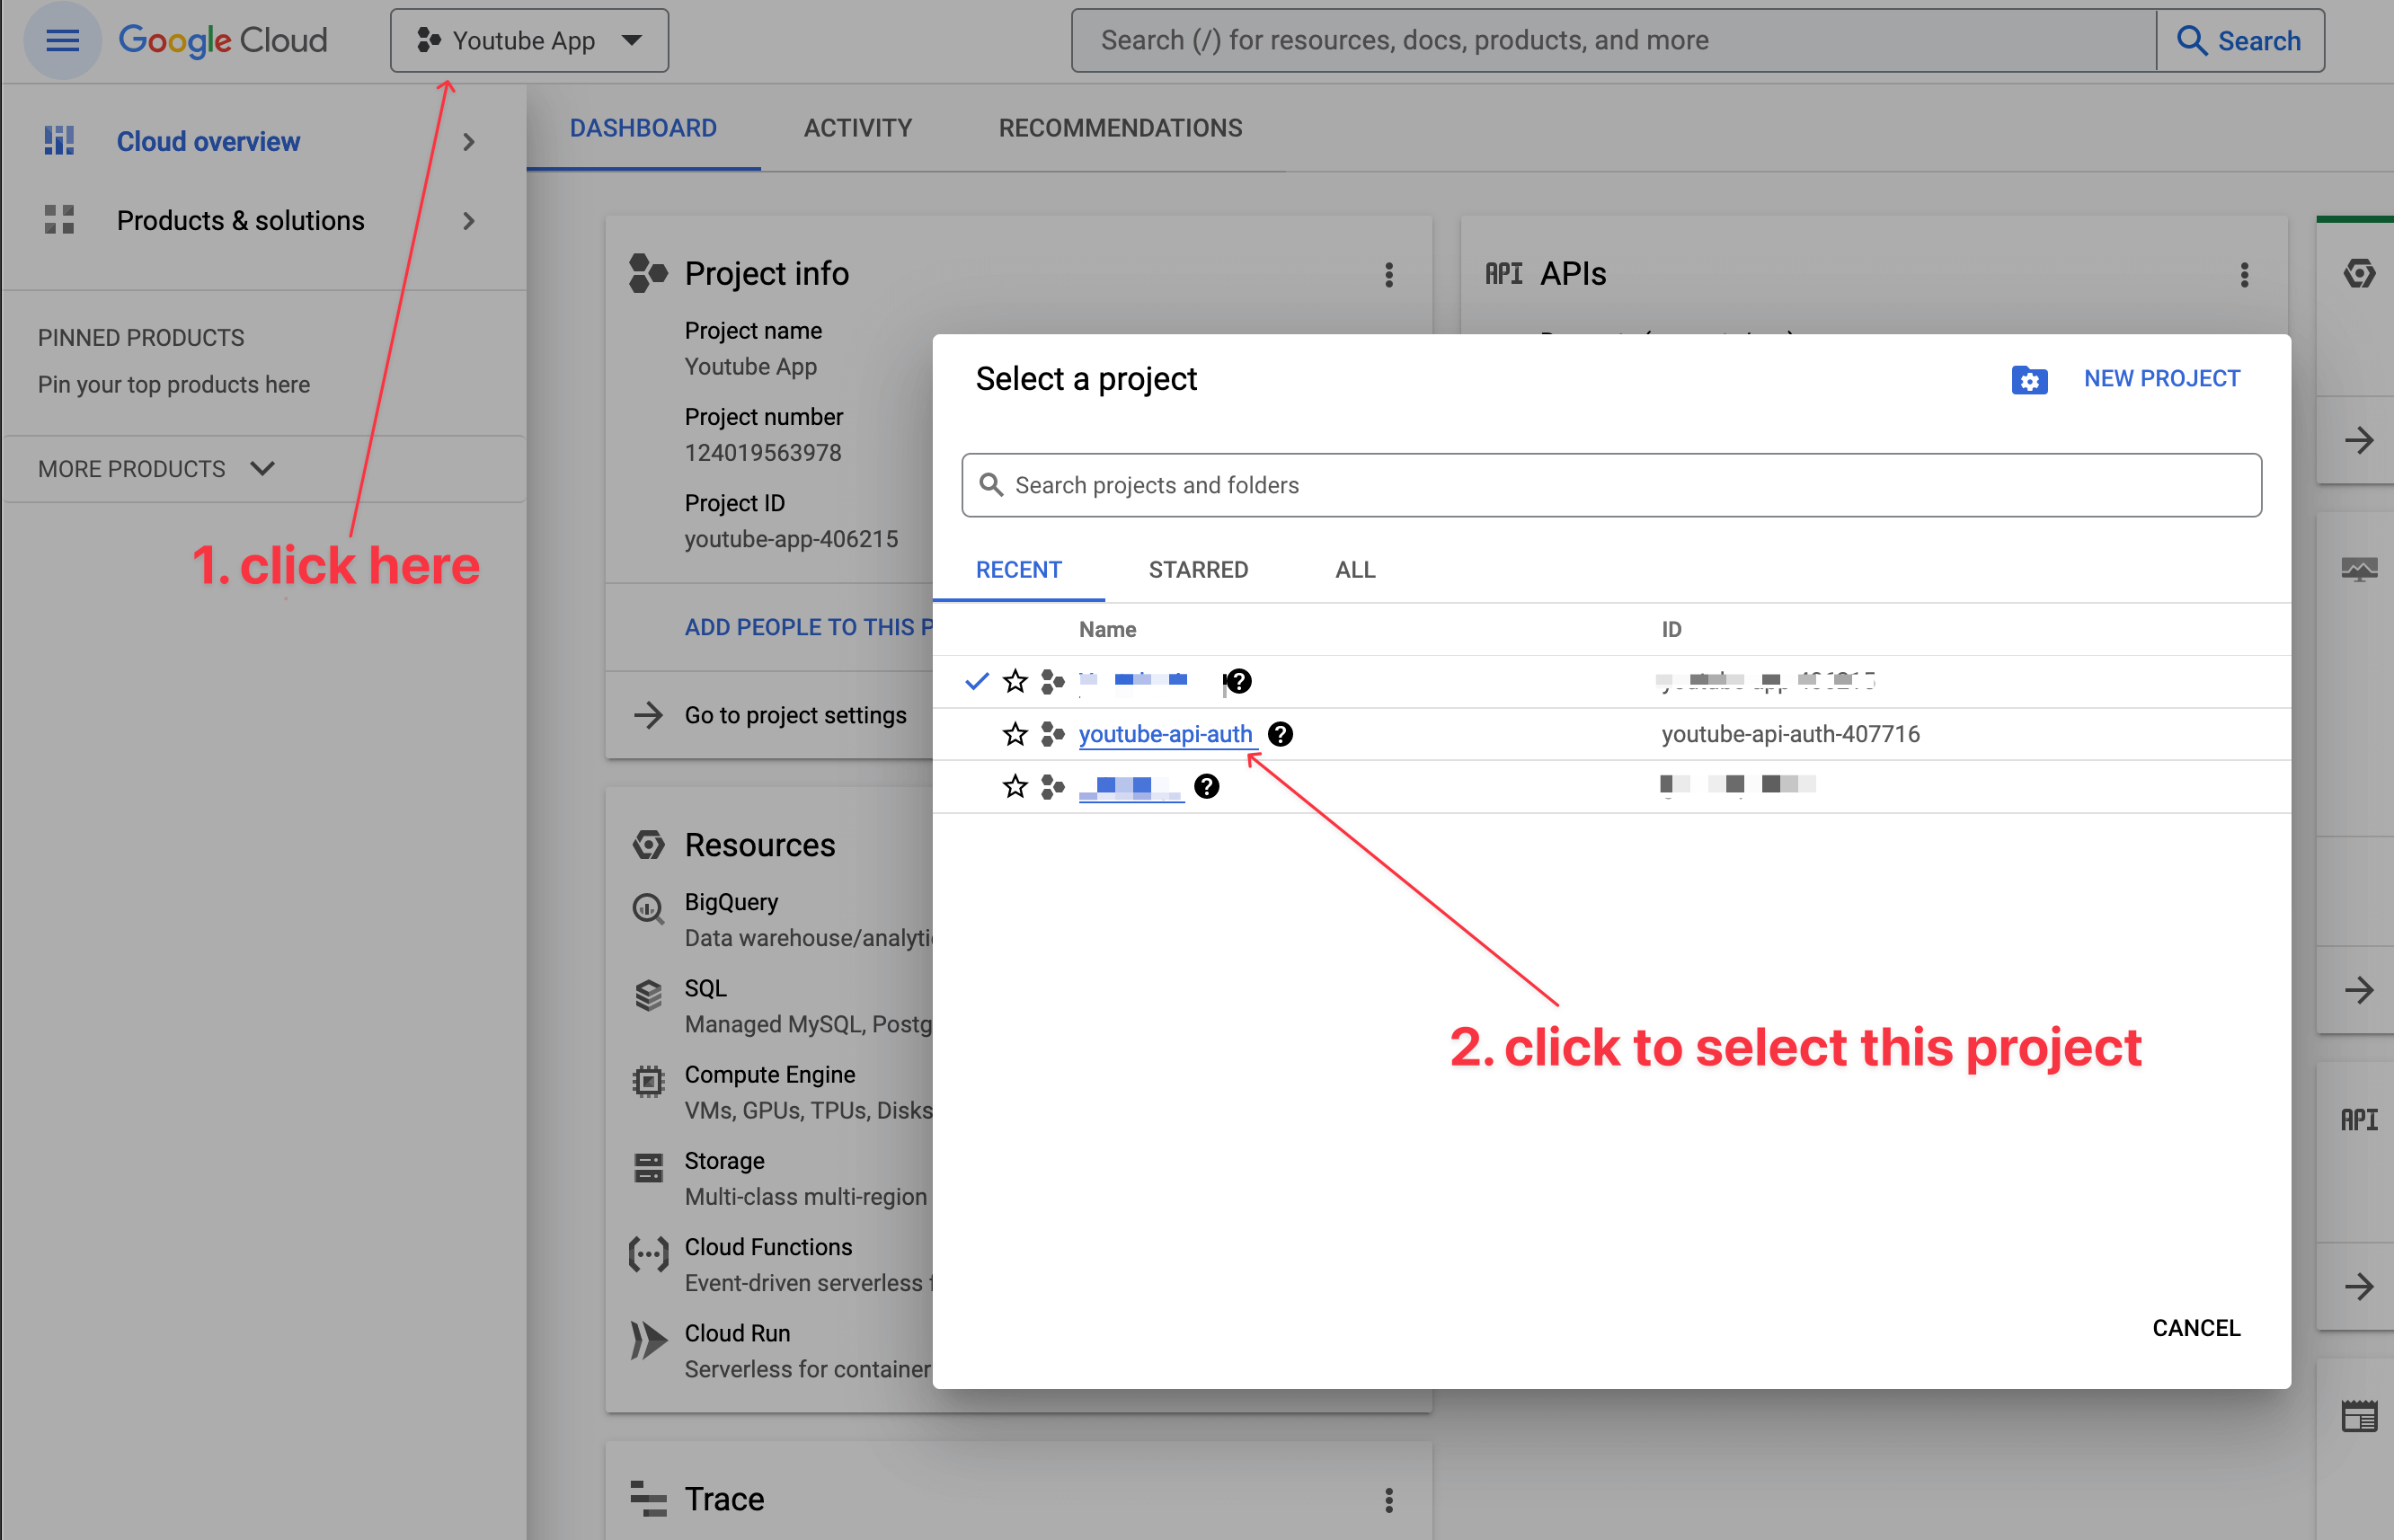
Once the project is created, select it to continue
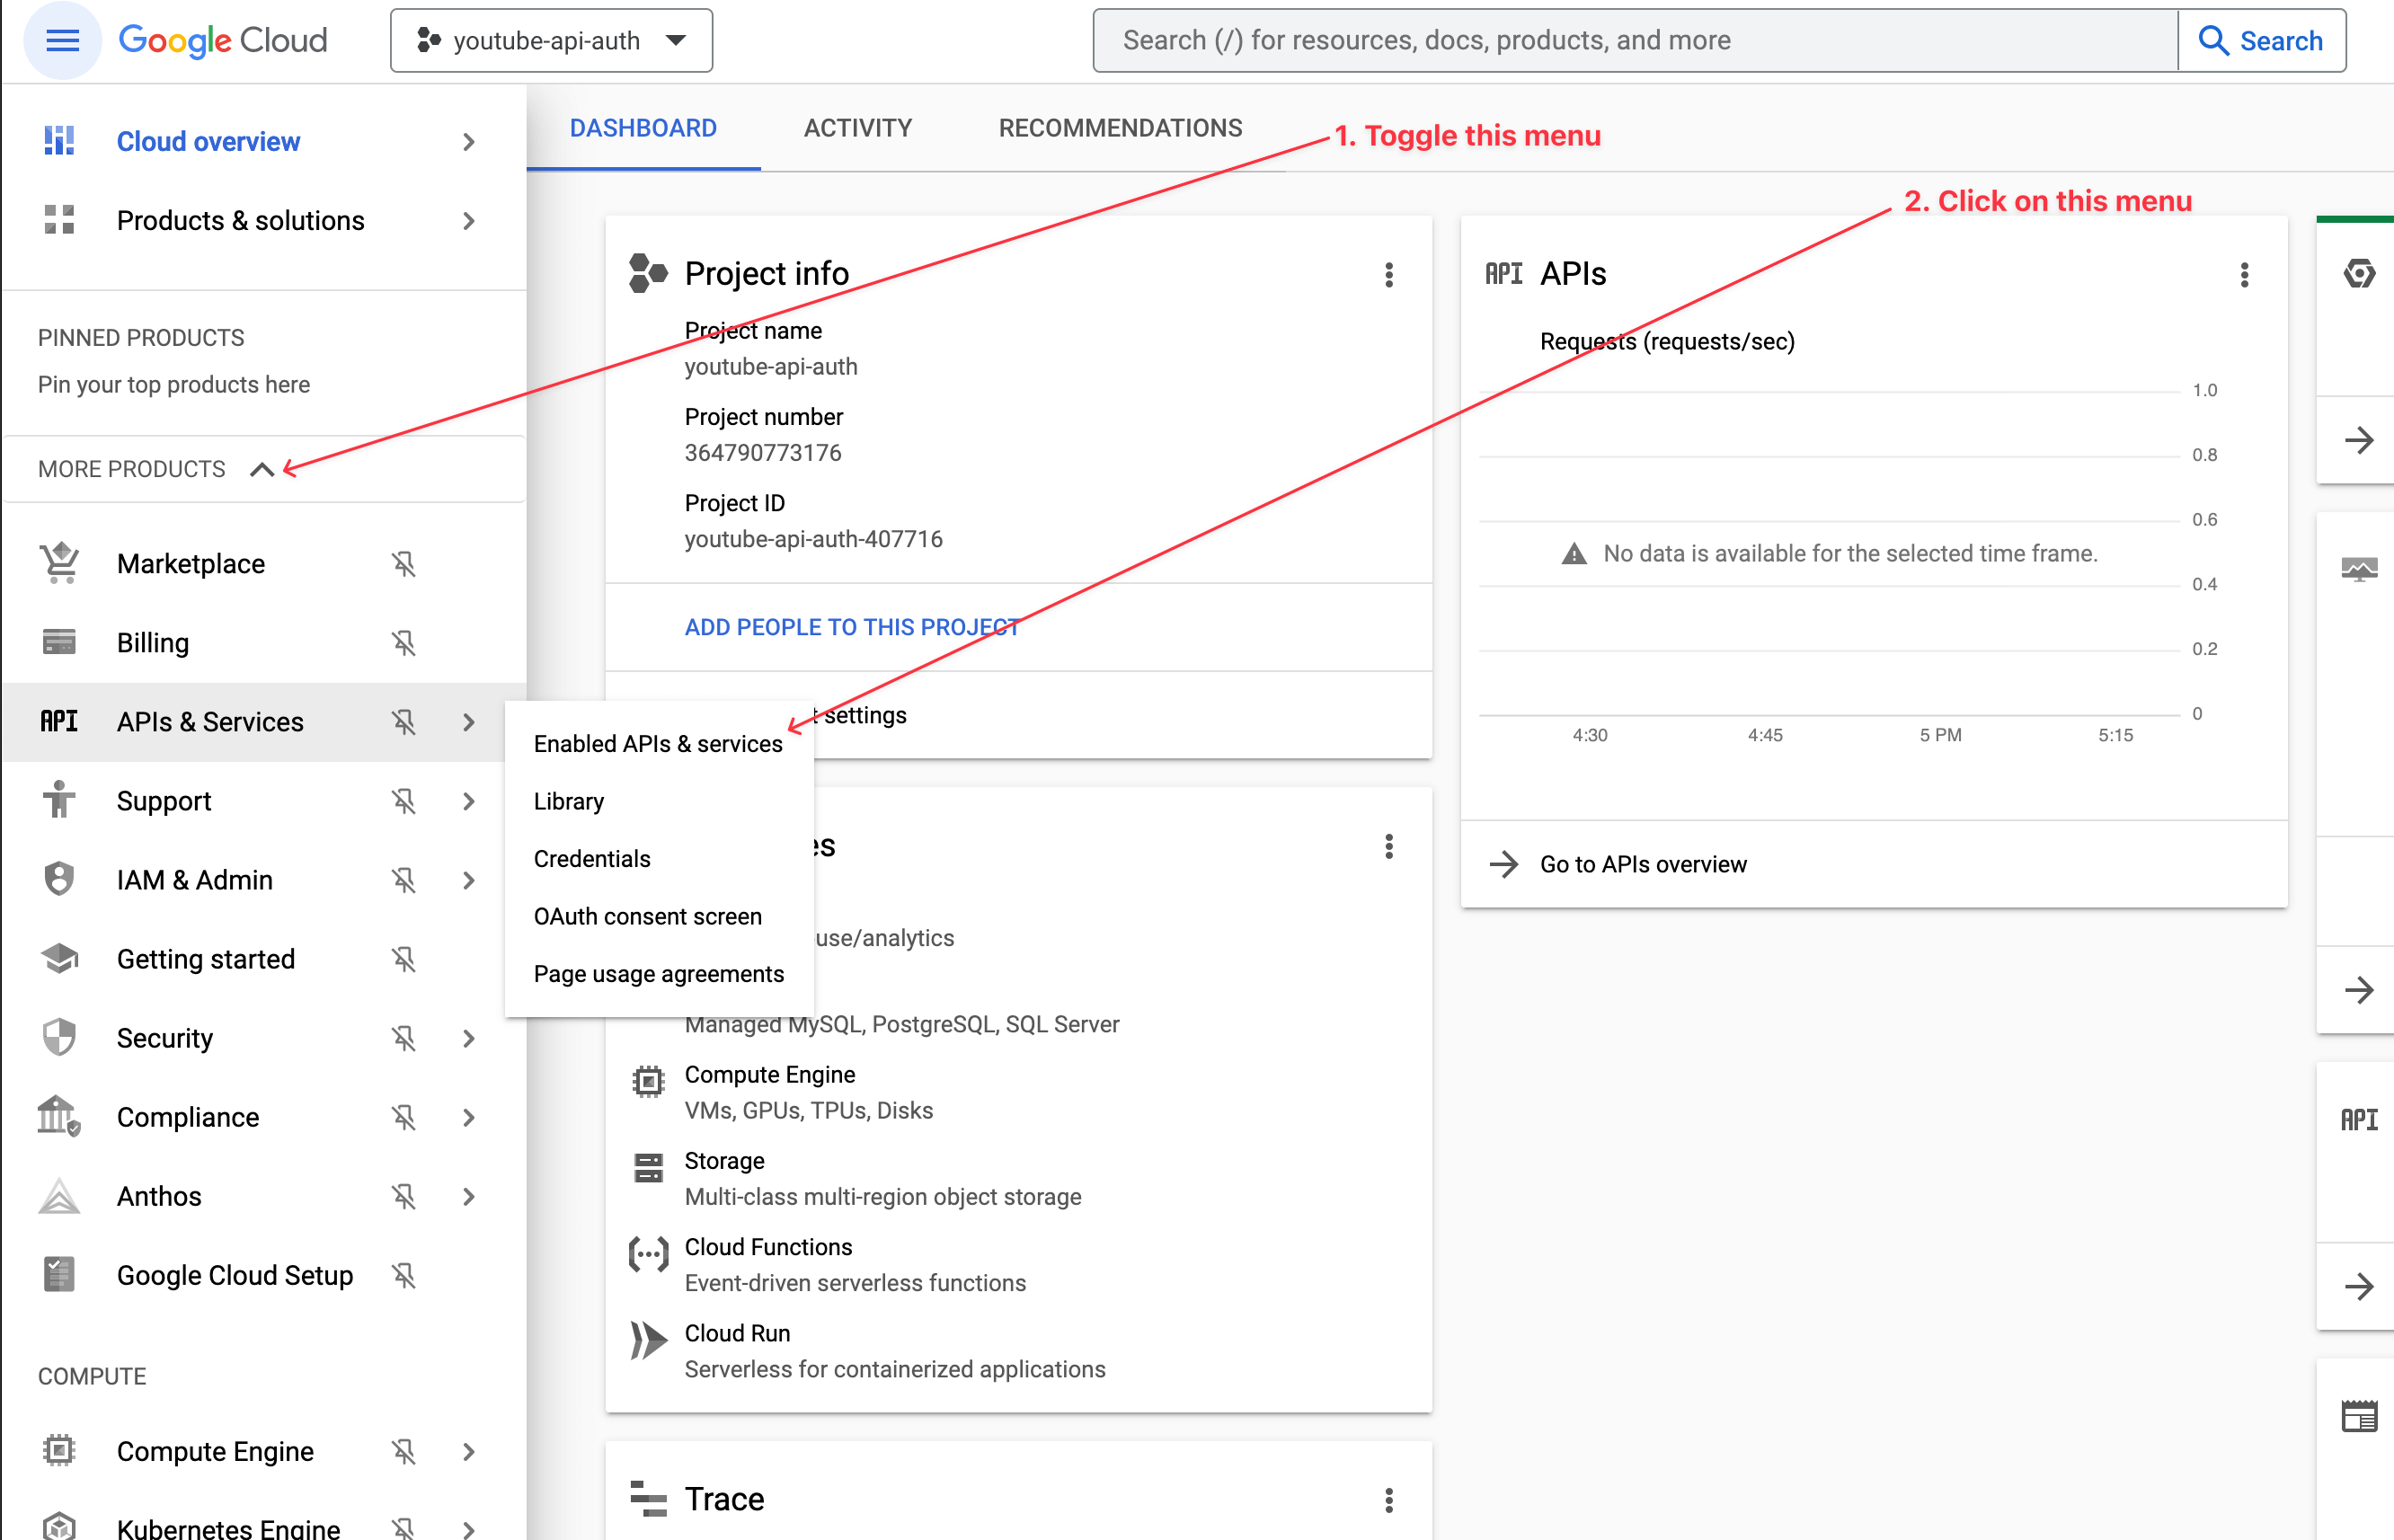
You will be redirected to the console dashboard. On the sidebar menu, under the "MORE PRODUCTS" menu item, click on the sub-menu "APIs & Services".
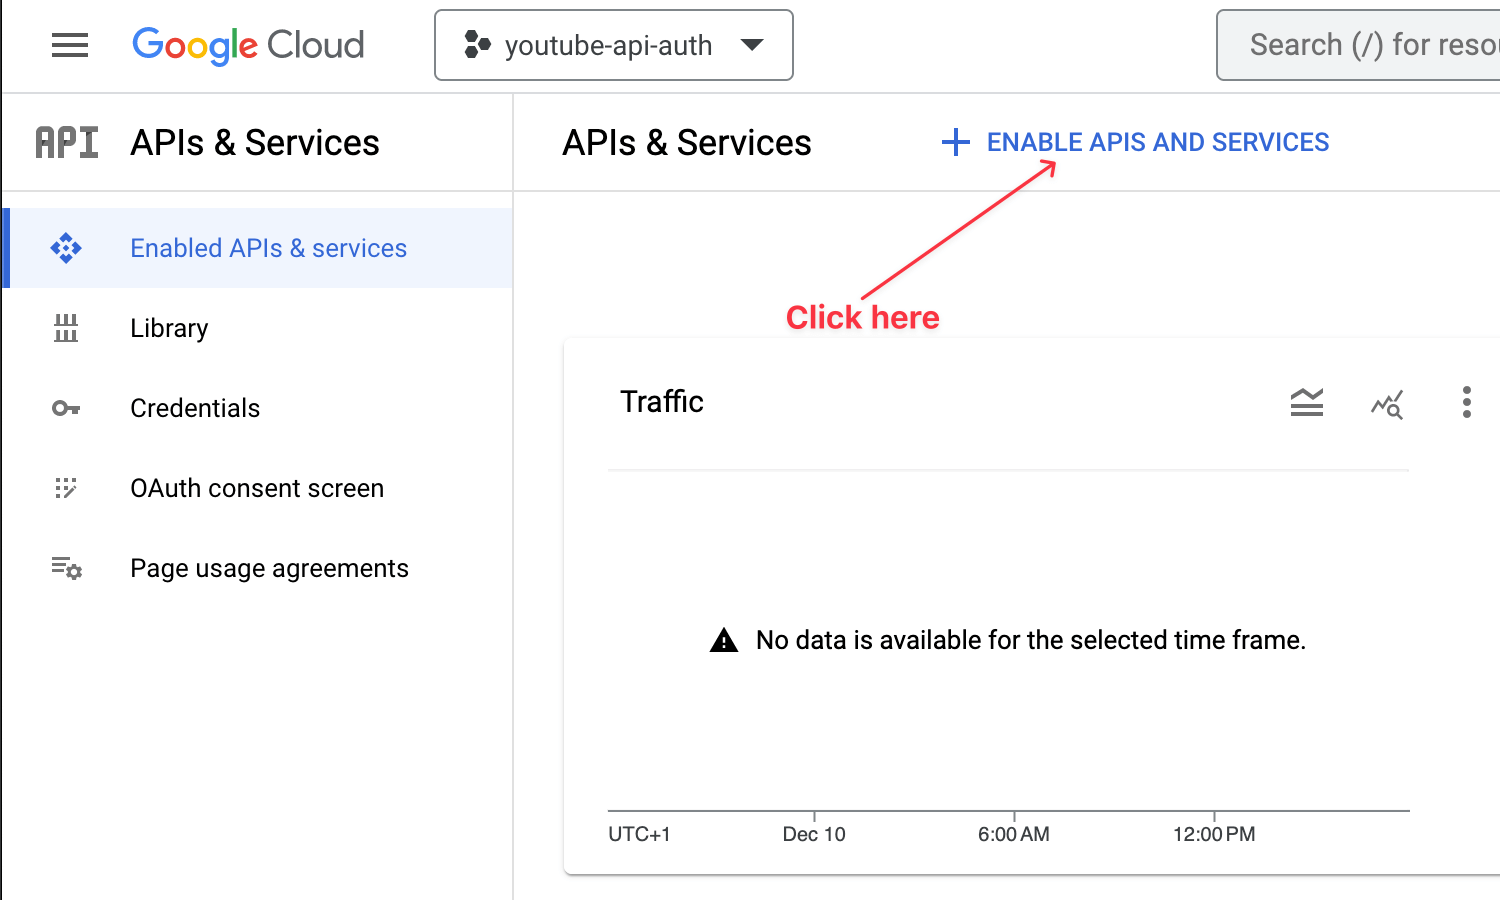
Locate the button "ENABLE APIS AND SERVICES" and click on it.
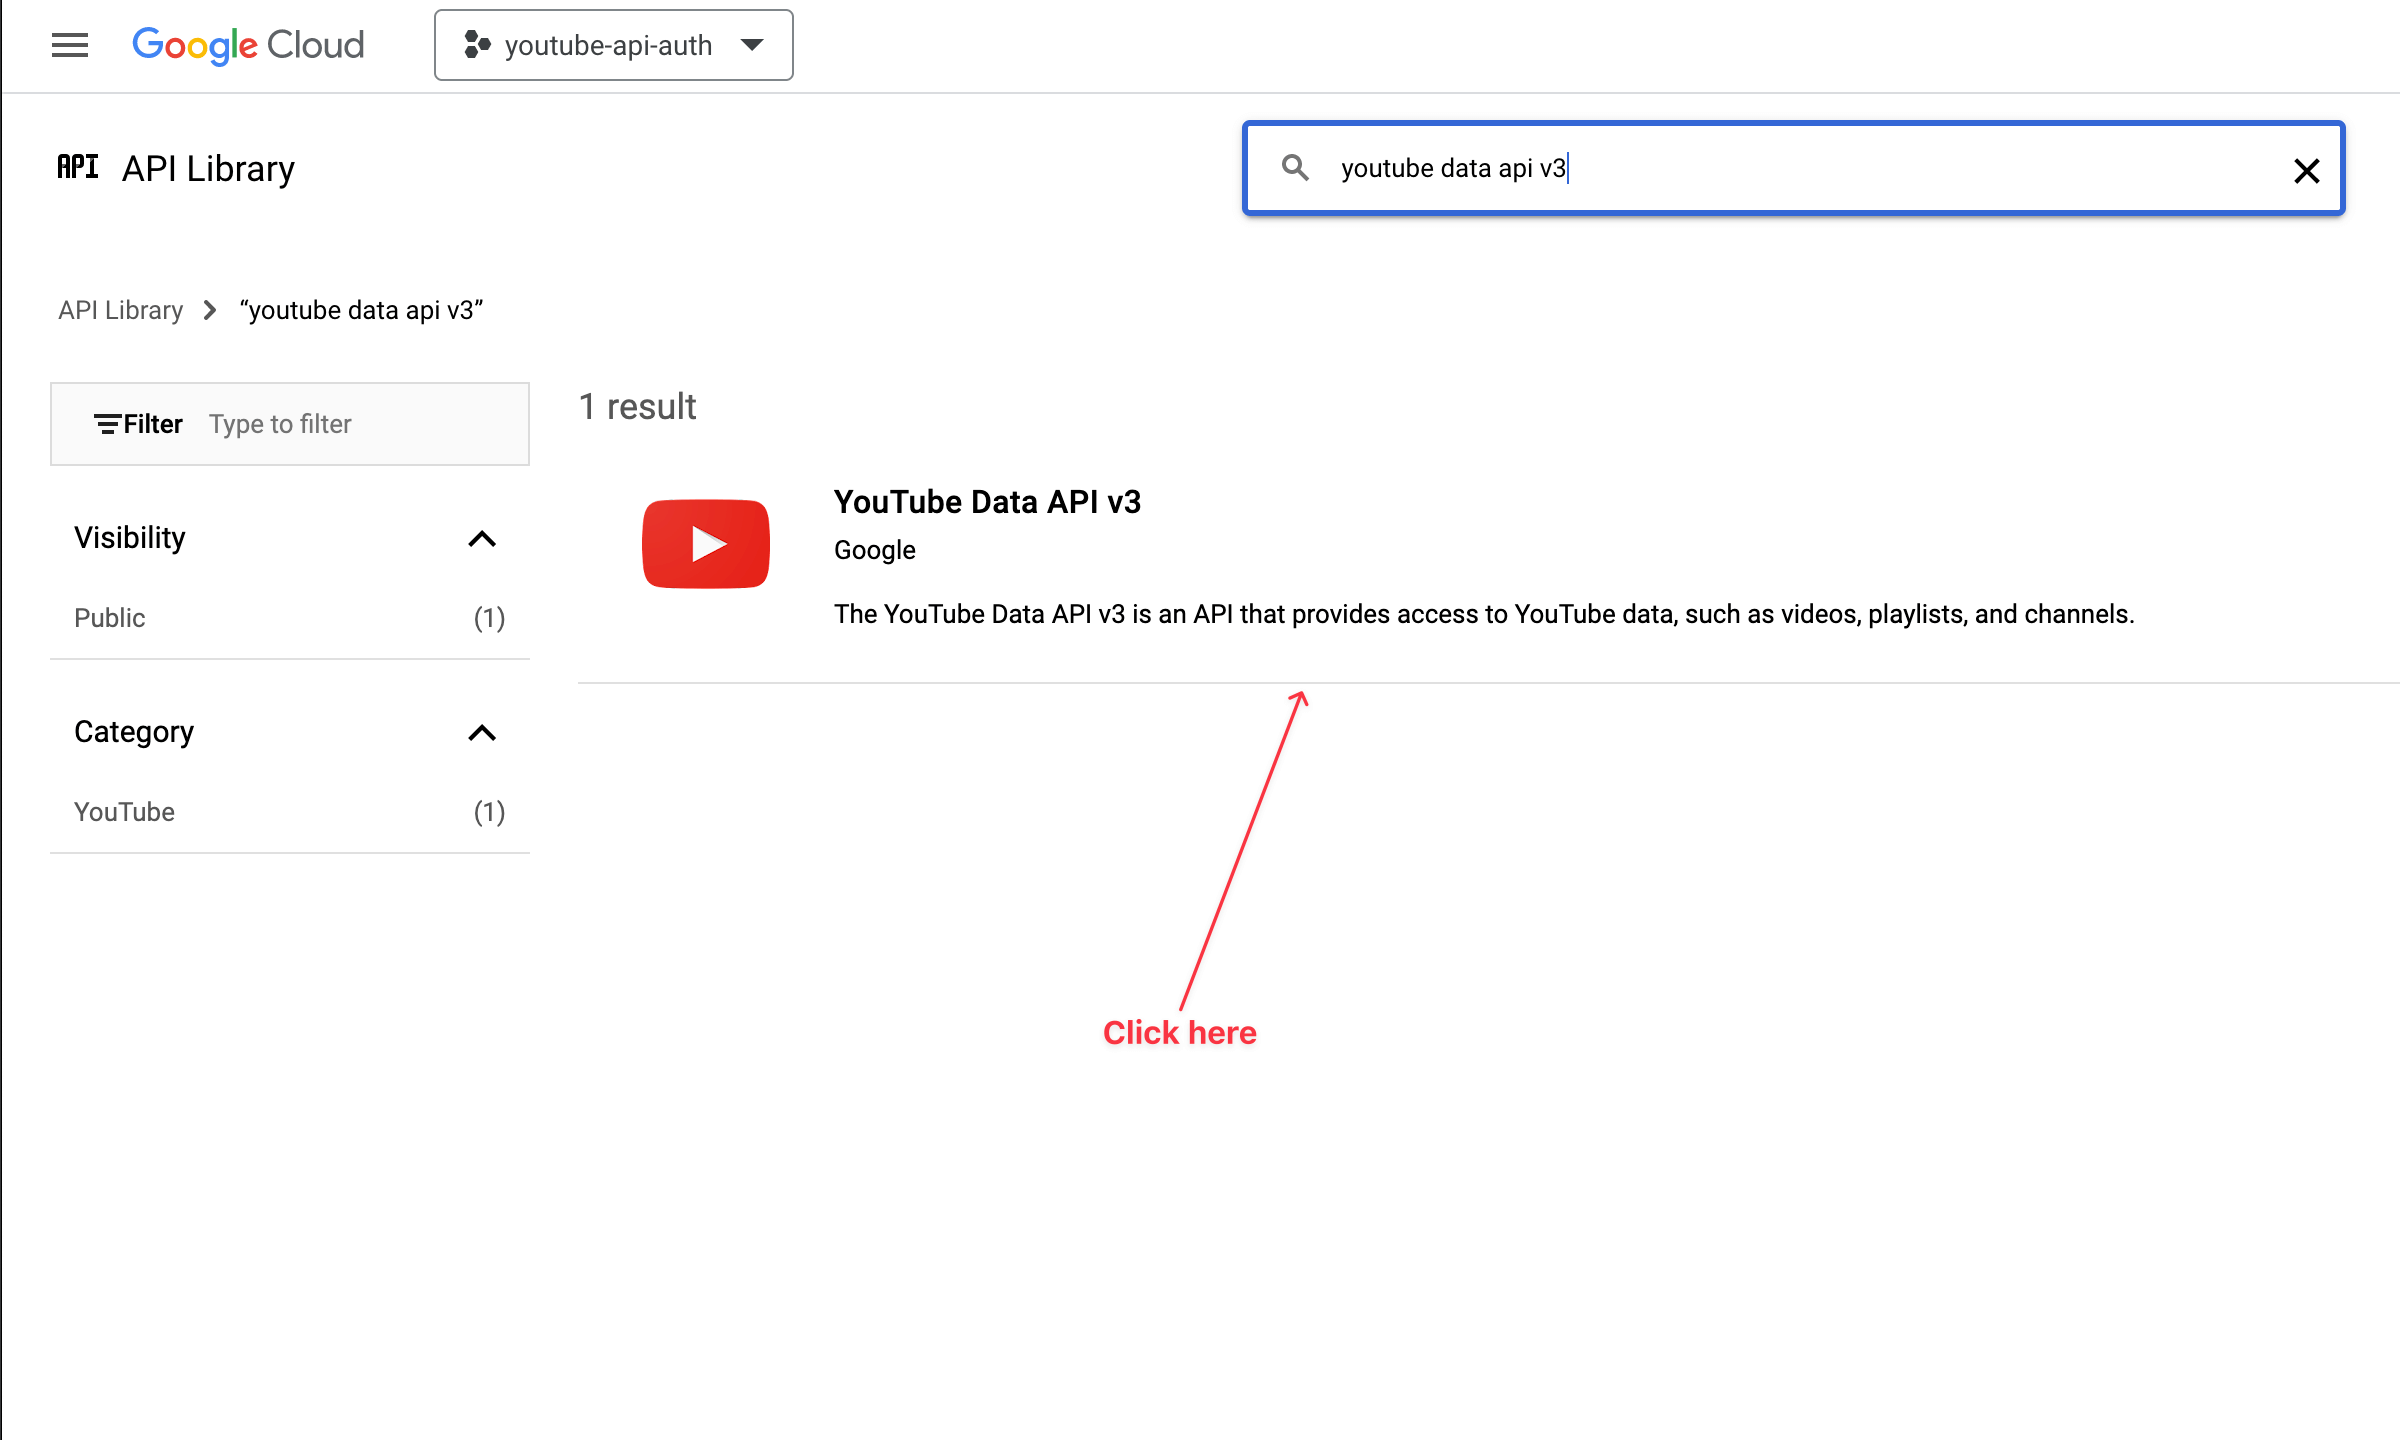
You will be redirected to a page listing all the Google APIs; search for "youtube data api v3" and click on it in the result list.
On the next page, click on the button "Enable," and you will be redirected to a page where the API will be enabled.
On the page displayed, in the sidebar menu, click on the menu "OAuth consent screen"; you are redirected to a page to configure the users to target by your application, and there are two options.
Choose the option "External" because the users allowed to use the application aren't in the same Google workspace as me.
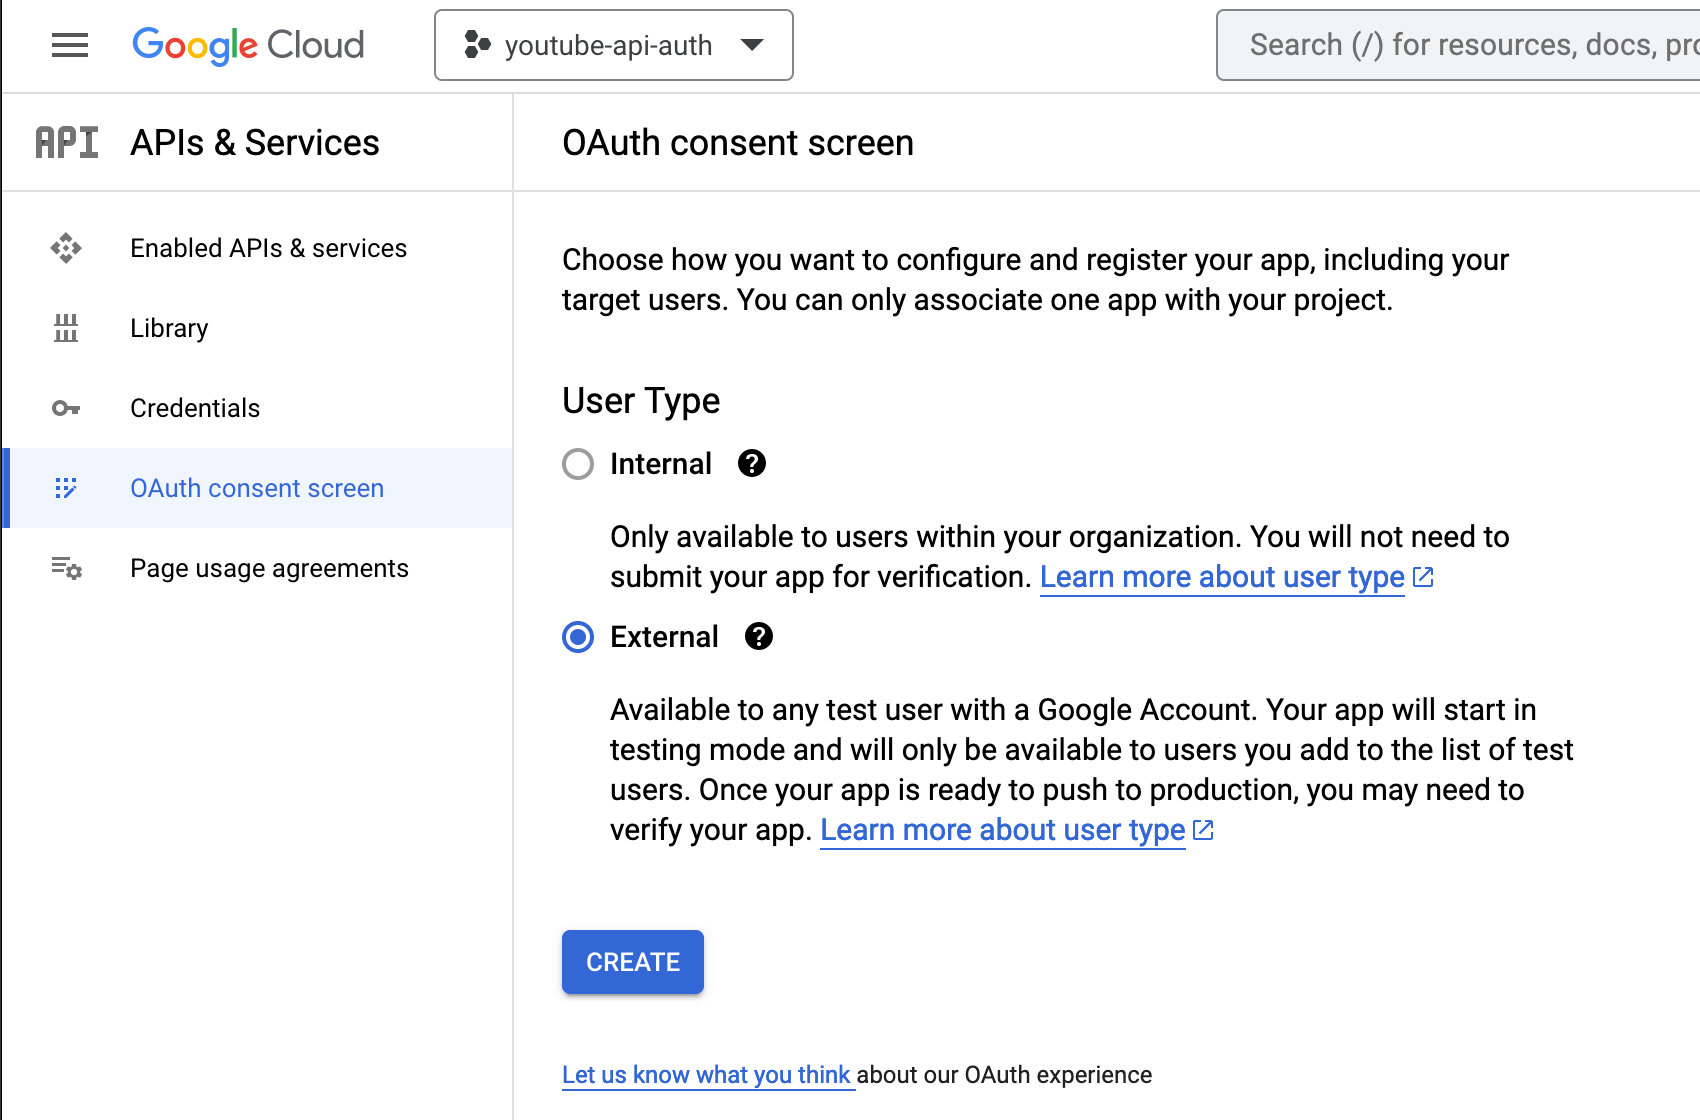
Click on the "Create" button, and you will be redirected to a page to create the application in four steps.

Step 2: Create the application
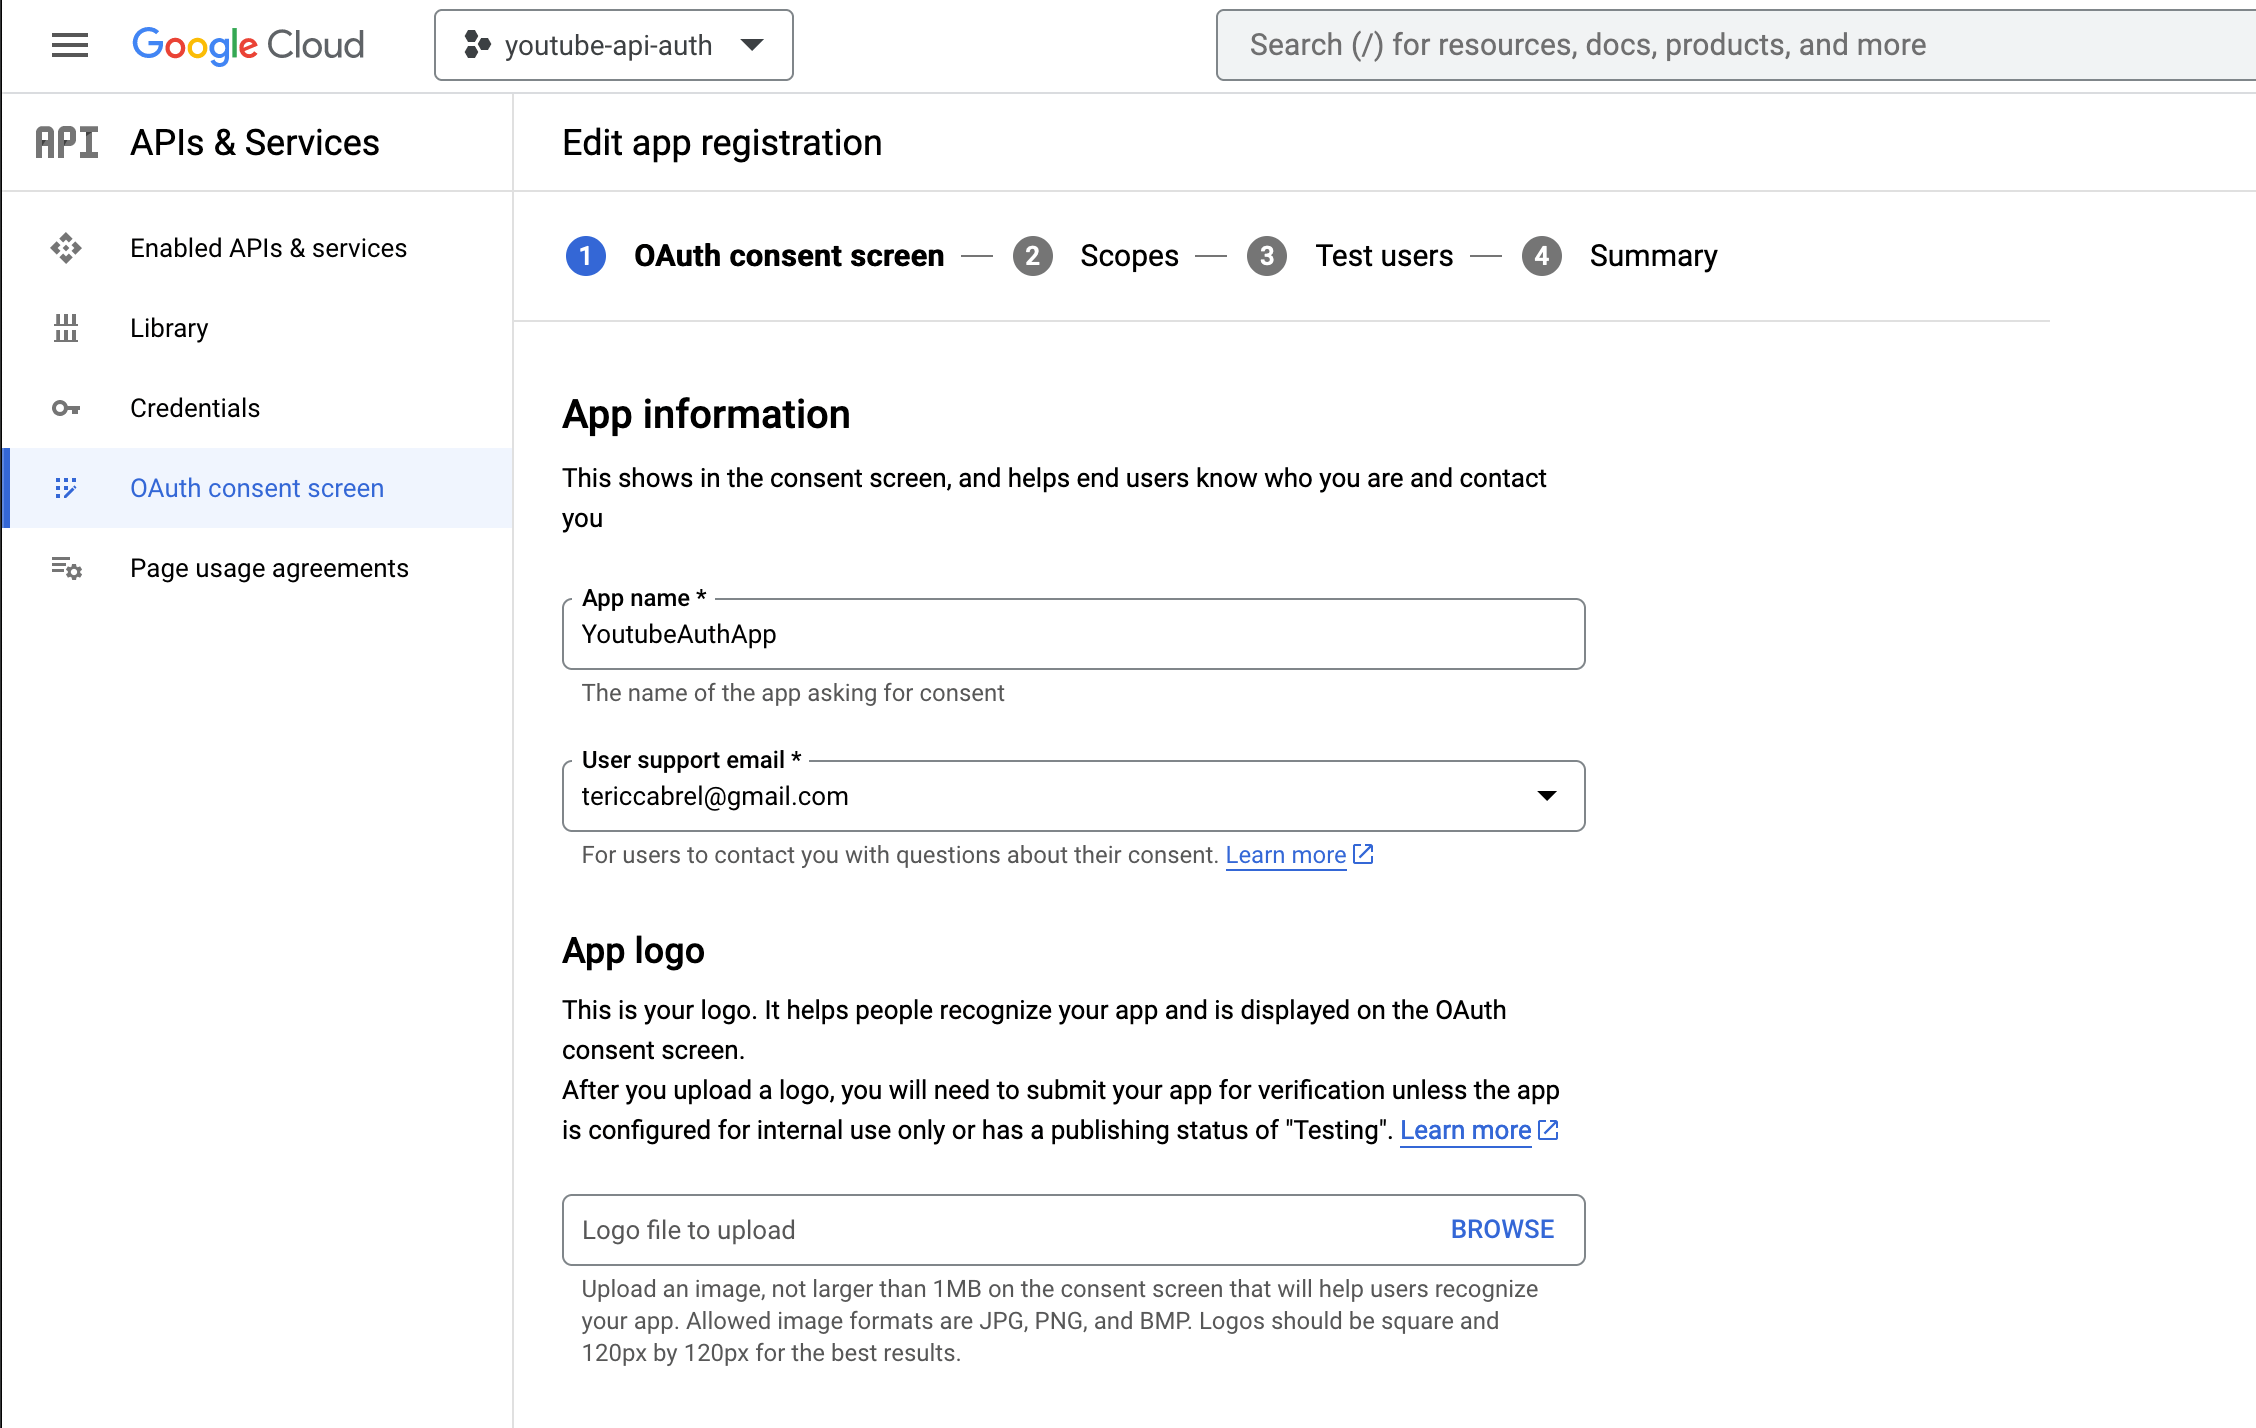
In the first step of the application creation, give an application's name and select your email address as the value for the input labeled "User support email."
Also, give your email address as the value for the input labeled "Developer contact information." You can ignore other inputs since they aren't mandatory. Click on "Save and Continue."
You are now on step two of the application creation; you have no configuration to do, so click on "Save and Continue.".
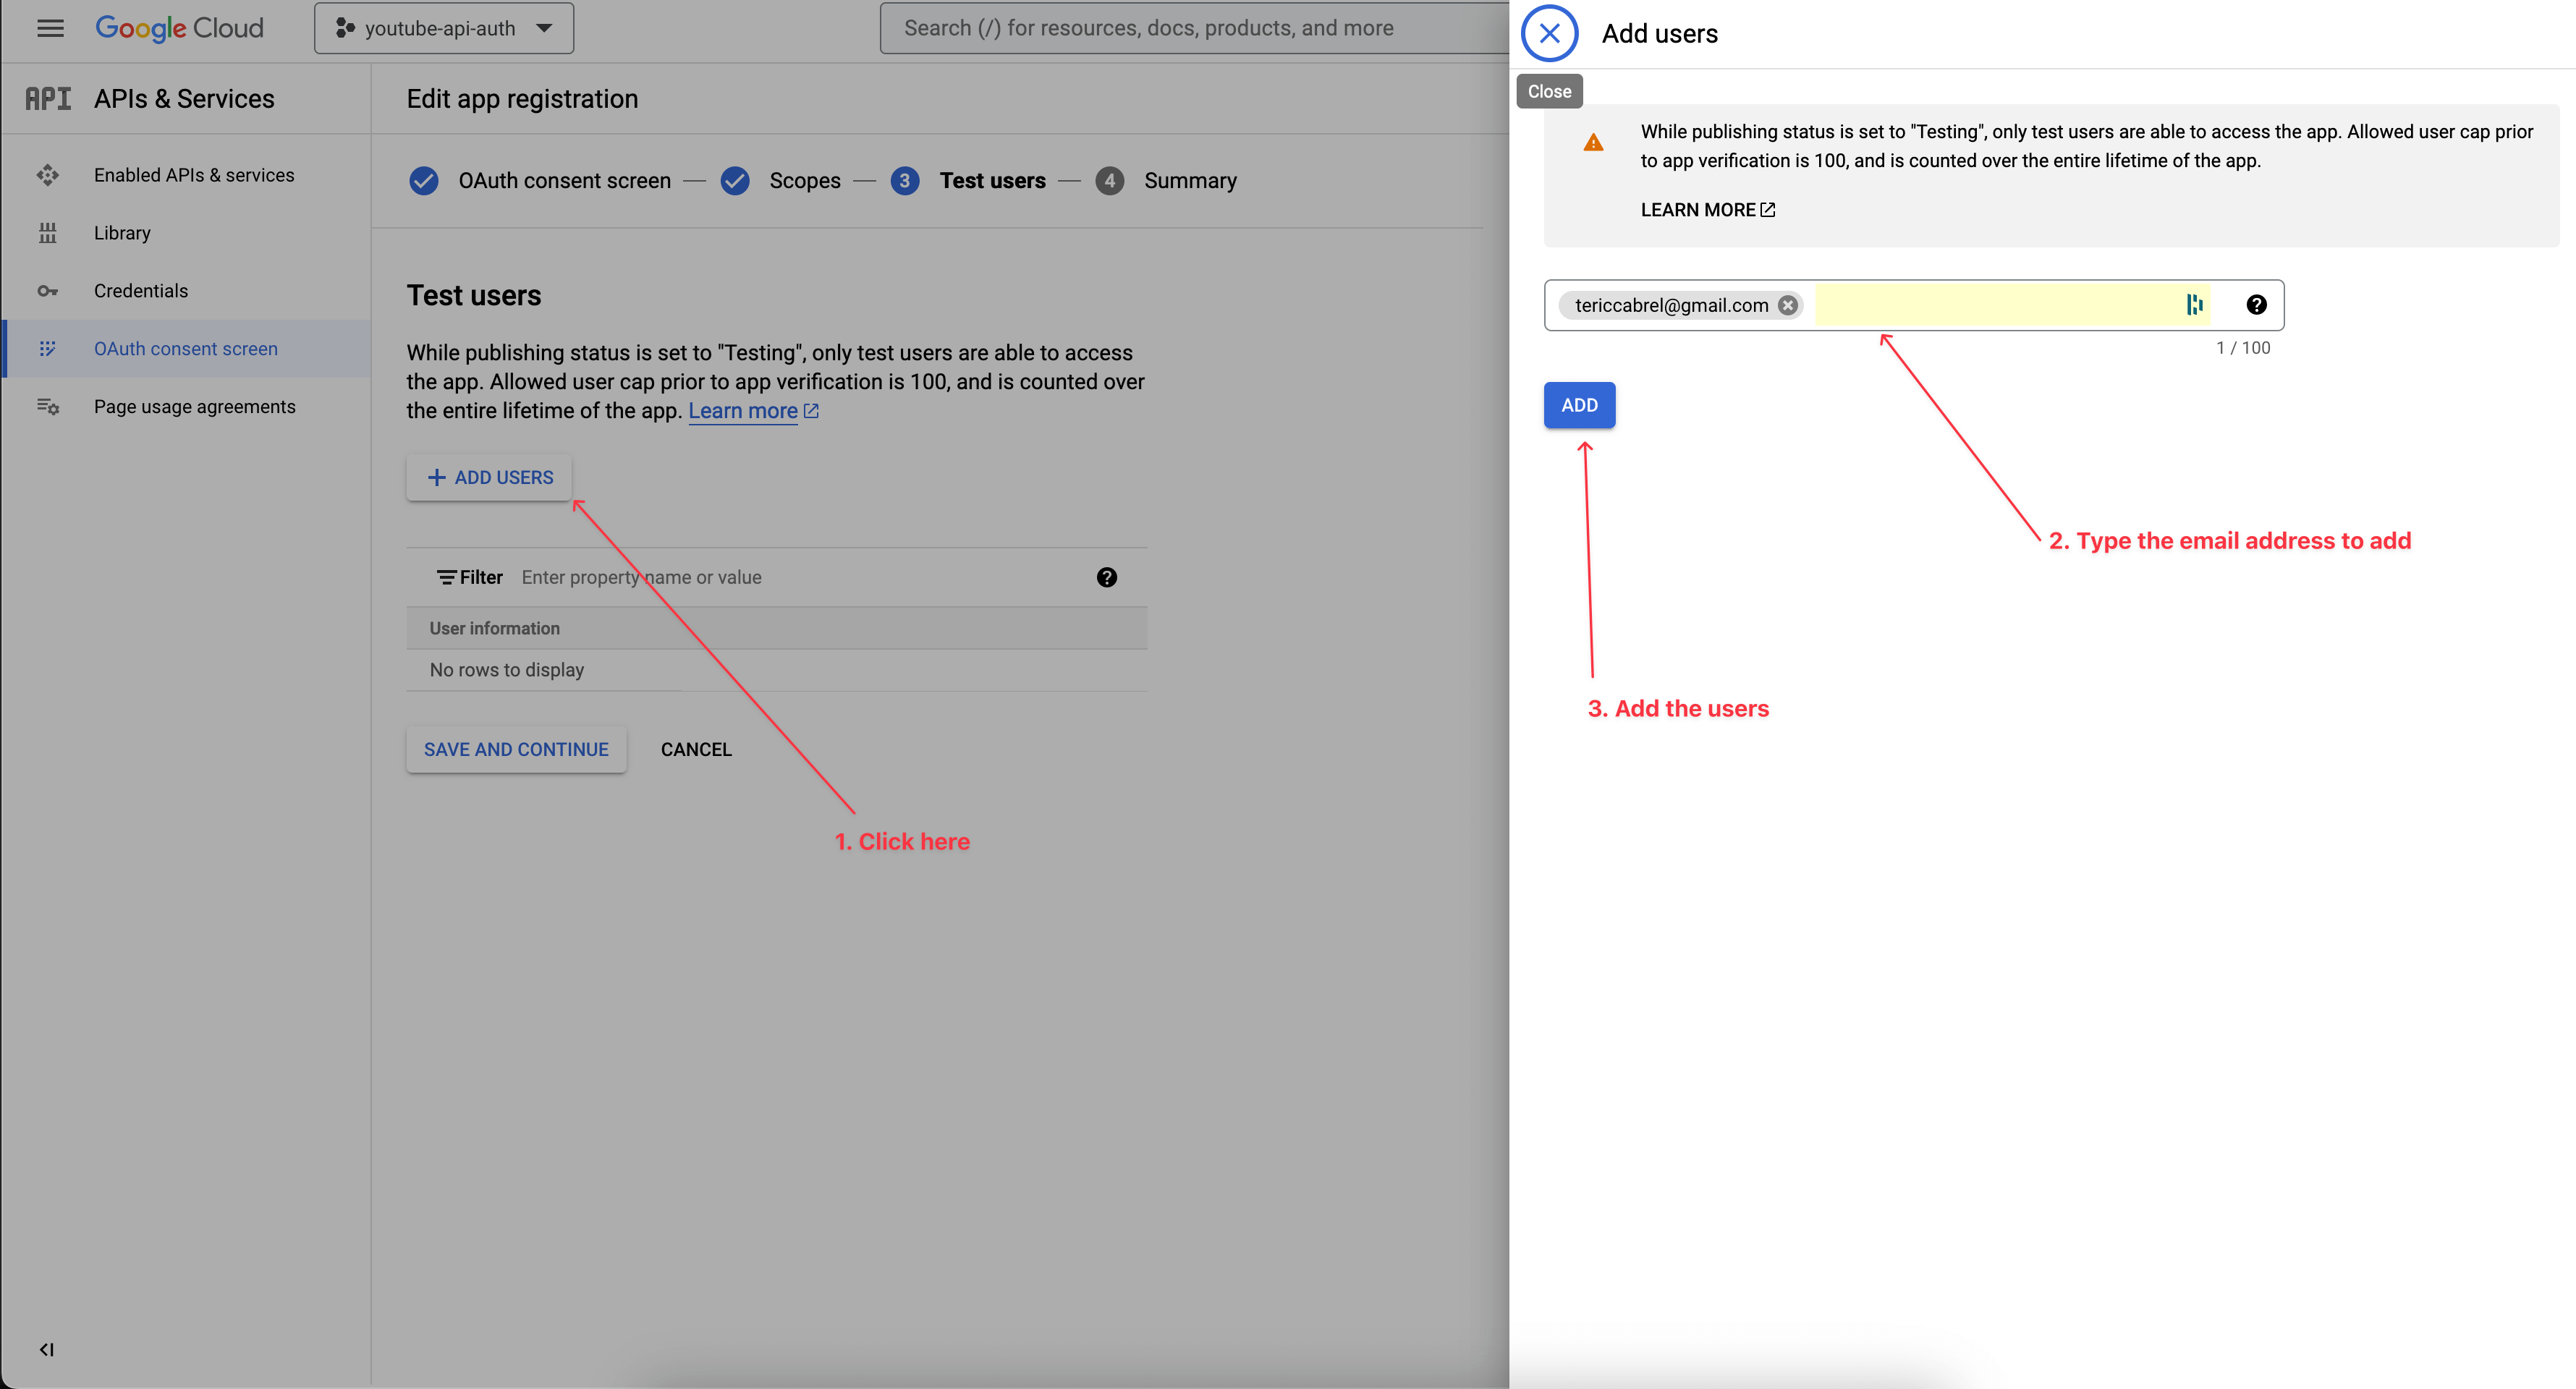
In step three, add a test user with your Gmail email address; you can add up to 100. Click on "Save and Continue".
The last step summarizes the previous three steps; click on the button "BACK TO DASHBOARD."
Step 3: Generate the application credentials
On the sidebar menu, click on the menu item "Credentials." On the displayed page, locate the drop-down button labeled "CREATE CREDENTIALS," click on it, and select the "OAuth client ID" drop-down menu.
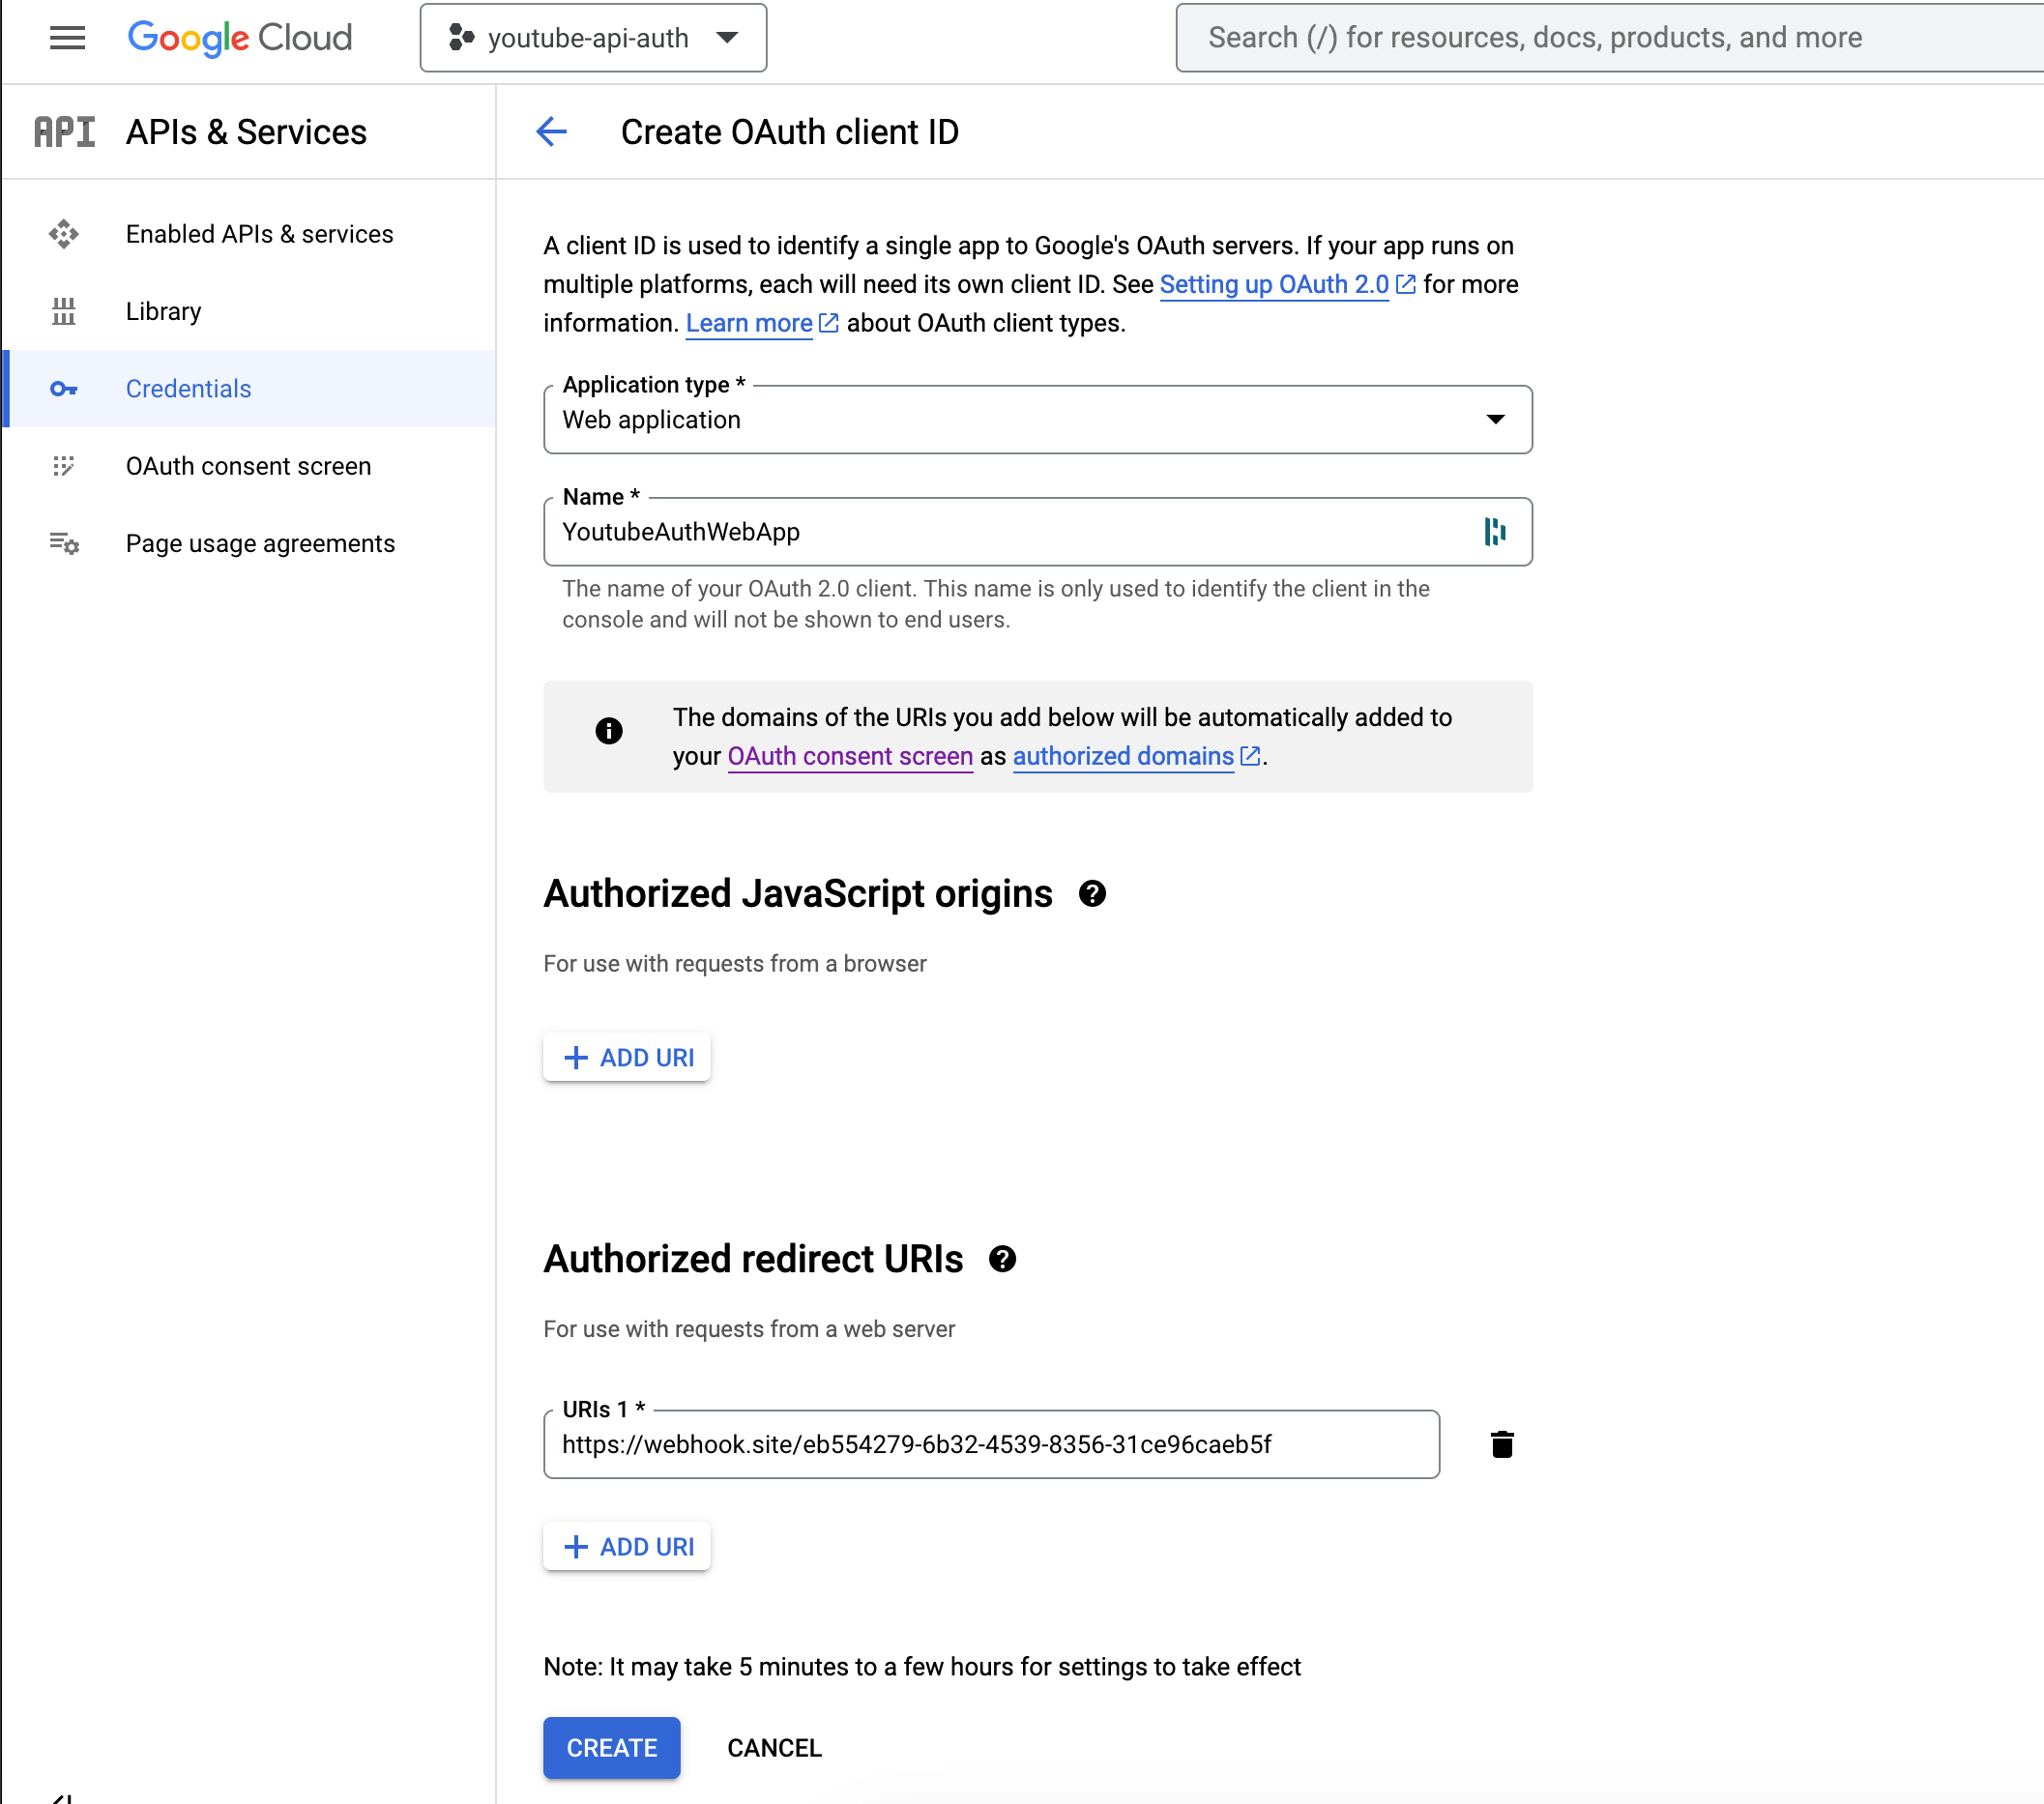
On the next page, select "Web Application" as the input value labeled "Application type," then give a name to the Web Application.
In the section "Authorized redirect URIs," click on "ADD URI" and go to this website https://webhook.site and copy the unique URL generated;
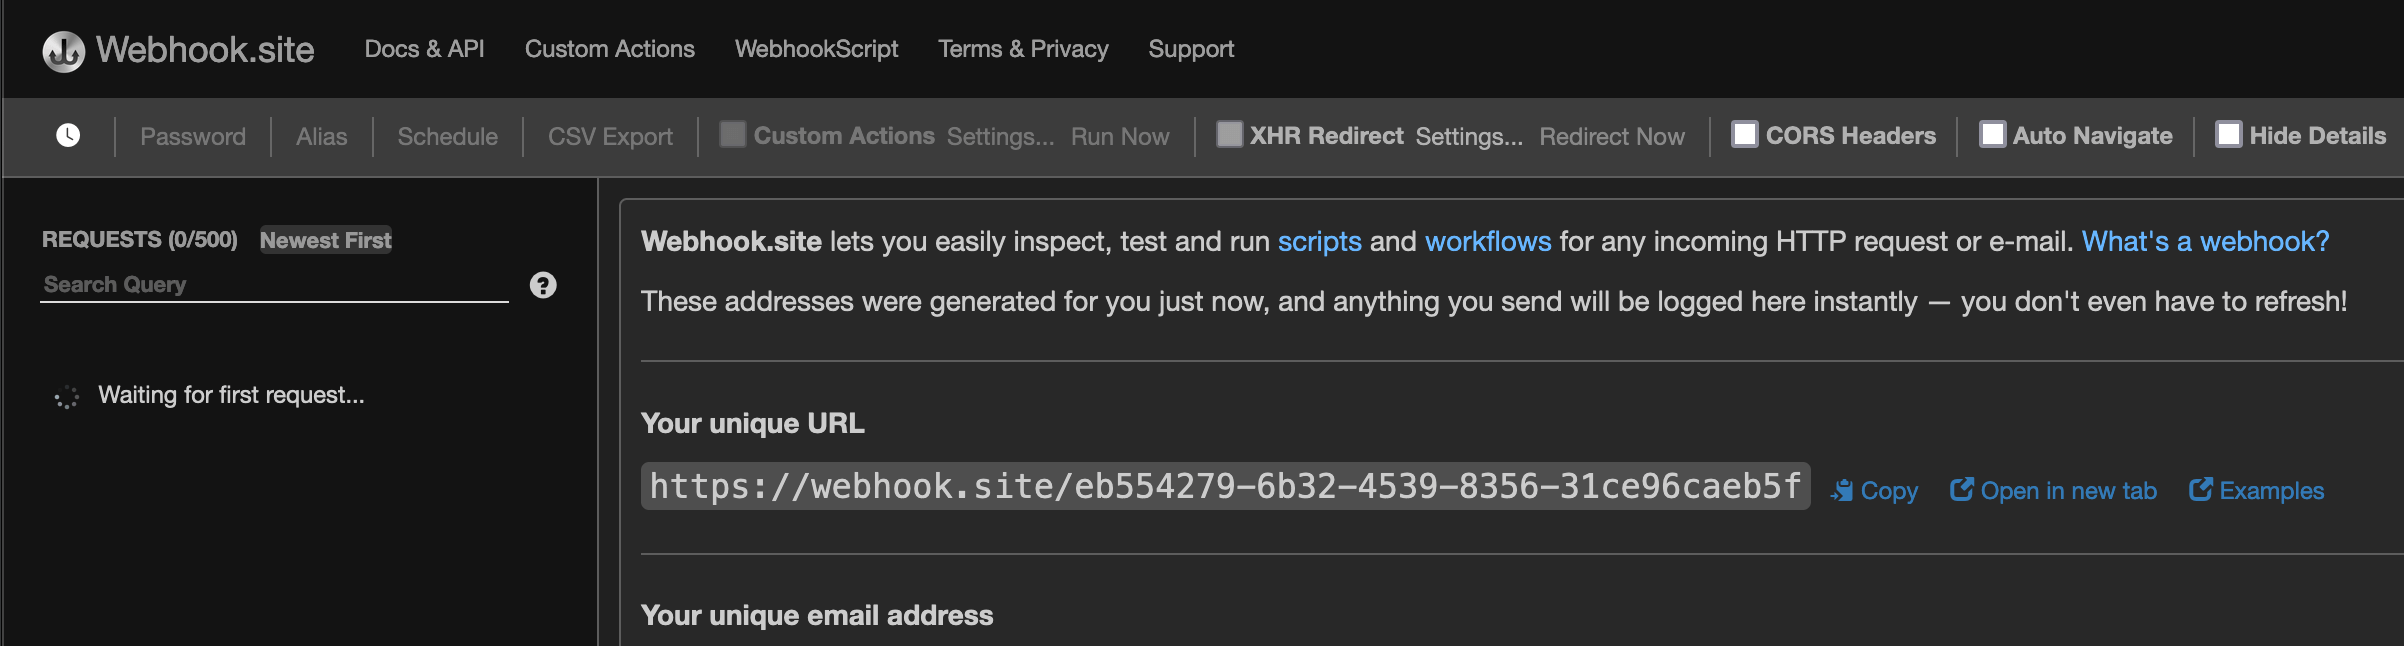
Come back and fill in the URI input with the webhook unique URL. This webhook URL will be used to receive the authentication code after authorizing the web application to access your Google account. This code is required to generate the access token.
Click on the button "CREATE" to submit; a modal will appear with the Client ID and Client secret.
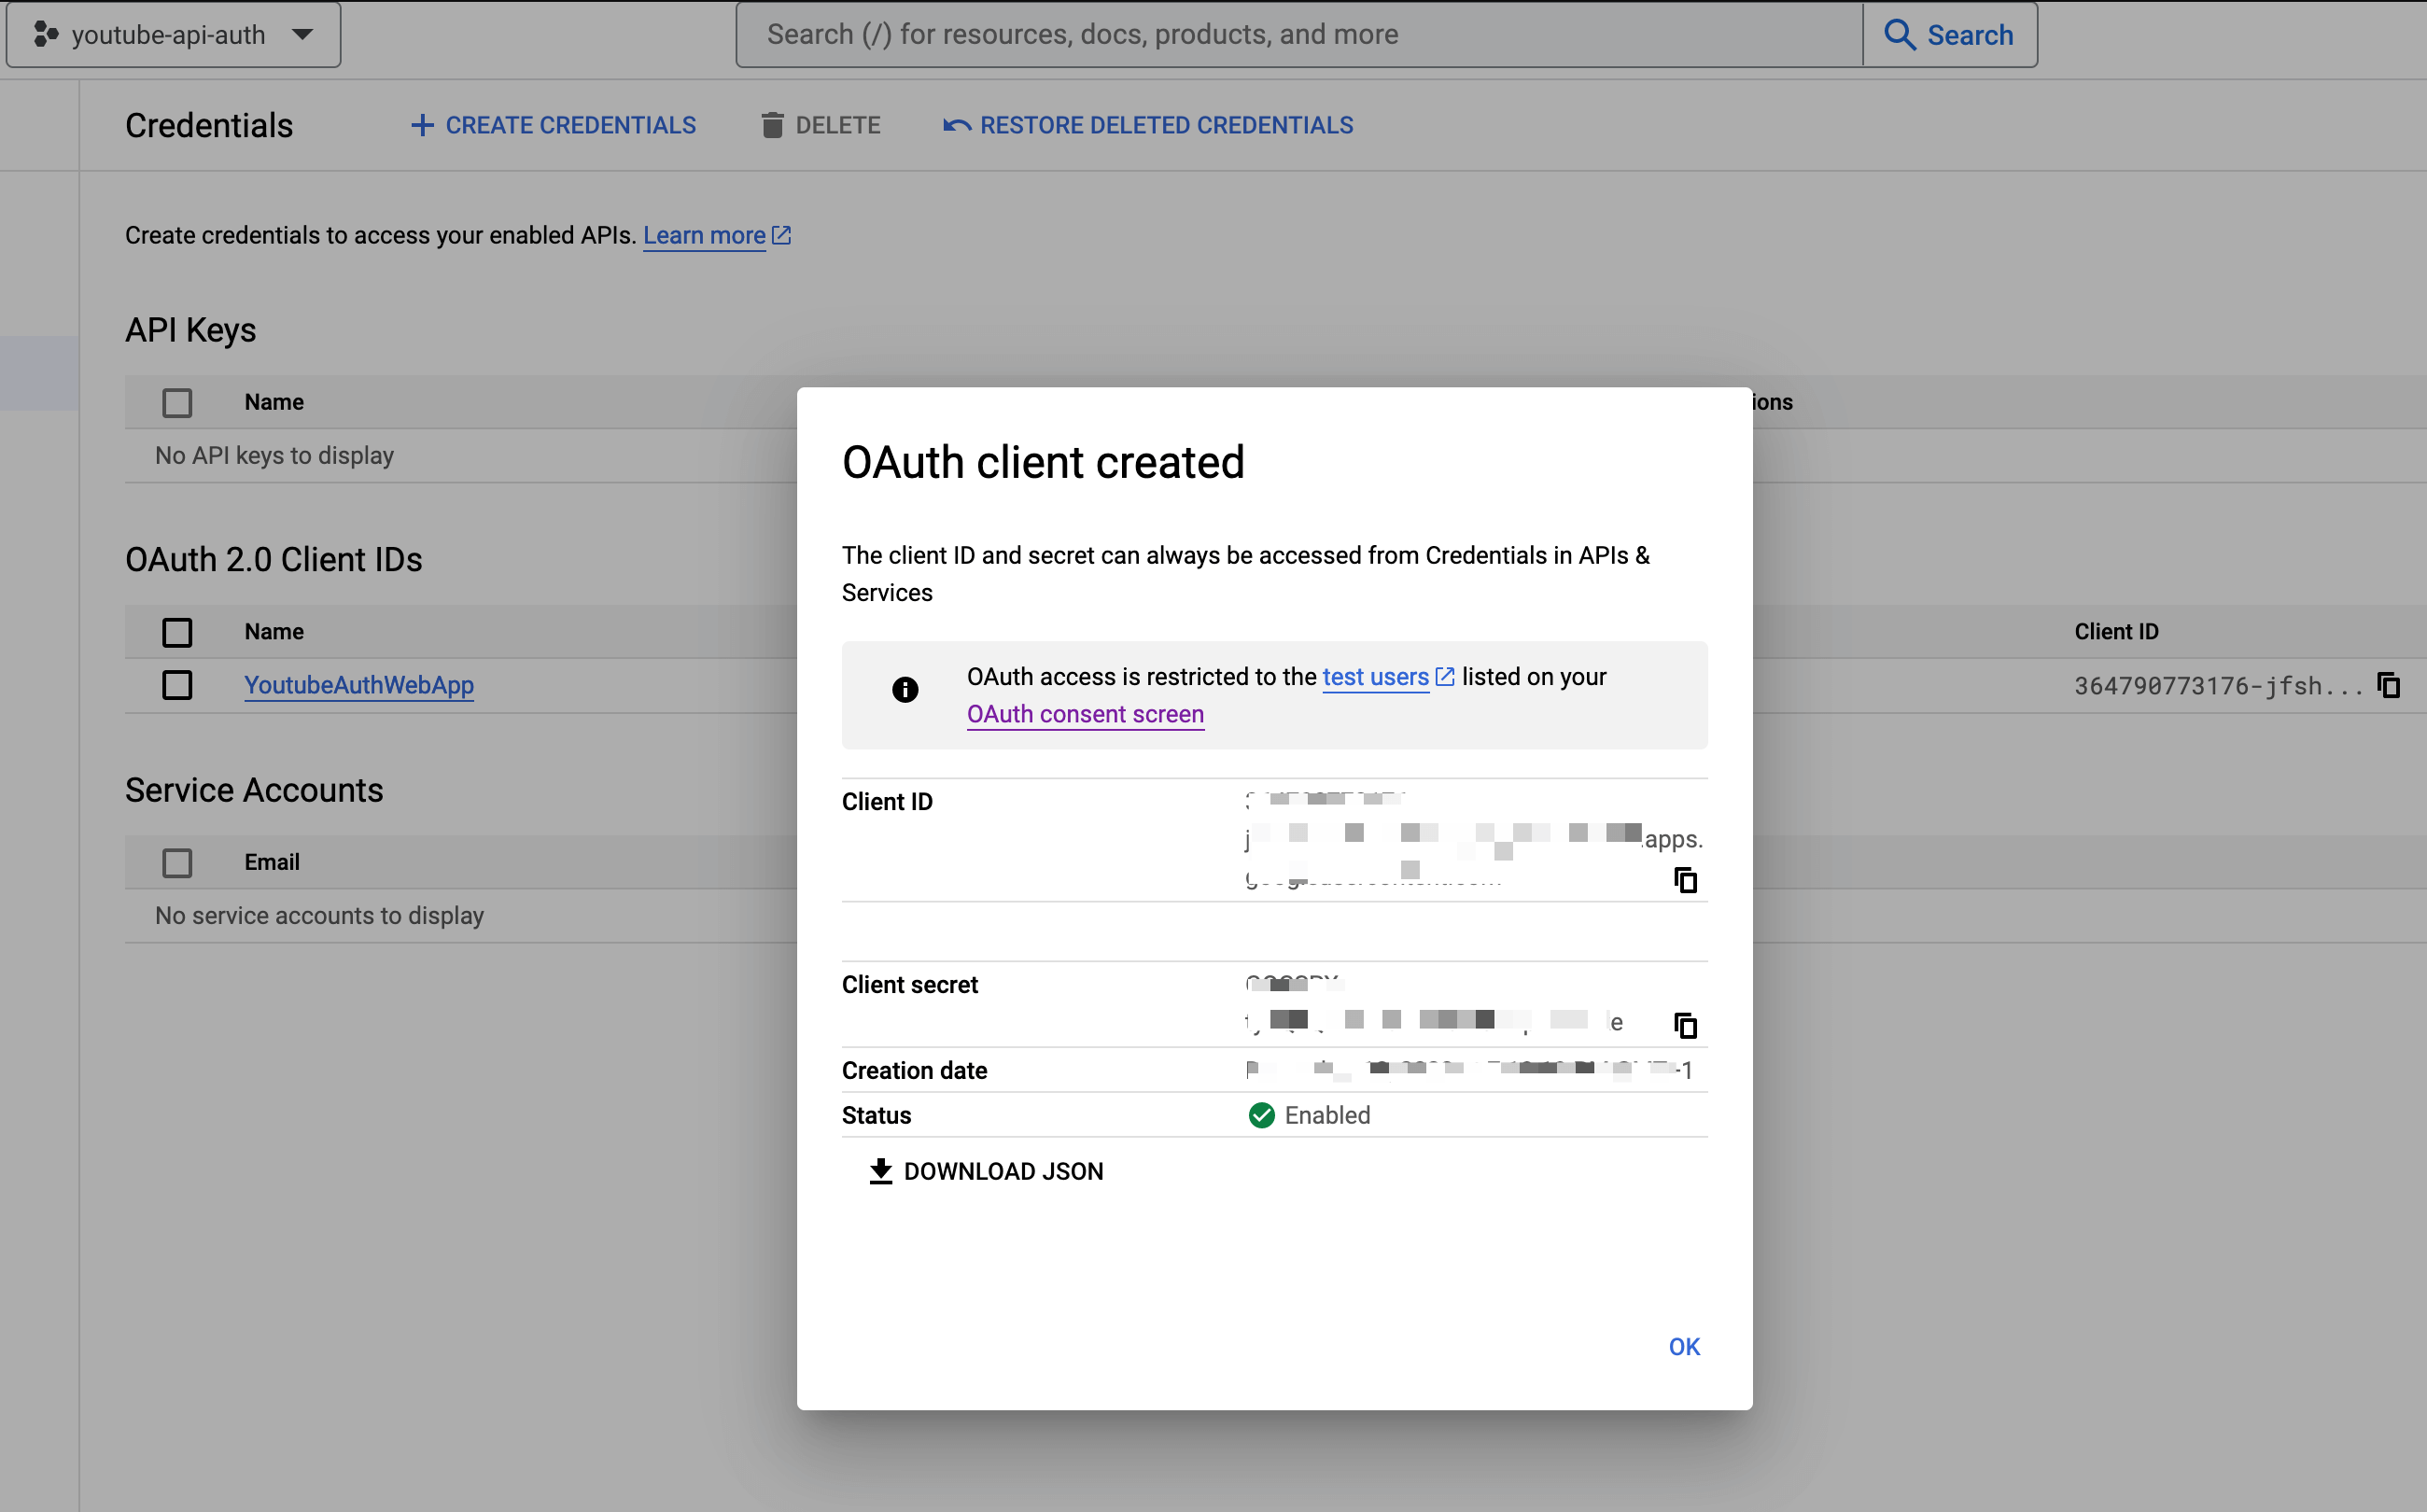
Copy the Client ID and the client secret and keep them somewhere, as we will use them in the Node.js application to generate the access token.
Set up the Node.js project
Let's initialize a Node.js project with TypeScript from the starter project we built on this tutorial. Let's clone it and install the dependencies:
git clone https://github.com/tericcabrel/node-ts-starter.git node-youtube-api-auth

cd node-youtube-api-auth

yarn install
Manage the environment variables
To securely load the credentials in our Node.js application, let's install the Node.js package dotenv.
yarn add dotenv
Create a file .env and add the three following keys inside:
- GOOGLE_CLIENT_ID for the client ID.
- GOOGLE_CLIENT_SECRET for the client secret.
- AUTH_REDIRECT_URI for the redirect URI we set to receive the authorization code.
The .env file looks like this:
GOOGLE_CLIENT_ID=<your_app_client_id>
GOOGLE_CLIENT_SECRET=<your_app_client_secret>
AUTH_REDIRECT_URI=<your_webhook_unique_url>
We can now access these values in the Node.js application by writing process.env.GOOGLE_CLIENT_ID, process.env.GOOGLE_CLIENT_SECRET and process.env.AUTH_REDIRECT_URI.
Create the Google Oauth Client
Google provides a Node.js package named googleapis to interact with all their APIs and thus the YouTube Data API.
To consume a Google API, you must create an OAuth client to send requests; the Node.js package google-auth-library will be helpful because it is a client library for using OAuth 2.0 authorization and authentication with Google APIs.
Let's install these two Node.js packages:
yarn add googleapis google-auth-library
Open the file src/index.ts and add the code below:
import { configDotenv } from 'dotenv';
import { google } from 'googleapis';

configDotenv();

const { GOOGLE_CLIENT_ID } = process.env;
const { GOOGLE_CLIENT_SECRET } = process.env;
const { AUTH_REDIRECT_URI } = process.env;

const { OAuth2 } = google.auth;

const oauth2Client = new OAuth2(GOOGLE_CLIENT_ID, GOOGLE_CLIENT_SECRET, AUTH_REDIRECT_URI);
The code above reads the Google credentials from the environment variables and creates an instance of the OAuth client.
Generate the YouTube API access token
The access token is the key that grants access to consume the YouTube API data. The process to generate it is the following:
- Generate the Authorization URL and print it in the terminal so the user can click on it and then ask for the authorization.
- Click on the authorization URL and authorize the application to use your Google account.
- After successful authorization, the authorization code will be sent to the redirect URI; copy and paste it as the answer to the question of step 1.
- Generate the access token and the refresh token using the authorization code.
To ask a question in the terminal and capture the answer, we will use the Node.js native module called readline.
Update the file src/index.ts with the code below:
import readline from 'readline';

import { configDotenv } from 'dotenv';
import { Credentials, OAuth2Client } from 'google-auth-library';
import { google } from 'googleapis';

configDotenv();

const { GOOGLE_CLIENT_ID } = process.env;
const { GOOGLE_CLIENT_SECRET } = process.env;
const { AUTH_REDIRECT_URI } = process.env;

const { OAuth2 } = google.auth;
const SCOPES = ['https://www.googleapis.com/auth/youtube.readonly'];

const oauth2Client = new OAuth2(GOOGLE_CLIENT_ID, GOOGLE_CLIENT_SECRET, AUTH_REDIRECT_URI);

const askAuthorizationCode = (): Promise<string> => {
  const console = readline.createInterface({
    input: process.stdin,
    output: process.stdout,
  });

  return new Promise((resolve) => {
    console.question('Enter the code from that page here: ', (code) => {
      console.close();

      resolve(code);
    });
  });
};

const generateAccessToken = (oauth2Client: OAuth2Client, authorizationCode: string): Promise<Credentials> => {
  return new Promise((resolve, reject) => {
    oauth2Client.getToken(authorizationCode, (err, token) => {
      if (err) {
        return reject({ err, message: 'Error while trying to retrieve access token' });
      }

      if (!token) {
        return reject({ message: 'The token is not defined!' });
      }

      resolve(token);
    });
  });
};

const authorize = async () => {
  const authURL = oauth2Client.generateAuthUrl({
    access_type: 'offline',
    scope: SCOPES,
  });

  console.log('Authorize this app by visiting this url: ', authURL);

  const authorizationCode = await askAuthorizationCode();

  const accessToken = await generateAccessToken(oauth2Client, authorizationCode);

  console.log('The authentication generated successfully!');
  console.log(accessToken);
};

void authorize();
Make sure the webhook URL is ready to receive the authorization code and execute the script by running the command below:
yarn start
The video below shows a demo of the process:
Demo of generating the YouTube API access token.
As you can see, a token object is printed in the console with the shape below:
{
  access_token: '<oauth_client_accesss_token>',
  refresh_token: '<oauth_client_refresh_token>',
  scope: 'https://www.googleapis.com/auth/youtube.readonly',
  token_type: 'Bearer',
  expiry_date: <expiration_date_in_timestamp>
}
You can now use the access token as your YouTube API key to retrieve information about a YouTube channel.
Retrieve the YouTube Channel information
To test the use of the token, we will retrieve information about the YouTube channel named Amigoscode.
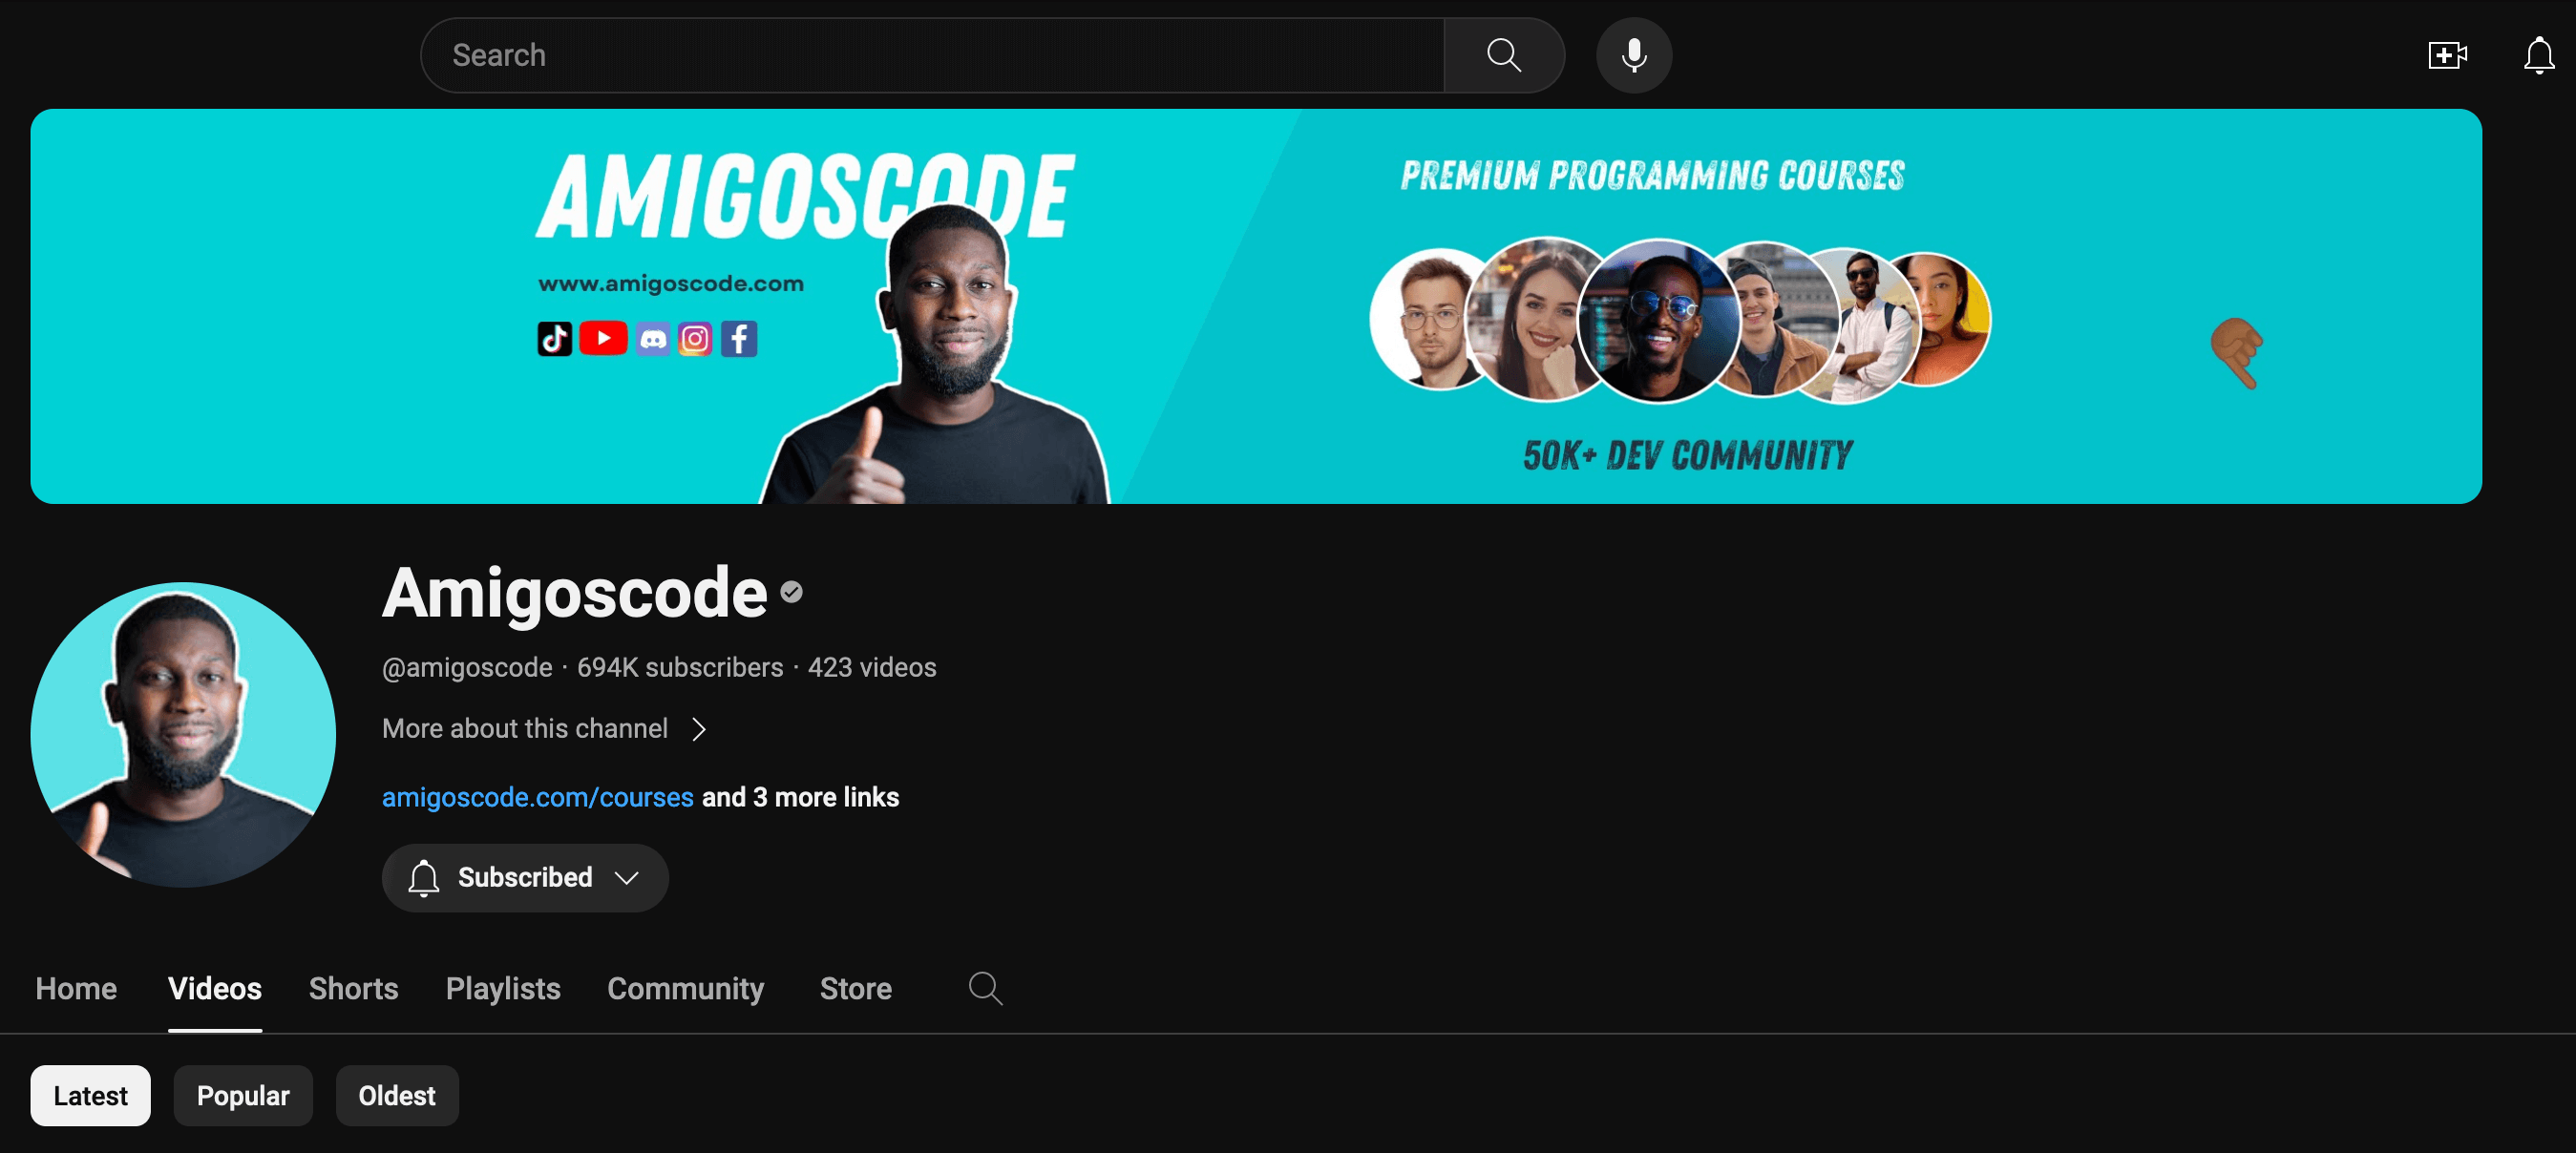
We will retrieve the following information:
- The number of videos published
- The number of subscribers
- The all-time views.
To retrieve this information, we need the channel identifier, which can be found on the YouTube channel itself.
This is how to find the ID of a YouTube channel:
- Go to the YouTube channel.
- Locate the text "More about this channel" and click on it.
- A modal will appear; click on the button "Share channel," and a drop-down menu will appear.
- Click on the menu item "Copy channel ID".
Following this process, the Amigoscode's YouTube channel ID is: UC2KfmYEM4KCuA1ZurravgYw
Set the OAuth client credentials
Before sending requests to the YouTube API, we must define the credentials to authenticate the client application. The credentials required the Access token, the refresh token, and the Access token expiration date.
Update the .env file to add the following keys:
CLIENT_TOKEN=<access_token>
CLIENT_REFRESH_TOKEN=<refresh_token>
CLIENT_EXPIRATION_DATE=<expiry_date>
Create a new file src/find-channel.ts and add the code below:
import { google } from 'googleapis';
import { Credentials, OAuth2Client } from 'google-auth-library';
import { configDotenv } from 'dotenv';

configDotenv();

type ChannelInfo = {
  id: string;
  subscriberCount: number;
  viewCount: number;
  videoCount: number;
  playlistId: string | null;
};

const { CLIENT_EXPIRATION_DATE, CLIENT_REFRESH_TOKEN, CLIENT_TOKEN, GOOGLE_CLIENT_ID, GOOGLE_CLIENT_SECRET, GOOGLE_REDIRECT_URI } = process.env;

const { OAuth2 } = google.auth;
const SCOPE = 'https://www.googleapis.com/auth/youtube.readonly';
const YOUTUBE_CHANNEL_ID = 'UC2KfmYEM4KCuA1ZurravgYw';

const oauth2Client = new OAuth2(GOOGLE_CLIENT_ID, GOOGLE_CLIENT_SECRET, GOOGLE_REDIRECT_URI);

if (!CLIENT_EXPIRATION_DATE) {
  throw new Error('The token expiration date is required');
}

const credentials: Credentials = {
  access_token: CLIENT_TOKEN,
  expiry_date: +CLIENT_EXPIRATION_DATE, // The plus sign in front cast the string type to a number
  refresh_token: CLIENT_REFRESH_TOKEN,
  scope: SCOPE,
  token_type: 'Bearer',
};

oauth2Client.credentials = credentials;

const service = google.youtube('v3');

const retrieveChannelInfo = (oauth2Client: OAuth2Client, channelName: string): Promise<ChannelInfo> => {
  return new Promise((resolve, reject) => {
    service.channels.list(
      {
        auth: oauth2Client,
        id: [channelName],
        part: ['snippet', 'contentDetails', 'statistics'],
      },
      (error, response) => {
        if (error) {
          return reject({ error, message: 'The API returned an error: ' });
        }

        if (!response) {
          return reject({ message: 'Response has no content!' });
        }

        const channels = response.data.items ?? [];

        if (channels.length === 0) {
          return reject({ message: 'No channel found.' });
        }

        const [channel] = channels;

        resolve({
          id: channel.id ?? '',
          playlistId: channel.contentDetails?.relatedPlaylists?.uploads ?? null,
          subscriberCount: +(channel.statistics?.subscriberCount ?? 0),
          videoCount: +(channel.statistics?.videoCount ?? 0),
          viewCount: +(channel.statistics?.viewCount ?? 0),
        });
      },
    );
  });
};

(async () => {
  try {
    console.log(`Retrieve information about the channel ${YOUTUBE_CHANNEL_ID}`);

    const channel = await retrieveChannelInfo(oauth2Client, YOUTUBE_CHANNEL_ID);

    console.log('channel information has been successfully retrieved!');

    console.log(channel);
  } catch (error) {
    console.error(error);
  }
})();
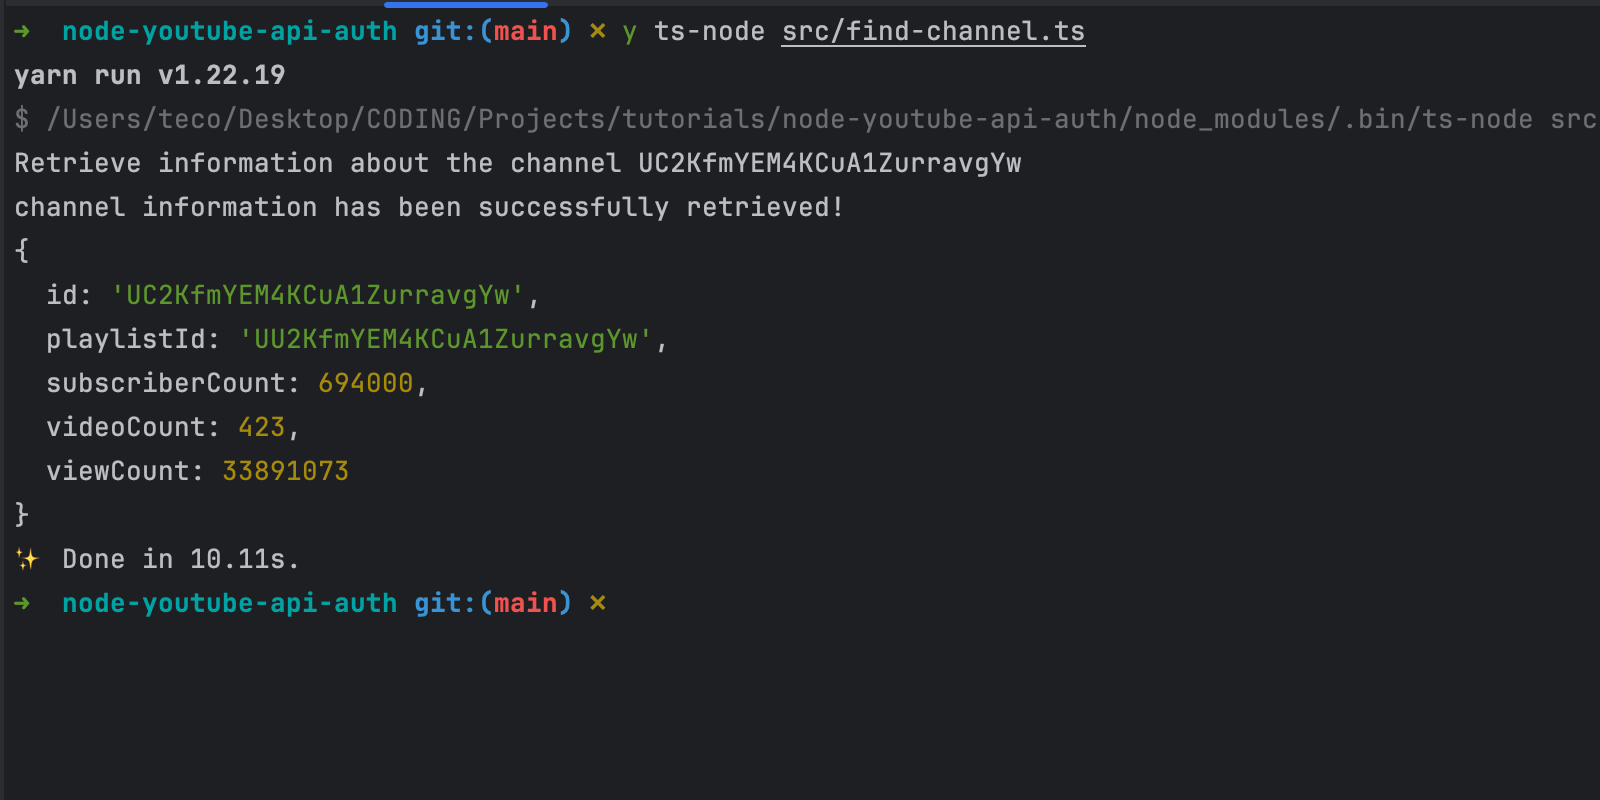
To execute the file, run the command below:
yarn ts-node src/find-channel.ts
We can see the channel information printed in the terminal
About refreshing the access token
The access token generated is valid for one hour, and after that, you have to generate a new access token, which will also be valid for an hour, and so on. This is where the refresh token is very helpful.
When setting the refresh token in the OAuth client credentials, as we did previously, the OAuth client will handle the access token regeneration before the expiration. Thus, you don't have to manage it yourself.
Wrap Up
In this post, we saw how to generate a YouTube API key and programmatically retrieve information about a YouTube channel. We summarize the process into the following:
- Create a new application in the Google Cloud console.
- Select the YouTube Data API v3 and generate OAuth credentials.
- Create a Node.js project and install the Google APIs SDK.
- Create an OAuth client and generate the access token and the refresh token.
- Set OAuth credentials and start interacting with the YouTube API.
Remember to set the refresh token to avoid having to refresh the access token every hour. Read the documentation to learn more about it.
You can find the code source on the GitHub repository.
Follow me on Twitter or subscribe to my newsletter to avoid missing the upcoming posts and the tips and tricks I occasionally share.