
Create a Node.js REST API using Prisma ORM and PlanetScale


A backend API is the part of the system handling the business logic and the data persistence in a database. It allows client-side applications to send requests for displaying data to users. To make the integration with API more straightforward to understand, the REST architecture is popular for describing how to design your API routes.
This post will show you how to build a REST API in Node.js using Prisma and PlanetScale.

What we will build
A blogging platform wants to expose a public API to its users so that they can integrate it with third-party services. The API must allow users to create, edit, and search posts.
The table below summarizes the list of endpoints the API will expose:
| API Endpoint | Description |
|---|---|
| [POST] /posts | Create a new blog post |
| [PUT] /posts/{id} | Update a post (title, content, status, isFeatured) |
| [DELETE] /posts/{id} | Delete a post |
| [GET] /posts | Search posts (by user, status, keyword) |
| [GET] /posts/{id} | Retrieve a post |
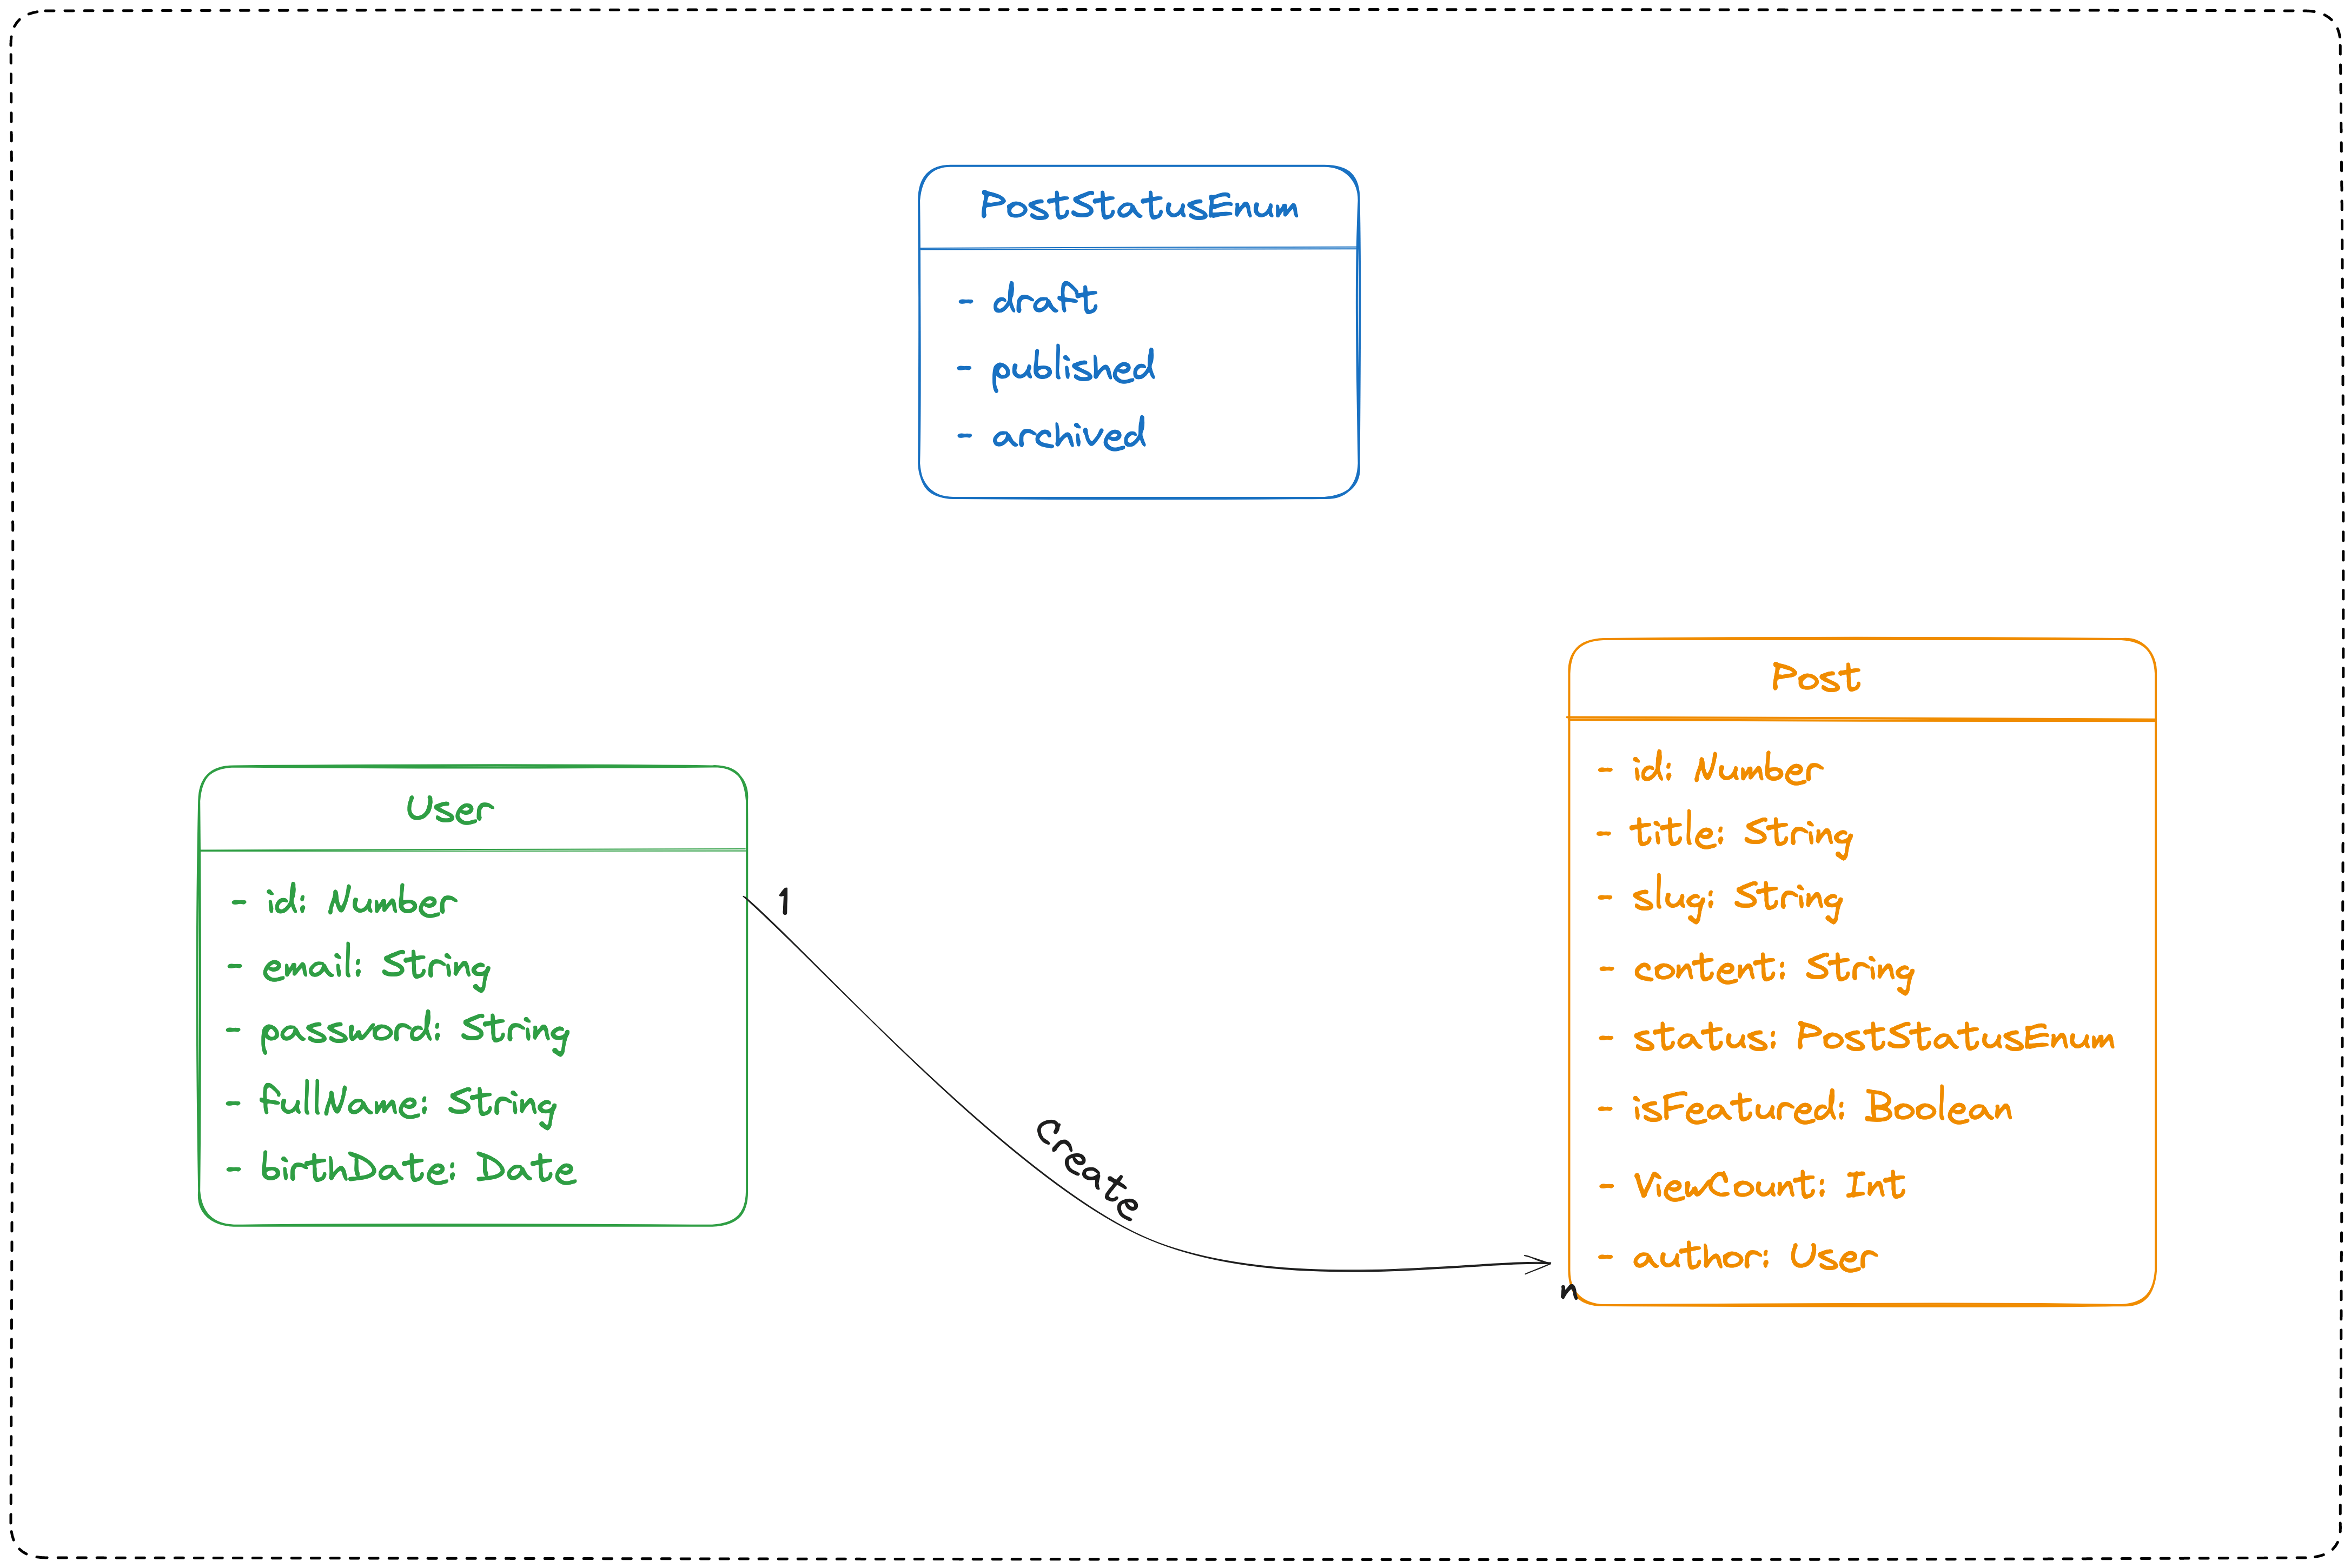
Database schema
We need a database to store information about users and blog posts. Below is a simplified version of the database schema required to build the REST API for our blog system.
Prerequisites
To follow this tutorial, make sure you have the following tools installed on your computer.
- Node.js 20.6 or higher - Download link
- NPM or Yarn (I will use Yarn)
- A PlanetScale account - We will create one in the next section.
- An HTTP client for consuming the API; I will use Postman.
- Docker, to run a shadow database for Prisma migrations.
Set up a PlanetScale database
PlanetScale is a fully managed MySQL Platform providing advanced features to provide a performant MySQL database to run your backend applications. It also makes the developer's experience straightforward in handling database migrations or working locally with a database.
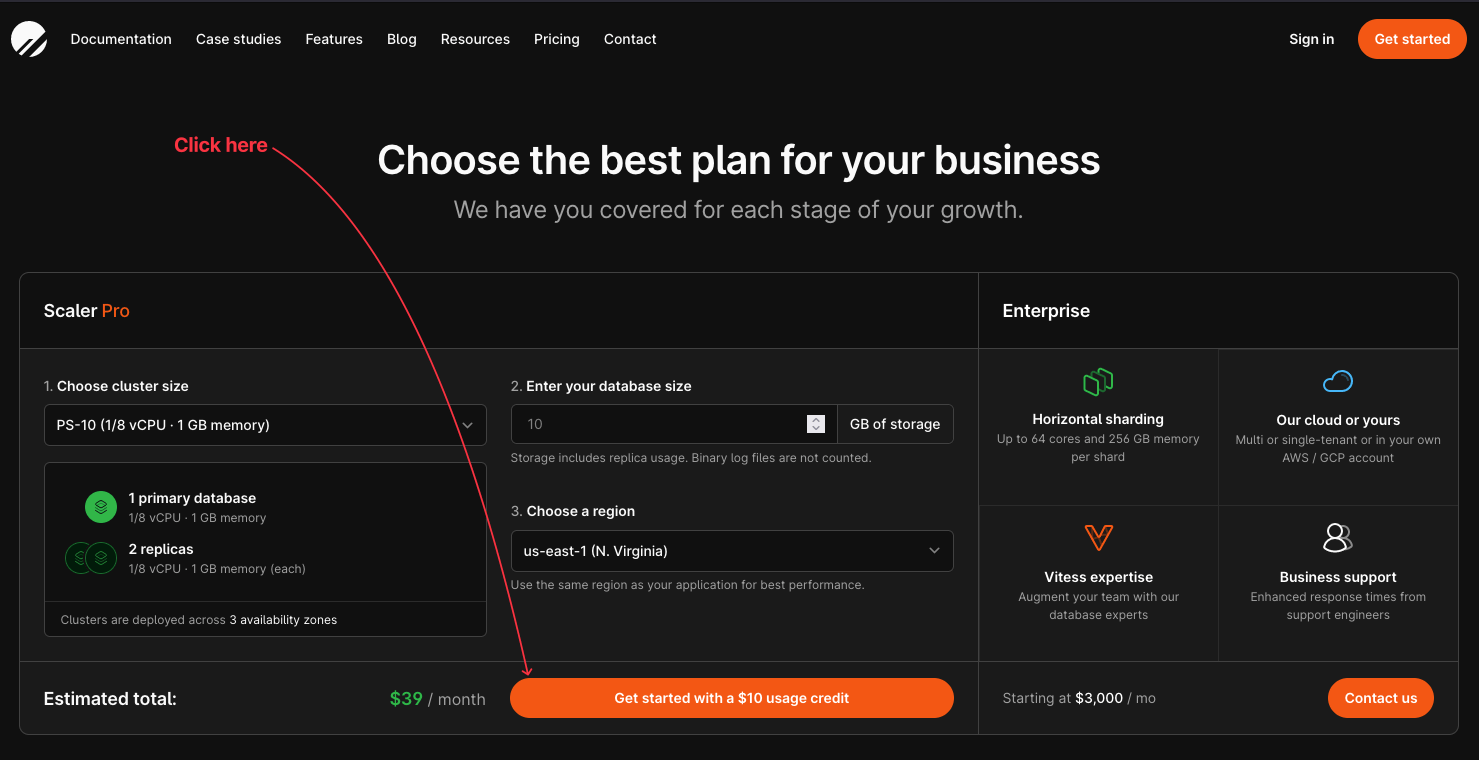
PlanetScale doesn't provide a free tier, but the Pro plan gives you a 10$ credit to try it; it will be enough to follow this post and convince you to stay with it 😉.
To create a PlatnetScale account, go to the Pricing page, and click on "Get Started"
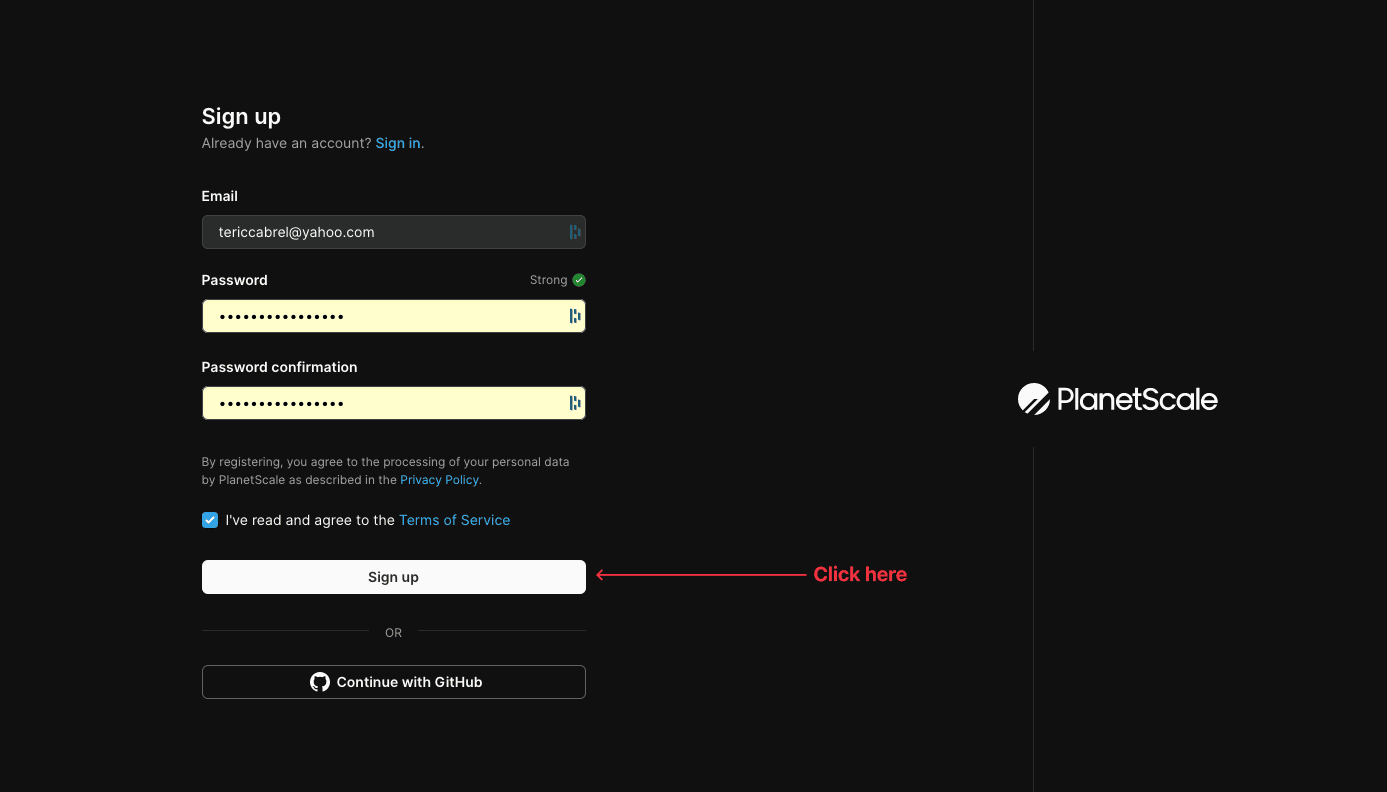
You will be redirected to the registration page, where you can create an account through email or with GitHub. We will use the email method, so fill in an email and password, then click on "Sign up"
You will receive an email to confirm your account; proceed to confirmation, and once done, you will see the PlanetScale welcome page where you can create or import a database.
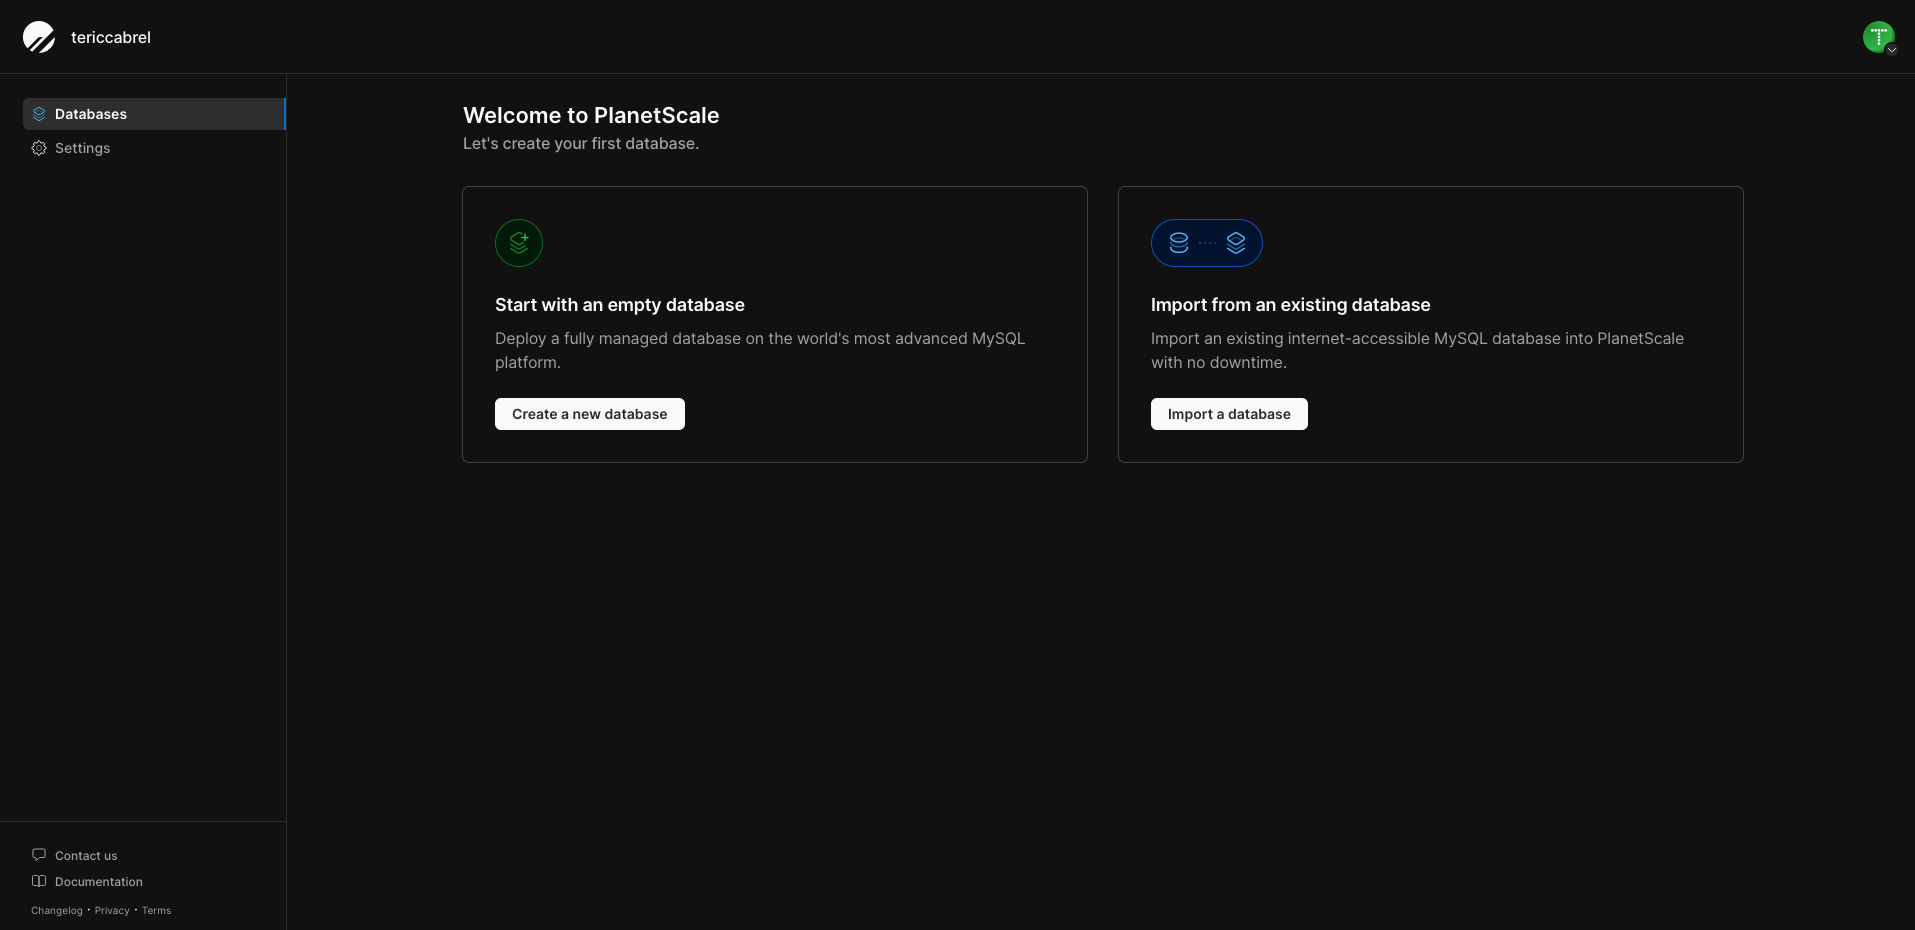
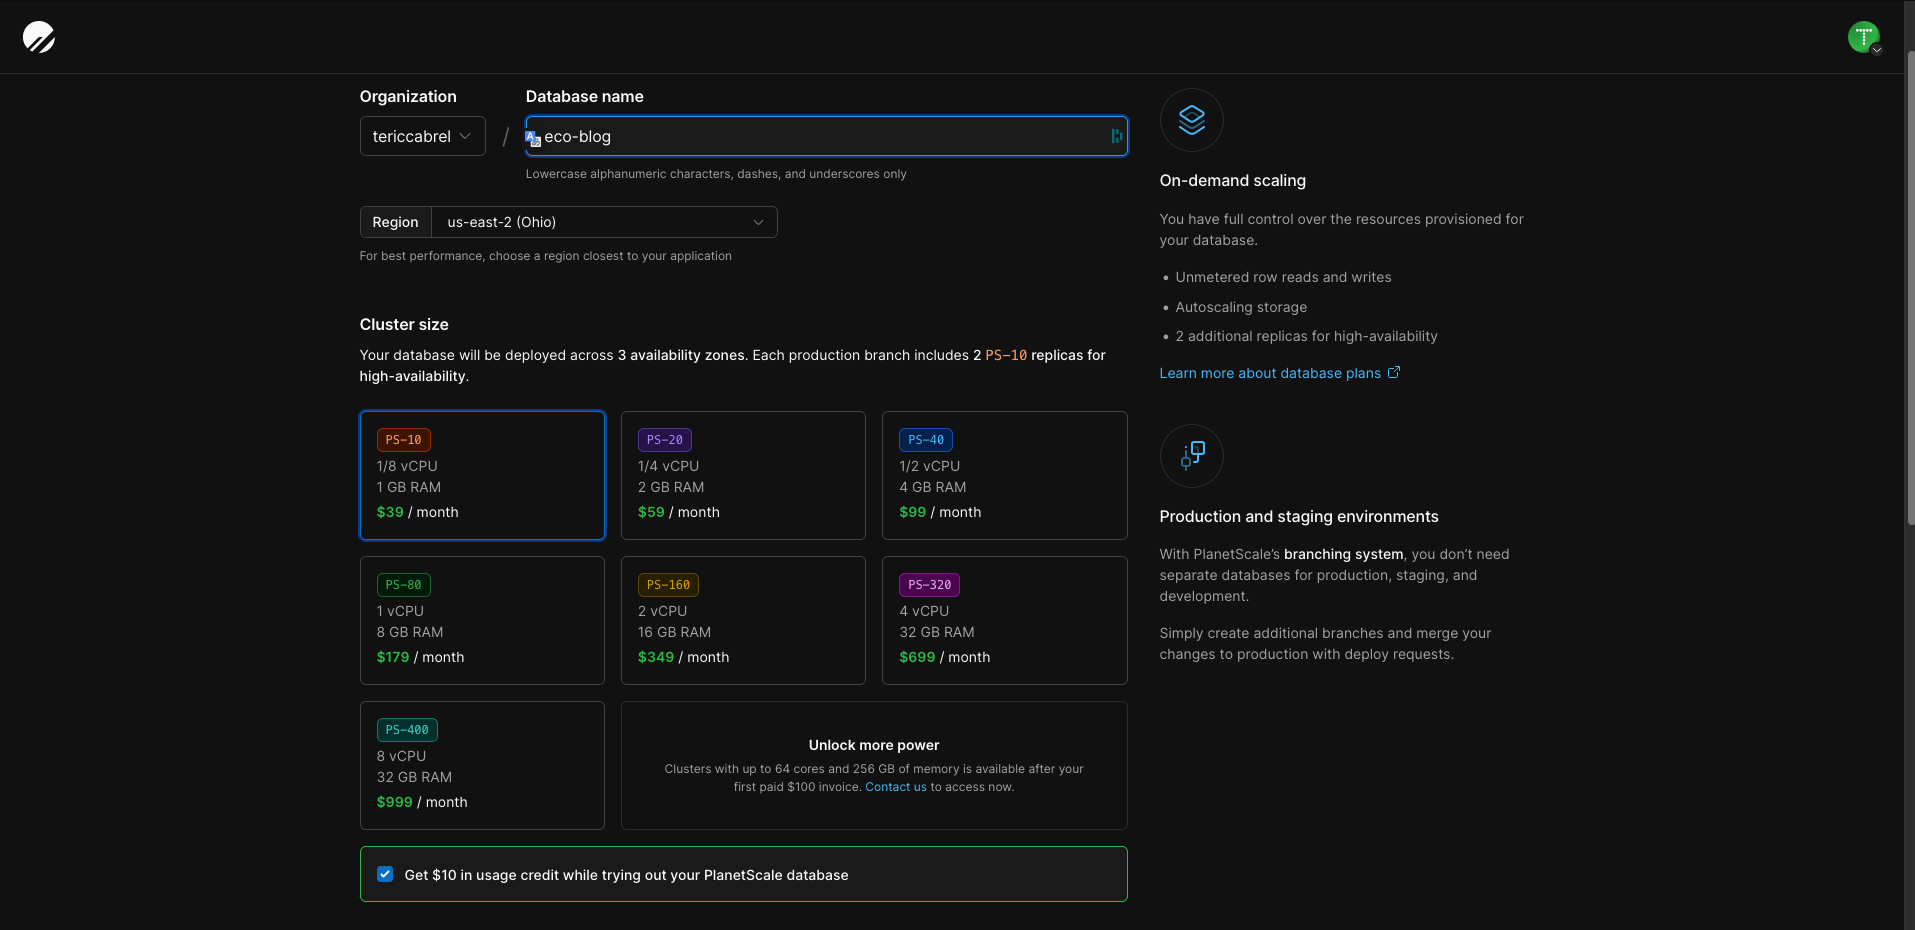
Click on the button to create a database. You are redirected to a page to configure your database.
- Enter the database name.
- Select a region to deploy your database.
- Select the database cluster size; you can keep the preselected one.
- Check the box to get the 10$ usage credit so you can test it.
Scroll down and add a credit card; this is required to prevent abusive usage of the platform.
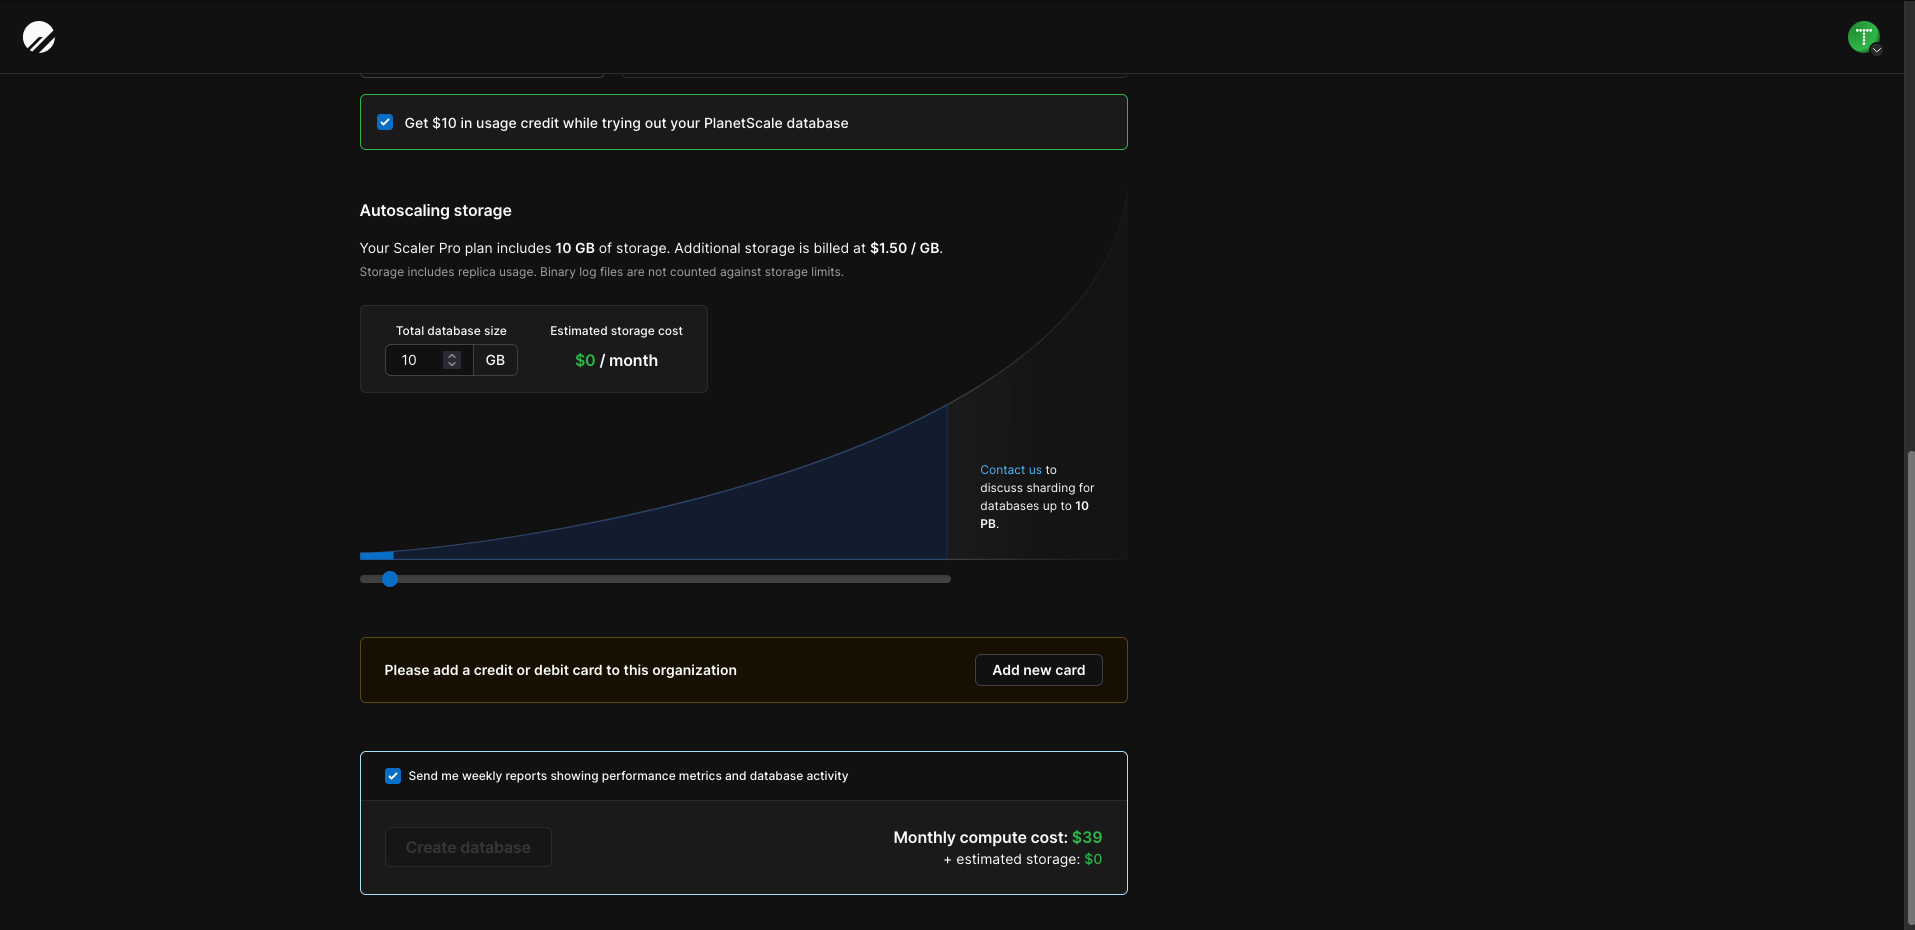
Once the card information is added, click the button to create the database.
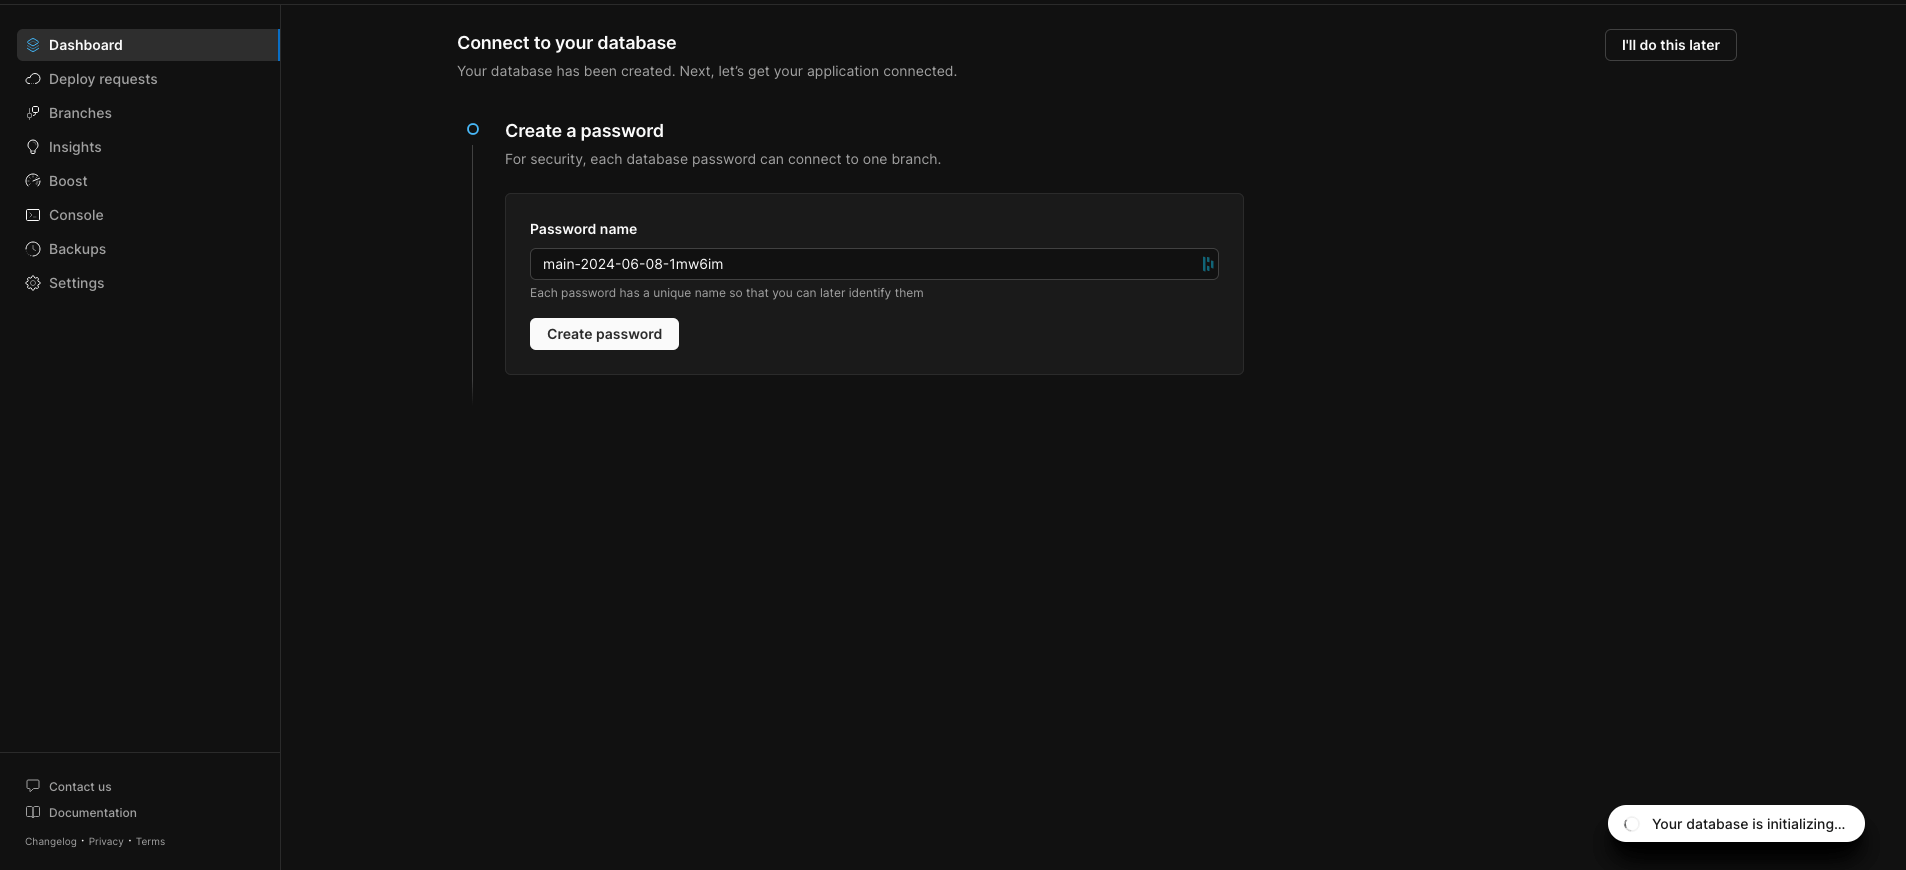
On the next page, you can see the notice about the database being initialized at the bottom right. On the page, click the button to create the database password.
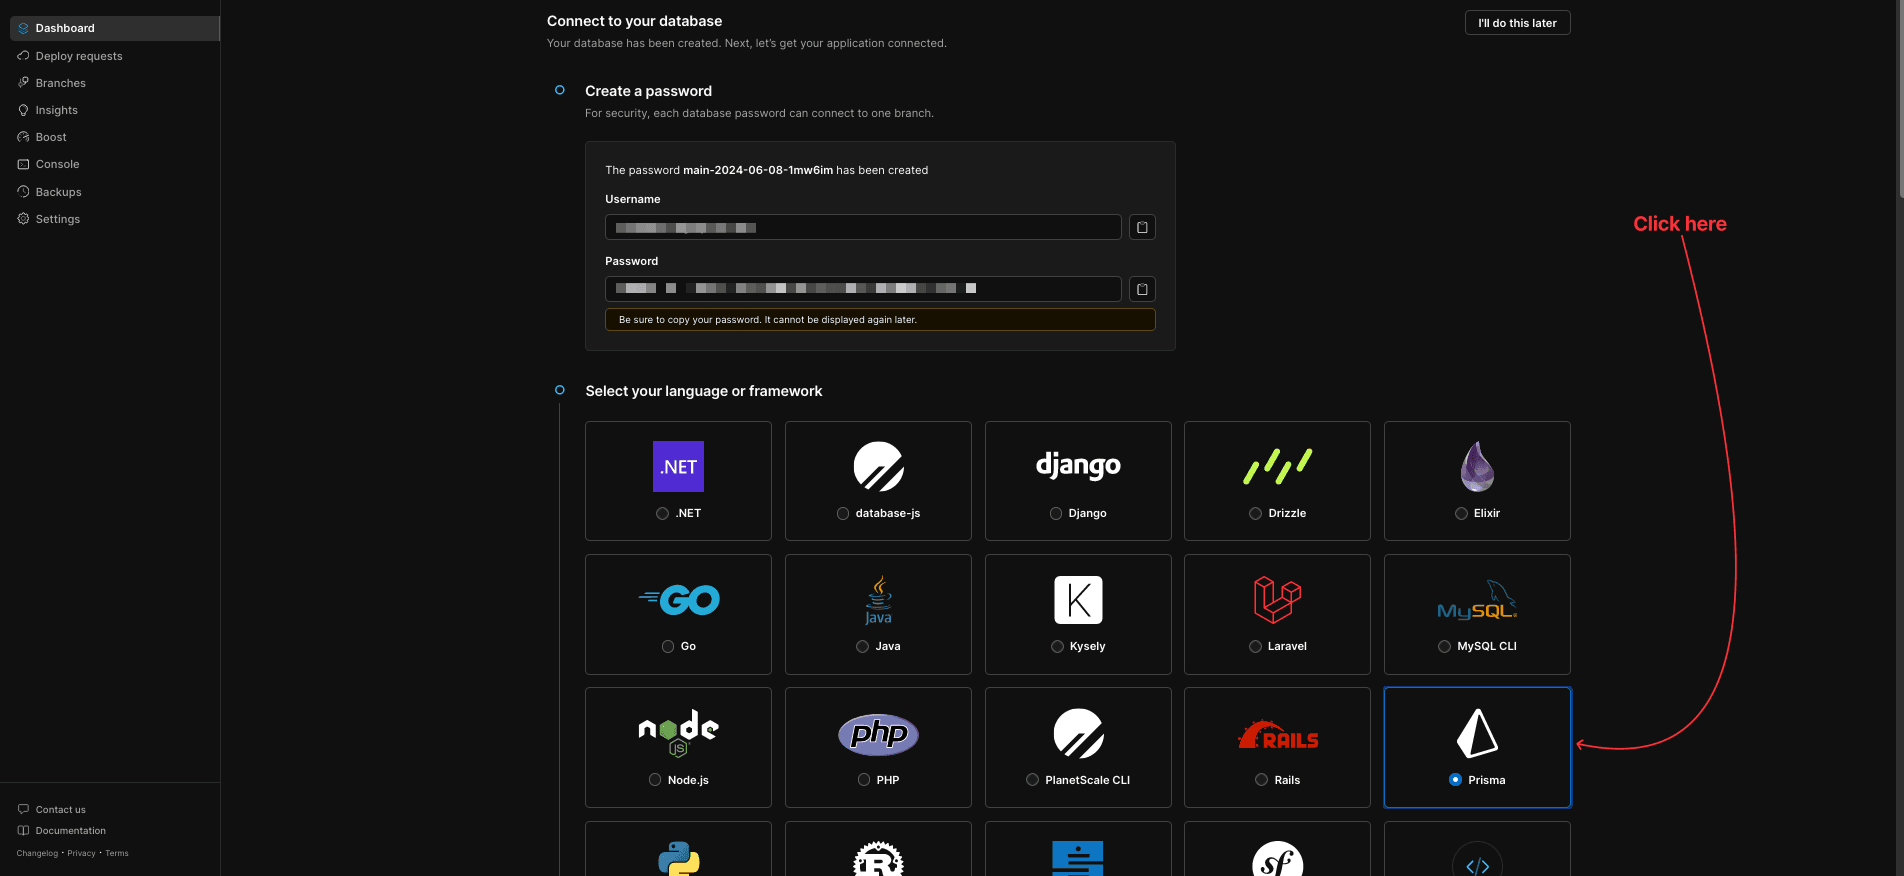
This action will output the database user name and the password; copy and save them somewhere.
Next, you are asked to select your framework; we will use Prisma, so choose it. Instructions on using PlanetScale with Prisma will be displayed; you can ignore them as we will do it here.
At the bottom page, click on the button to go to your dashboard. You can see your newly created database.
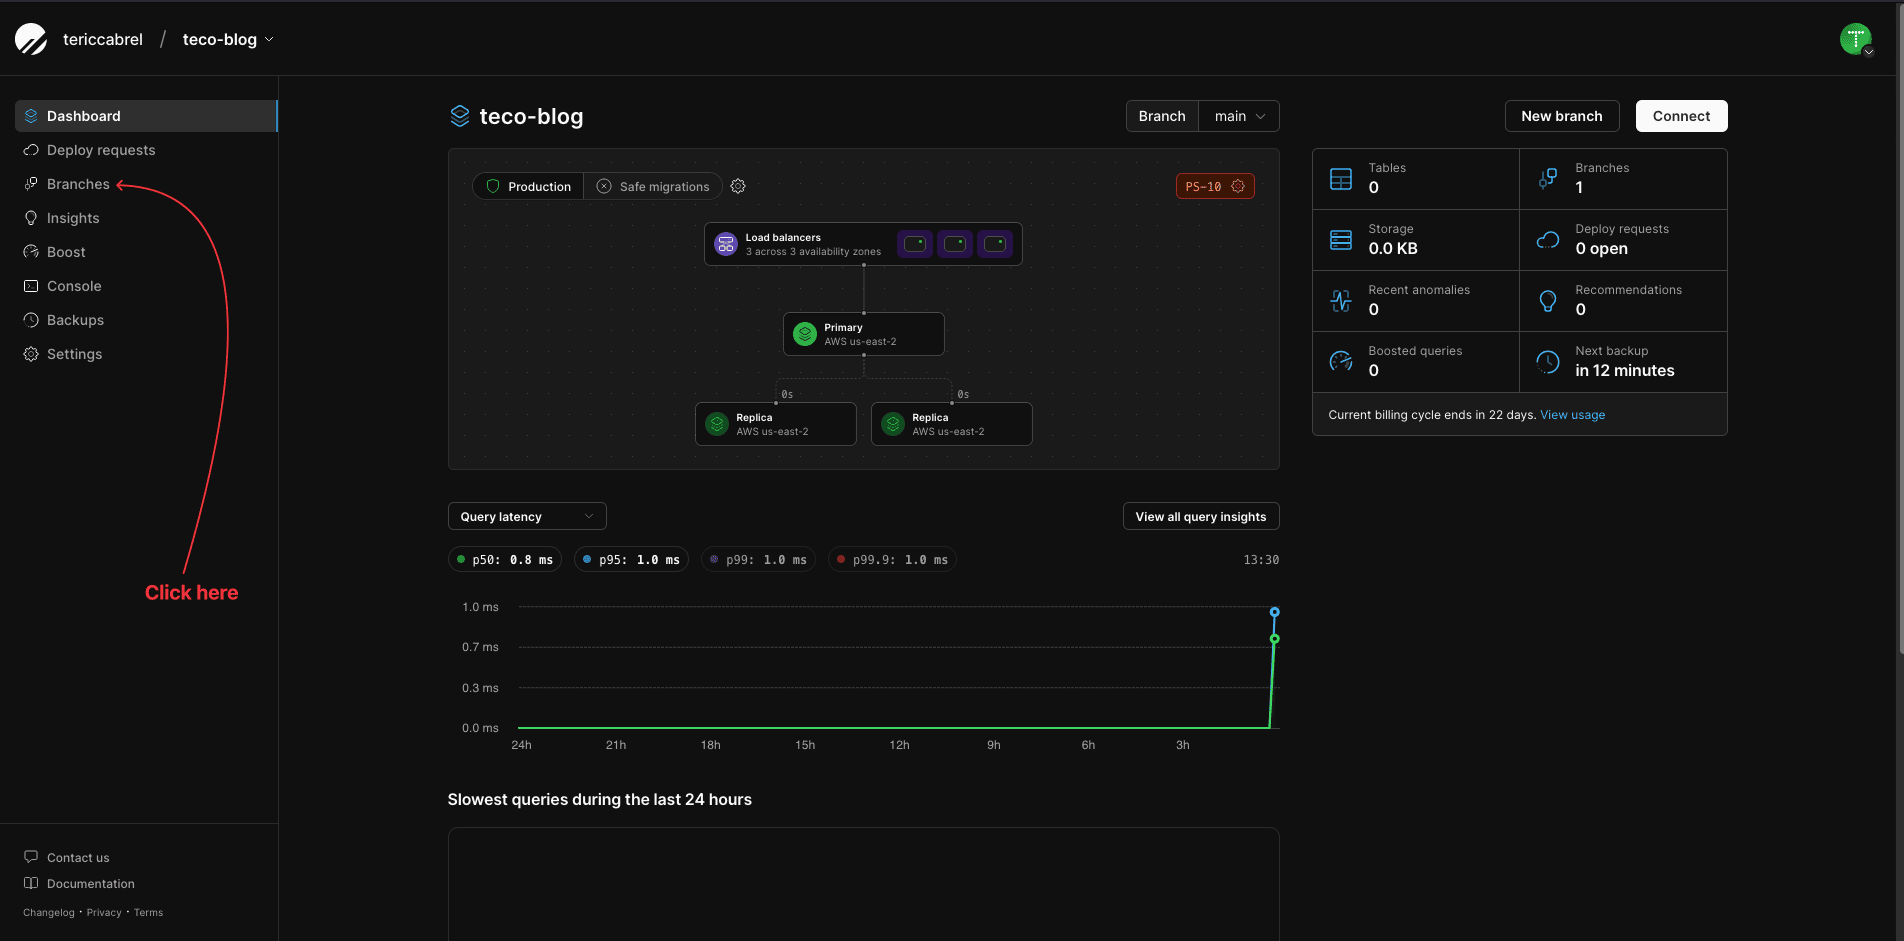
The last step is to protect the main database branch by enabling safe migrations. On the left menu, click on the "Branches" menu item.
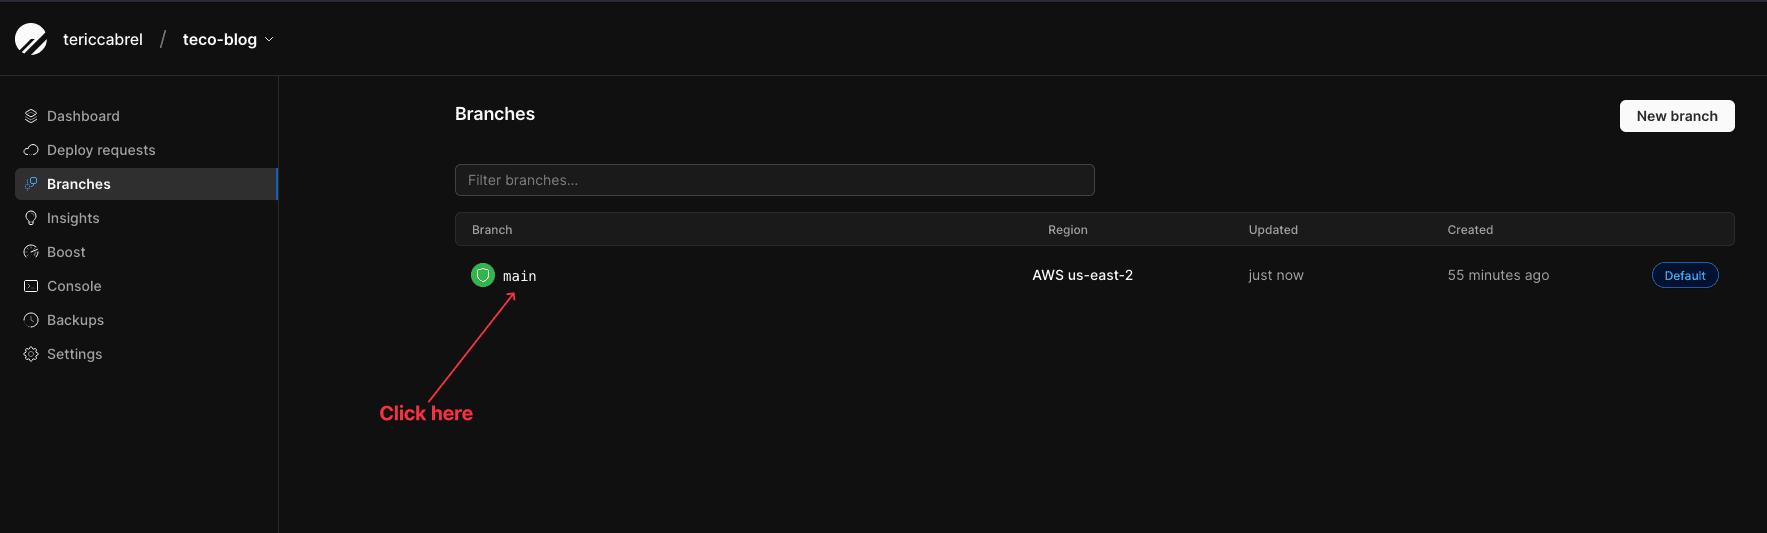
The page displays the branches list for the database; the main branch is the only one; click on it:
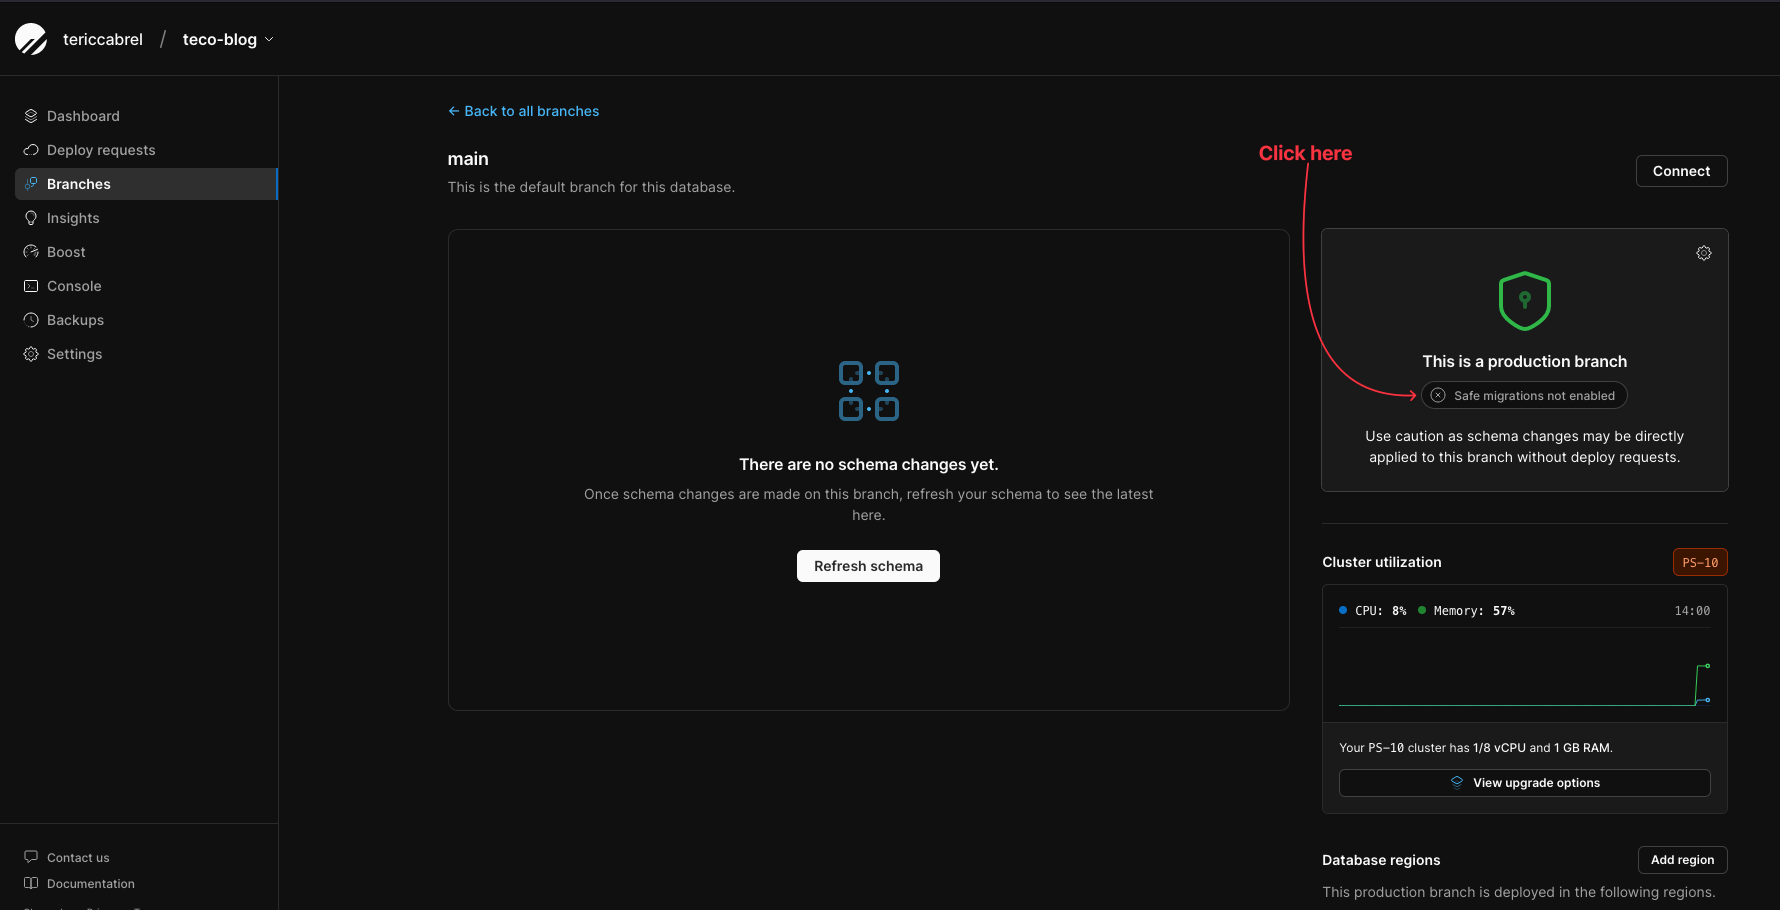
The page displays the branch details; let's click the button to enable safe migrations.
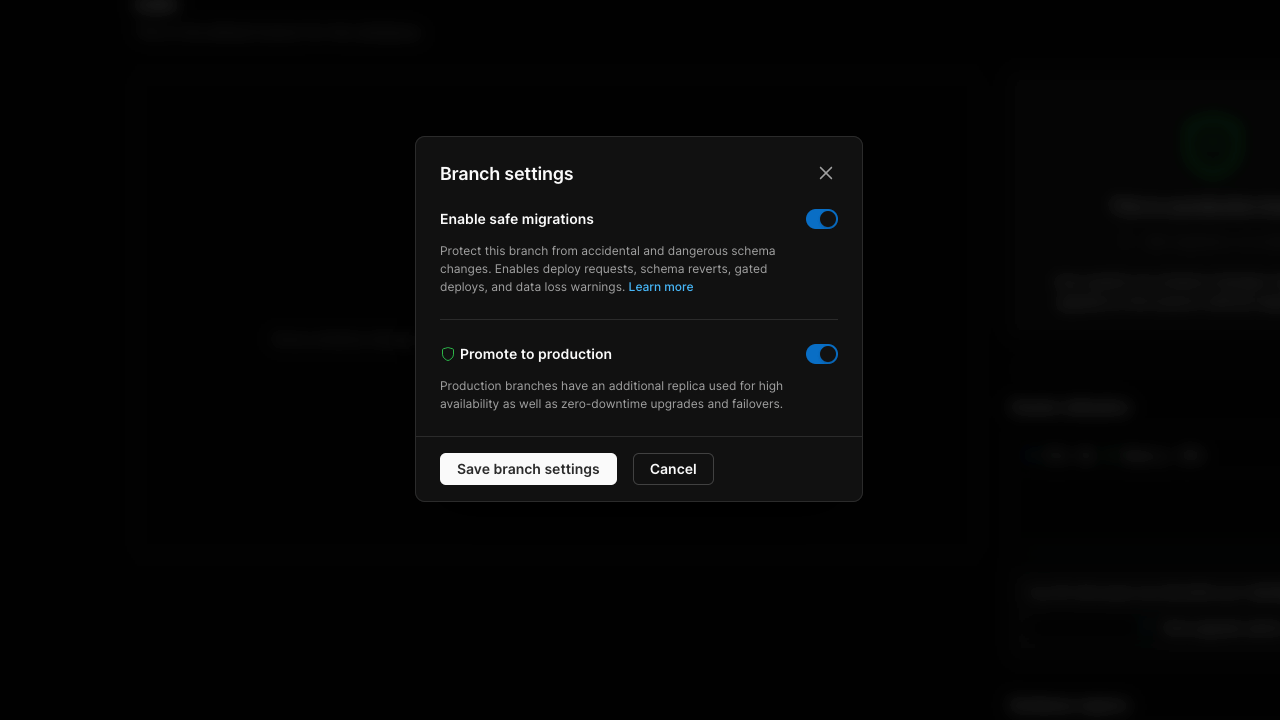
On the modal dialog displayed, check the "Enable safe migrations" button and save the settings.
We are all set!
Install the PlanetScale CLI
To enhance the developer experience while working locally with the MySQL database, PlanetScale provides a CLI tool that allows you to do almost all the tasks you can do in the Web console.
Check out the installation guide for Linux and Windows users. For MacOS users, run the following commands:
brew install planetscale/tap/pscale

brew install mysql-client
The MySQL client installation is optional as it only required to run some commands with the PlanetScale CLI.
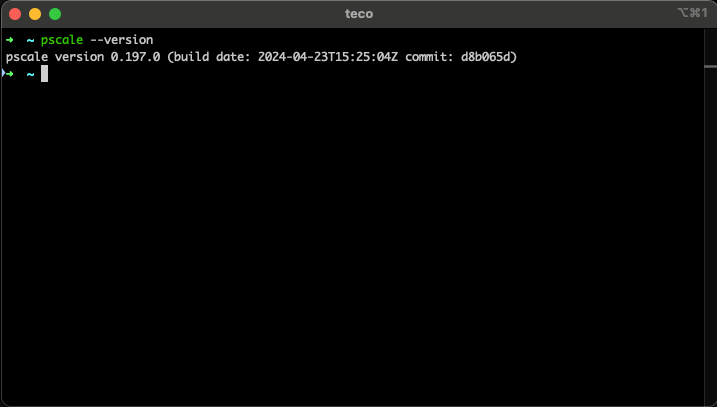
Once the installation is completed, check the version using the command pscale --version.
Create the Node.js Project
To initialize a project, we will use the Node.js starter project we built on this tutorial. The code is available on the GitHub repository.
We will clone the branch named "express" to have the Express framework already configured. Run the commands below to set up and run the project locally
git clone https://github.com/tericcabrel/node-ts-starter.git -b express node-prisma-rest-api

cd node-prisma-rest-api

cp .env.example .env

yarn install

yarn start
The application will start on http://localhost:4500.
Build the database schema with Prisma
Let's install the Prisma CLI and use it to quickly initialize Prisma in the project. Run the commands below:
yarn add -D prisma

yarn prisma init
This command will create a Prisma schema and a .env file to set the environment variables to inject into the application.
Replace the content of the file prisma/schema.prisma with the code below to set the provider to MySQL.
generator client {
  provider = "prisma-client-js"
}

datasource db {
  provider = "mysql"
  url      = env("DATABASE_URL")
}
Define the database schema with Prisma
Update the file prisma/schema.prisma with the code below:
generator client {
  provider = "prisma-client-js"
}

datasource db {
  provider          = "mysql"
  url               = env("DATABASE_URL")
  relationMode      = "prisma"
}

enum PostStatus {
  draft
  published
  archived
}

model User {
  id        Int      @id @default(autoincrement())
  email     String   @unique @db.VarChar(100)
  password  String   @db.VarChar(100)
  fullName  String   @map("full_name")
  birthDate DateTime @map("birth_date") @db.Date
  createdAt DateTime @default(now()) @map("created_at")
  updatedAt DateTime @updatedAt @map("updated_at")
  posts     Post[]
}

model Post {
  id         Int        @id @default(autoincrement())
  title      String
  slug       String
  content    String     @db.Text
  status     PostStatus @default(draft)
  viewCount  Int        @default(0) @map("view_count")
  isFeatured Boolean    @default(false) @map("is_featured")
  userId     Int        @map("user_id")
  createdAt  DateTime   @default(now()) @map("created_at")
  updatedAt  DateTime   @updatedAt @map("updated_at")
  author     User       @relation(fields: [userId], references: [id], onDelete: Cascade)
}
Generate and execute the database migrations
Now that we have the Prisma schema from our local computer, we want to:
- Generate the SQL queries to create the database tables
- Execute the SQL queries on our database in PlanetScale.
Using the PlanetScale CLI, we can connect to a remote database branch by creating a tunnel from our local computer to the remote branch.
Open a terminal and run the following commands:
pscale auth login

pscale branch create teco-blog create-main-table

# Wait for a few seconds for the database branch to be ready

pscale connect teco-blog create-main-table
We authenticate from the CLI, then create a new database branch named "create-main-table" and finally create a tunnel from our local machine to the remote database branch.
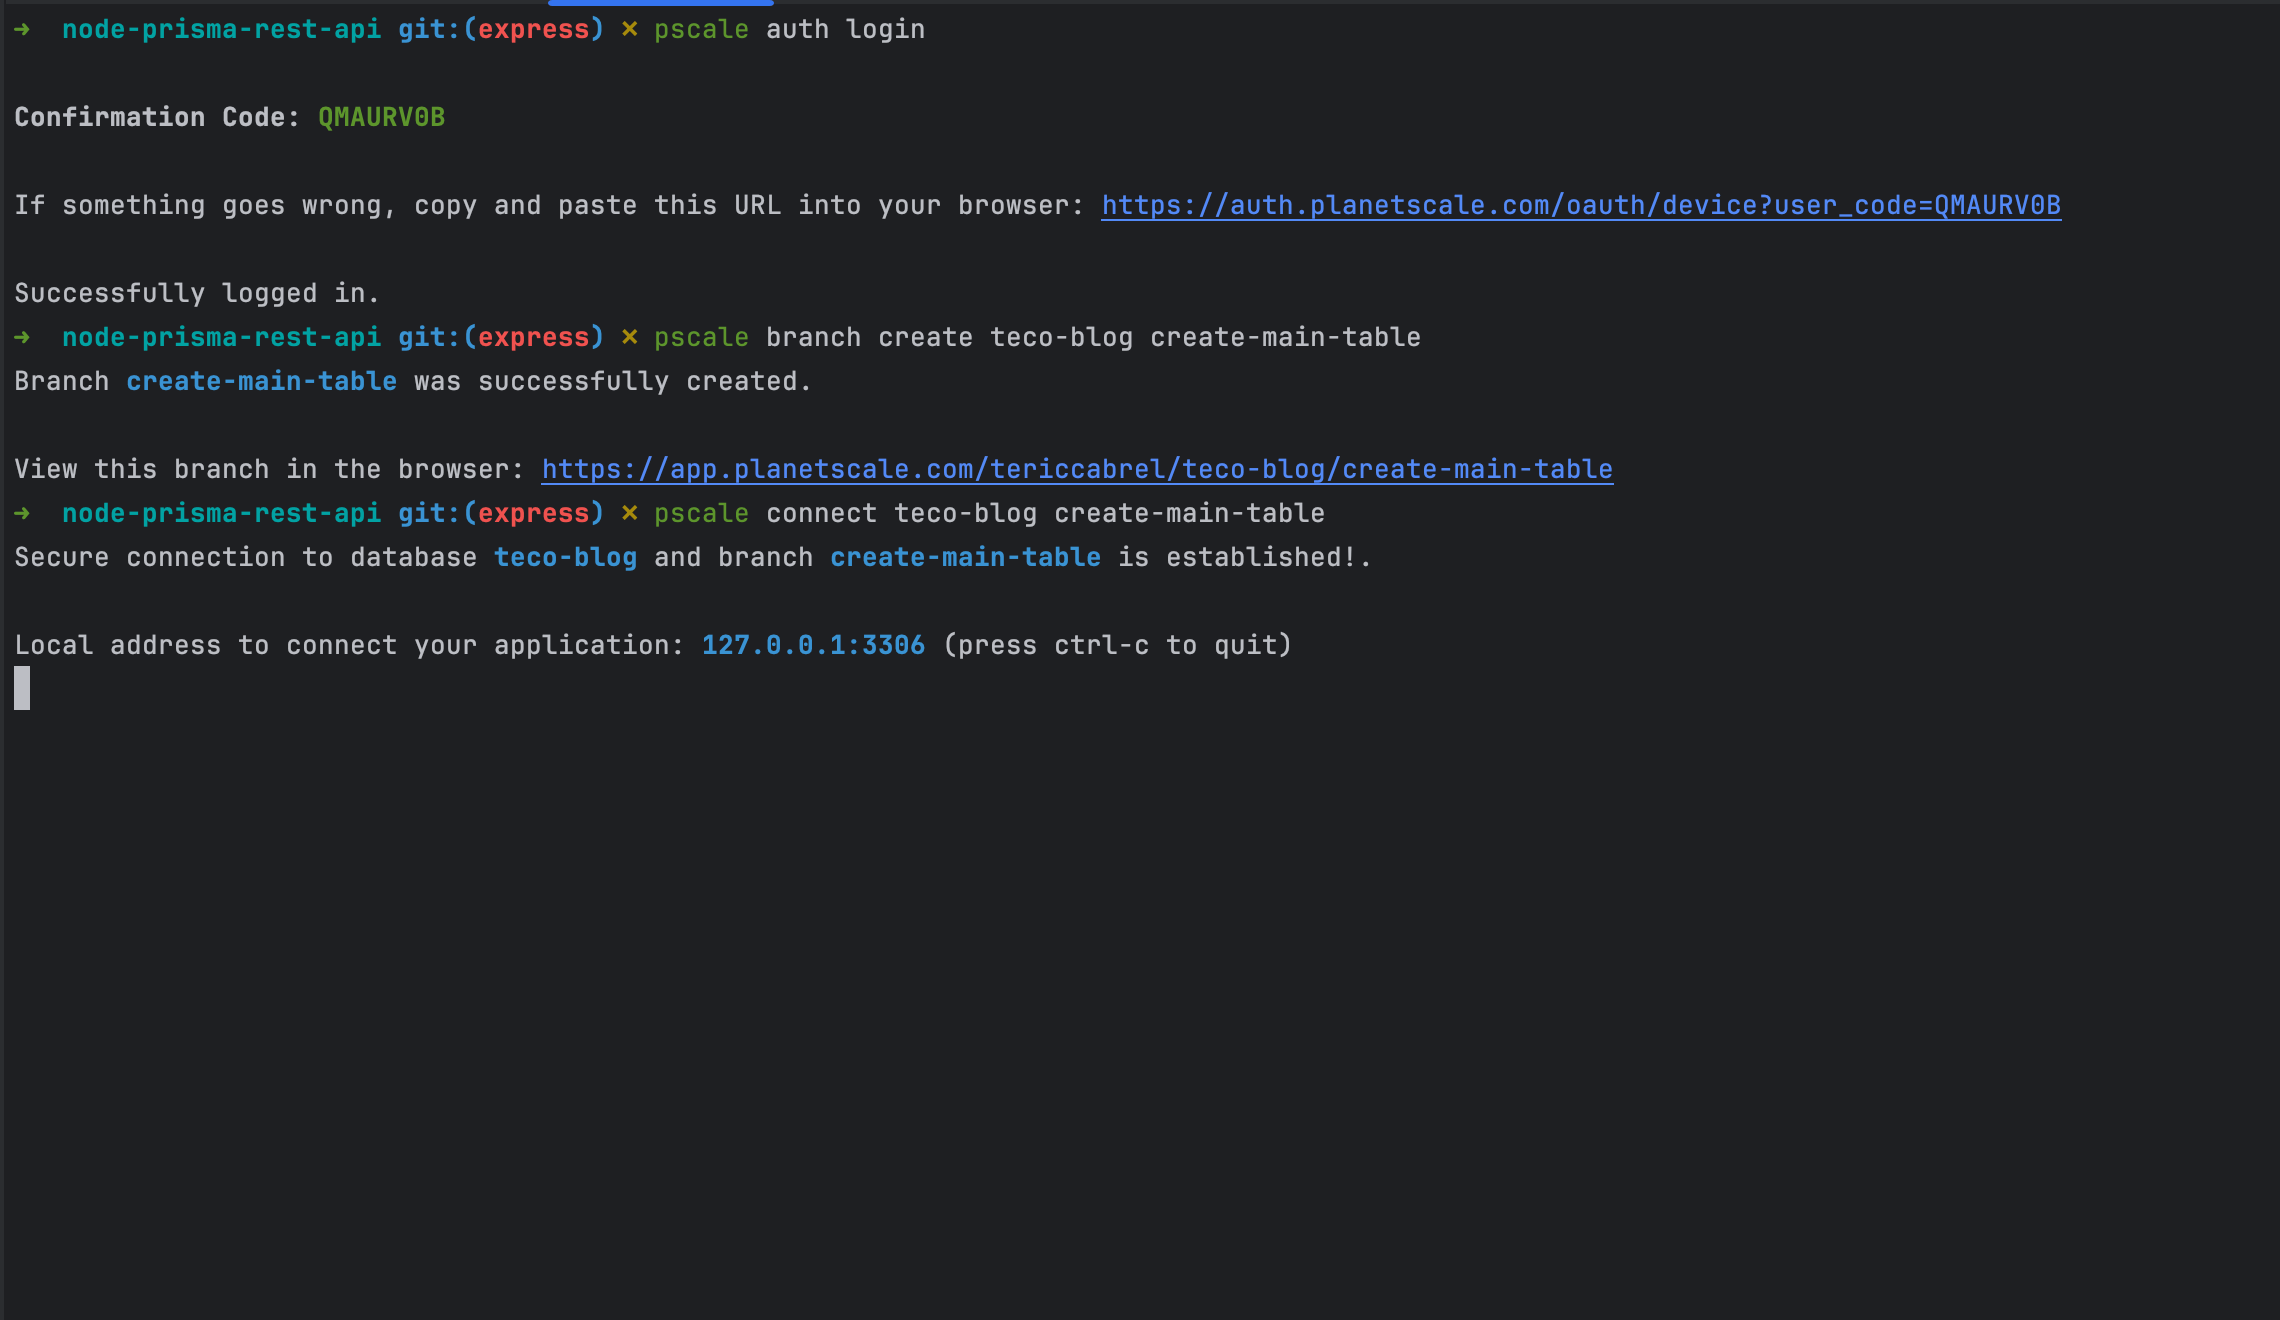
The database is accessible through port 3306, and the connection URL is mysql://root@localhost:3306/teco-blog
Open the .env file and replace the database value of the DATABASE_URL field with the above value.
DATABASE_URL=mysql://root@localhost:3306/teco-blog
To generate and execute the migration in a PlanetScale database using Prisma, we must have a second database instance we call shadow.
I wrote a complete post to explain why; read it to learn more

We will use Docker to run a container of a MySQL database; run the command below:
docker run -d -e MYSQL_ROOT_PASSWORD=secret -e MYSQL_DATABASE=blog --name blog-shadow-db -p 3307:3306 mysql:8.0.37
Based on the above command we ran, the connection string is: mysql://root:secret@localhost:3307/blog
Open the .env file, add a field named SHADOW_DATABASE_URL, and set the value to the connection URL of the MySQL database instance running in Docker.
SHADOW_DATABASE_URL=mysql://root:secret@localhost:3307/blog
Update the schema.prisma file to set the shadow database URL
datasource db {
  provider          = "mysql"
  url               = env("DATABASE_URL")
  shadowDatabaseUrl = env("SHADOW_DATABASE_URL")
}
Run the command below to generate and execute the database migrations
yarn prisma migrate dev --name create-main-table
We get the following output
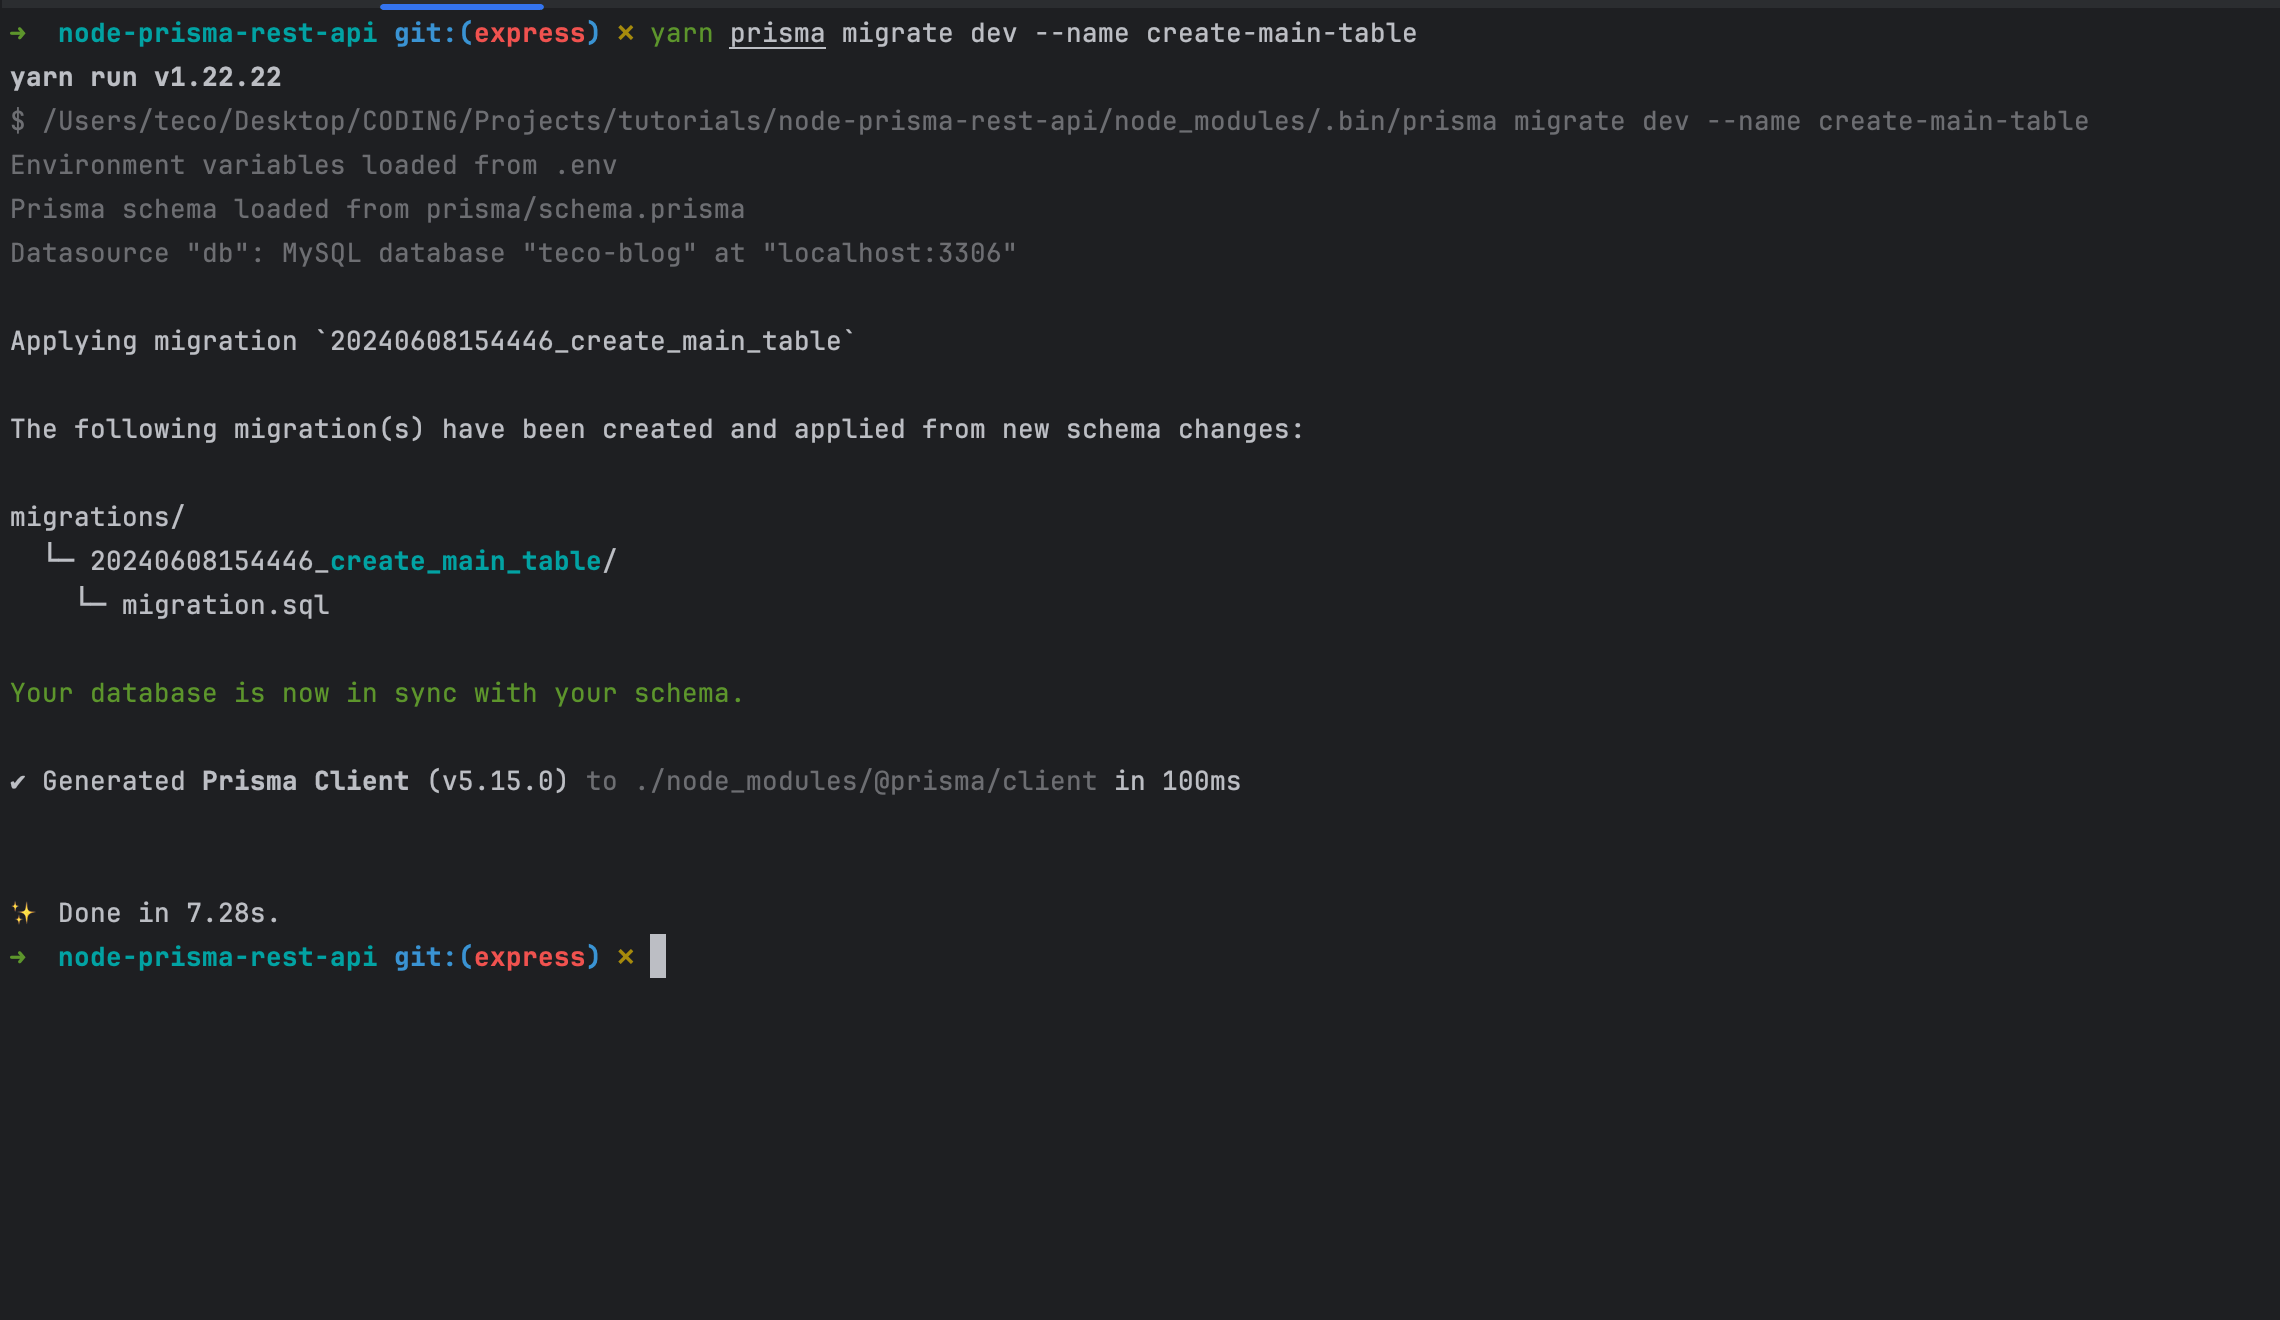
The database is created; we can build the API routes and interact with the database.
Connect to the database from the application
In the project root directory, create a file "src/database.ts" and add the code below:
import { PrismaClient } from '@prisma/client';

export const prismaClient = new PrismaClient();
Edit the file "src/index.ts" by adding the code to connect the database when the application starts.
import express from 'express';
import { prismaClient } from './database';

const HOST = process.env.HOST || 'http://localhost';
const PORT = parseInt(process.env.PORT || '4500');

const app = express();

app.use(express.urlencoded({ extended: true }));
app.use(express.json());

app.get('/', (req, res) => {
  return res.json({ message: 'Hello World!' });
});

app.listen(PORT, async () => {
  await prismaClient.$connect();

  console.log(`Application started on URL ${HOST}:${PORT} 🎉`);
});
Run the application with the command yarn start
Seed the database with some users
Creating a post requires a user, which is the author. Because we will focus on creating API routes for blog posts, let's seed the database with some users.
Create a file prisma/seed.ts and add the code below:
import { Prisma, PrismaClient } from '@prisma/client';

const prisma = new PrismaClient();

const main = async () => {
  const usersInput: Prisma.UserCreateManyInput[] = [
    {
      fullName: 'Bob',
      email: 'bob@email.com',
      birthDate: new Date('1995-10-11'),
      password: 'bob-secret',
    },
    {
      fullName: 'Alice',
      email: 'alice@email.com',
      birthDate: new Date('1996-02-10'),
      password: 'alice-secret',
    },
  ];

  await prisma.user.createMany({
    data: usersInput,
  });
};

main().then(async () => {
  await prisma.$disconnect();
});
Run the following command to seed the users in the database.
yarn ts-node prisma/seed.ts
After the execution, you will see two users in the database.
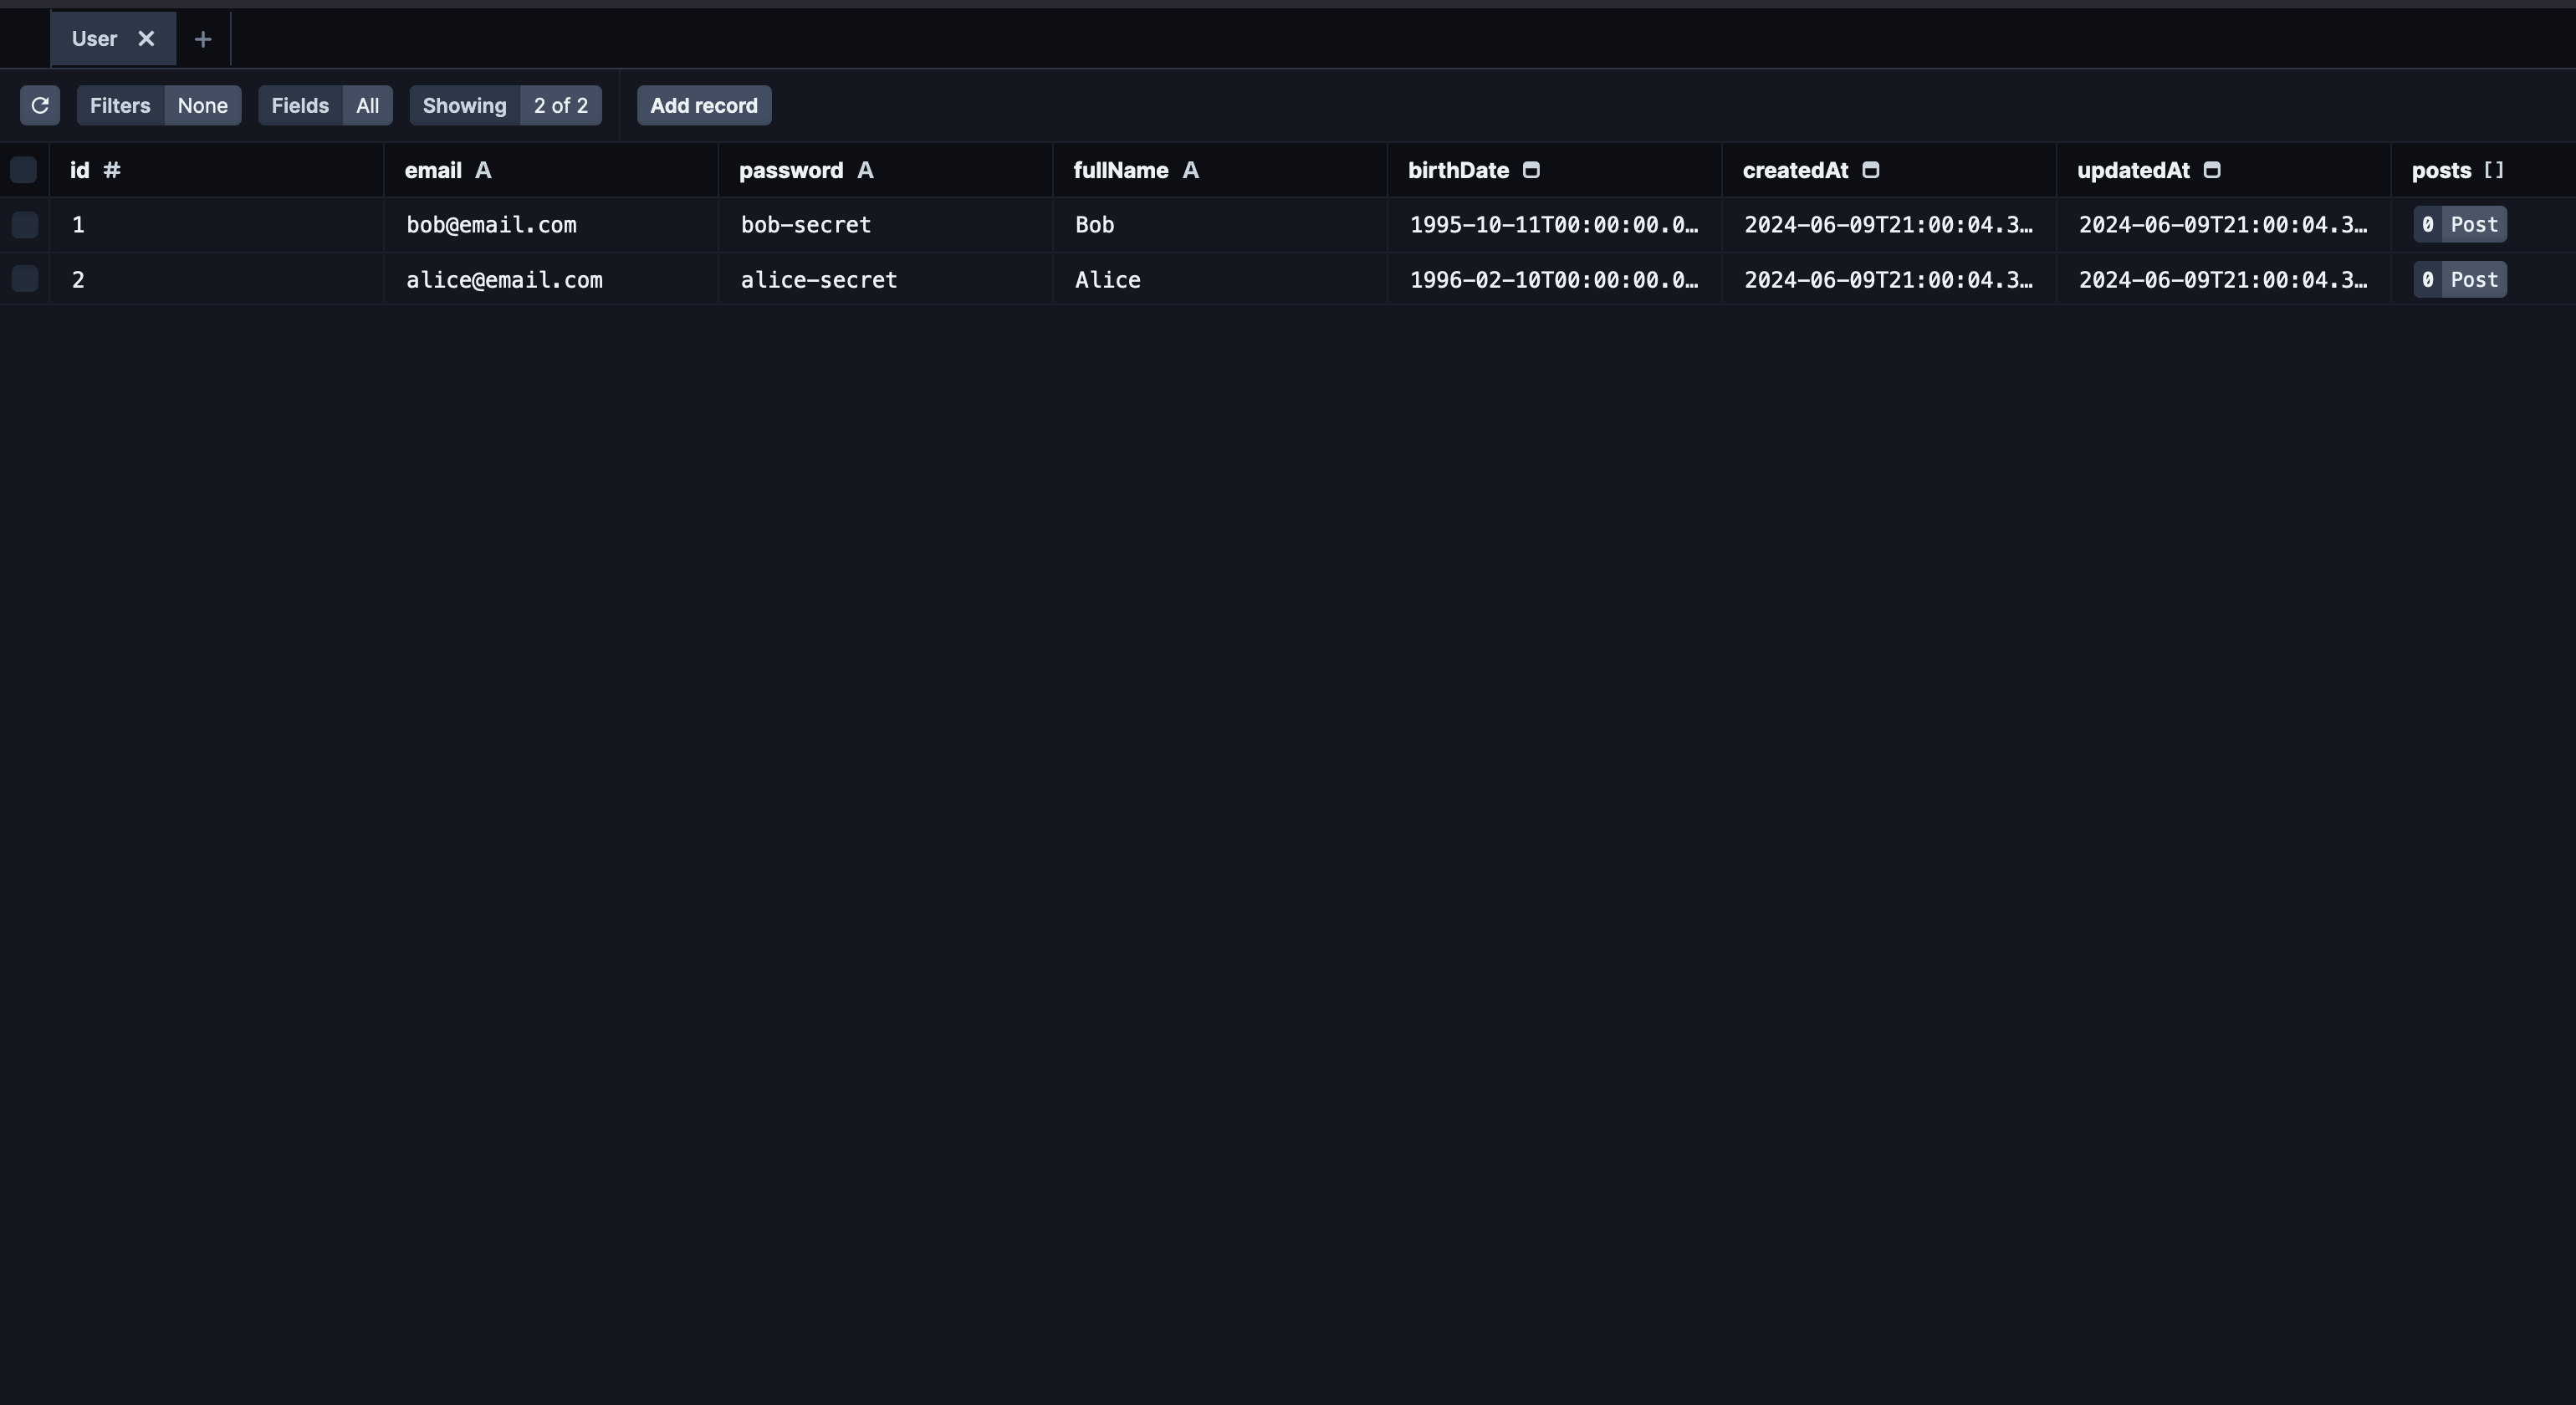
The Prisma CLI provides this database viewer in the browser; run the command yarn prisma studio to launch it.
Create the endpoint to create a post
The first API route allows users to create a post; let's create a file "src/post.controller.ts" and add the code below:
import { PostStatus } from '@prisma/client';
import { Request, Response } from 'express';
import * as y from 'yup';

import { prismaClient } from './database';

const createPostBodySchema = y.object({
  authorId: y.number().required(),
  title: y.string().required(),
  content: y.string().required(),
  isFeatured: y.boolean(),
  status: y.string().oneOf([PostStatus.draft, PostStatus.published, PostStatus.archived]),
});

export const createPost = async (req: Request, res: Response) => {
  try {
    const payload = createPostBodySchema.validateSync(req.body, {
      abortEarly: false,
      stripUnknown: true,
    });

    const post = await prismaClient.post.create({
      data: {
        title: payload.title,
        content: payload.content,
        isFeatured: payload.isFeatured,
        slug: payload.title.toLowerCase().replace(/ /g, '-'),
        status: payload.status,
        userId: payload.authorId,
      },
    });

    return res.json({ data: post });
  } catch (e) {
    const error = e as y.ValidationError;

    return res.status(422).json({ errors: error.errors });
  }
};
We validate the request body payload using the Node.js library Yup; run the command to install it:
yarn add yup
Read my blog post below to learn more about validating request payload with Yup.

We now need to link the controller function to the API route; let's create a file "src/post.route.ts" and add the code below:
import { Router } from 'express';
import { createPost } from './post.controller';

export const postRoute = () => {
  const router = Router();

  router.post('/posts', createPost);

  return router;
};
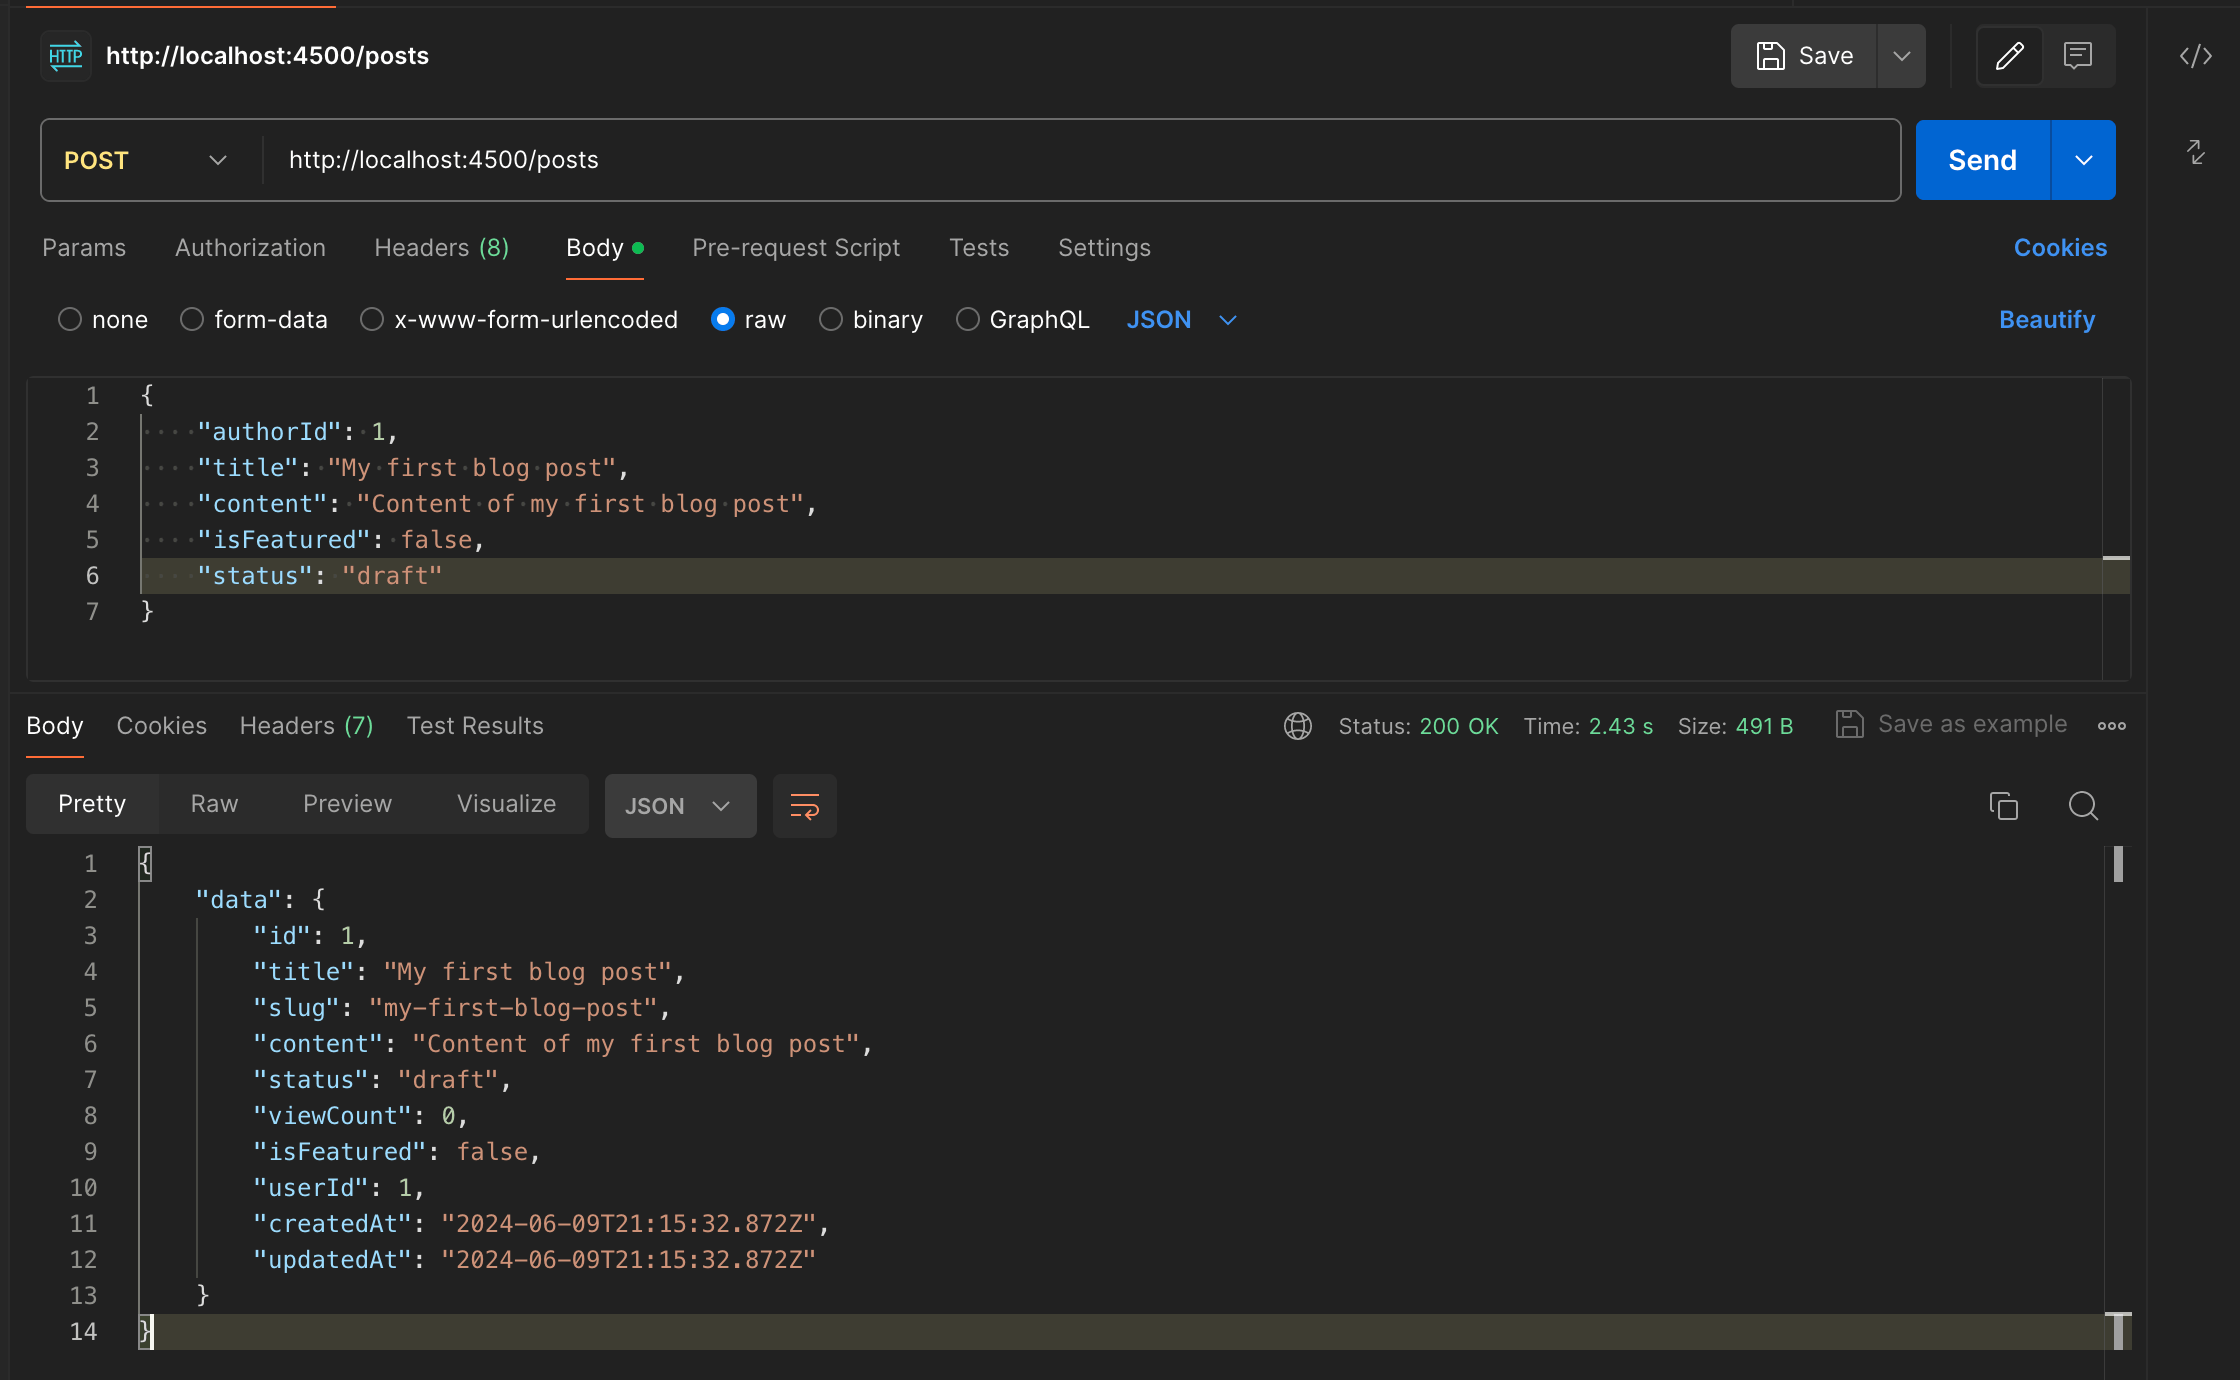
Now, calling the route http://localhost:4500/posts with the POST method will execute the function createPost().
Load Express routes declared in the function postRoute() in the "src/index.ts" file.
import express from 'express';
import { prismaClient } from './database';
import { postRoute } from './post.route';

const HOST = process.env.HOST || 'http://localhost';
const PORT = parseInt(process.env.PORT || '4500');

const app = express();

app.use(express.urlencoded({ extended: true }));
app.use(express.json());

app.use('/', postRoute);

app.get('/', (req, res) => {
  return res.json({ message: 'Hello World!' });
});

app.listen(PORT, async () => {
  await prismaClient.$connect();

  console.log(`Application started on URL ${HOST}:${PORT} 🎉`);
});
Re-run the application, use an HTTP client to send a POST request, and appreciate the result.
Create the endpoint to retrieve all the posts
Update the file "src/post.controller.ts" to add the code below:
export const getPosts = async (_req: Request, res: Response) => {
  const posts = await prismaClient.post.findMany({
    orderBy: {
      createdAt: 'desc',
    },
  });

  return res.json({ data: posts });
};
Update the file "src/post.route.ts" to link the route to the controller function.
router.get('/posts', getPosts);
Re-run the application, add some posts, and call this route to retrieve all of them.

Create the endpoint to retrieve a post
Update the file "src/post.controller.ts" to add the code below:
export const getPost = async (req: Request, res: Response) => {
  const { id } = req.params;

  const post = await prismaClient.post.findUnique({
    where: {
      id: parseInt(id, 10),
    },
  });

  if (!post) {
    return res.status(404).json({ message: `Post with id "${id}" not found.` });
  }

  return res.json({ data: post });
};
Update the file "src/post.route.ts" to link the route to the controller function.
router.get('/posts/:id', getPost);
Create the endpoint to update a post
Update the file "src/post.controller.ts" to add the code below:
const updatePostBodySchema = y.object({
  authorId: y.number().required(),
  title: y.string().required(),
  content: y.string().required(),
  isFeatured: y.boolean(),
  status: y.string().oneOf([PostStatus.draft, PostStatus.published, PostStatus.archived]),
});

export const updatePost = async (req: Request, res: Response) => {
  const { id } = req.params;

  try {
    const payload = updatePostBodySchema.validateSync(req.body, {
      abortEarly: false,
      stripUnknown: true,
    });

    const post = await prismaClient.post.findFirstOrThrow({ where: { id: parseInt(id, 10) } });

    if (!post) {
      return res.status(404).json({ message: `Post with id "${id}" not found.` });
    }

    if (post.userId !== payload.authorId) {
      return res.status(403).json({ message: 'Only the author can edit the post.' });
    }

    const updatedPost = await prismaClient.post.update({
      where: {
        id: parseInt(id, 10),
      },
      data: {
        title: payload.title,
        content: payload.content,
        isFeatured: payload.isFeatured,
        slug: payload.title.toLowerCase().replace(/ /g, '-'),
        status: payload.status,
        userId: payload.authorId,
      },
    });

    return res.json({ data: updatedPost });
  } catch (e) {
    const error = e as y.ValidationError;

    return res.status(422).json({ errors: error.errors });
  }
};
Update the file "src/post.route.ts" to link the route to the controller function.
router.put('/posts/:id', updatePost);
Create the endpoint to delete a post
Update the file "src/post.controller.ts" to add the code below:
export const deletePost = async (req: Request, res: Response) => {
  const { id } = req.params;

  await prismaClient.post.delete({
    where: {
      id: parseInt(id, 10),
    },
  });

  return res.status(204).send();
};
Update the file "src/post.route.ts" to link the route to the controller function.
router.delete('/posts/:id', deletePost);
Test all the API routes
To test all the API routes we created, we will add a post, retrieve the list, retrieve a post, update the post, and finally delete the post. The video shows all these actions.
Demo of all the API routes for managing blog posts.
Wrap up
In this post, we saw how to build a REST API in Node.js using Prisma and PlanetScale.
PlanetScale provides the database infrastructure and a great developer experience working with MySQL databases. Prisma makes it easy for your Node.js application to interact with the database.
Here are some actions you can do to go further and build a powerful API:
- Write the API documentation using Swagger and Open API.
- Build the Docker image of the application.
- Publish the Docker image on a Docker repository.
- Deploy your API behind a reverse proxy using Nginx.
You can find the code source on the GitHub repository.
Follow me on Twitter or subscribe to my newsletter to avoid missing the upcoming posts and the tips and tricks I occasionally share.